Event Day 14, Daily Stage 13- Barren Plaza - Risk Level 8 (June 25)
This guide will step through a strategy for clearing the 13th Daily Stage - Barren Plaza - with Risk Level 8, for June 25.
For information on other CC Stages see these pages:


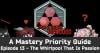
Map Information and Strategy
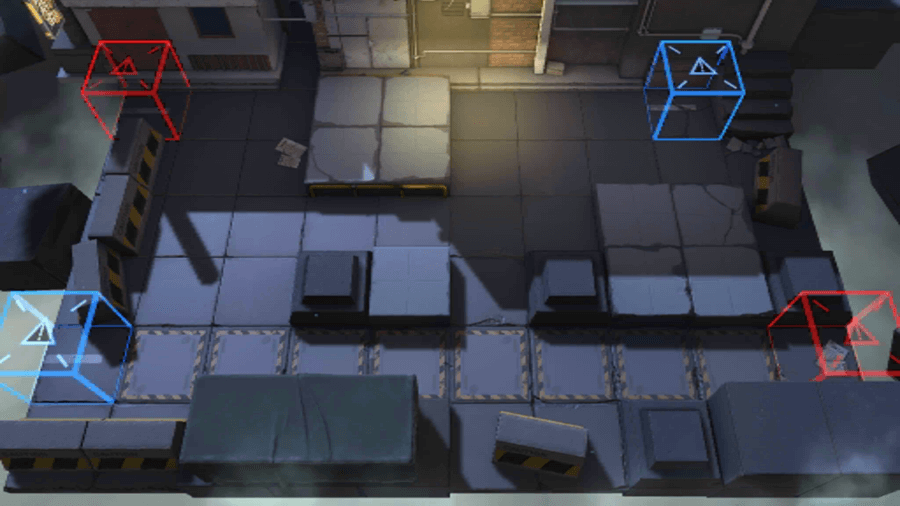
Contracts
The main challenges are as follows:
- Dog rush at the beginning needs to be handled, limiting the amount of time we have to set up initial Operators
- Casters will patrol around the middle section, have a 2 grid attack range, and hit all operators in adjacent grids to the main target. This means we need to spread out our Operators to avoid being overwhelmed with damage, especially if there are more than 1.
- Dog rush towards the end of the map means we have to have high DPS or multi-target/splash to take them all down.
- There are a mix of high DEF and high RES enemies, meaning mixed damage types and/or debuffs can be very useful.
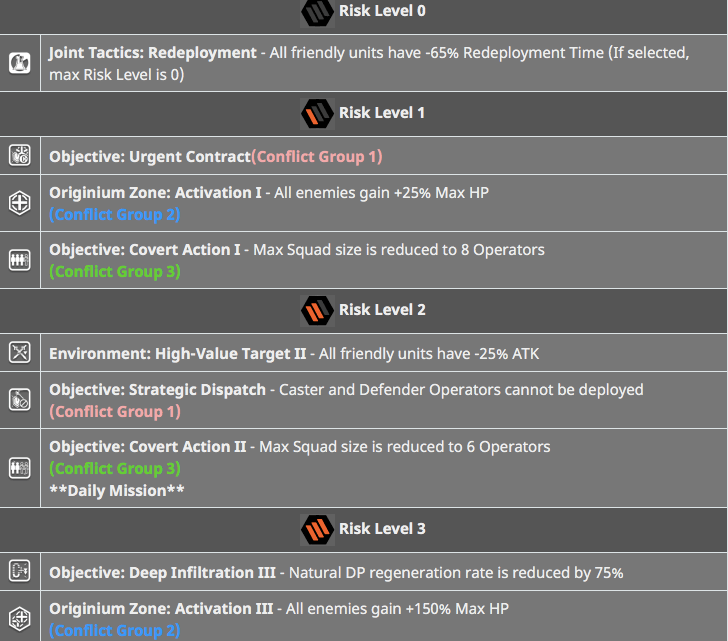
These are the Contracts I used:
- One of the Risk 3 Contracts must be taken to reach level 8. The reduced DP Generation requires strong Vanguards, but is overall easier if you have the Vanguards you need to get a team on the board early enough. The Risk 3 increased HP is difficult when paired with the ATK down, but it is straightforward to overcome with powerful enough Operators.
- My strategy for the DP down Risk 3 was basically: use Myrtle and Texas and one other Vanguard, then go as usual.
- I'll go over my Risk 3 enemy HP clear here. Any kind of AoE damage, especially Arts, will help us. Healing requirements are rather low, so its all about the dps.
Recommended Team Composition
- 2 Skill-DP-Recovery, V1 and V2. Siege with S2 is superb, and worth getting on Friend Support if you don't have her.
- 1 AoE Guard, G1, preferably at E2 so they can block 3.
- 1 Ranged Guard, G2, to add some hurt from a distance.
- 1 ST Medic, M1
- 1 AoE Sniper, S1, Meteorite's S2 can help your team increase its overall damage.
- 1 Supporter, Su1, the more Arts damage they can do the better, or enhancing the rest of your teams damage can work as well.
- 1 Controller Specialist - Sp1, This Operator needs to be placed out of Medic range in order to avoid getting double-blasted by the Casters. A self sustaining Operator or one that avoids damage is best. If your medic can handle the healing of 2 Operators placed adjacent then you can choose any Operator you want, really. You can also place Operators closer to your home base that stay out of Caster range, so this can be a very flexible pick depending on your team.
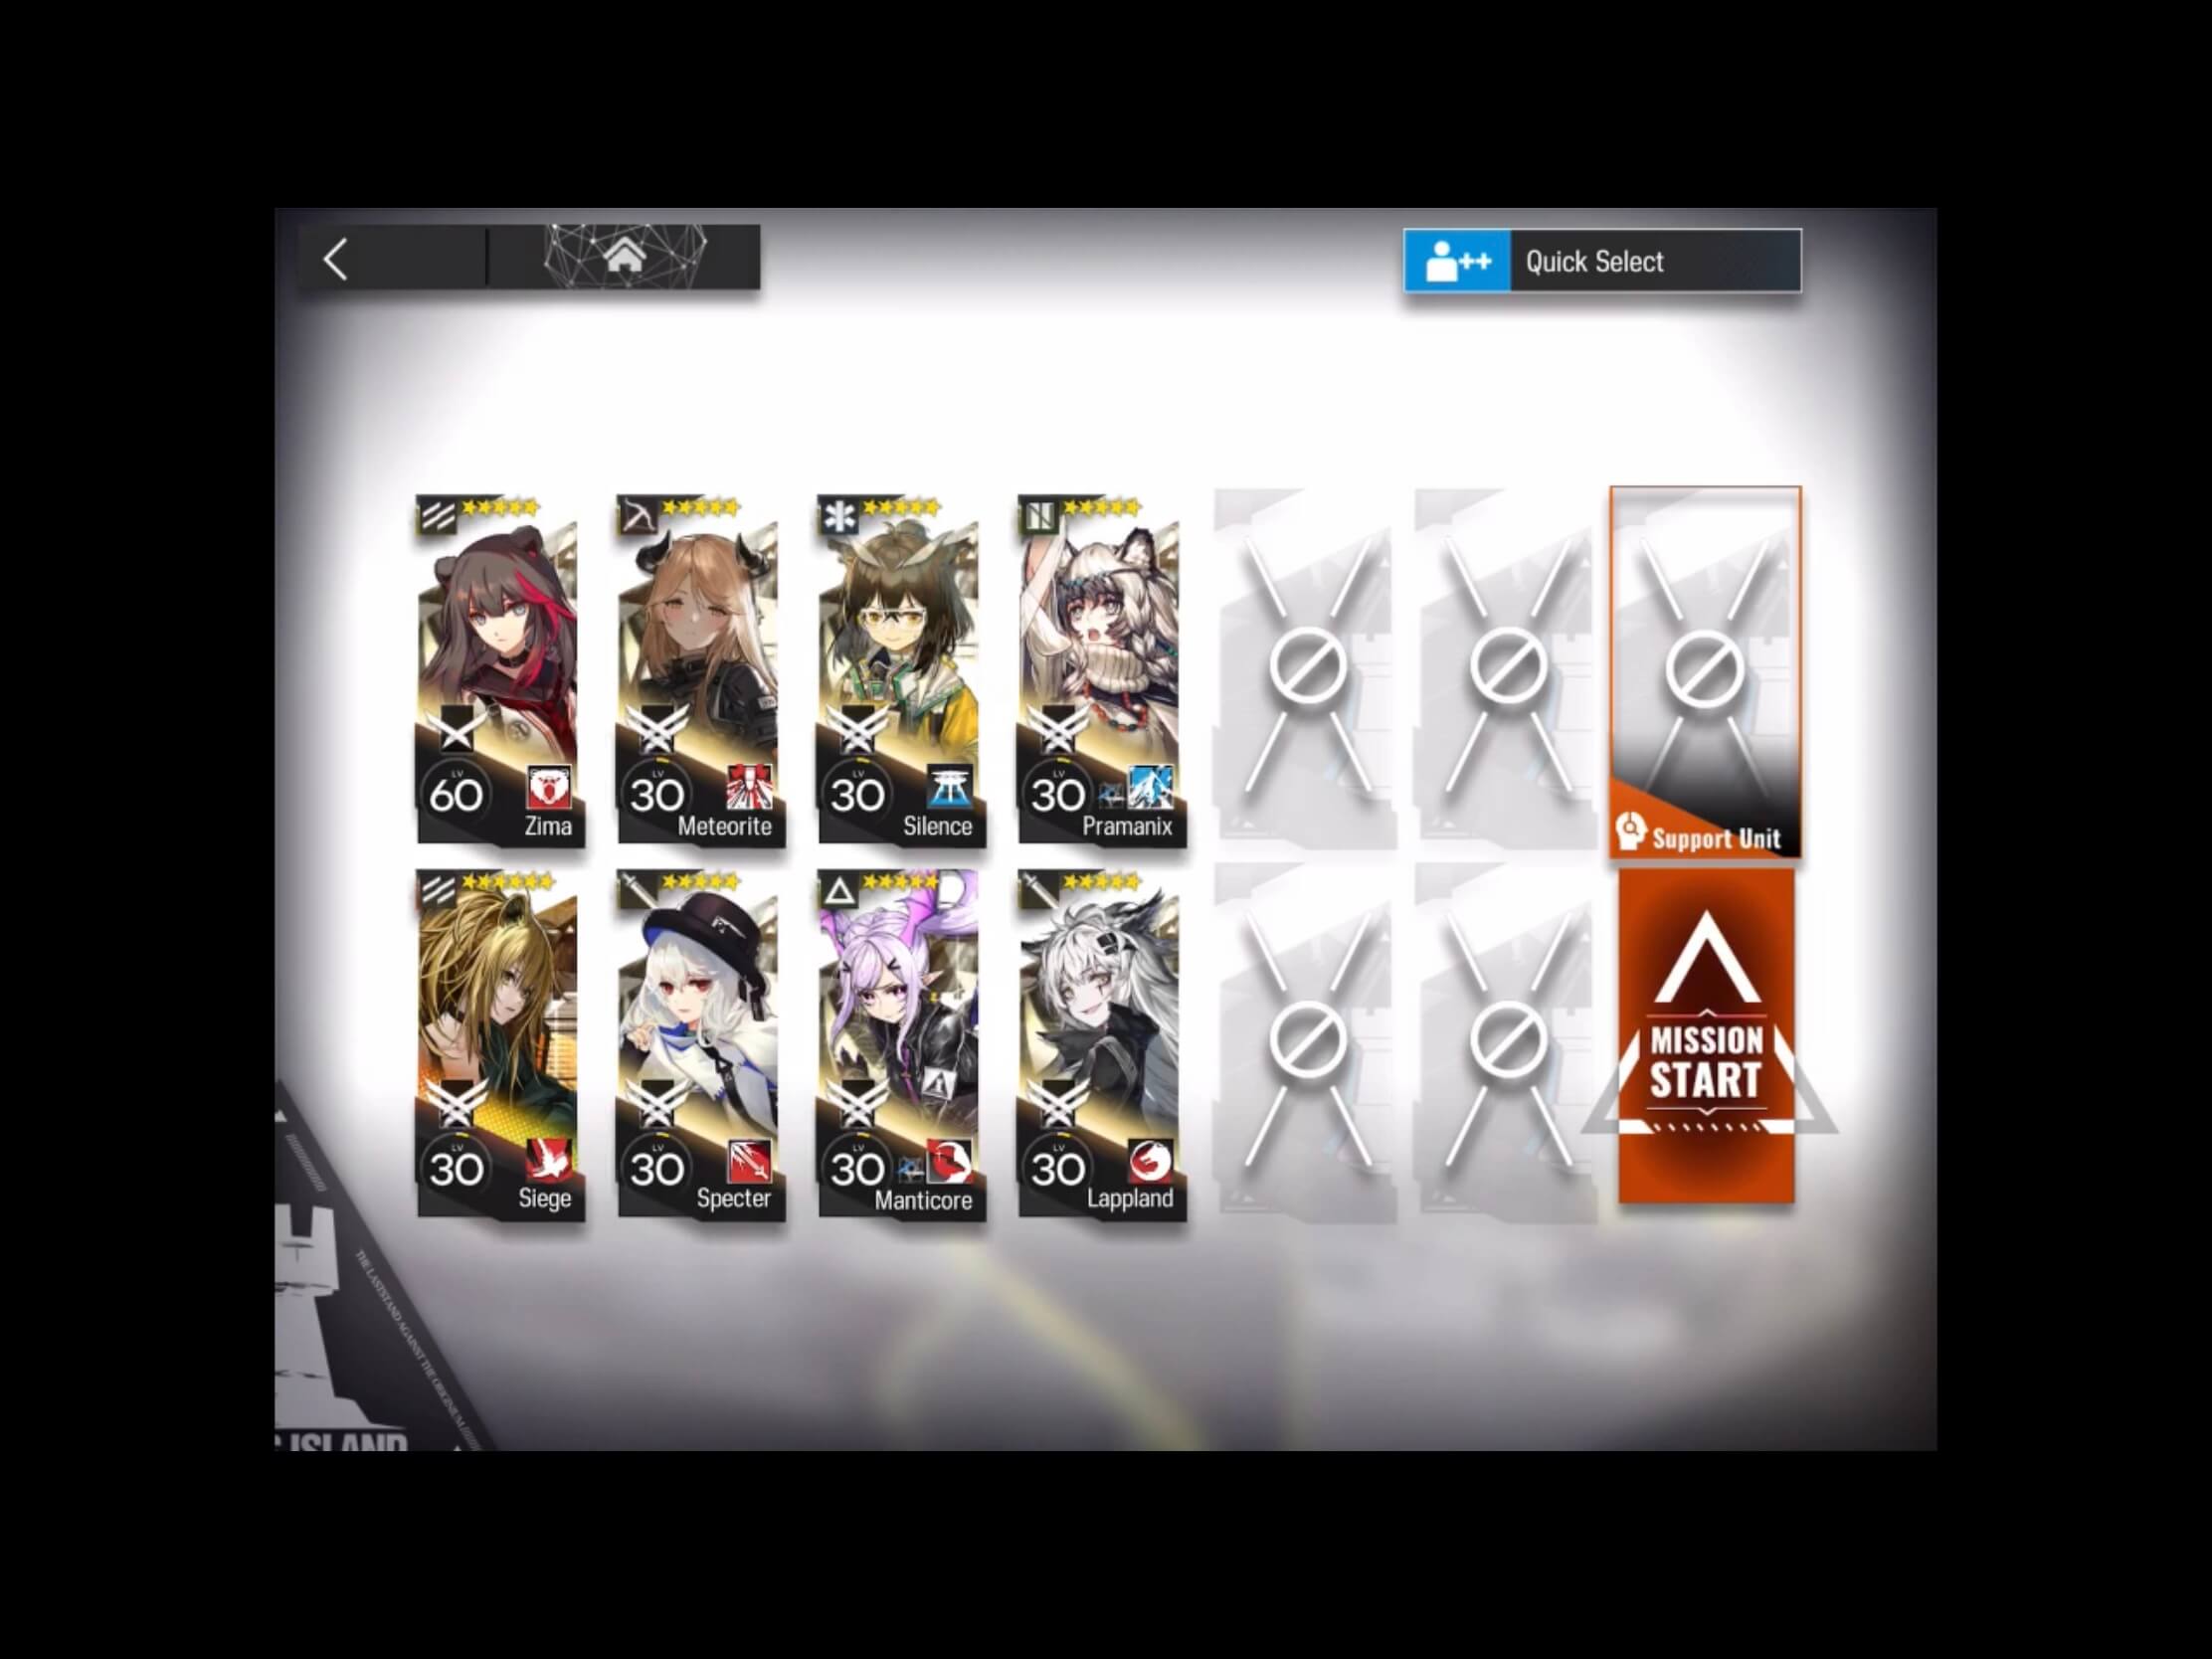
Here is an example of the team I used:
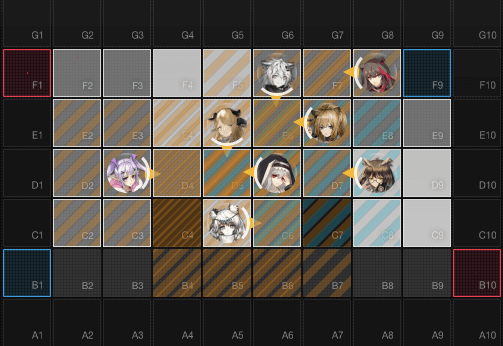
Deployment
Unit placement can be seen in the image below, and deployment order should be done exactly as presented.
Deployment Order:
- V1: Zima - Skill-DP-Recovery Vanguard
- V2: Siege - Skill-DP-Recovery Vanguard
- M1: Silence - ST Medic
- G1: Specter - AoE Guard
- Su1: Pramanix - Debuffer Supporter
- S1: Meteorite - AoE Sniper
- G2: Lappland - AoE Guard
- Sp1: Manticore - Control Specialist
We are now at full team deployment and it should look something like this:
This is it for the rest of the fight. After this, you either have enough DPS or you don't!
- Skill timing can be important, see the companion video for timings/ideas.
- If you have any ideas, suggestions, or alternatives for other players, please share them in the comments below!
Enjoy your rewards!