Event Day 10, Daily Stage 9 - Barren Plaza - Risk Level 8 (June 21)
This guide will step through a strategy for clearing the 9th Daily Stage - Barren Plaza - with Risk Level 8, for June 21.
For information on other CC Stages see these pages:


Map Information and Strategy
Contracts
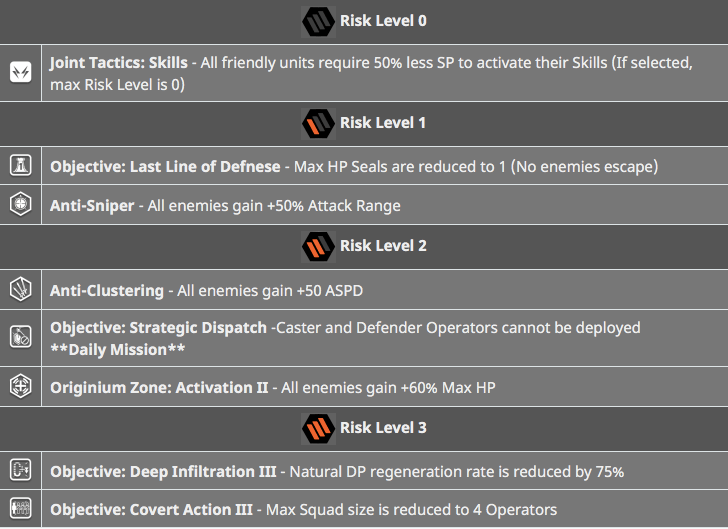
The main challenges are as follows:
- Dog rush at the beginning needs to be handled, limiting the amount of time we have to set up initial Operators
- Casters will patrol around the middle section, have a 2 grid attack range, and hit all operators in adjacent grids to the main target. This means we need to spread out our Operators to avoid being overwhelmed with damage, especially if there are more than 1.
- Dog rush towards the end of the map means we have to have high DPS or multi-target/splash to take them all down.
- There are a mix of high DEF and high RES enemies, meaning mixed damage types and/or debuffs can be very useful.
These are the Contracts I used:
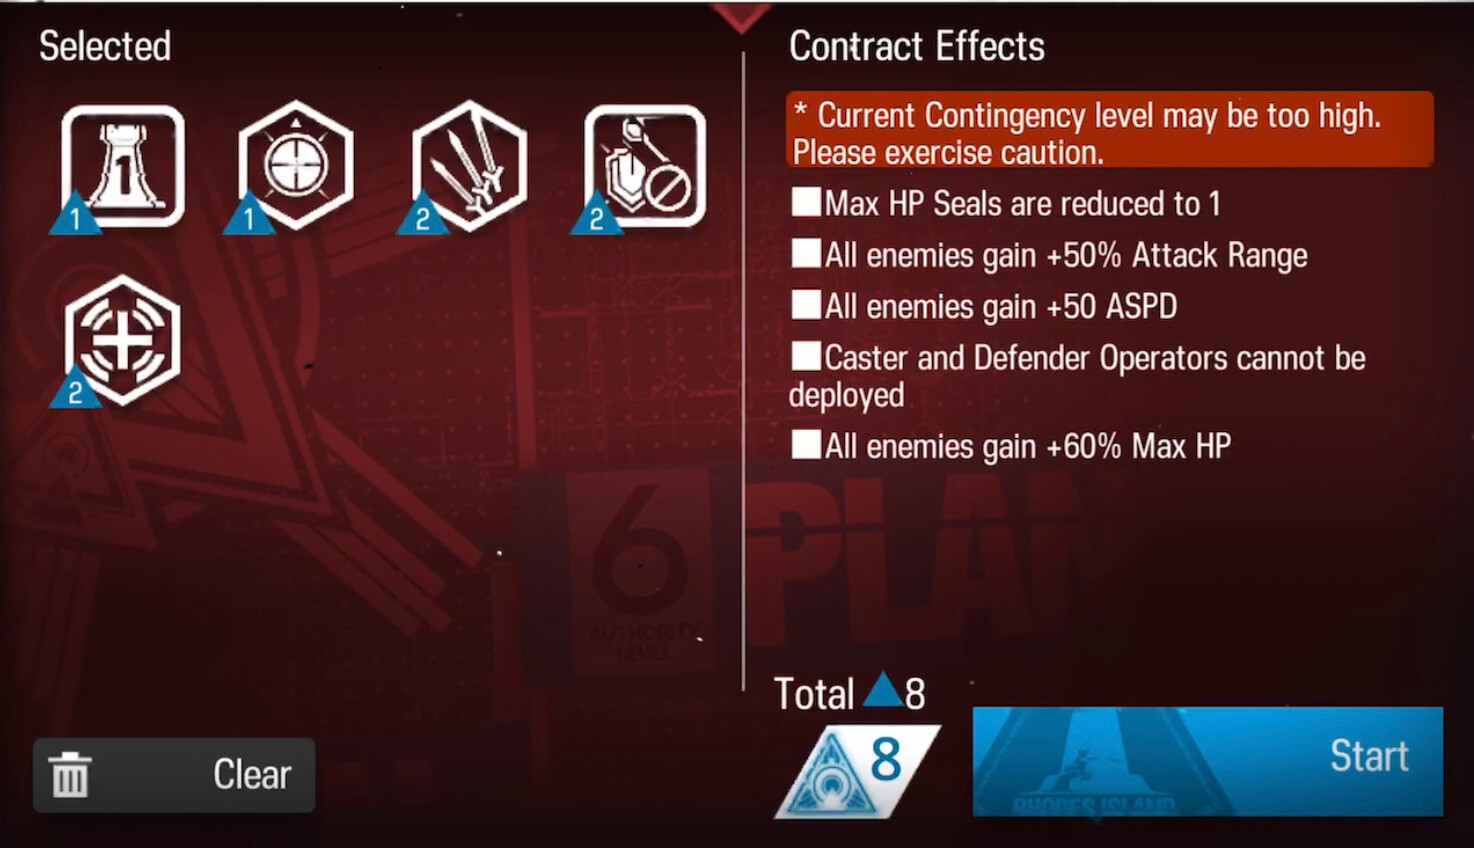
- The increased range means the Casters will have a very long reach, 3 tiles, so we just need to be smart about formation and placement order.
- No Casters and Defenders limits our Arts Damage and Blocking capabilities a bit, but we can get around that using alternate sources of Arts damage (like supporters), and having enough DPS.
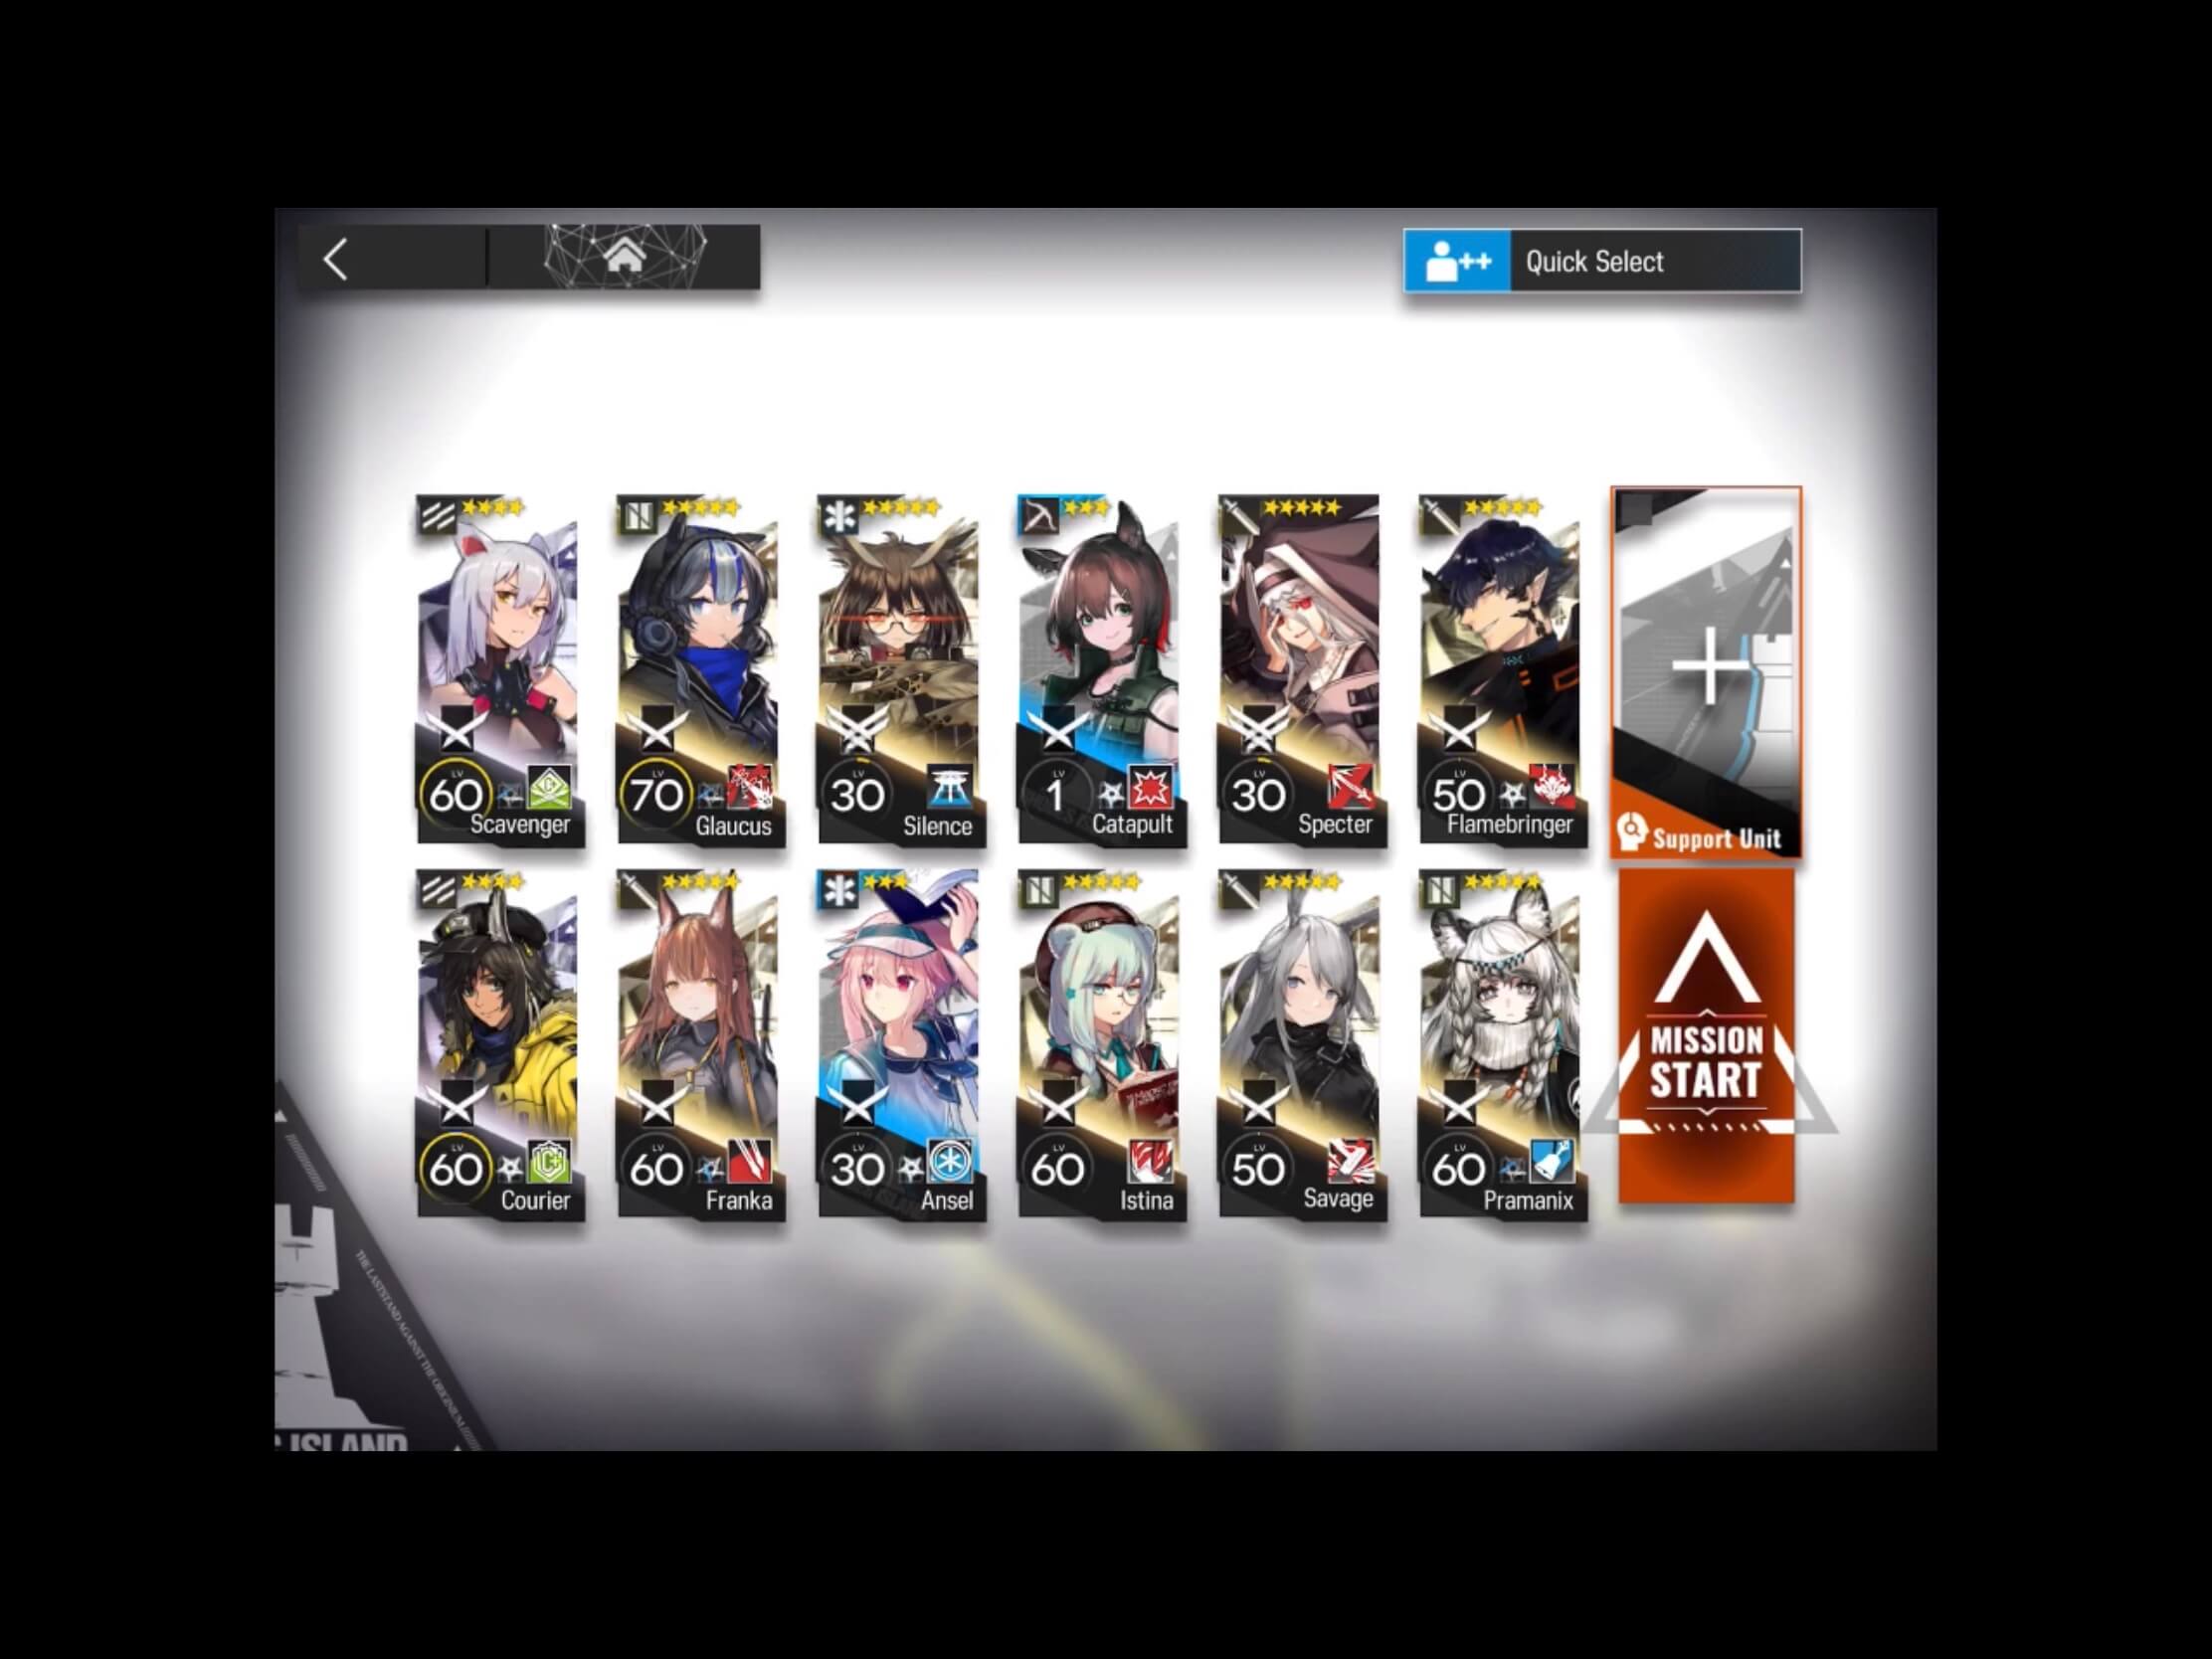
Recommended Team Composition
- 2 Skill-DP-Recovery Vanguards, V1 and V2, V1 can possibly be Myrtle for a faster start, just make sure the caster is more than 3 grids away before deploying V2
- 2 ST Medics, M1 and M2
- 2 Supporters, Su1 and Su2, multi-target damage is best.
- 1 AoE Sniper, S1
- 1 AoE Guard, G1, if you don't have one, any other 2-block guard could work.
- 2 Guards, G2 and G3, to assassinate Casters.
- good backup choices would be blocking Guards or Ranged multi-target damage.
Here is an example of the team I used:
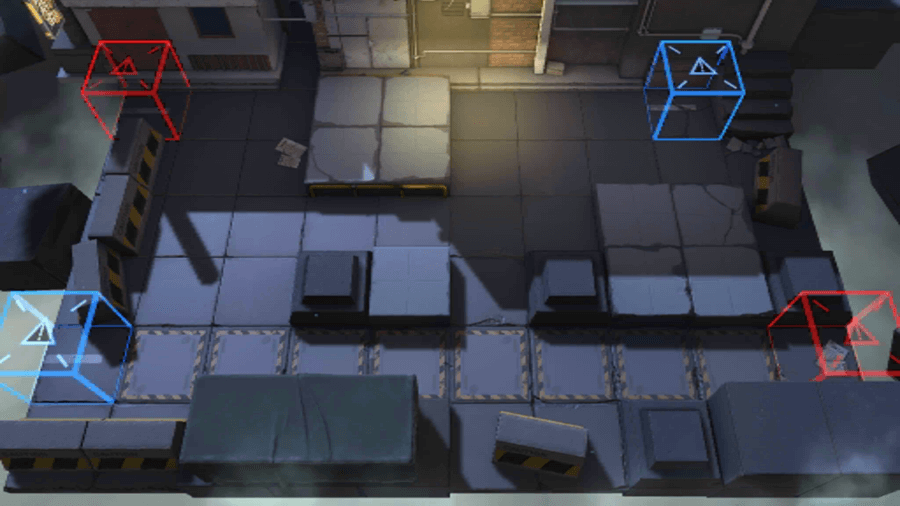
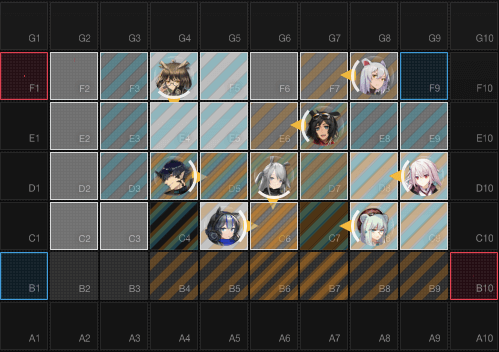
Deployment
Unit placement can be seen in the image below, and deployment order should be done exactly as presented. Each Operator can be placed as soon as there is sufficient DP.
Deployment Order:
- V1: Scavanger - Skill-DP-Recovery Vanguard
- V2: Courier - Skill-DP-Recovery Vanguard
- Su1: Istina - Slower Supporter
- M1: Ansel - ST Medic (might need to deploy the medic third depending on your team DP costs)
- M2: Silence - ST Medic
- G1: Savage - AoE Guard
- G2: Flamebringer - Duelist Guard
- Su2: Glaucus - Slower Supporter
We are now at full deployment and it should look something like this:
Next we retreat V1 and deploy S1: AoE Sniper - Catapult
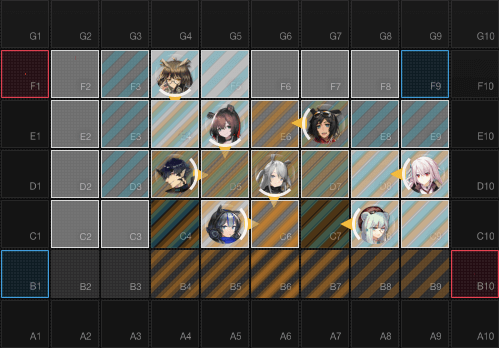
This will be the main formation for the rest of the fight. Depending on your squad, you may need/want to consider some of the following:
- You might need a backup Guard in the D4 spot (Flamebringer) in case it dies or looks like it will fail to block one of the casters (in which case we can retreat this one and deploy the second)
- V2 can be replaced by anything with block-2, though I did not need to.
- G1 at D6 is at the highest risk of dying, which is why we placed them early to avoid Caster aggro. A backup for this Operator is recommended.
- Whichever of the ranged dps we deployed last is also at high risk of dying, so a replacement might be necessary.
- Skill timing can be important, see the companion video for timings/ideas.
- If you have any ideas, suggestions, or alternatives for other players, please share them in the comments below!
Enjoy your rewards!