Lungmen Force Onslaught
The great nation sends their anti-arts force on a large scale attack. This time, we will stop their assault at the core. Let no one pass and leave no survivors! Thank Doctor Eckogen for taking the time to develop this strategy with low tier units by checking out his video here. Using the video as a basis to this guide, players can find out how to utilize their own units with his strategy below.
Map Information
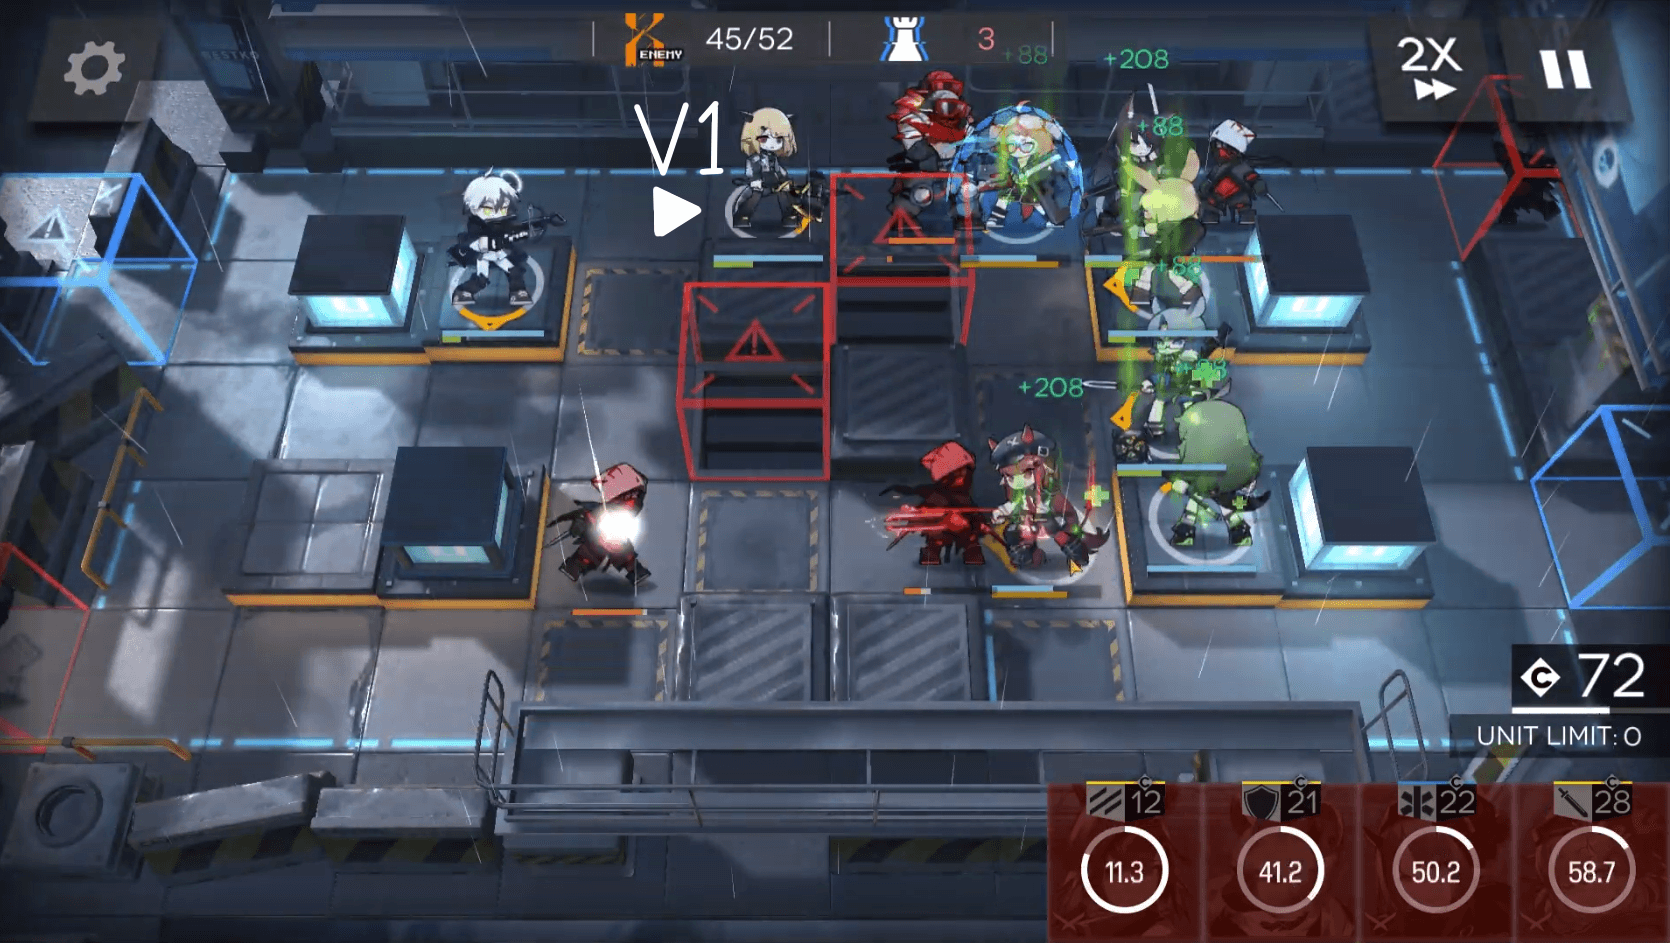
At first glance, the map seems rather daunting. There are 2 leak zones to protect at opposite sides of the map with many routes to get there. However, all enemy units will pass through the 12 tiles surrounding the 2 central spawn locations at some point in their path.
Enemy Information
There are 2 key details players need to keep in mind:
- All the units in this stage are resistant to Arts damage. Their Defense is low, making physical damage extremely effective.
- Enemies emerging from the two central spawn locations will remain immobile for a few seconds before moving.
Team Composition
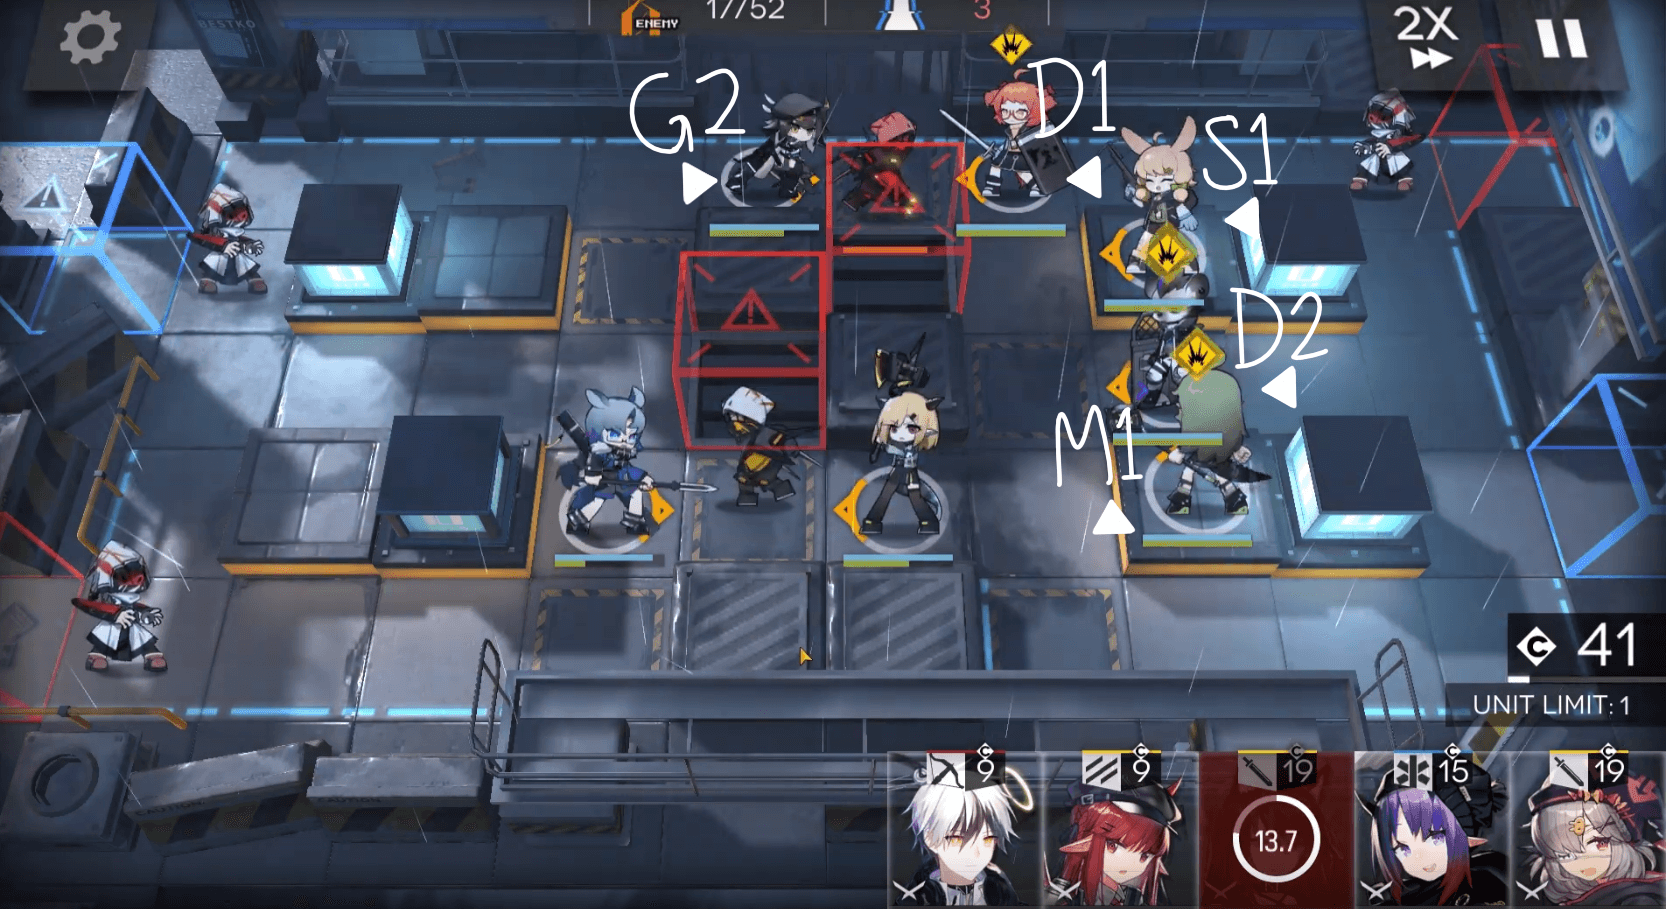
- 2 Vanguards (V1, V2): Players can choose any Vanguards they wish to run. The main goals for the vanguards are to generate DP and kill emerging enemies.
- 2 Medics (M1, M2): ST Medics are very valuable in this stage; enemies will concentrate high-powered attacks on a couple of targets.
- 2 Guards (G1, G2): ST Physical Guards are required to output damage quickly and eliminate enemy units individually as they spawn or while they are attacking defenders. *Well developed G1 is the centerpiece of this strategy*
- 2 Defenders (D1, D2): One of the defenders must be able to take hits from high physical damage enemies; Beagle, Cuora, and Liskarm fit this archetype. The second defender is flexible; healer defenders are recommended because their innate Arts Resistance reduces damage from the caster Arts shots and their heals will help the medic keep your D1 and S1 alive.
- 2 Snipers (S1, S2): ST Physical Snipers will make this stage easier, they can provide supporting fire to pick off enemy units alongside the vanguards and guards. They also can deal chip damage to the casters as they walk to quicken their demise.
- 2 Flex Pick (Fp1, Fp2): While there are good picks that can fill this role, players can use almost any Physical Damage Melee Operators to help clear the stage, including their favorite units. Making different strategies work with style is what makes the game more enjoyable!
Budget Unit: Melantha - At Elite 1 with maximum level, potential, and trust, Melantha can solo the casters without any backup.
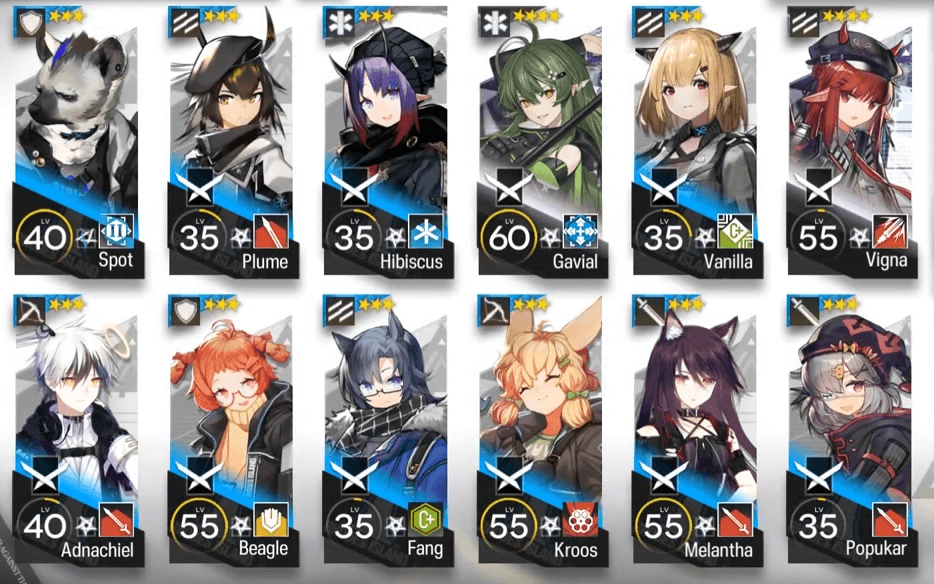
Doctor Eckogen’s “Low Stars All Stars Team'' consists of Fang, Vanilla, Plume, Kroos, Adnachiel, Vigna, Spot, Hibiscus, Beagle, Gavial, and Popukar as shown below. These units are relatively easy to obtain through recruiting and purchasing from the store. His run shows players what is possible; using the swirling ocean within the vast mind, paint the journey on the canvas of this stage.
Execution
Prepare to get serious!
At the start of the stage, enemies will emerge from the south central spawn point as well as 4 casters at the corner of the map. First deploy V1 and V2 facing the southern adjacent tile of the spawn point. As the enemy units emerge, the vanguards will ambush them before they have a chance at retaliation.
Then deploy G1 to take care of the southeastern caster. If G1 does not eliminate the caster, use Fp1 or Fp2 to help kill the caster, then retreat. We will be using the same strategy to kill the northwestern caster later.
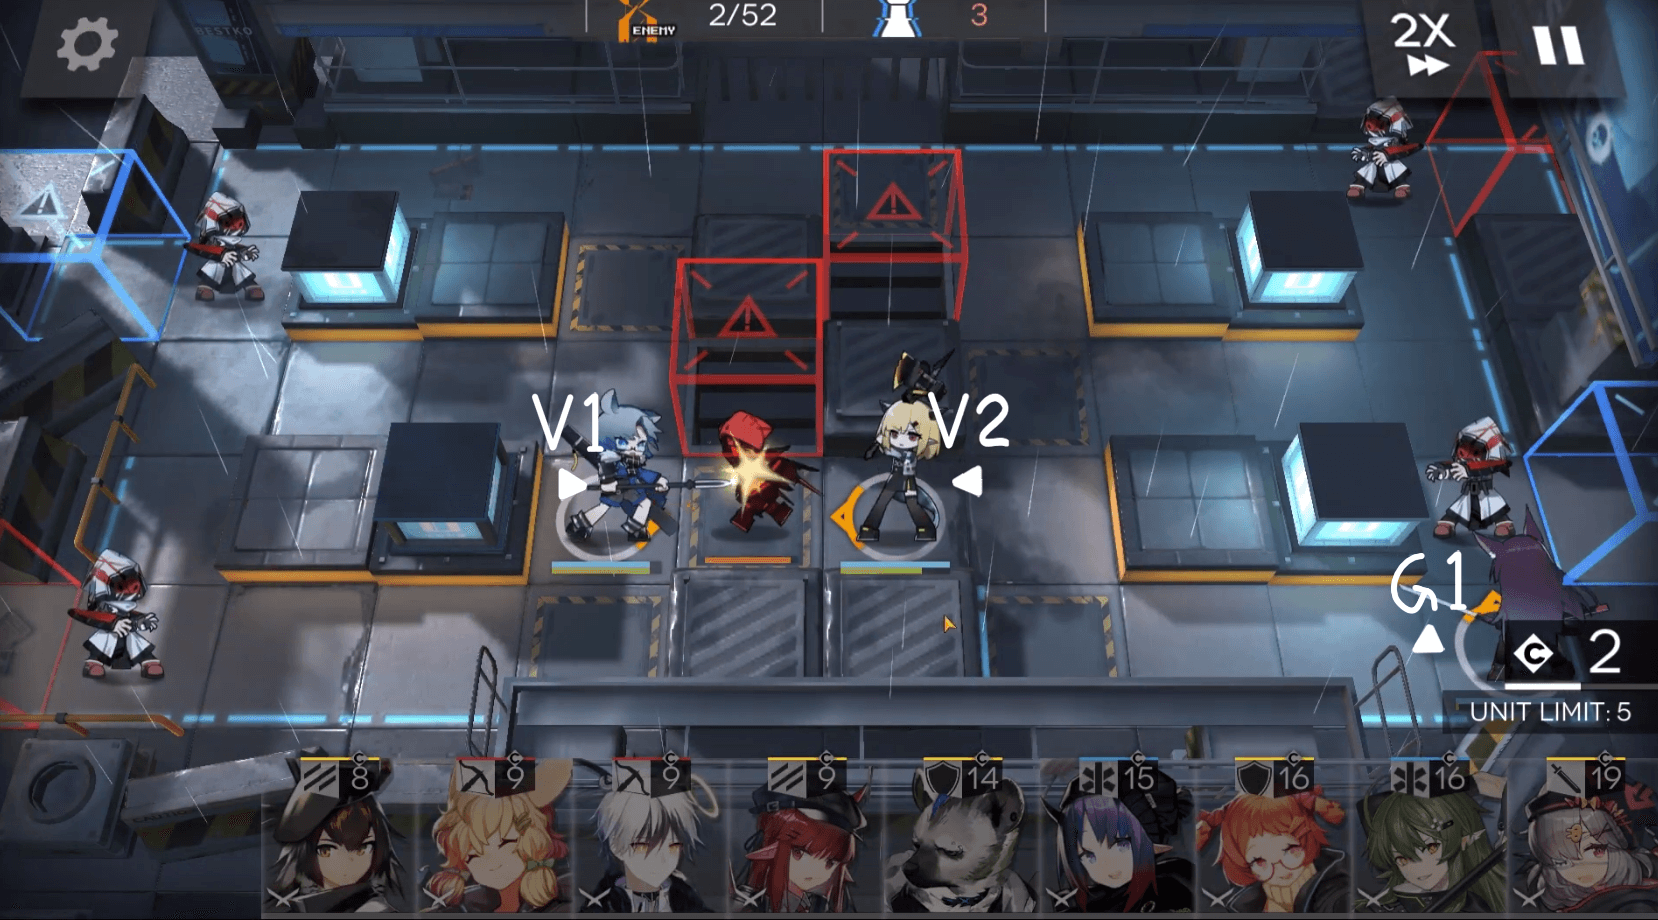
The next wave will approach from the north central spawn point. To prepare, first deploy a M1 on the south eastern tile facing north. Then deploy S1 facing west. Supporting S1 will be G2 and D1 facing the northern adjacent tile of the spawn point.
Then deploy D2 on the tile between S1 and M1; D2’s purpose will be to take the multihit from the caster so that your sniper will live.
At 19 kills, the northern casters will start moving. Deploy G1 to intercept the northwestern caster and employ the previous strategy used to remove the caster. The northeastern caster will be attacking the two defenders and S1 will take care of them.
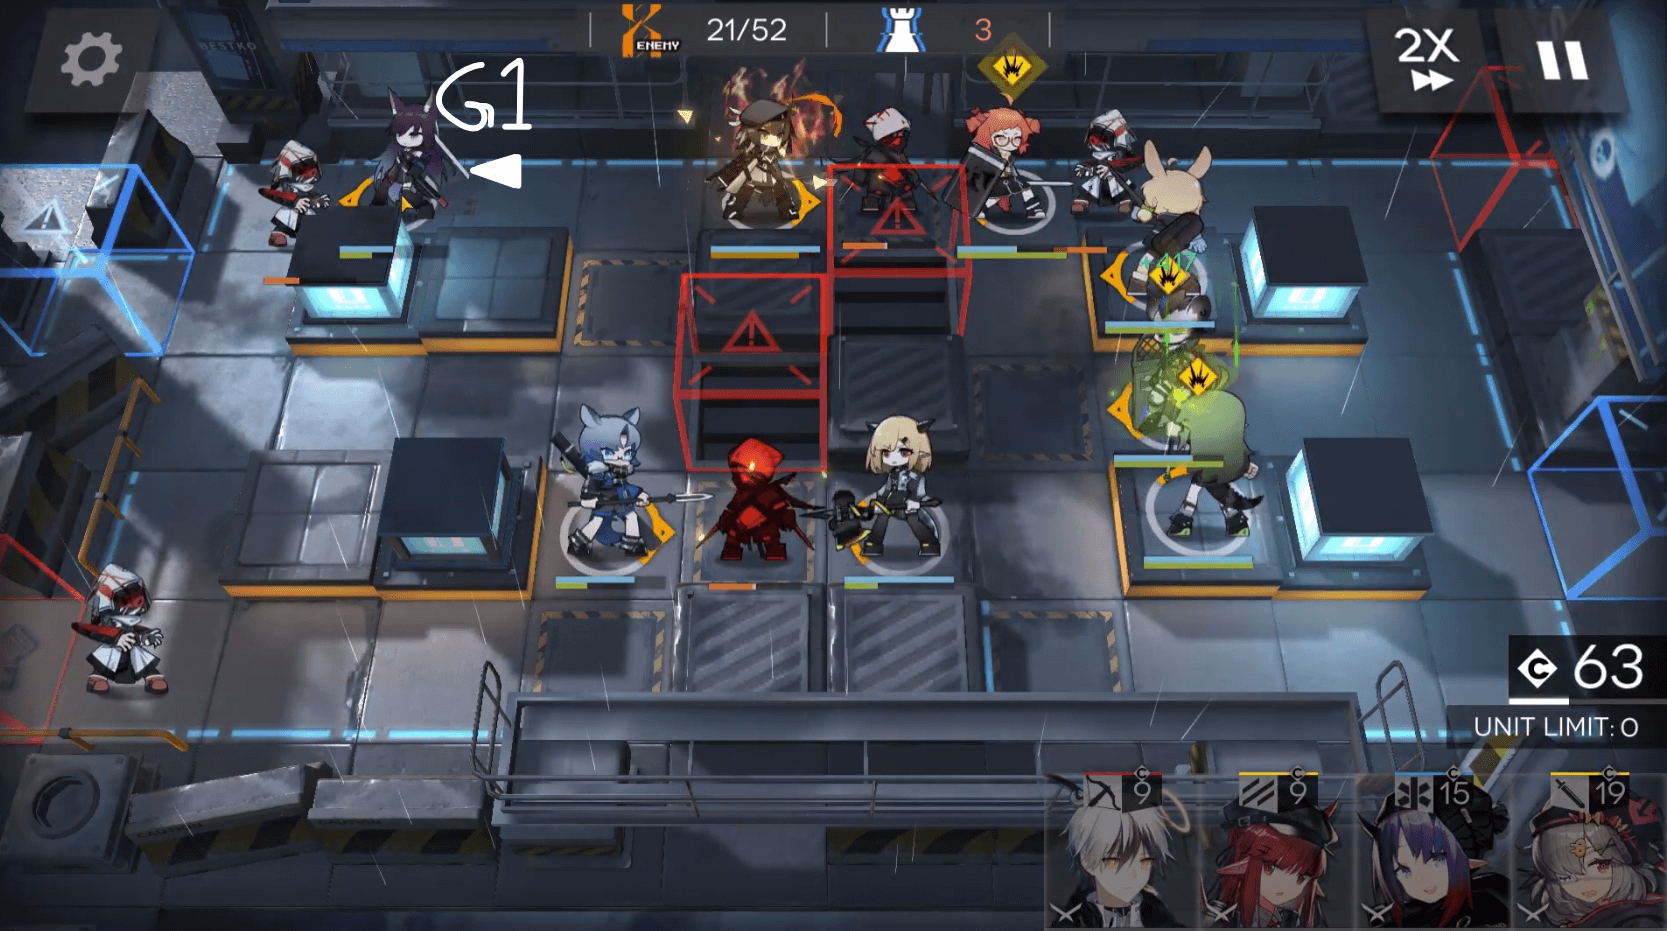
When the northwestern caster is removed, retreat the units used and deploy S2 on the northwestern ranged tile facing south.
Entering the next phase of the operation, retreat V1 to prevent death and deploy Fp1 behind V2 to reinforce the southern defense and kill the advancing casters. After V2 soaks up hits, retreat V2 before they take lethal damage.
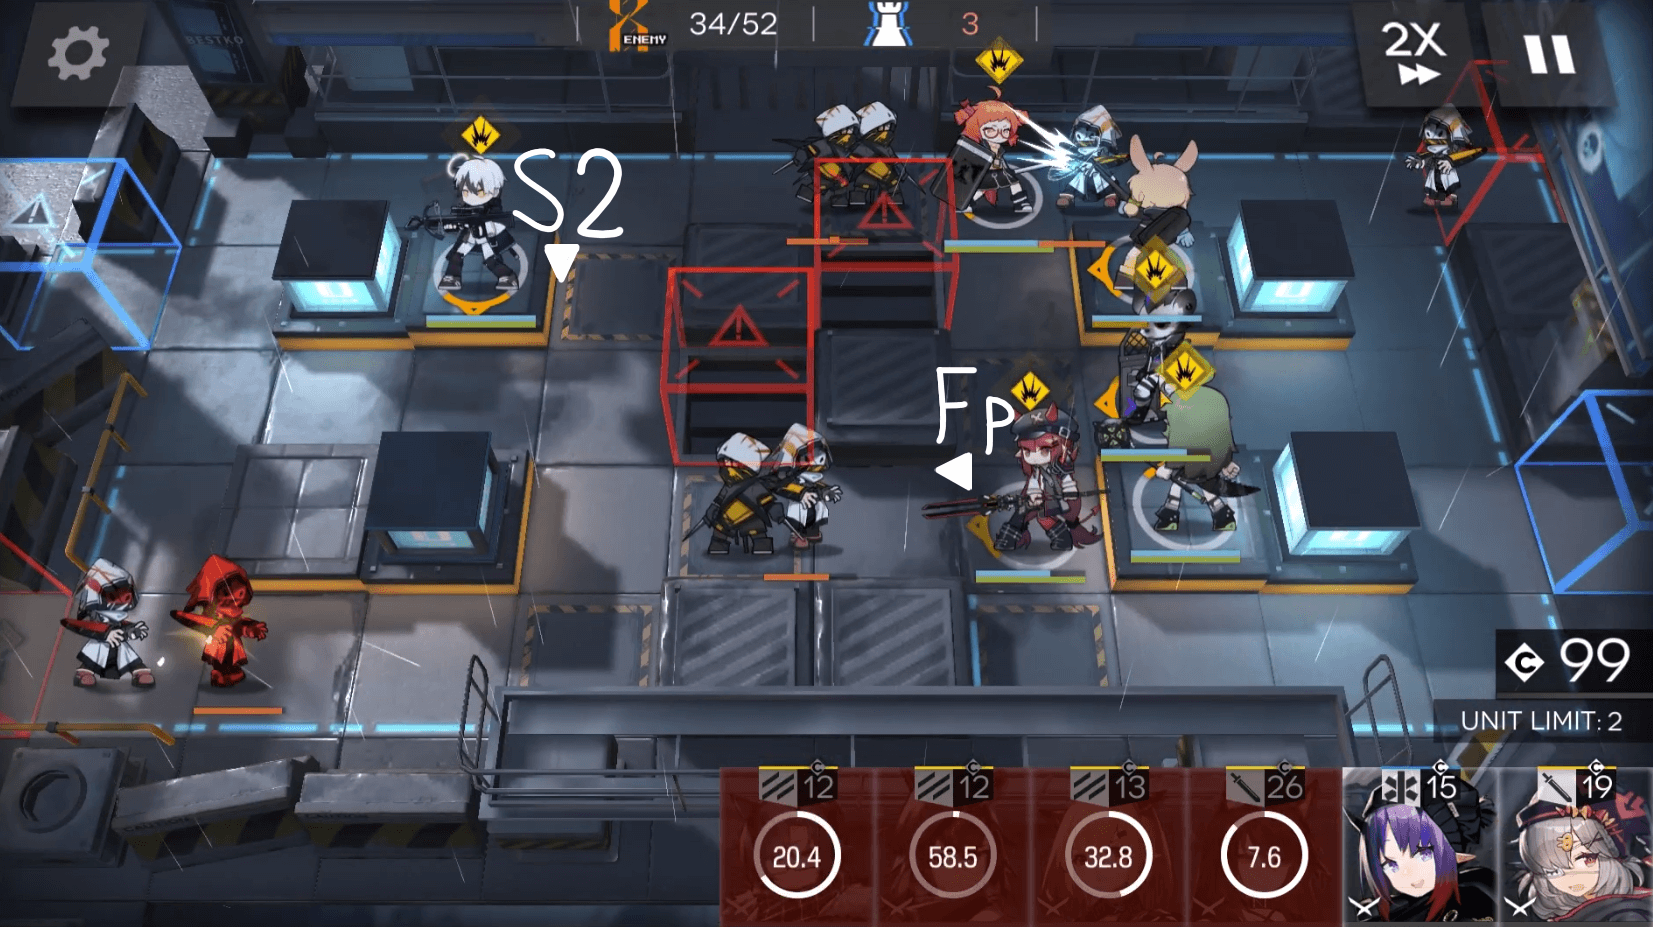
The southwestern mage will now advance. Deploy M2 on the southwestern ranged tile facing north. Next, deploy Fp2 directly south of S2 facing east. This should be sufficient in killing the advancing mage. A new wave will rush from the northeastern spawn location; deploy G1 behind D1 to intercept the assault. After the mage meets the grave, retreat M2 and Fp2.
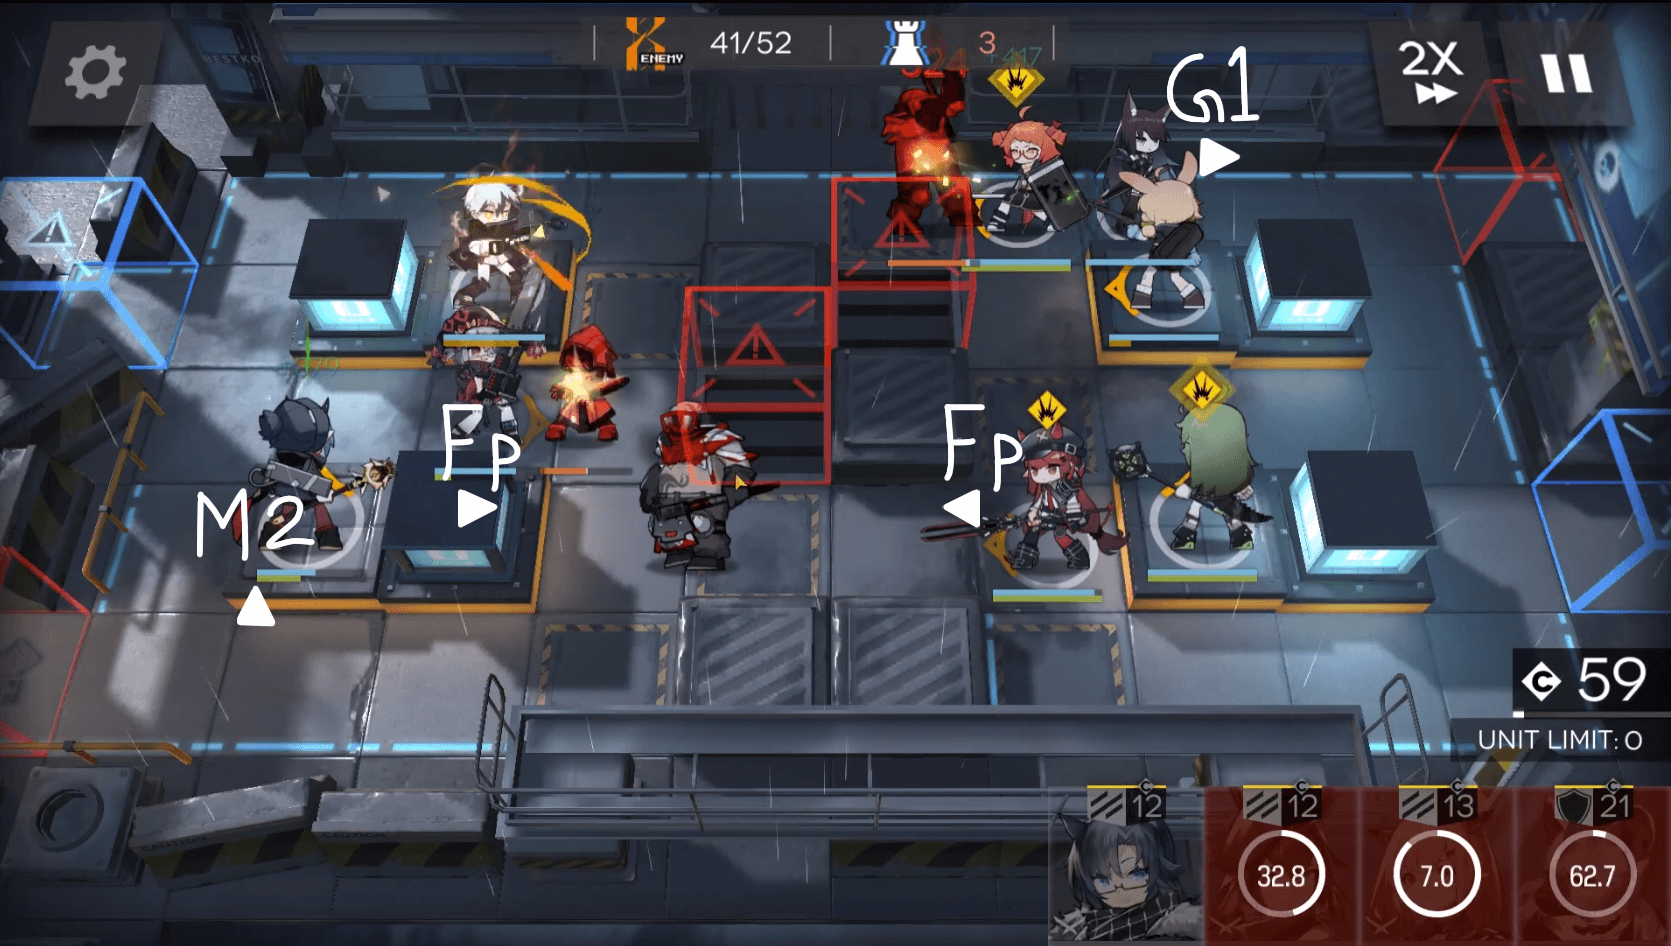
Entering the final stages of the operation, deploy V1 behind the two Axe enemies at the north. Use skills when needed and the stage is a wrap. Good luck on the clear Doctor!