CB-EX6 Challenge and Normal Mode
This guide will step through a strategy for clearing CB-EX6 that will work for both Normal and Challenge Mode. For other Guides and event info, see the following pages:

Map Information and Strategy
| Stage | Sanity | Rec. Lvl & Unlock Cond. | First Time Drops | Additional Drops | Challenge Reward |
|---|---|---|---|---|---|
| CB-EX6 | 20 |
Elite 2 Lv. 10
|

|
|
Challenge Condition: Guard and Vanguard Operators have -1 Block
- The Challenge Condition mainly just limits our blocking options, especially reducing the effectiveness of 1-block Guards and Vanguards.
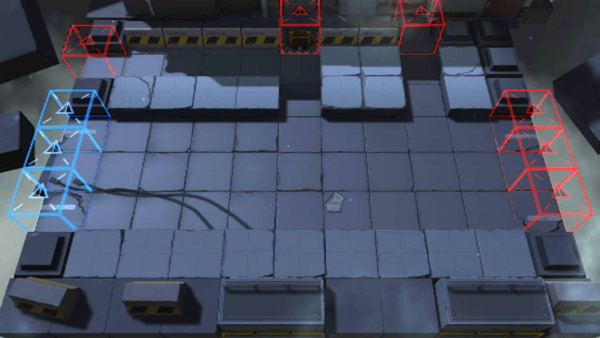
- The main Challenge of this map is how to handle the enemies that emerge from the top 3 exits so that they don't destroy your Ranged Operators deployed along the top. Desperate Fanatics emerge from the top-left, and Authorized Caster Leaders from the top-middle and top-right. The primary danger is if multiple enemies are targeting the right-most ranged Operator at the same time.
- There are several Bulldozers that zig-zag down the main passage, requiring 3-block count to stop. Enemies need to die quickly enough so that our front line doesn't get over-run.
- Enemies come down the center lane in a fairly constant stream. Other than the Casters, most enemies have higher DEF than RES, making Arts damage preferable.
Recommended Team Composition
- 3 Skill-DP-Recovery Vanguard, V1 - V3
- 2 Casters, C1-C2, AoE will probably be more effective, but ST might work as well. Ifrit is amazing for this map, I highly recommend using her as Support if you don't have her. Eyja as well.
- 2 Medic, M1 and M2, M1 must be an ST Medic
- 3 Defenders, D1-D3. Using Healing Defenders for the top and/or bottom row can be very helpful for keeping our Ranged Operators alive.
- 1 Guard, G1, must have Block-2, Ranged Guard is best, Support Guard will likely also work
- ----------- The Above Operators will be handling the main corridor. The last two Operators will we will use to distract/damage the top-exit enemies
- 1 melee Operator - Me1, the job of this Operator is primarily to act as the damage soak to keep our top-row Ranged Operators alive. Adding dps is also a nice bonus. Some good options for this Operator include: Dur'nar (can block and do Arts Damage), Arts Guards (even if they can't block, they have Arts Damage and innate RES), Hellagur (with self heal and good dps), or anything else with good survivability or DPS (especially Arts Damage)
- 1 Ranged Operator - R1, A healer if your Me1 needs help staying alive, if not any ranged Operator to help with any role necessary.
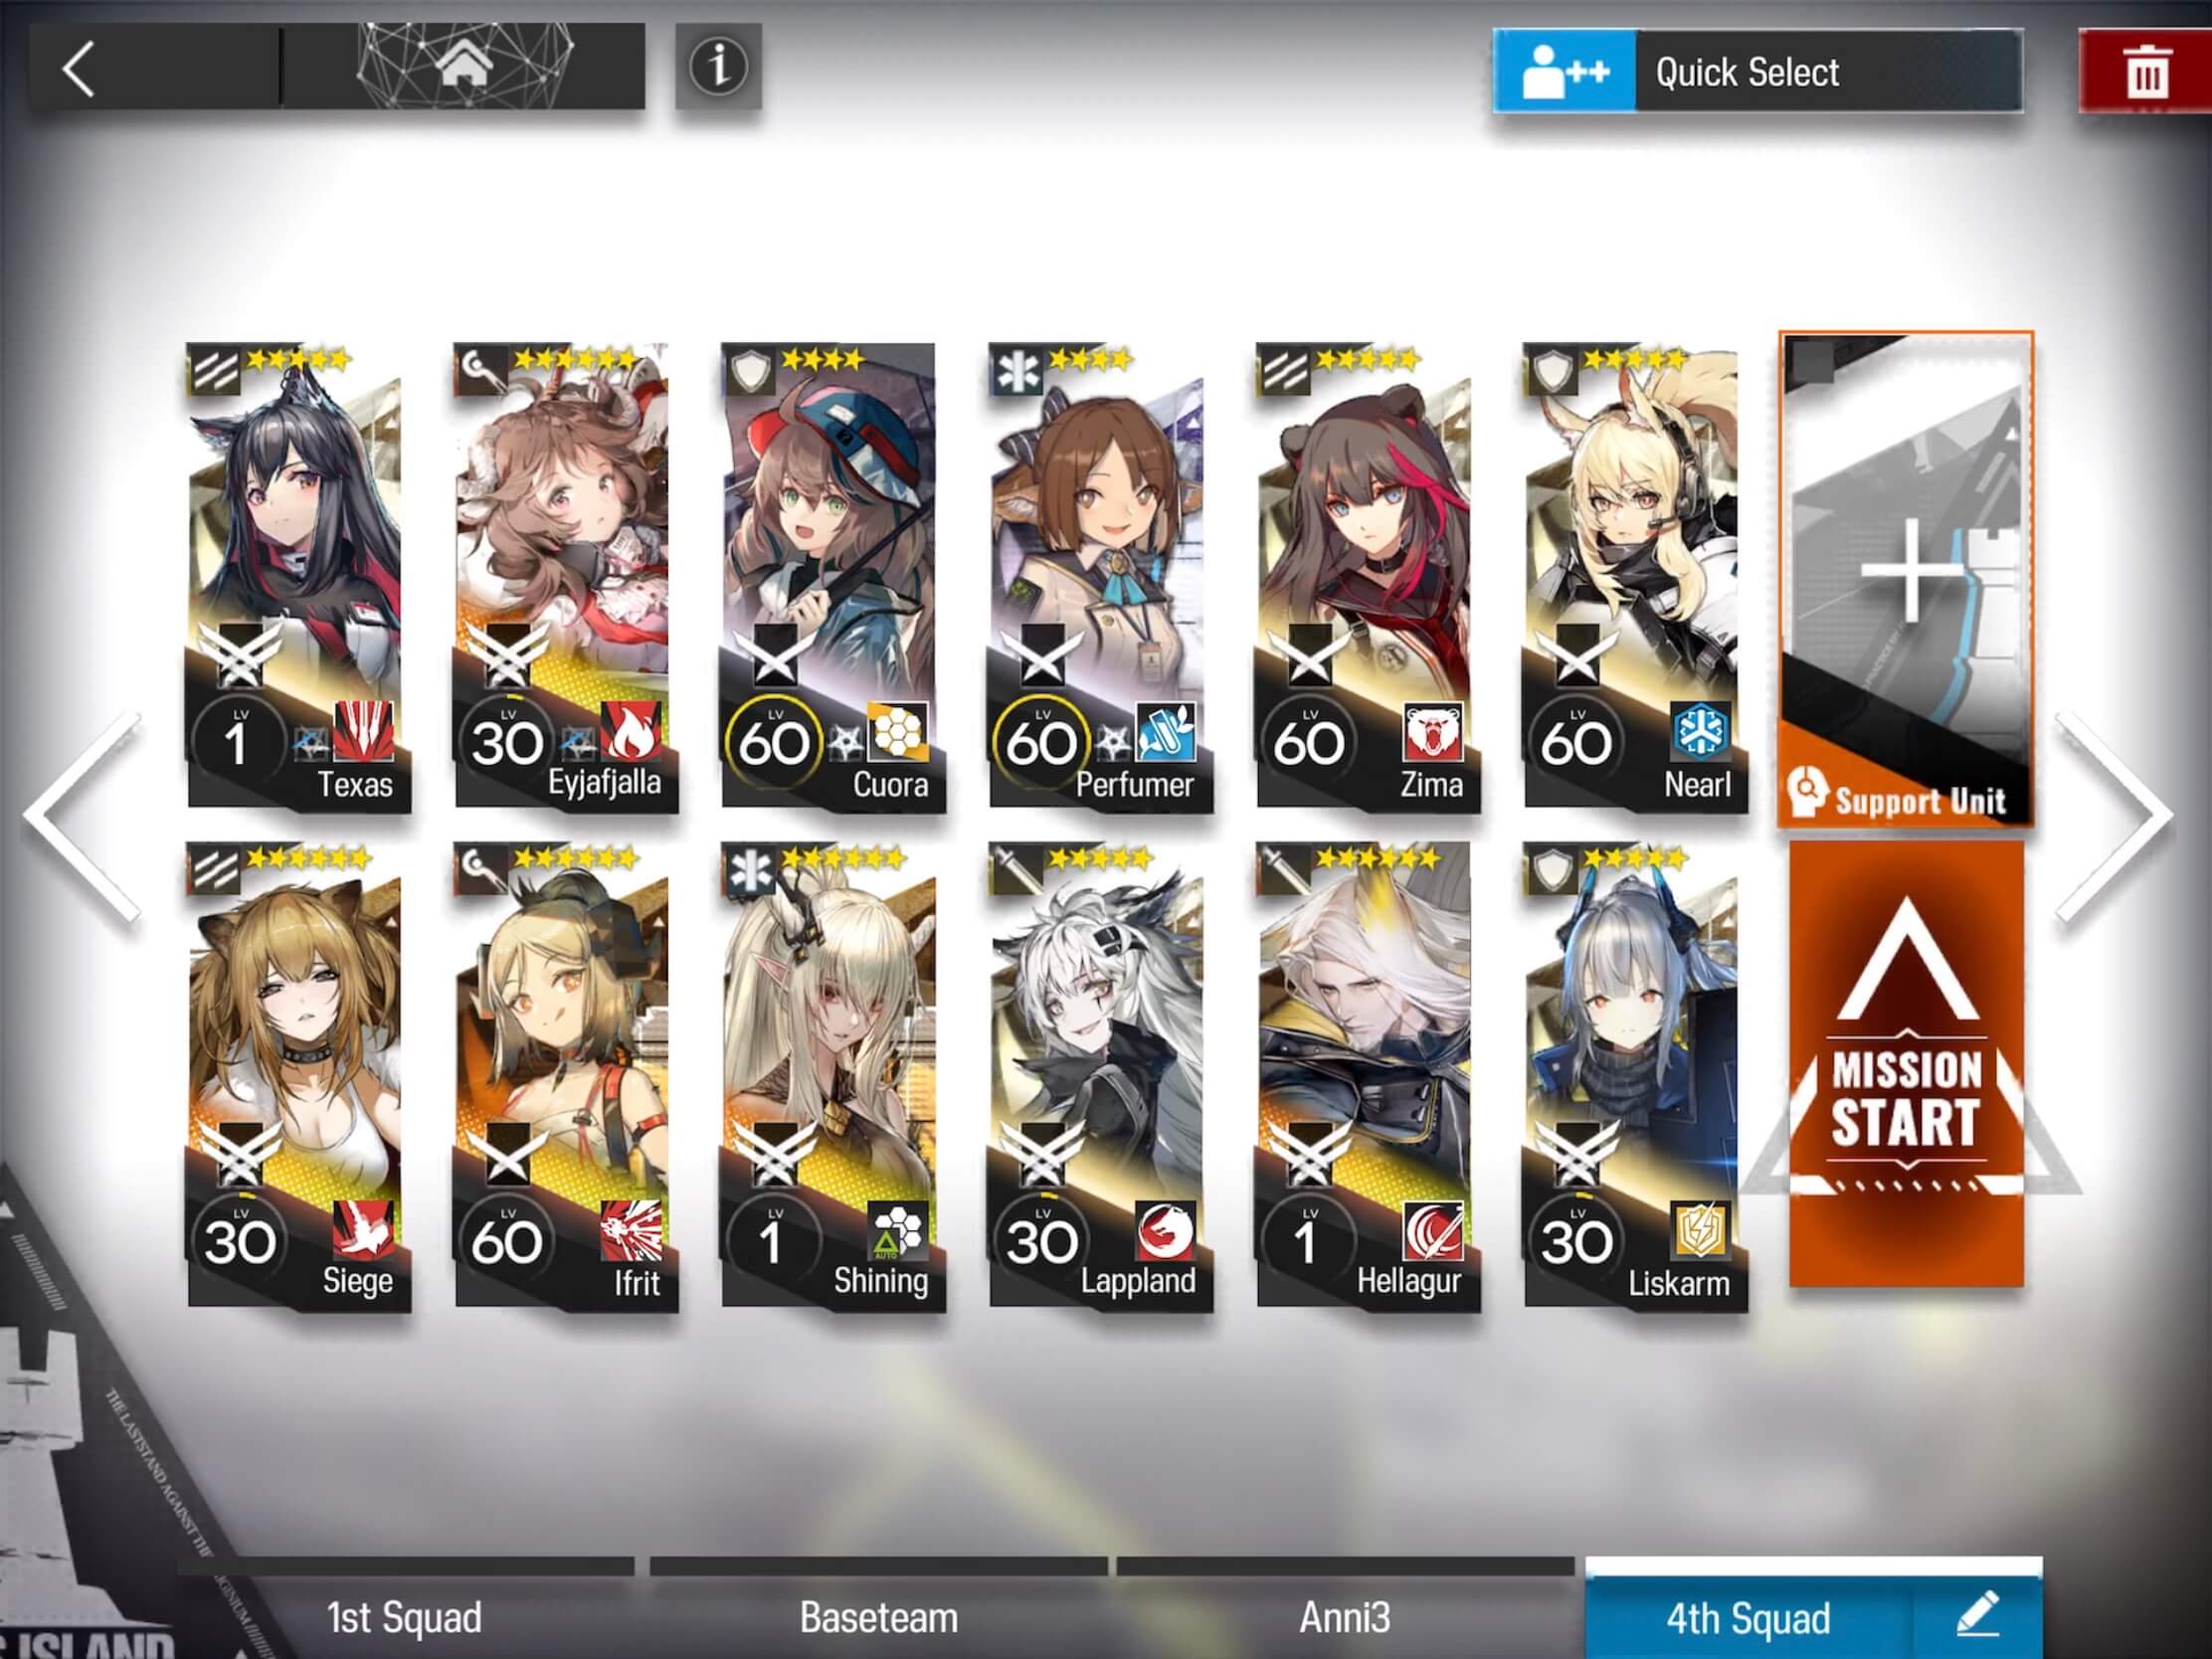
Here is an example of the team I used:
Deployment
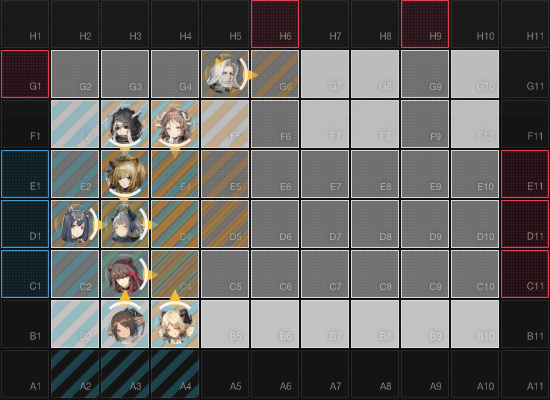
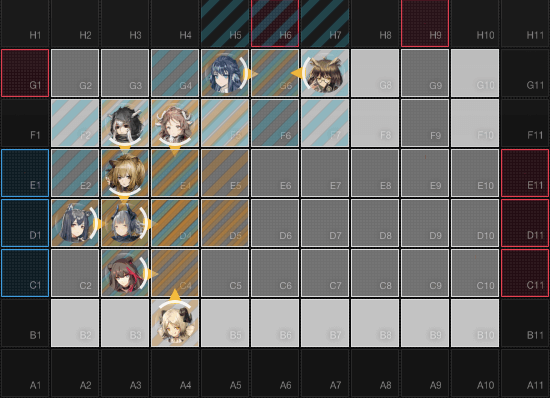
Unit placement can be seen in the image below, and deployment order should be done exactly as presented. Each Operator can be placed as soon as there is sufficient DP.
Deployment Order:
- V1: Texas - Skill-DP-Recovery Vanguard
- V2: Siege - Skill-DP-Recovery Vanguard
- V3: Zima - Skill-DP-Recovery Vanguard
- C1: Eyjafjalla - ST Caster (with AoE)
- C2: Ifrit - Caster (Ifrit the Burninator crushes this map when placed here, as she reaches the very top lane as well.)
- M1: Shining - ST Medic
- D1: Liskarm - Normal Defender (If you have Saria, deploying her here with S2 would be very helpful)
- Me1: Hellagur - Enmity Guard. This positioning will cause the Fanatics to stop (to attack) or be blocked within range of Ifrit. If you aren't using Ifrit, then really any of grids G5, G6, or F6 should serve the purpose here.
- R1: Perfumer, AoE Medic. Where to put this Operator will depend on what you use. Since I had Hellagur , I didn't need to put a healer on him, so I placed Perfumer at the bottom to help with the bottom ranged. If you are using a healer to keep alive your Me1, or a dps, then you might want to deploy them before Me1, depending on who you want the free enemy Casters to target.
At this point we are at our Deploy Limit, and our formation should look something like this:
or this:
When we have enough DP, we'll do the following:
- Retreat our V3 and deploy our D2: Nearl - Healing Defender ( a healing Defender is essential here if you aren't placing a medic on the bottom row)
- Retreat our V1 and deploy our G1: Lappland - Ranged Guard
- Retreat our V2 and deploy our D3: Cuora - Normal Defender (A Healing Defender can be useful if you need healing support for your C1)
Our formation now looks like this:
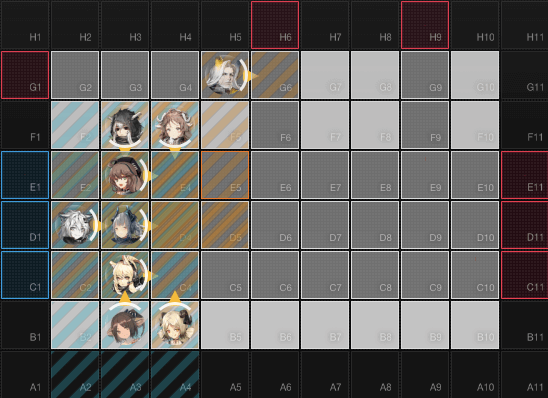
And this should take us all the way to the end!
Enjoy your OP!