OF-EX5 Normal And Challenge Mode
This guide will step through a strategy for clearing OF-EX5 that will work for both the normal and Challenge mode, though the DP gymnastics we do for the Challenge Mode will be major overkill for normal.
If you are looking for other Event information or Operation clear guides, see the following:


Map Information
- The 2/3 slower DP generation in the Challenge Mode will require a major change from the way most players will originally approach the Normal Mode. Be smart with your DP, heavily use your Vanguards, and retreat Operators before they die. Even small mistakes can make the difference, as you may not have the extra DP to deploy backups.
- <Lava Fountains> Spray out lava, damaging friendly units in the surrounding 8 tiles. These cover most of the deployable tiles on the map, meaning almost all of your units will need to be supported by a healer. AoE healers are great for handling this
- Squishier Operators will die if hit by 2 exploding spiders (Infused Originium Slugs) without heals in between. Or by 1 spider + a Lava Fountain. Handle with care.
- The top lane enemies will be primarily high DEF and low RES, so Arts damage is preferred. The exception is the Caster Leaders, which are high RES and low DEF.
- Bottom lane enemies are low DEF high RES, so physical damage is king. Be careful of the Agent Leaders, whose attacks lower an Operators block count by 1. They come in bunches and do Arts damage, so they can quickly shred and bypass a Defender if you aren't careful.
- If you use a Push or Pull Operator, you should use Skill 2 of at least Level 7 to move the Agent Leaders.
Recommended Team Composition
Using a Push Operator makes this map considerably easier. I'm going to try to explain both a strategy for using a Push Operator, and a strategy for if you don't. The companion video at the bottom shows an example of doing it without, as it is more difficult.
-
3 Skill-DP-Recovery Vanguards. Myrtle is amazing for this. We need to generate DP ourselves since the passive regen is reduced. Fixing the DP problem will fix the major hurdle of the map, so this is the most important part/step for Challenge Mode.
-
At least 1 DP-On-Kill Vanguard. We are going to use them to take out Spiders. Can also use a Fast-Redeploy Operator if DP isn't an issue, but these Vanguards return their DP when retreated, which is nice for this map.
-
2 Medics, AoE is great for Lava fountains, but ST has further distance. You may have to bring at least 1 ST Medic if you don't have Saria or Nearl, which I'll describe in more detail below.
-
2 Defenders. Preferably 1 is a Healing Defender, and must be Nearl or Saria. If you don't have one of them I'll describe a change you can try below.
-
1 Ranged Guard. Preferably Lappland.
-
1 Caster. Eyja with S2 is amazing. Angelina with S3 is great, but you might have to use an ST Sniper in her spot early-on to handle the starting rush. AoE or multi-target is preferred.
-
1 Push Operator with S2 at least level 7
-
if you don't have a Push Operator: 1 melee physical dps with at least 2 block. Specter, SilverAsh, Ch'en, etc.
-
1 Sniper. high physical damage preferred. If you are using Angelina, this might need to be a low DP cost ST Sniper for the initial rush. If you are NOT using a Pusher, then you want this to be high physical DPS.
-
With your support you have 1 flex option. I'd recommend either another Operator to kill spiders (DP-On-Kill Vanguard or Fast-Redeploy), or an Operator to replace one that is likely to die (If you don't have a Pusher, that would be your 2 block-or-more Guard or Healing Defender). Otherwise look for one of the Operators specifically mentioned above.
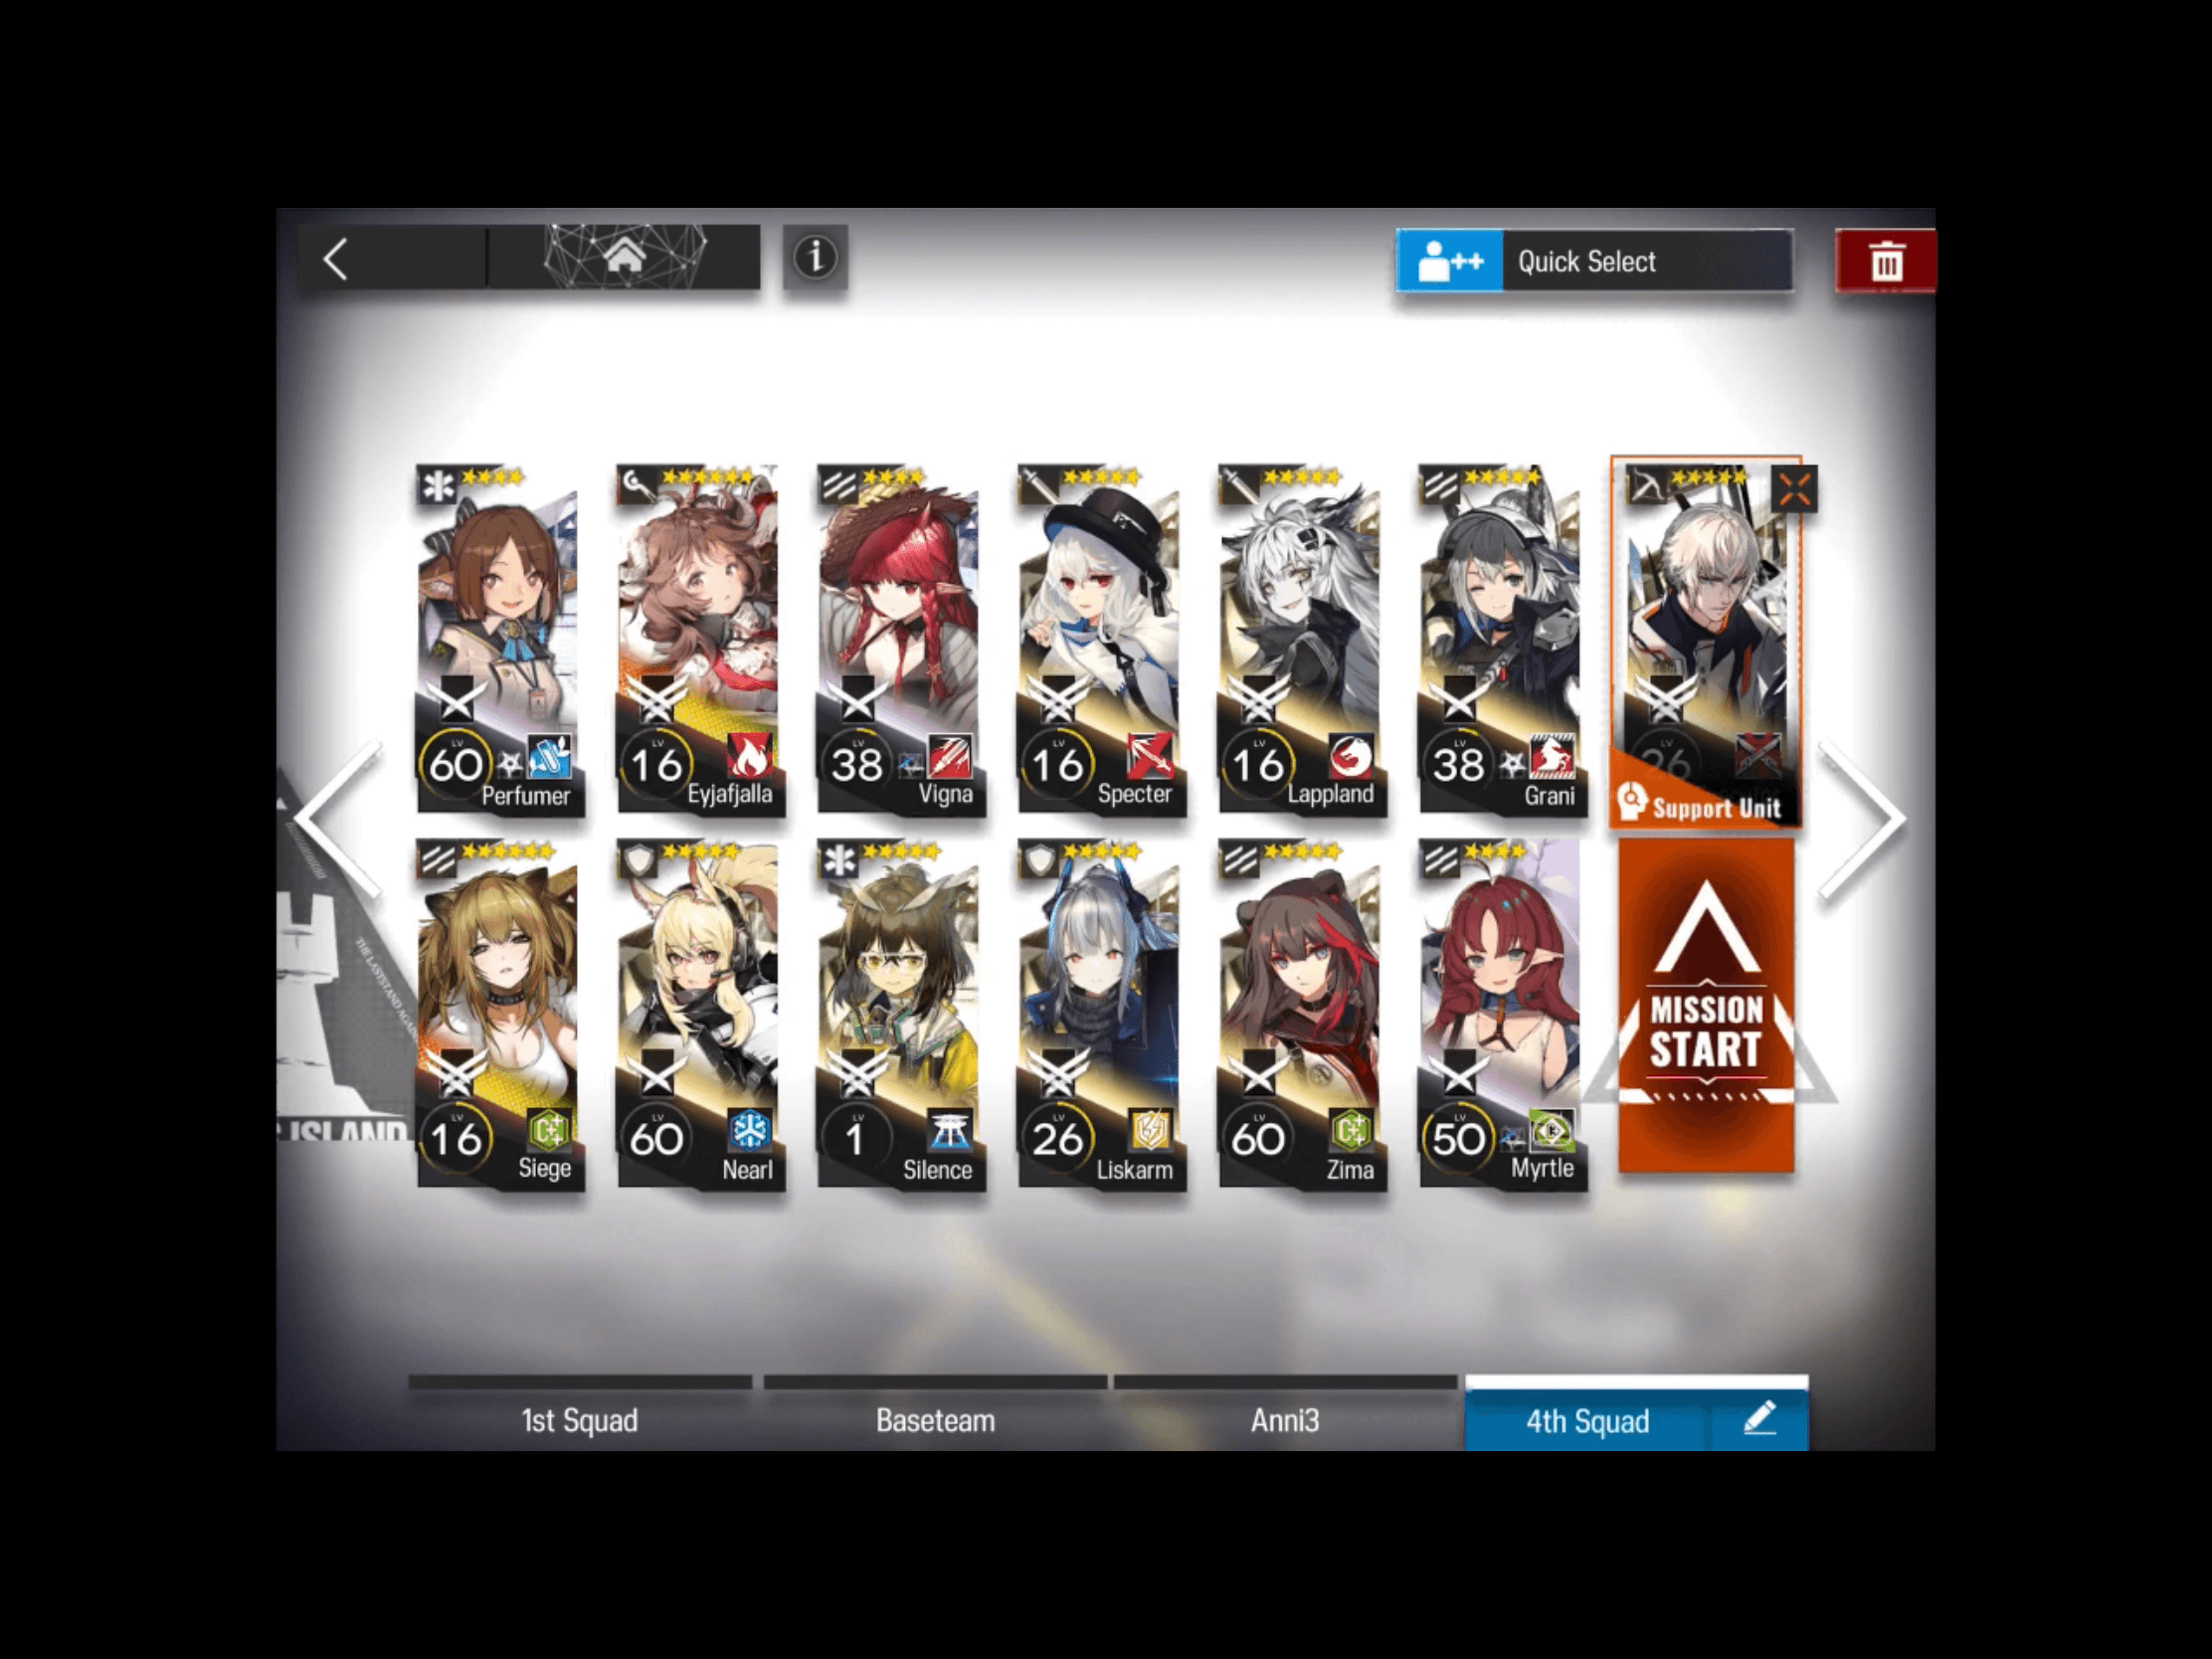
Here is an example of the team I used that did NOT have a Push Operator:
Deployment
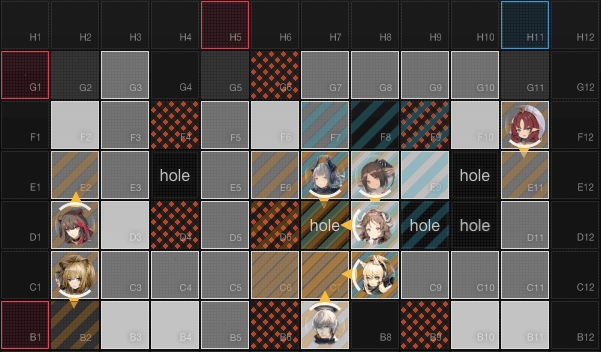
Unit placement can be seen in the image below, and deployment order should be done as presented. Each Operator can be placed as soon as there is sufficient DP.
Deployment Order:
First we set up our Vanguards outside of the reach of the Lava Fountains:
- 1. Myrtle - Skill-DP-Recovery Vanguard - She will kill the spider, but she won't die.
- 2. Zima - Skill-DP-Recovery Vanguard
- 3. Siege- Skill-DP-Recovery Vanguard
Then we will start using our DP-On-Kill Vanguard(s) and Fast-Redeploy Operators to kill the remaining Spiders. Remember that they can be used to kill 2 spiders, but will be killed by the second one. If you retreat after the second one is dead, but before the spider explodes, the Operator does not die and the DP refund still occurs. Beware the Lava Fountains and time the deployment to be right after an explosion so there is time to kill and retreat.
- 4. Vigna. - DP-On-Kill-Vanguard (she is not shown in the image below, since she should be deployed to kill the spiders, then retreated)
During this process we will start deploying the rest of the team.
- 5. Eyja - the multi-target or AoE caster. if you are using a Angelina or an AoE Caster you may have to deploy a ST Sniper in this spot first to handle starting rushes or leaks. This spot is clear of Lava Fountain damage. This Operator can also kill the one Spider in front of them and in their range without dying.
- 6. Nearl - Healing Defender - Or a non-Healing Defender if you don't have Nearl or Saria.
- 7. Perfumer - AoE Medic - If you do not have Nearl or Saria, then this should be an ST Medic instead. In that case you may have to place the ST Medic before the Defender, since the Defender is in range of a Lava Fountain.
- 8. Liskarm - Defender - (faced down because of her range, but can be faced left, and should be if it is not Liskarm)
- 9. Feater or Shaw if we are using a Push Operator, our physical damage Sniper if we are not (I used Executor)
Things should look like this:
- If you are using a Pusher, be sure to time the Pushes so that you are taking out all Agent Leaders at once. There are 3 in the first Agent rush, 2 in the second, and 2 in the third. The timing is demonstrated in the PeacCow Video linked below.
- If either of your vanguards are going to die, then retreat them before they do.
At around Kill 22, the enemy Caster Leaders will start appearing from the upper left. Retreat your left-most Vanguards if you haven't already.
- Next, Deploy your Ranged Guard. It will usually be better to face it down, but can also be faced left if you find that more helpful.
- If we are not using a Pusher, we are going do deploy our Guard that can block at least 2 in front of our bottom Defender. This will give us the blocking and DPS we need to handle this lane. This Operator is very susceptible to death, which is why a replacement is suggested as a flex Operator. Also, use healing and other cool downs wisely.
- Last, when we have a sufficient DP buffer, we will retreat our last Vanguard and place our second Medic. It can be an AoE or ST medic, and can be placed at B10 facing left, E9 facing left, or E9 facing down, wherever you happen to need it the most. Both lanes will be getting rushed at different points, so you may need to experiment with the best placement for your team.

This will be the formation the remainder of the fight. Some notable occurrences:
- The Agent Leader rushes arrive at your Defender at around kill 26, 39, and 49. These must be Pushed off or helped block. If your Defender is alone enemies will leak
- The rush at 48 also comes with 2 Rockbreaker Leaders. Be ready for this with cool downs.
- The second wave of triple casters comes behind a Heavy Defender and arrives at our top Defender at about kill 44. This is dangerous, and you might want to use cooldowns.
- The last wave of 3 Casters comes behind 2 Heavy Defenders. At kill 54, When the last Slug is killed on the bottom row, no more enemies will come for the bottom. At this point our bottom row Operators can be retreated and we can use our Vanguards to stall or kill the trailing Casters to give our team some breathing room.
Enjoy the OP!
* This site was used to create and share the map formations.