There’s No Place Like Home Base
Last Update: 05/02/21 - added links for Orundum production guide
In this guide we go over some of the important things to know about your Rhodes Island Infrastructure Complex (RIIC) a.k.a. the Base. The game already does a good job of explaining the basics, so we will provide a brief overview while focusing more on the less obvious or strategic elements.
RIIC is crucial to developing Operators and provides many resources, so don’t neglect it!
The base consists of several different types of facilities, which we will go over below. Operators assigned to each of these facilities provide and receive various benefits depending on the type. Each Operator has bonuses called RIIC Skills. These skills will take effect when an Operator is stationed at a specific facility. As an Operator works in a facility, their Morale goes down over time. When their Morale reaches 0, they become distracted and will no longer contribute their bonus. RIIC is the main source of Trust for Operators, especially those not taking part in battle. Every day an Operator will obtain Trust points one time when stationed in a facility. Assistants set in the Control Room will obtain more points. More details about Trust, how it is gained, and what it is good for can be found in this guide:

NOTE: More details about each facility, including prerequisites and building material costs, can be found in their linked wiki pages.
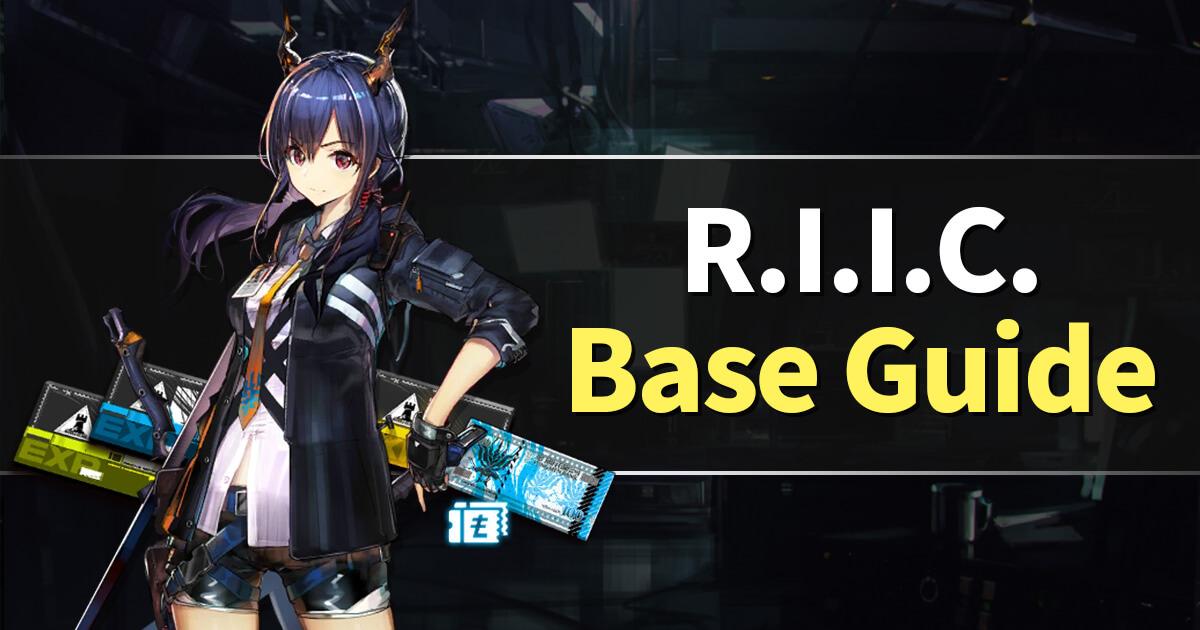
Control Center
-
The Control Center is Base Headquarters.
-
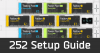
Located at 1. in Image1 above.
-
Maximum level is 5.
-
Operators with bonuses for this room buff aspects of the Base or slow down Morale reduction of Operators in this facility.
-
The player can assign 5 Assistants: 1 leader and 4 sub-leaders/assistants. When not assigned to any facility they'll hang out in the Control Center(leader) and Dormitories (other Assistants).
-
Assistants get additional daily Trust.
-
Upgrading allows Base expansion.
Tips:
-
Production from previous days can be viewed.
-
Even without skills specific to the Control Center, stationing Operators there will reduce the mood consumption rate of the entire Base.
Dormitory
-
A Dormitory restores Morale for tired Operators.
-
Can be built in locations 2. - 5. in Image1 above, for a max of 4.
-
Maximum level is 5.
-
Operators with Bonuses for this room increase Morale restoration speed.
-
Furniture increases Ambiance.
-
Higher Ambiance restores Morale faster.
-
Higher Ambiance generates more Friend Credits, with a maximum of 50 per Dormitory (so max 200 possible).
Tips:
-
Save Furniture Parts for buying limited Event Furniture.
-
Completing Furniture sets gives an Ambiance bonus.
-
Each Dormitory has a maximum Ambiance of 1000 per level, even if your Furniture score is more than that. Try to spread out your Furniture to maximize overall benefit, rather than putting too much in one.
-
Operators with Dormitory RIIC skills that improve the morale restoration of every Operator stationed there are particularly effective (Durin, for example).
Power Plant
-
The Power Plant provides power to the other rooms in our Base.
-
Can be built in locations 6. - 14. in Image1 above.
-
Maximum level is 3.
-
Produces Drones that are used to build/upgrade rooms or enhance facility production.
-
Operator Bonuses increase Drone regeneration rate.
Tips:
-
Building 3 Power Plants allows players to fully develop the base.
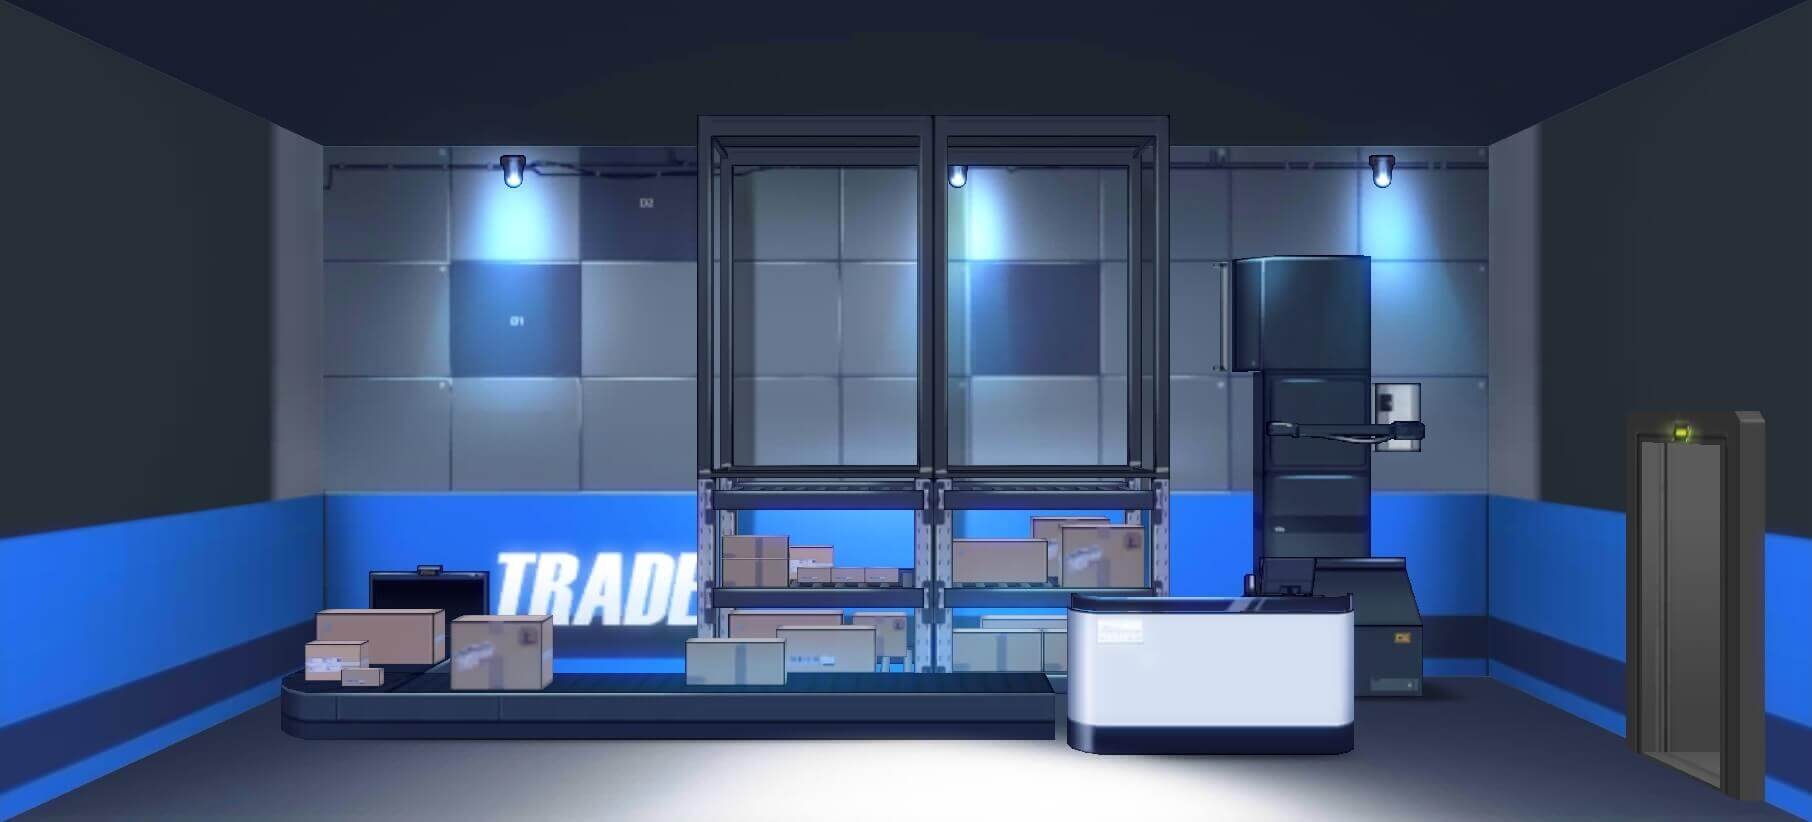
Factory
-
The Factory produces goods, including LMD, Battle Record (EXP), DualChips for Operator Elite2 Promotion, and Originium.
-
Can be built in locations 6. - 14. in Image1 above.
-
Maximum level is 3.
-
Operator Bonuses increase productivity or capacity limit.
Tips:
-
Production can be queued past the capacity, but will halt when capacity is reached. Be sure to regularly collect production.
-
A list of Factory Formula recipes can be found here.
-
Originium Shards are used by the Trading Post to trade for Orundum. You can learn more about producing Orundum in the base here:
Trading Post
-
The Trading Post allows players to sell Gold Bars for LMD or Originium for Orundum.
-
Can be built in locations 6. - 14. in Image1 above.
-
Maximum level is 3.
-
Operator Bonuses increase Acquisition Efficiency and the Order Limit.
Tips:
-
While getting extra Orundum may be tempting, it’s not recommended for most players due to the Sanity and LMD cost severely slowing down the development of Operators. Each Trade Order allows trading 2 Originium Shards for 20 Orundum. If you are interested in learning more about making Orundum in the base, you can learn more here:
- When switching between LMD and Orundum, the next order will be for the newly set currency, and not the ongoing one.
Reception Room
-
In the Reception Room the player finds, sends, and receives Clues. Once all 7 have been obtained, a 24-hour Clue Exchange will be held. Exchanges held by in-game friends can be visited.
-
All of the above actions reward Friend Credits that can be spent in the Shop for items (including 4* Operators)
-
Located at 15. in Image1 above.
-
Maximum level is 3.
-
Upgrading this facility increases Support Operator slots.
-
Number of possible Friends increases with facility level.
-
Operator Bonuses increase Clue Search Speed and make it easier to find some clues.
Tips
-
There are "hidden" factors that can increase Clue Search Speed. More information can be found here:

Workshop
-
The Workshop allows players to process Base building materials, skill books, Elite chips, and recycle Furniture.
-
Located at 16. in Image1 above.
-
Maximum level is 3.
-
Operator Bonuses increase the rate of byproduct produced when processing specific materials.
Tips:
-
Be sure to assign an Operator with a bonus for the specific type of material being processed.
-
A list of Workshop Formula recipes can be found here.
-
Keep your Operators with the best Workshop bonuses at high morale levels so they are ready when needed.
Human Resources Office
-
The Human Resources Office allows players to unlock additional Recruitment Slots and refresh Recruitment Tags.
-
Located at 17. in Image1 above.
-
Maximum level is 3.
-
Operator Bonuses increase HR accumulating speed (the rate Tag refreshes are gained).
Training Room

-
The Training Room is used to upgrade Skill mastery (beyond level 7).
-
Located at 18. in Image1 above.
-
Maximum level is 3.
-
The level of the facility corresponds to the maximum mastery level a skill can be upgraded to.
-
Operator bonuses increase the training speed of specific classes.
Tips:
-
When training is not in process, 2 Operators can be stationed here for bonus trust, as their Morale won’t go down.
Base Build Strategy
The main decision that needs to be made with your Base is how many Trading Posts, Factories, and Power Plants to build. The 9 spots on the left side of the Base are available for these 3 facilities. We will list the pros and cons of the most common builds below.
2 Trading Posts, 5 Factories, 2 Power Plants (2-5-2)
Strategy
-
3 Factories produce Battle Records, 2 Gold Bars.
-
Use Drones to enhance Battle Record production or Gold Bars if their production rate doesn’t meet the Trading Posts’ demand.
-
Alternatively, for more LMD production, 2 factories produce Battle Records, and 3 produce Gold Bars. Use Drones to speed up Trading Posts.
-
Base right side can be fully upgraded at the cost of lower level Dorms and left-side facilities, though a fully upgraded left-side will produce the most at maximum output.
-
Keeping the HR Office at a low level is recommended
Pros
-
Highest production.
-
Lower building material costs, since not every facility will be fully upgraded.
-
Balanced production of LMD and Battle Records (EXP)
-
Relies less on Operator micromanaging for maximizing output, since having low level Dormitories means there is little to gain from more frequent swaps.
Cons
-
Less power available means you cannot support a fully developed and upgraded Base, which can trigger some completionist players.
-
Low level Dormitories give less Friend Credits and Trust.
NOTE:
-
Right-side facilities cannot be downgraded, and a fully built-right side 2-5-2 build has less max output potential because of the left-side sacrifices that must be made. Upgrade right-side facilities with care, and be sure you want to move away from a 2-5-2 build before fully upgrading the right side.
-
For a detailed guide on building a 2-5-2 Base, see the following:
2 Trading Posts, 4 Factories, 3 Power Plants (2-4-3)
Strategy
-
2 Factories produce Battle Records, 2 Gold Bars.
-
Use Drones to enhance Battle Record production or Gold Bars if their production rate doesn’t meet the Trading Posts’ demand.
Pros
-
3 Power Plants allow for the whole base to be fully upgraded. Completionists will find satisfaction.
-
Maxed Dormitories give more Friend Credits and Trust.
-
Balanced production of LMD and Battle Records (EXP).
Cons
-
Does not match the output potential of 2-5-2, though it does outperform 333 and 153 (except for whales).
-
Having better dorms allows for more frequent rotations, in order to keep the more efficient buffs active, but this also means more management to completely optimize. 243 is more punishing against suboptimal management compared to 252. (Same goes for 153 and 333.)
- More expensive to build since all facilities need to be built and upgraded. Dormitories are especially expensive to max out.
1 Trading Posts, 5 Factories, 3 Power Plants (1-5-3)
Strategy
-
4 Factories produce Battle Records, 1 Gold Bars.
-
Use Drones to enhance Battle Record production.
-
Production focused on Battle Records.
Pros
-
3 Power Plants allow for the whole base to be fully upgraded. Completionists will find satisfaction.
-
Maxed Dormitories give more Friend Credits and Trust.
-
Highest Battle Record output.
Cons
-
Unbalanced output.
-
Requires LMD to be farmed using Sanity (stamina).
-
Having better dorms allows for more frequent rotations, in order to keep the more efficient buffs active, but this also means more management to completely optimize. 243 is more punishing against suboptimal management compared to 252. (Same goes for 153 and 333.)
- More expensive to build since all facilities need to be built and upgraded. Dormitories are especially expensive to max out.
3 Trading Posts, 3 Factories, 3 Power Plants (3-3-3)
Strategy
-
3 Factories produce Gold Bars.
-
Use Drones to enhance Factory or Trading Post when needed.
-
Production focused on LMD.
Pros
-
3 Power Plants allow for the whole base to be fully upgraded.
-
Maxed Dormitories give more Friend Credits and Trust.
-
Highest LMD output.
Cons
-
Less overall production than other builds.
-
Unbalanced output.
-
Requires Battle Records to be farmed using Sanity (stamina). LS-5, the best stage for Battle Records, is still very inefficient.
-
Having better dorms allows for more frequent rotations, in order to keep the more efficient buffs active, but this also means more management to completely optimize. 243 is more punishing against suboptimal management compared to 252. (Same goes for 153 and 333.)
- More expensive to build since all facilities need to be built and upgraded. Dormitories are especially expensive to max out.
General Tips
-
If unsure, go with the 2-5-2 build. It has the maximum output, cheapest to set up, and works well without intensive micromanagement.
-
Use a 1-5-3 build if you urgently need to level up Operators, or if you frequently exchange Originite Prime for Sanity. Otherwise, a 2-5-2 or 2-4-3 build provides enough EXP.
-
Use a 3-3-3 build if you have a very large surplus of Battle Records (EXP). Farming EXP at LS-5 is very inefficient, and it’s best to avoid having to do so.
-
All materials other than Drones are refunded when destroying a facility, so you can try different builds without a re-build cost (remember that right-side facilities cannot be downgraded or destroyed).
-
A filterable and sortable list of all Operator RIIC Base Skills can be found here:
-
Some Operators gain great Base Skills when they are promoted. You can find a guide to these Operators here:

- Some Operators have strong synergy when used together in the base. A guide to potent Operator Combinations can be found here (includes CN operators):
-
Swap in rested Operators if you will be away for a long period of time.
-
Focus on upgrading the left side first to maximize LMD and Battle Record production output. This will help you develop your Operators faster.
-
If you do not need them to build or upgrade facilities, use drones to accelerate your Trading Post or Factory.
-
Although not recommended for most players, some may be interested in producing Orundum in the base for more banner pulls. A guide can be found here: