Table of Contents
Character Stats
| Critical |
|
|---|---|
| Ki Restore Speed |
|
Character Info
| Battle Style | |
|---|---|
| Defense | |
| Arts Cards Held | |
| Tags | |


|
|
Overview
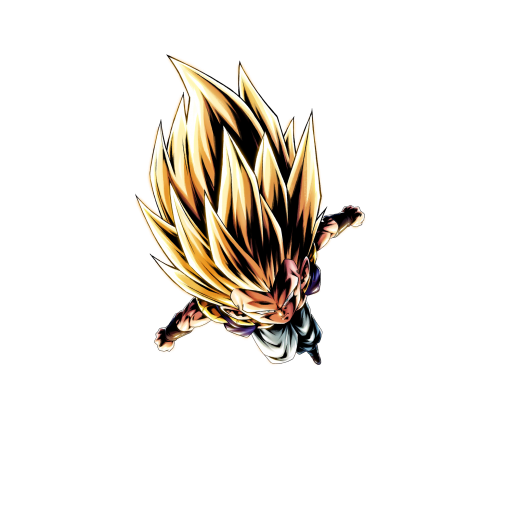
Coming straight from his fight against SP Buu: Super PUR in Majin Buu Saga, the ultimate fusion between Goten and Trunks has arrived once again, this time rocking their most powerful transformation - Super Saiyan 3.
In similar fashion to his previous forms, this Gotenks variant is at his peak during early stages of a Match. Even though he’s classified as a Defensive Fighter, he can still pack a punch through his Strike Art Cards, and his very high chance to inflict Faint via Ultimate Arts Card can swing the tides of the Match in his Team favor.
Despite his excellent early-game prowess, Gotenks simply can't keep it up in the late-game. His Blast Attack, even at the start of combat, is laughably poor, and his Main Tags have better options than him. At the very least, he contributes to his Teams with his excellent Z-Ability.
Strengths
Rewarding Cover

SP SSJ3 Gotenks YEL is the first Fusion Warrior Fighter that comes equipped with Cover Ability, and it’s a strong one at that.
While the 40% Damage reduction during Cover is rather standard, activating it gives him a huge 50% Strike Damage inflicted Boost - coupled with Buffs gained from his base +35% Damage Inflicted Butt provided by his Unique Ability, "Crazy Strong", he becomes a force to reckoned with.
Crowd Control

This Gotenks is the first character in the game to introduce Ranged Ultimate Arts Card, and it’s a very powerful one at that. With up to 75% chance to Faint, landing it can create a game-change situation which sets up a high Damaging combo for him or his Teammates.
His Extra Move Immobilizes the Enemy in similar fashion to SP FF Frieza YEL, but also heavily reduced Enemy Ki Recovery Speed.
All of the above, alongside the Ki Reduction from his Special Move Arts Card, this Combo can heavily impact Enemy movement and Ki management, giving the upper hand to his Team on many occasions
Valuable Z-Ability


Z-Abilities that increase base Health are invaluable, making Fighters with them well-sought after. Not only does this Gotenks increase Health of Fusion Warriors--being the first Fighter ever to do so--he also does so for Hybrid Saiyans, making him a great addition to both of those Teams.
Weaknesses
Unpredictable Strength
Unique Ability ‘Crazy Strong’ provides much-needed Damage Buffs in addition to Buffs that greatly help with his Ki and Vanish Gauge management.
The issue with this Ability lies in its random nature though. Every time SP SSJ3 Gotenks YEL enters the battlefield, he receives between one to three Buffs that either reduce Strike Arts cost, increase his Ki or Vanish Gauge recovery.
There’s no way to control which of these Buffs are applied to him, making his strength and usefulness heavily depend on luck of the draw.
In addition, the fact that he loses his biggest Damage Buff after 45 timer counts from start of the Match certainly doesn’t help him either.
Stats Distribution
While SP SSJ3 Gotenks YEL boasts great Strike and Blast Defenses that go very well with Cover Ability, his Health pool is on the lower side for a Defensive Fighter, even when accounting in the bonus provided by his Z-Ability.
Similarly, his Blast Attack leaves much to be desired and can quickly become his pain point, because the Fighters that he is often paired with are Ranged Fighters that bring Blast Art Cards into the deck.
Team Synergy
Fusion Warrior


SP SSJ3 Gotenks YEL, as a powerful Defensive Fighter, is a great addition to the Fusion Warrior team. Not only does he bring a strong and much-needed Cover Ability for the Team, but he’s also the first Fighter with a Health Buffing Z-Ability for Fusion Warriors, making him a welcome sight and staple Fighter in this Team.
In-combat, his contributions pale in comparison to his contemporaries, but he can function as a counter-pick Fighter against Tag Teams that aren't likely to bring a Red. He is significantly aided by his technical father, SP Gogeta BLU, who can check those Red Fighters if they do appear.
Hybrid Saiyan


At 5 stars, SP SSJ3 Gotenks YEL also Buffs the Health of Hybrid Saiyan Tag through his Z-Ability. While SP Kid Gohan YEL also boasts the same Z-Ability, the former Fighter isn’t just a bench, which can open more Team Building options.
The addition of SP SSJ Youth Gohan YEL completely kicks him off the core but SP SSJ3 Gotenks YEL still has a more valuable Z-Ability
As a Yellow Defensive Fighter that brings two Strike Art Cards, this Gotenks has great Synergy with SP Ultimate Gohan GRN, both color and kit-wise.
While he excels in early stages of the Match, he gets slightly weaker later on, but SP SSJ2 Gohan RED can pick up the torch from him to carry the rest of the Match. Again, however, he's inferior to SP SSJ Youth Gohan YEL and should only be brought along if Hybrid Saiyan Players are missing him.
Teams Featured In
Parent ID: 150586

Equippable Items
I want to fight!
|
Type | Gold |
|---|---|---|
| Equip Condition | Hybrid Saiyan | |
| Sale Price | 30000 |
- Slot 1
- Slot 2
- Slot 3

Strike Defense or Blast Defense Up
|
6% - 18% |
|---|

Special Move Damage UP
|
5% - 12.5% |
|---|---|

Ultimate Damage UP
|
5% - 12.5% |

base Health or Damage to Regeneration UP
|
5% - 12.5% |
|---|
This is a great pick for Hybrid Saiyans with Ultimate Moves, and the Defensive roll options of the first slot further increase his abilities as a Tank. However the third slot rolls, it's a great benefit in the current Meta.
Fusion!
|
Type | Gold |
|---|---|---|
| Equip Condition | Fusion Warrior | |
| Sale Price | 30000 |
- Slot 1
- Slot 2
- Slot 3

Base Blast Defense UP
|
6% - 15% |
|---|

Base Strike Defense UP
|
6% - 15% |
|---|

Base Blast Attack or Strike Attack Up
|
6% - 15% |
|---|
This Equip plays to all his Strengths: Strike Attack and both Defenses.
I'm an Elite
|
Type | Gold |
|---|---|---|
| Equip Condition | Yellow | |
| Sale Price | 30000 |
- Slot 1
- Slot 2
- Slot 3

Base Strike Attack UP
|
8% - 20% |
|---|

Base Ki Restore Speed UP
|
4% - 10% |
|---|

Defense against Saiyan for 20 timer counts Up
|
12% - 30% |
|---|
Defense against Saiyan Teams is still very relevant in this Meta, and luckily he gets 20% Strike Attack to go along with it.
Main Ability
| Here I Go! |
|---|
Draw the Ultimate Arts Card "Charging Ultra Buu Buu Volleyball" next. Requirements: 20 timer counts must elapse. |
Unique Ability
| Crazy Strong |
|---|
+30% to damage inflicted from battle start for 45 timer counts. -10 to own Strike Arts cost for 10 timer counts. |
| Cover: Sustained Damage CUT |
Reduces damage received by 40% until combo ends when changing cover. |
| Ghost Medal (Gold) +3 |
+3 to Ghost Medals (Gold) dropped during the Legends Road - Gotenks - Event. |
Z Ability
|
+14% to "Tag: Fusion Warrior" max base health during battle.
Character(s) Affected
|
|
|
+16% to "Tag: Fusion Warrior" max base health during battle.
Character(s) Affected
|
|
|
+18% to "Tag: Fusion Warrior" or "Tag: Hybrid Saiyan" max base Health during battle.
Character(s) Affected
|
|
|
+20% to "Tag: Fusion Warrior" or "Tag: Hybrid Saiyan" max base Health during battle.
Character(s) Affected
|


Special
|
 Die Die Missile Barrage
Can Teach Die Die Missile Barrage
Can Teach
|
|---|
Deals major Explode damage. Cost 50 |
Extra
|
|
 Howl Howl |
|---|
Immobilizes the enemy on hit. Cost 25 |
Ultimate Special
|
|
 Charging Ultra Buu Buu Volleyball Charging Ultra Buu Buu Volleyball |
|---|
Deals major Explode damage. 1 member: 10% chance to inflict Faint on hit. Cost 20 |
Resistance
| Slice |
|
|---|---|
| Pierce |
|
| Impact |
|
| Explode |
|
Soul Boost Stats
| Stat | 100% | 200% | 300% | 400% | 500% | 600% | 698% |
|---|---|---|---|---|---|---|---|
| Health | 21540 | 44600 | 78747 | 121535 | 175499 | 244959 | 325131 |
| Strike Attack | 1793 | 3713 | 6561 | 10129 | 14629 | 20425 | 27120 |
| Blast Attack | 1793 | 3713 | 6561 | 10129 | 14629 | 20425 | 27120 |
| Strike Defense | 1542 | 3190 | 5637 | 8700 | 12564 | 17544 | 23292 |
| Blast Defense | 1542 | 3190 | 5637 | 8700 | 12564 | 17544 | 23292 |
| Critical | 118 | 260 | 472 | 708 | 968 | 1240 | 1520 |
| Strike Art Level | 2 | 3 | 4 | 5 | 5 | 5 | 5 |
| Blast Art Level | 2 | 3 | 4 | 5 | 5 | 5 | 5 |
| Special Art Level | 1 | 1 | 2 | 2 | 2 | 2 | 2 |
| Extra Art Level | 1 | 1 | 2 | 2 | 2 | 2 | 2 |
| Ultimate Art Level | 1 | 1 | 2 | 2 | 2 | 2 | 2 |
| Equipment Slots | 1 | 2 | 2 | 2 | 3 | 3 | 3 |
Recommended Soul Boosts
 |  |  |  |  |
|---|---|---|---|---|