
Table of Contents
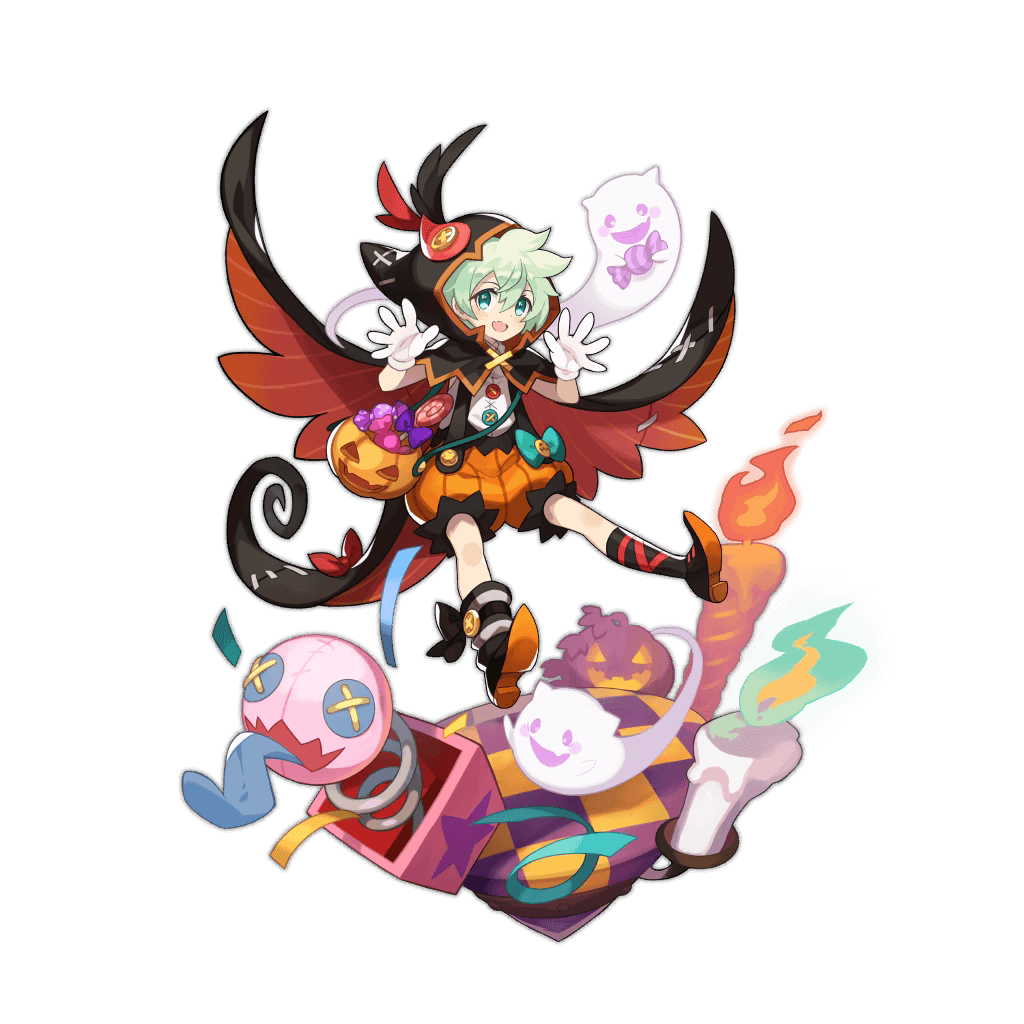
Halloween Lowen
Kit Overview


- 4* Art
- 5* Art


| About | |
|---|---|
Lowen, dressed as a prankster fiend. He's usually a very respectful child, but this Halloween he's working hard to be naughty. Even so, his raw cuteness has him being showered in candy. |
|
| CV Info - English | CV Info - Japanese |
| Erin Mathews | Sanae Kobayashi |
| Halloween Prankster |
|---|
|
Obtainable as a 4
|
Character Stats
Overview
Halloween Lowen is here with no tricks, just treats for Dragalia Lost. His kit is shockingly effective for a healer, packing an abundance of heals and a defense buff to help survive HP Checks. On top of a stacking HP Buff, and he can instantly charge his skills with Force Charge to use his abilities at the start of the quest thanks to his skill prep. The literal only drawback is that he doesn't have Stun Res for HMS, but that makes him perfect for Expert Volk, so no need to complain.
Strengths
Optimized Healing Kit
Lowen's kit is so incredibly optimized for healing that it's hard to see how it could improve.
Top Healer for Flame teams
Lowen can find a home in any content where a Flame healer is wanted, and is one of the top choices in the meta.
Weaknesses
Limited Availability
The only downside to Halloween Lowen is if you didn't get him the first time around, it's going to be a while before you do access to him again.
Dragon Recommendations
Phoenix: The best choice for healers looking to maximize their output in Flame.
Cerberus / Agni: As Lowen is a pure healer, if you want extra damage a pure strength dragon is your best option.
Pop-Star Siren: While a Light attuned dragon might seem a strange choice, she's the top pick for Expert Volk for the support her skill provides as well as the extra dragon time.
Weapon Recommendations
Gjallarhorn: The end game for Flame healers, this Staff is easily the best option for Lowen after a very long grind.
Chimeratech Cardinal: The pure stats on the Cardinal makes it preferable to options outside of the Gjallarhorn unless you have access to HDT2 weapons.
Ark Voyager: While this staff might seem to be a budget option, until you unlock some endgame items the active heal on this staff is invaluable for progression.
Wyrmprint Recommendations
Pair 1
Pair 2


Set 1: Bow's Boon loadout, Skill Haste focus
Set 2: Staff's Boon loadout, Buff Time focus
Any Skill Prep pick can top off Lowens's 75% (EX. The Chocolatiers, New World Escort)
Shared Skill
|
|
||
| Lvl 2 | Restores HP to all allies and continues healing over the next 15 seconds. It will also increase the entire team's strength by 8% for 60 seconds, and defense by 8% for 5 seconds. This strength increase will not stack. | 200  |
|---|---|---|
| Lvl 3 | Restores HP to all allies and continues healing over the next 15 seconds. It will also increase the entire team's strength by 8% for 60 seconds, and defense by 10% for 5 seconds. This strength increase will not stack. | 300 |
| SP Cost | 11536 | Iframe | Medium |
|---|---|---|---|
| Unlock Materials |
|
||
| Cost | 5 | Level | 1 |
Skills
Skill 1
|
|
||
| Lvl 1 | Restores HP to all allies and continues healing over the next 15 seconds. It will also increase the entire team's strength by 8% for 60 seconds. This strength increase will not stack. | 100 |
|---|---|---|
| Lvl 2 | Restores HP to all allies and continues healing over the next 15 seconds. It will also increase the entire team's strength by 8% for 60 seconds, and defense by 8% for 5 seconds. This strength increase will not stack. | 200 |
| Lvl 3 | Restores HP to all allies and continues healing over the next 15 seconds. It will also increase the entire team's strength by 8% for 60 seconds, and defense by 10% for 5 seconds. This strength increase will not stack. | 300 |
| SP Cost | 5916 | Iframe | Medium |
|---|
Skill 2
|
|
||
| Lvl 1 | Restores HP to all allies, and increases the entire team's max HP by 5% for the remainder of the quest. Once HP buffs reach the limit, an HP recovery effect is granted instead. | 100 |
|---|---|---|
| Lvl 2 | Restores HP to all allies, and increases the entire team's max HP by 10% for the remainder of the quest. Once HP buffs reach the limit, an HP recovery effect is granted instead. | 200 |
| Lvl 3 | " | 300 |
| SP Cost | 11832 | Iframe | Medium |
|---|
Abilities
Ability 1
|
Fills 50% of skill gauges at the start of quests. |
60
|
| Upgrades To | |
|---|---|
|
Fills 75% of skill gauges at the start of quests. |
80
|
Ability 2
|
Reduces susceptibility to sleep by 50%. |
60 |
| Upgrades To | |
|---|---|
|
Reduces susceptibility to sleep by 100%. |
100 |
Ability 3
|
Fills 25% of skill gauges when the user's force strikes connect (up to three times per quest). |
60 |
| Upgrades To | |
|---|---|
|
|
Co-Abilities
|
Increases the potency of recovery skills by 6%. Benefits your whole team. |
110 |
|
Show Upgrades
|
|
Increases the potency of recovery skills by 8%. Benefits your whole team. |
Increases the potency of recovery skills by 10%. Benefits your whole team. |
Increases the potency of recovery skills by 14%. Benefits your whole team. |
Increases the potency of recovery skills by 20%. Benefits your whole team. |
Co-Ability Chain
|
(Flame) HP 60% = Strength +1%
If a team member is attuned to (Flame): increases their strength by 1% when their HP is 60% or above. Benefits your whole team. |
|
Show Upgrades
|
If a team member is attuned to (Flame): increases their strength by 1% when their HP is 60% or above. Benefits your whole team. |
If a team member is attuned to (Flame): increases their strength by 3% when their HP is 60% or above. Benefits your whole team. |
If a team member is attuned to (Flame): increases their strength by 3% when their HP is 60% or above. Benefits your whole team. |
If a team member is attuned to (Flame): increases their strength by 5% when their HP is 60% or above. Benefits your whole team. |
Total Materials Required
- 1
- 2
- 3
- 4
- 5
Mana Circle 1
Total Materials
Effects


Mana Circle 2
Total Materials
Unbind Materials
Effects
Mana Circle 4
Total Materials
Unbind Materials
Effects
 Here's a treat for you! (Upgrade 1)
Mana Circle 5
Total Materials
Unbind Materials
Effects

 Recovery Potency +8%
You won't trick me! (Upgrade 2)
Recovery Potency +8%
You won't trick me! (Upgrade 2)


