Event Guide Hub
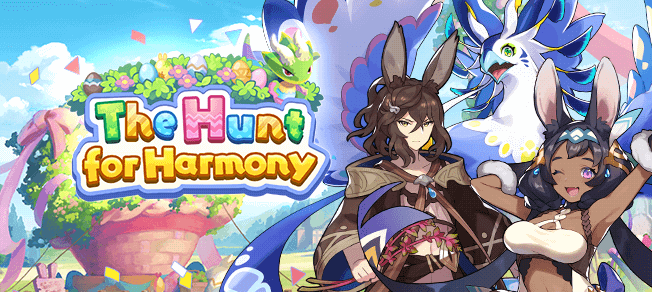
The Hunt for Harmony Facility Event ran from Sun, 03/31/2019 at 06:00 AM, 2019 UTC until Fri, 04/12/2019 at 05:59 AM, 2019 UTC.


About the Event
The Hunt for Harmony is a Facility event featuring a new story, a short series of quests, a Boss Battle, and a Challenge Battle that pits players against waves of enemies! Rewards include a new 5★ Wyrmprint, a brand new building for the Halidom, and plenty of Mana, Rupies and other goodies. Silver / Golden Keys also gain increased value following the double Wyrmprint update.
There are several story maps to be played culminating in a Boss Battle and Challenge Battle. While the regular quests are easy to clear, the Challenge Battle (particularly on Master difficulty) requires some finesse and strategy to overcome.
Obtain 4 copies of A Mother’s Love ASAP, but refrain from unbinding until each party member has a copy. Any two of the above prints can be used in tandem for extra event bonuses.
Use Getherwings primarily for Boss Battles, since Challenge Battles cannot be done in Co-Op.
Successful Boss Battle clears have a chance of unlocking a single-use Extra Boss Battle. Clear these before continuing regular Boss Battles to avoid “wasting” potential Extra appearances.
Always kill the Menace. Boss Battles are quickly melted and it’s easy to ignore the mini-boss that spawns when the Ogre’s HP gets low. More loot is never bad.
Currencies
Papier-Mâché
Used to upgrade the Dragoñata facility. Best obtained from Boss / Extra Boss Battles.
7816 Papier-Mâchés are needed to fully upgrade the Dragoñata.
Eggsploration Points
Gained passively by clearing any event content. Farming Expert Challenge Battles is the most efficient way to reach 1,000,000 points. Master difficulty is far more...difficult to preserve multipliers such as finishing quickly, keeping teammates alive, and minimizing damage taken.
Woodland Herbs
Obtained from Boss/Extra Boss Battles and Challenge Battles. Exchanged in the Treasure Trade.
Mushroom Medley
Obtained from Extra Boss Battles and Challenge Battles. Exchanged in the Treasure Trade.
Notable Rewards
Facility
The Dragoñata is the second Water facility after the Yuletree, boosting the HP and STR of all Water Adventurers. Those looking attempt High Brunhilda’s Trials will relish in what is essentially another Water Altar.
A Mother’s Love
Available from both the Treasure Trade and as Eggsploration Rewards. Additional copies can be found as drops from Challenge Battles. The only similar Wyrmprint currently available is Lord of the Skies, and both are used to quickly break bosses from their dangerous Overdrive states.
Eggsploration Rewards
- Summon Vouchers
- Knight’s / Champion’s Testament
- Golden Fragments
- Silver / Golden Key
- Twinkling Sand
Treasure Trade
- Twinkling Sand
- Steel Brick / Damascus Crystal
- Knight’s / Champion’s Testament
Challenge Battles
Team Comps
- Xander: The king of Flame IO makes his triumphant return for the Hunt for Harmony. The same traits that made him desirable before still apply, namely Stun immunity, scaling, and powerful Force Strikes.
- Dragonyule Cleo: She’s coveted for her ability to zip around the map and frequent Freeze applications.
- Lily: Wide range AOE and Freeze make short work of grouped enemies. Her range also keeps her safe from unpredictable club swings.
- Karina: Axe users feel most at home when hacking away at large mobs of lesser foes. A defensive Co-Ability will benefit the entire team and greatly reduce chip damage. Healing Doublebuff pairs well with Thaniel for extra hardiness.
- Verica and Valentine's Hildegarde: Despite losing points for not bringing only Water-attuned Dragons/Adventurers, Verica and Valentine’s Hildegarde are viable healers for their Stun immunity. This is compounded by the fact that Thaniel’s Gauge Inhibitor counteracts A Mother’s Love, and quickly breaking the boss is essential to victory.
- Thaniel: Water’s strongest healer. Slightly less desirable due to his lack of Stun Res and deleterious Gauge Inhibitor.
- Luther: His scaling damage and unconditional Crit Rate perform well, but his lack of Freeze is a noticeable downgrade from DY Cleo.
Helper Skills
Lily: Despite the initial cast time, the massive AOE, range, and Freeze pay for themselves.
Dragonyule Cleo: Quick-fire close-range Freeze with Skill Shift as a side bonus.
Xander: If positioned strategically, can wipe out the majority of a wave in one swoop.
Wave Breakdown
The first wave is a group of Slimes in a cross formation. Hang back for a brief moment to allow them to bunch up, then plow through them all at once. Run to a corner to prepare for the next wave.
Two lines of Goblins and Gobmancers form flanks on either side. Pick a corner and finish one line at a time with Gobmancers as priority targets.
A ring of Bison and Hounds. To prevent a mess of charges and knockbacks, its best to expend some AOE or a helper skill before the enemies scatter.
A cluster of Rats and Shrooms will spawn in the center. To be on the safe side, spend a skill / helper skill to speed things up. Shroom detonations will heavily chunk teammates if left alive too long.
Boss Attacks
- Melee (No Marker): A basic melee attack with no action marker. Beware! It has a deceptively large range.
- Sweep (Red Marker): The Ogre winds up, and swings his weapon in a circle around himself.
- Walking Slash (Red Marker): The Ogre strides forward, swinging his weapon in a wide radius. This attack has a huge range and is very difficult to avoid with Skills, thanks to its long duration.
- Rock Shot (Red Marker): The Ogre winds up to hurl a large rock at a targeted Adventurer.
- Aerial Strike (Purple Marker): The Ogre leaps at a target Adventurer, crushing them and causing heavy damage.
Start by cleaning up the four Hounds that accompany the Cyclops, as their knockback and damage will be a nuisance. As previously stated, take care not to overlap your Freezes, and never attempt to Freeze the Cyclops right before it enters Overdrive. At this time, switching to a ranged DPS adventurer will greatly improve clear rates. Rather than pop skills right away, prioritize skill usage to i-frame Red Marker attacks. This keeps as many teammates alive as possible, as even suboptimally built allies will contribute greatly to DPS.