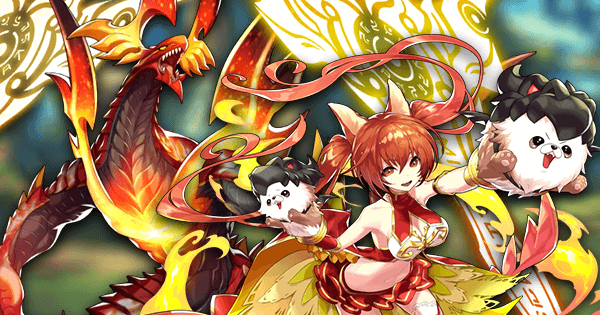
Event Content Hub
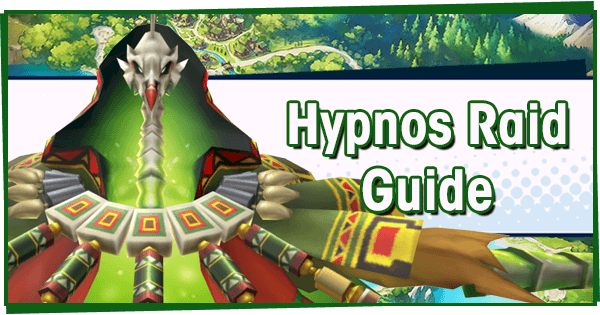
Kindness and Captivity Raid Event
The Kindness and Captivity Raid Event began on 2018/10/31 14:00 UTC and lasted until 2018/11/12 13:59 UTC. During this event, Co-op play was used to fight against the Wind raid boss, Hypnos.


Preparing for the Raid
Hypnos is a tricky fighter with high HP and the capability to deal heavy damage. Those accustomed to the Phraeganoth raid might find that Hypnos has a lot more purple action marker attacks, and is therefore harder. Taking the time to prepare a good team will help a great deal in this raid battle.
If you're instead looking for information about the event, check out our Kindness and Captivity Event Guide.
Adventurers

As a Wind-attuned enemy, Hypnos is best defeated with Adventurers of the Flame element. Thankfully, there are many powerful choices, making teambuilding for this raid relatively easy. Try and include many different co-abilities in your team, as more than one of the same co-ability type won't stack.
Melsa is a fantastic choice for this raid, and her Physian's Bane allows her to deal heavy damage to Hypnos. If you're going to use her, make sure to invest a little into her Mana Circles: at least until Physian's Bane is unlocked. Taking her into the raid will also quickly build her friendship level.
Ezelith, Naveed, Aoi, and Karl are among the best choices for damage-dealers. They all have innate Sleep Res and great weapon types. Aoi is an especially good choice if you find targeting Hypnos' Right Hand difficult. However, she also has less Sleep Res than the others.
Vanessa, Mikoto, and Euden are also strong choices, but are ever-so-slightly riskier due to their lack of Sleep Res. Correct strategy on Hypnos can avoid Sleep completely, making these Adventurers every bit as good as the ones listed above.
Sinoa and Verica are good support units. Sinoa's usefulness is partially down to randomness, but she can add a lot of damage to a team. Verica's healing is useful but damage-dealers are preferred, especially when going for the 100-second clear.
Dragons
Agni and Cerberus are the two top Dragons for this raid. This is due to their +40/60% Strength bonus, which provides an enormous boost to damage. Cerberus is the slightly better of the two thanks to her defense reduction.
If you managed to get Pele, this is the perfect chance to use her. Pele's Skill deals excellent damage and her 30% boost is plenty for clearing the harder difficulties. Ifrit is another solid choice, but Pele is recommended over him unless he's fully unbound. For those without any of the above options, Brunhilda will do just fine.
As always, Phoenix is an incredible choice who can sustain the entire raid group. It is recommended having Phoenix on an Adventurer you don't plan on controlling since she does not provide a Strength increase.
Wyrmprints

Better Together is the best choice for the raid, due to its +30/35% damage bonus against Hypnos. In general, you should have as many copies of this print on your team as is possible, and make sure to always have it on the Adventurer you're controlling.
One of the best strategies for clearing Hypnos on Special is to use Wyrmprints that boost Shapeshift Prep. This works since Shapeshift Prep Wyrmprints are shared among the entire raid group. When four players have three Adventurers each with 8% Shapeshift Prep, this gives a 96% boost to everyone's Dragon Gauge. Dragon Arcanum is a very common 2* Wyrmprint with 5/8%, while Dragon's Nest and King's Countenance are summon-only with 8/10%.
Hypnos: Expert
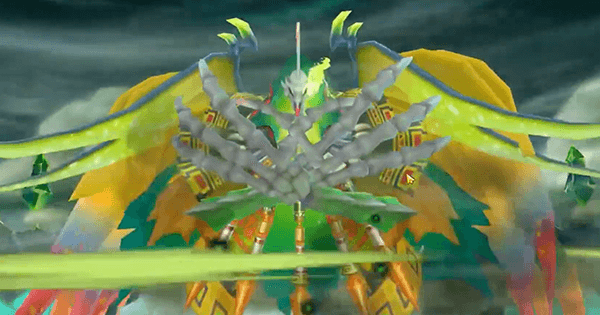
Raid bosses aren't the same as regular bosses-- Although they have a Mode Gauge, they have multiple parts each with their own HP bar. Destroying these parts is not necessary, but it can prevent the boss from using certain attacks. Damaging a part will lower Hypnos' overall health, and destroying one grants Dragon Gauge and incapacitates Hypnos for a short period.
Starting Out
Hypnos will always begin the fight by using Double Slash. The easiest way to avoid this attack is to run behind him, or simply wait for the attack to pass before running up to him.
The team's first priority should be defeating Hypnos' Right Hand. Destroying this part will modify some of Hypnos' attacks to have safe spots, making it much easier to survive them. Targeting the hand can be tricky since it moves around a lot, but defeating this part of Hypnos is essential. When Hypnos uses Ascension, the next stage of the fight begins.
Attacks
- Double Slash (Red): After a short charging period, Hypnos slashes twice in front of him, once with each hand. He will always use this as his first attack.
- Whirlwind (Red): With his right hand, Hypnos charges a red attack marker. When fully charged, it releases a damaging whirlwind. Destroying Hypnos' Right Hand prevents him from using this attack.
- Teleport Slash (Purple): Hypnos instantly teleports to the edge of the arena, and charges. There are two purple action markers (a rectangular one in front of him, and a circular one in the middle of the arena). When fully charged, he leaps forward and slashes.
- Energy Ray (Red): Hypnos brings his hands together to begin charging light. When fully charged, he releases a beam that deals very heavy damage.
- Destructive Tornado (None): Hypnos raises his right hand, and creates three small tornados which travel around the map. These tornados last for the rest of the fight and deal minimal damage on impact.
- Gale Orbs (Red): Hypnos focuses and creates three green orbs around him. They deal damage when touched, but only last a couple of seconds before disappearing.
Ascension/Cataclysmic Cyclone
This is the name of Hypnos' signature attack. Upon using it, he will rise into the air, begin charging a purple attack marker and summon eight Wind Mana Founts. These founts must be quickly destroyed by your team, as the more are left alive, the stronger the attack that follows.
The best way to do this is to have each team member KO two founts. A good way to coordinate this is to spread out when the attack begins: Look for founts without any teammates near them. Should time run short, don't be afraid to use Skills in order to clear them.
Once Hypnos has fully charged, he will use Cataclysmic Cyclone, which hits the entire map for unavoidable damage. If you managed to KO all of the founts, this damage is only around 100-200 (on a Flame Adventurer).
Overdrive
By this stage, you should have destroyed Hypnos' Right Hand and are close to bringing him into Overdrive. Try and press as much damage as you can into him, and if you've finished off his Right Hand, target either his Left or Right Wing. Once his Right Hand is down, neither of his new attacks is much of a threat.
New Attacks
- Orb of Sleep (Purple): Hypnos lifts his Right Hand, and charges a white orb. When fully charged, he will release a very strong attack that also inflicts Sleep. This attack has a big radius and is nearly impossible to avoid, however destroying his Right Hand will leave a safe spot in the center, making this attack inconsequential.
- Circle Slash (Red): Using his Right Hand, Hypnos slashes in a full circle around him. If his Right Hand has been destroyed this attack will have a safe spot in the center, making it easy to avoid.
Finishing the fight
Once Hypnos has been broken, he'll enter the final phase of the battle. The minions don't deal much damage, but they can be annoying when trying to deal damage. Both leaving them alive and choosing to defeat them are valid options. Beware the tornados created from Destructive Tornado, and keep dealing damage. Destroying Hypnos' Wings will render him immobile for a few seconds, so take advantage of that to pile on the damage.
New Attacks
- Spiral Gates (None): Hypnos summons four minions which all have their own Red Marker attacks. None of them are particularly threatening, but they can make it tough to stay in one spot and deal damage.
Hypnos: Special
The EX version of the raid is slightly harder and is less forgiving on certain timings. In order to get the endeavor, Hypnos must be beaten before 1:20 is left on the timer. This section of the guide assumes you're familiar with the raid and are going for the 100 second clear.
It's highly recommended to use the Shapeshift Prep strategy when clearing Hypnos Special, as it is accessible to everyone and grants much faster clears. It involves everyone equipping three Adventurers (the three you aren't controlling) with Shapeshift Prep Wyrmprints. This effectively gives everyone in the raid 12 x 8% = 96% of the Dragon Gauge immediately, allowing for constant transformations. See the Wyrmprints section above for details on which Wyrmprints can be used. This walkthrough assumes your team is using this strategy.
Your raid team should look like this:
- Damage-dealer / Best Strength-boosting Dragon / Better Together
- Teammate 1 / Any Dragon / Shapeshift Prep Wyrmprint
- Teammate 2 / Any Dragon / Shapeshift Prep Wyrmprint
- Teammate 3 / Any Dragon / Shapeshift Prep Wyrmprint
Starting Out
Hypnos will begin the fight with his Destructive Tornado attack. Run up to him and immediately Shapeshift-- then target his Right Hand and dump as much damage into it as you can. If you've done things correctly, Hypnos will quickly enter Overdrive and begin to cast Ascension. At this stage, his Right Hand should be at less than 25% HP.
Once you've defeated all of the founts, he'll prepare his Cataclysmic Cyclone. Clever players can time getting hit by a tornado to avoid the damage, but so long as all founts are down, taking this attack isn't a problem.
Mid-fight
At this point, you'll want to finish off Hypnos' Right Hand as soon as possible. It should be possible to Shapeshift again, and doing so is a good idea in order to secure the KO. Shifting quickly is also a good idea as you ideally want your next Shapeshift to happen when Hypnos reaches Break.
Now move onto Hypnos' Wings, and continue to pour on the damage. Destroying the Wings will grant a large amount of Dragon Gauge, preparing you for the next Shapeshift.
Break
Hypnos' Mode Gauge should be decreasing rapidly, and you want to Shapeshift in order to deal heavy damage during his Break phase. Try and time your Shapeshift to happen around 3 seconds before Hypnos actually reaches Break: This means you won't waste valuable Break time actually transforming. Use your Dragon's Skill and keep dealing damage. Make sure you target the main body since his other parts don't take additional damage during the Break phase.
After Break, Hypnos will use Spiral Gates to summon minions. Don't bother engaging them, just deal damage. Hypnos should only have a small amount of HP left and be finished off quickly. Should the fight drag on, simply Shapeshift again and continue damaging him normally until he is defeated.