
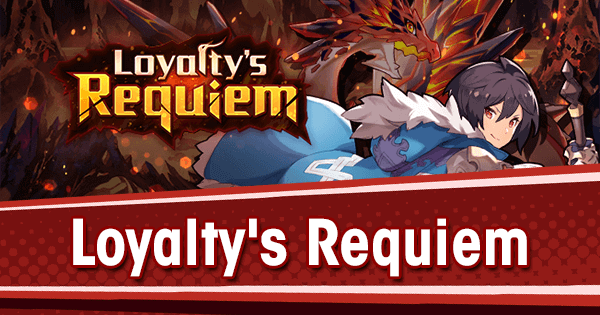
Event Overview

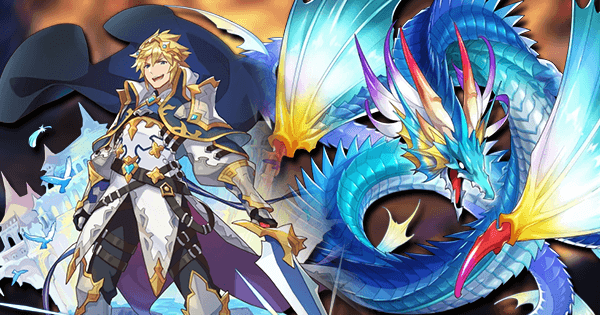
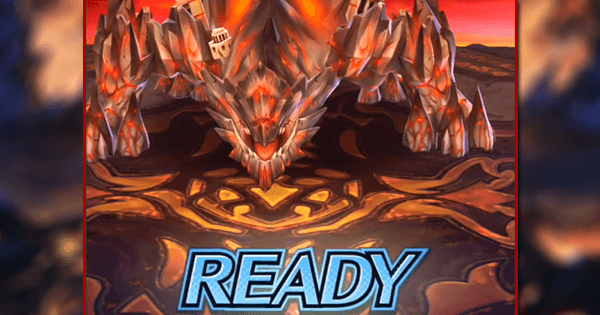
The Loyalty's Requiem raid event begins on 2018/10/04 06:00 UST and lasts until 2018/10/12 05:59 UST. During this event, one can use Co-op Play to fight against the flame raid boss, Phraeganoth!
This Dragalia Lost event features a new story and pits players against a series of fiery maps culminating with a challenging 16-man Raid Battle. There are many rewards to be obtained, notably including a new 4* Adventurer, 4* Wyrmprint and a 5* Dragon!
Event Currencies and Rewards
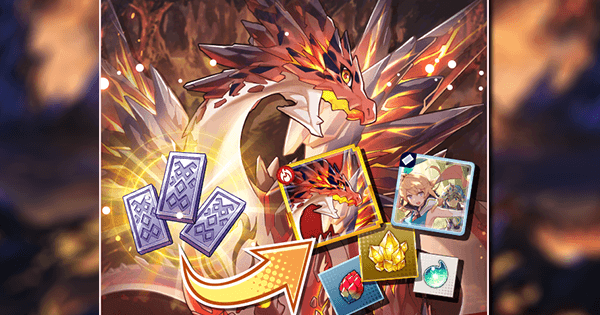
Clearing Boss Battle: Archeole and Raid Battle: Phraeganoth earns Peregrine Blazons and emblems which can be leveraged for various rewards. Blazons are used to summon rewards from a continually depleting pool. Once Pele has been earned from a blazon summon, the pool can be refreshed which enables all rewards to be obtainable again.
Blazons are earned through all difficulties of Archeole and Phraeganoth.
Event Quests
There are Daily and Limited event quests which can be completed to earn rewards.
Miscellaneous Rewards
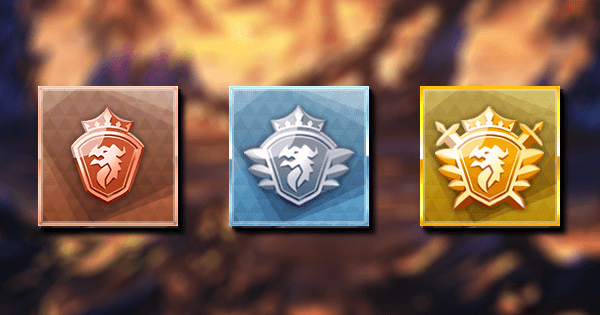
Bronze, Silver and Gold Emblems unlock one-time rewards, which can be claimed by navigating to Emblems in the event menu. As more types of each emblem are earned, more rewards are unlocked along their respective tracks.
Bronze Emblems are earned from Archeole while Silver and Gold are earned through beating Phraeganoth (Gold Emblems cannot be earned on Beginner difficulty, though).
Rewards from blazons and emblems include Rupies, Mana, Eldwater, Whetstones, Dragonfruit, Crystals, Water, Elemental Orbs, Crafting Materials, 2* Weapons, 2* Wyrmprints, Water Dragon Scales, Ethon Ashes, Honey, Testaments, and Summon Vouchers.
Notable Rewards
Celliera is a 4* Adventurer who will join the group as a Temporary Character. By bringing her along to battles, her friendship level will grow. Once her friendship reaches 500, she will join for good! Investment into Celleria will not be wasted, as she'll maintain her stats and levels upon joining permanently. Her current friendship can be checked at any time by visiting the Loyalty's Requiem event page ingame.
Pele is a 5* Flame Dragon who can be unlocked through the event. He can be obtained by collecting 300 Silver Emblems, or through Blazon summons. Multiple copies of Pele can be obtained in the event.
The Paladyn Defender 4* Wyrmprint is earned though collecting emblems and Blazon summons. This Wyrmprint is vital for beating Phraeganoth, as it grants a substantial +20% damage boost while fighting him. Multiple copies of Paladyn Defender can be obtained during the event.
Getting Started
First, there are several story maps which have to be cleared. These are all remarkably easy, with Might requirements ranging from 1500 to 1900. Clearing the Archeole Boss Battle is required to then access the raid battle.
To enter the raid battle, Getherwings must be spent to join a room, or Stamina plus Otherworld Fragments to create one. These fragments can be obtained by clearing the Archeole Boss Battle or through Emblem rewards during the event.
Being Efficient
Since Phraeganoth does not drop Bronze Emblems, it’s recommended to clear Archeole multiple times first in order to unlock the Bronze Emblem rewards and obtain a stock of Otherworld Fragments. Hosting the lobby is recommended since a finder’s bonus of emblems and blazons is awarded to the room host on a successful raid battle clear. The host also has a small chance of triggering an Extra raid battle, which has special rewards. See Extra Hero Battles below for more details.
Raid Battle Basics

Raid battles are co-op battles where four players each bring their four-man team, totaling 16 characters against a raid boss.
There are three difficulty levels for raid battles: Beginner, Standard, and Expert.
To participate in a raid battle, either create a room as the host, or join a room as a guest.
-
For Hosts: Creating a room requires otherworld fragments and stamina. Otherworld fragments are obtained from boss battles.
- For Guests: Otherworld fragments are not required to participate in Co-op Play. Getherwings will be used.
Other Notes
-
During raid battles, players will only recover 1/4 of the usual amount of HP from certain skills and abilities.
-
To challenge raid battles, be around the same difficulty level and team might as the host.
-
Blazons, emblems, or otherworld fragments obtained in this event cannot be used in future events.
Preparing for the Battle
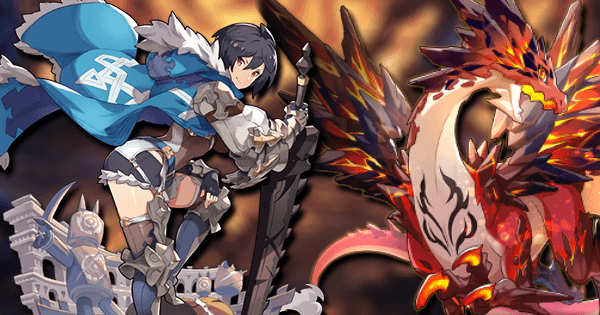
Phraeganoth is a tough customer with extremely high HP and who can deal heavy damage with his attacks, so taking time to prepare a strong team will greatly raise the chance of victory. Each character on the team should be equipped with Paladyn's Defender in order to increase their damage against Phraeganoth. Structuring around AI is also important, as only one Adventurer can be controlled at a time.
Adventurers
As a Flame-type creature, Phraeganoth is weak to the water element. It's recommended to include as many water-type Adventurers as possible in order to maximize damage output and survivability. It's also a good idea to try and include many different co-abilities in a team, as more than one of the same co-ability won't stack.
Xander, Xainfried, Luther, Orsem, Karina, and Lily are all strong choices with good stats and damage output. Some are quite rare, but for those who have them, these are premier choices.
Celliera is the most obvious choice of unit for the fight. She'll require some investment into her Mana Circles, but provides great damage and is available for all players. Taking her into the raid will also quickly build her friendship level.
Elisanne is in the same boat, but won't perform as strongly. Her buff skill makes her a good candidate for the team, but not as the controlled adventurer.
Healing Units are highly recommended to keep teams sustained throughout the fight. Water-types are best for ranged damage and fire resistance, but other elements that are neutral against fire also have strong utility. Because healers will be AI-controlled in most circumstances, avoid bringing any Wind types.
Dragons
Thanks to Phraeganoth's massive HP bar, this raid is all about dealing damage in order to finish him off within the time limit. Dragons with high attack are most desired: Leviathan is the best choice thanks to his strong +60% unbound Strength bonus. Vodyanoy and Poseidon are the next best choices, with Poli'ahu coming next. If you have issues destroying the nearby Magma Spots that appear, Poli'ahu can come in handy since her Lilinoe's Mist skill will freeze them and delay their explosion timer.
Having a secondary Adventurer with Phoenix equipped is a great idea if healing is a problem on the team. She can heal the entire raid and is almost necessary to guarantee no deaths at harder difficulties!
Into the Fight!

From the beginning, Phraeganoth threatens adventurers with powerful attacks. Coordinating with the raid team is key, as is focusing on specific parts of Phraeganoth's body.
Although he might be big and scary, Phraeganoth is not a difficult boss by any means. Clever use of Skill dodging can avoid most of his attacks, and his ultimate move has a very, very long windup time. A good tip for this fight is to always have a Skill charged to dodge one of his attacks.
Phraeganoth has four different health bars: His main bar, plus one each for the forelegs and tail. These parts can be destroyed independently, preventing Phraeganoth from unleashing certain attacks. His moves have two types of action markers, yellow and purple. Yellow action markers indicate attacks which can be avoided with temporary invincibility granted through a Skill.
Starting Out
When the fight begins, move behind Phraeganoth and start attacking his tail. This is to prevent him from using his Tail Swing attack, which has a purple action marker and has an extremely large radius and deals considerable damage. Only his Spin Attack, Crush (yellow action marker) and Tail Swing can hit Adventurers directly behind him. If Phraeganoth's tail is destroyed quickly enough, he won't ever use his Tail Swing!
Attacks
- Crush (Yellow) Phraeganoth rears up on his hind legs and smashes down. This is always his first attack, and will hit adventurers around his tail.
- Tail Swing (Purple) A large attack which deals heavy damage and has a massive radius.
- Triple Fireball (Yellow) Phraeganoth sequentially spits three fireballs from his mouth. He aims one to the left, one in front of him, and one to his right.
- Spin Attack (Yellow) An attack with a slow charge time, that hits all around him. Deals relatively low damage.
- Flamethrower (None) Phraeganoth unleashes a fiery jet in front of him. He begins facing right, and over the course of the attack turns his head to the left.
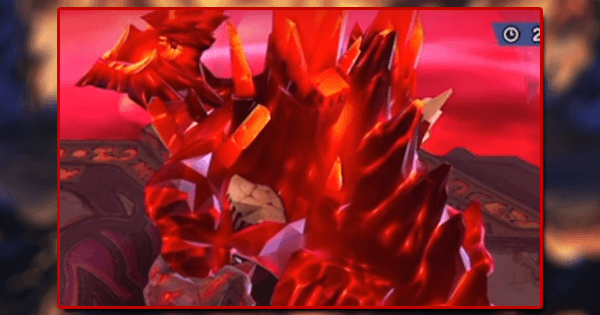
- Lava Meteor (Yellow) An attack that causes several lava bombs to crash down. Afterward, the area where they land becomes dangerous, inflicting a Burn to anyone who walks on it.
- Melee (None) Phraeganoth winds up and uses a front leg to swipe in front of him. This attack has no action marker, making it tricky to avoid.

Once Phraeganoth has been pushed into the Overdrive state, Phase 2 of the fight begins. When this happens, he knocks all players into the air and changes the color of his shell to orange. Beware as he is now ready to unleash his ultimate move, Volcanic Ruin. This spawns 4-5 small vents, which slowly charge up a powerful purple marker attack. Destroying these vents stops the charge and opens up safe spaces on the map.
New Attacks
- Volcanic Ruin (Purple) Several Magma Spots spawn around the map, each slowly charging a powerful move. Each spot destroyed opens up safe area to stand when the attack hits. Skills that Freeze will delay these timers and allow you to stack more damage on them before they blow!
Bringing it Home
Once Phraeganoth has been through the Break state, he will revert into his first form. He will now alternate between a deadly Charge attack and launching Fireballs, and can use any of his first phase moves. During this phase, keep an eye on the timer and don't forget to use Skills and Shapeshifts for maximum damage. Be wary of Phraeganoth's Charge attack, as it gives little time to dodge, has a huge radius, and deals heavy damage.
New Attacks
- Charge (Yellow) Phraeganoth gathers energy for a moment, and performs a quick charge forward.
Extra Raid Battles
From the beginning, Phraeganoth threatens adventurers with powerful attacks. Coordinating with the raid team is key, as is focusing on specific parts of Phraeganoth's body.
Although he might be big and scary, Phraeganoth is not a difficult boss by any means. Clever use of Skill dodging can avoid most of his attacks, and his ultimate move has a very, very long windup time. A good tip for this fight is to always have a Skill charged to dodge one of his attacks.
Phraeganoth has four different health bars: His main bar, plus one each for the forelegs and tail. These parts can be destroyed independently, preventing Phraeganoth from unleashing certain attacks. His moves have two types of action markers, yellow and purple. Yellow action markers indicate attacks which can be avoided with temporary invincibility granted through a Skill.
Starting Out
When the fight begins, move behind Phraeganoth and start attacking his tail. This is to prevent him from using his Tail Swing attack, which has a purple action marker and has an extremely large radius and deals considerable damage. Only his Spin Attack, Crush (yellow action marker) and Tail Swing can hit Adventurers directly behind him. If Phraeganoth's tail is destroyed quickly enough, he won't ever use his Tail Swing!
Attacks
- Crush (Yellow) Phraeganoth rears up on his hind legs and smashes down. This is always his first attack, and will hit adventurers around his tail.
- Tail Swing (Purple) A large attack which deals heavy damage and has a massive radius.
- Triple Fireball (Yellow) Phraeganoth sequentially spits three fireballs from his mouth. He aims one to the left, one in front of him, and one to his right.
- Spin Attack (Yellow) An attack with a slow charge time, that hits all around him. Deals relatively low damage.
- Flamethrower (None) Phraeganoth unleashes a fiery jet in front of him. He begins facing right, and over the course of the attack turns his head to the left.
- Lava Meteor (Yellow) An attack that causes several lava bombs to crash down. Afterward, the area where they land becomes dangerous, inflicting a Burn to anyone who walks on it.
- Melee (None) Phraeganoth winds up and uses a front leg to swipe in front of him. This attack has no action marker, making it tricky to avoid.
Once Phraeganoth has been pushed into the Overdrive state, Phase 2 of the fight begins. When this happens, he knocks all players into the air and changes the color of his shell to orange. Beware as he is now ready to unleash his ultimate move, Volcanic Ruin. This spawns 4-5 small vents, which slowly charge up a powerful purple marker attack. Destroying these vents stops the charge and opens up safe spaces on the map.
New Attacks
- Volcanic Ruin (Purple) Several Magma Spots spawn around the map, each slowly charging a powerful move. Each spot destroyed opens up safe area to stand when the attack hits. Skills that Freeze will delay these timers and allow you to stack more damage on them before they blow!
Bringing it Home
Once Phraeganoth has been through the Break state, he will revert into his first form. He will now alternate between a deadly Charge attack and launching Fireballs, and can use any of his first phase moves. During this phase, keep an eye on the timer and don't forget to use Skills and Shapeshifts for maximum damage. Be wary of Phraeganoth's Charge attack, as it gives little time to dodge, has a huge radius, and deals heavy damage.
New Attacks
- Charge (Yellow) Phraeganoth gathers energy for a moment, and performs a quick charge forward.


