


Armor Guides
Positioning: Utilizing Assists
Overview
Armors typically tend to stick together in formations, supporting each other with armor buffs and support bonuses, as well as gaining the advantages of Armor March. Because of this, armors are much more restrictive in their positions as opposed to fliers or infantry units. Like all grounded units, they're unable to traverse mountains and rivers, though they do ignore trenches and forests.
Swap
Swap is considered a strong movement skill for armors because it does not result in any formation misplacement. This Assist skill retains the current formation while allowing units to maneuver between one another.
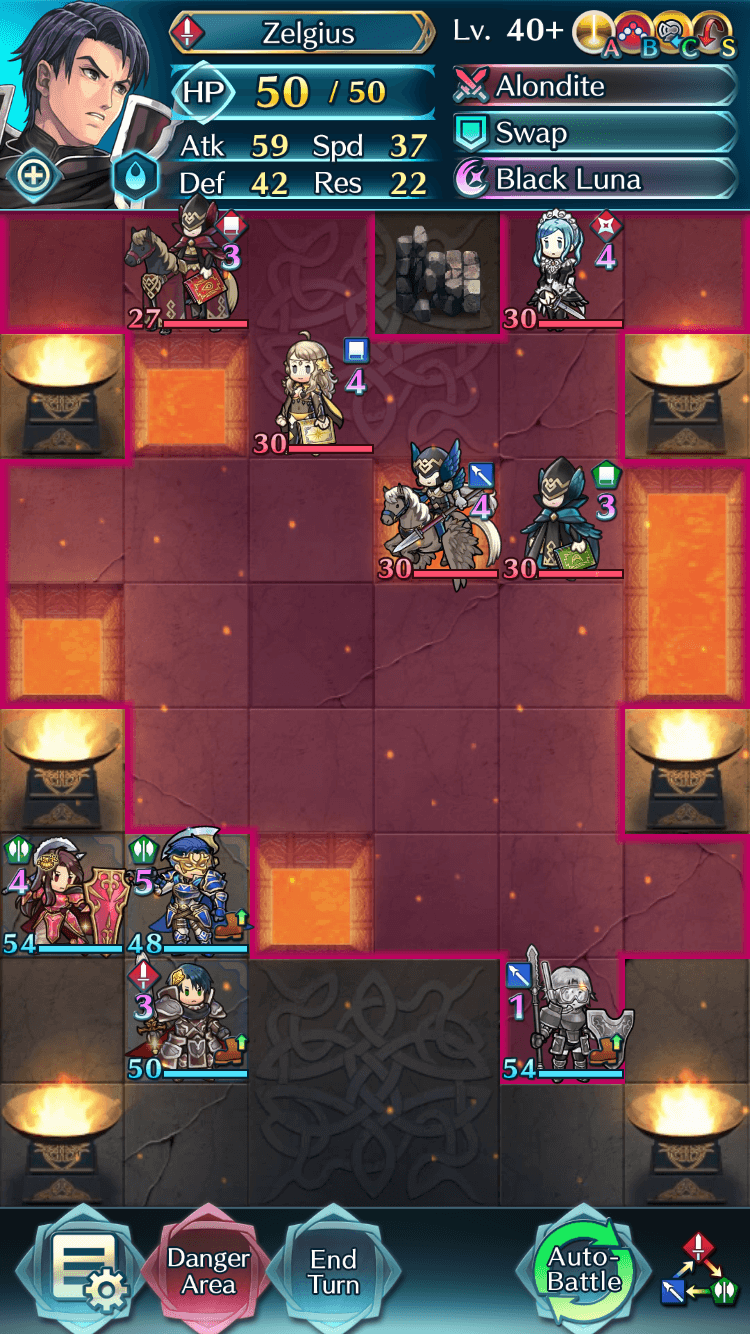
In the above image, Gwendolyn is in danger from the Green Mage's attacks. Zelgius will need to move to her adjacent position and use Swap, allowing him to take the blow instead.
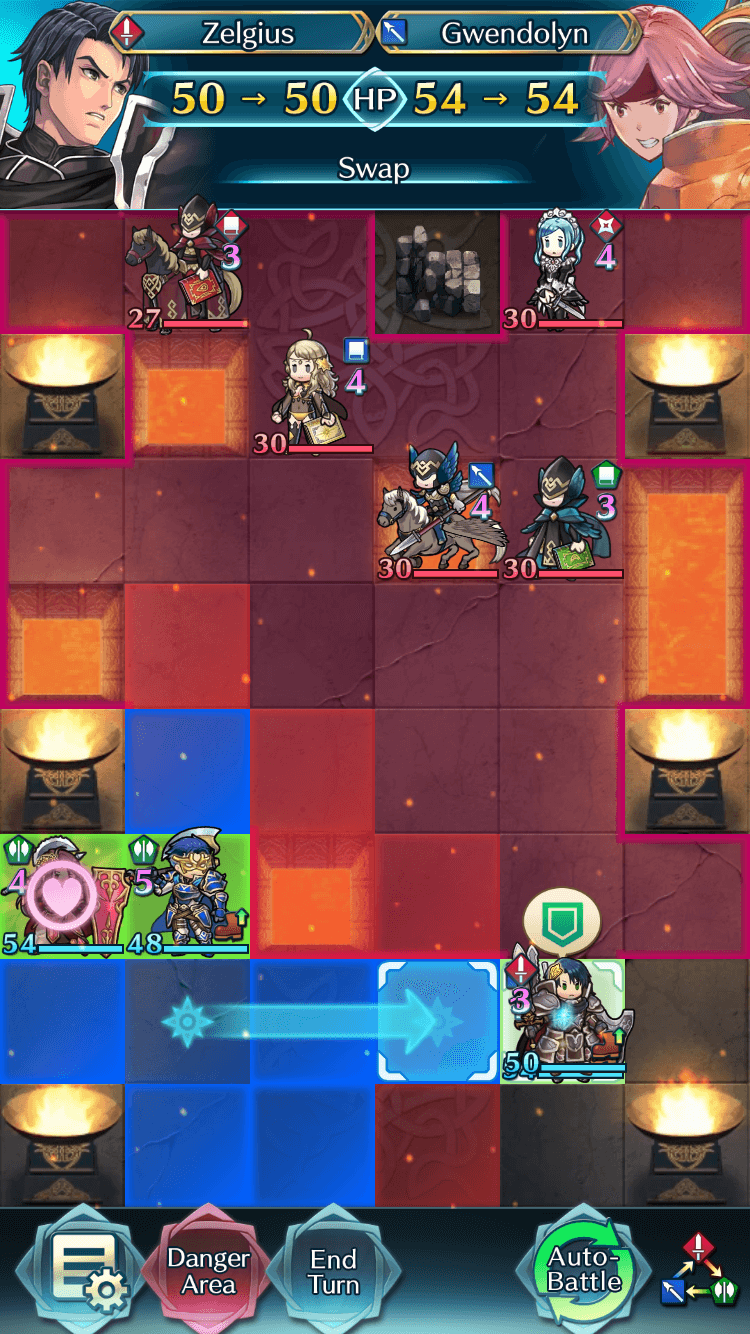
After using Swap, Zelgius is now ready to deal with the Green Mage, and both Zelgius and Gwedolyn retain an adjacent formation, enabling one another to receive any other additional bonuses.
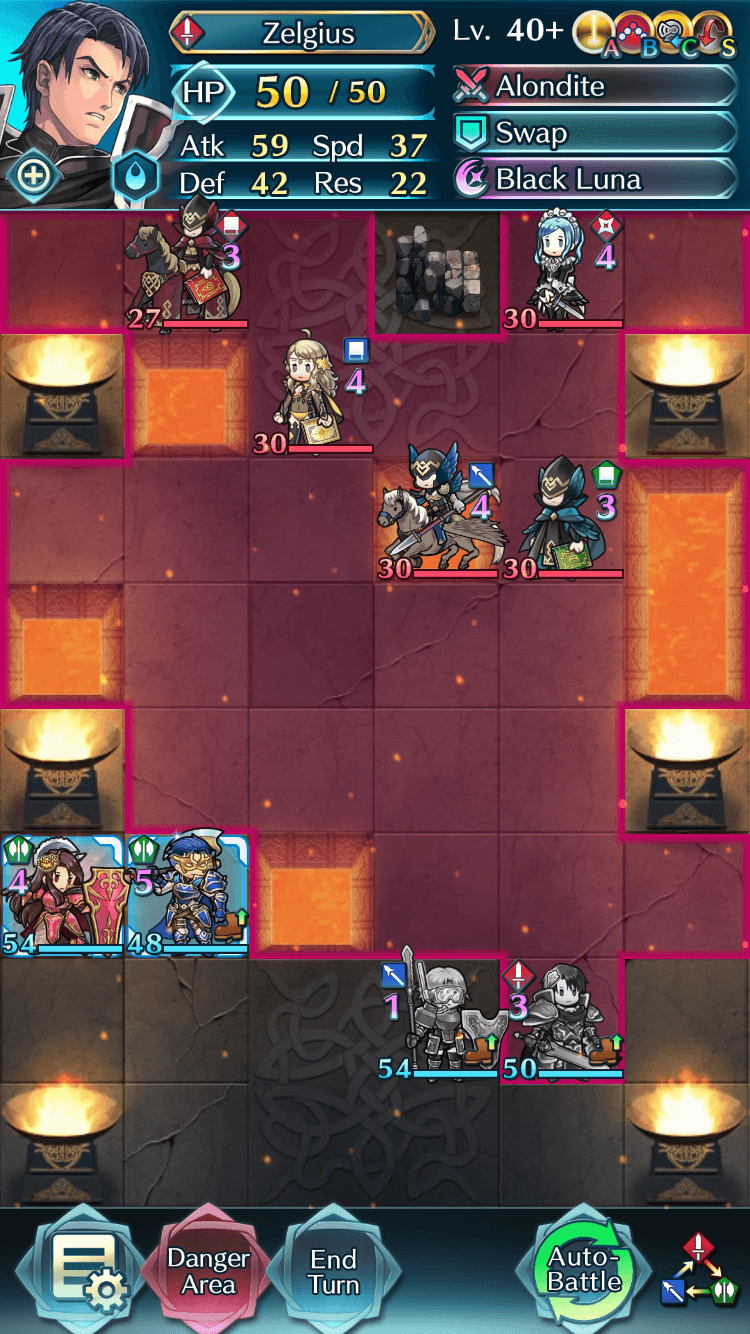
Now, Zelgius is ready to handle the Green Mage and Gwendolyn is safe.
Pivot
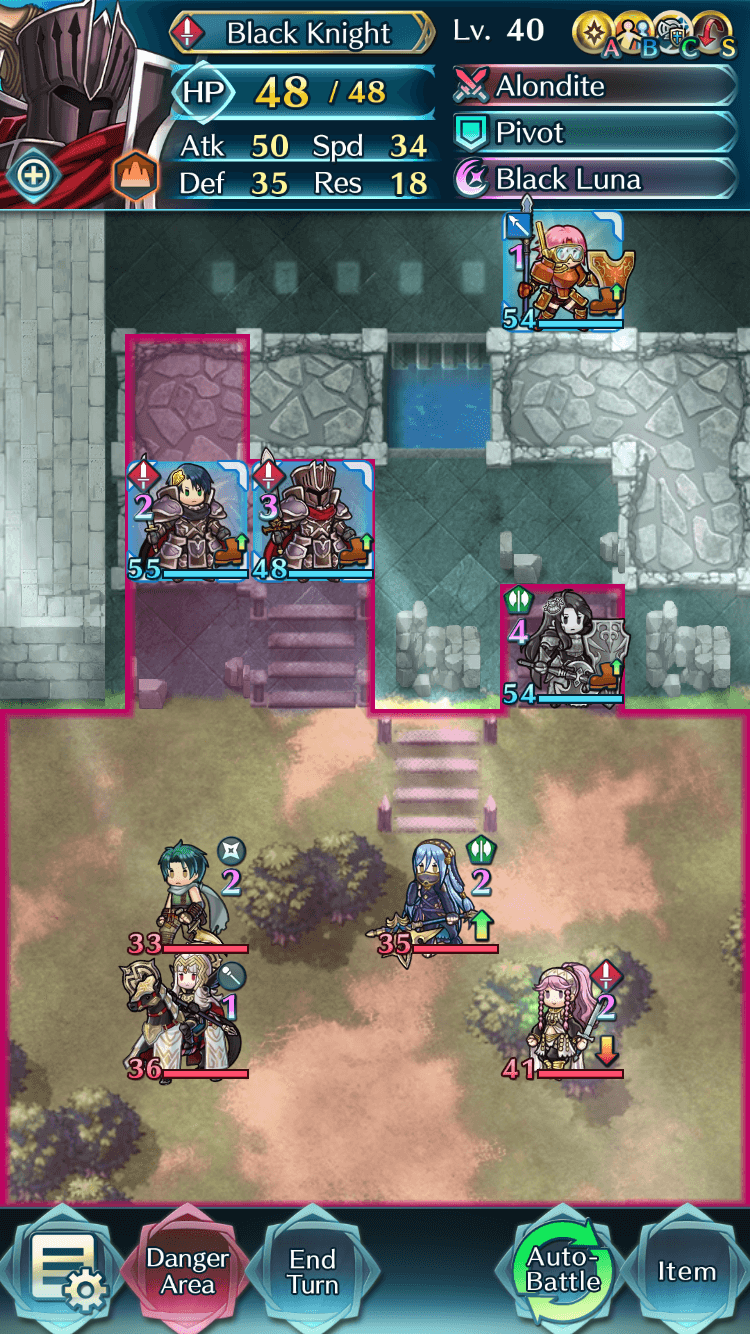
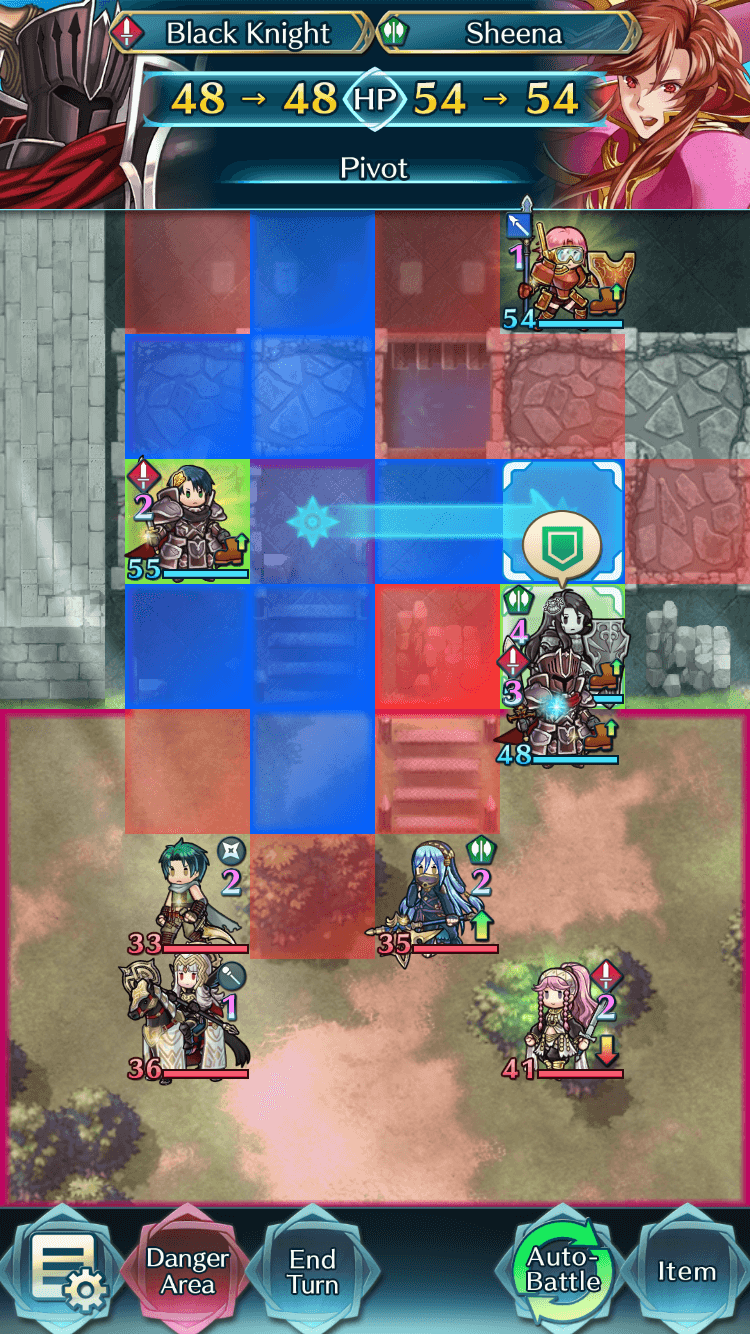
Pivot can also be an option for armors, especially on teams that lack Armor March. Pivot an additional 2 points of movement when used correctly. In the above image, Sheena needs protection from Olivia. Luckily, Black Knight is affected by Armor March and has the Pivot skill.
We can take advantage of the additional movement of Armor March and Pivot to place Black Knight in front of Sheena, guarding her from Olivia's attacks.
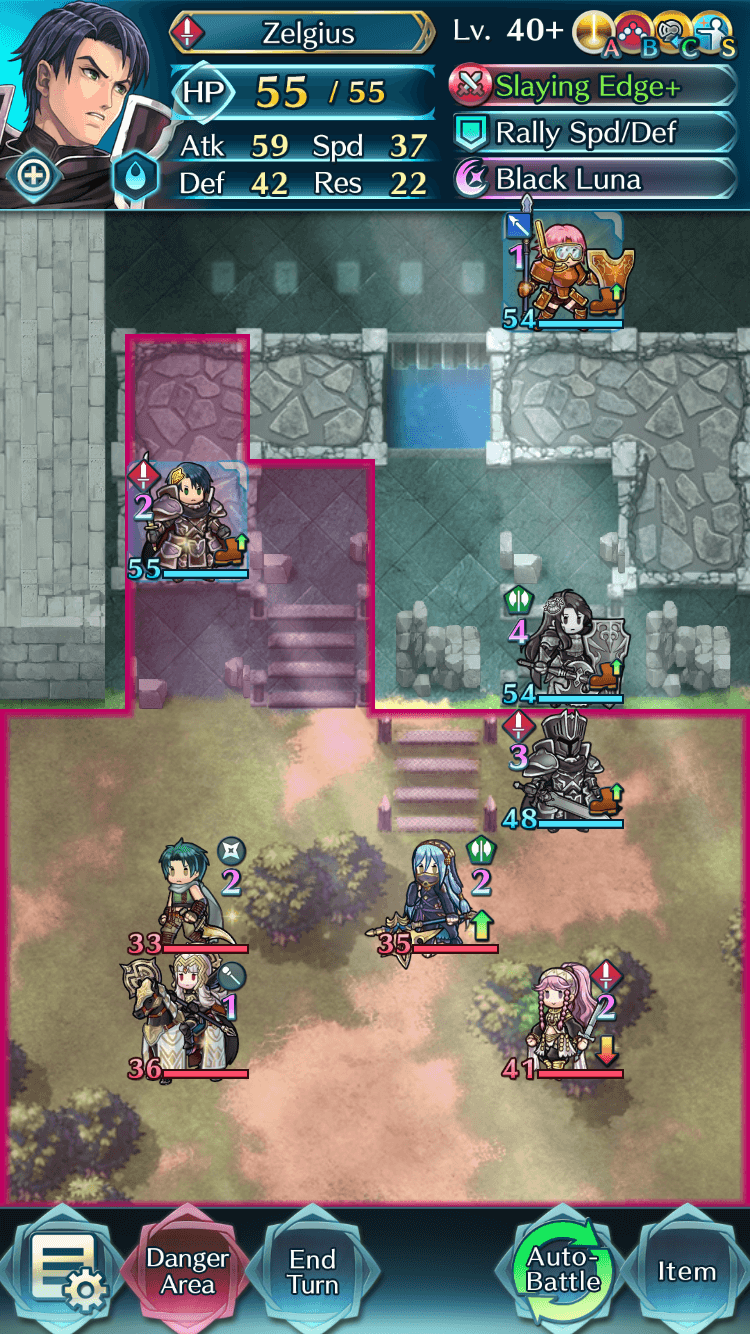
Now, Black Knight stands ready to defend Sheena from the incoming attackers. You may note Black Knight essentially moved 4 spaces thanks to uttilizing the effects of Pivot.
Armor Movement Skills
In terms of base mobility armors have the shortest range of all movement types in Fire Emblem Heroes. Limited to 1 space per turn, armor units instead rely on their high BST to take blows and retaliate with force. In addition to movement-based Assist skills, there are also notable skills that boosts the movement of armors, so long as they meet a few conditions.
Armor March
What brings armor teams from good to great is Armor March, a C slot Skill learnable by all armor units with the effect of granting one extra movement if the unit with the Skill starts the turn adjacent to another armored unit.

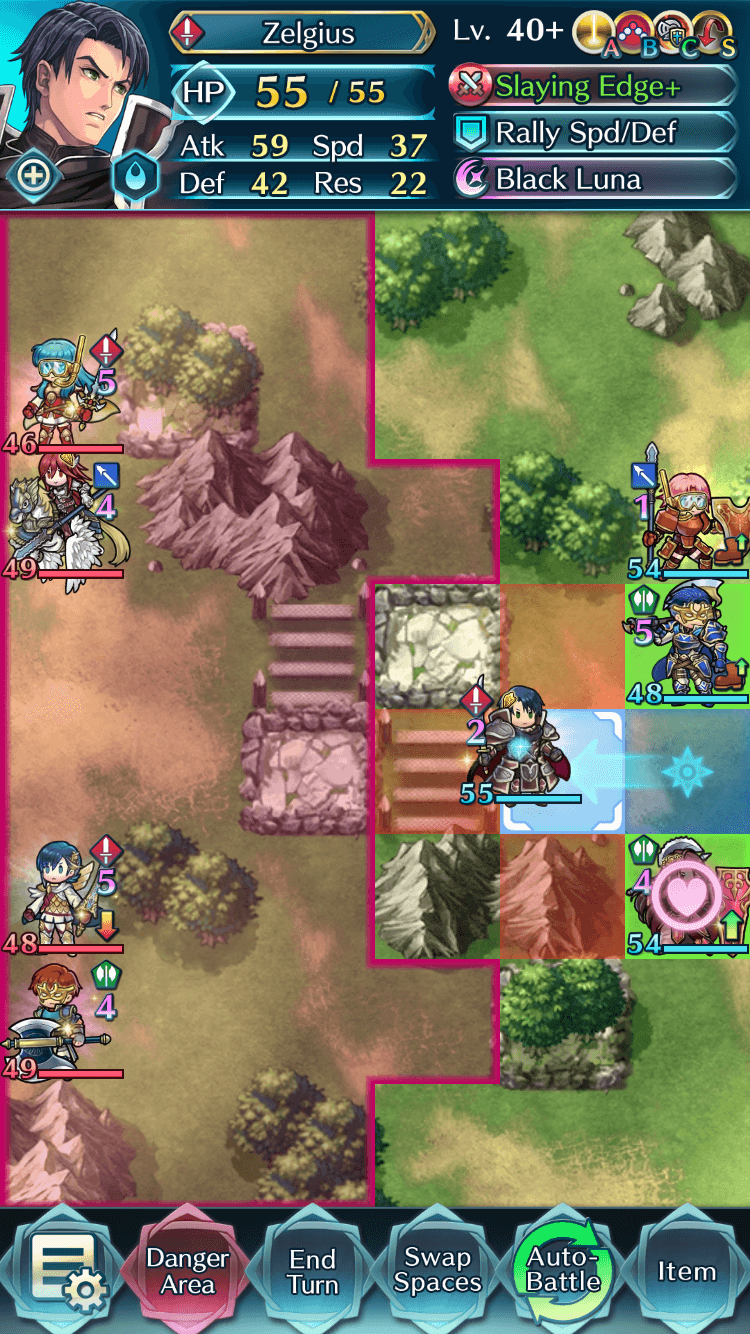
As seen above, with Armor March active, Zelgius can move two spaces as opposed to the default one. Armors also ignore forests and trenches, traversing these spaces with no movement penalty. This means that Armor March turns armors from the worst unit type in terms of movement into one of the best, as they’re able to freely traverse forests so long as they have Armor March active.
Armored Boots

Armored Boots is a Sacred Seal that is usable by all armor types, functioning similarly to Armor March and granting one extra movement if the unit’s HP is 100% Armored Boots and Armor March do not stack with one another, so the highest movement increase an armor unit can ever gain even when using these two abilities together is +1.
Like Armor March, the Armored Boots effect is checked at the beginning of each turn. If a unit with Armored Boots starts the turn with less than full HP but is then healed by a support unit, they will receive +1 movement next turn provided their HP is full.. If a unit starts the turn with full HP and receives the boost, though, they are able to take damage from combat, be refreshed or activate Galeforce, and retain their extra movement for the remainder of the turn.
Playstyle
An armor team’s playstyle is one of overpowering the opposition either through sheer offensive power or by creating an impenetrable defensive wall. Because of their usually high BST, individual armor units can be built in ways that can face threats both on Player Phase and Enemy Phase.
Because of Armor March, armor teams are best used in formations that keep them adjacent to their allies. Assist Skills like Swap and Pivot allow armors to reposition themselves while remaining adjacent to their teammates. Ally Support during combat also works well for armors, due their nature of sticking together.
Classic armor builds such as Steady Breath / Bold Fighter / Armor March / Quick Riposte allow these units to perform in both Player and Enemy Phases. This allows less restrictive positioning, as armors can usually soak several blows from their opponents and retaliate for staggering damage.
Armors can be min/maxed to perform optimally on any phase, thanks to their high BST. Offensive armors with Deathblow 4 and Bold Fighter or armors that utilize Special Fighter win the majority of their Player Phase matchups, even when at a color disadvantage. Likewise, defense armors with Steady/Warding Breath and Vengeful Fighter can do the same during the Enemy Phase.


