
Introduction
You've probably heard of Galeforce compositions as a way of cleanly dealing with Aether Raids Offense. You've probably also heard that it's a bit more complicated than other strategies and requires more planning and math than just plunking down a tank or Vantage unit and ending your turn. The intent of this guide is to simplify how to build and run a Galeforce composition in Aether Raids Offense, as well as some general tips and tricks for how they operate.
Galeforce is a 5 cooldown Special which enables a unit to refresh its own turn if the cooldown hits 0 before the end of combat. This can allow a unit to potentially defeat two opponents on the same turn. If multiple members of your team are able to utilize Galeforce, you can sweep an entire Aether Raids Defense in a single turn.
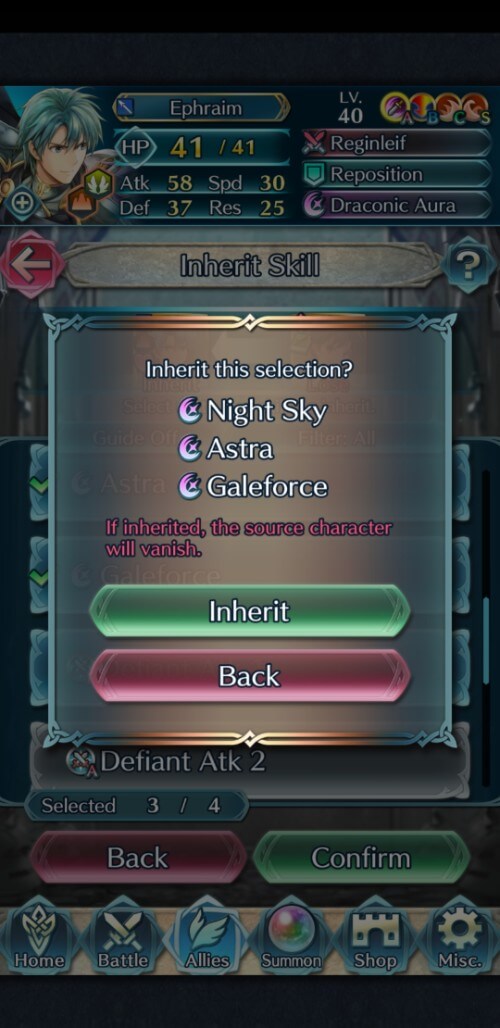
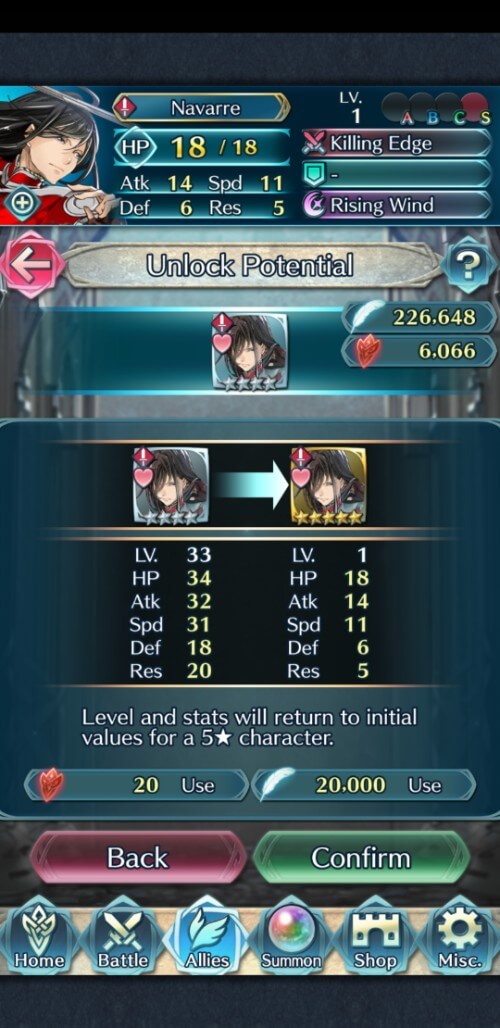
Inheriting Galeforce
Why Galeforce? Pros and Cons
Galeforce can be safer than many other tactics - but also more complicated, as you need to ensure that your Special is activated and that you can eliminate enemy units in a single combat.
Pros
- Galeforce can handle enemy teams with fragile nuking units, such as Infantry Pulse teams and other defenses which are arranged in such a way that you cannot otherwise leave units in enemy range.
- A skilled Galeforce user can sometimes even end the fight before the first Enemy Phase, which negates all enemy debuff opportunities, since they do not take effect until the beginning of the enemy’s turn (Sudden Panic, Chills, etc).
- Galeforce can also physically ‘trap’ an enemy ranged unit between melee units at the end of the engagement, which gives you free turns to destroy enemy Aether pots before finishing off the last ranged unit.
Cons
- Galeforce can be countered by certain scenarios, such as when enemies have cooldown penalties (such as Special Fighter), use Goad buffs to stack Attack and Speed, or when traps prevent Galeforce units from initiating.
- Galeforce is only inheritable to non-dragon melee units, making it difficult to destroy towers or defeat key units in the back of a team. At the time of writing this guide, there is only one offensive mythic unit who can inherit Galeforce (Altina) which makes it difficult - but not impossible - to incorporate your offensive mythics into a Galeforce team.
- It can be difficult to put together a Galeforce team with the resources at hand. Cooldown mitigation is vital, but can be expensive or rare (such as Time’s Pulse or Velouria’s Wolfpup Fang), and inheritance restrictions make cavalry or fliers trickier to use. Making a Galeforce team that works is very much like putting together the pieces of a puzzle: it has to fit and be synergistic or it won’t work.
You will often find yourself using every single skill slot in every single unit you bring just to pull off a successful Galeforce - but when it works, there’s nothing more satisfying.
You're telling me that this guy is good now?
How Does It Work? The Step by Step Guide to Running Galeforce
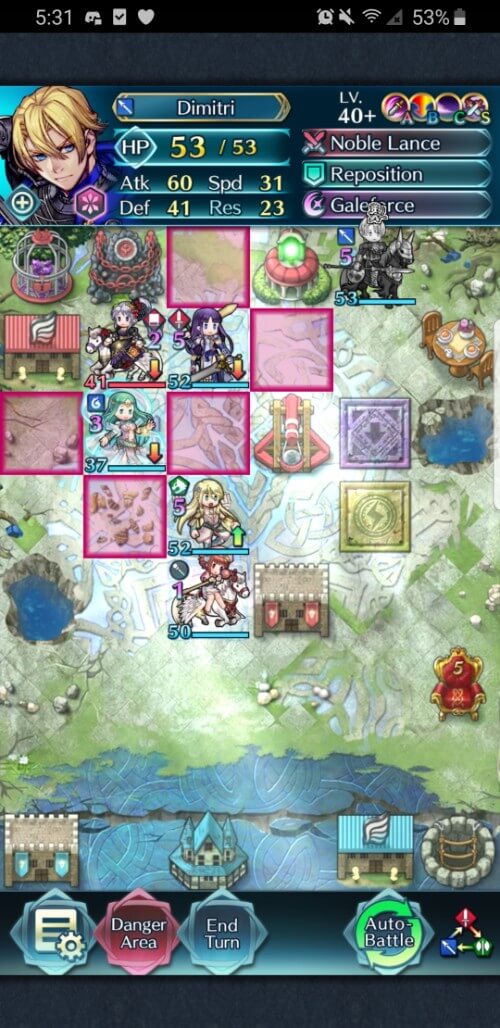
Most Galeforce teams have a ‘lead’ unit. This is the unit who typically initiates and engages the opponent first and ideally, activates Galeforce after the first combat by using Heavy Blade or Flashing Blade. This unit will also ideally either lose HP during that first combat or trigger a Bolt Trap, which reduces their HP enough for their allies to activate Wings of Mercy in order to teleport beside them and initiate their own combat.
Note that you can also use Ardent Sacrifice on your lead unit to help get into Wings of Mercy range before you initiate, particularly if the enemy is running a Duma.
There are 6 units on an enemy team and 5 units on your own. This means that for a flawless Galeforce, you need to have your Galeforce units defeat 1-3 of the enemy units each in a single turn. Typically, a Galeforce team will only defeat 5 enemy units and either tank the 6th unit (usually the least threatening) or trap them where they cannot engage your units in combat.
Altina and Naga trapping Soiree Ishtar
If you cannot reliably activate Wings of Mercy, you can also utilize Galeforce for a ‘hit and run’ strategy, in which you initiate with your lead unit and then activate Galeforce and have them return to safety. This forces the enemy team to try to engage by closing the gap between your teams, at which point you can engage again in the following turn at a section of the map that is not quite as heavily guarded.
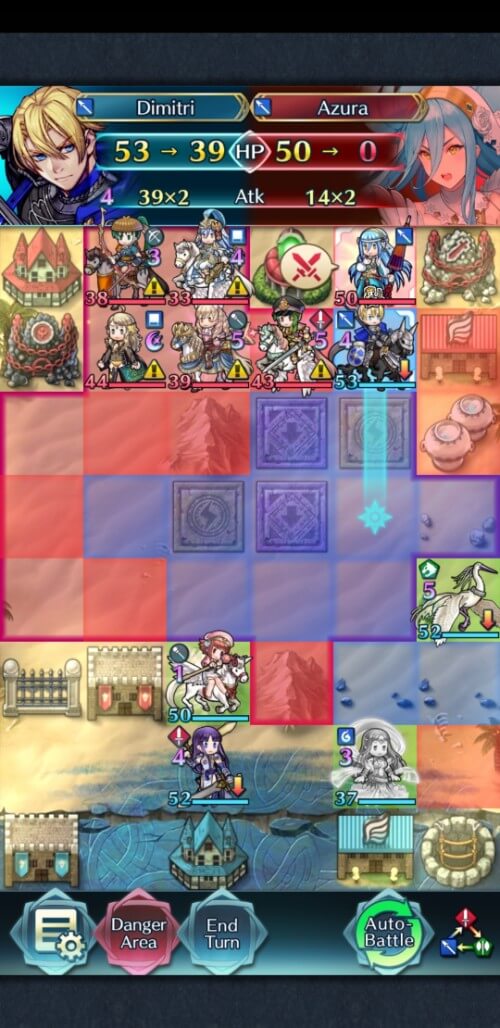
Here, Dimitri engages but cannot lower his HP enough to activate Wings of Mercy. He can activate Galeforce and retreat with the help of a dancer, forcing the enemy team to come to the player.