


Event History
| Start | End |
|---|---|
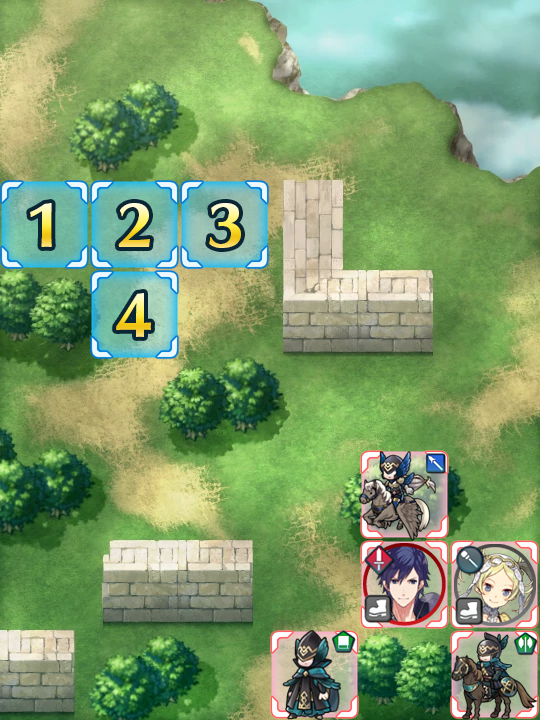
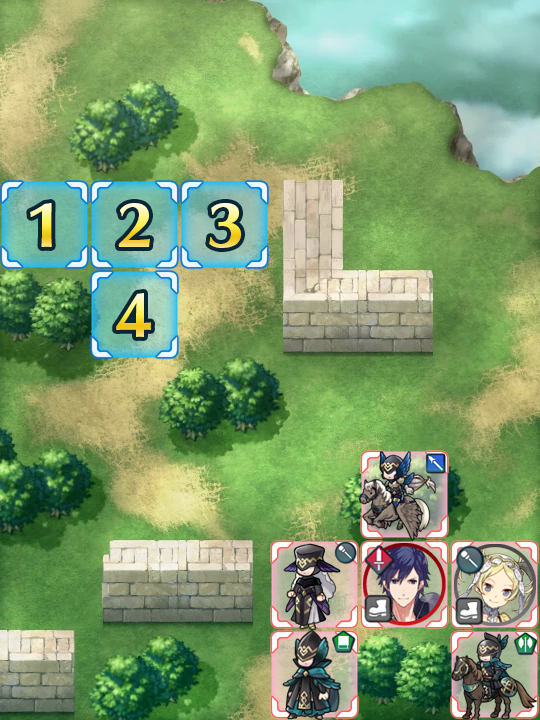
Map
- Normal
- Infernal
Bound Hero Battle: Chrom & Lissa
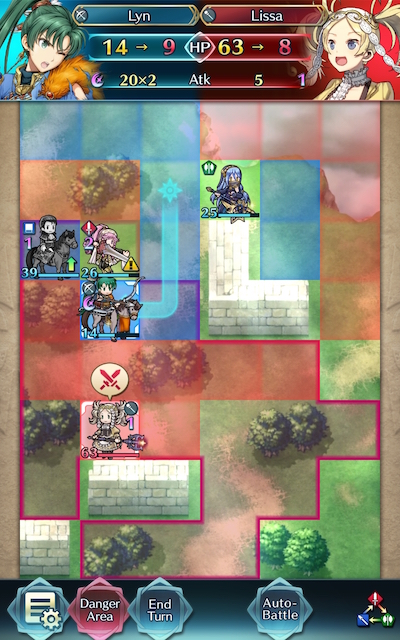
Featuring quite possibly one of the most wholesome pair of siblings in the franchise, Chrom and Lissa’s Bound Hero Battle is definitely a bit of a breather compared to maps with reinforcements. Although Lissa herself and the other healer featured here tote Gravity, Savage Blow, and Dazzling Staff, they can’t deal full damage due to lacking a Wrathful refinement. This makes them much less threatening than other healers on trickier maps, as well as much less dangerous to bait.
As for the more offensively-oriented units like Chrom, the green mage, the cavalry axe, and the lance flier, they’re rather easily dealt with as well. Hard color counters completely vaporize these foes, even if that counter is a dancer! Strong colorless units can also come in handy; it’s completely feasible for a Brave Bow archer to complete this whole map with nothing but the help of three dancers. This is true even though the flier possesses Iote’s Shield -- they still shouldn’t give you much trouble.
Before you begin teambuilding, it’s completely possible you already possess everything you need to beat this map. Created by Gamepress staff member RedFerrari1998, the video guide below uses only F2P units and seals -- see the description for more details. If it doesn’t work for you, though, then read on!
Who To Choose
As is generally true of Bound Hero Battles, the individual units used is very important as they will primarily inform a strategy. There are a few routes one can take depending on what units are personally available, and, of course, adjustment based on the units one possesses is always a possibility.
Baiters
Since the enemies on this map won’t start moving unless they are damaged or baited and the healers aren’t very threatening, you may want to start by luring them close to your starting position. Even though your unit won’t be able to counterattack due to Dazzling Staff, the hit will help them charge their Special. Just be aware that both these foes carry Gravity, so to grant your units some extra maneuverability you may need them to inherit Swap.
Even low Resistance units won’t take a lot of damage from these healers, so who is chosen for this task depends on their utility in dealing with other units on this map. Dragons like Nowi, Adult Tiki, Fae, and Fallen Robin are particularly useful due to their ability to target ranged foes’ lower defensive stat, though all of them (except Nowi if she is using a Triangle Adept build) will need to avoid Chrom at all costs due to his ability to deal effective damage to them with Falchion. Armors such as Hector, Valentine Hector, Hardin, Winter Tharja, Black Knight, and Zelgius are able to easily withstand a hit and shrug off the effects of Gravity due to their native movement being low anyways. Great F2P options include Legendary Ike and Fjorm -- he gains a Resistance boost and cooldown acceleration from his base kit, while she is able to comfortably tank the green mage due to her exclusive Special, Ice Mirror.
Strikers
Brave Bow users once again prove to be incredibly potent strikers in this Bound Hero Battle due to their ability to overpower enemies that other units may otherwise struggle with. Alternatively, speedy archers with the Desperation skill (which can be found on a 4 star Shanna or Navarre) along with the Brash Assault 2 seal are able to effectively gain a Brave effect against enemies who can counter when their HP hits the prerequisite threshold. Brave Lyn, Bridal Cordelia, Klein, and Setsuna are potential strikers you may want to use, with a special mention going to Brave Lyn given her F2P status and her ability to utilize the Desperation/Brash Assault combo to great effect.
Alternatively, Brave and Blade weapon wielders can also serve to be useful if your team composition provides them with the appropriate buffs. Tharja, Reinhardt, Cordelia, Hinoka, Tailtiu, Brave Axe Cherche, and Nino are potential options here, especially if they are equipped with a Breaker skill to add to their coverage.
Dancers
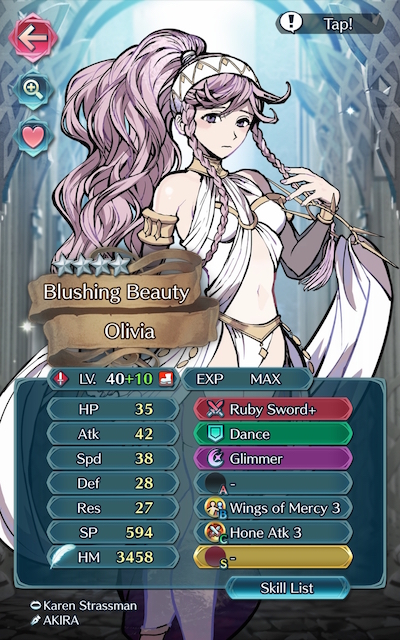
Dancers help provide support, may even have a decent offensive presence themselves, and can usually tank a hit or two, if need be. Due to the presence of Savage Blow, they can also abuse Wings of Mercy / Escape Route on this map. Olivia, Performing Olivia, Performing Inigo, Performing Shigure,Performing Azura, Azura, New Year Azura, and Ninian all give the refreshment that high-firepower units need while also possessing the ability to provide an assist to KO an enemy. A team with two Strikers and two Dancers is a perfectly viable option -- if you use Ninian, though, be careful to keep her away from Chrom. A special mention goes to dancers who possess gem weapons (Ruby Sword, Sapphire Lance, etc) or Triangle Adept due to their ability to check opponents who they possess a color advantage against.
Healers
While not generally a great choice over units who can deal heavy damage or dancers, Healers can be incredibly useful in this Bound Hero Battle due to Savage Blow being present on this map. In particular, healers that tote Rehabilitate can be incredibly useful. Genny, Elise, Wrys, and Lissa are potential additions to a team that may serve useful in this Bound Hero Battle, though any healer who has inherited the proper healing skills will likely do the trick.
Strategy
Strategizing for this Bound Hero Battle shouldn’t be too challenging due to the absence of reinforcements. While it can be difficult to exactly predict what will happen due to IV / Merge variance, here’s some general tips to get you started.
The Battle Begins!
Since this isn’t a map where you can just wait for the enemy to come to you, you’re going to have to make a move to get these foes moving.
Since the healers deal so little damage and have such long range, you may want to bait regardless of whether you’re using a team full of strikers and dancers or a dedicated baiter. If the Gravity effect is pretty much causing you to lose instantaneously, though, creative use of Reposition can allow your dancer to get to your striker if they’ve overextended.
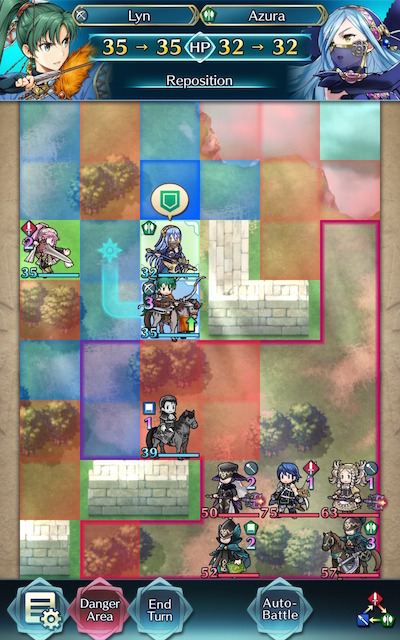
Even if you do manage to KO a foe this turn, it’s likely that one of your Strikers will be left in the range of either Lissa or the other healer. That’s fine -- very few units possess a low enough Resistance stat to take significant damage from these foes. In fact, they may even help you activate skills like Brash Assault, Wings of Mercy, or Escape Route!
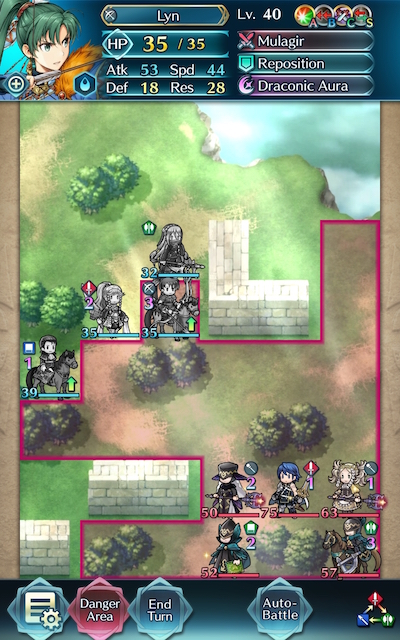
Alternatively, if you’re using a Tank or multiple Tanks, you can bait them from any edge of the Danger Zone. If baiting directly below the starting spaces isn’t working, try using the narrow corridor behind the wall. Lissa has lower Attack than the other healer, and depending on how you position your other units, you may be able to bait the AI to split up their forces.
Countermeasuring Contest
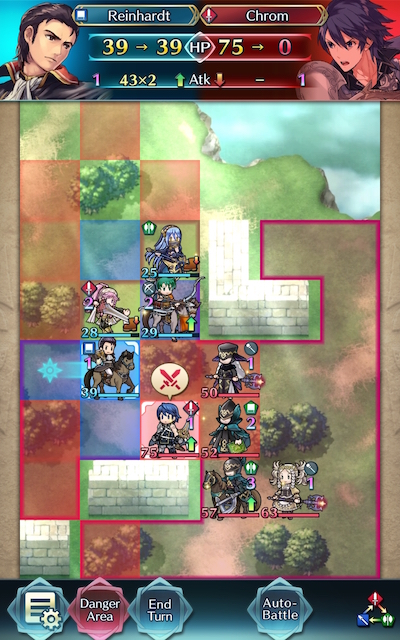
As one of the most dangerous units on this map (though that’s not saying much), Chrom is definitely one of the foes in this Bound Hero Battle that it’s important to have an answer to. Since he carries Brazen Atk/Def (which grants him a massive +7 to Attack and Defense if his HP is less than or equal to 80%) and Vantage, damaging him without KOing him outright can be downright dangerous, as he most likely will be able to lay down some pain.
Thankfully, Chrom has two giant weaknesses: his low Speed of 28, and his even lower Resistance of 18 (!) Pretty much any unit that deals magic damage and is not green will be able to easily wipe him off the face of this map. Just be careful to keep dragons far away from him -- since he deals effective damage to them with Falchion, it’s exceedingly likely they’ll be overwhelmed by the sheer damage he can deal.
Wrath Of The Dancer
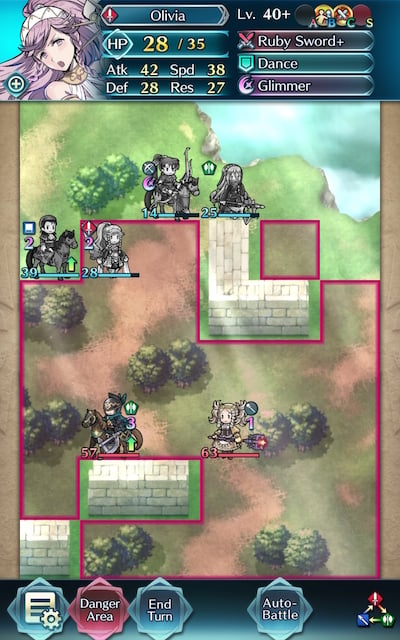
Although Infernal enemies who carry Brave weapons are usually fearsome opponents, the axe cavalry is really quite a pushover. Even a standard Silver Sword 4 star Olivia can take him on and double him on her counterattack. If you want some breathing room, though, Triangle Adept or the Ruby Sword is a great way to stop him dead in their tracks -- KOing him outright or bringing him to incredibly low HP for not a lot of tradeoff. From there, any of your units (provided they have a weapon equipped) should be able to finish him off.
Cleaning Up The Stragglers
Once you’ve dealt with most of the enemies on this map, you’ll need to be careful with your remaining HP if you’ve taken heavy damage on any of your units. Nothing feels worse than having victory in your grasp, only to lose at the last second! If you need to, carefully kite the remaining foes around the map so that you can pick them off, or use a skill like Wings of Mercy to get your healthier units into a position where they can net the remaining KOs. If your units can comfortably finish off their foes, though, there’s no need to be cautious -- charge in and clean up!
If At First You Don’t Succeed
Don’t be fooled by video walkthroughs of any Bound Hero Battle that you watch -- it’s very rare for anyone to beat high-difficulty content (or record a video of themselves doing so!) on their first try. Additionally, the potential variance in unit builds that Skill Inheritance brought along with the random nature of summoning has resulted in pretty much every single summoner having different “building blocks” to work with. This, when combined with the high difficulty level of Infernal, may prove frustrating while someone is trying to find the right combination of units and moves. The key thing to keep in mind is that it may take some light Skill Inheritance and seal shuffling, multiple tries of the map, and a few stamina potions to find a strategy that works for you. Every single turn you complete gets you one step closer to completing the puzzle. Finally, reading about or watching videos of successful strategies may also help you break through a particularly difficult turn that you can’t complete, or may give you ideas of a new unit to use.
Map Enemies
- Hard
- Lunatic
- Infernal
| HP | ATK | SPD | DEF | RES | |
|---|---|---|---|---|---|
| 33 | 30 | 27 | 15 | 28 | |
| Weapon | Slaying Lance | A | Iote's Shield | ||
| Support | B | Poison Strike 2 | |||
| Special | Iceberg | C | Def Ploy 3 | ||
| HP | ATK | SPD | DEF | RES | |
|---|---|---|---|---|---|
| 49 | 45 | 18 | 23 | 12 | |
| Weapon | Falchion (Awakening) | A | Brazen Atk/Def 3 | ||
| Support | Pivot | B | Vantage 3 | ||
| Special | Aether | C | Spur Def 3 | ||
| HP | ATK | SPD | DEF | RES | |
|---|---|---|---|---|---|
| 40 | 30 | 18 | 20 | 23 | |
| Weapon | Gravity+ | A | Spd/Def Bond 3 | ||
| Support | Rehabilitate+ | B | Dazzling Staff 3 | ||
| Special | Kindled-Fire Balm | C | Hone Spd 3 | ||
| HP | ATK | SPD | DEF | RES | |
|---|---|---|---|---|---|
| 33 | 32 | 24 | 14 | 20 | |
| Weapon | Rexcalibur | A | Steady Stance 2 | ||
| Support | B | Seal Spd 2 | |||
| Special | Moonbow | C | Atk Smoke 3 | ||
| HP | ATK | SPD | DEF | RES | |
|---|---|---|---|---|---|
| 36 | 34 | 15 | 21 | 26 | |
| Weapon | Brave Axe | A | Fury 3 | ||
| Support | B | Guard 2 | |||
| Special | Bonfire | C | Panic Ploy 2 | ||
| HP | ATK | SPD | DEF | RES | |
|---|---|---|---|---|---|
| 44 | 42 | 35 | 21 | 36 | |
| Weapon | Slaying Lance+ | A | Iote's Shield | ||
| Support | B | Poison Strike 3 | |||
| Special | Iceberg | C | Def Ploy 3 | ||
| HP | ATK | SPD | DEF | RES | |
|---|---|---|---|---|---|
| 65 | 53 | 25 | 31 | 17 | |
| Weapon | Falchion (Awakening) | A | Brazen Atk/Def 3 | ||
| Support | Pivot | B | Vantage 3 | ||
| Special | Aether | C | Spur Def 3 | ||
| HP | ATK | SPD | DEF | RES | |
|---|---|---|---|---|---|
| 54 | 36 | 25 | 28 | 30 | |
| Weapon | Gravity+ | A | Spd/Def Bond 3 | ||
| Support | Rehabilitate+ | B | Dazzling Staff 3 | ||
| Special | Kindled-Fire Balm | C | Hone Spd 3 | ||
| HP | ATK | SPD | DEF | RES | |
|---|---|---|---|---|---|
| 44 | 44 | 32 | 20 | 28 | |
| Weapon | Rexcalibur+ | A | Steady Stance 3 | ||
| Support | B | Seal Spd 3 | |||
| Special | Moonbow | C | Atk Smoke 3 | ||
| HP | ATK | SPD | DEF | RES | |
|---|---|---|---|---|---|
| 49 | 45 | 22 | 28 | 33 | |
| Weapon | Brave Axe+ | A | Fury 3 | ||
| Support | B | Guard 3 | |||
| Special | Bonfire | C | Panic Ploy 3 | ||
| HP | ATK | SPD | DEF | RES | |
|---|---|---|---|---|---|
| 52 | 45 | 38 | 23 | 39 | |
| Weapon | Slaying Lance+ | A | Iote's Shield | ||
| Support | B | Poison Strike 3 | |||
| Special | Iceberg | C | Def Ploy 3 | ||
| HP | ATK | SPD | DEF | RES | |
|---|---|---|---|---|---|
| 50 | 41 | 31 | 27 | 38 | |
| Weapon | Gravity+ | A | HP/Def 2 | ||
| Support | Martyr+ | B | Dazzling Staff 3 | ||
| Special | Heavenly Light | C | Savage Blow 3 | ||
| HP | ATK | SPD | DEF | RES | |
|---|---|---|---|---|---|
| 75 | 57 | 28 | 34 | 18 | |
| Weapon | Falchion (Awakening) | A | Brazen Atk/Def 3 | ||
| Support | Pivot | B | Vantage 3 | ||
| Special | Aether | C | Spur Def 3 | ||
| HP | ATK | SPD | DEF | RES | |
|---|---|---|---|---|---|
| 63 | 39 | 28 | 31 | 33 | |
| Weapon | Gravity+ | A | Spd/Def Bond 3 | ||
| Support | Rehabilitate+ | B | Dazzling Staff 3 | ||
| Special | Kindled-Fire Balm | C | Hone Spd 3 | ||
| HP | ATK | SPD | DEF | RES | |
|---|---|---|---|---|---|
| 52 | 47 | 35 | 22 | 31 | |
| Weapon | Rexcalibur+ | A | Steady Stance 3 | ||
| Support | B | Seal Spd 3 | |||
| Special | Moonbow | C | Atk Smoke 3 | ||
| HP | ATK | SPD | DEF | RES | |
|---|---|---|---|---|---|
| 57 | 48 | 25 | 31 | 36 | |
| Weapon | Brave Axe+ | A | Fury 3 | ||
| Support | B | Guard 3 | |||
| Special | Bonfire | C | Panic Ploy 3 | ||
User Submitted Teams
This theme team fares surprisingly well against this BHB due to Sigurd’s powerful mixed tanking and the support from his teammates. I used Veronica here because my Ethlyn isn’t finished and I didn’t have before completed the map.
IVs and supports:
Sigurd - +HP/-ATK (yes, I know this is his worst possible IV, but I only have one)
Deirdre - +RES/-HP (the extra RES helps, but isn’t necessary)
Arvis - Neutral (obviously)
Veronica - Neutral (f2p ftw, base kit + LTS 1 seal)
Sigurd/Deirdre: S
(I didn’t want to use an S Support, but I just couldn’t bring myself to restart their support from nothing)
Veronica/Arvis: A at the time of first clear, but I removed the support and it works fine.
The strategy here is using Deirdre to bait the healer, then supporting Sigurd with heals from Veronica and Arvis (Arsent Sacrifice + Recover Ring). Remember to not use Arvis as bait when running Fury in him because the -6 HP might throw things off. Don’t be afraid to take a while to set up, and be sure to keep the mages behind Sigurd until Chrom and the Axe Cavalier are gone. I suggest Brazen Atk/Def on Sigurd with Close Def as a Seal, but you can do whatever (I only did this because my Sigurd is -ATK). Just remember to give him some help (the Vantage+Aether from Chrom can delete him if you’re not careful) and keep his wife inQR range then you’ll be good. TA helps with Deirdre, but really it’s your choice.
https://youtu.be/38anYRPfqiU
All-flying team for Lunatic Mode Quest
Shigure:
Level 40
+SPD/-RES
Base Kit
NY!Azura:
Level 40
+RES/-HP
Hagoita+, Sing, Buckler, Fury 2, Earth Dance 3, Hone Speed 2, Earth Dance (Seal; doesn't stack with Skill)
S!Y!Tiki:
Level 40
A-support with S!Takumi (S in video; doesnt matter which)
+HP/-ATK
Base Kit + Spur Def 3 Seal
S!Takumi:
Level 40+2
+RES/- HP
A-Support with Y!S!Tiki
Base Kit + MT Bow Forging + Defense +3 Seal
(Infernal) (Flier Team) https://youtu.be/M_6GqOHuy1E
(Lunatic) (Sharena & Fjorm Missions) https://youtu.be/dLTsFkRnW7w
I had <10 minutes to finish this BHB. So I brute forced. All my summons on that legendary summon event stacked with all 3 green units desirable yielded Gunnthra. Hence the +8. I wouldn't have cared to merge her otherwise.
All typical builds. +Atk Gunnthra runs Death Blow 3 and Fortify Cav. Clarine provides Hone Cav. My +10 Nowi has the typical +Def build with SB. Atk Smoke 3 seal on L!Ike.
The team just park and tank really. The only 'trick' was that I used Clarine to Fear+ an enemy nearby in order to debuff Chrom first before nuking him into oblivion with Gunnthra. Chrom can kill an unmerged L!Ike quite easily. If not, it would be someone else that he catches on. There is an enemy healer spraying Gravity+ after all. It's better to take Chrom out before he attacks.


