


Event History
| Start | End |
|---|---|
Map
- Normal
- Infernal
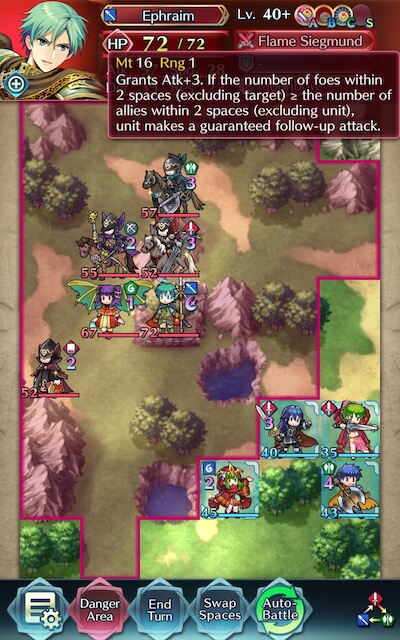
Bound Hero Battle: Ephraim and Myrrh
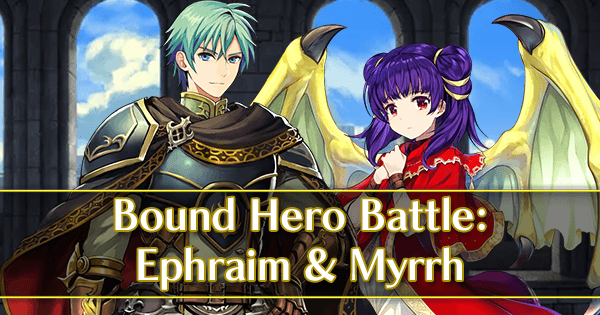
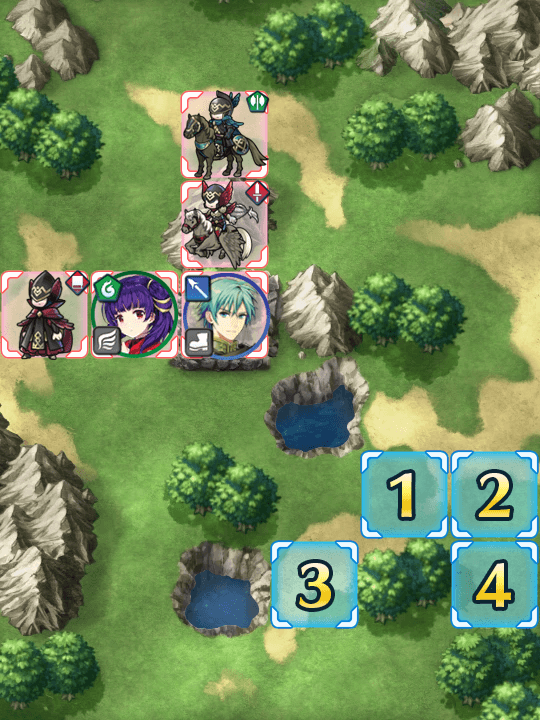
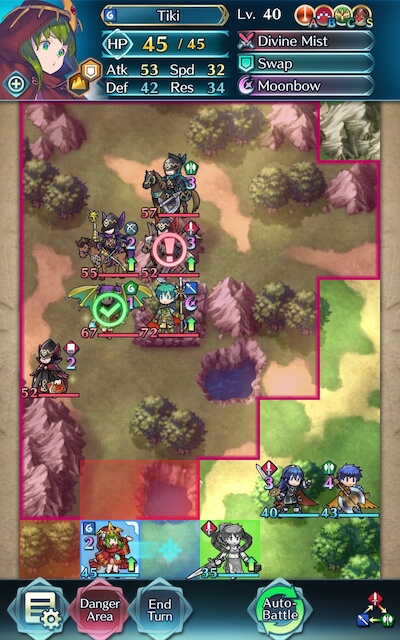
Hailing from the continent of Magvel is Ephraim, and he is accompanied by the shy and humble manakete Myrrh in this Bound Hero Battle! Featuring no reinforcements but a somewhat difficult layout, the multiple obstacles on this map do present some difficulties to non-flier units. Striking hard and fast or making sure you KO multiple units while baiting will be key here -- otherwise, you may risk getting overwhelmed by the advancing forces.
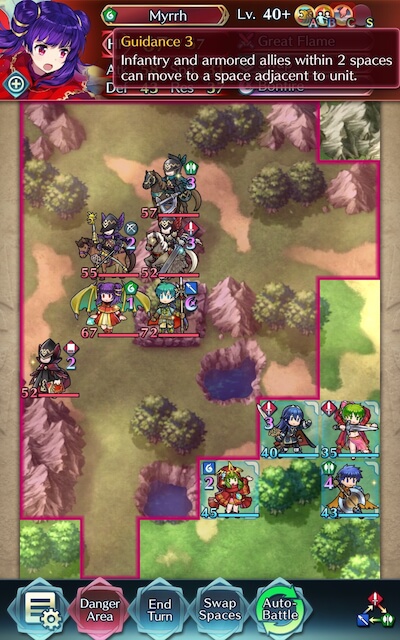
As is typical for the namesakes of these maps, Myrrh and Ephraim themselves are quite potent threats. Ephraim’s Flame Sigmund grants him a follow-up attack regardless of his Speed (contingent on some positioning restrictions) and his fully charged Moonbow will lay on the pain, while Myrrh’s Great Flame denies follow-ups from your units if her Defense is 5 over your units’ Defense. Other units on these maps also have tricky Skills or weaponry, so there’s plenty to watch out for while you forge your path to victory.
Before you begin teambuilding, it’s completely possible you already possess everything you need to beat this map. Created by Gamepress staff member RedFerrari1998, the video guide below uses only F2P units -- see the description for more details. If it doesn’t work for you, though, then read on!
Who to Choose
As is generally true of Bound Hero Battles, the individual units used is very important as they will primarily inform your strategy. There are a few routes you can take depending on what units are available to you, and, of course, adjustment based on the units you possess is always a possibility.
Tanks
Since you’ll need to either bait or strike to get your foes moving (and the mountains complicate using a striker), you’ll most likely want to use at least one tank on this map. Ephraim is a particularly big issue, so if you don’t bring a striker to deal with him specifically, you’ll need a tank check to him as well.
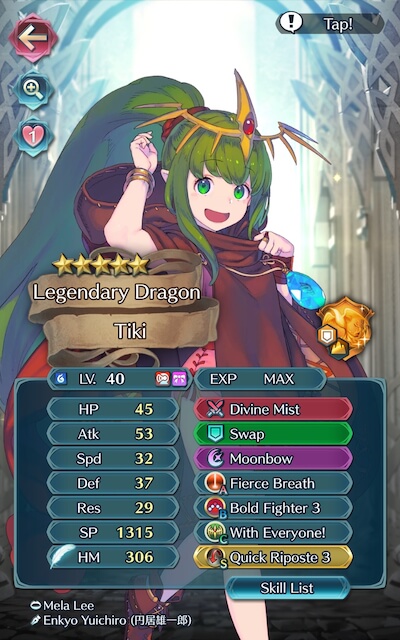
Armors such as Zelgius, Winter Tharja, Halloween Myrrh, Fallen Hardin, and Legendary Tiki are able to hit hard very upon attacking and counterattacking, especially if they’re making use of Bold Fighter, Quick Riposte or Vengeful Fighter. Hector, LA Hector, Legendary Hector, Brave Ephraim, Winter Chrom and Lissa, as well as Fallen Robin will do well tanking Ephraim due to their Weapons Triangle Advantage -- though Legendary Hector and Fallen Robin are particularly notable due to Hector’s ability to deny follow-ups and Robin’s damage-seeking against ranged foes. Black Knight is a powerful F2P option due to his potent exclusive Special, Black Luna, while Halloween Docas’ high Defense makes him a prime candidate to go toe-to-toe with Ephraim as well. All these units, however, will have to be cautious of the sword flier carrying an Armorsmasher which will deal effective damage to them.
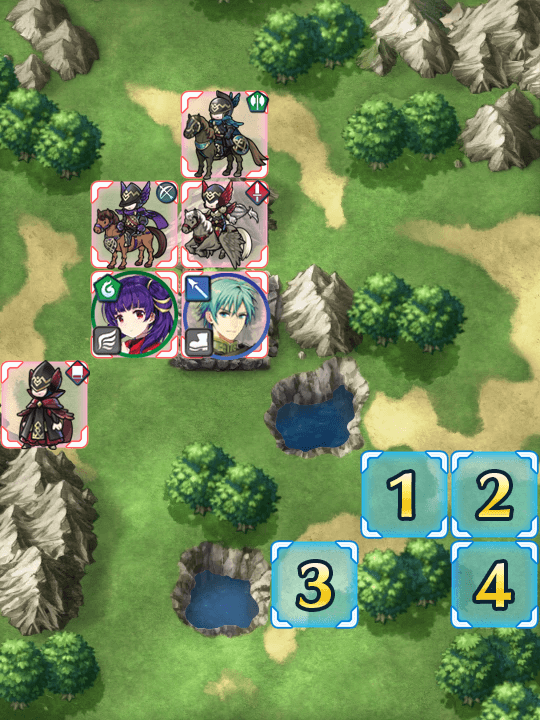
Green infantry tanks also will serve to take care of the prince of Renais, and will likely do a good job checking the axe cavalry as well. Brave Ike is able to consistently fire off powerful Special activations due to Steady Breath, Dorcas can counterattack at-range, and Helbindi is able to self-sufficiently buff himself through his weapon. Other infantry F2P options include Fjorm, who is able to tank ranged foes extremely well with her exclusive Special, Ice Mirror, and Legendary Ike, whose native Warding Breath grants him accelerated cooldown and extra Resistance.
Calvary tanks like Xander, Camus, Quan, and Sigurd perform better with class-specific buffs, and Sigurd is notable for his ability to tank a fair bit of magic damage due to Divine Tyrfing and the Crusader’s Ward. Groom Marth also provides valuable team support, can take advantage of cavalry buffs, and is fairly tanky in his own right -- though they all might struggle to navigate through the forests that pepper this map.
Dragons are also very strong tanks, especially when they’re equipped with Lightning Breath (or another Breath and Distant Counter, if you’re feeling fancy). Nowi, Female Corrin, Male Kana, Fae, Myrrh, Legendary Robin, Female Kana, Adult Tiki, Young Tiki, and/or Summer Young Tiki will all likely be able to do the job and do it well. They are also incredibly useful due to their damage-seeking effect against ranged foes -- and the Tikis in particular have the ability to deal effective damage to Myrrh, which is quite useful when combined with their natural Weapons Triangle Advantage.
Strikers
Strikers can be excellent assets on this map, especially if they’re fliers. While infantry and cavalry strikers may struggle due to the presence of mountains and forests, fliers are able to freely traverse all terrain, be danced, and then move out of harm’s way.
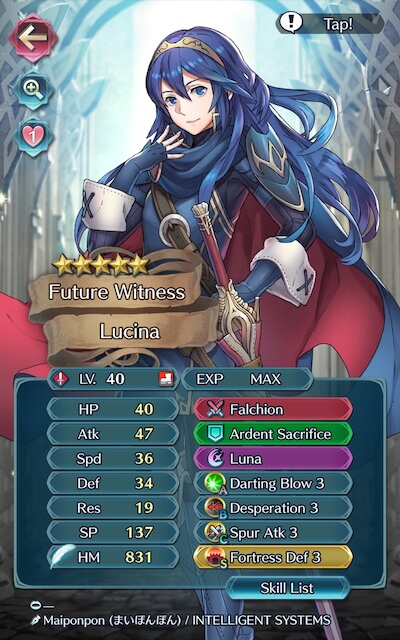
The fliers on this map are vulnerable to archers, and will be especially affected by archers toting high Speed or those carrying a Brave Bow. Brave Lyn, WF Hinoka, Summer Takumi, Setsuna, and Klein are potential strikers you may want to use, with a special mention going to Brave Lyn given her potential F2P status. Colored archers like Legendary Lucina and Halloween Niles may perform well, but will have to watch out for foes who possess a Weapons Triangle Advantage over them.
Alternatively, melee Brave users are able to hit foes twice without retaliation, and may even quad hit if they outspeed an enemy. Cherche, Cordelia, and Elincia are all great melee Brave users who can make excellent use of class-specific buffs, and when equipped with Hit and Run or Drag Back they are able to retreat once attacking. WT Reinhardt is also useful on this map, but must be conscious of positioning due to the terrain restrictions present here.
Brave and Blade tome wielders can also serve to be useful if your team composition provides them with the appropriate buffs, though other mages can also be powerful strikers. Laevatein is distinguishable for being the only unit with a melee Blade weapon, while Tharja, Reinhardt, Ishtar, Linde, Ophelia, WT Olwen, Lewyn, SF Nino, and Nino are potential magical options here, especially if they are equipped with a Breaker skill to add to their coverage. Flying mages will be particularly potent due to their ability to target Ephraim right off the bat then retreat to danger, so consider using them if you're having trouble getting started.
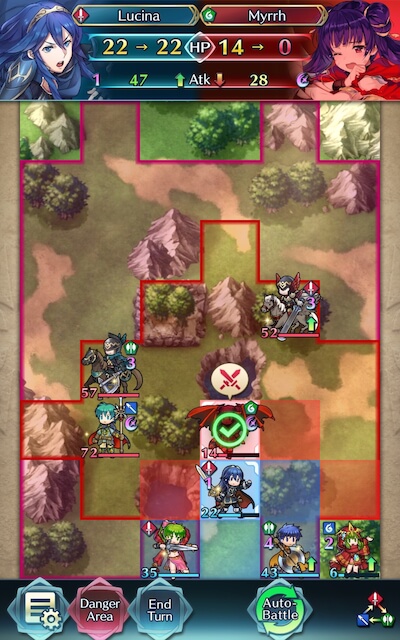
Because Myrrh is so difficult to deal with, also noteworthy are units who deal effective damage to dragons. Lucina, Masked Marth, Exalted Chrom, Alm, Breath of Fog Adult Tiki and Young Tiki, Summer Young Tiki, Roy, Julia, and Deirdre are all examples of units who fill this role.
Refreshers
Refreshers help provide support, may even have a decent offensive presence themselves, and can usually tank a hit or two, if need be. Really, any of them will do the trick. Do note that the red sword flier is carrying Swordbreaker, so a sword-wielding dancer may not be the best choice if another one is available.
Healers
Due to every healer having access to the Wrathful Staff refinement, they can serve as incredibly potent colorless pseudo-mages -- who can heal to boot! Brave Veronica is particularly notable due to her excellent exclusive weapon that prevents counterattacks (among other things), access to the Wrathful Staff Skill, and great support unity, but other healers like Genny, Elise, Maribelle, Ethlyn, Wrys, and Lissa are potential additions to a team that may serve you well.
Supporters
As units that offer extra utility, supporters typically fit one of the above roles while also providing some sort of assist to your other units. Buffers, debuffers, and drivers all can play a valuable role in your team composition by making use of their incredible utility.
Because of Skill Inheritance, any unit can be a buffer with enough investment -- many Drives, Spurs, Hones, Fortifies, and Dual Rallies are readily accessible on 4 star units, and can be further stacked with seals for maximum coverage. Tactics seals are also easily accessible and provide a hefty +6 boost to one stat. Noteable options who natively provide buffs through their exclusive weapons include YT Olivia, Performing Azura, Brave Veronica, Eirika, and Ephraim, while Brave Lucina, New Year Corrin, and New Year Azura are able to stack Drives through theirs.
That isn’t to say that offensive juggernauts can’t provide team support, though -- class specific buffs (like Hone Cavalry or Fortify Fliers) are easily accessible and incredibly potent. Considering that most offensive units don’t make heavy use of their C-slot Skill anyways, they can inherit these Skills to boost the team’s firepower. Some units are even able to support both themselves or their allies at the same time. Legendary Tiki and Helbindi are examples of units who buff both themselves and their allies when fulfilling certain conditions.
Debuffers can make use of weaponry, Skills, or Seals to help de-fang the enemy team and make them significantly less threatening. Ploys, Chills, and Smokes especially are wide-reaching and potent debuffs that can easily turn the tide of the battle at a pivotal moment. Lilina and Soren have a Chill effect on their refined weapons, while Male Morgan has a unique buff/debuff dual effect on his. Dagger units also inflict debuffs when they attack, which can be very useful to cut through an Infernal foes’ inflated HP.
Strategy
Strategizing for this Bound Hero Battle should be a relatively simple matter due to the absence of reinforcements. While it can be difficult to exactly predict what will happen due to IV / Merge variance, here’s some general tips to get you started.
3, 2, 1, Start!
If you’re a dedicated reader of these guides, you’ll know by now that most of these maps are won or lost before they even start. While it may be tempting to jump right in, knowing (and loving!) your enemy will help you not only choose your units, but also figure out where to begin.
If you’re going the striking route, the most accessible foe in your line of fire will be Ephraim. While it would be nice to KO him outright, it’s not strictly necessary -- if you’re feeling particularly fancy, you can even have your unit tote the Savage Blow Skill/Seal combo to heavily dent the opposing team when you target him.
Regardless, in your standard review of the foes you’ll be facing (you have been looking at their Skills, right...?) you’ve likely realized that Ephraim and Myrrh are likely going to be the biggest problems here. Ephraim’s Flame Siegmund grants him guaranteed follow-ups when the amount of your units within 2 spaces of him outnumber his allies within 2 spaces of him, which can get quite annoying if you’re relying on Spurs, Drives, or Buffs. Moreover, Chill Defense allows him to heavily debuff the member of your team with the highest Defense, and Brazen Atk/Def will grant him a potent offensive and defensive boost when he has ≤ 80% HP. When combined with the fact that he has a fully charged Moonbow ready and waiting to wreak havoc on an unsuspecting unit, these factors make Ephraim one of the most threatening foes on the battlefield.
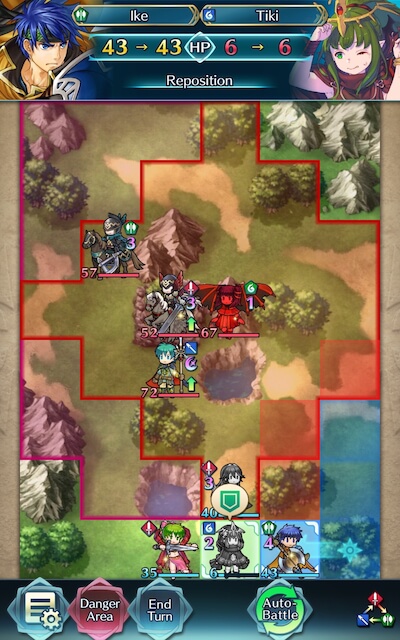
But you shouldn’t have much to worry about, right? After all, it would be difficult for Ephraim to reach your units from the position that he starts in… except that’s not exactly true. Myrrh -- ever the faithful ally -- is able to grant him the ability to get the drop on your forces by using Guidance, further complicating the issue of how to bait. Moreover, her Great Flame prevents your units from following up on her if they have 5 less Defense than her, making her deceptively tanky even if you employ effective weapons against her. To make matters worse, the sword flier not only carries Flier Guidance -- making Myrrh more mobile -- but also is equipped with an Armorsmasher and Swordbreaker as well.
All these factors make baiting from across the mountain, forest, and lake tricky -- not impossible, mind you, but perhaps a little more frustrating than it has to be. This leaves three options: baiting at the top of the map, baiting in the corridor at the bottom, or using a double-pronged approach and doing both. In fact, if you’re having trouble with the AI moving the way you want, it may be a good idea to split your forces to manage its movement.
If you decide to bait from the top, a red breath user is your best bet considering the flier will double any sword user it attacks. From the bottom, any blue unit who can attack at-range and withstand both physical and magical attacks will do nicely.
Specialty Seals
Once you’ve figured out where you’re going to be baiting, your next step is making sure that your unit is outfitted to a degree that they’ll be able to do the job they need to do. This step involves watching carefully and taking note on not only if you’re missing out of KOs, but also by how much. A simple Drive or Spur Seal can sometimes make the difference between a strategy being viable or not, especially if you’re missing out on a KO by 4 or less points of damage. Seals like Distant Def, Close Def, Fortress Def, and Quick Riposte can also make a big difference in later turns by mitigating the damage your unit takes or allowing them to double and net a KO.
Do The Shuffle!
If you’re using a close formation to take advantage of buffs or you’re using armored units, you may find yourself constrained by the tight quarters. While Swap can help mitigate this issue, it may not extend your units’ range enough.
If you encounter this issue, don’t hesitate to chain movement Skills together; you’ll be surprised how much ground your armored unit can cover when they Swap with one unit then are repositioned by another. Pivot is another uncommonly used movement Skill that can prove very handy when you’re trying to get a heavily damaged unit out of danger. It’s accessible too, which means you won’t have to invest heavily to try it out and see if it works for you.
Effective Efficiency
Dragons are often some of the most difficult foes to handle in Infernal maps, and this one is no different. Luckily, effective weapons against them are fairly accessible: Masked Marth is a particularly notable option given her F2P status. Falchion users even offer the extra utility of filling a pseudo-healer role due to their weapon’s HP restoring effect, especially if they’re also equipped with Renewal. Just keep in mind that Myrrh’s Great Flame will most likely deny any follow-ups your unit would normally make -- assuming they’re not carrying a Skill or weapon that overrides the effects.
If At First You Don’t Succeed
Don’t be fooled by video walkthroughs of any Bound Hero Battle that you watch -- it’s very rare for anyone to beat high-difficulty content (or record a video of themselves doing so!) on their first try. Additionally, the potential variance in unit builds that Skill Inheritance brought along with the random nature of summoning has resulted in pretty much every single summoner having different building blocks to work with. This, when combined with the high difficulty level of Infernal, may prove frustrating while someone is trying to find the right combination of units and moves. The key thing to keep in mind is that it may take some light Skill Inheritance and seal shuffling as well as multiple tries of the map to find a strategy that works for you. Every single turn you complete gets you one step closer to completing the puzzle. Finally, reading about or watching videos of successful strategies may also help you break through a particularly difficult turn that you can’t complete, or may give you ideas of a new unit to use.
Map Enemies
- Hard
- Lunatic
- Infernal
| HP | ATK | SPD | DEF | RES | |
|---|---|---|---|---|---|
| 46 | 46 | 18 | 24 | 14 | |
| Weapon | Flame Siegmund | A | Brazen Atk/Def 3 | ||
| Support | B | Chill Def 3 | |||
| Special | Moonbow | C | Threaten Def 3 | ||
| HP | ATK | SPD | DEF | RES | |
|---|---|---|---|---|---|
| 42 | 47 | 21 | 28 | 26 | |
| Weapon | Great Flame | A | Fury 3 | ||
| Support | Swap | B | Atk/Def Link 3 | ||
| Special | Bonfire | C | Guidance 3 | ||
| HP | ATK | SPD | DEF | RES | |
|---|---|---|---|---|---|
| 33 | 31 | 26 | 16 | 22 | |
| Weapon | Rauðrowl | A | Fury 2 | ||
| Support | B | Poison Strike 2 | |||
| Special | Moonbow | C | Savage Blow 3 | ||
| HP | ATK | SPD | DEF | RES | |
|---|---|---|---|---|---|
| 33 | 30 | 27 | 15 | 28 | |
| Weapon | Armorsmasher | A | Death Blow 3 | ||
| Support | B | Swordbreaker 2 | |||
| Special | Iceberg | C | Flier Guidance 2 | ||
| HP | ATK | SPD | DEF | RES | |
|---|---|---|---|---|---|
| 36 | 31 | 12 | 18 | 23 | |
| Weapon | Brave Axe | A | Sturdy Blow 1 | ||
| Support | B | Guard 2 | |||
| Special | Pavise | C | Spd Tactic 3 | ||
| HP | ATK | SPD | DEF | RES | |
|---|---|---|---|---|---|
| 63 | 54 | 25 | 32 | 20 | |
| Weapon | Flame Siegmund | A | Brazen Atk/Def 3 | ||
| Support | B | Chill Def 3 | |||
| Special | Moonbow | C | Threaten Def 3 | ||
| HP | ATK | SPD | DEF | RES | |
|---|---|---|---|---|---|
| 58 | 55 | 28 | 39 | 34 | |
| Weapon | Great Flame | A | Fury 3 | ||
| Support | Swap | B | Atk/Def Link 3 | ||
| Special | Bonfire | C | Guidance 3 | ||
| HP | ATK | SPD | DEF | RES | |
|---|---|---|---|---|---|
| 44 | 44 | 35 | 23 | 31 | |
| Weapon | Rauðrowl+ | A | Fury 3 | ||
| Support | B | Poison Strike 3 | |||
| Special | Moonbow | C | Savage Blow 3 | ||
| HP | ATK | SPD | DEF | RES | |
|---|---|---|---|---|---|
| 44 | 42 | 35 | 21 | 36 | |
| Weapon | Armorsmasher+ | A | Death Blow 3 | ||
| Support | B | Swordbreaker 3 | |||
| Special | Iceberg | C | Flier Guidance 3 | ||
| HP | ATK | SPD | DEF | RES | |
|---|---|---|---|---|---|
| 49 | 42 | 19 | 25 | 30 | |
| Weapon | Brave Axe+ | A | Sturdy Blow 2 | ||
| Support | B | Guard 3 | |||
| Special | Pavise | C | Spd Tactic 3 | ||
| HP | ATK | SPD | DEF | RES | |
|---|---|---|---|---|---|
| 72 | 57 | 28 | 35 | 22 | |
| Weapon | Flame Siegmund | A | Brazen Atk/Def 3 | ||
| Support | B | Chill Def 3 | |||
| Special | Moonbow | C | Threaten Def 3 | ||
| HP | ATK | SPD | DEF | RES | |
|---|---|---|---|---|---|
| 67 | 58 | 31 | 43 | 37 | |
| Weapon | Great Flame | A | Fury 3 | ||
| Support | Swap | B | Atk/Def Link 3 | ||
| Special | Bonfire | C | Guidance 3 | ||
| HP | ATK | SPD | DEF | RES | |
|---|---|---|---|---|---|
| 52 | 47 | 38 | 25 | 34 | |
| Weapon | Rauðrowl+ | A | Fury 3 | ||
| Support | B | Poison Strike 3 | |||
| Special | Moonbow | C | Savage Blow 3 | ||
| HP | ATK | SPD | DEF | RES | |
|---|---|---|---|---|---|
| 52 | 45 | 38 | 23 | 39 | |
| Weapon | Armorsmasher+ | A | Death Blow 3 | ||
| Support | B | Swordbreaker 3 | |||
| Special | Iceberg | C | Flier Guidance 3 | ||
| HP | ATK | SPD | DEF | RES | |
|---|---|---|---|---|---|
| 57 | 45 | 22 | 28 | 33 | |
| Weapon | Brave Axe+ | A | Sturdy Blow 2 | ||
| Support | B | Guard 3 | |||
| Special | Pavise | C | Spd Tactic 3 | ||
| HP | ATK | SPD | DEF | RES | |
|---|---|---|---|---|---|
| 55 | 50 | 24 | 27 | 25 | |
| Weapon | Shining Bow+ | A | Bracing Blow 2 | ||
| Support | B | Guard 3 | |||
| Special | Glimmer | C | Panic Ploy 3 | ||
User Submitted Teams
NY!Laegjarn is a support, she only kills a red mage
Leanne sings and heals
Hríd is a debuffer and kills Myrrh
Yune kills Ephraim
I put Fjorm in the spot next to the tree near Ephraim and Myrhh and everyone just died attacking her idk
This team is one of my first Arena team - Luckily I barely made it on 2nd try
All the heroes have their full original skills. Only Brave Lyn got Draw Back & Brave Hector got Swap through SI. These skills are crucial.
The main idea is to burn Ephraim with SF Nino in first round (over the lake), Brave Lyn draw her down & Hector swap with Nino to protect her from the Archer. In the mean time, Legendary Ike move up to stop the Axe Cavalry. Armor Boots Seals are recommended for Hector, though it is not necessary. It takes me about 2 turns to setup the position before I take on Ephraim.
With Ephraim gone, Hector tanks, kill the red mage and severely injure the calvary archer. Myrrh remains the worst threat, as she can easily decimate Brave Hector. Swap again safe the day, let Hector hide behinds BLyn & SF Nino. BLyn take down the sword flier, SF Nino blow away the half-dead archer, while Ike kill the Axe Cavalry in one turn.
Then BLyn & SF Nino shot down the flying nightmare on the last turn, end the run on turn 5.
Note:
Brave Lyn got S-rank summonner support
Nino & Brave Lyn got a S support
But it won't work against Infantry Pulse. TOO BAD.
You know the drill, the sets are there on my heroes list, and on any other of my team showcases.
Just leave Corrin in range and Azura right next to her for when Ephraim tries to abuse Guidance. Everybody other than the green units will suicide, as usual.
Robin (+1 and +def) runs TA Raven, with Bowbreaker and QR3. He's there for both ranged units.
Myrrh and Tiki serve mainly to counter the respective BHB units. Tiki kept some of her base kit, but has QR2. Myrrh runs Goad Fliers and QR2, and is allowed to have Fury.
The main centerpoint is Sumia's Atk/Def Link. She and Robin carry Reposition (though Robin didn't need his), while the dragon gals have Swap. Sumia also has Spur Res seal, so Robin won't dip too low in HP after the red mage, plus Fortify Fliers just because.
Turn 1: Robin should start at the unjoined square, with Sumia nearby. He will go down, only for Sumia to repo him back up. Keep the dragons nearby. Both the red mage and bow will SD.
Turn 2: Robin retreats south. Tiki swaps with Sumia for the Link buff, while ally Myrrh moves to Robin's right, and Sumia moves so that she is adjacent to both dragons. Enemy Myrrh self destructs.
Turn 3: Swap Myrrh up, then repo her to the left with Sumia. Move Tiki away from the action...for now. Sword flier will SD if Sumia is +atk or merged (not in my case), but if not, don't worry. Ephraim SD's on Myrrh.
Turn 4: Move Robin so Sumia can repo Tiki, then move Tiki between lake and forest. The cav (and if still alive, the flier) will SD.


