


Event History
| Start | End |
|---|---|
Map
- Normal
- Infernal
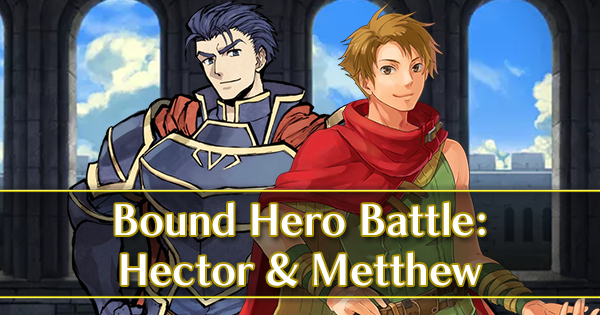
Bound Hero Battle: Matthew & Hector
Coming straight from the battlefields of the continent of Elibe is Matthew and Hector, ready and waiting to do their worst to your army during this Bound Hero Battle! Thankfully featuring no reinforcements, this map is yet another that will not have your foes move before they are damaged, KO’d, or baited -- and whether this is a good or a bad thing is really dependent on what units you have available to you. If you have some tanks (plus Fjorm) that can take advantage of tactic or class-specific buffs, this BHB shouldn’t prove to be much of a challenge. If you don’t, then you’ll have to take a different approach.
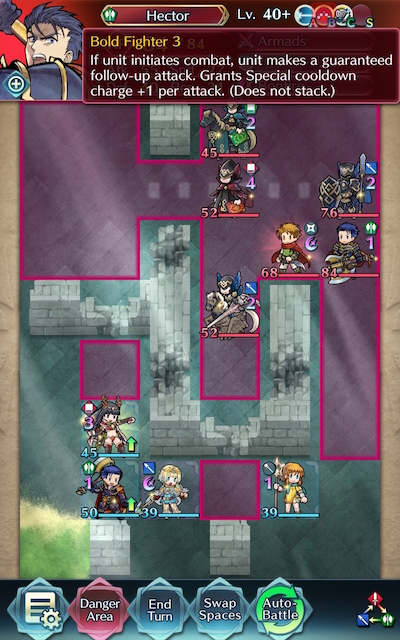
There’s some things to be careful about on this map too. Hector is carrying Bold Fighter -- which allows him to always perform a follow-up when he initiates -- and Matthew’s dagger will provide your foes with buffs after he attacks, resulting in them being able to absorb a fair amount of punishment. Starting strong and netting key KOs early on will be your salvation here; otherwise you risk being overwhelmed by the enemy’s forces.
Before you begin teambuilding, though it’s completely possible you already possess everything you need to beat this map. Created by Gamepress staff member RedFerrari1998, the video guide below uses only F2P units, no Skill Inheritance, and some Seals -- see the description for more details. If it doesn’t work for you, though, then read on!
Who to Choose
As is generally true of Bound Hero Battles, the individual units used is very important as they will primarily inform your strategy. There are a few routes one can take depending on what units are available to you, and, of course, adjustment based on the units one possesses is always a possibility.
Baiters
Since the enemies on this map won’t move unless baited and striking and retreating is a bit difficult due to the map layout, you’ll likely want to include at least one baiter in your team. If they’re adequately buffed and have the right seals/skills equipped, you’ll likely be able to KO one or two foes in your first round of combat -- which will certainly help you start out on the right foot. If you choose to start the map by baiting to the left or center, you’ll probably want to use a red or blue unit. If you instead start to the right, a red or green unit may prove useful.
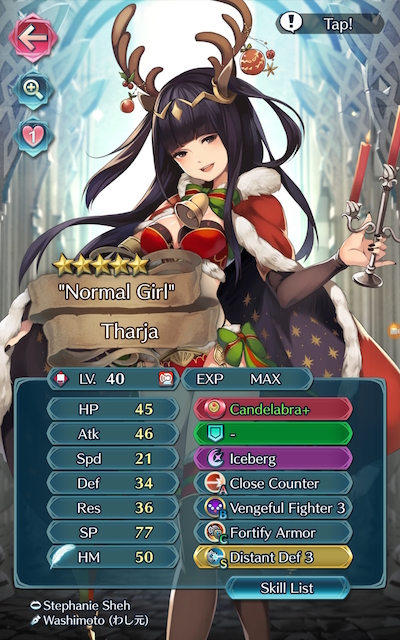
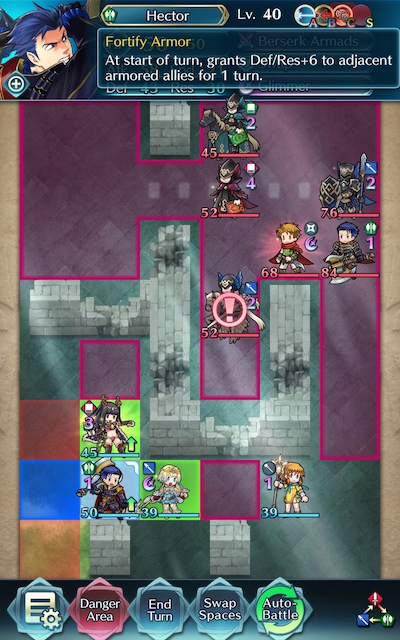
Armors such as Zelgius, Black Knight, Winter Tharja, Fallen Hardin, Hector, LA Hector, Legendary Hector, and Fallen Robin are able to hit hard very upon counterattacking, especially if they’re making use of Quick Riposte or Vengeful Fighter. They’ll need to be cautious when dealing with the lance flier carrying the Slaying Spear, though, due to the effective damage it will deal to them. Calvary tanks like Xander and Camus perform particularly well with class-specific buffs, but need to watch out for the green cavalry mage carrying Keen Gronnwolf. Although more offensively oriented, Legendary Ryoma can make use of class-specific buffs as well and is able to also counterattack at distance. An amazing F2P option is Fjorm, who is able to tank the mages with her high Resistance and her exclusive Special, Ice Mirror, and Legendary Ike, whose native Warding Breath grants him accelerated cooldown.
Dragons are also very strong tanks, especially when they’re equipped with Lightning Breath (or another Breath and Distant Counter, if you’re feeling fancy). Nowi, Female Corrin, Male Kana, Fae, Myrrh, Female Kana, Legendary Robin, Adult Tiki, and/or Young Tiki will all likely be able to do the job and do it well.
Strikers
Whether you want to use a Striker on this map is entirely up to you -- as per usual, their ability to overpower most foes will no doubt serve useful, but this map seems more geared towards establishing chokepoints with your own tanks than kiting and KOing outright. That isn’t to say they can’t pull their weight, but it is suggested for most players that strikers are used in conjunction with tanks for this map.
In particular, Brave Bow users can be incredibly potent strikers due to their ability to overpower and/or finish off any enemies your tank may otherwise struggle with. Brave Lyn, WF Hinoka, Bridal Cordelia, Klein, and Setsuna are potential strikers you may want to use, with a special mention going to Brave Lyn given her F2P status.
Alternatively, melee Brave users are able to hit foes twice without retaliation, and may even quad hit if they outspeed an enemy. Cherche, Cordelia, and Elincia, are all great Brave users who can make excellent use of class-specific buffs. Finn is a great F2P option who would work particularly well in a cavalry team along with WT Reinhardt.
Brave and Blade tome wielders can also serve to be useful if your team composition provides them with the appropriate buffs, though speedy mages can also be powerful strikers. Tharja, Reinhardt, Tailtiu, Linde, Ishtar, Nino, SF Nino, and WT Olwen are potential options here, especially if they are equipped with a Breaker skill to add to their coverage and/or are accompanied by a buffbot like Eirika or Ephraim.
Refreshers
Refreshers help provide support, may even have a decent offensive presence themselves, and can usually tank a hit or two, if need be.Lene, Olivia, Performing Olivia, Performing Inigo, Performing Shigure, Performing Azura, Azura, New Year Azura, Bridal Ninian, and Ninian all give the refreshment that high-firepower units need while also possessing the ability to provide an assist to KO an enemy.
Healers
While not generally a great choice over units who can deal heavy damage or dancers, Healers can be incredibly useful in this Bound Hero Battle due to their ability to provide valuable healing to your tanks. Genny, Priscilla, Elise, Nanna, Wrys, and Lissa are potential additions to a team that may serve you well on this map.
Strategy
Strategizing for this Bound Hero Battle should be fairly simple due to the absence of reinforcements. While it can be difficult to exactly predict what will happen due to IV / Merge variance, here’s some general tips to get you started.
Threat Thoroughfare
Like most Bound Hero and Grand Hero Battle guides advocate, most of these maps are won or lost before they even start. While it may be tempting to jump right in, knowing (and loving!) your enemy will help you not only choose your units, but also figure out where to begin.
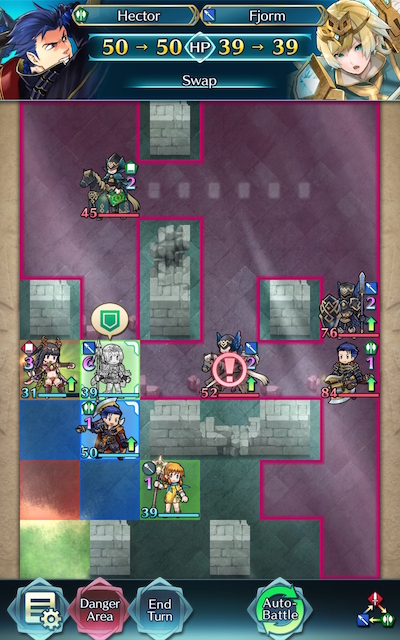
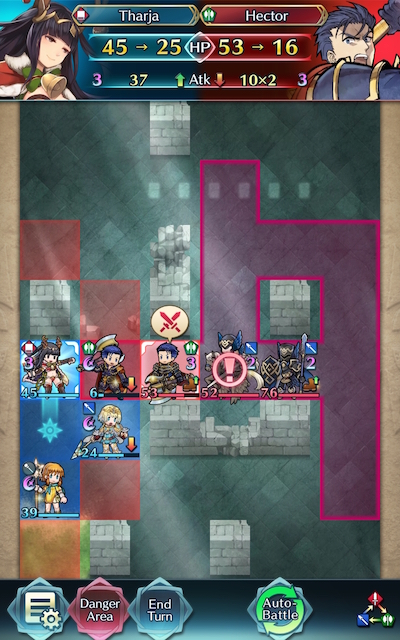
The first thing you should take note of is arguably the biggest threat on this map -- Hector. Featuring 40 base Defense to scale off of, his Bonfire procs will hurt to say the least, and the fact that he’s carrying Bold Fighter allows him to attack twice when he initiates regardless of his Speed. Moreover, Armads grants him a Quick Riposte effect when his HP is over or equal to 80%. It’s a potent combination and a big reason to bring a tanky red to this map, as any unit that takes neutral damage from Hector will struggle to stand in his way.
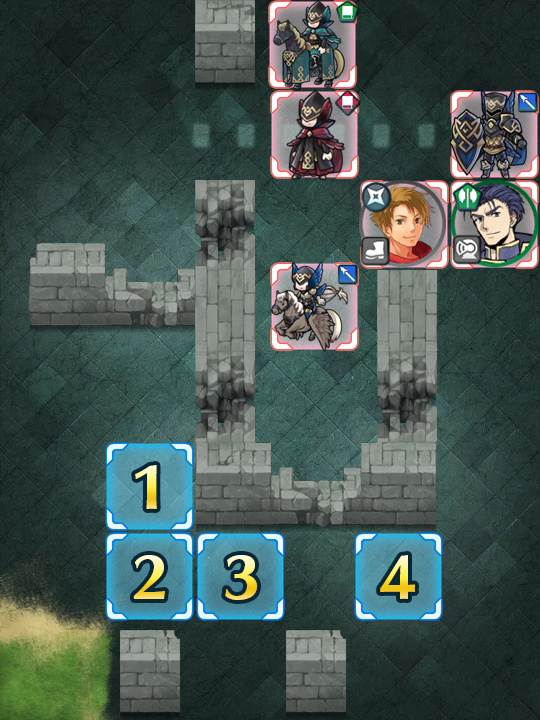
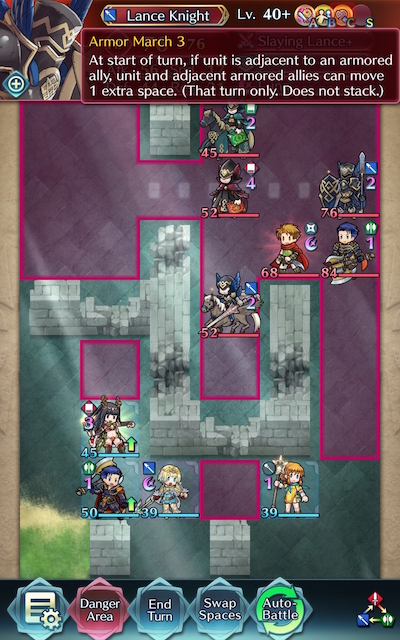
But Hector surely can’t be that big of a problem because he only has one movement, right? Think again; since the lance armor next to him is carrying Armor March, the one-man-army’s range is further extended. If you choose to bait on the furthermost right, that means that your unit will have to survive both a Glimmer proc from Matthew and (likely) a Bonfire from Hector, which is a less than ideal situation. Moreover, since the lance armor also carries Wings of Mercy, damaging any foe without KOing them can be potentially dangerous.
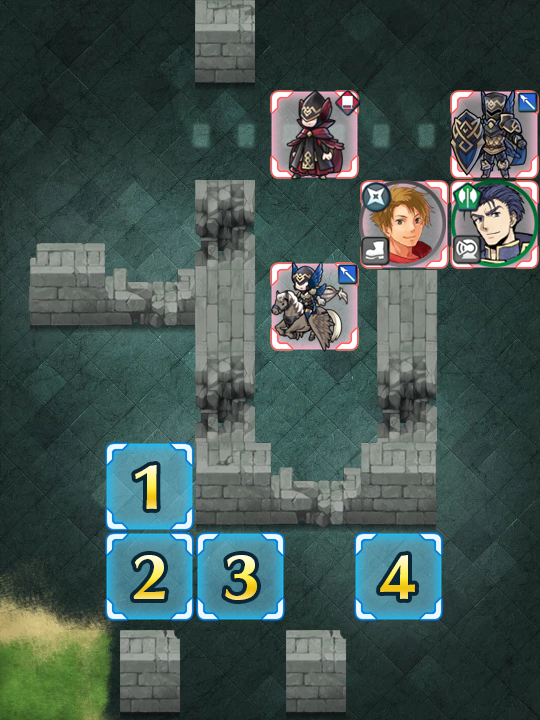
Starting Off Strong
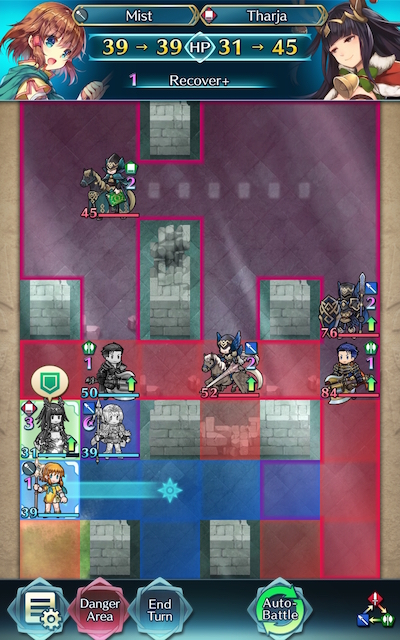
So with Hector fully sized up, feared, and most probably loathed, the next question raises itself: where should you start? For the reasons stated above, it may not be a good idea to face Hector and his dagger wielding chum head-on, so it’s most probably best to bait on the middle danger zone tile or the far left one. But why does the danger zone extend outside the walls? Well, since the lance flier carries Guidance, the red mage and Matthew are able to teleport to a space adjacent to them, which they’re rather likely to do if you place a unit to bait them.
Ultimately, whether you choose to bait in the center space or the left is dependent on which one puts you in a more favourable position once the enemy starts moving. Since the left will reduce your foes’ ability to use a pincer tactic against you, though, it is arguably the better choice.
Marked Maneuvering
Whenever your units are in tight quarters (whether to distribute Drives, Spurs, or buffs) it does raise the issue of maneuvering, especially if you’re using armored units. You may find that your units are getting in each other’s way, or -- worse yet! -- not allowing each other to attack and retreat properly. Thankfully, the solution to this problem is simple: use movement skills! While Reposition is the most popular of the bunch, Swap and Pivot can serve to extend your unit’s range instead of only letting them offer support.
Preventive Medicine
If you’re using a healer, don’t be fooled into thinking that their cooldown management isn’t just as important as the rest of your team’s. A timely Imbue or Heavenly Light can sometimes make the difference between victory and defeat. Because of this it is usually worthwhile to heal only slightly damaged allies -- assuming you wouldn’t be wasting your healer’s charged Special in the process, of course.
Chip-Chip-Cherie
Although ideally you’ll always have Specials charged when you need them, chip damage can be a great way to prevent your units from taking more damage than they need to. Unless your unit will do no damage to their foe and will just charge their Special, even a little bit of chipping can make a difference.
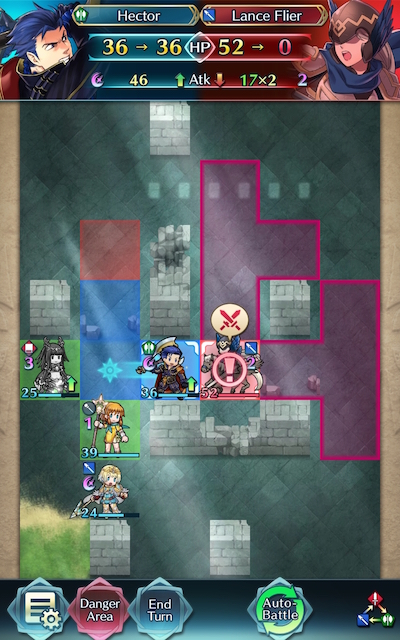
Effective Evasion
Even if you’re using tanks, ideally you’ll avoid being initiated on when the foe possesses weaponry that’s effective against your unit -- even if you have the weapons triangle on your side. If you can’t KO an enemy carrying effective weaponry with one unit, other ranged units like mages, archers, and healers can provide an assist. The sole exception to this rule is if you’re using Enemy Phase-active Skills like Close Def, Distant Def, Quick Riposte, and the winter weapons in order to survive a round of combat or net a KO.
If At First You Don’t Succeed
Don’t be fooled by video walkthroughs of any Bound Hero Battle that you watch -- it’s very rare for anyone to beat high-difficulty content (or record a video of themselves doing so!) on their first try. Additionally, the potential variance in unit builds that Skill Inheritance brought along with the random nature of summoning has resulted in pretty much every single summoner having different building blocks to work with. This, when combined with the high difficulty level of Infernal, may prove frustrating while someone is trying to find the right combination of units and moves. The key thing to keep in mind is that it may take some light Skill Inheritance and seal shuffling as well as multiple tries of the map to find a strategy that works for you. Every single turn you complete gets you one step closer to completing the puzzle. Finally, reading about or watching videos of successful strategies may also help you break through a particularly difficult turn that you can’t complete, or may give you ideas of a new unit to use.
Map Enemies
- Hard
- Lunatic
- Infernal
| HP | ATK | SPD | DEF | RES | |
|---|---|---|---|---|---|
| 55 | 44 | 17 | 29 | 13 | |
| Weapon | Armads | A | Distant Counter | ||
| Support | B | Bold Fighter 3 | |||
| Special | Pavise | C | Goad Armor | ||
| HP | ATK | SPD | DEF | RES | |
|---|---|---|---|---|---|
| 41 | 29 | 29 | 24 | 16 | |
| Weapon | Rogue Dagger+ | A | Fury 3 | ||
| Support | B | Poison Strike 3 | |||
| Special | Glimmer | C | Spd Tactic 3 | ||
| HP | ATK | SPD | DEF | RES | |
|---|---|---|---|---|---|
| 33 | 32 | 24 | 14 | 20 | |
| Weapon | Rauðrblade | A | Swift Sparrow 1 | ||
| Support | Pivot | B | Seal Def/Res 1 | ||
| Special | Draconic Aura | C | Drive Def 2 | ||
| HP | ATK | SPD | DEF | RES | |
|---|---|---|---|---|---|
| 49 | 40 | 11 | 32 | 13 | |
| Weapon | Slaying Lance | A | Brazen Atk/Def 3 | ||
| Support | B | Wings of Mercy 2 | |||
| Special | Luna | C | Armor March 2 | ||
| HP | ATK | SPD | DEF | RES | |
|---|---|---|---|---|---|
| 33 | 30 | 27 | 15 | 28 | |
| Weapon | Slaying Spear+ | A | Iote's Shield | ||
| Support | B | Dull Close 3 | |||
| Special | Escutcheon | C | Guidance 2 | ||
| HP | ATK | SPD | DEF | RES | |
|---|---|---|---|---|---|
| 72 | 52 | 24 | 37 | 19 | |
| Weapon | Armads | A | Distant Counter | ||
| Support | B | Bold Fighter 3 | |||
| Special | Pavise | C | Goad Armor | ||
| HP | ATK | SPD | DEF | RES | |
|---|---|---|---|---|---|
| 59 | 41 | 37 | 33 | 21 | |
| Weapon | Rogue Dagger+ | A | Fury 3 | ||
| Support | B | Poison Strike 3 | |||
| Special | Glimmer | C | Spd Tactic 3 | ||
| HP | ATK | SPD | DEF | RES | |
|---|---|---|---|---|---|
| 44 | 44 | 32 | 20 | 28 | |
| Weapon | Rauðrblade+ | A | Swift Sparrow 2 | ||
| Support | Pivot | B | Seal Def/Res 2 | ||
| Special | Draconic Aura | C | Drive Def 2 | ||
| HP | ATK | SPD | DEF | RES | |
|---|---|---|---|---|---|
| 66 | 52 | 16 | 40 | 19 | |
| Weapon | Slaying Lance+ | A | Brazen Atk/Def 3 | ||
| Support | B | Wings of Mercy 3 | |||
| Special | Luna | C | Armor March 3 | ||
| HP | ATK | SPD | DEF | RES | |
|---|---|---|---|---|---|
| 44 | 42 | 35 | 21 | 36 | |
| Weapon | Slaying Spear+ | A | Iote's Shield | ||
| Support | B | Dull Close 3 | |||
| Special | Escutcheon | C | Guidance 3 | ||
| HP | ATK | SPD | DEF | RES | |
|---|---|---|---|---|---|
| 84 | 55 | 27 | 40 | 21 | |
| Weapon | Armads | A | Distant Counter | ||
| Support | B | Bold Fighter 3 | |||
| Special | Bonfire | C | Goad Armor | ||
| HP | ATK | SPD | DEF | RES | |
|---|---|---|---|---|---|
| 68 | 44 | 40 | 36 | 22 | |
| Weapon | Rogue Dagger+ | A | Fury 3 | ||
| Support | B | Poison Strike 3 | |||
| Special | Glimmer | C | Spd Tactic 3 | ||
| HP | ATK | SPD | DEF | RES | |
|---|---|---|---|---|---|
| 45 | 52 | 28 | 18 | 39 | |
| Weapon | Keen Gronnwolf+ | A | Atk/Res Bond 2 | ||
| Support | B | Seal Atk 3 | |||
| Special | Moonbow | C | Spd Ploy 3 | ||
| HP | ATK | SPD | DEF | RES | |
|---|---|---|---|---|---|
| 52 | 47 | 35 | 22 | 31 | |
| Weapon | Rauðrblade+ | A | Swift Sparrow 2 | ||
| Support | Pivot | B | Seal Def/Res 2 | ||
| Special | Draconic Aura | C | Drive Def 2 | ||
| HP | ATK | SPD | DEF | RES | |
|---|---|---|---|---|---|
| 76 | 56 | 17 | 44 | 21 | |
| Weapon | Slaying Lance+ | A | Brazen Atk/Def 3 | ||
| Support | B | Wings of Mercy 3 | |||
| Special | Luna | C | Armor March 3 | ||
| HP | ATK | SPD | DEF | RES | |
|---|---|---|---|---|---|
| 52 | 45 | 38 | 23 | 39 | |
| Weapon | Slaying Spear+ | A | Iote's Shield | ||
| Support | B | Dull Close 3 | |||
| Special | Escutcheon | C | Guidance 3 | ||
User Submitted Teams
Ike: base kit
+quick riposte 3 seal
*his only job is killing Matthew
Leon 5*: DB3
brave bow
swap
ignis
+attack 3 seal
Olivia:
ruby sword
moonbow
+hone spd 2
Nino 5*: fury 3, desperation, threaten res 3
gronblade+
draw back
moonbow
+speed 3 seal
Nino
Gronnblade+
Draw Back
Dragon Fang
A.Darting Blow 3
C.Hone Atk 3
S. Speed +2
Olivia
Silver Sword+(S)
Dance
B.Knock Back
C. Hone Atk 3
S. Spur Atk 3
Klein
Brave Bow+
Shove
Glacies
A. Darting Blow 3
B. Quick Riposte 3
C. Hone Atk 3
Laslow
Silver Sword+ (R)
Noontime
A. Fury 3
B. Axebreaker 3
C. Threaten Atk 3
S. Hone Spd 1


