


Event History
| Start | End |
|---|---|
Map
- Normal
- Infernal

Linus: Mad Dog
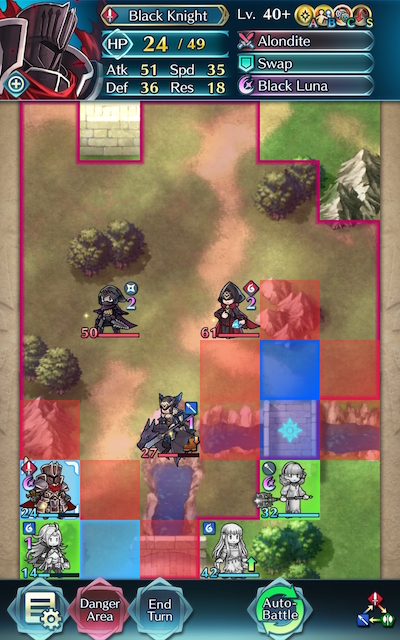
Hailing from the Black Fang assassins, Linus joins the fray in a new Grand Hero Battle! Wielding the cooldown-reducing axe, Basilikos, along with Brazen Atk/Spd, Linus is certainly a threat you must be wary of -- and that doesn’t even account for his entourage. Other difficult foes include the sword infantry with Cancel Affinity and the dagger user with the Barb Shuriken and Atk Smoke; if you’re not careful, this map can easily shred you to bits.
The good news is that there’s no reinforcements to be seen here, so what you see is what you get, making Infernal difficulty that much easier to deal with. Careful teambuilding will be key here, as the battle will likely be won before it even starts.
Before you begin teambuilding, it’s completely possible you already possess everything you need to beat this map. Created by Gamepress staff member RedFerrari1998, the video guide below uses only F2P units, an inherited skill, and seals -- see the description for more details. If it doesn’t work for you, though, then read on!
Who to Choose
As is generally true of Grand Hero Battles, the individual units used is very important as they will primarily inform a strategy. There are a few routes one can take depending on what units are personally available, and, of course, adjustment based on the units one possesses is always a possibility.
Baiters
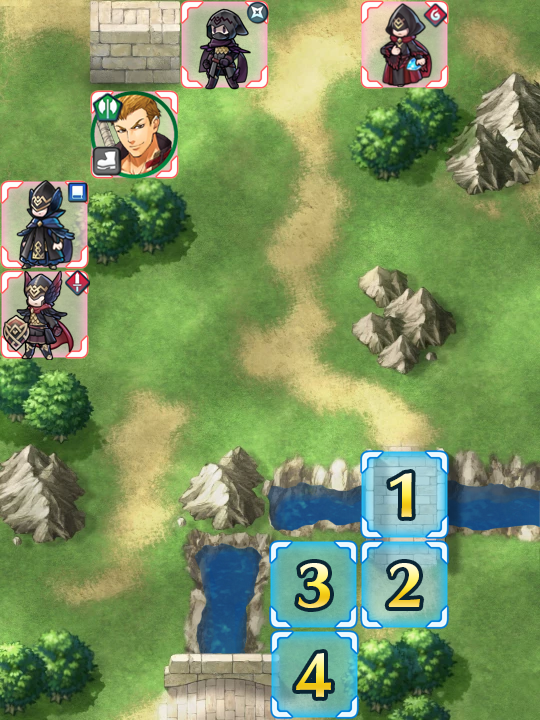
This is one of those maps which won’t start unless you strike or bait, and the absence of trenches makes both options rather compelling. If you do decide to go with the baiting route, though, be aware that the sword infantry is carrying Cancel Affinity, meaning that any blue baiter you decide to use should un-equip Triangle Adept if that is what they normally run in their A-slot.
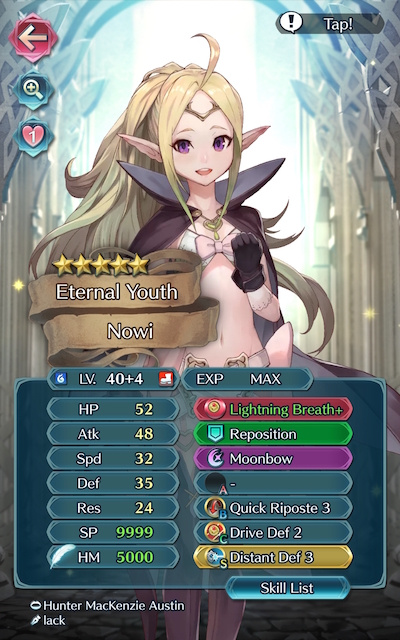
Since baiting across the bridge only requires your unit to withstand two rounds of combat instead of three, you’ll likely want to start there and use a blue tank. Armors such as Fallen Hardin and Distant Counter Effie are able to hit hard very upon counterattacking, especially if they’re making use of Quick Riposte or Vengeful Fighter. Camus performs particularly well with buffs. Nowi, Female Corrin, and Male Kana all boast decent mixed defenses. Legendary Robin is also a potential choice, but may struggle due to her lack of color advantage. An amazing F2P option is Fjorm, who is able to tank the mages with her high Resistance and her exclusive Special, Ice Mirror.
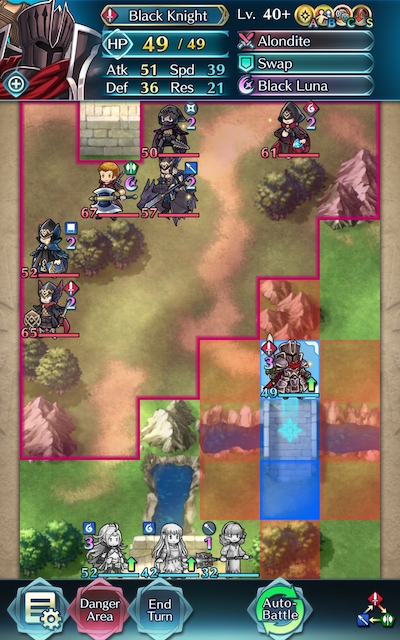
Meanwhile on the other side of the bridge, you’ll probably want to leave a red unit waiting and ready to take care of Linus once he advances. Black Knight, Zelgius, Winter Tharja, Legendary Ryoma, Palla, WT Reinhardt, Xander, Adult Tiki, and Young Tiki are all good options who can take advantage of class-specific buffs. The F2P legend himself Legendary Ike is also a serviceable tank once given a boost to his Defense (through the Fortress Def or Def Tactic seal), through really any sword user with the Close Def seal should be able to survive the blow.
Strikers
Archers are powerful strikers that can either finish off foes on their own or provide an assist. In particular, however, Brave Bow users can be incredibly potent on this map due to their ability to overpower and finish off any foes your tanks may otherwise struggle with. New Year Corrin, Brave Lyn, WF Hinoka, Bridal Cordelia, Klein, and Setsuna are potential strikers you may want to use, with a special mention going to New Year Corrin and Brave Lyn given their F2P status.
Alternatively, melee Brave users are able to hit foes twice without retaliation, and may even quad hit if they outspeed an enemy. Cherche, Cordelia, Hinoka, Elincia, and WT Reinhardt are all great Brave users who can make excellent use of class-specific buffs. Finn is a great F2P unit who would work particularly well in a cavalry team.
Brave and Blade tome wielders can also serve to be useful if your team composition provides them with the appropriate buffs, though speedy mages can also be effective strikers. Tharja, Reinhardt, Tailtiu, Linde, Ishtar, Nino, SF Nino, and WT Olwen are potential options here, especially if they are equipped with a Breaker skill to add to their coverage and are accompanied by a buffbot like Eirika or Ephraim.
Refreshers
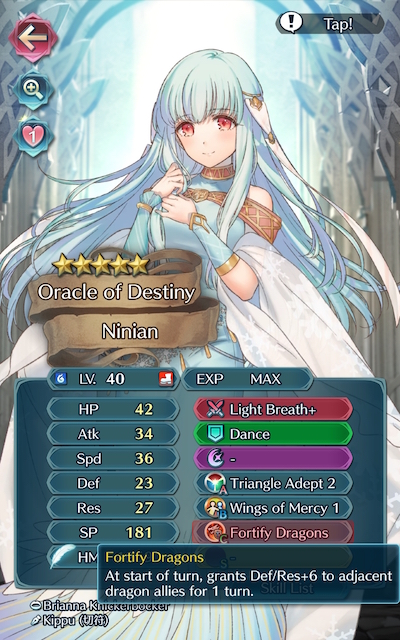
Dancers and Singers help provide support, may even have a decent offensive presence themselves, and can usually tank a hit or two, if need be. Lene, Olivia, Performing Olivia, Performing Inigo, Performing Shigure, Performing Azura, Azura, New Year Azura, Bridal Ninian, Ninian all give the refreshment that high-firepower units need while also possessing the ability to provide an assist to KO an enemy.
Healers
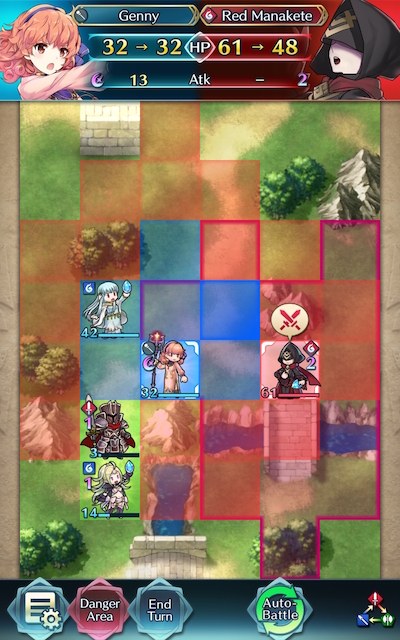
While not generally a great choice over units who can deal heavy damage or refreshers, Healers can be incredibly useful in this Grand Hero Battle due to their ability to provide valuable healing to your tanks. Genny, Priscilla, Elise, Nanna, Wrys, and Lissa are potential additions to a team that may serve you well on this map.
Strategy
Strategizing for this Grand Hero Battle may be challenging, but shouldn’t generally give you too much trouble after some practice due to the absence of reinforcements. While it can be difficult to exactly predict what will happen due to IV / Merge variance, here’s some general tips to get you started.
Devious (In)direction
So you’ve chosen your team and you’re ready to start the map, but there might be something you’ll want to consider before you charge over the bridge. It may be a good idea to leave your red unit behind to deal with Linus later -- in fact, you may even want to move them up a space (still outside of the danger zone, but just barely) to help get them into a more advantageous position for baiting this single foe.
Ducks In A Row
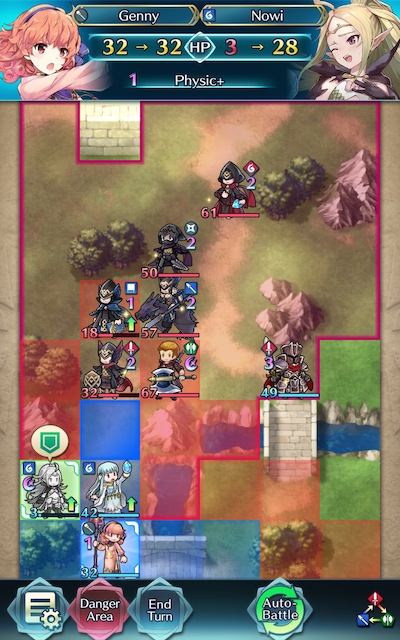
Although usually it’s a good idea to not bunch your units together in order to give yourself some maneuvering room, when you’re relying on buffs to survive rounds of combat, that may not be an option. In that case, healers who carry the staff Physic+ can be excellent allies, as it allows them to heal your tanks at-range and retreat from danger when enemies get too close. You can even combine it with Wings of Mercy for even greater mobility!
Gravity Gravitas
Although it may not see much proliferance in the meta or general use, being able to limit your opponent’s movement range is exceedingly useful. Leo’s exclusive tome, Brynhildr, as well as the Gravity stave can help you enact some serious crowd control exactly when you need it -- dealing damage can sometimes be less important than getting your units out of trouble when they’re cornered.
Wind Beneath My Wings
There’s a reason almost every refresher you encounter in the Arena uses Wings of Mercy as their B-slot skill, and Infernal maps are a constant reminder of how useful this skill is. Black Knight even possesses this skill natively, allowing him to bypass movement limitations entirely and warp across the map to an injured ally. If you’re stuck at a certain turn because one of your units is too overextended, Wings of Mercy (as well as Escape Route) can be their ticket away from the frontline.
Precarious Pivot
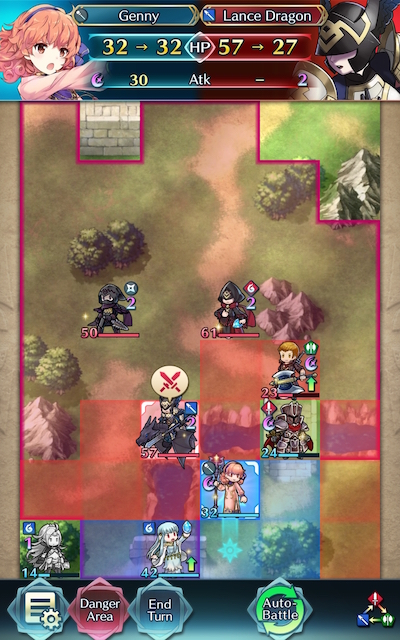
Something that might catch you by surprise is the red dragon’s Pivot assist, which allows them to utilize their flier friend and bypass the bridge entirely. If you suddenly find yourself with this enemy smack-dab in the middle of your ranks, don’t panic! Focus on KOing whichever enemy is most threatening and do your best to tank whichever units you can’t outright defeat. If you need your dancer to tank and the unit that they’re tanking is the opposite color, consider using Triangle Adept or Gem weapons to make the matchup more polarizing. You can also use Wings of Mercy or Escape Route to, well, escape.

Kinetic Kiting
Once victory is in sight, it’s always better to be safe than sorry. Assuming you’re not recording yourself while playing this map, there’s always a chance you’ll forget exactly what you did to get this far -- and it would be a shame to have to build up your strategy once again from scratch.
If you have a ranged unit and a dancer, you can usually safely chip away at foes from a distance until they can be KO’d by your weakened tanks. Attacking, being refreshed, and retreating is called kiting, and is a good skill to learn for Infernal maps. A Gravity effect will once again make this much easier, but so will any kind of Attack or Speed debuff.
If At First You Don’t Succeed
Don’t be fooled by video walkthroughs of any Grand Hero Battle that you watch -- it’s very rare for anyone to beat high-difficulty content (or record a video of themselves doing so!) on their first try. Additionally, the potential variance in unit builds that Skill Inheritance brought along with the random nature of summoning has resulted in pretty much every single summoner having different “building blocks” to work with. This, when combined with the high difficulty level of Infernal, may prove frustrating while someone is trying to find the right combination of units and moves. The key thing to keep in mind is that it may take some light Skill Inheritance and Seal shuffling as well as multiple tries of the map to find a strategy that works for you. Every single turn you complete gets you one step closer to completing the puzzle. Finally, reading about or watching videos of successful strategies may also help you break through a particularly difficult turn that you can’t complete, or may give you ideas of a new unit to use.
Map Enemies
- Hard
- Lunatic
- Infernal
| HP | ATK | SPD | DEF | RES | |
|---|---|---|---|---|---|
| 42 | 45 | 25 | 23 | 13 | |
| Weapon | Basilikos | A | Brazen Atk/Spd 3 | ||
| Support | Pivot | B | |||
| Special | Luna | C | Drive Def 2 | ||
| HP | ATK | SPD | DEF | RES | |
|---|---|---|---|---|---|
| 31 | 28 | 30 | 9 | 24 | |
| Weapon | Barb Shuriken | A | Sturdy Blow 2 | ||
| Support | Reciprocal Aid | B | Renewal 2 | ||
| Special | Iceberg | C | Atk Smoke 2 | ||
| HP | ATK | SPD | DEF | RES | |
|---|---|---|---|---|---|
| 38 | 37 | 26 | 24 | 23 | |
| Weapon | Water Breath | A | Fury 3 | ||
| Support | Pivot | B | |||
| Special | Moonbow | C | Drive Atk 1 | ||
| HP | ATK | SPD | DEF | RES | |
|---|---|---|---|---|---|
| 33 | 29 | 24 | 14 | 20 | |
| Weapon | Blárowl | A | Swift Sparrow 2 | ||
| Support | B | Guard 2 | |||
| Special | Glimmer | C | Drive Spd 1 | ||
| HP | ATK | SPD | DEF | RES | |
|---|---|---|---|---|---|
| 41 | 33 | 323 | 23 | 16 | |
| Weapon | Slaying Edge | A | HP/Spd 1 | ||
| Support | B | Cancel Affinity 3 | |||
| Special | Vengeance | C | Fortify Def 2 | ||
| HP | ATK | SPD | DEF | RES | |
|---|---|---|---|---|---|
| 58 | 53 | 33 | 32 | 19 | |
| Weapon | Basilikos | A | Brazen Atk/Spd 3 | ||
| Support | Pivot | B | |||
| Special | Luna | C | Drive Def 2 | ||
| HP | ATK | SPD | DEF | RES | |
|---|---|---|---|---|---|
| 43 | 40 | 38 | 13 | 32 | |
| Weapon | Barb Shuriken+ | A | Sturdy Blow 2 | ||
| Support | Reciprocal Aid | B | Renewal 3 | ||
| Special | Iceberg | C | Atk Smoke 3 | ||
| HP | ATK | SPD | DEF | RES | |
|---|---|---|---|---|---|
| 52 | 49 | 33 | 32 | 31 | |
| Weapon | Water Breath+ | A | Fury 3 | ||
| Support | Pivot | B | |||
| Special | Moonbow | C | Drive Atk 2 | ||
| HP | ATK | SPD | DEF | RES | |
|---|---|---|---|---|---|
| 44 | 41 | 32 | 20 | 28 | |
| Weapon | Blárowl | A | Swift Sparrow 2 | ||
| Support | B | Guard 3 | |||
| Special | Glimmer | C | Drive Spd 2 | ||
| HP | ATK | SPD | DEF | RES | |
|---|---|---|---|---|---|
| 56 | 45 | 33 | 30 | 22 | |
| Weapon | Slaying Edge+ | A | HP/Spd 2 | ||
| Support | B | Cancel Affinity 3 | |||
| Special | Vengeance | C | Fortify Def 3 | ||
| HP | ATK | SPD | DEF | RES | |
|---|---|---|---|---|---|
| 67 | 57 | 36 | 35 | 21 | |
| Weapon | Basilikos | A | Brazen Atk/Spd 3 | ||
| Support | Pivot | B | Wrath 3 | ||
| Special | Luna | C | Drive Def 2 | ||
| HP | ATK | SPD | DEF | RES | |
|---|---|---|---|---|---|
| 50 | 43 | 42 | 15 | 35 | |
| Weapon | Barb Shuriken+ | A | Sturdy Blow 2 | ||
| Support | Reciprocal Aid | B | Renewal 3 | ||
| Special | Iceberg | C | Atk Smoke 3 | ||
| HP | ATK | SPD | DEF | RES | |
|---|---|---|---|---|---|
| 61 | 52 | 36 | 35 | 34 | |
| Weapon | Water Breath+ | A | Fury 3 | ||
| Support | Pivot | B | Bowbreaker 3 | ||
| Special | Moonbow | C | Drive Atk 2 | ||
| HP | ATK | SPD | DEF | RES | |
|---|---|---|---|---|---|
| 57 | 49 | 30 | 44 | 21 | |
| Weapon | Slaying Lance+ | A | Fortress Def 3 | ||
| Support | B | Hit and Run | |||
| Special | Bonfire | C | Drive Spd 2 | ||
| HP | ATK | SPD | DEF | RES | |
|---|---|---|---|---|---|
| 52 | 44 | 35 | 22 | 31 | |
| Weapon | Blárowl+ | A | Swift Sparrow 2 | ||
| Support | B | Guard 3 | |||
| Special | Glimmer | C | Drive Spd 2 | ||
| HP | ATK | SPD | DEF | RES | |
|---|---|---|---|---|---|
| 65 | 48 | 36 | 33 | 24 | |
| Weapon | Slaying Edge+ | A | HP/Spd 2 | ||
| Support | B | Cancel Affinity 3 | |||
| Special | Vengeance | C | Fortify Def 3 | ||
User Submitted Teams
Nino and Shigure can be changed for Eir and little Azura
This is for the Lunatic with Armor mission. Notes:
* Hector has base kit plus Swap and DD seal.
* Henry runs a support with Hector, and kept Armor March.
* The secondary star, Arden, runs Wings of Mercy and Ward Armor along with Drive Atk.
* Any Armor Marcher will do for the last slot, though one with a buff of some sort preferred. Alternatively, other means of mobility acceptable.
Turn one: Everyone moves forward, nothing special here.
Turn two: Hector, now under Even Res Wave, moves within range of the three units. Henry nudges right behind him as a support, while Arden moves next to Henry. The sword, dagger, and mage will SD.
Turn three: Since Linus is now closing in, Arden utilizes WoM to rush to Hector's side. If you cannot one-round Linus, this is where Henry comes in so he can help Arden with Linus, but if you can, good for you. Hector later swaps so Arden is moved away from the manakete, who will SD on Hector.
INITIAL SETUP :
Bait (Left of the map): Fjorm
Buffer of Fjorm : Olivia
Standby at the right : Ike and Brave Lyn
After the initial confrontation (Fjorm), move Fjorm and Olivia back to the right. Use Ike to bait red/green enemies, destroy with Brave Lyn enemies on reach.
Team built around utilizing L!Robin tanking skills between Dragonskin, Ally Support, Distant Def 2, and Ward Fliers. L!Robin is great for baiting units use her to lure the Mages with the conjunction with those buffs. The key is to position her in front of the mountain and take care of the other units before dealing with Linus; this is important on infernal because he has Luna charged. When Linus approaches, have Camilla bait him; if you engage he will KO you with Luna next. Once Linus is defeated, have Shigure take care of Red Manakete.


