


Flier Guides
Positioning: Utilizing Assists
Overview
Positioning with fliers is extremely forgiving, thanks to their all-terrain mobility and their access to unique positioning skills such as Flier Formation (which is even available in a Seal). This allows them to move almost freely along the battlefield and utilize unexpected attack routes to KO vulnerable enemy units. This is particularly useful when considering their weakness to bow units because on many maps they are able to manipulate their superior mobility to reach bow units before a bow unit could reach them, despite bow’s superior range. This is demonstrated in the screenshots below:
Offensive Repositions
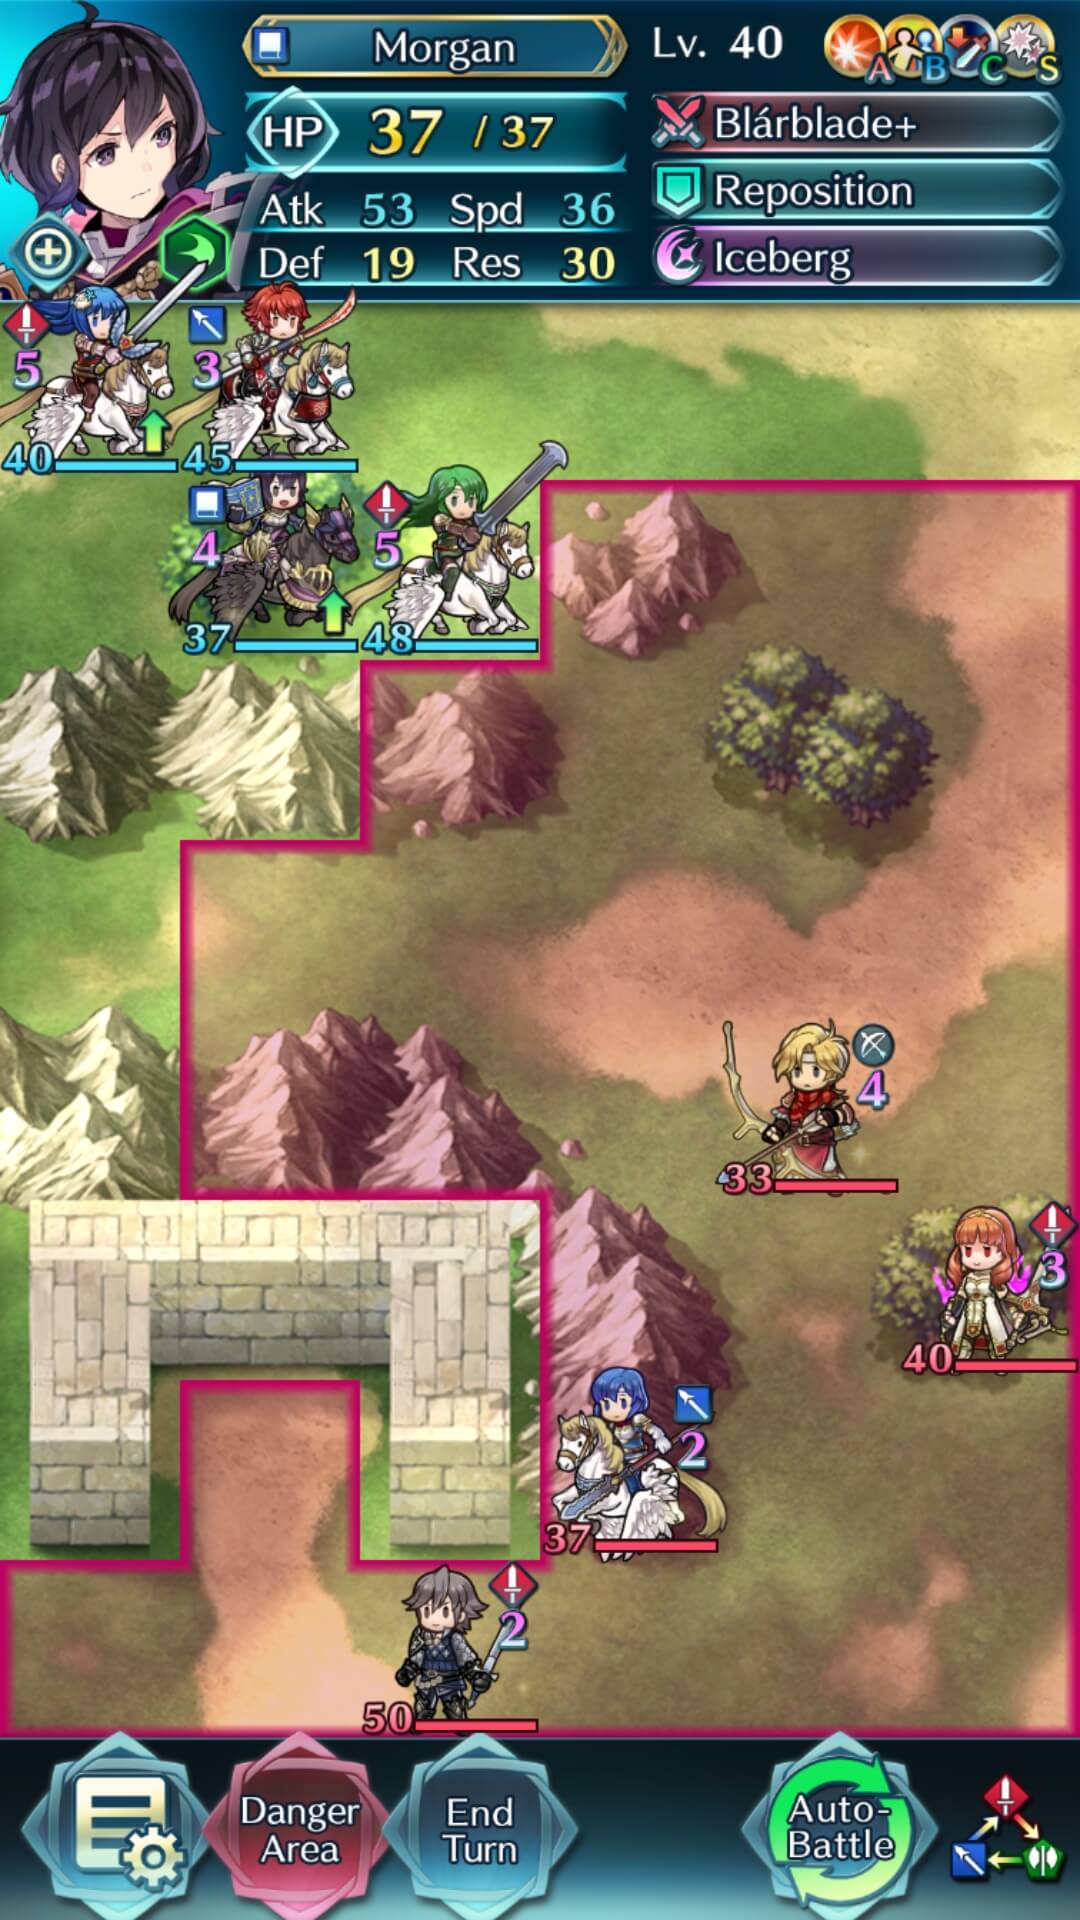
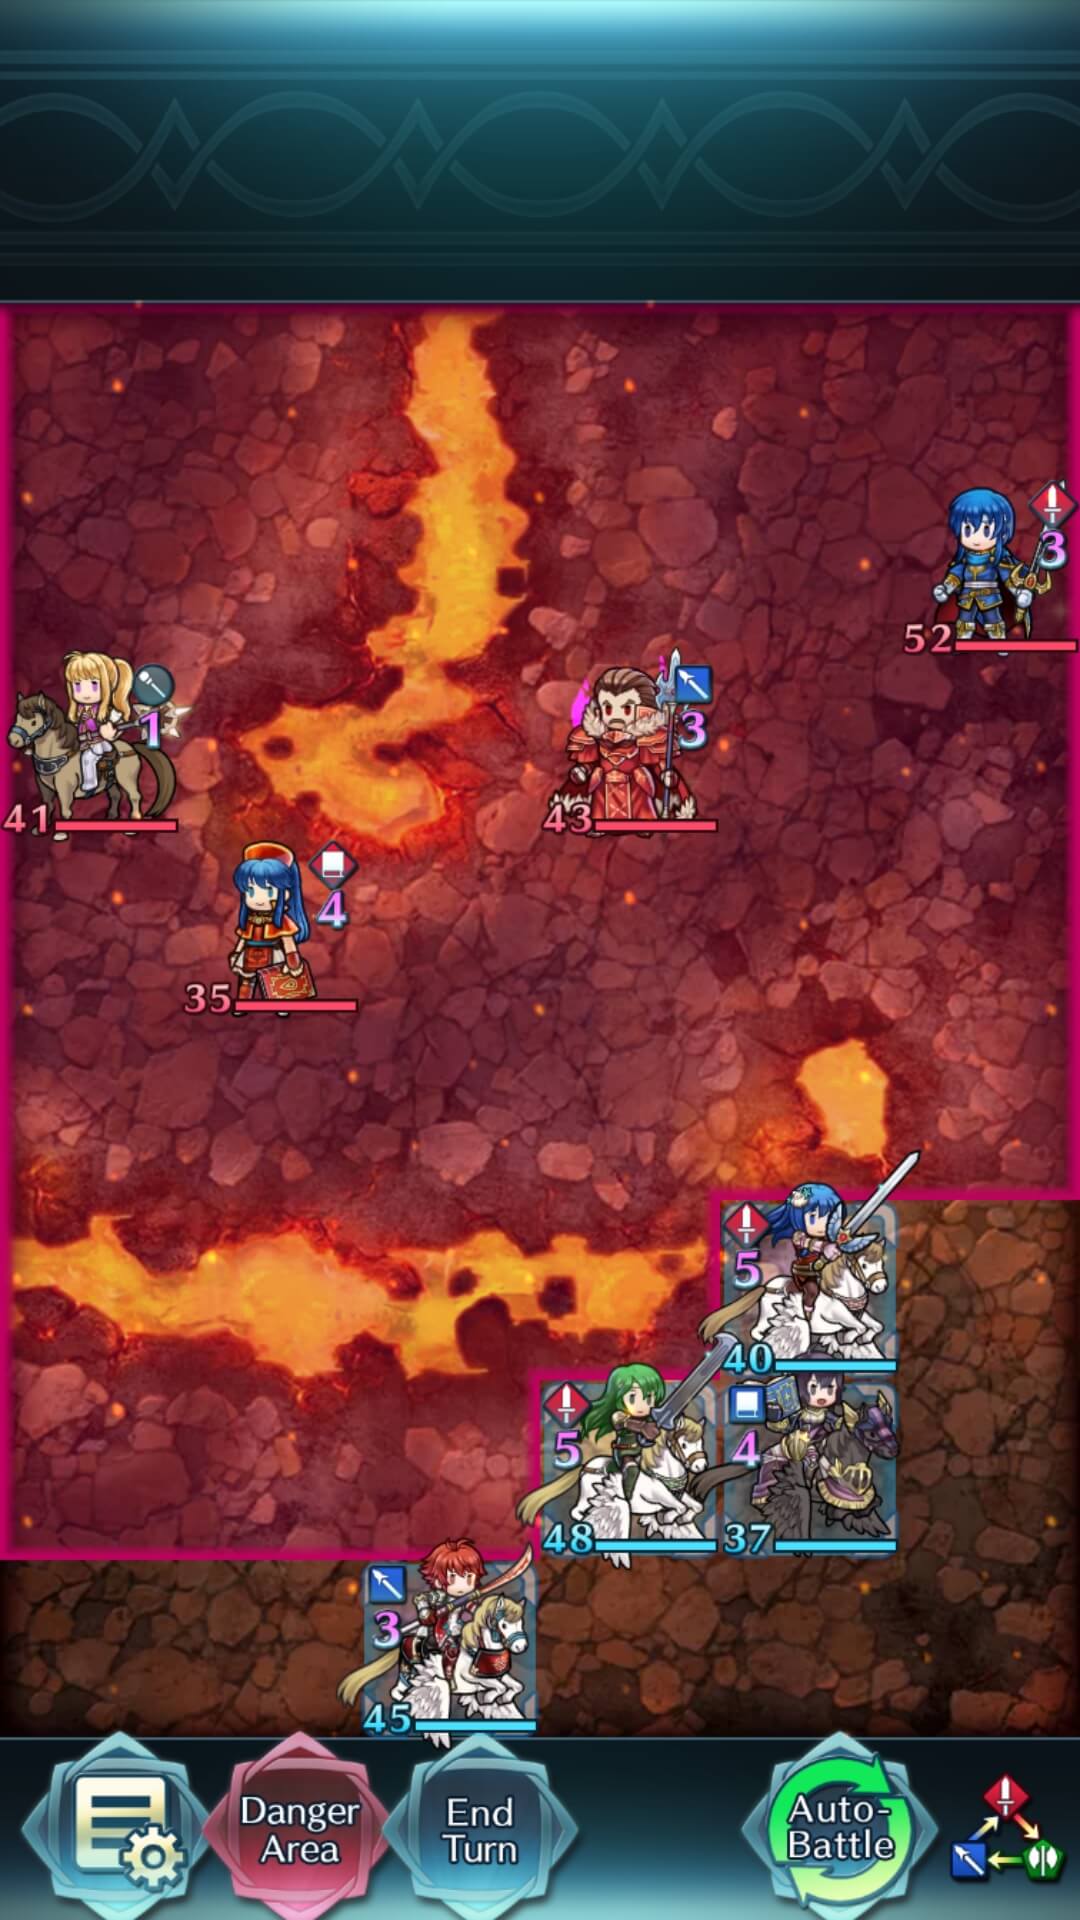
Here we see my flier team up against an archer, Jeorge. Because of his range, it would be tedious and perhaps even difficult to find a way to initiate on him if my units could not fly over mountains.

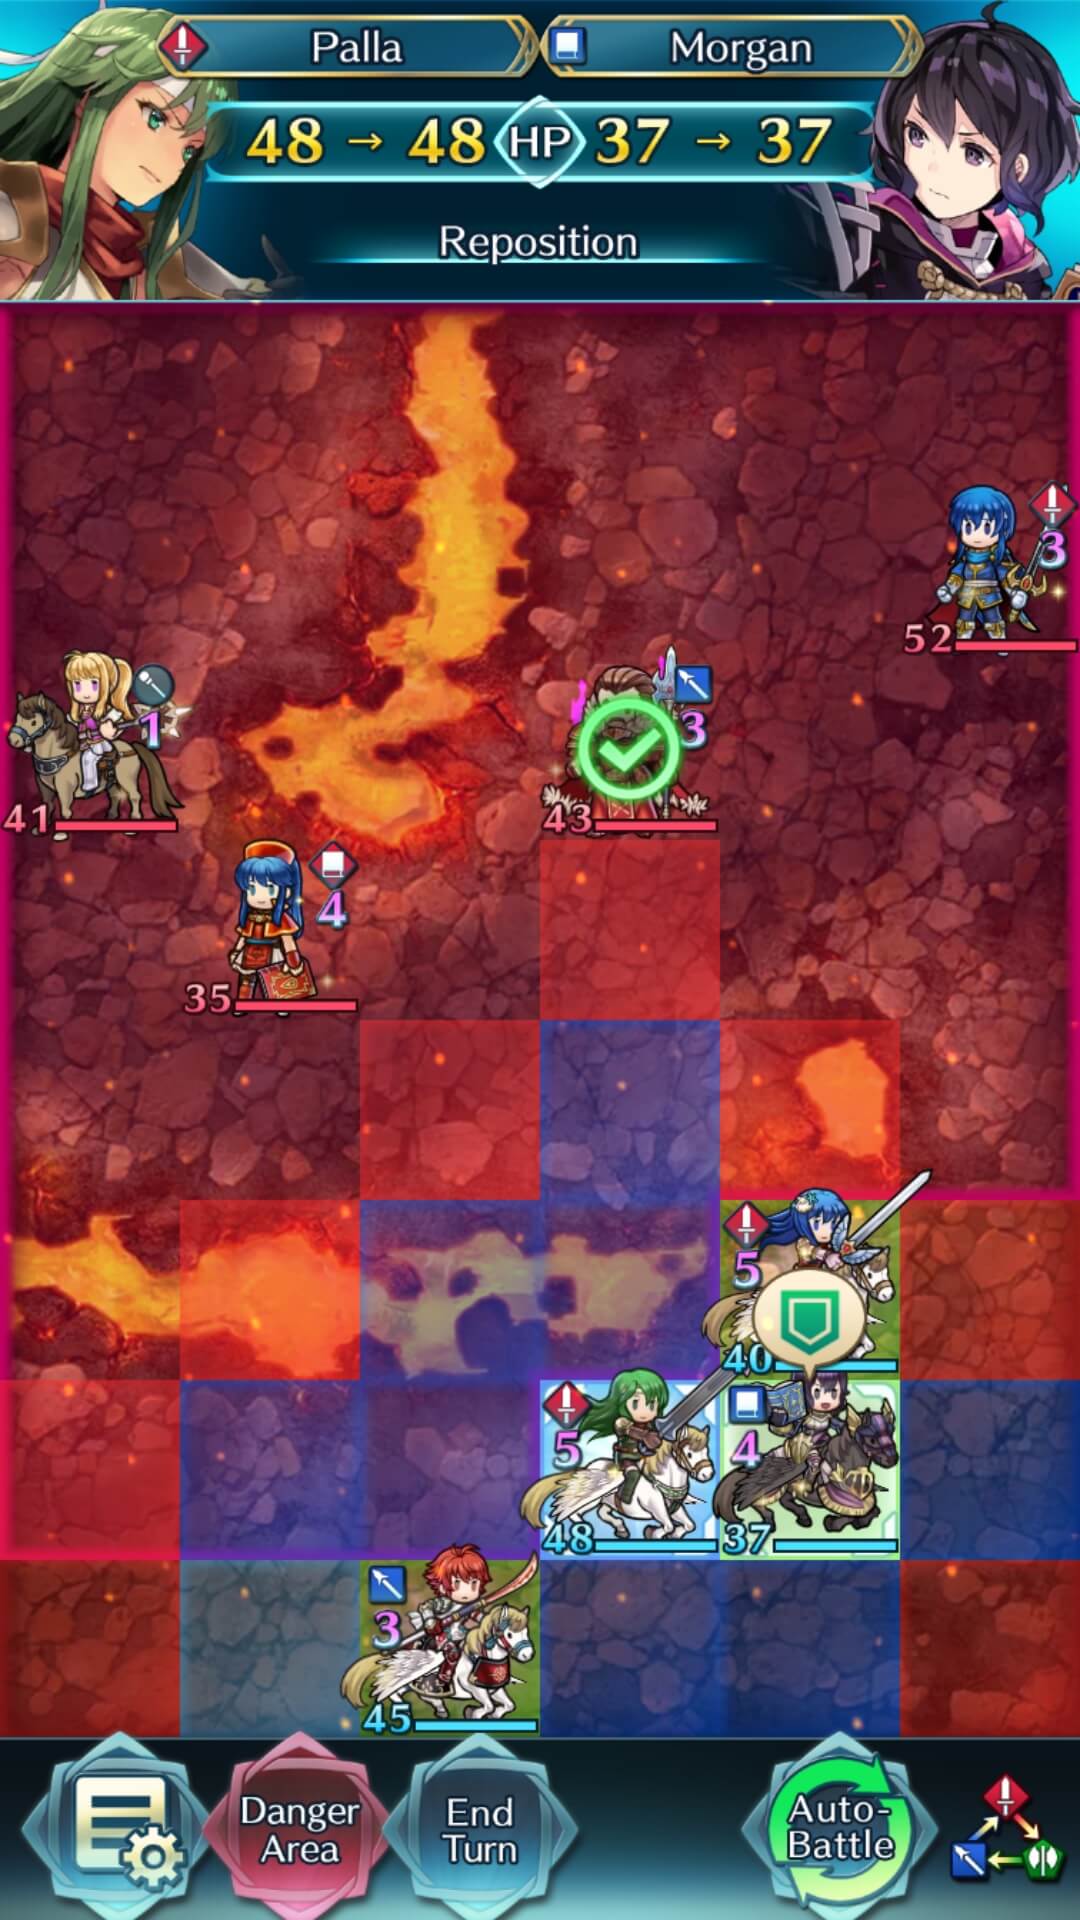
Thankfully, they can! I use F Morgan to reposition Palla in a “leap frog” motion. Leap frog repositions- moves where you use one unit to ‘skip’ over another and Reposition them to their opposite side- are extremely useful in flier emblem, as they can allow your flier units to have superior range to even cavalry and lets them utilize their all-terrain movement to initiate on enemy units who are a fair distance away.
This is an example of an offensive Reposition, or, utilizing the Reposition Assist skill to maneuver a unit close enough to an opponent to strike. Through offensive Repositions, units can vastly exceed their normal range.
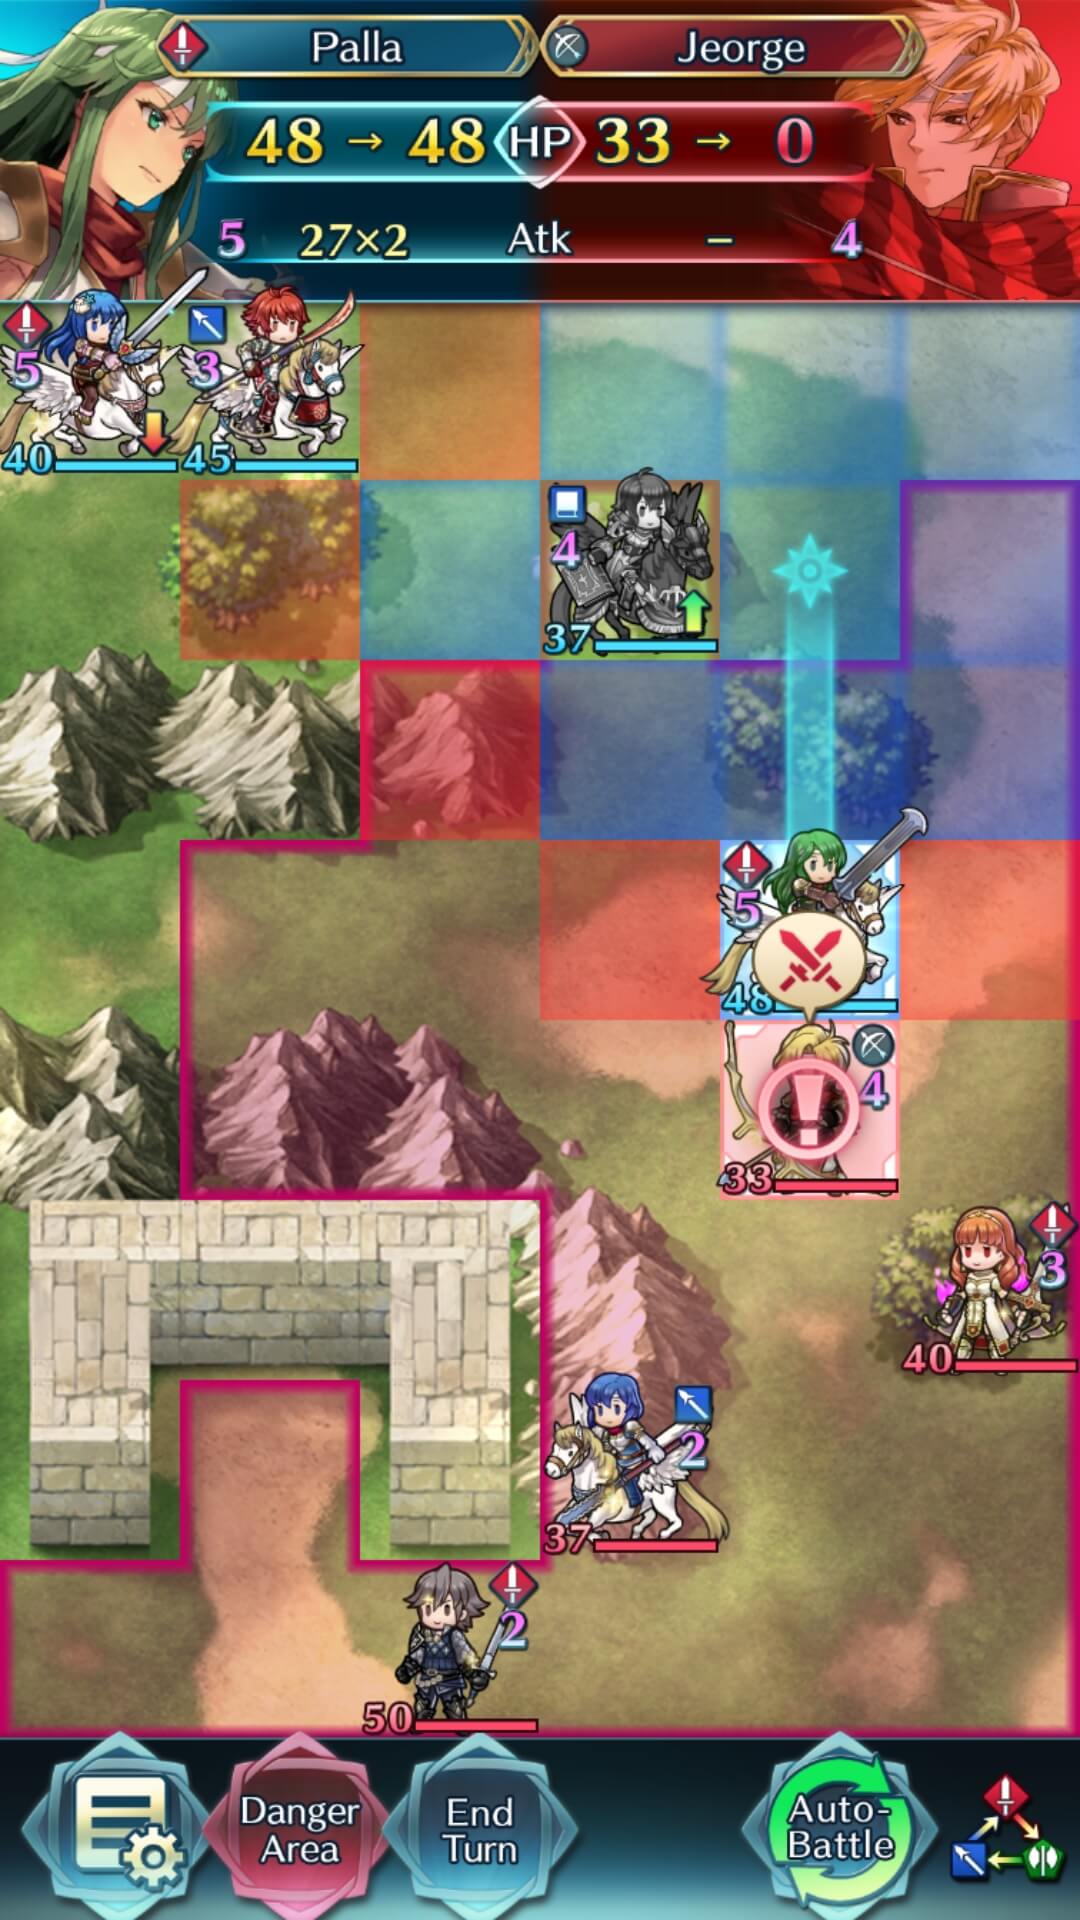
With Palla now on the other side of F Morgan, she can safely push in to initiate on Jeorge, KOing him in one turn and removing the threat of a bow unit.
Defensive Repositions
Reposition can be used offensively or defensively. In the previous example, it was used purely offensively, to put a Player Phase unit within range for them to make an attack. In this next example, we’ll use Reposition both offensively and defensively, while seeing how the mobility of flier type units can really come in handy.
Here’s a familiar map. Let’s say that I want to KO Lilina, but I don’t want to engage with any of the other units in the next turn. This sort of positioning is vital if you’re playing against an enemy team with a high value unit like a Dancer or Blade tome mage who could ruin your day, nestled in the middle of their team. Utilizing both offensive and defensive repositioning, we can move a unit in for a quick assassination and get them out to safety.
F Morgan will be our attacking unit. We have Palla Reposition F Morgan to her other side to put her in range of Lilina.
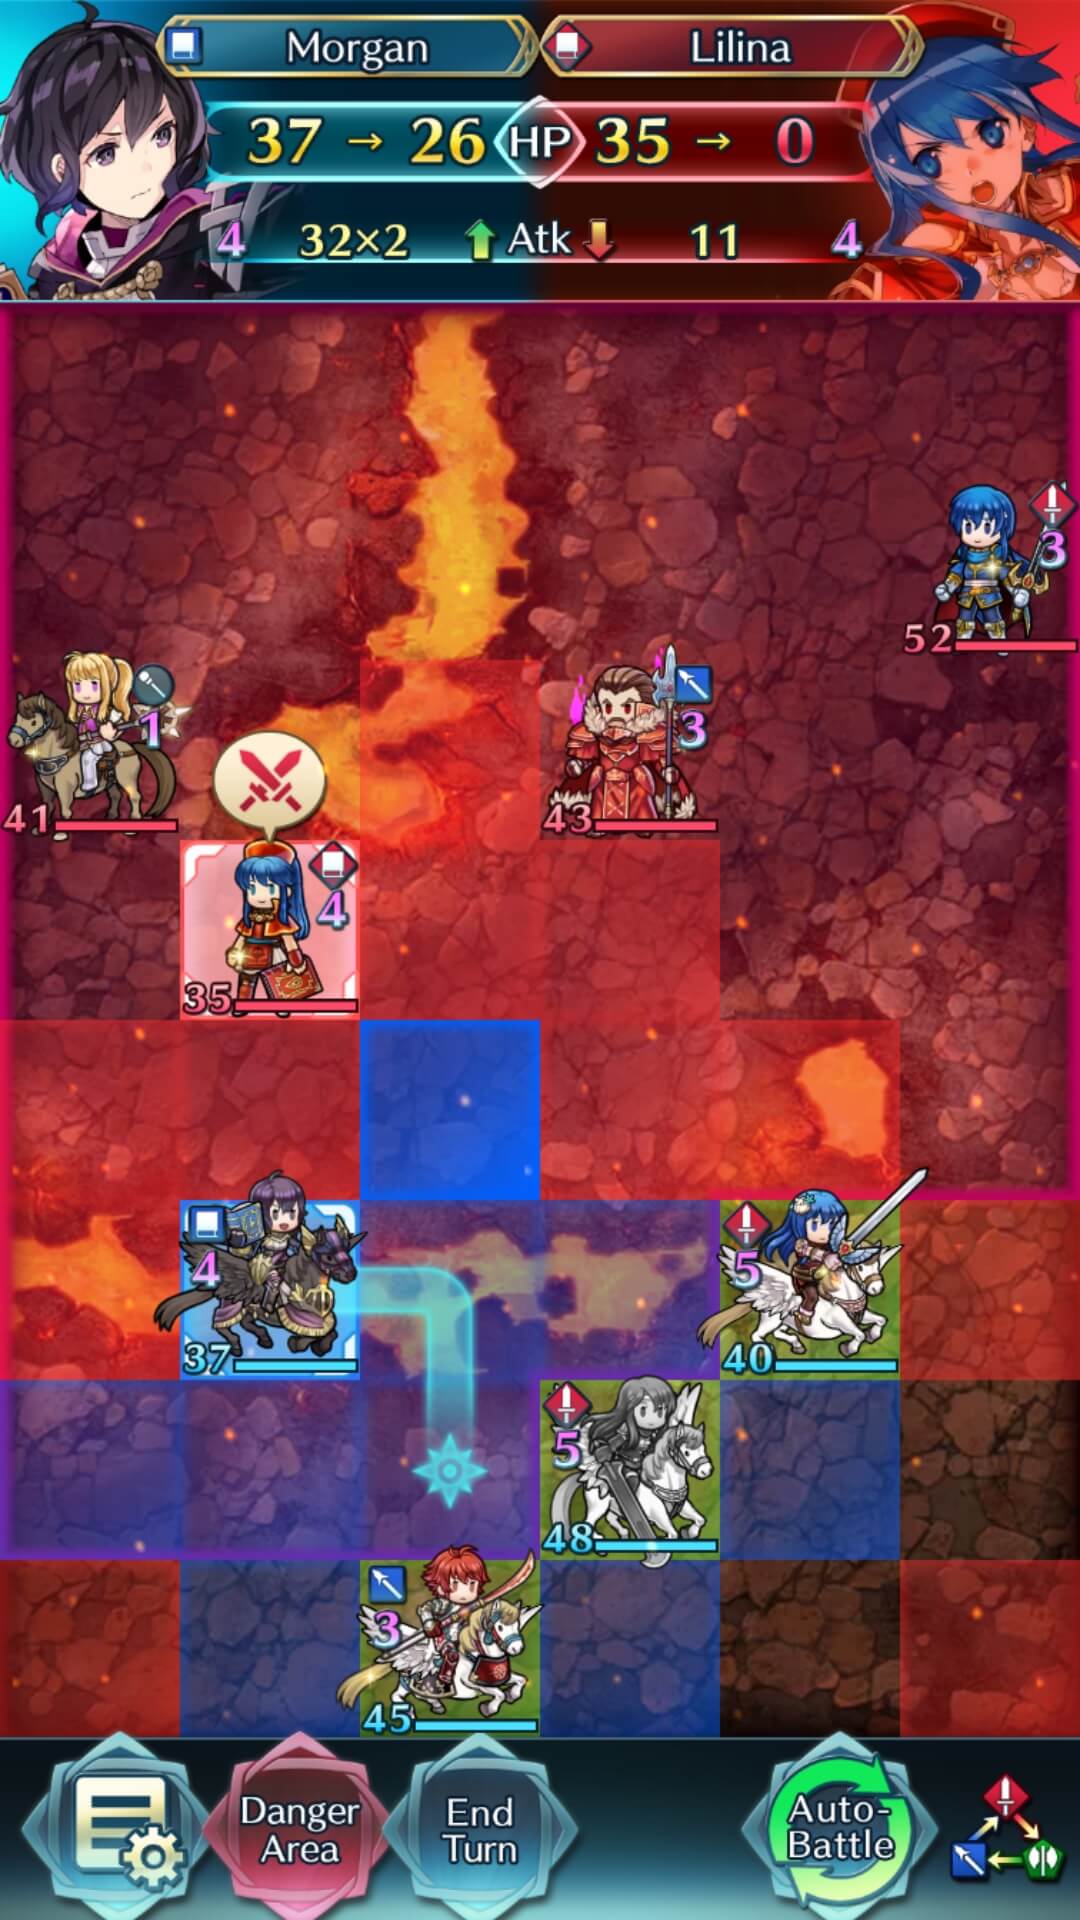
Using flier mobility, we have F Morgan fly over the untouchable lava on this map to attack Lilina for an easy KO.

After Lilina is taken care of, F Morgan is still in enemy range. If Clarine were a bigger threat, like Cecilia or Brave Lyn, we’d want to get all of our fliers out of range immediately. This is done through defensive Repositions. First, Caeda uses Reposition to move F Morgan to a safe tile. This leaves Caeda still in an unsafe tile.
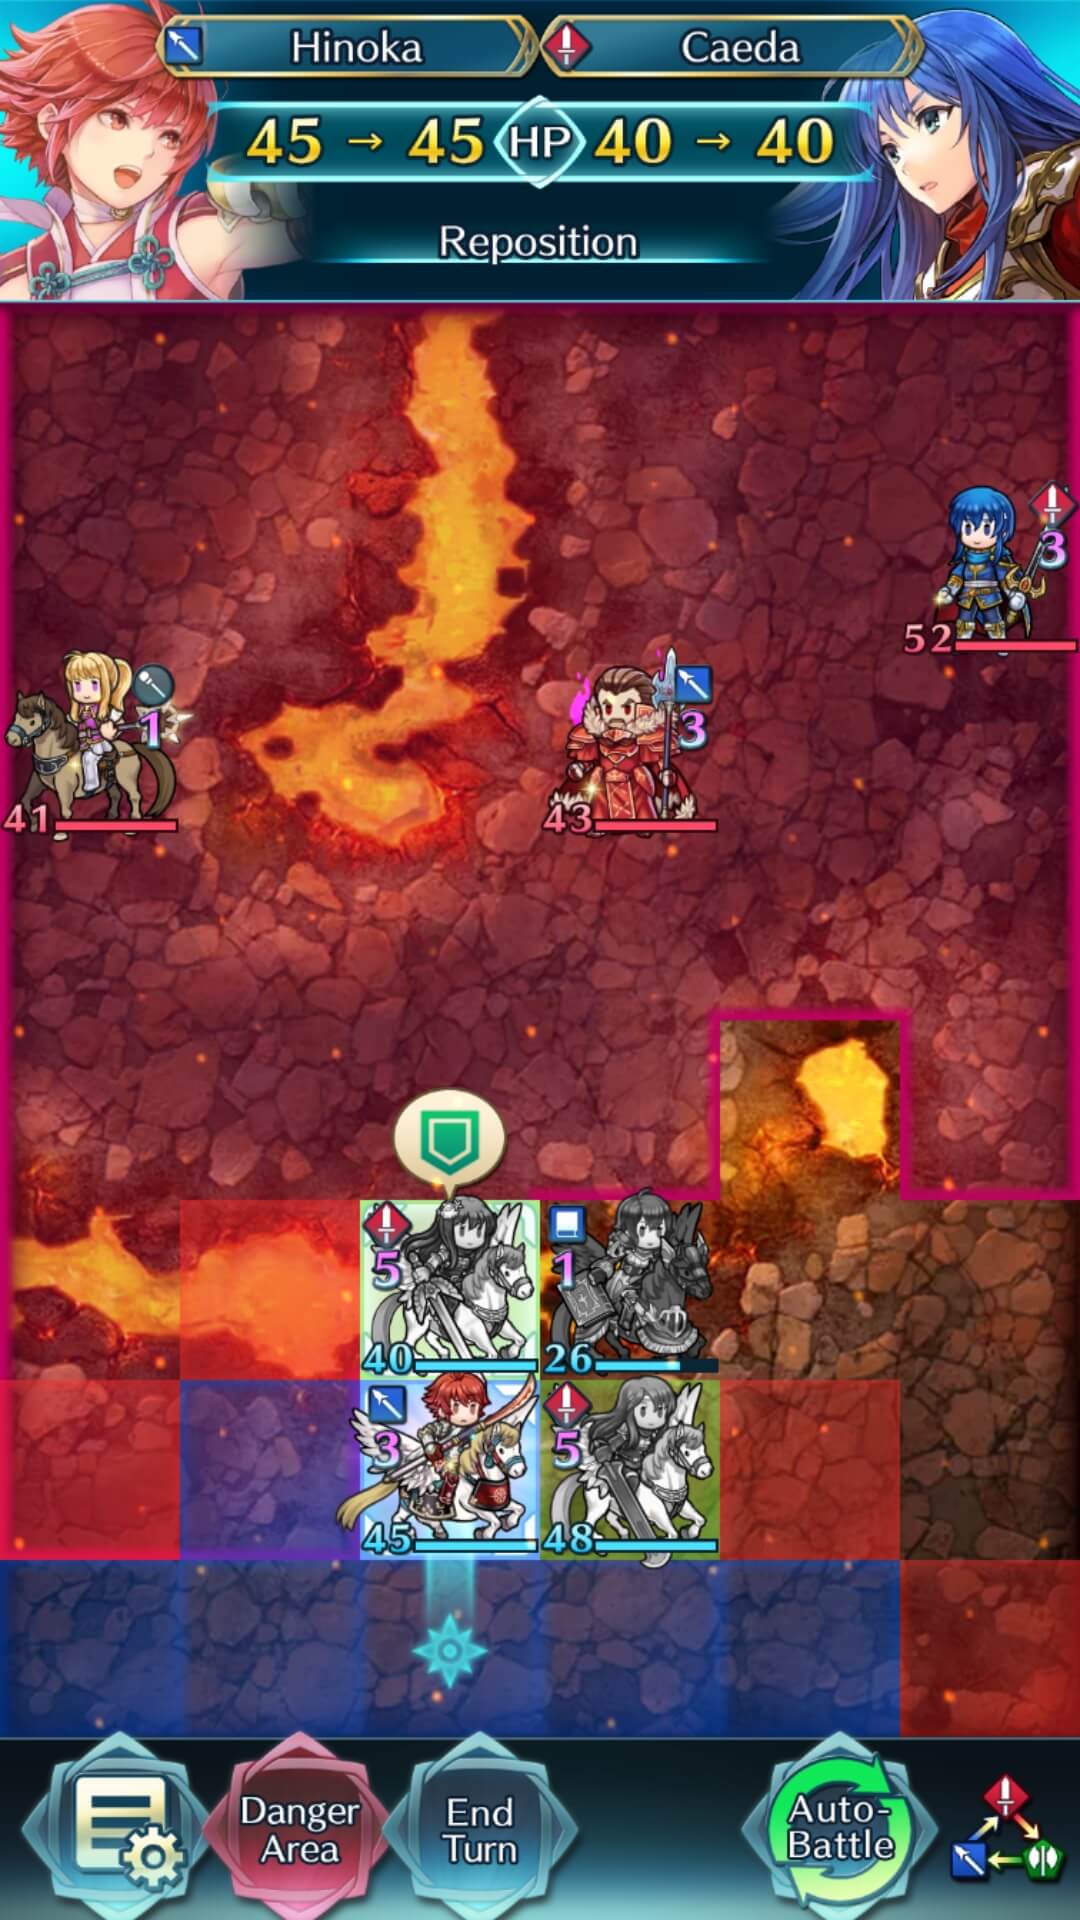
And finally, we use our fourth flier, Hinoka, to reposition Caeda out and ensure that everyone is safely outside of enemy range, leaving them untouchable for the next Enemy Phase, despite how deep F Morgan went into the backline to assassinate a key unit.
Because of this positioning utility, Reposition is hands down the best assist skill for all fliers. It’s an excellent tool that pairs very well with their natural movement and helps them to get in and out of engagements, essentially allowing them to pick and choose their most advantageous battles.
Flier Movement Skills
As one of the more mobile unit types, it makes sense that flier units have exclusive skills to allow both them and their allies to take advantage of their mobility. While these skills don't help fliers out in combat at all, they can be very useful in positioning in order to force advantageous matchups.
Flier Formation
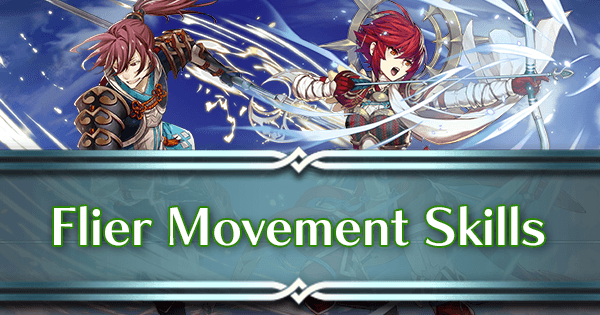
Introduced on Elincia, Flier Formation is a skill which allows a unit to move to any space adjacent to an ally within 2 spaces of them. Once in that space, the unit can attack an enemy unit or use an assist skill. Below is an example of how Flier Formation works:
Hinoka has Flier Formation. This skill allows her to move within adjacent tiles of any flier within two spaces of her. Utilizing this skill, she can move to Subaki's right, left, or in front of him, for 1 extra tile of movement.
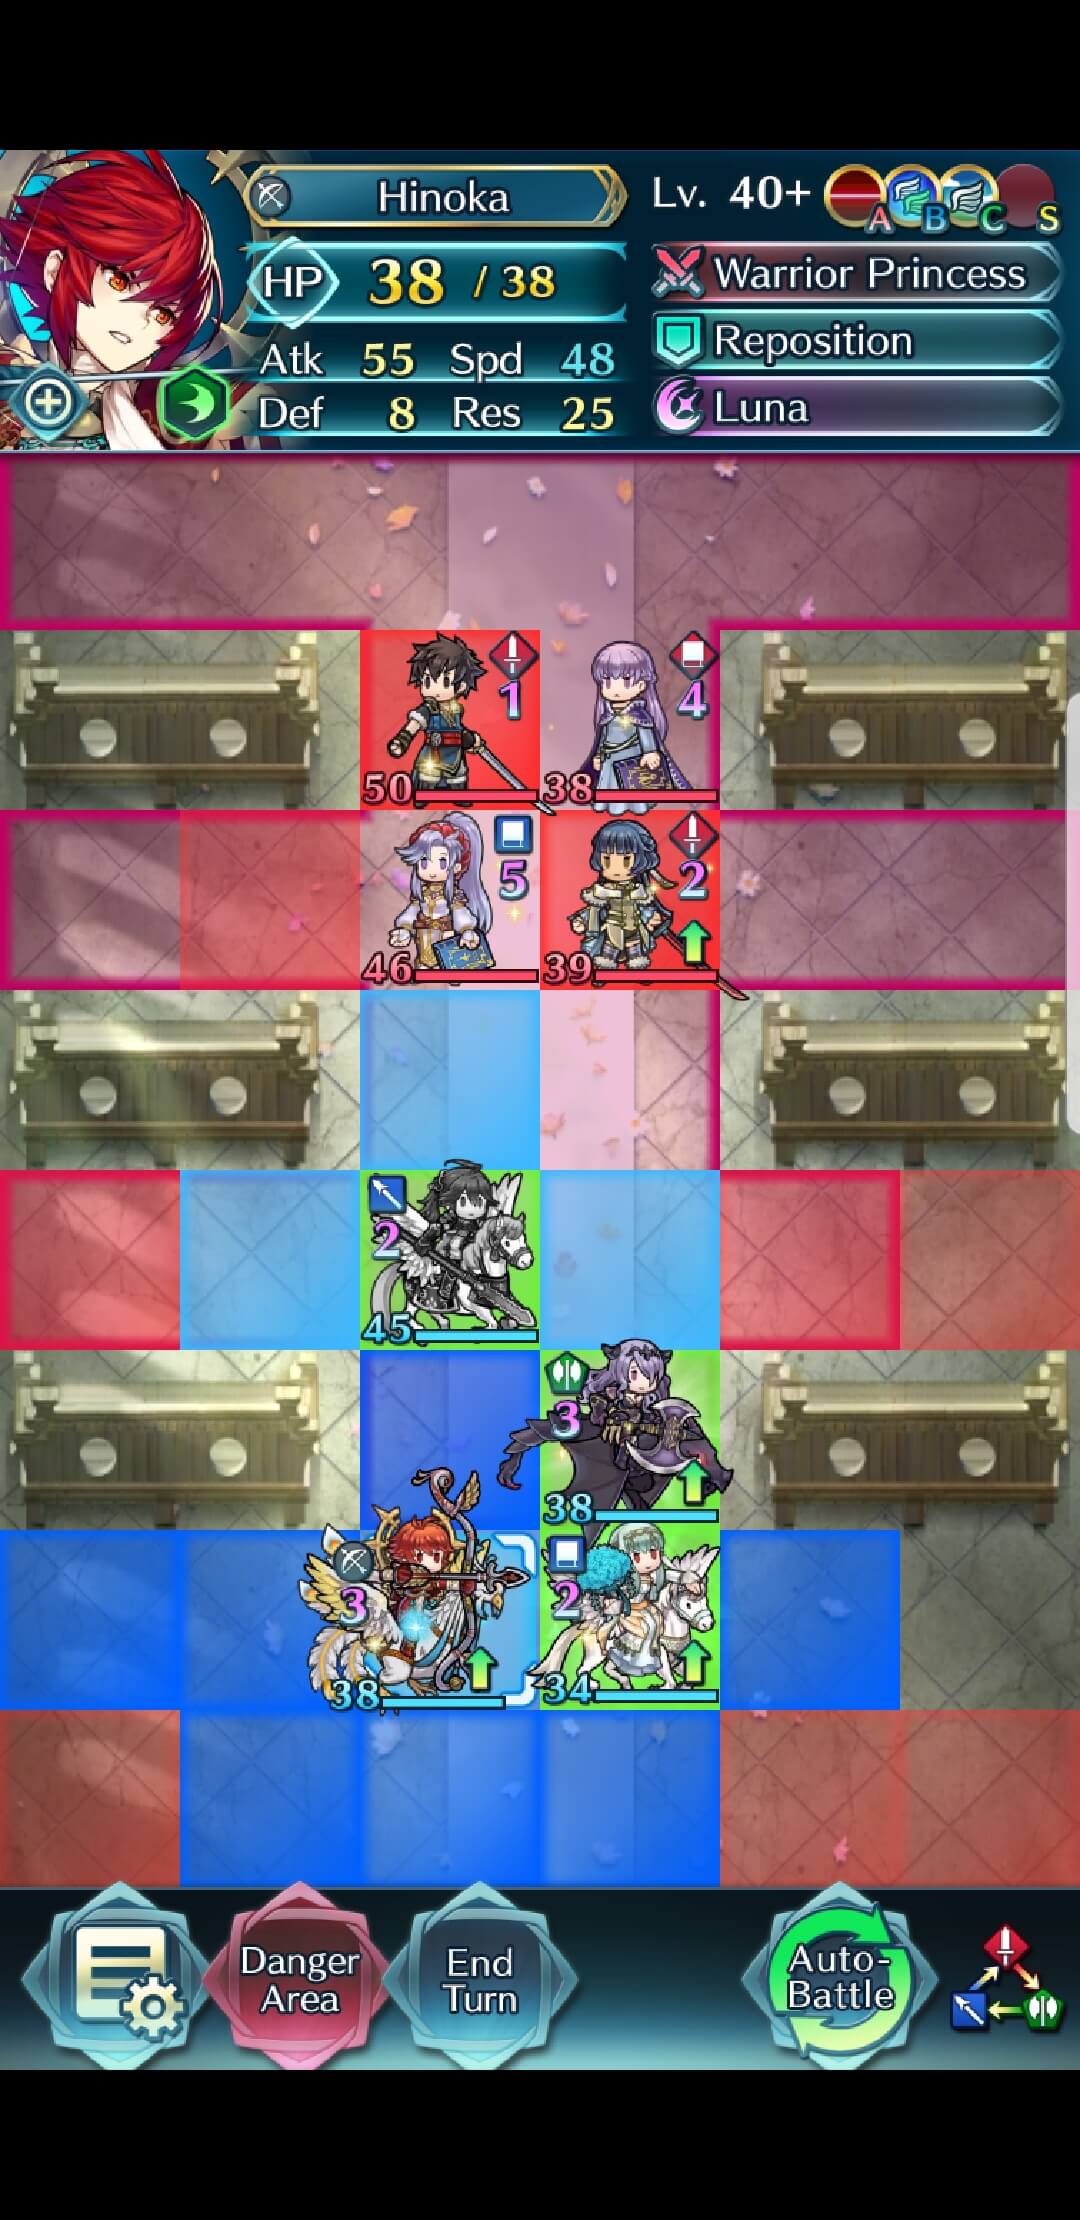
Hinoka can use this mobility to attack Athena, who is 5 tiles away from her starting position!
Flier Formation is generally best on units who don't need their B/S slot for combat purposes. The drawback to Flier Formation is that the positioning of your moving unit is very dependent on the position of another unit. Because of this, the best units to utilize Flier Formation are typically ranged units (able to move to the left or right of a melee unit, attack the enemy that the melee unit is engaged with and have a wider attack range for more flexibility in one spot) or dancers (able to position in a safer spot away from danger while simultaneously being able to dance the unit they're using to position).
Flier Guidance
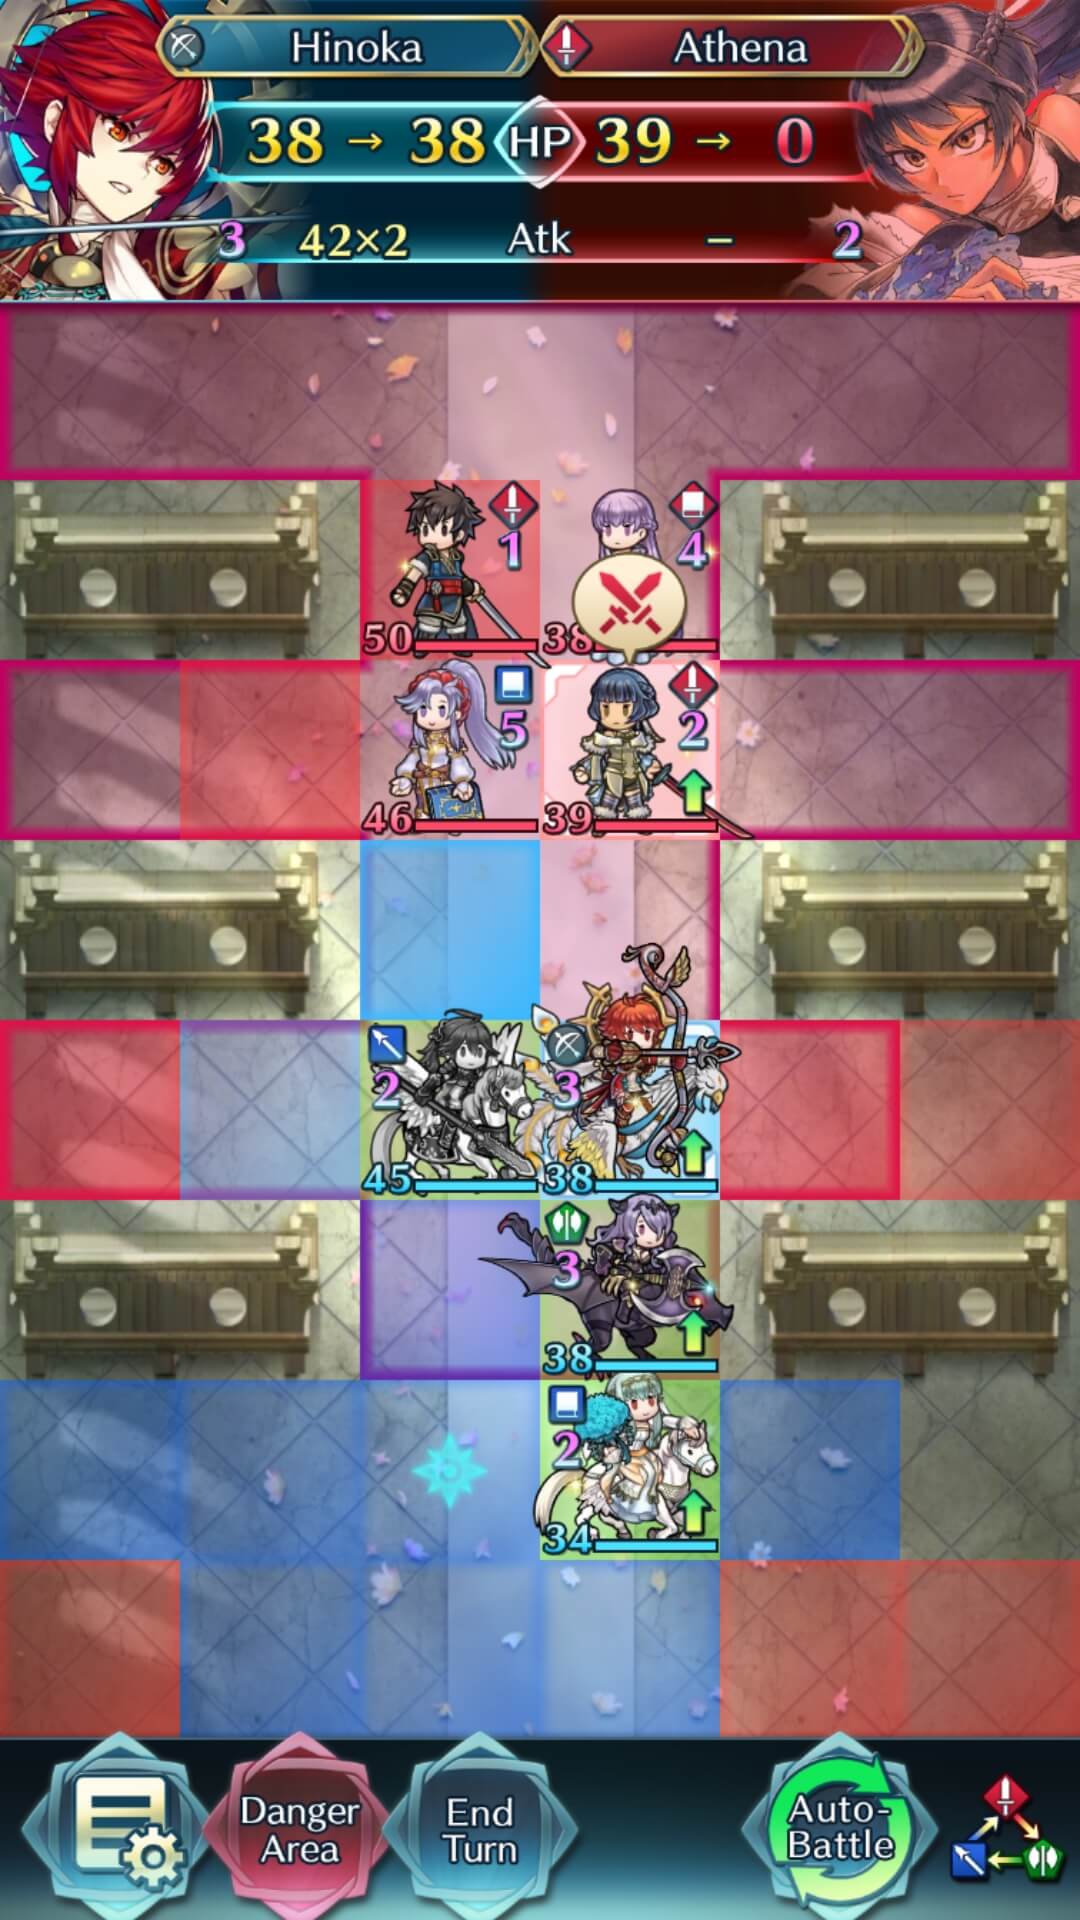
This skill works as a reverse Flier Formation. Introduced on WF Hinoka, Flier Guidance allows other units to position around the unit carrying the skill, as long as they are within 2 tiles of the unit. Below is an example of Flier Guidance:
Here, Hinoka has moved to the tile diagonally from Subaki, which the game counts as being 2 tiles away. Because Hinoka has Flier Guidance, Subaki is able to use Hinoka's positioning to put himself in front of either Cain or Amelia to attack them.

Of course, Subaki attacks Cain for an easy KO.
Flier Guidance works best on units who don't need their C slot for combat purposes. This skill is found naturally on Hinoka's Spear and WF Hinoka has the skill on her C slot.
Unlike Flier Formation, Flier Guidance tends to work best on melee fliers and units who play a central part in your flier team. These can be buffers, like NY Azura or Camilla, or it can be units who need supporting, like many Player Phase units. If a unit carries Flier Guidance, dancers can teleport to tiles adjacent to them, as can ranged units who can attack a unit that the melee unit is engaged with.
Aerobatics
Unlike Flier Formation and Flier Guidance, Aerobatics works mainly on mixed teams. This skill allows your flying unit to position themselves next to an infantry, armored, or cavalry ally within 2 tiles- much like Flier Formation, but for other emblem move types. Shown below is an example of Aerobatics in play.
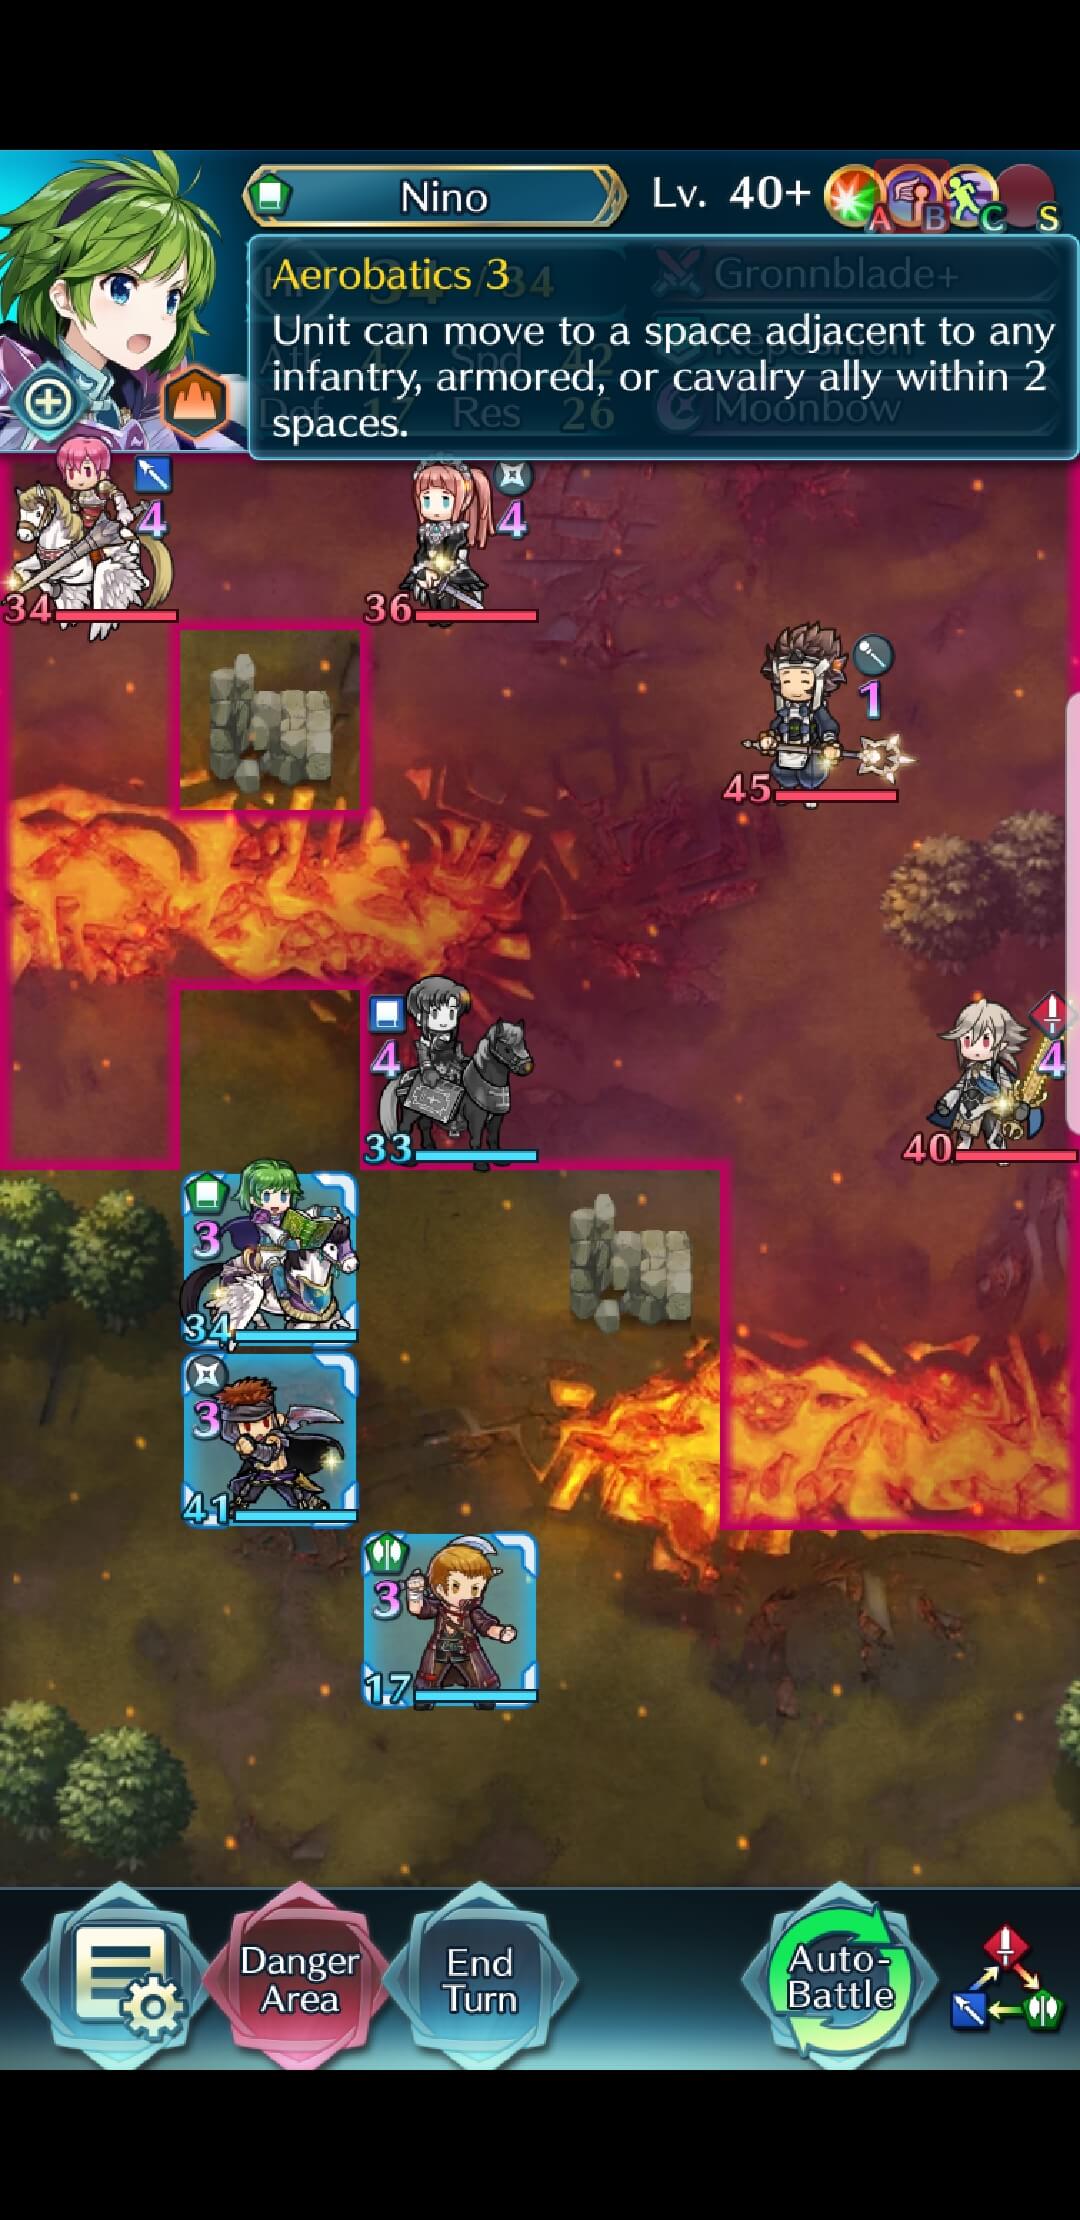
Our flying Nino here has Aerobatics and wants to be able to attack units near Ursula.
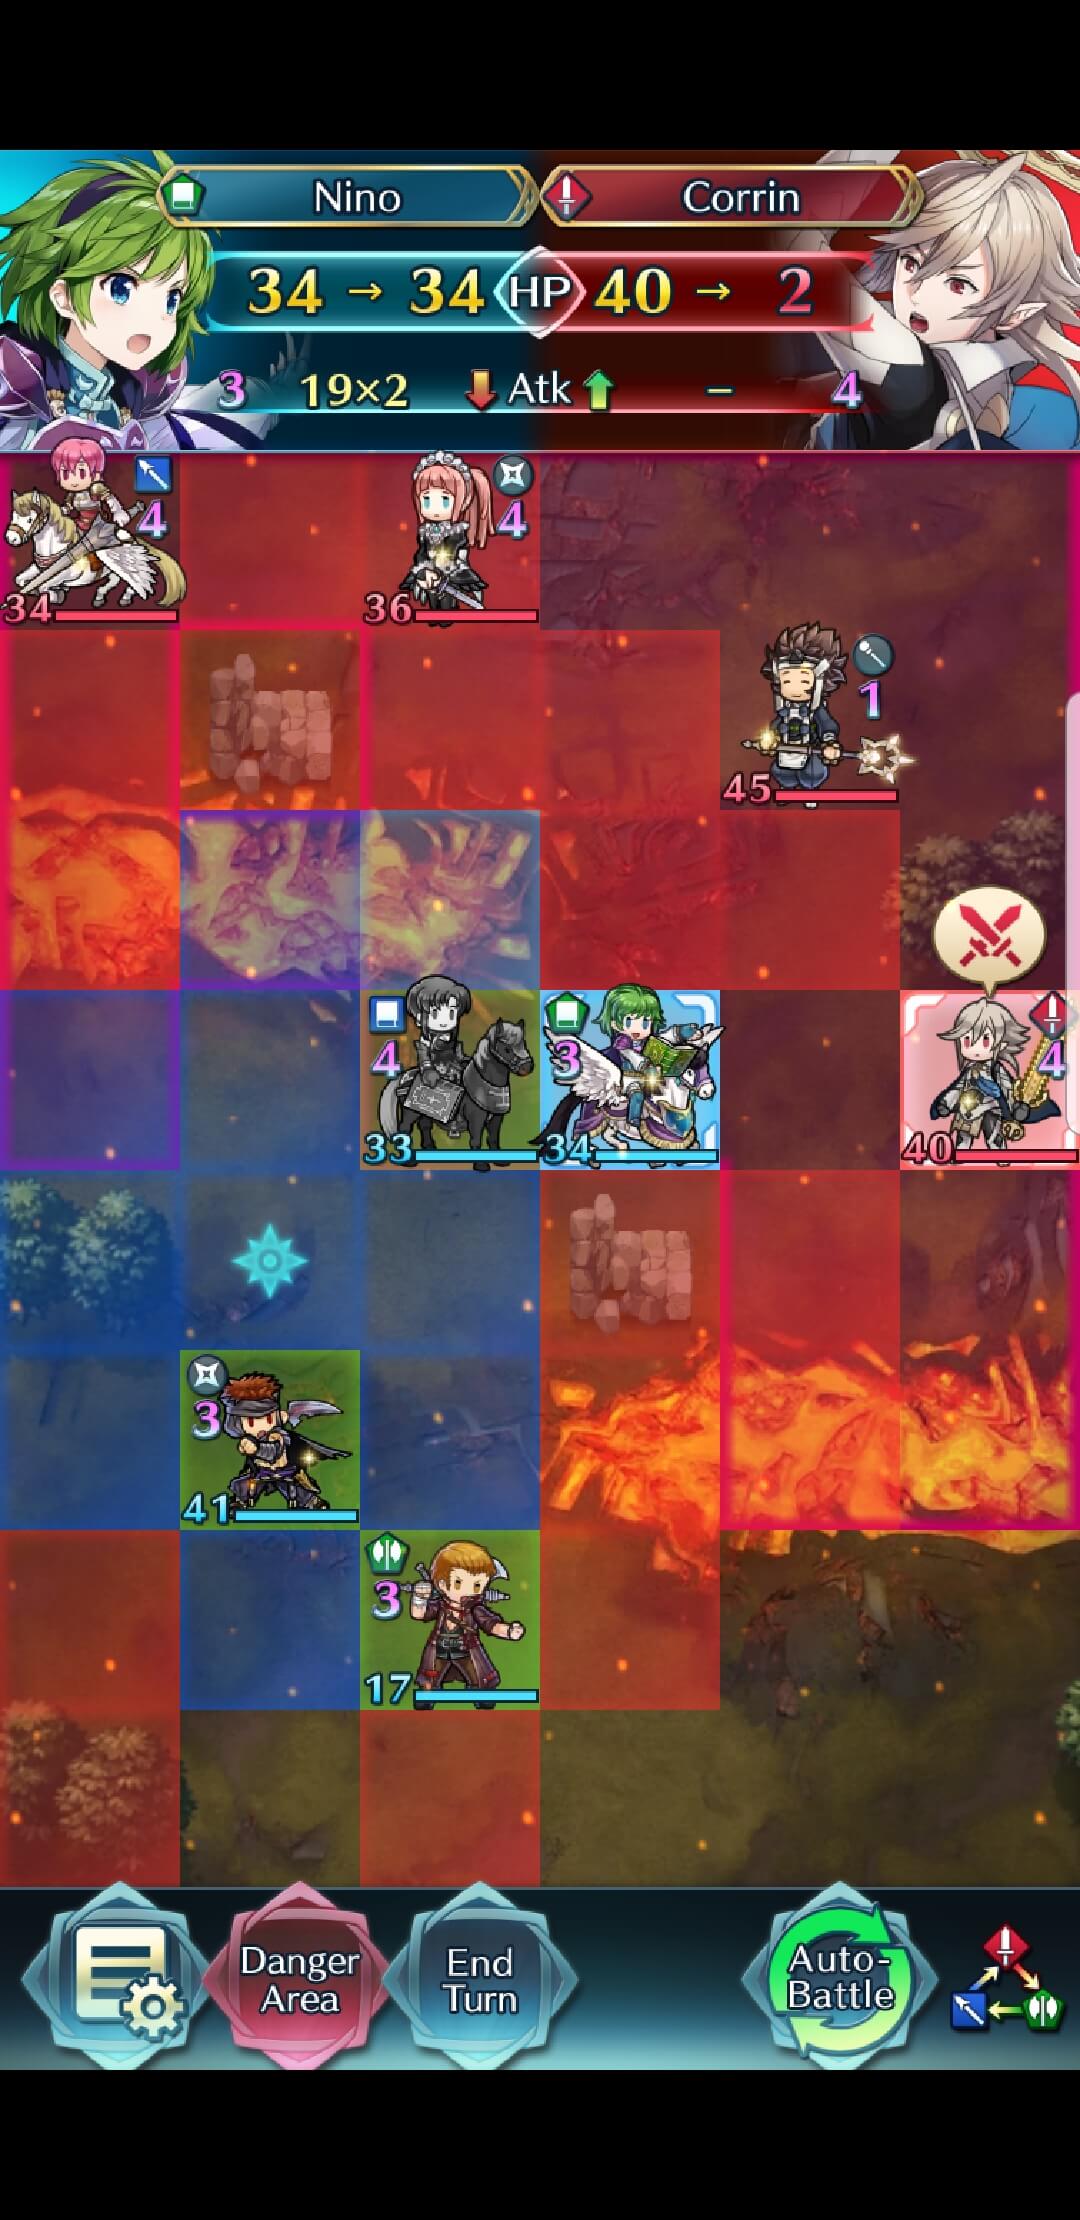
Using Aerobatics, Nino is able to attack M Corrin.
Aerobatics is of course, best used on a mixed team since fliers cannot teleport to one another with them- otherwise, the rules for using it are much like Flier Formation. It's best left to ranged units and dancers, but it can be utilized by all sorts of fliers for all sorts of reasons.
Playstyle
If it wasn’t obvious in the previous section, the playstyle of flier emblem is all about using their superior mobility to force advantageous matchups. While they are inferior in terms of pure reach in an open field when compared to cavalry units, they are far superior in maps with water, lava, forests, trenches, or mountains- which are a great many maps! In addition, because of their ability to fly over obstacles, they are able to utilize the assist skill Reposition without worrying about being unable to Reposition their teammate onto a mountain or water tile.
Hit and Run, along with Drag Back, are also great skills for Player Phase fliers, and work better on fliers than any other movement type, due to the fact that they can ‘pull back’ onto mountain or water tiles with no issue. These skills allow a unit to rush in for a quick KO, and then move back 1 space after the battle, which enables you to pull them easily out of enemy range.
Due to their superior mobility in initiating fights, it’s probably no small wonder that fliers tend to have superior Player Phase units and somewhat inferior Enemy Phase units when compared to other movement types. They are designed to operate primarily during Player Phase, and using them as bait units can waste their movement capability.
Still, there are a few remarkable Enemy Phase oriented fliers who shouldn’t be overlooked- just know that you may wind up using them primarily as Reposition bots to get your strikers in and out of engagements. However, when the time comes that you need a unit to take a hit, like you’ve accidentally gotten Hector into Vantage range, or you’re on a cramped map and need to protect your fragile units- then your Enemy Phase unit will truly shine, so try not to disregard them.


