


Event History
| Start | End |
|---|---|
Map
- Normal
- Infernal
Bound Hero Battle: Corrin and Kana
Here to demonstrate the strength of their bond are Corrin (M) and Kana (F), the dynamic parent-and-child duo who are our fated opponents in this Bound Hero Battle! Luckily, this map features no reinforcements and has a rather straightforward layout, but don’t think you can rest easy quite yet -- your foes won’t start moving until you either bait or attack them, something which can create complications should you fail to make the prerequisite preparations.
Kana (F) and Corrin (M) can both be particularly difficult to deal with, as their combination of great mixed bulk and high Speed can make it difficult to kill either of them outright in a single round of combat in both the Player Phase and the Player Phase. With that all being said, aside from them, most of the foes on this map aren’t particularly daunting and can be relatively simple to take down with a proper strategy and the willingness to experiment until you find the right combination of skills.
Before you begin teambuilding, it’s completely possible you already possess everything you need to beat this map. Created by Gamepress staff member RedFerrari1998, the video guide below uses only F2P units -- see the description for more details. If it doesn’t work for you, though, then read on!
Who to Choose
As is generally true of Grand or Bound Hero Battles, the individual units used is very important as they will primarily inform a strategy. There are a few routes one can take depending on what units are personally available, and, of course, adjustment based on the units one possesses is always a possibility.
Baiters
As previously mentioned, the enemies on this map will not move until you either bait or attack them -- this makes including at least one baiter or tank on your team a great course of action to take as they can be helpful in surviving the initial onslaught should you choose to go on the defensive. The choice of what kind of tank to utilize (physical or magical) is ultimately up to you, but since the majority of the foes on the map happen to deal physical damage, it may be more preferable to make use of a unit with a higher physical damage soak than magical. Alternatively, you can make use of a unit with good mixed defenses to eliminate the need to make a choice entirely.
Armors such as Zelgius, Winter Tharja, Halloween Myrrh, Legendary Tiki (Young), Effie, Hector (LA), Brave Ephraim, Fallen Robin (M), and Halloween Kagero are able to hit very hard upon counterattacking, especially if they’re making use of Quick Riposte or Vengeful Fighter. Those who can counterattack regardless of range, such as Legendary Tiki (Young) and those with Distant Counter/Close Counter, are especially flexible and fantastic options thanks to the map’s nearly evenly split mix of melee and ranged opponents.
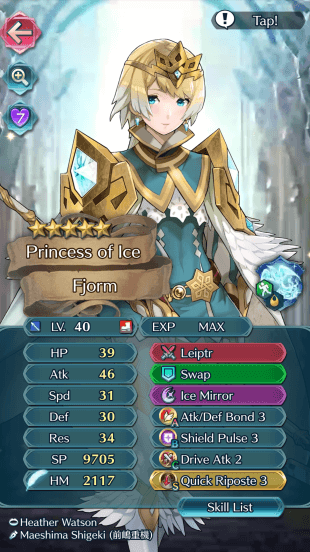
Cavalry tanks like Sigurd, Xander, and Silas are good options as well, performing considerably well when supported with class-exclusive buffs. Dragons can also serve as powerful tanks, especially when equipped with Lightning Breath (or in some instances, another Breath and Distant Counter) -- Adrift Corrin (M), Nowi, Kana (M), Myrrh, Adrift Corrin (F), and Summer Tiki (Young) are all notable examples and are fairly interchangeable, as they are each more than capable of doing the job and doing it well. Some notable F2P options as far as tanks go include the likes of Fjorm, who is able to tank ranged foes extremely well with her exclusive Special, Ice Mirror, Legendary Ike, whose native Warding Breath grants him accelerated cooldown and extra Resistance, and Black Knight, whose unique Special, Black Luna, allows him to consistently deal significant amounts of damage.
Strikers
Thanks to the lack of exceptionally powerful foes on this map, strikers are also well-deserving of a slot on the team as they can easily overpower foes and promptly break through enemy lines. When paired with refresher support, such units can attain impressive amounts of destructive prowess and prove to be invaluable components of any given strategy.
Archers, in particular, can be incredibly potent strikers due to their ability to overpower and/or finish off any enemies your tank may otherwise struggle with, especially if they are equipped with a Brave Bow. Hinoka (WF), Summer Takumi, Roy (LA), and Bridal Cordelia are potential strikers you may want to use, with a special mention going to Brave Lyn given her F2P status. Another solid option, melee Brave users are able to hit foes twice without retaliation, and may even quad hit if they outspeed an enemy, solidifying their ability to perform as powerful offensive strikers. Elincia, Cherche, Reinhardt (WT), and Cordelia are all great Brave weapon users who have the added benefit of having access to class-specific buffs.
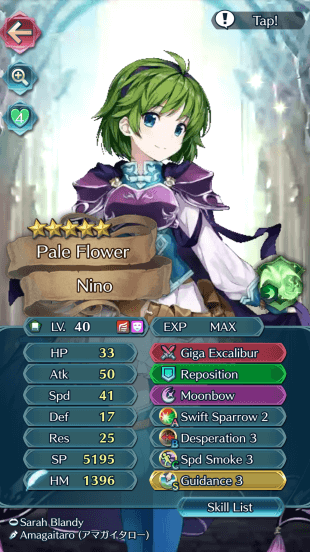
Alternatively, Brave and Blade tome wielders can also serve to be useful if your team composition provides them with the appropriate buffs. Bridal Tharja, Summer Tana, Morgan (F), Tailtiu, and Nino are potential options here, especially if they are equipped with a Breaker skill to add to their coverage and are accompanied by a buffbot like Eirika or Ephraim. Lastly, should you be having particular difficulty in dealing with Kana (F), it may be worth considering utilizing units who deal effective damage to dragons like Masked Marth, Legendary Marth, Alm, and Lucina.
Refreshers
Refreshers help provide invaluable support -- the ability to grant another unit a second turn is extremely powerful, with a well-placed Dance or Sing having the possibility of changing the tide of an entire battle in your favor. Really, any of them will do the trick, though Bridal Ninian, New Year Azura, Performing Azura, and Olivia (YT) all deserve a special mention thanks to their ability to simultaneously provide additional movement support with the Guidance seal, buffs, or in Olivia’s case, a combination of both.
Healers
The support that healers provide can also be incredibly useful as it enables your baiters to tank more damage as well as stay within the HP thresholds of powerful Enemy Phase skills like Quick Riposte more reliably. Furthermore, their access to the coveted Dazzling + Wrathful Staff combo and weapons like Pain+ and Gravity+ lets them possess latent offensive prowess, allowing them to act as ranged magical Firesweep users who can also apply debilitating debuffs/effects to a wide range of foes. Brave Veronica, Ethlyn, Halloween Mia, Genny, Sakura, and Lachesis are potential additions to a team that may serve you well on this map.
Strategy
Strategizing for this Grand Hero Battle shouldn’t be too challenging due to the absence of reinforcements. While it can be difficult to exactly predict what will happen due to IV / Merge variance, here are some general tips to get you started.
Burning Bridges
Like most Bound Hero and Grand Hero Battle guides advocate, most of these maps are won or lost before they even start. While it may be tempting to jump right in, knowing (and loving!) your enemy will help you not only choose your units, but also figure out where to begin.
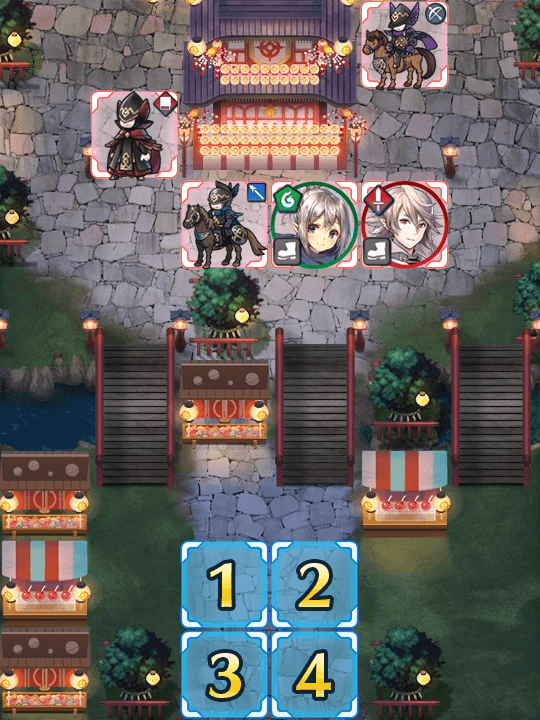
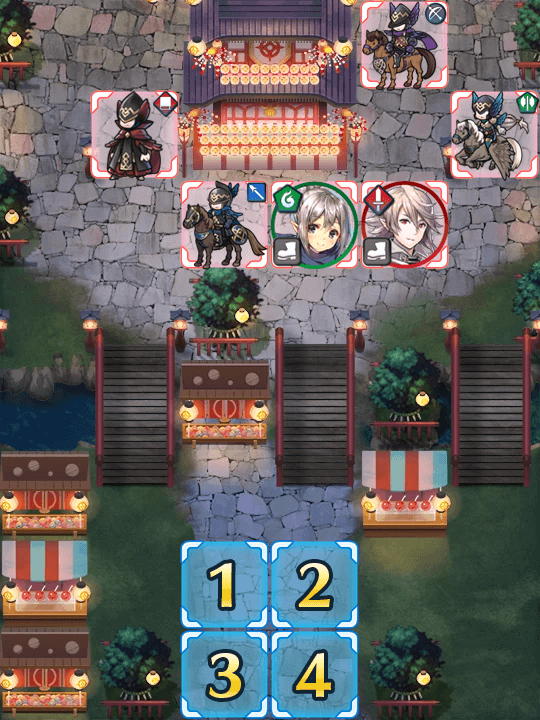
The map overlay itself is fairly simple, presenting us with an immediate course of action to get the battle underway: crossing one of the three bridges. However, before you even begin, it’s always best to browse through the opponents’ skill sets and determine if any of them could pose a significant threat to your team or your strategy. Although the leftmost or rightmost bridges don’t appear to lead to anything too troublesome, the middle bridge, on the other hand, is a slightly different story altogether. Corrin can be particularly difficult to deal with due to his bloated statline, possessing high all-around stats with the lowest being his Resistance at a value of 29. Nonetheless, you can still quickly dispose of him by using a sturdy defensive tank, or by exploiting the fact that he can’t counter against ranged foes and chip away at his health using a strong offensive mage or archer. Do take caution though, since if you take too long, you risk letting yourself get overwhelmed by the other incoming forces.
In a similar vein, Kana can be a tough roadblock to overcome because of her bloated stats as well, however, you should take much more caution when deciding how to approach the young dragon than with her father. Although the option of chipping away at her health from afar does still exist, baiting her can be entirely out of the equation depending on the units you have at your disposal due to the fact that in addition to her regular skill-set, she also carries Windsweep -- this means that unless you have a tank who meets the specific requirements to not be affected by Windsweep, your baiter is likely just going to be a sitting duck when faced with the adorable little tyrant.

For this reason, you might be better off trying to bait the enemies on the other two bridges or going for a full-out offensive approach and try to chunk her as much as possible in the first round of combat, making it easier to take care of her in subsequent turns.
Setting the Stage
Regardless of whatever approach you finally decide on, it’s always a good idea to try and see how you can most effectively make the most of your initial actions to set the rest of your team up for success. Whether this means trying out a new strategy to split up your team for a pincer movement, making use of skills like Savage Blow or AoE Specials to simultaneously damage your targeted foe and nearby opponents, or anything along those lines is ultimately up to you -- just remember that there is ultimately no downside to testing out your options and thanks to the fact that the enemies won’t move until you prompt them to, you can take as much time as needed to figure out the setup that best accommodates your strategy.

Tactful Action
Especially when tackling maps at higher difficulties, you generally always want to do your best to recognize when it’s best to go on the offensive -- and conversely, when to go on the defensive. Although it may be tempting to get caught up in the moment and try to finish the map as quickly as possible, in reality, there is nothing to be gained from trying to rush. Take your time and pay close attention to what possible actions could be made to turn a tough situation into a favorable one. Having a refresher on hand or making use of movement Assists like Reposition and Swap can become crucial in such instances, granting you a significant amount of added maneuverability.
Offense is the Best Defense
Although many of us can barely stomach the thought of leaving a seemingly fragile striker in range of an enemy out of fear of suffering defeat, the truth of the matter is that unless your strikers are overwhelmingly fragile, such fears are unnecessary most of the time. Even those who sacrifice their overall bulk in exchange for impressive offensive potential generally have enough bulk to safely take at least one hit from an opposing foe, and contrary to popular belief, can be left in the enemy’s line of fire if the situation calls for it -- so long as you take the proper precautions, of course.

Tying Up Loose Ends
As the end of the battle approaches, the risk of becoming careless grows greater and greater -- try to remain cautious and proceed carefully so as to not lose all the progress you’ve made thus far. After all, a slight miscalculation on your part could potentially result in your defeat right when victory was within grasp.
If At First You Don’t Succeed
Don’t be fooled by video walkthroughs of any Grand Hero Battle that you watch -- it’s very rare for anyone to beat high-difficulty content (or record a video of themselves doing so!) on their first try. Additionally, the potential variance in unit builds that Skill Inheritance brought along with the random nature of summoning has resulted in pretty much every single summoner having different “building blocks” to work with. This, when combined with the high difficulty level of Infernal, may prove frustrating while someone is trying to find the right combination of units and moves. The key thing to keep in mind is that it may take some light Skill Inheritance, seal shuffling, and multiple tries of the map to find a strategy that works for you. Every single turn you complete gets you one step closer to completing the puzzle. Finally, reading about or watching videos of successful strategies may also help you break through a particularly difficult turn that you can’t complete, or may give you ideas of a new unit to use.
Map Enemies
- Hard
- Lunatic
- Infernal
| HP | ATK | SPD | DEF | RES | |
|---|---|---|---|---|---|
| 49 | 44 | 26 | 22 | 19 | |
| Weapon | Yato (+Atk) | A | Swift Sparrow 2 | ||
| Support | B | Obstruct 3 | |||
| Special | Dragon Fang | C | Even Atk Wave 3 | ||
| HP | ATK | SPD | DEF | RES | |
|---|---|---|---|---|---|
| 41 | 37 | 26 | 24 | 19 | |
| Weapon | Water Breath+ | A | Fierce Stance 3 | ||
| Support | B | Windsweep 3 | |||
| Special | Draconic Aura | C | Drive Atk 2 | ||
| HP | ATK | SPD | DEF | RES | |
|---|---|---|---|---|---|
| 33 | 32 | 24 | 14 | 20 | |
| Weapon | Bolganone | A | Atk/Def Bond 2 | ||
| Support | B | Obstruct 2 | |||
| Special | Growing Flame | C | Drive Def 2 | ||
| HP | ATK | SPD | DEF | RES | |
|---|---|---|---|---|---|
| 36 | 36 | 17 | 18 | 23 | |
| Weapon | Reprisal Lance | A | Steady Posture 1 | ||
| Support | B | Swordbreaker 2 | |||
| Special | Blazing Thunder | C | Odd Spd Wave 3 | ||
| HP | ATK | SPD | DEF | RES | |
|---|---|---|---|---|---|
| 35 | 31 | 11 | 17 | 18 | |
| Weapon | Brave Bow | A | Atk/Spd Bond 2 | ||
| Support | B | Guard 2 | |||
| Special | Iceberg | C | Drive Spd 2 | ||
| HP | ATK | SPD | DEF | RES | |
|---|---|---|---|---|---|
| 63 | 52 | 34 | 30 | 26 | |
| Weapon | Yato (+Atk) | A | Swift Sparrow 2 | ||
| Support | B | Obstruct 3 | |||
| Special | Dragon Fang | C | Even Atk Wave 3 | ||
| HP | ATK | SPD | DEF | RES | |
|---|---|---|---|---|---|
| 56 | 44 | 34 | 33 | 26 | |
| Weapon | Water Breath+ | A | Fierce Stance 3 | ||
| Support | B | Windsweep 3 | |||
| Special | Draconic Aura | C | Drive Atk 2 | ||
| HP | ATK | SPD | DEF | RES | |
|---|---|---|---|---|---|
| 44 | 44 | 32 | 20 | 28 | |
| Weapon | Bolganone+ | A | Atk/Def Bond 3 | ||
| Support | B | Obstruct 3 | |||
| Special | Growing Flame | C | Drive Def 2 | ||
| HP | ATK | SPD | DEF | RES | |
|---|---|---|---|---|---|
| 49 | 48 | 24 | 25 | 30 | |
| Weapon | Reprisal Lance+ | A | Steady Posture 2 | ||
| Support | B | Swordbreaker 3 | |||
| Special | Blazing Thunder | C | Odd Spd Wave 3 | ||
| HP | ATK | SPD | DEF | RES | |
|---|---|---|---|---|---|
| 48 | 42 | 17 | 24 | 23 | |
| Weapon | Brave Bow+ | A | Atk/Spd Bond 3 | ||
| Support | B | Guard 3 | |||
| Special | Iceberg | C | Drive Spd 2 | ||
| HP | ATK | SPD | DEF | RES | |
|---|---|---|---|---|---|
| 72 | 55 | 37 | 33 | 29 | |
| Weapon | Yato (+Atk) | A | Swift Sparrow 2 | ||
| Support | B | Obstruct 3 | |||
| Special | Dragon Fang | C | Even Atk Wave 3 | ||
| HP | ATK | SPD | DEF | RES | |
|---|---|---|---|---|---|
| 64 | 47 | 37 | 36 | 29 | |
| Weapon | Water Breath+ | A | Fierce Stance 3 | ||
| Support | B | Windsweep 3 | |||
| Special | Draconic Aura | C | Drive Atk 2 | ||
| HP | ATK | SPD | DEF | RES | |
|---|---|---|---|---|---|
| 52 | 47 | 35 | 22 | 31 | |
| Weapon | Bolganone+ | A | Atk/Def Bond 3 | ||
| Support | B | Obstruct 3 | |||
| Special | Growing Flame | C | Drive Def 2 | ||
| HP | ATK | SPD | DEF | RES | |
|---|---|---|---|---|---|
| 57 | 51 | 27 | 28 | 33 | |
| Weapon | Reprisal Lance+ | A | Steady Posture 2 | ||
| Support | B | Swordbreaker 3 | |||
| Special | Blazing Thunder | C | Odd Spd Wave 3 | ||
| HP | ATK | SPD | DEF | RES | |
|---|---|---|---|---|---|
| 55 | 45 | 19 | 27 | 25 | |
| Weapon | Brave Bow+ | A | Atk/Spd Bond 3 | ||
| Support | B | Guard 3 | |||
| Special | Iceberg | C | Drive Spd 2 | ||
| HP | ATK | SPD | DEF | RES | |
|---|---|---|---|---|---|
| 52 | 44 | 38 | 23 | 39 | |
| Weapon | Wo Gùn+ | A | Spd/Def Bond 3 | ||
| Support | Pivot | B | Def/Res Link 3 | ||
| Special | Moonbow | C | Drive Res 2 | ||
User Submitted Teams
I'll cut to the chase. Only things to mention, I upgraded Water Boost for Corrin, Deflect Magic got passed to her son now. For once, the devs ALMOST made it impossible. Had my Lyn not been +HP it definitely wouldn't have been.
There comes the replay. Sadly the audio failed again. I promise the next one will come with music for all you to enjoy.
https://www.youtube.com/watch?v=UpDufjMlToo
Laevatein: Laevatein, Swap, Ignis, Brazen Atk/Def 3, Atk/Def Link 3, Odd Spd Wave 3, Heavy Blade 3
L!Lucina: Thogn, Future Vision, Luna, Swift Sparrow 2, Wings of Mercy 3, Distant Guard 3, Drive Spd 2
Cherche: Cherche's axe (No refine required), Reposition, Luna, Death Blow 4, Desperation 3, Atk Tactic 3, Brash Assault 3
B!Véronica: Hliøskjálf, Recover +, Firewind Balm+, Def/Spd Link 3, Wrathful Staff 3, Close Guard 3, Live to Serve 3
Top left: Lucina
Top right: Laevatein
Bottom left: Veronica
Bottom right: Cherche
Turn 1 : Use Cherche's Repo' on the right of Laevatein, and make her move one step upwards. Use Future Vision to swap with Cherche and make Lucina be right next to Laevatein. Veronica then goes between Cherche and Lucina.
Turn 2: Do nothing
Turn 3: Use Future Vision to make Laevatein move up. Laevatein is now in range. Veronica moves where Lucina was, and Cherche doesn't move.
Enemy phase: The bow Cav and Corrin do a measly 12 damage, and the other ennemis move forward.
Turn 4: Use Future Vision on Véronica and make her kill Corrin. Lucina then shoots down the Axe flier through the obstacle (doubling him thx to Veronica). Laevatein then kills the Bow Cav, and Cherche doesn't move
Enemy phase: Cherche barely tanks Kana's Draconic Aura, and the Lance Cav scratches Laevatein thx to her Brazen
Turn 5: Use Future Vision on the right of Cherche and kill the Red Mage with Lucina. Kill the Lance Cav with Veronica, and slaughter Kana with the BAD DB4 Cherche (Brash Assault Desperation Death Blow 4)
The end
HIGH INVESTMENT (RESULTS MAY BE DIFFERENT DEPENDING ON YOUR SETUP)
(H)Myrrh: 40+4 Spirit Breath, Swap, Aether, Distant Counter, Vengeful Fighter, Armour March, Fortress Defence 3 SS +DEF -SPD with Summoner Support
(L)Tiki: 40 Divine Mist, Swap, Aether, Fierce Breath, Bold Fighter, With Everyone!, Quick Riposte 3 SS +ATK -DEF
(H)Jakob: 40 Brave Bow+ Swap, Moonbow, Death Blow 3, Bold Fighter, Hone Armour, Atk/Def +2 SS +ATK -HP
(B)Ephraim: Garm, Swap, Aether, Distant Counter, Special Fighter, Hone Armour, Distant Defence 3 SS NEUTRAL
PLAYER PHASE 1:
First, swap your units around using "Swap Spaces", so that myrrh is directly below the path Kana and Corrin can take and Jakob and Tiki are buffing her, and move everyone one space upward.
ENEMY PHASE ONE:
This should bait down the Cavalry Lancer down to do almost no damage to myrrh, stopping anyone else from getting to her. Leaving them all to simply group up behind it doing nothing.
PLAYER PHASE TWO:
Next, Use Jakob to destroy the Axe Flier unique to the infernal map, and move everyone else one square downwards, which will allow myrrh to continue receiving their turn buffs.
ENEMY PHASE TWO:
The Cavalry Brave Bow archer will come down and attack Jakob, leaving him with only 2 hp remaining, this is due to Ephraim's Hone Armour, if he doesn't have this skill, Jakob dies to the bow as it will quad attack him. The Lance Cavalry then attacks Tiki, who promptly kills it with ease, leading to Kana, her father and the Red Mage to wait patiently behind the Cavalry doing nothing.
PLAYER PHASE THREE:
Kill the Bow Cavalier with Tiki, and use Jakob's immense damage output to ORKO Corrin, leaving only Kana and her Red Mage friend left standing. Attack Kana with Myrrh, who will ORKO her as Myrrh will have her special charged for this fight due to vengeful, and simply end your turn.
ENEMY PHASE THREE:
The red mage suicides itself into Myrrh, ending the map.
Both of the guys are +2 merged.
Silas (+atk -spd) carries his base kit, Def refine, Bonfire, Guard, and QR seal. Required: Reposition
Chrom (+spd -HP) has most of his base kit, but has Vantage (didn't matter, so might as well use his native Chill), Hone Cavs, and Reposition. Seal is open. Required: Fury, plus either: Spd or Atk boon with the other stat hone on an ally or Hone Cav on an ally.
Cecilia (+1, +res -hp) has TA Raven with Bowbreaker, plus Fortify Cavs.
Veronica (neutral) has her base kit, and is carrying Hone Atk seal. Hasn't seen healing.
Turn one: Chrom takes out Kana and takes damage from Fury, and Silas repo's him back. Have both ladies positioned nearby. Don't heal Chrom's Fury damage; he needs Sealed Falchion's effect next turn. If Silas is given QR, the lance and Corrin will SD. If not, the lance will be softened and the axe flier will pivot over Corrin and receive Link buff.
Turn two: Chrom takes out the red mage. Now for the branching paths.
-Silas has QR: Hold off on attacking the remaining foes. Axe flier will SD. Take out bow cav turn three.
-No QR Silas: Cecilia and Veronica will weaken the axe flier so Silas can defeat it with Bonfire. Corrin is weakened while lance SDs. Clean up turn three.
LHector with his normal kit build with sol and distant def seal and lilina with death blow 3 and Glacies special plus quickened pulse seal


