


Map
- Normal
- Infernal
Bound Hero Battle: Ike and Soren
Welcome to the guide for the Bound Hero Battle against Ike and Soren. The original blue haired swordsman + tactician with a dark secret combine in a tricky map that appears neutral at first glance, but is carefully designed to give the opponent many advantages.
There is a mix of both physical and magical opponents, but the real danger is in the Blue Flier. She has both Aerobatics and Guidance, allowing her and allies around her to move unpredictably. Additionally, the enemy team makes use of Tactics skills to buff themselves into the stratosphere.
This map is annoying at first, but once you’ve got a handle on the enemy’s movement patterns and the right teammates selected, things become much easier.
Before you begin teambuilding, it’s completely possible you already possess everything you need to beat this map. Created by Gamepress staff member RedFerrari1998, the video guide below uses only F2P units -- see the description for more details. If it doesn’t work for you, though, then read on!
Who to Choose
For Grand or Bound Hero Battles, the choice of individual units used is very important as they will determine your strategy. There are a few routes one can take depending on what units are personally available, and, of course, adjustment based on the units one possesses is always possible.
Baiters
As is the case with most Bound Hero Battles, a good defensive unit or two will make getting through the initial turns much easier. The positioning of enemies forces you to tank multiple attacks on the first turn, so having the right unit bait them out is imperative.
The AI on this map won’t move until you get within range, but once you are, they’ll proceed to steamroll in with full force. Strong defensive units are great for resisting the enemy’s initial push, letting you handle those first few units on the map.
The first kind of defensive unit you’ll want is a red unit with Distant Counter. This is because the easiest way to provoke the enemy is by having them tank a Green Cavalier and Troubadour on the same turn. A red unit with Distant Counter can handle these, provided they have a decent mix of Defense and Resistance.
Ike, Ike(Vanguard Legend), Tiki(Young), Tiki(Adult), Ryoma, Saber and Fir are examples of units who can perform this role provided they have Distant Counter abilities. Some of these units have low Resistance, so giving them a Seal such as the Distant Defense seal will make their job easier. It’s also important for them to have good defense, enough to survive a hit from the Axe Cavalier.
The second kind of defensive unit is one with Resistance, who can counter and KO the Blue Flier and Soren. It’s recommended to use a green mage for this purpose, as they will have an advantage on the Blue Flier and be neutral against Soren. They should have Quick Riposte, G Tomebreaker, and 35+ Resistance in order to comfortably tank and KO both mages. It’s recommended to use this unit to KO the Lance Knight, as his 48 Defense makes him practically invincible to physical damage.
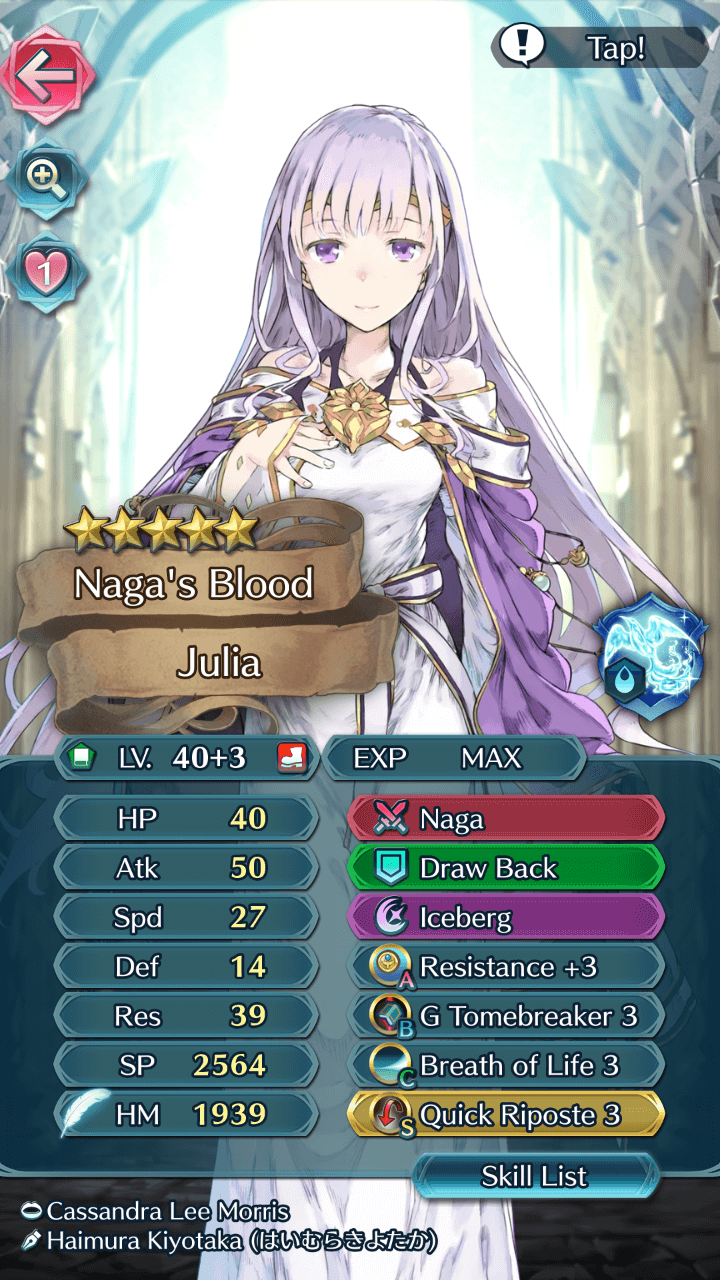
Julia, Soren, Deirdre and Sonya are among the best choices. Spring Sharena, Bridal Sanaki and Halloween Henry are solid but rare options. Lewyn, Nino and Cecilia can suffice, but they’ll need a Resistance boost or two to safely survive. Speed isn’t important since the Lance Knight is slow, and Quick Riposte lets even slow mages get a follow-up attack.
Refreshers
Although these units are typically better when paired with offensive units, the tight space around the map means refreshers are very useful during this battle. A good refresher can give your mage a second attack, let you move your tank to safety, or double the healing output of your staff user.
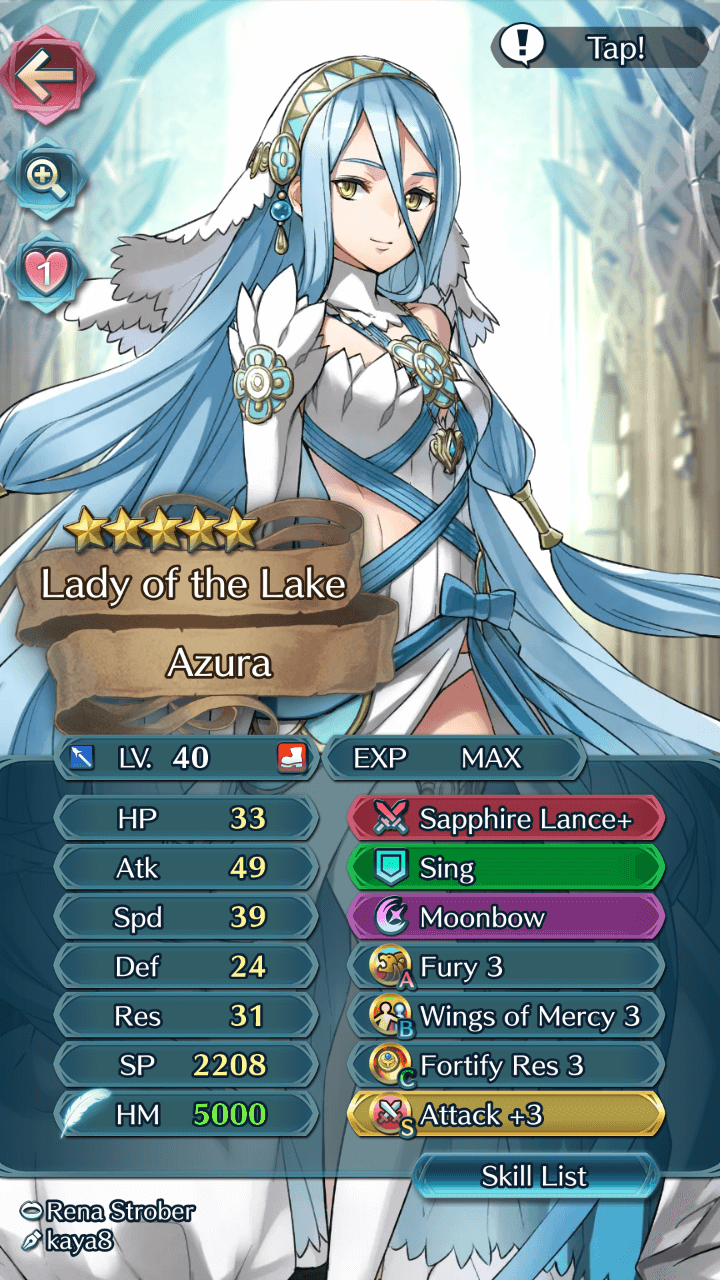
Any refresher works just fine, but Young Azura and Azura stand out as exceptional candidates. Young Azura is a free unit and thanks to her unique weapon and A slot skill Spd/Res Bond, can even fulfill the role of mage tank with a little support. Azura is another fantastic choice, coming with Hone Res to support the team. She can also take care of Ike due to her Sapphire Lance, but she might need a little boost to Attack or Speed to get the job done in one turn.
Healers
Healers are useful for this map, as you’ll likely be doing a lot of tanking with just one or two units. There is no strict criteria for healers, but make sure they have a strong Assist such as Rehabilitate or Physic. I find Physic to be the best healing skill due to its extra range. This fight is tight on positioning, so it really helps to have the extra wiggle room that Physic provides. Your healer may have to take a hit from Soren, but this isn’t usually a problem as Soren’s Watersweep prevents him from attacking twice, and many healers possess high Resistance.
Strategy
Strategizing for this Grand Hero Battle shouldn’t be too challenging due to the absence of reinforcements. While it can be difficult to exactly predict what will happen due to IV / Merge variance, here’s some general tips to get you started.
The calm before the storm
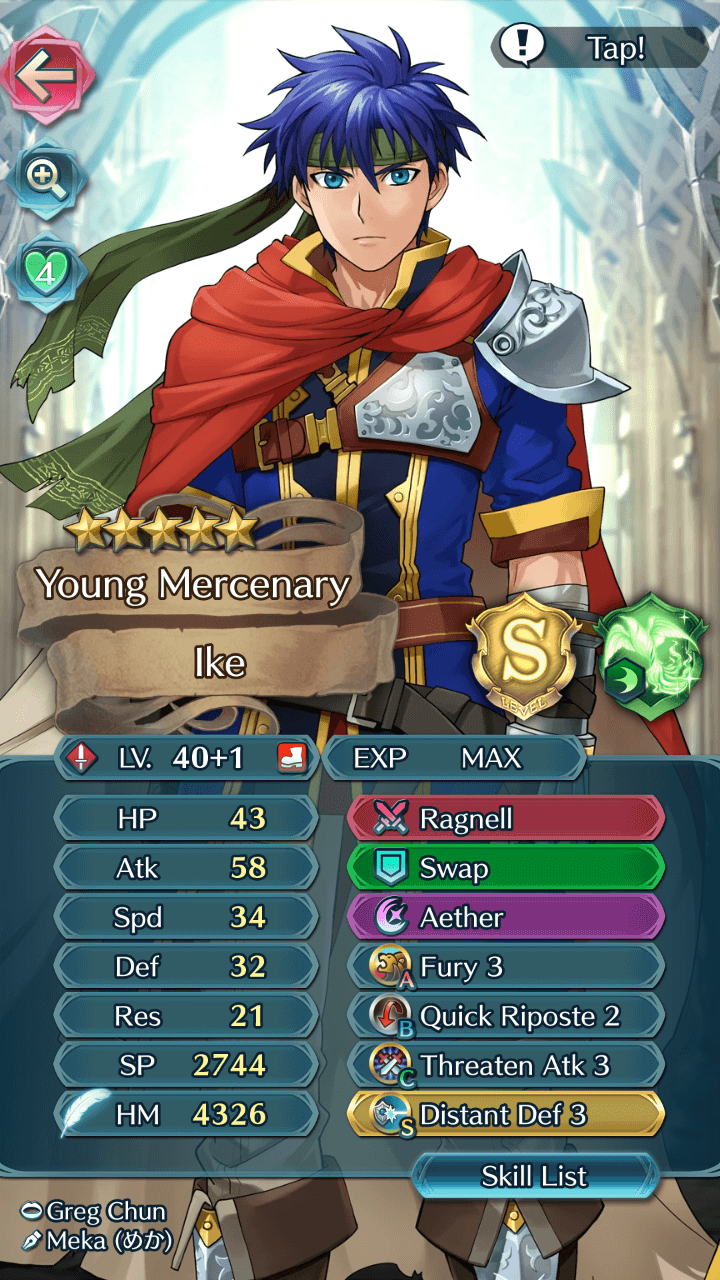
For this battle, I’m using Ike as my red Distant Counter tank, Julia as my mage tank, Genny as my healer, and Azura as my dancer. They are all 0-1 merges (except for Julia, who has three), and have basic budget builds which mostly use the unit’s natural skills. Please note that merges are not required for this team.
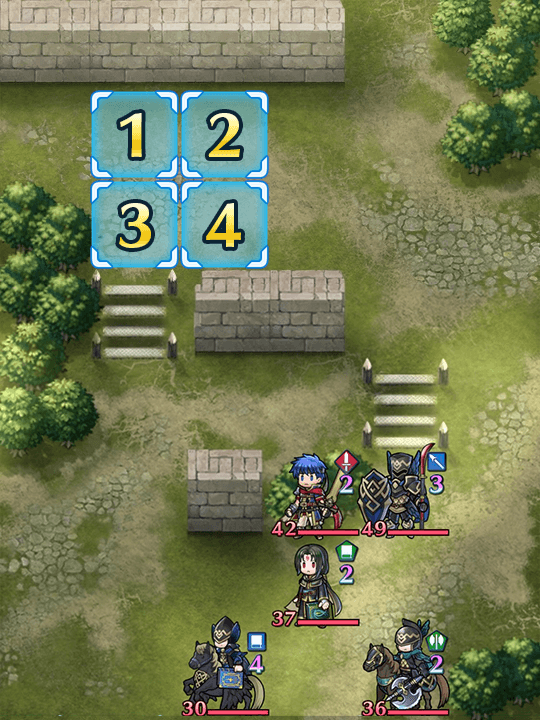
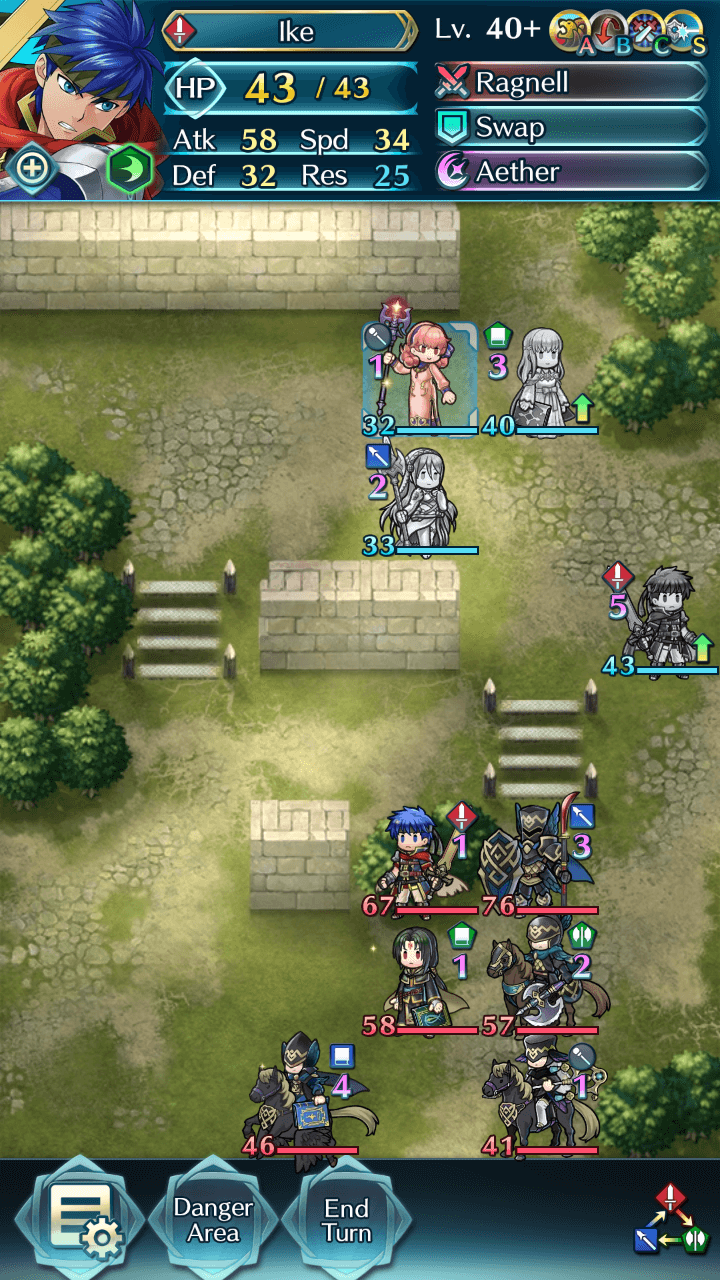
The start of this fight is slow, since the enemy won’t rush in until you move within their range. Therefore, you should get into a favorable position before triggering the enemy onslaught. Unfortunately, there’s no way to bait them without letting them activate all their Tactics buffs.
Moving directly to the left or right of the wall will cause multiple units to come in and attack all at once. The best place to bait out the enemy is from the square Ike is currently standing on. From there, only the Axe Cavalier and Troubadour will be able to attack.
The most important thing about this turn is defeating the Troubadour, as their Flash+ weapon will prevent your team from counterattacking, making this battle extremely difficult. She’s a lot tankier than she appears, due to Def Tactic and Close Guard giving her a +10 boost to Defense (when fighting a Sword-user).
Crimea marches!
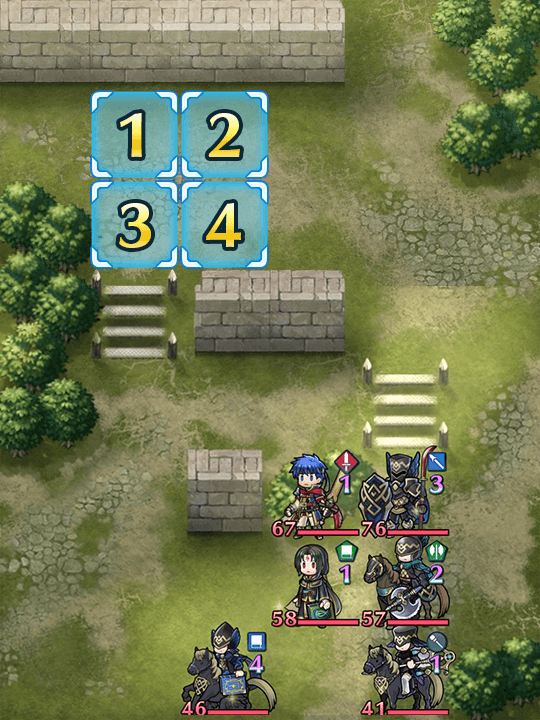
Now this is where things get tricky. Many opponents have moved up, making the field much more dangerous! But most importantly, the Troubadour has (hopefully) been removed from the map. The main danger now comes from the Blue Flier: We’ll want to try and lure them in on this turn.
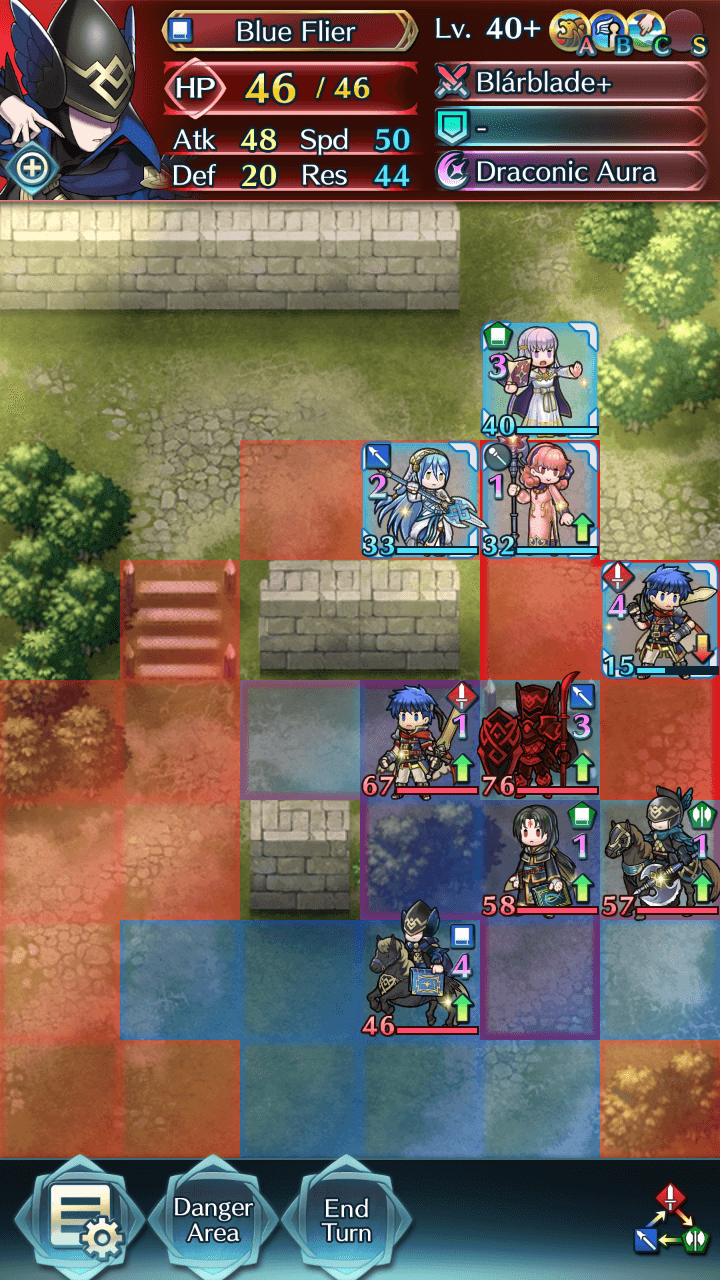
To do this, we’ll first need to move Ike back a little. Moving one space north allows him to only be exposed to Soren and the Axe Cavalier-- Units he can easily handle. There’s a good chance you’ll need to heal up your tank, so this is a great place to make use of a healer.
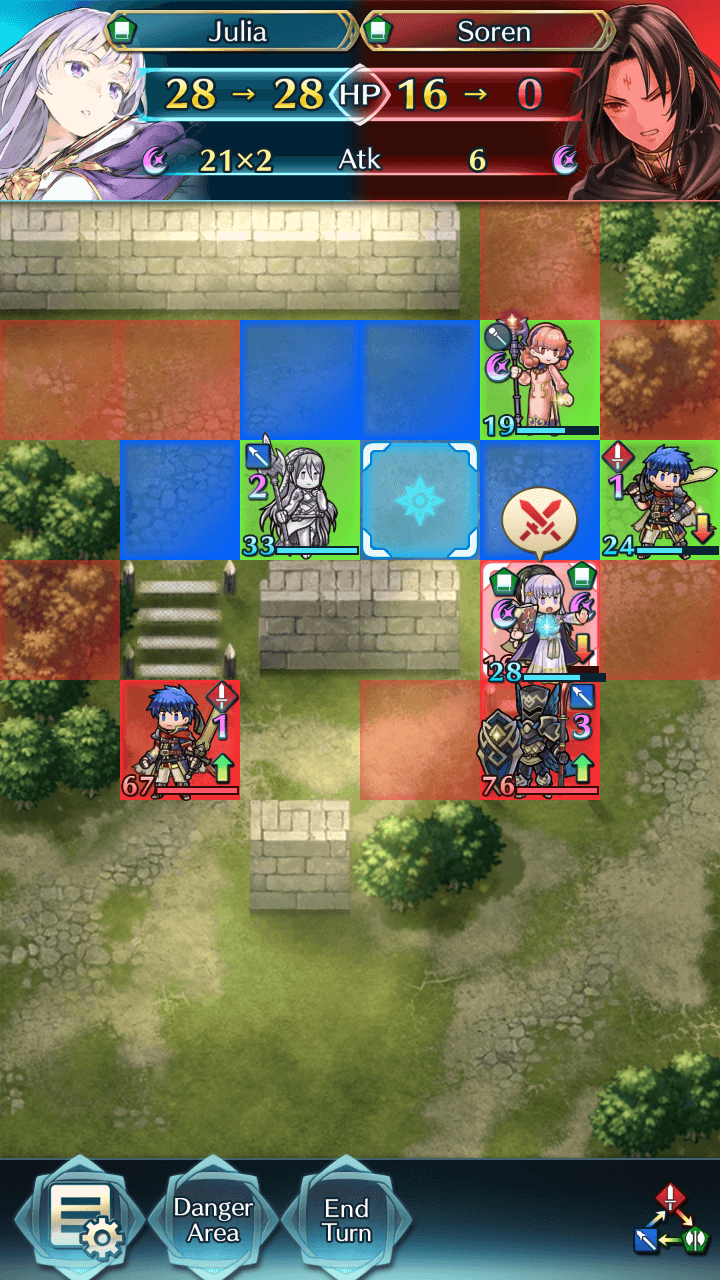
I’m also going to move my mage tank (Julia) up to the wall in order to lure the Blue Flier to engage her. With Quick Riposte, type advantage and high Resistance, Julia is well-equipped to handle her. The Lance Knight is still out of range, and Soren’s Watersweep prevents him from dealing serious damage to Genny.
If you’re using a one-range healer, try and have them positioned in the trees above your tank, as this will keep them safe from melee threats. And double check that Blue Flier’s range! She’s the most threatening opponent by far.
The Beginning of the End
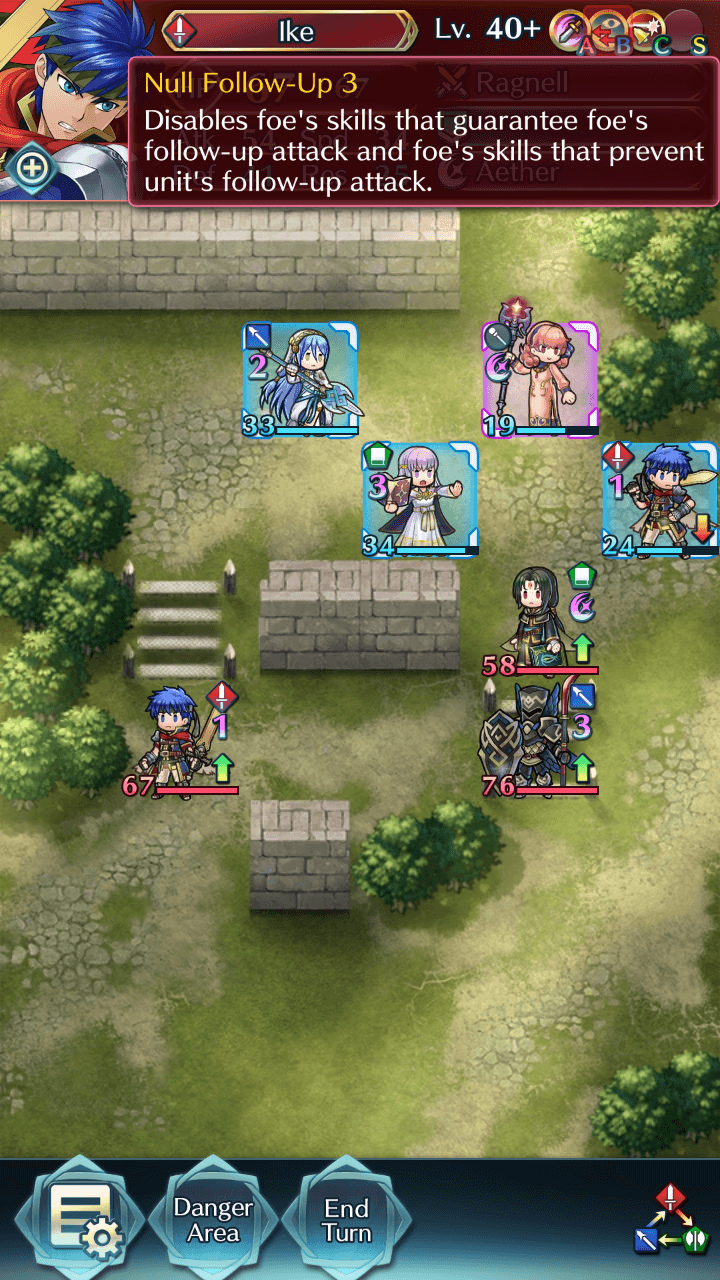
Hopefully by this turn, you’ve managed to rid the world of that Blue Flier and Axe Cavalier. Because the Lance Knight is so slow, the major threats are Ike and Soren. The enemy Ike in particular has crazy high stats and packs Null Follow-Up, meaning Skills like Wary Fighter, Swordbreaker and Quick Riposte won’t work on him.
If you’ve been saving a Blue unit, now is the time to use them. Enemy Ike has 34 Speed, making him tough to double. The easiest place to hit him is on his Resistance with a dragon or mage. If you can’t get a unit to 39 Speed though, the simplest way to KO him is with a Lance unit wielding either Triangle Adept or a Sapphire Lance. Make sure they have 30 or more Speed (to prevent a follow-up attack from enemy Ike).
Soren is much easier to take down: your red tank and green mage should easily be able to handle him. Beware you don’t put a unit in range of the Lance Knight though, as he packs Bold Fighter and 52 Attack. Soren’s Special is Growing Wind, which he can’t activate unless he initiates combat. Therefore, it’s best to just attack him directly. His Speed makes it tricky to get a follow-up attack, which is why I equipped Julia with G Tomebreaker.
If you’re packing a high-power mage like Sonya or Lewyn, you could potentially KO the Lance Knight on this turn and instead use your tank to remove Soren.
Finishing Up
At this stage, Soren should be defeated, and enemy Ike should be hurting badly or gone as well. It can be hard to KO enemy Ike in just one turn, so fret not if you need a second to finish him off. This leaves the slow but strong Lance Knight as the final enemy. This guy’s bad news, packing Bold Fighter and unreal stats of 48 Defense and 52 Attack to crush your units.
Magic is the best way to eliminate him. At just 17 Speed, he should be a pushover for your mage tank, especially if they’re green. If you can’t OHKO him, try attacking with your healer as well, or refreshing your mage to attack again. In the worst case scenario, use a Skill like Reposition or Draw Back to move your mage away from the Lance Knight if they can’t nab the OHKO. That way, you can safely eliminate him over multiple turns.

If At First You Don’t Succeed
Don’t be fooled by video walkthroughs of any Grand Hero Battle that you watch -- it’s very rare for anyone to beat high-difficulty content (or record a video of themselves doing so!) on their first try. Additionally, the potential variance in unit builds that Skill Inheritance brought along with the random nature of summoning has resulted in pretty much every single summoner having different “building blocks” to work with. This, when combined with the high difficulty level of Infernal, may prove frustrating while someone is trying to find the right combination of units and moves. The key thing to keep in mind is that it may take some light Skill Inheritance, seal shuffling, and multiple tries of the map to find a strategy that works for you. Every single turn you complete gets you one step closer to completing the puzzle. Finally, reading about or watching videos of successful strategies may also help you break through a particularly difficult turn that you can’t complete, or may give you ideas of a new unit to use.
User Submitted Teams
(for hard/lunatic) soren is a +10 merge, but i slapped a res+3 on his a slot anyway. the rest of them are +0-2 merges. once you take the enemy ike out, you're pretty much safe. i was locked into genny and young azura as i didn't have any better units.
This Team Mainly works with right Positioning & Many chips onto the Lance Knight with Nino. Use Karla to tank the Axe Cav & Soren, Nino the Blue Flier, Eir for Healing & The Troub, and Azura for Refreshing & Tanking Ike. My Nino's even -Atk, and I don't have any Affinities right, so just play it right, and you got it!
special spiral ophelia + 2 mage dancers + blazing wind = trivializing in game content
setsuna (brave bow) is there to kill the mage flier and pick anyone on low health off
This team works in every difficulty
Aversa has draw back and Hríd has swap. Gunnthrá needs supr atk because my Hríd didn't enough atk to kill Ike. Sharena has def tactic 2 (seal) and res tactic 3
Lewyn is the one doing the dirty job while all the girls dance for him. Silvia will take one hit. Blazing Thunder AoE destroys everyone here.
https://youtu.be/B-Cg9XgKjhU


