


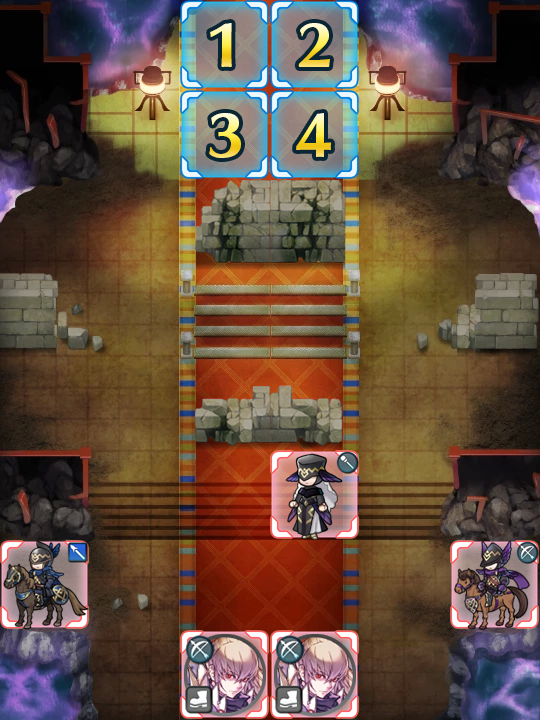
Map
- Normal
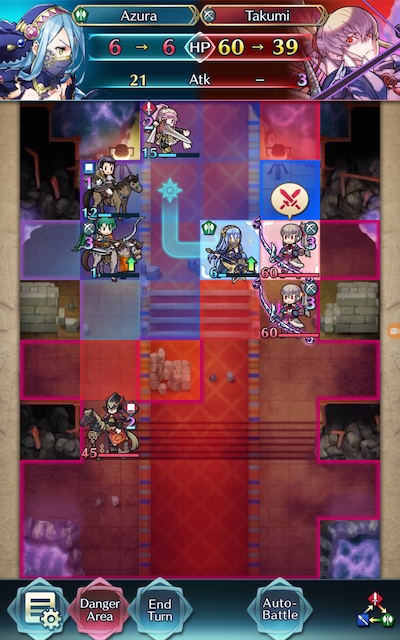
- Infernal
Fallen Takumi: Empty Vessel
Considering his brutal treatment in Fire Emblem Fates: Conquest, it’s no surprise that Fallen Takumi’s Grand Hero Battle is one of the most challenging maps to date. Featuring healers toting Dazzling Staff, reinforcements, multiple enemies carrying Savage Blow / Cancel Affinity, and not one, but two Fallen Takumis joining the party (causing a whopping 20 non-lethal damage to be inflicted to a team on turn 3 due to Skadi’s effect) it’s a given that the Infernal version of this Grand Hero Battle will be difficult for most Summoners to complete -- to say the least!
If one is really determined to reap the rewards of this map, however, it is possible to beat it with creative use of available tools and relatively little investment. There’s no need to spend 20 000+ feathers or grind supports, though if a few points of damage are needed to net a KO, the latter tool may be a good option if a seal is otherwise occupied and Skill Inheritance pickings from your barracks are slim.
Who to Choose
As is generally true of GHBs, the individual units used is very important as they will primarily inform a strategy. There are a few routes one can take depending on what units are personally available, and, of course, adjustment based on the units one possesses is always a possibility.
Baiters
Although made somewhat difficult by the presence of the Dazzling Staff wielding healers, baiting is possible on this map if you have units who can adequately hold the line. As a general rule, a tanky blue unit should be used to bait on the left of this map and a bulky red used on the right, though of course greens are still potential options.
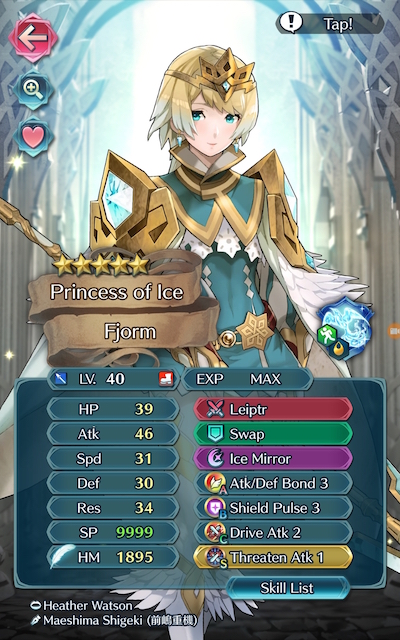
Ideally, you’ll also want to use a Distant Counter or Close Counter user utilizing the Quick Riposte skill or seal who can withstand the assault of both melee enemies and mages. Self-sustaining tanks who tote Aether, Radiant Aether, or Sol / Noontime can potentially forego healer support as well. Nowi, Adult Tiki, Lightning Breath Young Tiki, Fae, Zelgius, Winter Tharja, Fallen Robin, Hector, and Valentine Hector are all good choices who are able to counterattack regardless of distance. F2P options include Fjorm, Camus, Black Knight, and Legendary Ike. Fjorm is particularly notable due to Atk / Def Bond boosting her damage output as well as her Defense. Additionally, her exclusive Special, Ice Mirror, allows her to take reduced damage from ranged enemies and deal increased damage to them in return.
Strikers
Brave Bow users once again prove to be incredibly potent strikers in this Grand Hero Battle due to their ability to overpower enemies that other units may otherwise struggle with. Alternatively, Speedy archers with the Desperation skill (which can be found on a 4 star Shanna or Navarre) along with the Brash Assault 2 seal are able to effectively gain a Brave effect against enemies who can counter when their HP hits the prerequisite threshold. Brave Lyn, Bridal Cordelia, Klein, and Setsuna are potential strikers you may want to use, with a special mention going to Brave Lyn given her F2P status and her ability to utilize the Desperation/Brash Assault combo to great effect in this map.
Alternatively, Brave and Blade weapon wielders can also serve to be useful if your team composition provides them with the appropriate buffs. Reinhardt and Nino are potential options here, especially if they are equipped with a Breaker skill to add to their coverage.
Dancers
Dancers help support units with high firepower, may even have a decent offensive presence themselves, and can usually tank a hit or two, if need be. They can also abuse Wings of Mercy (found on 4 star Palla, Frederick, and Cain) very easily on this map because of the commonality of Savage Blow. Olivia, Performing Olivia, Performing Inigo, Performing Shigure, Performing Azura, Azura, New Year Azura, and Ninian all give the support that high-firepower units need while also possessing the ability to provide an assist to KO an enemy. Do note that if Inigo or Shigure are using a Triangle Adept / Raven tome build, they’ll be easily KO’d by any colorless enemy who is running Cancel Affinity. Baiting with them is therefore not recommended.
Healers
While not generally a great choice over units who can deal heavy damage or dancers, Healers can be incredibly useful in this Grand Hero Battle due to the prolific nature of Savage Blow on this map and the 20 non-lethal damage the dual Takumis deal on turn 3. In particular, healers that tote Rehabilitate, Heavenly Light, and / or Wings of Mercy (which can be found on a 4 star Lissa or Wrys for healing skills) are used in some strategies for this map. Genny, Priscilla, Elise, Wrys, and Lissa are potential additions to a team that may serve useful in this Grand Hero Battle, though any healer who has inherited the proper healing skills will likely do the trick.
Strategy
Strategizing for this GHB can be a challenge because of reinforcements, so while it’s difficult to exactly predict what will happen due to IV / Merge variance, here’s some general tips to get you started.
Roll for Initiative
Starting this map is definitely one of the most difficult aspects of defeating it, as it may seem that whatever is done, you can’t win. Should you attempt to weather the Dazzling healers? Or should you wait for the enemy to come to you?
Of course, what you should do varies on the strategy you choose. Fjorm can easily tank the healer on the left and start a good setup, but most striker and tanking strategies will require breaking down at least one of the walls that are directly below starting space 3 and 4, if not approaching the healers to KO one of them. While this may seem counterproductive, these walls will not provide protection, and with a GHB of this difficulty, you’ll need to take initiative to secure yourself some breathing room.

Where There’s a Will...
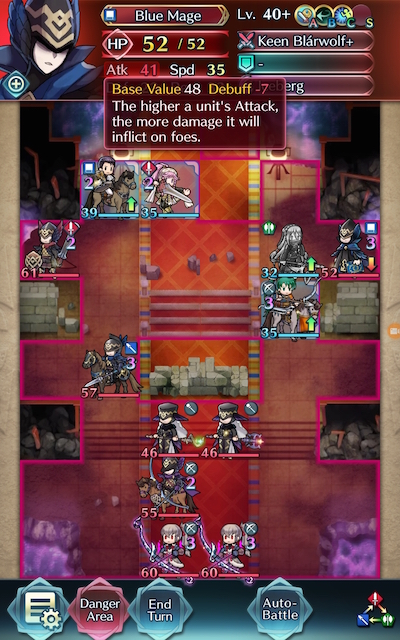
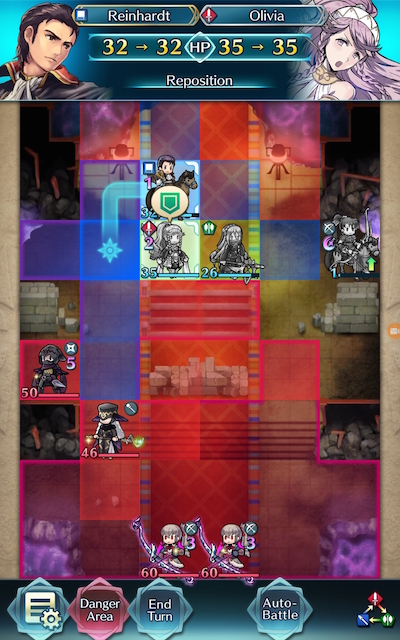
If you encounter a foe that you simply cannot KO outright, there may be skills and seals you can use to mitigate their effectiveness. For example, while the blue tome user on the right side of the map that spawns on turn 2 is able to KO Brave Lyn outright when she initiates combat, if she attacks the red flier first, the resulting debuff from Atk Smoke allows her to tank the hit. Fjorm is able to more easily tank hits from melee enemies that approach her when she is equipped with the Threaten Atk seal.
Use Dancers
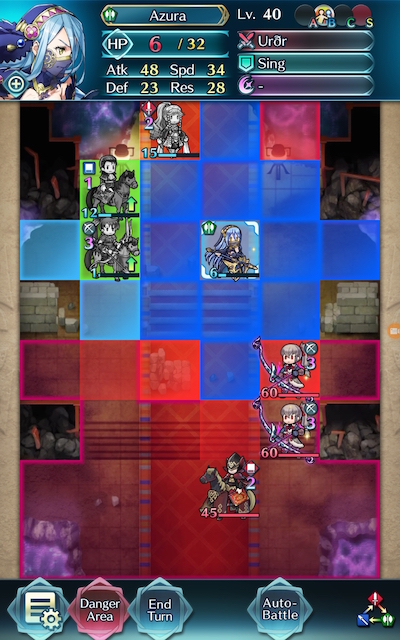
Because of the reinforcements that spawn in this Grand Hero Battle, dancers serve a valuable role of refreshing your units, allowing them to get some KOs they cannot net outright or move out of danger when they’ve overextended. Moreover, the chip damage caused by Savage Blow can either allow your dancers to utilize Wings of Mercy to teleport to damaged units, as was mentioned above. Another option is Escape Route (found on a 4 star Marth or Cecilia), which instead allows your dancer to teleport to an ally’s side if they’re low on health.
The Best Offense
Is sometimes a good defense. That means that on this map, you may need to retreat instead of attack in order to put yourself in a favourable position. Reinforcements should always factor into your strategy, which means that you’ll need to pay close attention to where and when they spawn. Nothing is worse than getting caught by surprise by a foe -- if you can anticipate an enemy appearing, then you can figure out a way to counteract them.
Necessity is the Mother of Invention
On a more general note, Spurs, Drives, Hones, and Fortifies can make the difference between a win and a loss on this map, no matter if you’re using an offensive or defensive strategy. If you have a great unit with a horrible IV, then these skills and seals can help patch up there defenses, give them a few extra points of Speed, or up their damage output. Also, don’t forget that a pinch, dancers can also help out their stronger allies by providing an assist in the form of an attack. While it isn’t generally a good idea to go on the offensive with support units, they can help clean up a map when you’re sure no more reinforcements are going to spawn.
If At First You Don’t Succeed
Don’t be fooled by video walkthroughs of any Grand Hero Battle that you watch -- it’s very rare for anyone to beat high-difficulty content (or record a video of themselves doing so!) on their first try. Additionally, the potential variance in unit builds that Skill Inheritance brought along with the random nature of summoning has resulted in pretty much every single Summoner having different “building blocks” to work with. This, when combined with the high difficulty level of Infernal, may prove frustrating while someone is trying to find the right combination of units and moves. The key thing to keep in mind is that it may take some light skill inheritance and seal shuffling (Breaker skills, low cooldown Specials, and the Attack +3 seal are your friends!), and multiple tries of the map to find a strategy that works for you. Every single turn you complete gets you one step closer to completing the puzzle. Finally, reading about or watching videos of successful strategies may also help you break through a particularly difficult turn that you can’t complete, or may give you ideas of a new unit to use.
Map Enemies
- Hard
- Lunatic
- Infernal
| HP | ATK | SPD | DEF | RES | |
|---|---|---|---|---|---|
| 36 | 39 | 19 | 18 | 23 | |
| Weapon | Silver Lance | A | Atk/Spd 2 | ||
| Support | B | Obstruct 2 | |||
| Special | Aegis | C | Threaten Atk 2 | ||
| HP | ATK | SPD | DEF | RES | |
|---|---|---|---|---|---|
| 30 | 27 | 20 | 17 | 27 | |
| Weapon | Gravity | A | Distant Def 2 | ||
| Support | Physic | B | Dazzling Staff 2 | ||
| Special | C | Savage Blow 3 | |||
| HP | ATK | SPD | DEF | RES | |
|---|---|---|---|---|---|
| 37 | 41 | 32 | 21 | 20 | |
| Weapon | Skadi | A | Fury 3 | ||
| Support | B | Cancel Affinity 3 | |||
| Special | Vengeance | C | Spd Smoke 3 | ||
| HP | ATK | SPD | DEF | RES | |
|---|---|---|---|---|---|
| 37 | 41 | 32 | 21 | 20 | |
| Weapon | Skadi | A | Fury 3 | ||
| Support | B | ||||
| Special | Vengeance | C | Spd Smoke 3 | ||
| HP | ATK | SPD | DEF | RES | |
|---|---|---|---|---|---|
| 35 | 36 | 16 | 17 | 18 | |
| Weapon | Silver Bow | A | Death Blow 2 | ||
| Support | B | Quick Riposte 2 | |||
| Special | Glimmer | C | Savage Blow 3 | ||
| HP | ATK | SPD | DEF | RES | |
|---|---|---|---|---|---|
| 49 | 49 | 24 | 25 | 30 | |
| Weapon | Silver Lance+ | A | Steady Stance 3 | ||
| Support | B | Obstruct 3 | |||
| Special | Aegis | C | Threaten Atk 3 | ||
| HP | ATK | SPD | DEF | RES | |
|---|---|---|---|---|---|
| 40 | 38 | 28 | 23 | 35 | |
| Weapon | Gravity+ | A | Distant Def 3 | ||
| Support | Physic+ | B | Dazzling Staff 3 | ||
| Special | C | Savage Blow 3 | |||
| HP | ATK | SPD | DEF | RES | |
|---|---|---|---|---|---|
| 51 | 48 | 40 | 28 | 27 | |
| Weapon | Skadi | A | Fury 3 | ||
| Support | B | Cancel Affinity 3 | |||
| Special | Vengeance | C | Spd Smoke 3 | ||
| HP | ATK | SPD | DEF | RES | |
|---|---|---|---|---|---|
| 51 | 48 | 40 | 28 | 27 | |
| Weapon | Skadi | A | Fury 3 | ||
| Support | B | ||||
| Special | Vengeance | C | Spd Smoke 3 | ||
| HP | ATK | SPD | DEF | RES | |
|---|---|---|---|---|---|
| 48 | 48 | 22 | 24 | 23 | |
| Weapon | Silver Bow+ | A | Death Blow 3 | ||
| Support | B | Quick Riposte 3 | |||
| Special | Glimmer | C | Savage Blow 3 | ||
| HP | ATK | SPD | DEF | RES | |
|---|---|---|---|---|---|
| 57 | 52 | 27 | 28 | 33 | |
| Weapon | Silver Lance+ | A | Steady Stance 3 | ||
| Support | B | Obstruct 3 | |||
| Special | Aegis | C | Threaten Atk 3 | ||
| HP | ATK | SPD | DEF | RES | |
|---|---|---|---|---|---|
| 46 | 43 | 31 | 25 | 38 | |
| Weapon | Slow+ | A | Distant Def 3 | ||
| Support | Physic+ | B | Dazzling Staff 3 | ||
| Special | C | Savage Blow 3 | |||
| HP | ATK | SPD | DEF | RES | |
|---|---|---|---|---|---|
| 46 | 41 | 31 | 25 | 38 | |
| Weapon | Gravity+ | A | Distant Def 3 | ||
| Support | Physic+ | B | Dazzling Staff 3 | ||
| Special | C | Savage Blow 3 | |||
| HP | ATK | SPD | DEF | RES | |
|---|---|---|---|---|---|
| 60 | 51 | 43 | 31 | 30 | |
| Weapon | Skadi | A | Fury 3 | ||
| Support | B | Cancel Affinity 3 | |||
| Special | Vengeance | C | Spd Smoke 3 | ||
| HP | ATK | SPD | DEF | RES | |
|---|---|---|---|---|---|
| 60 | 51 | 43 | 31 | 30 | |
| Weapon | Skadi | A | Fury 3 | ||
| Support | B | Cancel Affinity 3 | |||
| Special | Vengeance | C | Spd Smoke 3 | ||
| HP | ATK | SPD | DEF | RES | |
|---|---|---|---|---|---|
| 55 | 51 | 24 | 27 | 25 | |
| Weapon | Silver Bow+ | A | Death Blow 3 | ||
| Support | B | Quick Riposte 3 | |||
| Special | Glimmer | C | Savage Blow 3 | ||
User Submitted Teams
Not that hard, did it on my first attempt and forgot to record so i just have to redo it. Just let everyone comes to you and hit them hard with Rein/Lyn. Link below,
https://youtu.be/uWEJ4ZBuOp4
Nowi tanks everything with a Fortify dragons buff + steady breath/aether and Lyon and Cecilia mop up colourless units with their raven tomes
Link: https://youtu.be/kgclGpJ-hrA
Palla +10: +ATK -RES
Wo Dao+ +spd, Reposition, Life & Death, Hone Speed 3 seal.
Cordelia +5: +RES -HP
Reposition, Life & Death, Wings of Mercy, Goad Fliers, Heavy Blade Seal.
Cherche +9: +ATK -SPD
Brave Axe, Reposition, Aether, Death Blow, Wings of Mercy, Goad Fliers, Deflect Magic 3 Seal.
Elincia: +DEF -RES
Reposition, Galeforce, Wings of Mercy, Goad Fliers, Speed +3 seal.


