Possible Drops:
--
Mission and Clear Conditions:
Mission: Kill All enemies
S-Rank Clear: 14 Kills in 3 Turns
Thank you to @Owls#1086 for help with Clear Condition Translations
Clear Guide:
Team Recommendations:
- 4 Combat Echelons
- All Echelons should be capable of fighting Doppelsoldners at least once.
- 1 Dummy Echelon
- 2 HOC
- BGM and whatever has your highest Peirce. This map has 100% shield Uhlans.
Clear Steps
In theory, this search and destroy map is much easier than the preceding two. However, a few twists make that not so true. First, random enemies spawn on the Heliports. Second, Uhlans with 100% Shield will spawn. HOCs are therefore a must on this map. High Peirce should be prioritized, although if you have AT4 from the Theatre, she can shine against some enemy compositions.
Echelon compositions should have plenty of Firepower, as they will need to potentially fight both Uhlans and Doppels, so tell Grape to dust off her rifle as she’s going to have some work to do. Besides that, this is a good old fashioned search and destroy mission.
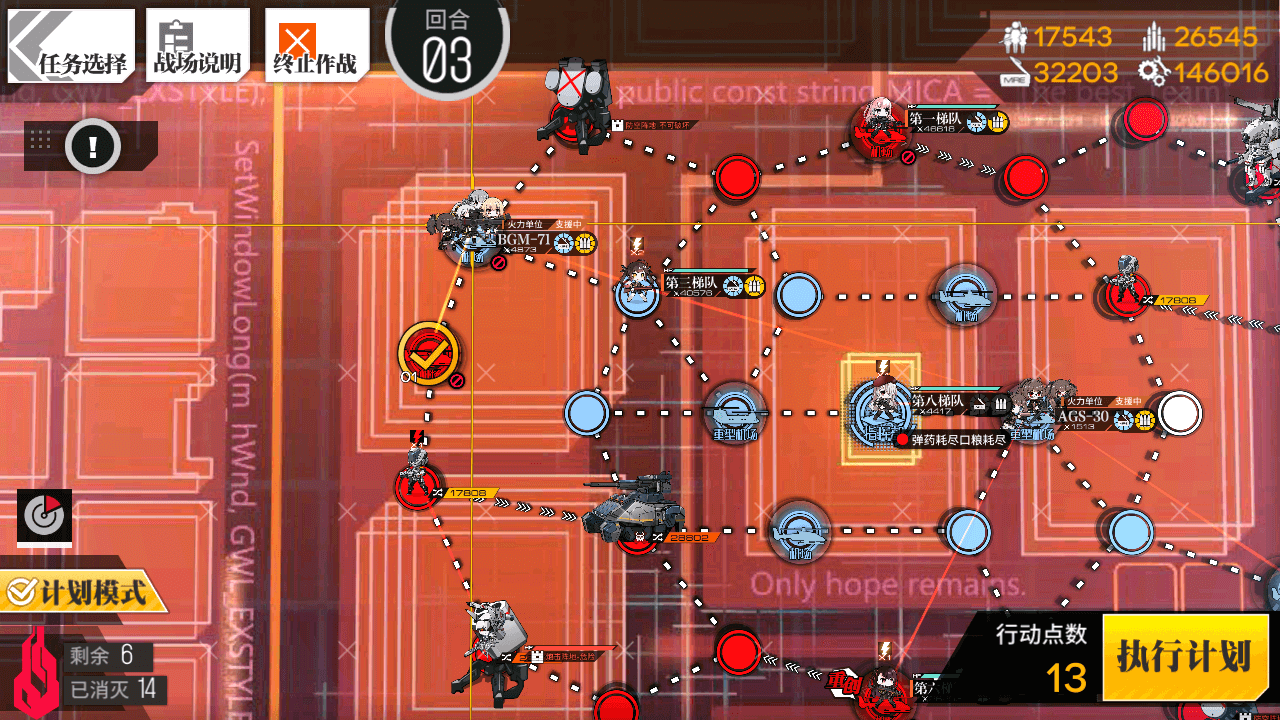
Turn 1
1.1
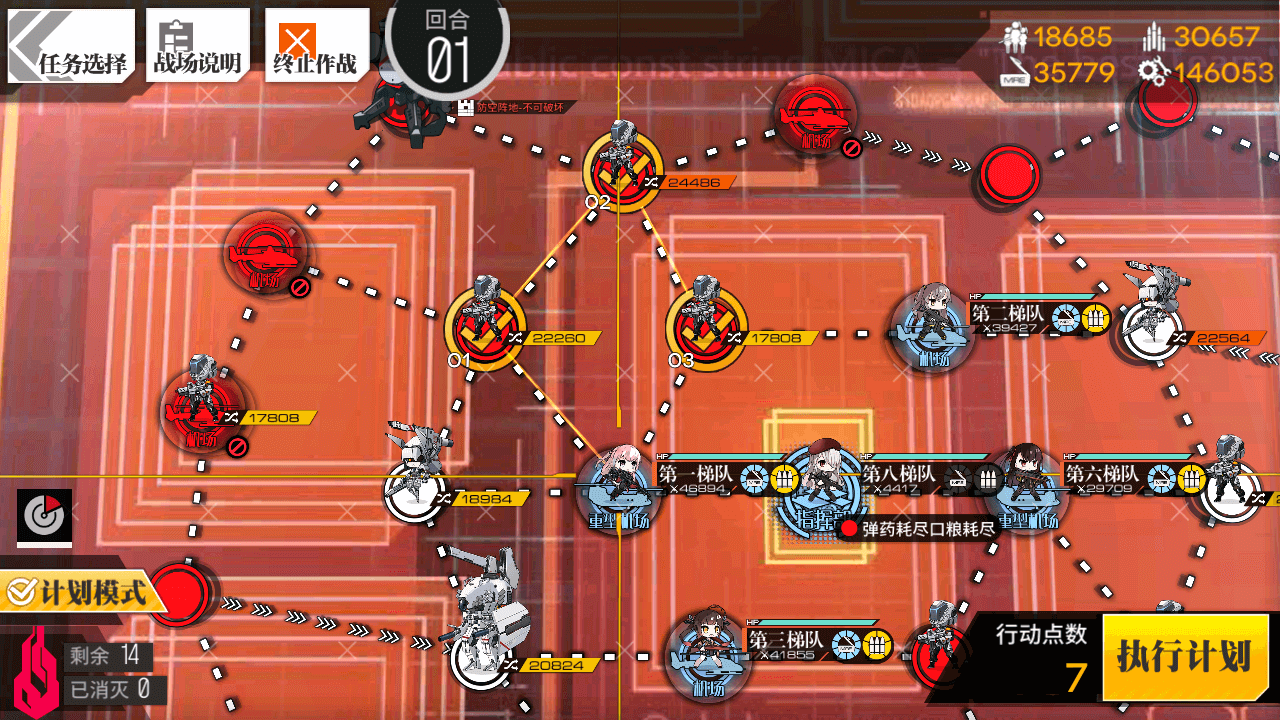
Deploy a Combat Echelon on all four Heliports. Deploy a DUmmy Echelon on the Command Post.
Move the Combat Echelon on the left Heavy Heliport up-left, then up-right, then back down right to kill three Sterlets.
1.2

Deploy an HOC on the now vacant Heavy Heliport. High Peirce HOCS are recommended. Move the Echelon on the lower-left Heliport left, and up, killing the Gundam and the Rodel.
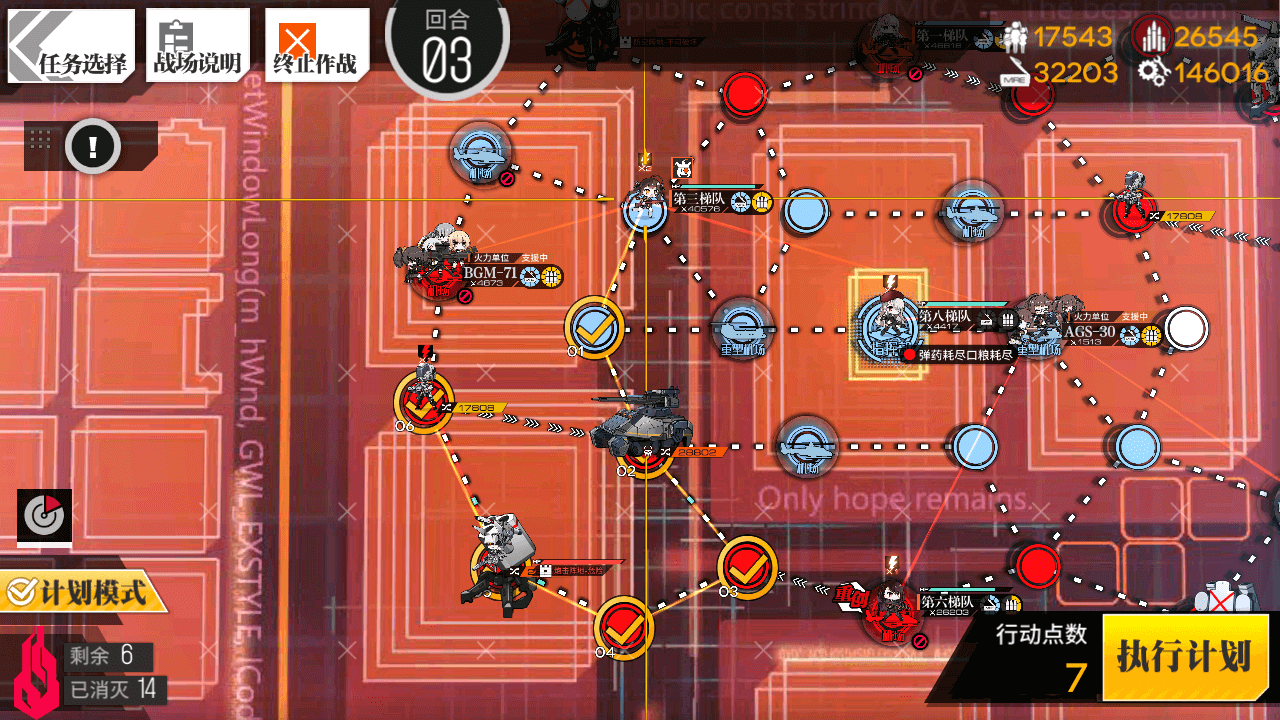
1.3
Move the Echelon on the upper-right Heliport right, and down two nodes.
1.4
Move the final combat Echelon down one node.
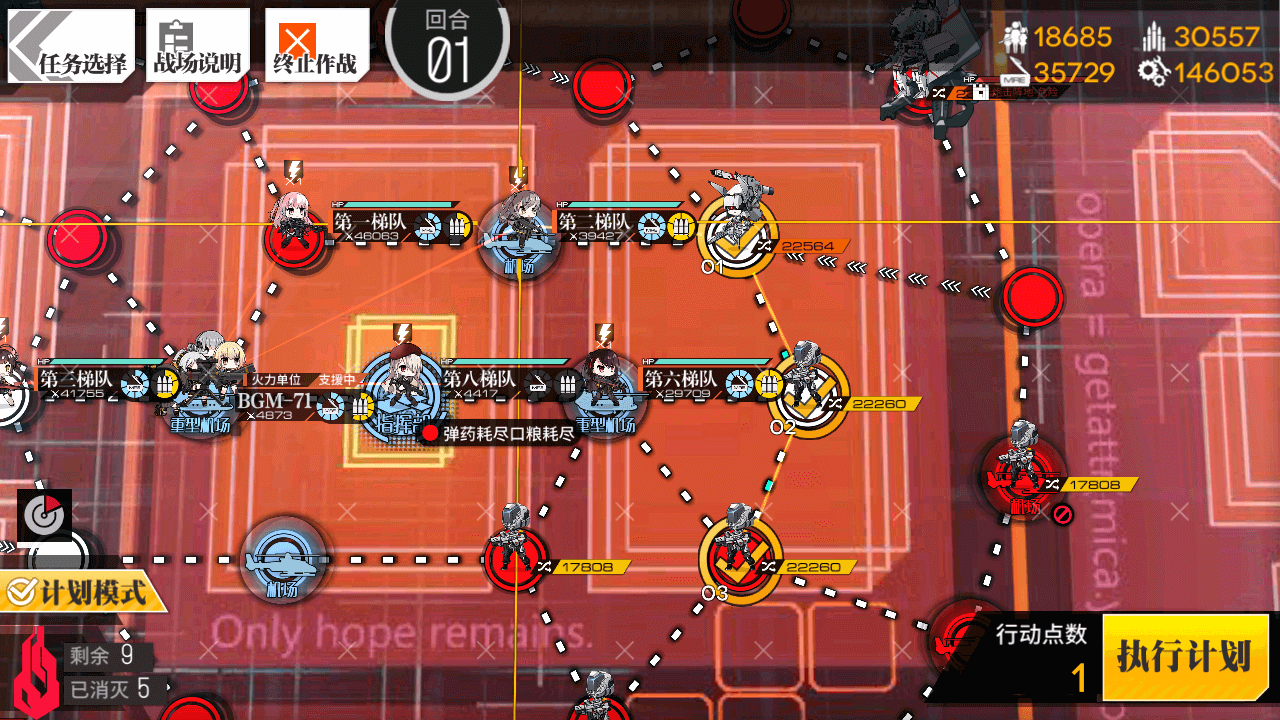
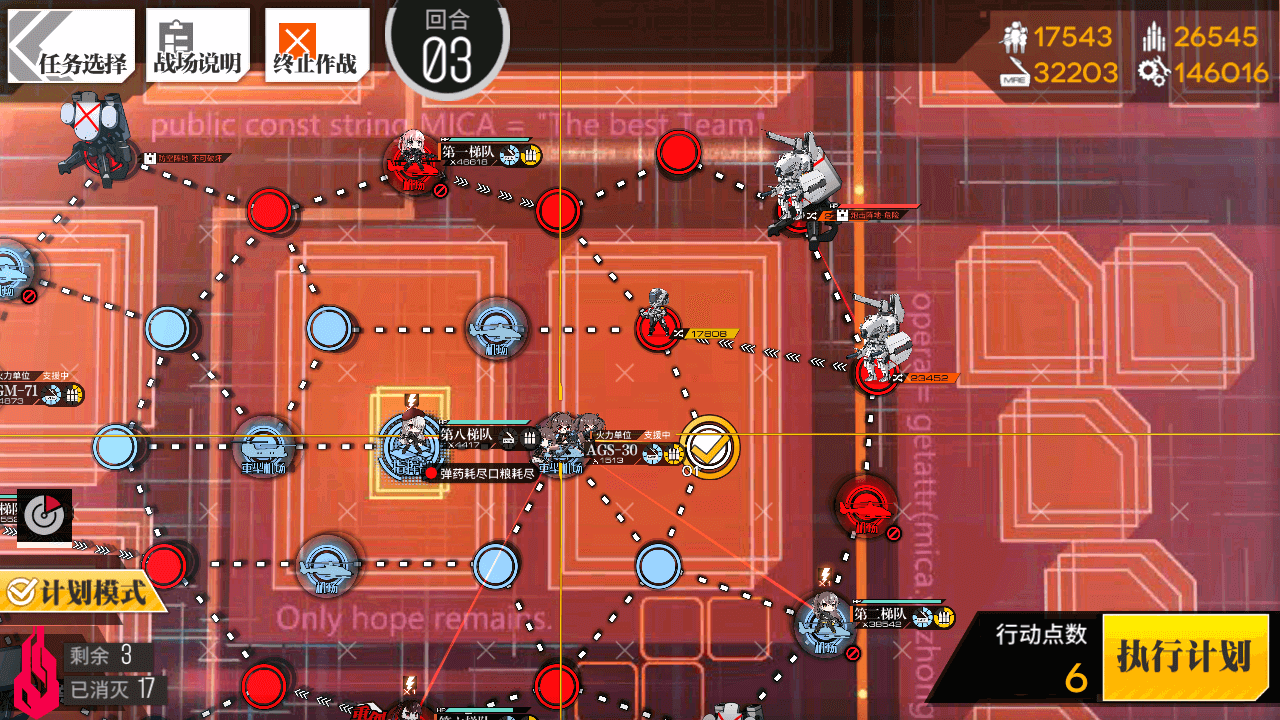
Turn 2
There is a chance that Uhlans may spawn from the Heliports in the outer circle, attacking the rightmost Combat Echelon. If this happens you will need to reset.
2.1
Deploy an HOC on the right Heavy Heliport. High pierce is again recommended.
Move the farther Right Combat Echelon down one node, right one node, and then up once again.
2.2

Move the other right Combat Echelon down one node, and left once node to block spawns from the bottom central Heliport.
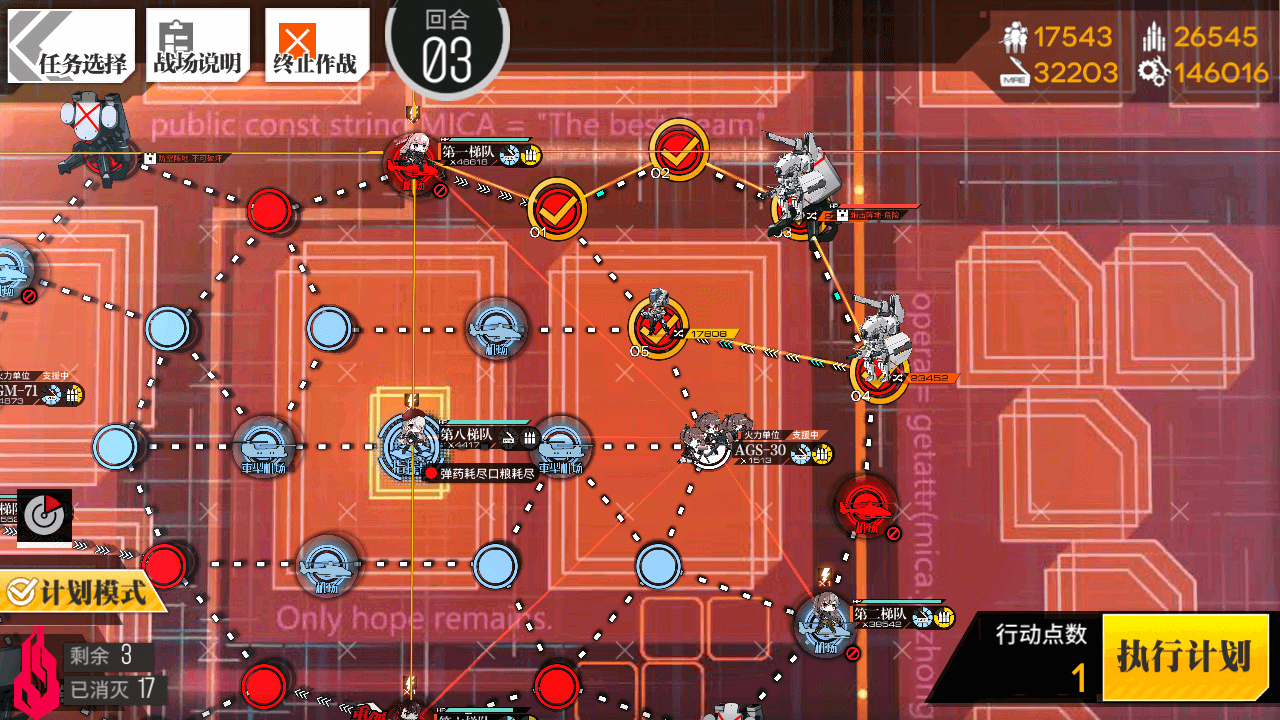
2.3
Move the upper left Combat Echelon should move up one node, and then right one node, onto the central top Heliport.
2.4
Move the far right Combat Echelon up one node, then left one node, onto a Heliport.
2.5
Follow behind them with BGM.
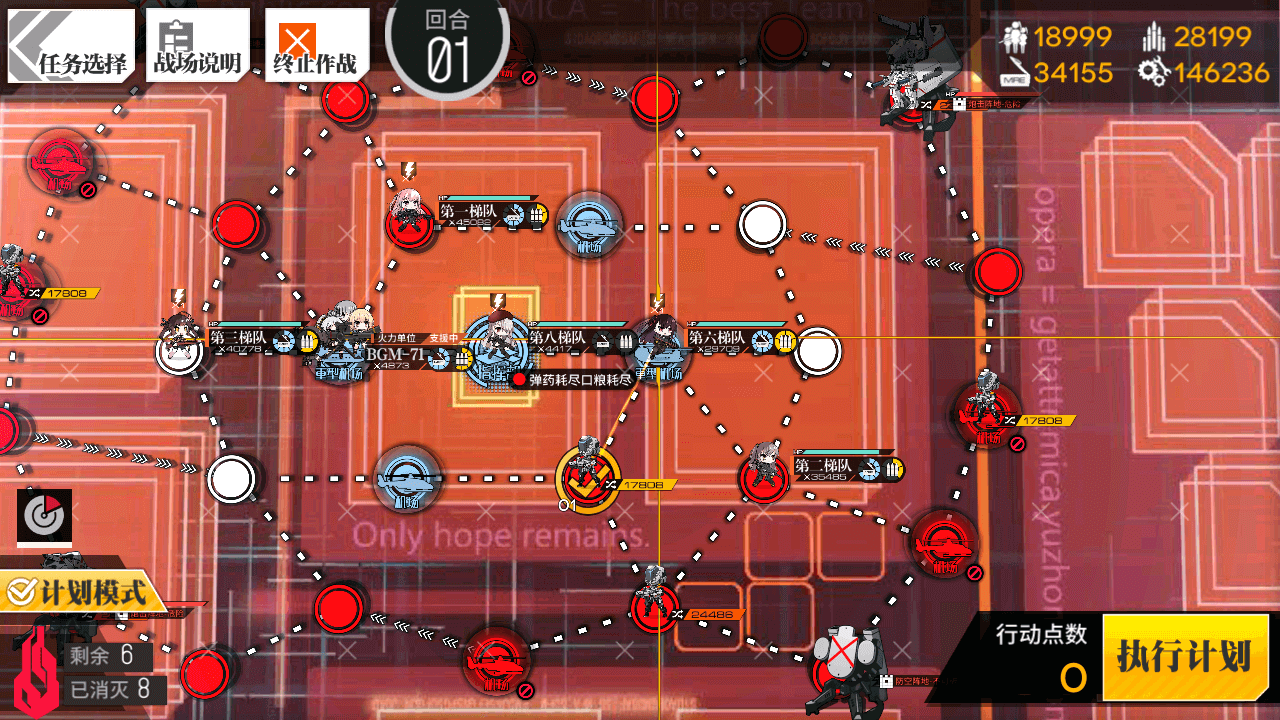
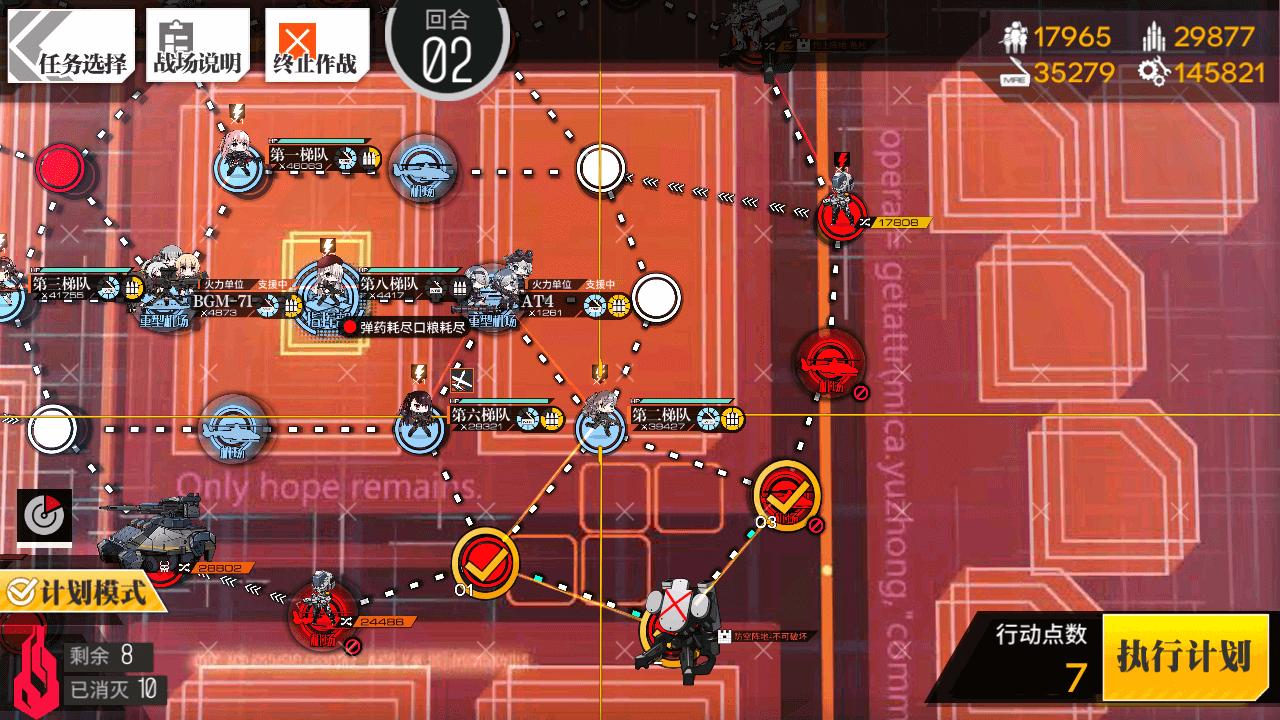
Turn 3
Turn 3 is mostly improv, as it is possible to get different spawn combinations and movements. This example is generally effective, but you may need to modify your turn to ensure an S-Rank Clear.
3.1
Swap BGM onto the Heliport, and move her down one node.
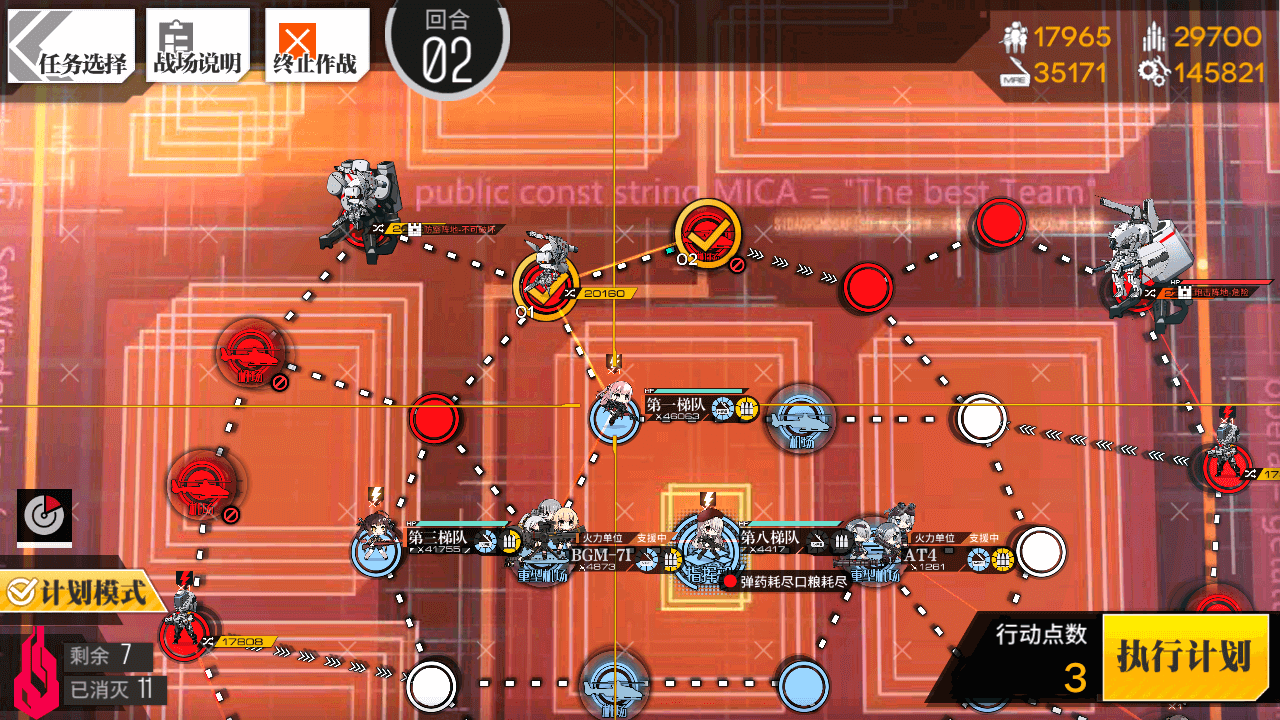
3.2
Move the left Combat Echelon down three nodes. There is a high likelihood of an Uhlan on the way so make sure you HOC is standing by for Bombardment. Then, move left one node, and up two nodes to finish cleaning up the left side of the map.
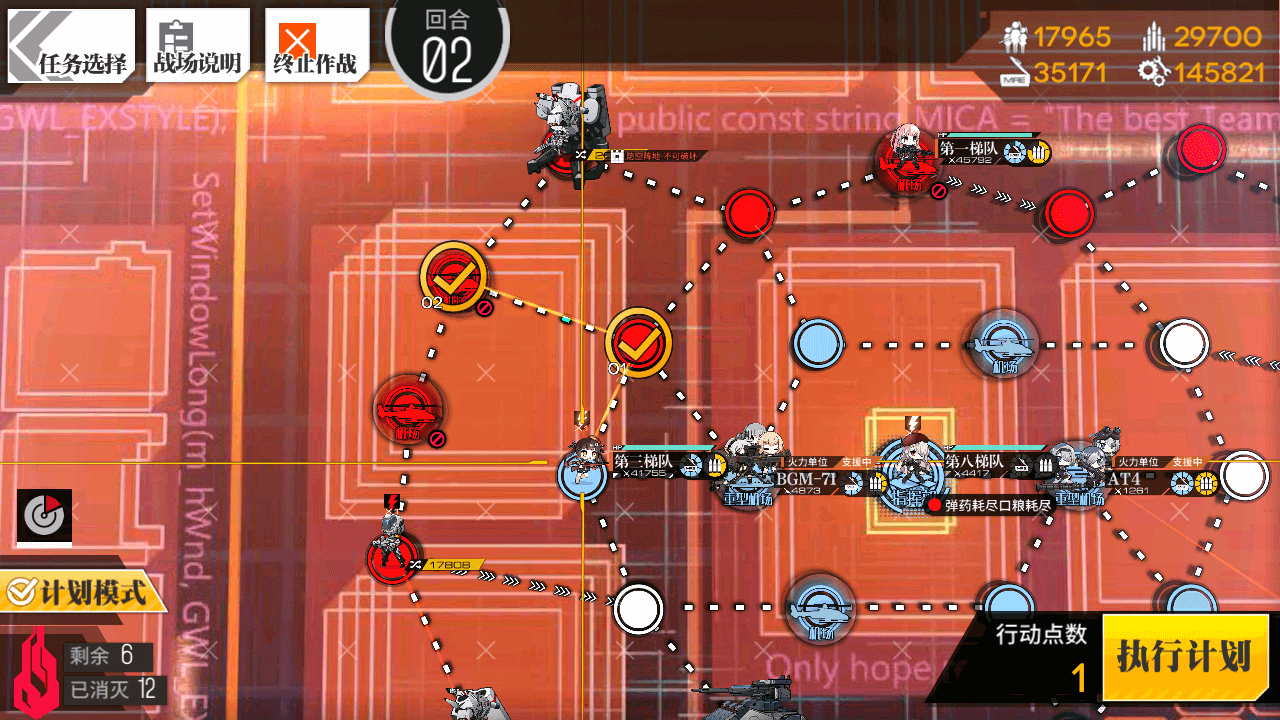
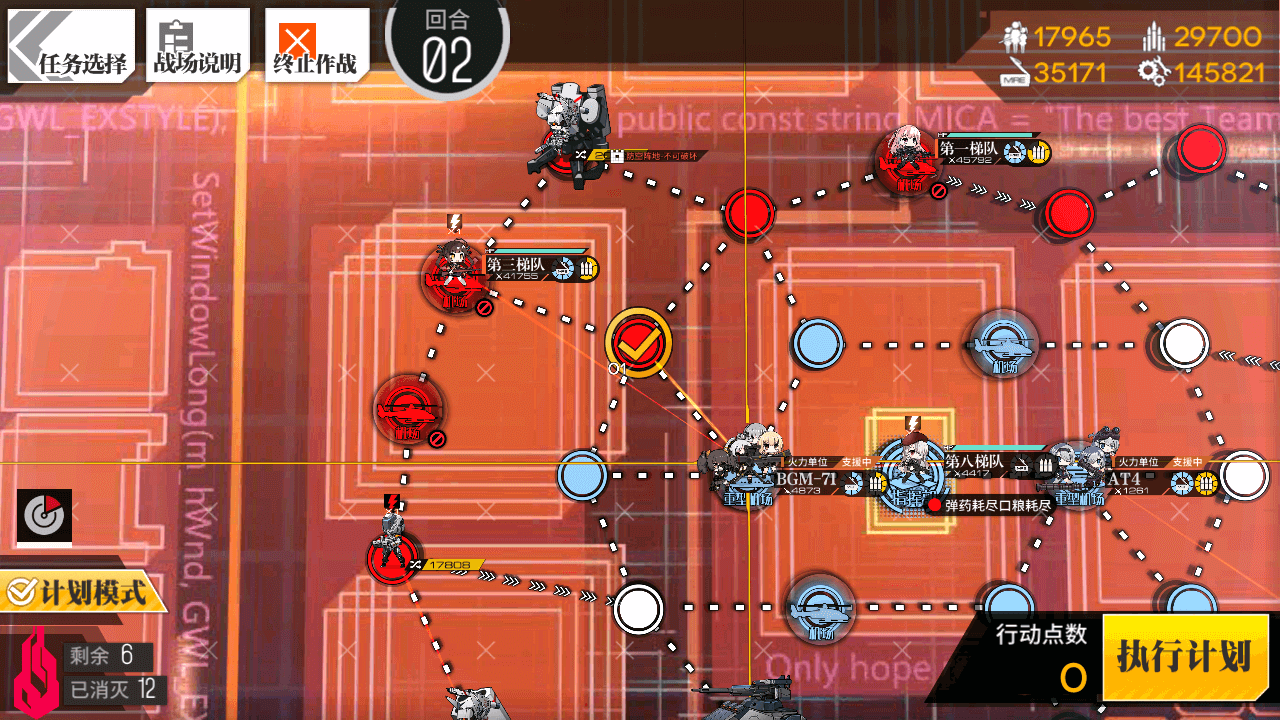
3.3
Move your other HOC out one node.
3.4
Send the upper Combat Echelon right three nodes, down one node, and left across the one way path to finish the map.