Mission and Clear Conditions:
Mission:
Gold: Defeat 10 Enemies and Rescue M4A1 in 9 turns
Silver: Capture the 2 Radars in the middle and hold the Supply Line for 1 turn
Clear Guide:
Team Recommendations:
- 2 RFHG Combat Echelons
- Taunt Fairy on one of these for the Patroller
- 1 ARSMG Combat Echelon
- 2 Dummies
- 3 HOCs (BGM, AGS, 2B/M2)
Clear Steps
Yes, that requirement list is real.
It is possible to achieve the Gold medal with less, but you can do both the Gold and Silver medal side by side in one go, so we are going to do this here.
Most of this map is fairly straightforward despite the node spaghetti and requirements list, but please read carefully to ensure you don't end up in a sticky spot engaging an Enemy with an Echelon incapable of defeating it. Likewise, make sure to check the Enemy starting positions in-game from time to time. Otherwise, you can end up in an unfortunate situation for other reasons.
Hey...Ari? Why is this guide 23 pages long?

Have fun!

Turn 1
1.1
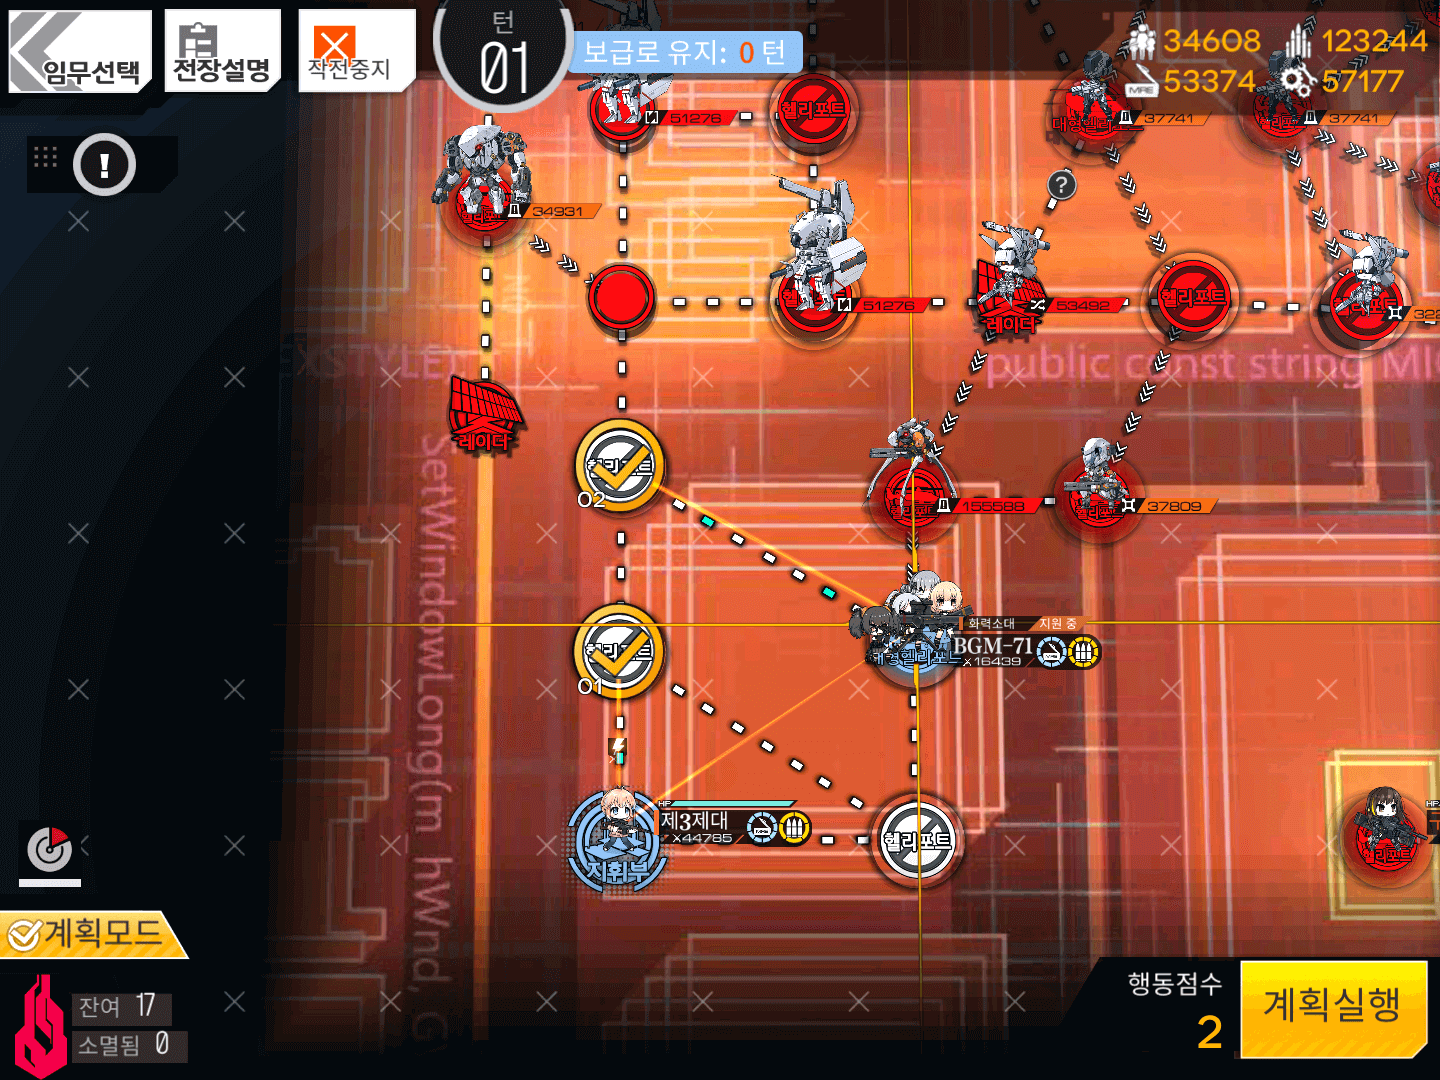
Deploy an RFHG Echelon on the Command Post and BGM on the Heavy Heliport.
Move your RFHG Echelon up one node and BGM up-left one node.
1.2
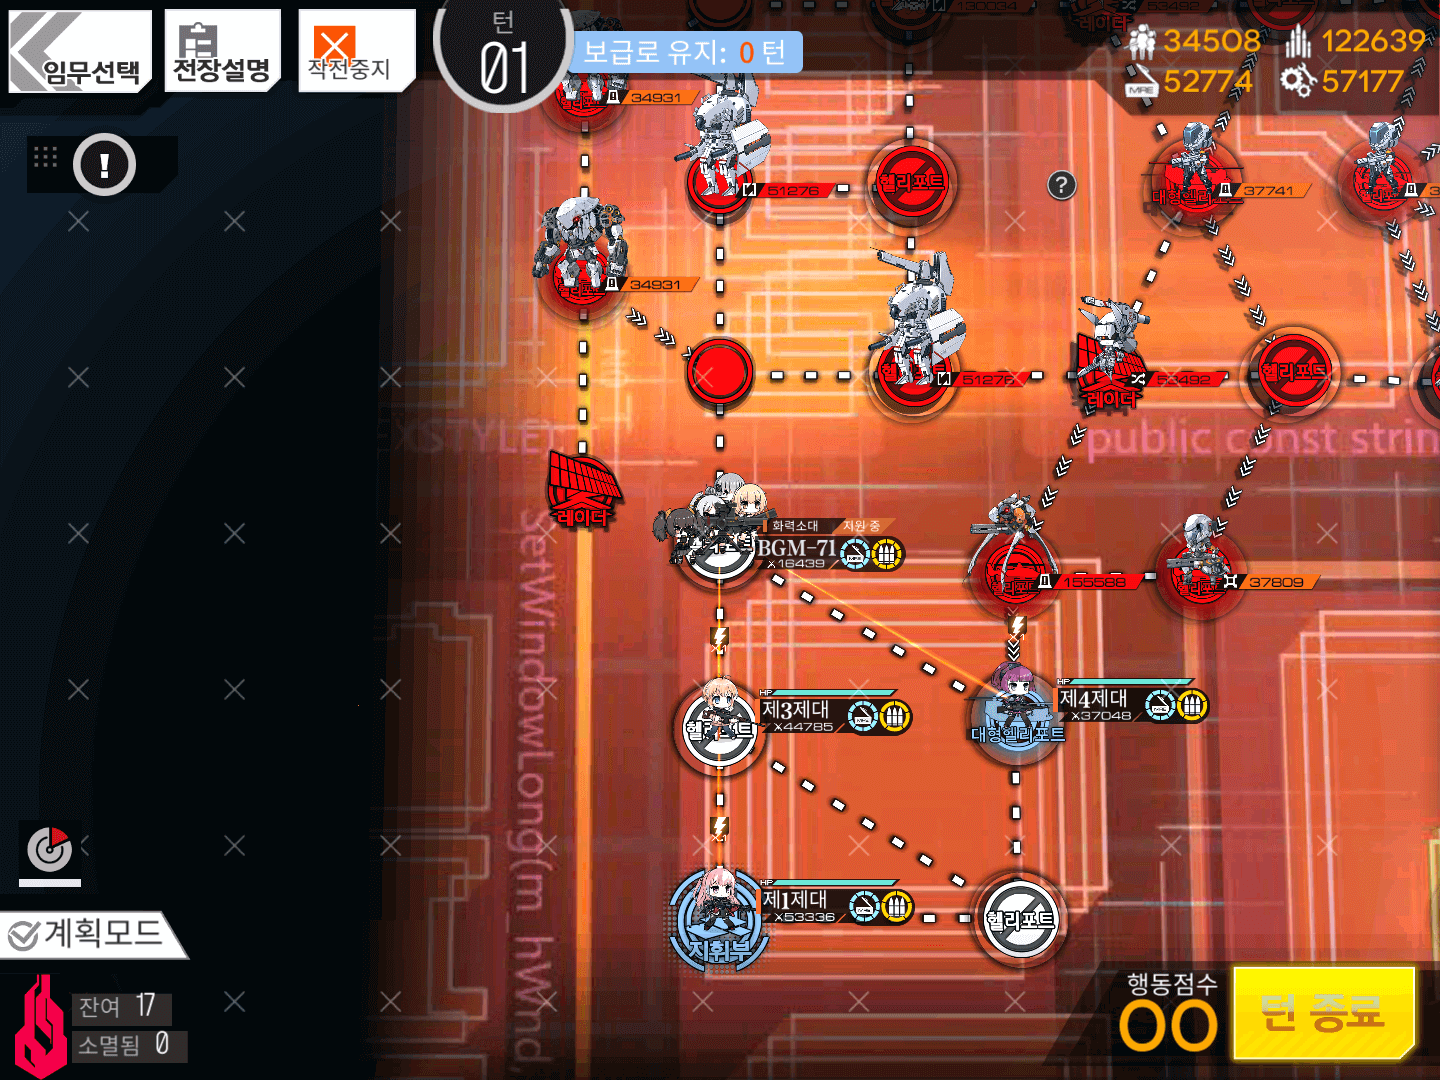
Deploy a second RFHG Echelon on the Heavy Heliport and an ARSMG Echelon on the Command Post, then end your turn.
Bring a Taunt Fairy for an easy Patroller fight. Disable Auto Skill and reactivate it when the Patroller jumps. M200/SSG3000 make short work of these guys, along with other Sure-Hit Skills.
Advanced strats: Bring NTW-20 Mod 2+. as her Skill 2 ignores HP Shields, allowing her to bring down the leggy-boy with ease. Desert Eagle also works for this.

Turn 2
2.1
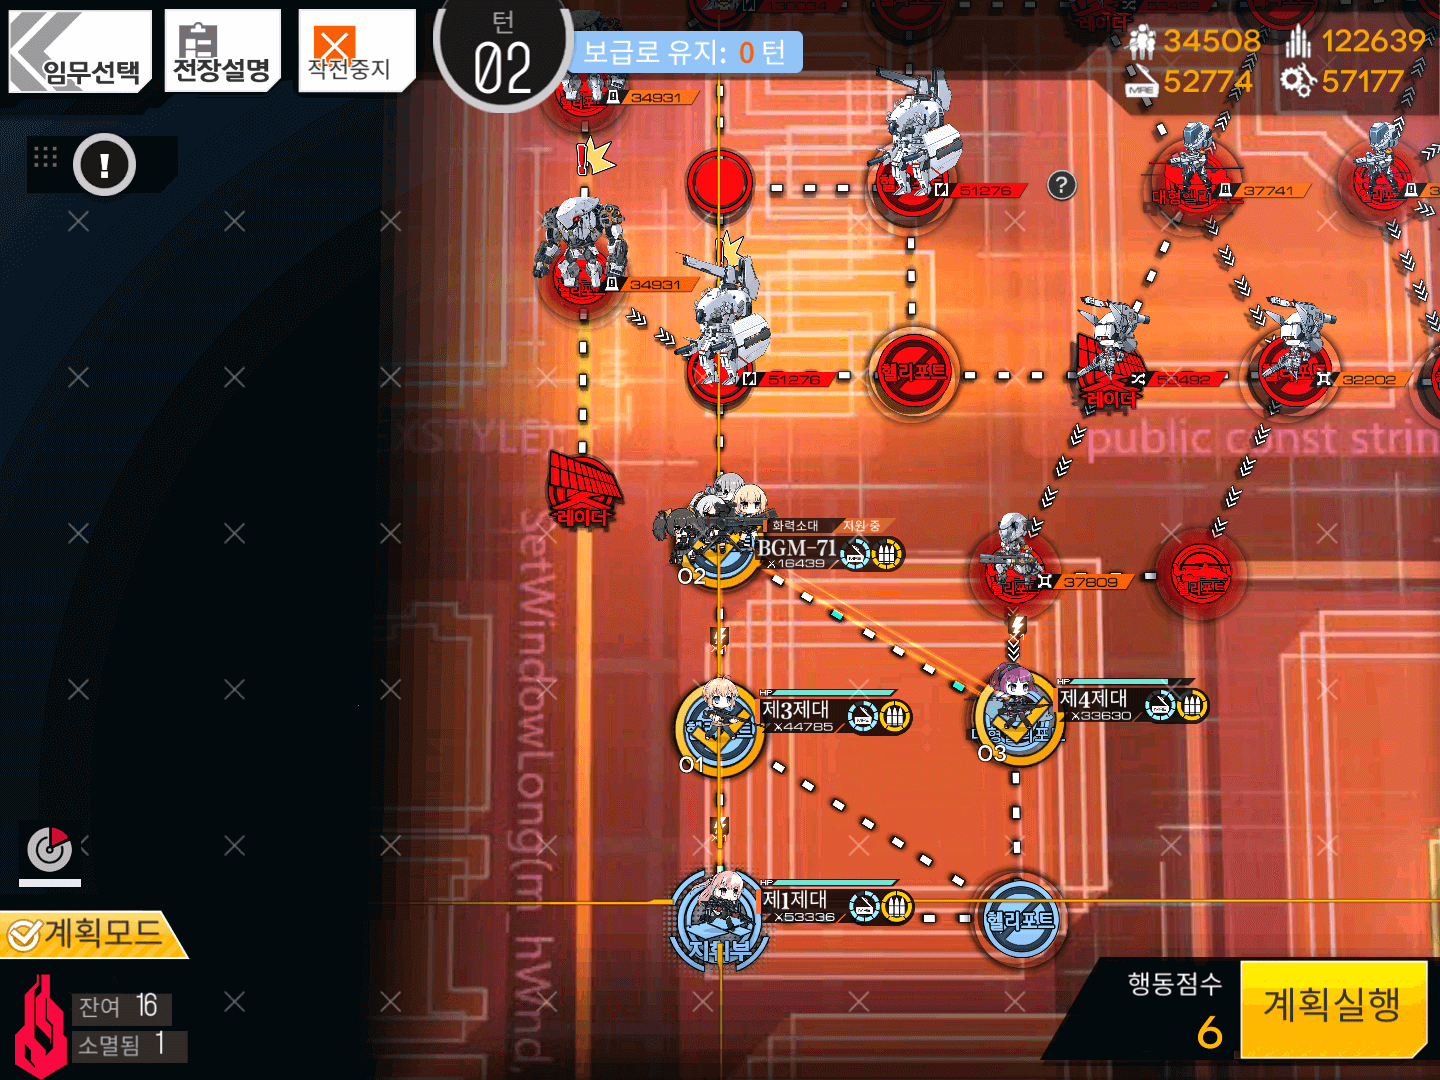
Swap your ARSMG Echelon up twice, then to the right once, ending up on the Heavy Heliport.
2.2
Move your second RFHG Echelon up one node then right one node. Then, move your first RFHG Echelon up three nodes.
2.3
Move your ARSMG Echelon up-left one node. Move BGM up one node, then spawn a Dummy on both the Command Post and Heavy Heliport.
2.4
Swap the ARSMG Echelon back down-right on the Heavy Heliport to intercept the Gunners during the Enemy turn and swap BGM up one node to support both RFHG teams.
End your turn.
Turn 3
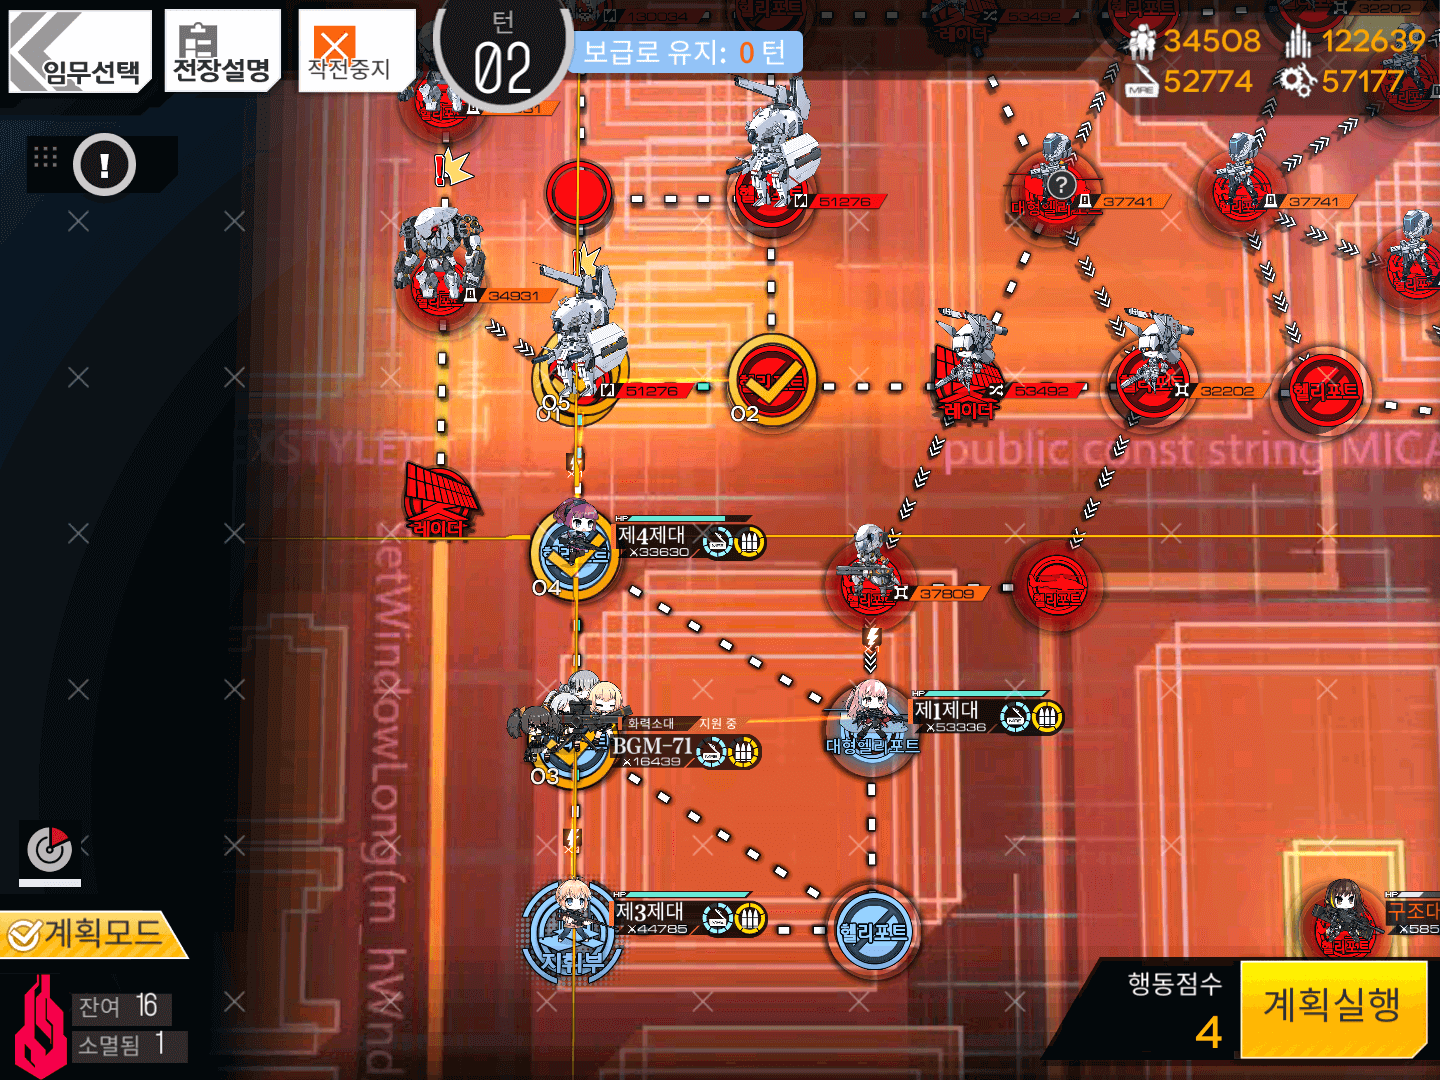
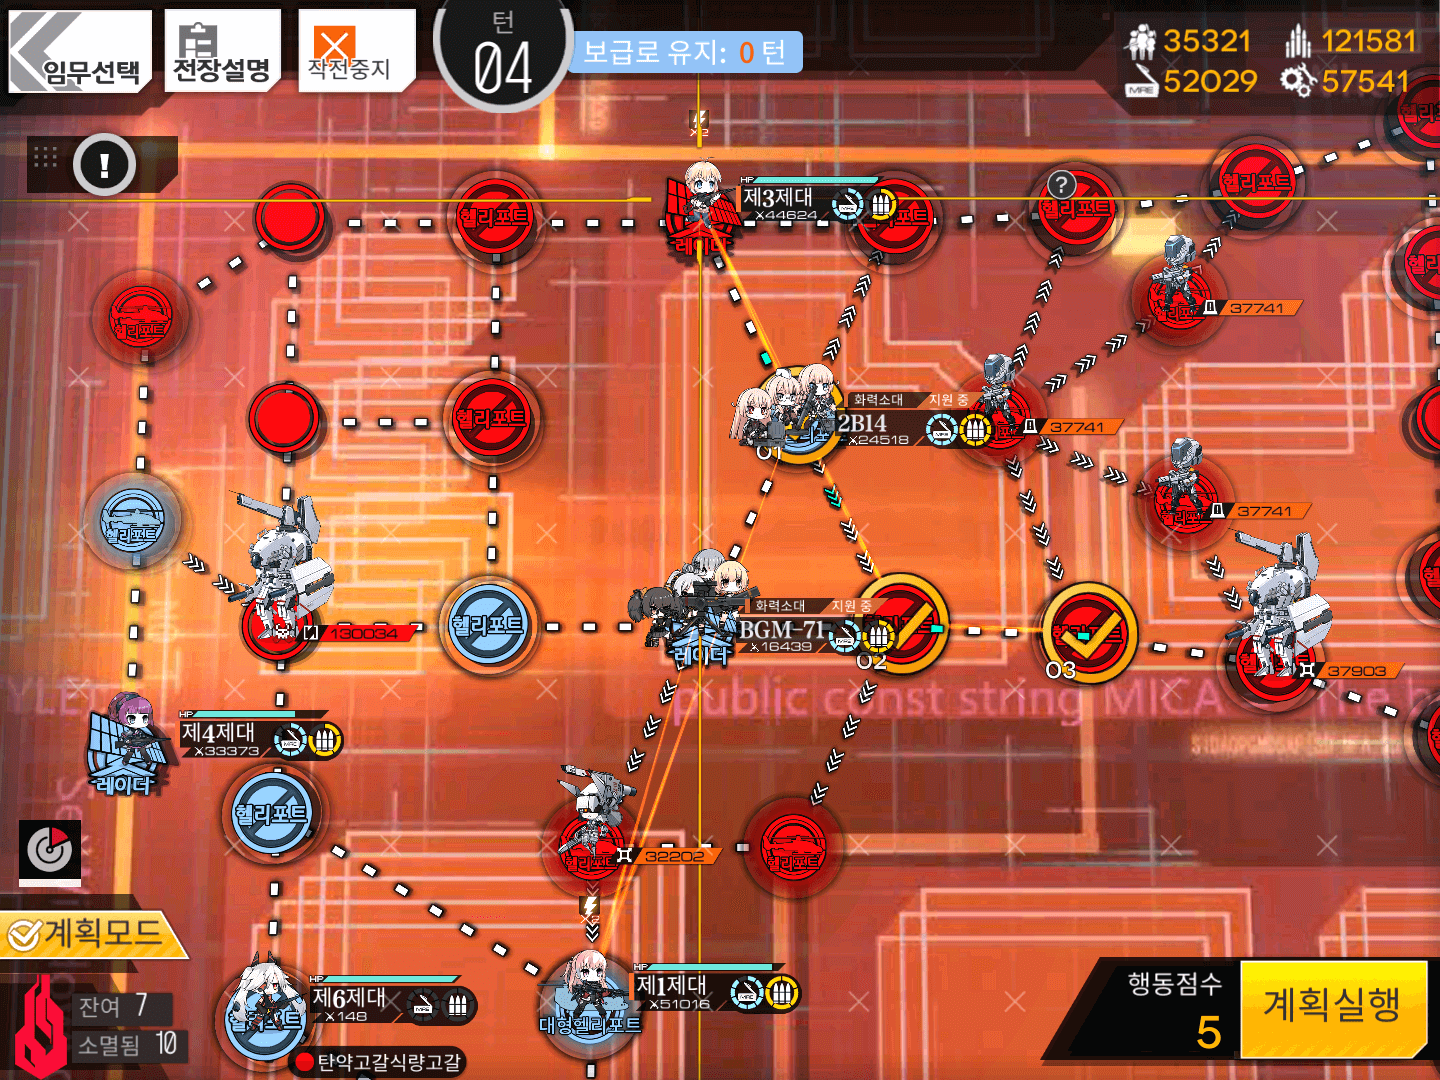
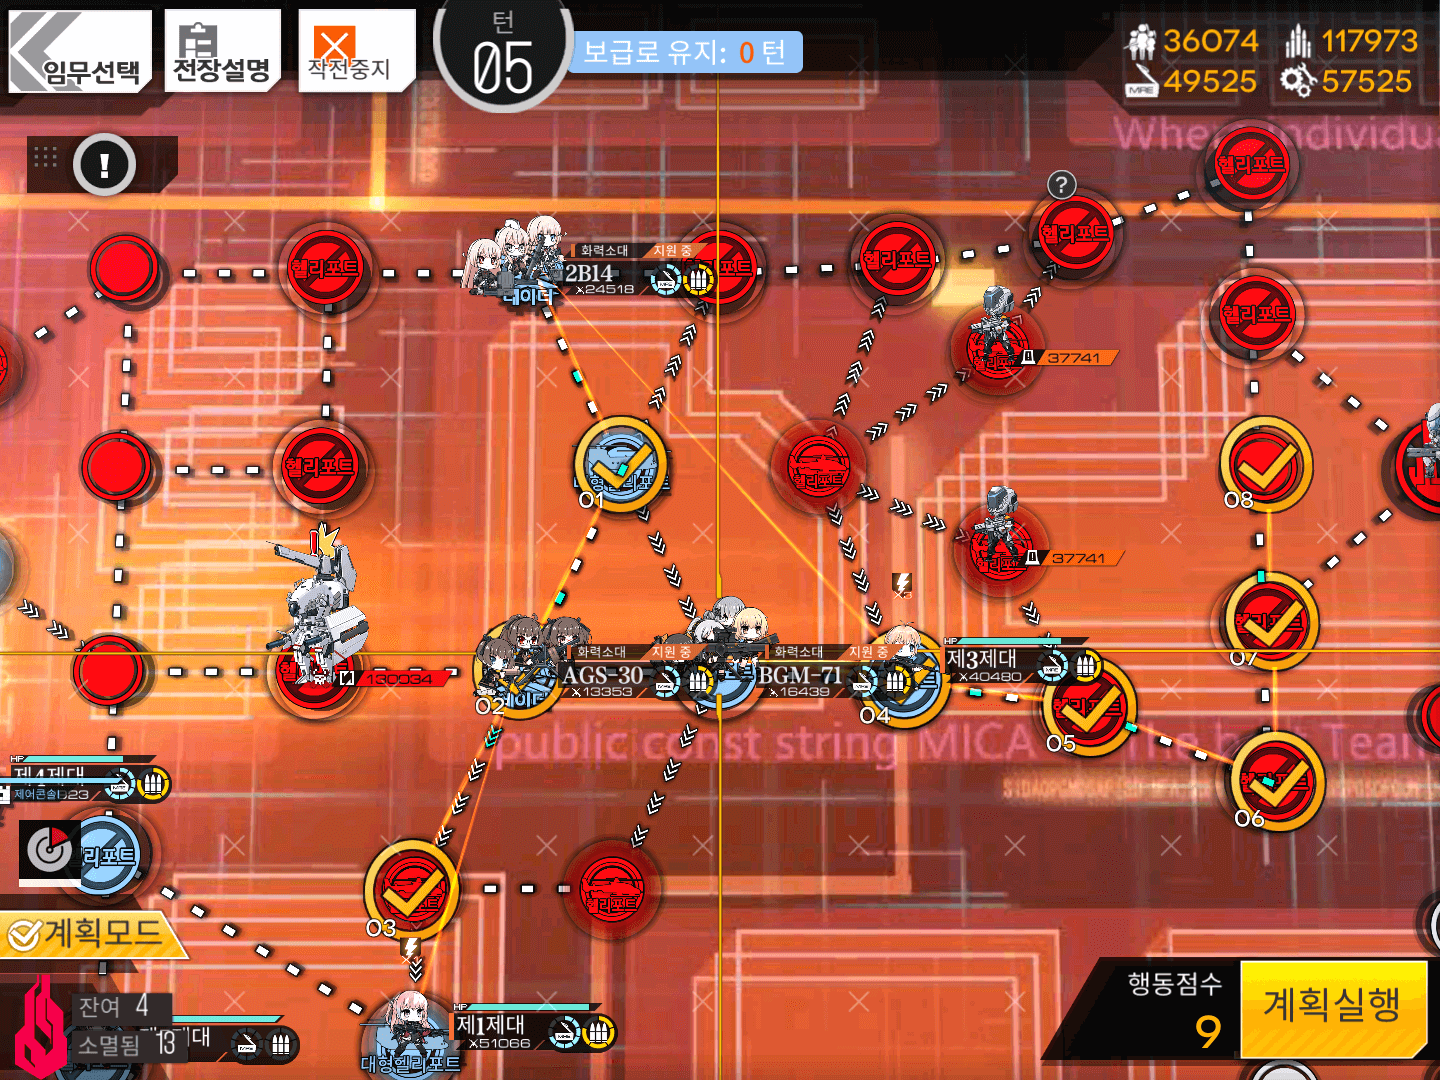
3.1
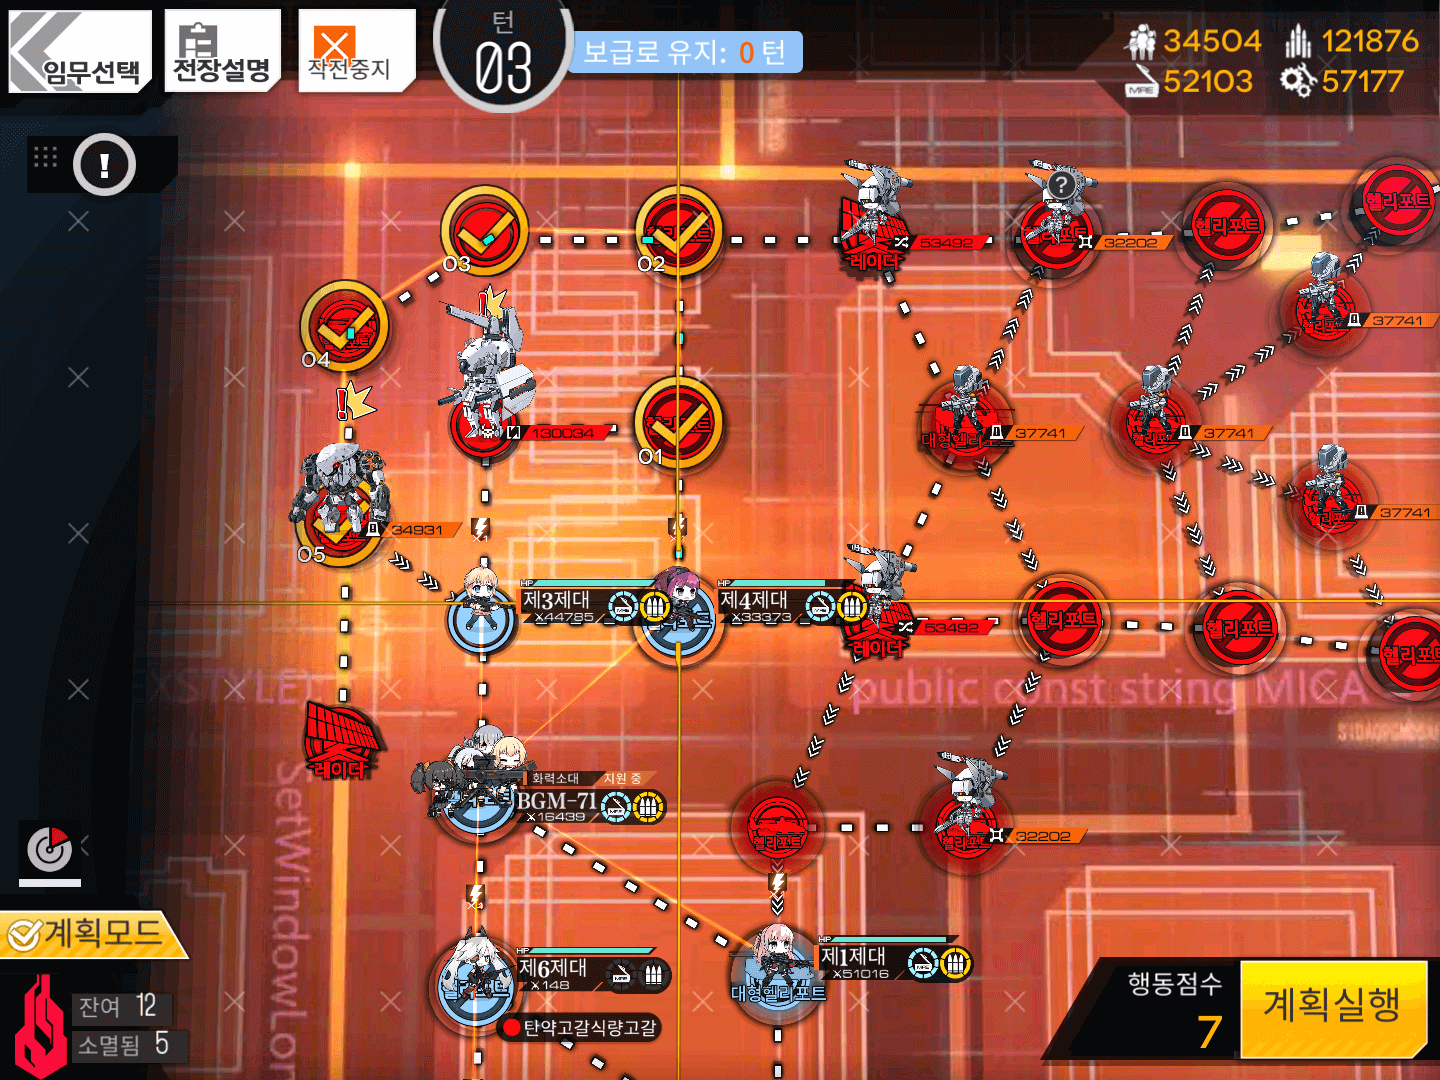
Resupply all your Echelons and BGM on either your Command Post or the Heavy Heliport via swapping. All Echelons should have full supplies before you continue!
After that, move the right RFHG Echelon up two nodes, left two nodes and down one node to fight the Gladiator. Stopping here ensures you capture both the Heliport and the Radar.
3.2
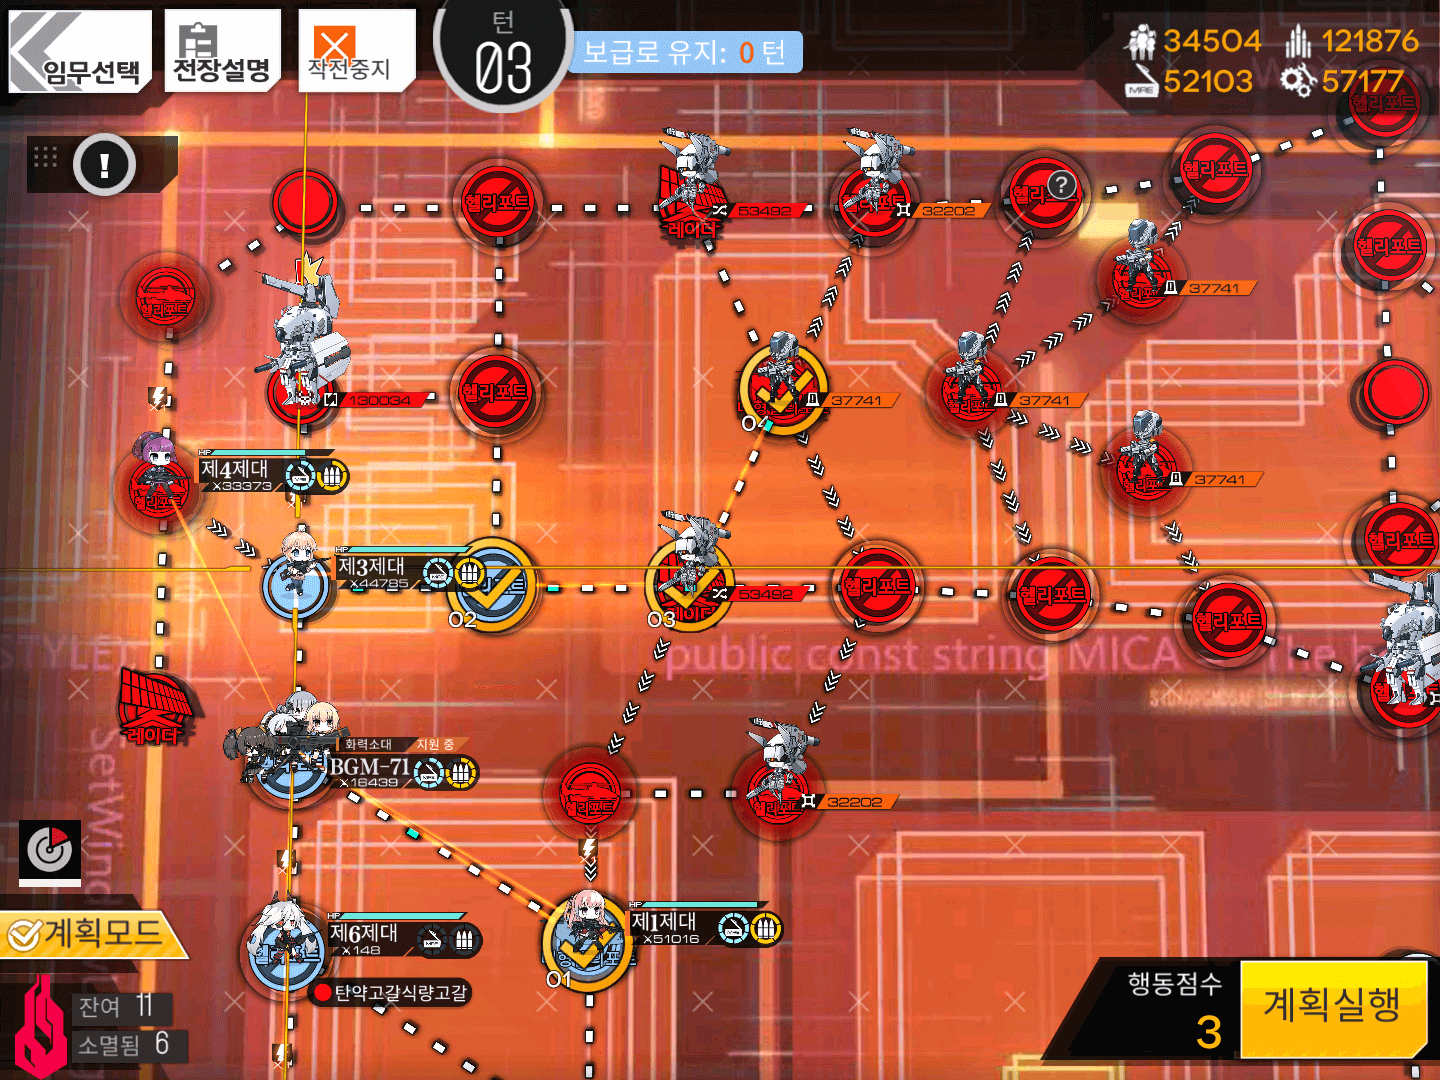
Swap BGM down-right with the ARSMG Echelon. This places BGM on the Heavy Heliport. Then move the other RFHG Echelon right two nodes and up-right one node.
We switch BGM here so that the RFHG Echelon will have fire support.
The Enemy on the Radar would not be fun to beat without it (unless your Echelons are the best of the best).

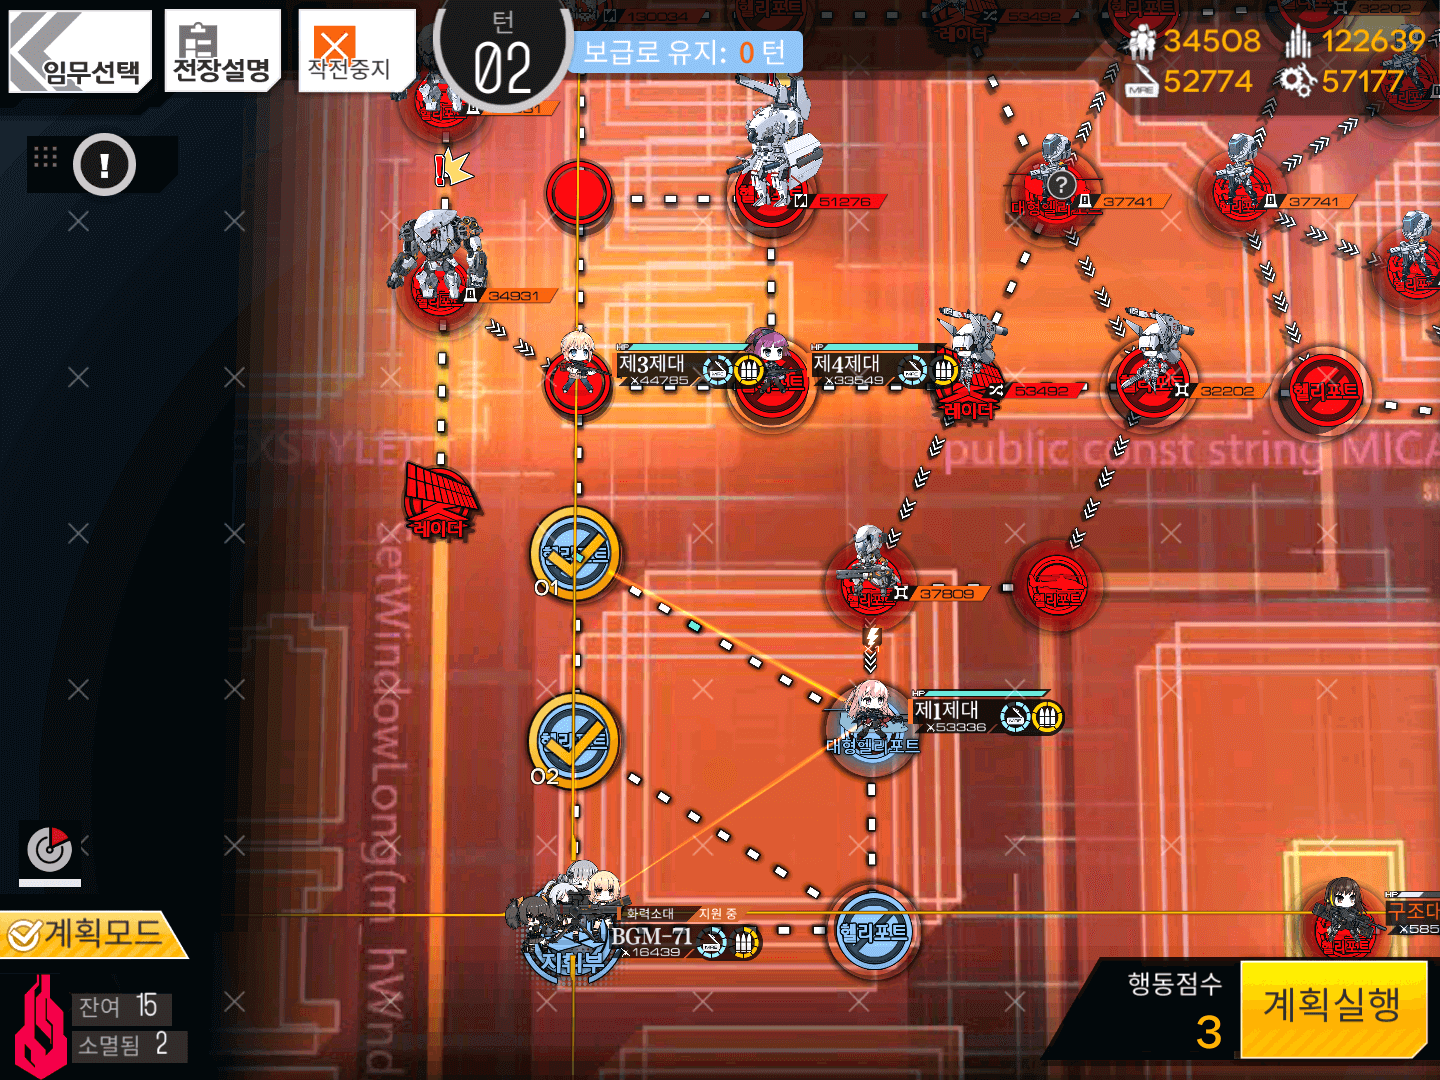
3.3
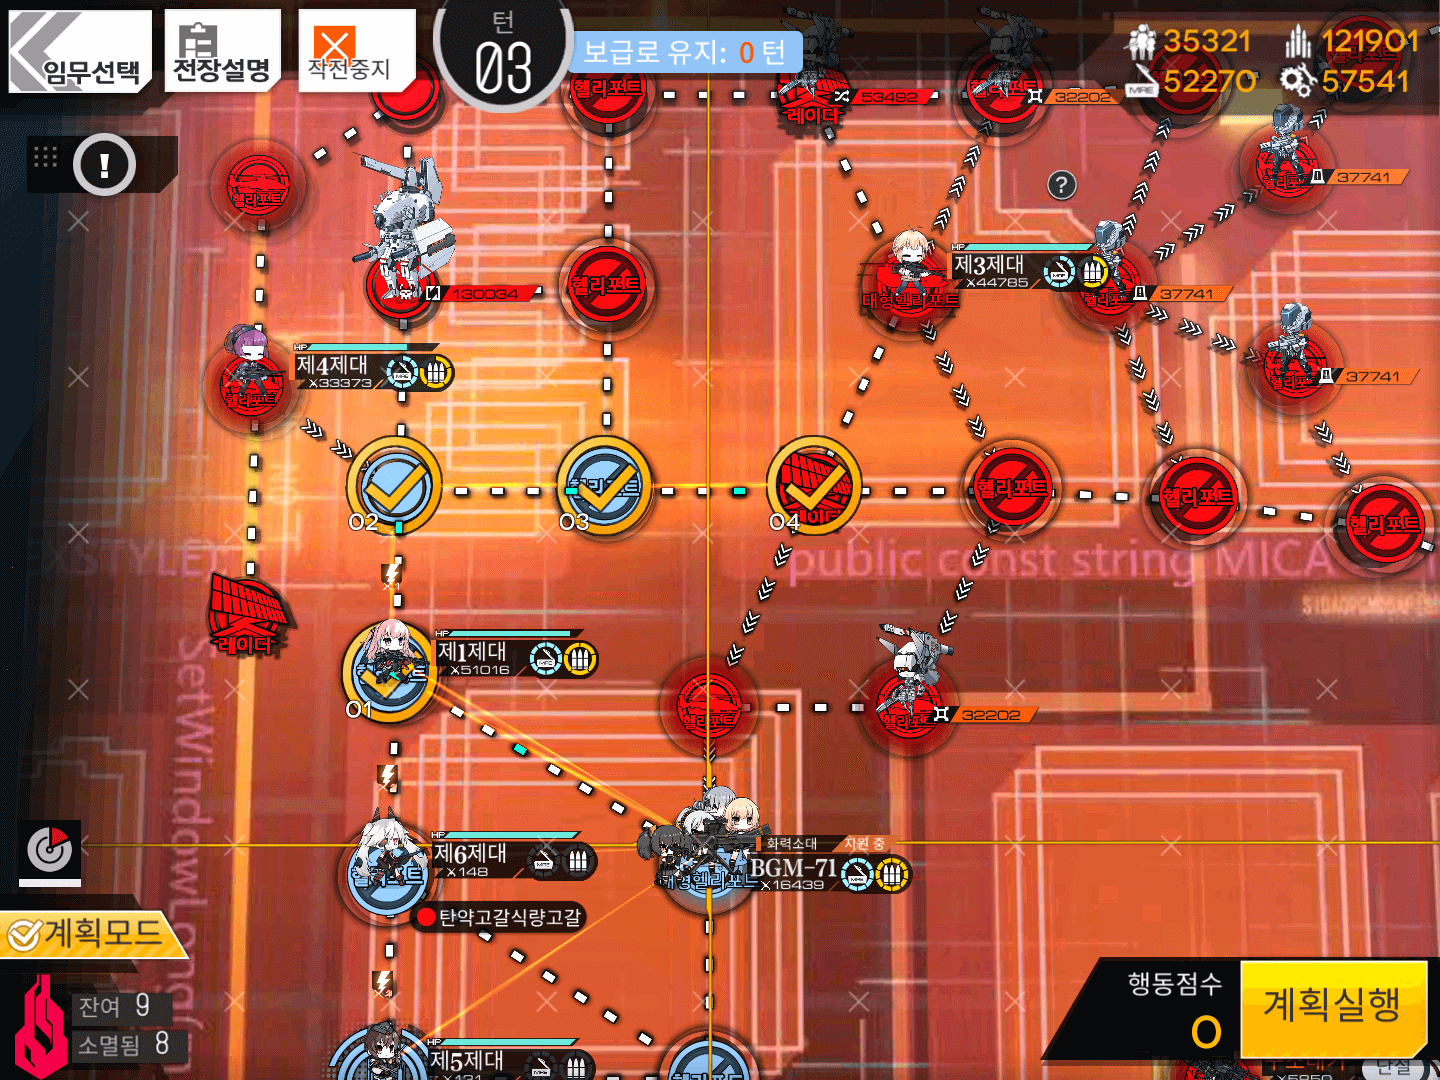
Resupply and swap BGM up-left one node, then move up one node and right two nodes.
End your turn.
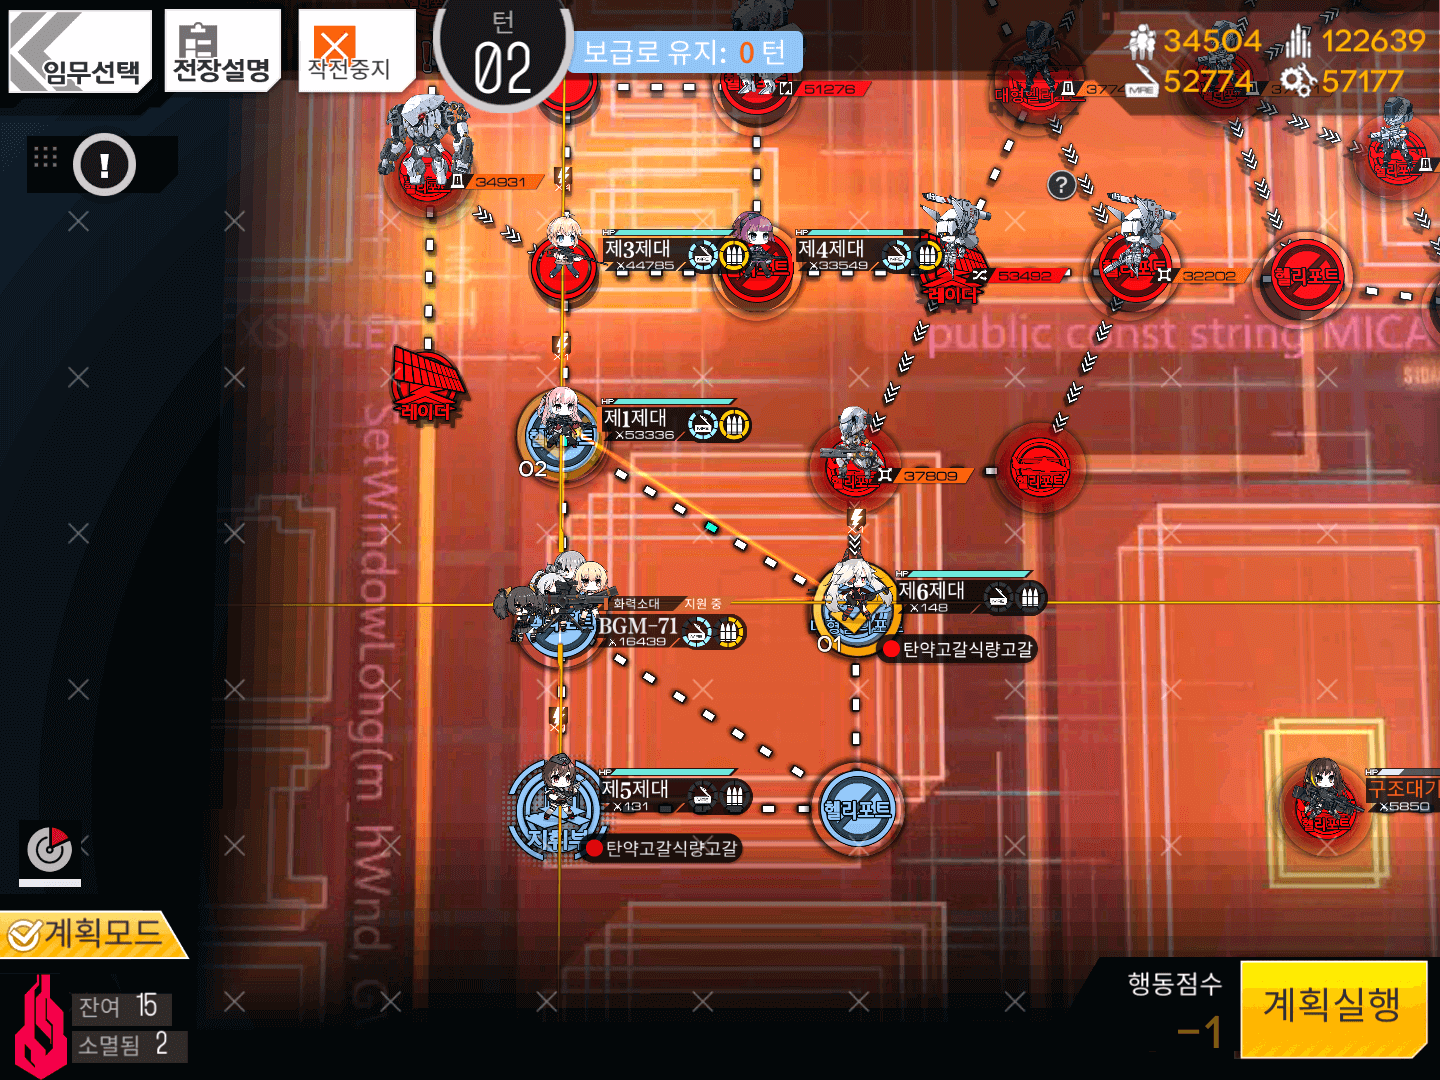
Turn 4
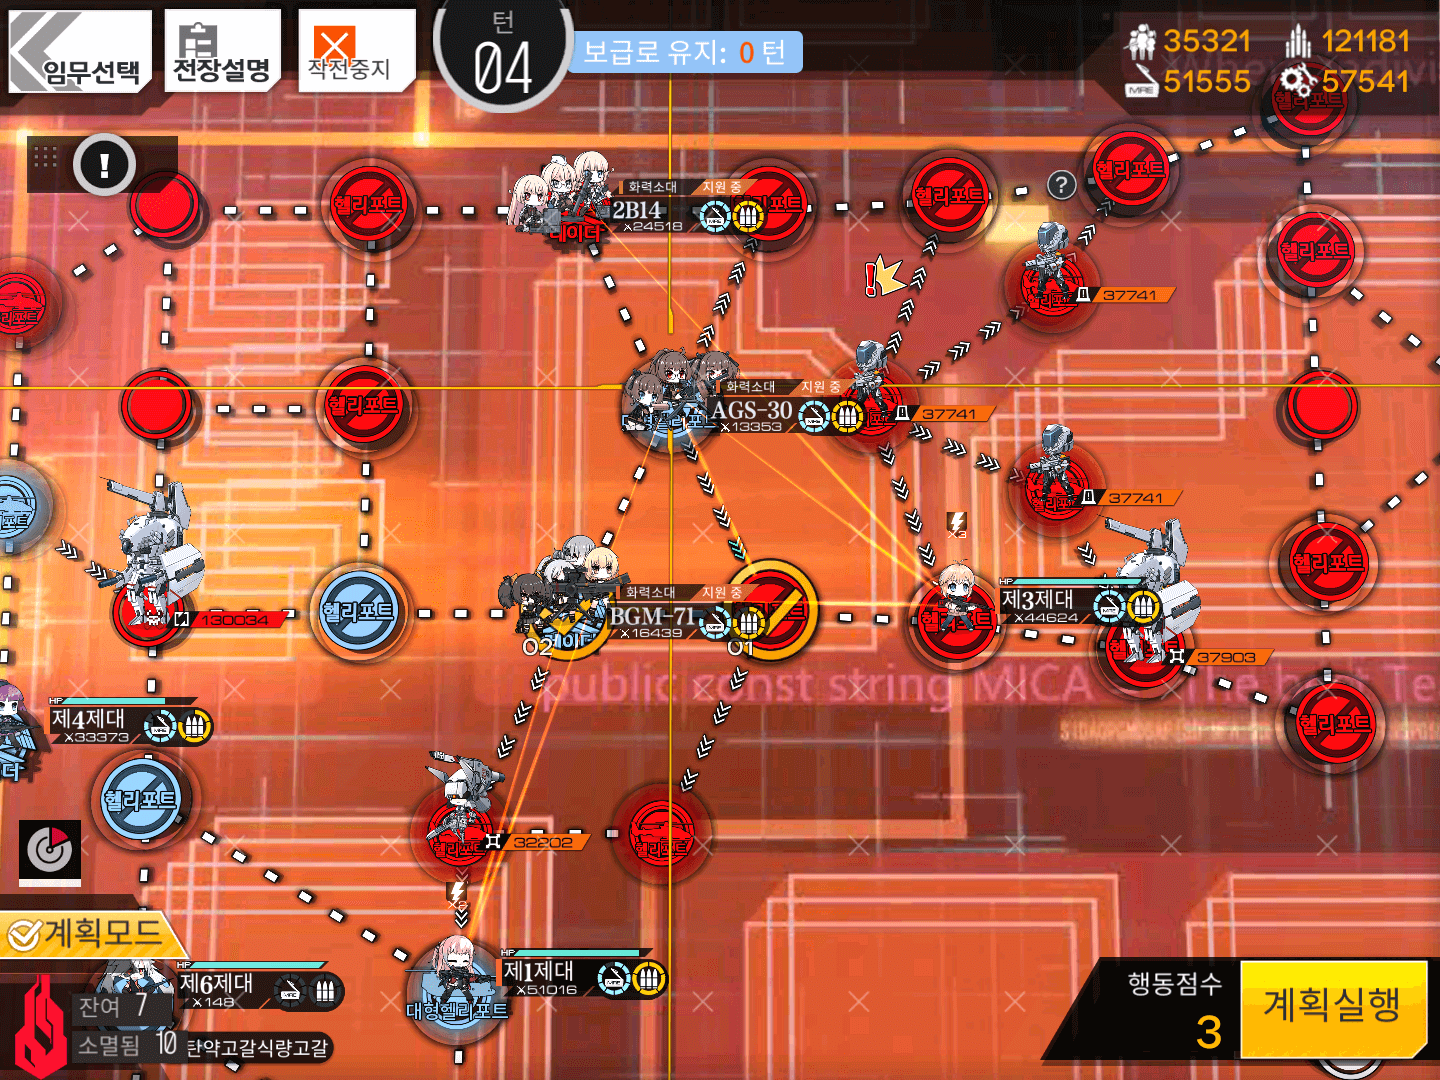
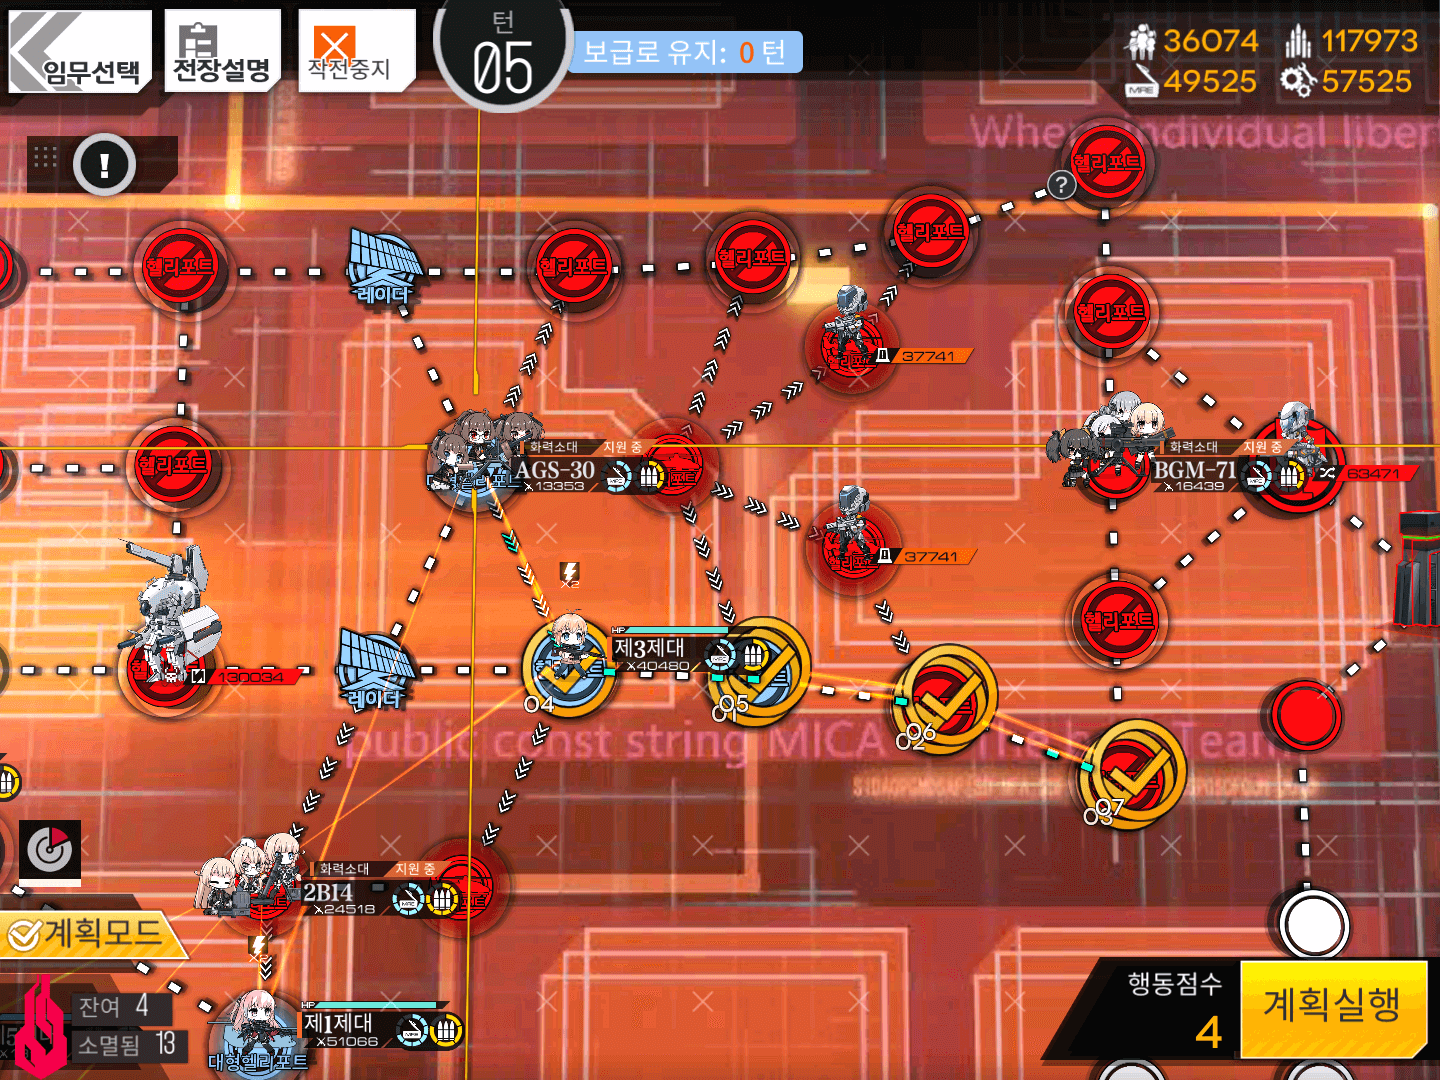
4.1
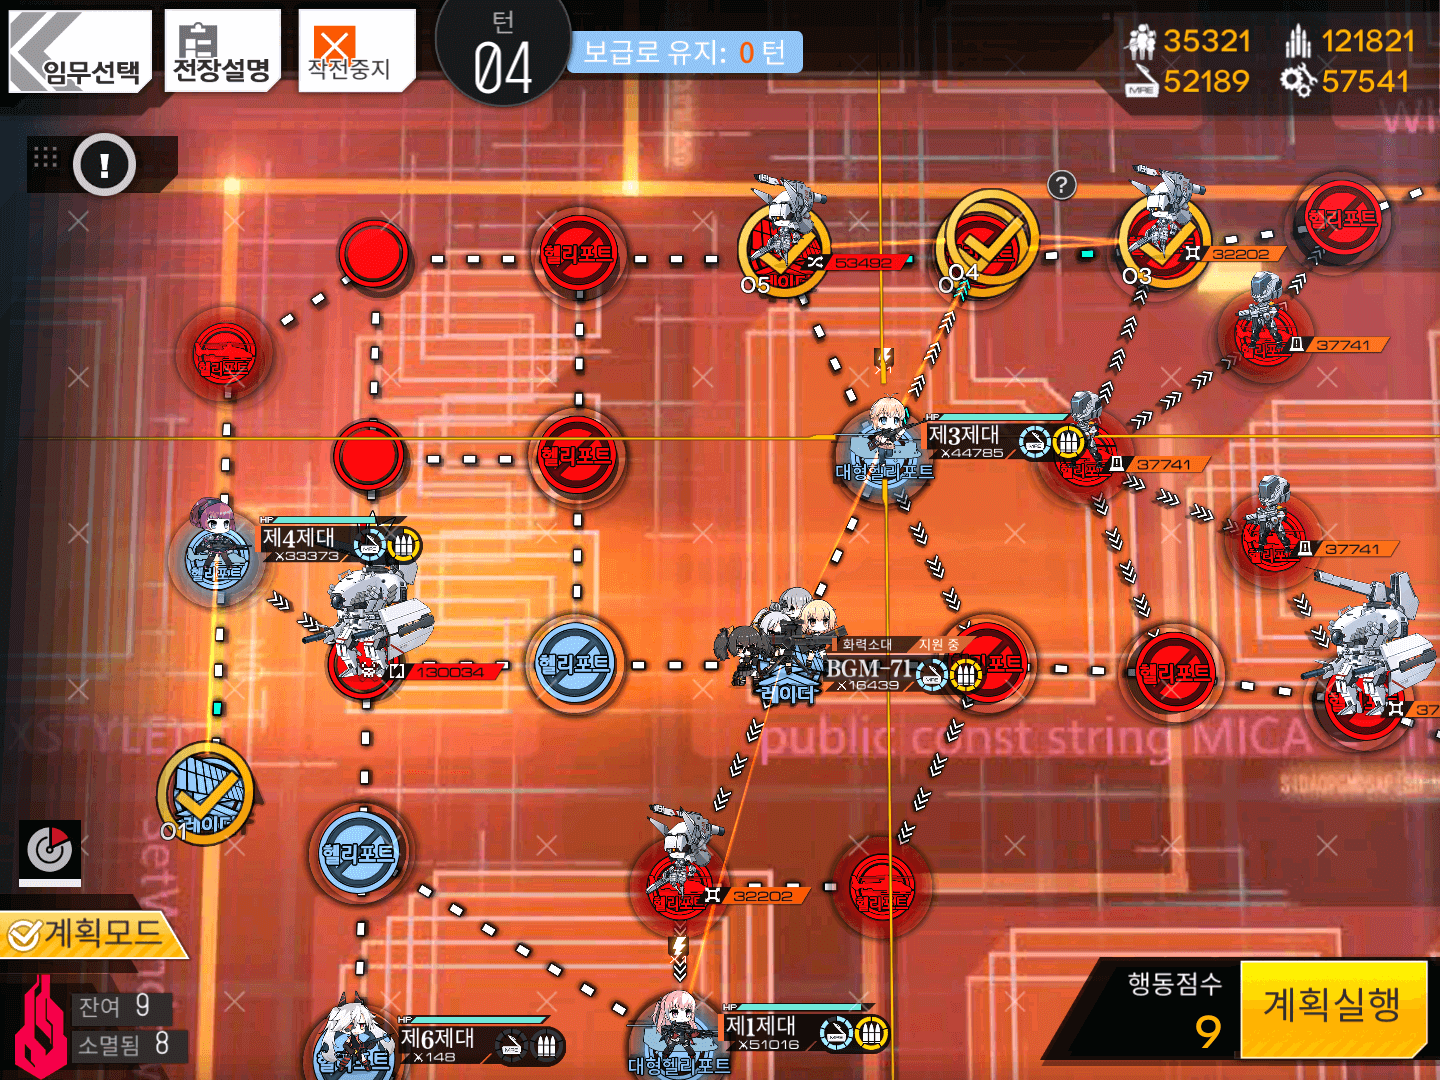
Move your leftmost RFHG Echelon down one node onto the Radar. A Remote will appear here next turn.
Move your right RFHG Echelon up-right one node, right one node, and left two nodes.
Deploy 2B on the middle Heavy Heliport above BGM.
We defeat the Rodels to make sure the Radar won’t get re-captured later.

4.2
Swap the upper RFHG Echelon down-right with 2B.
Resupply at the Heavy Heliport and then move down-right one node and one to the right.
Deploy AGS on the middle Heavy Heliport above BGM.
4.3
Move AGS down-right one node and then swap with BGM to the left.
4.4
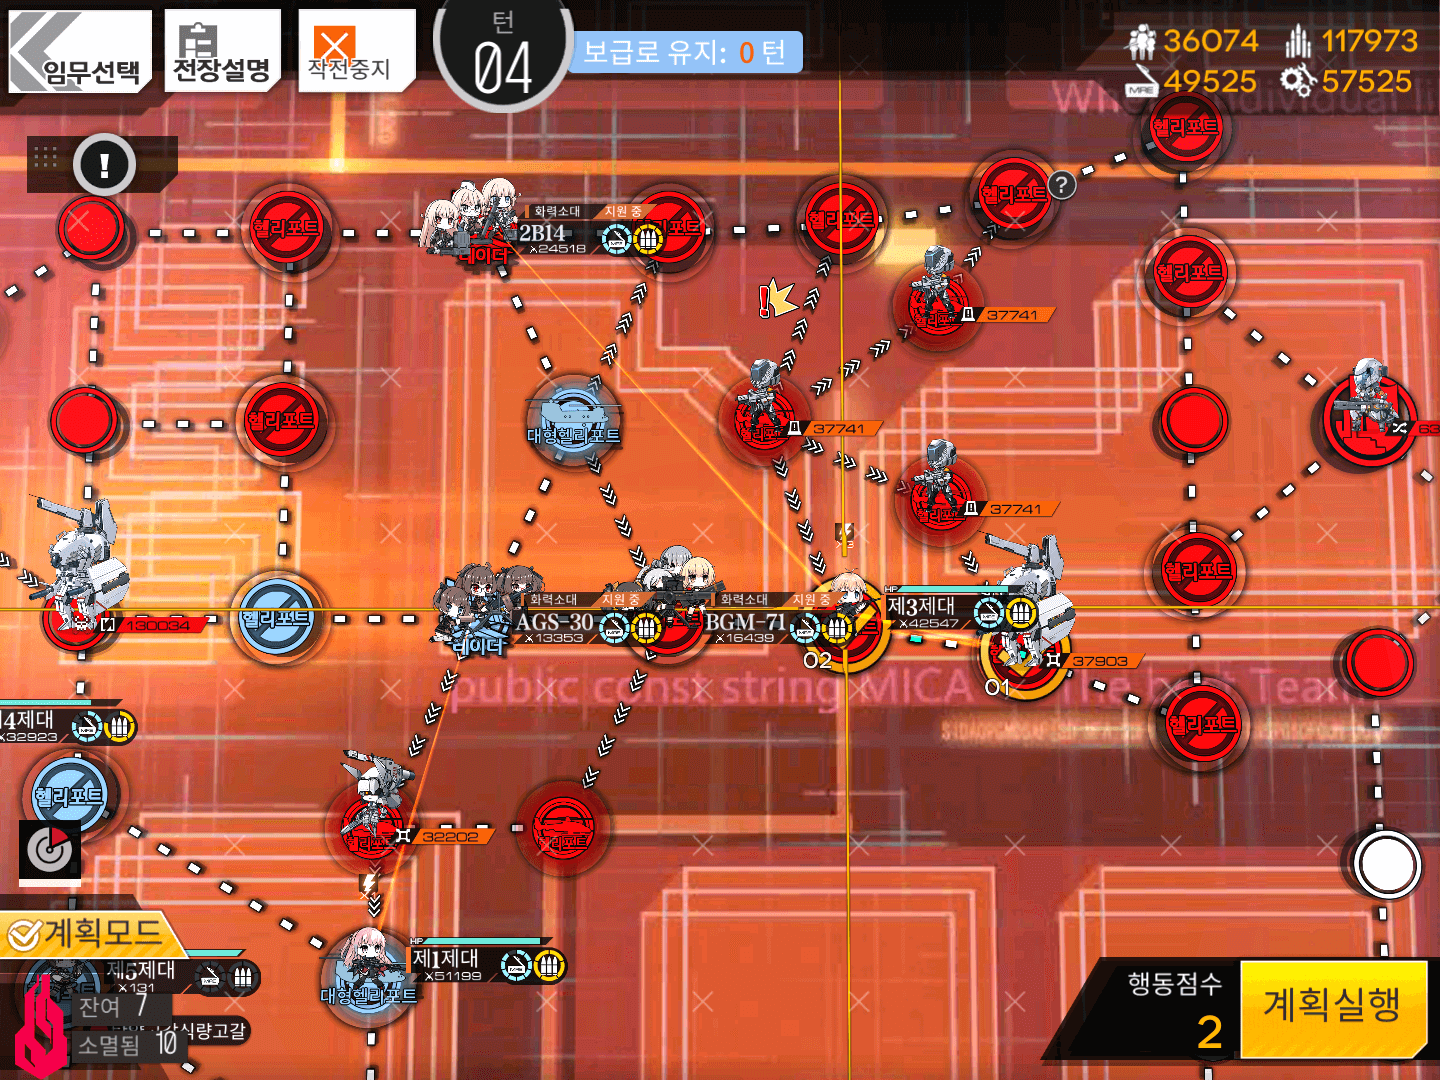
Move the right RFHG Echelon right one node, defeating the Doppelsöldner, and then left one node back onto their starting position.
We have leftover AP on this turn, so we can go ahead and beat up this Doppelsöldner early to prevent it from getting funny ideas about where to move.
Turn 5
5.1
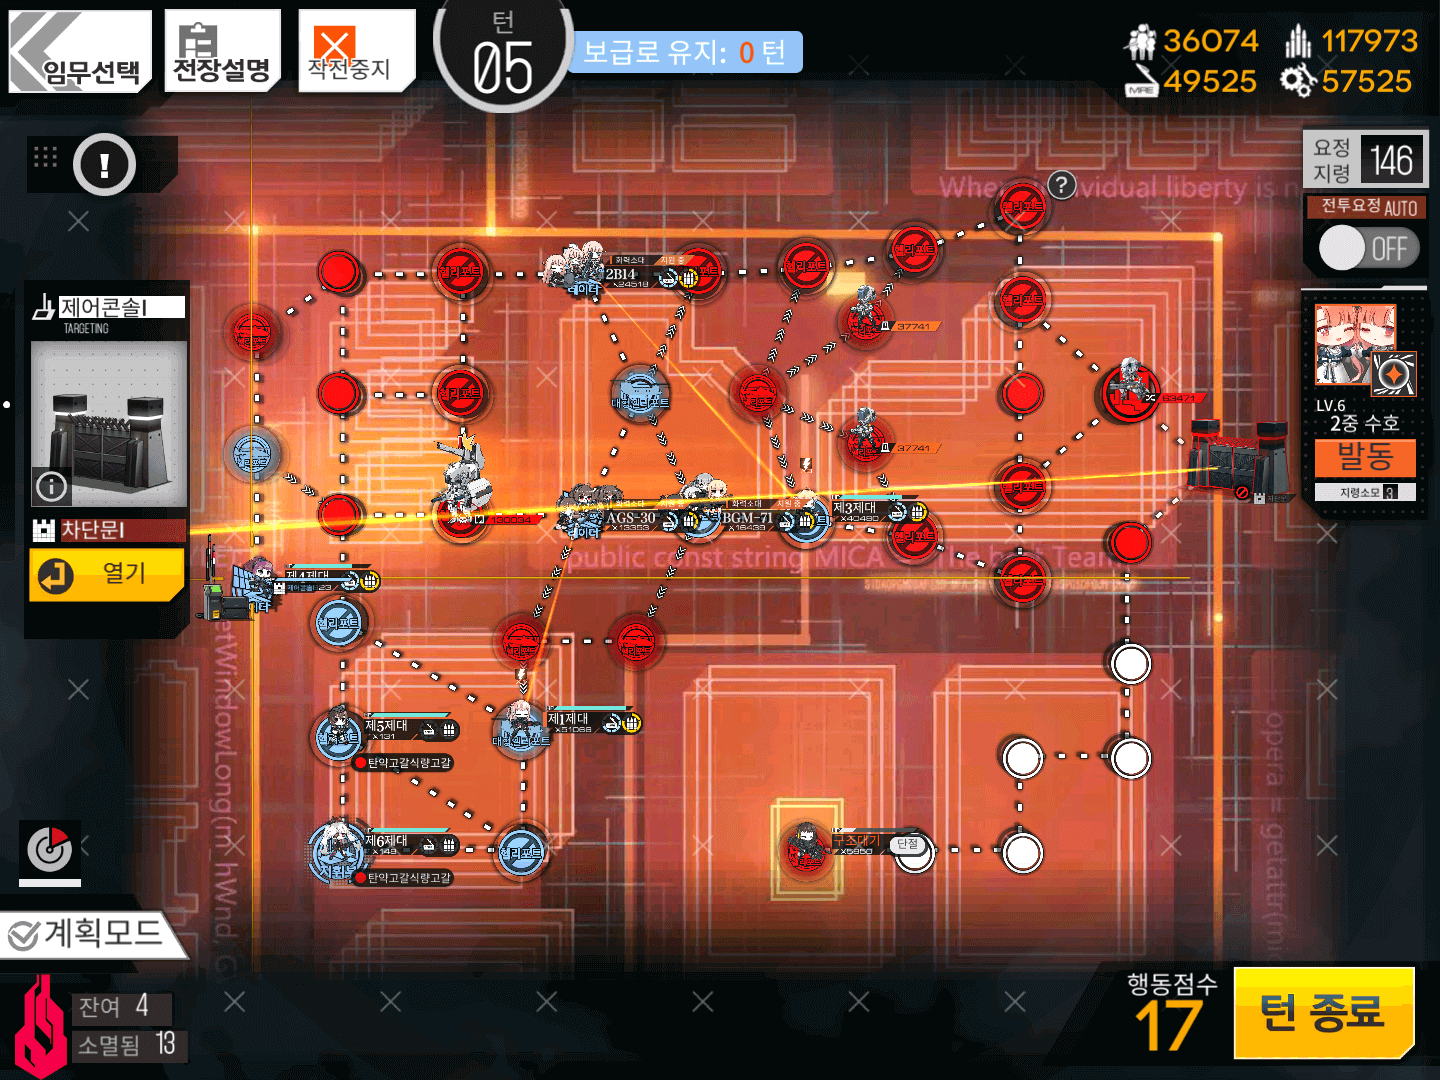
Use the Remote that spawned on the left Radar to open the Gate all the way on the right of the map.
5.2
At this point, you have a choice about what HOCs to bring to support your Echelon during the last few fights. BGM is used because the final Enemy is a Gunner/Gladiator combo that starts with 50% Shield. AGS or 2B can be used depending on which you prefer / is stronger.

Move 2B down-right one node, then swap with AGS. Move 2B down-left onto the Heliport.
Swap BGM with the RFHG team, then move BGM to the right two nodes and up two nodes.
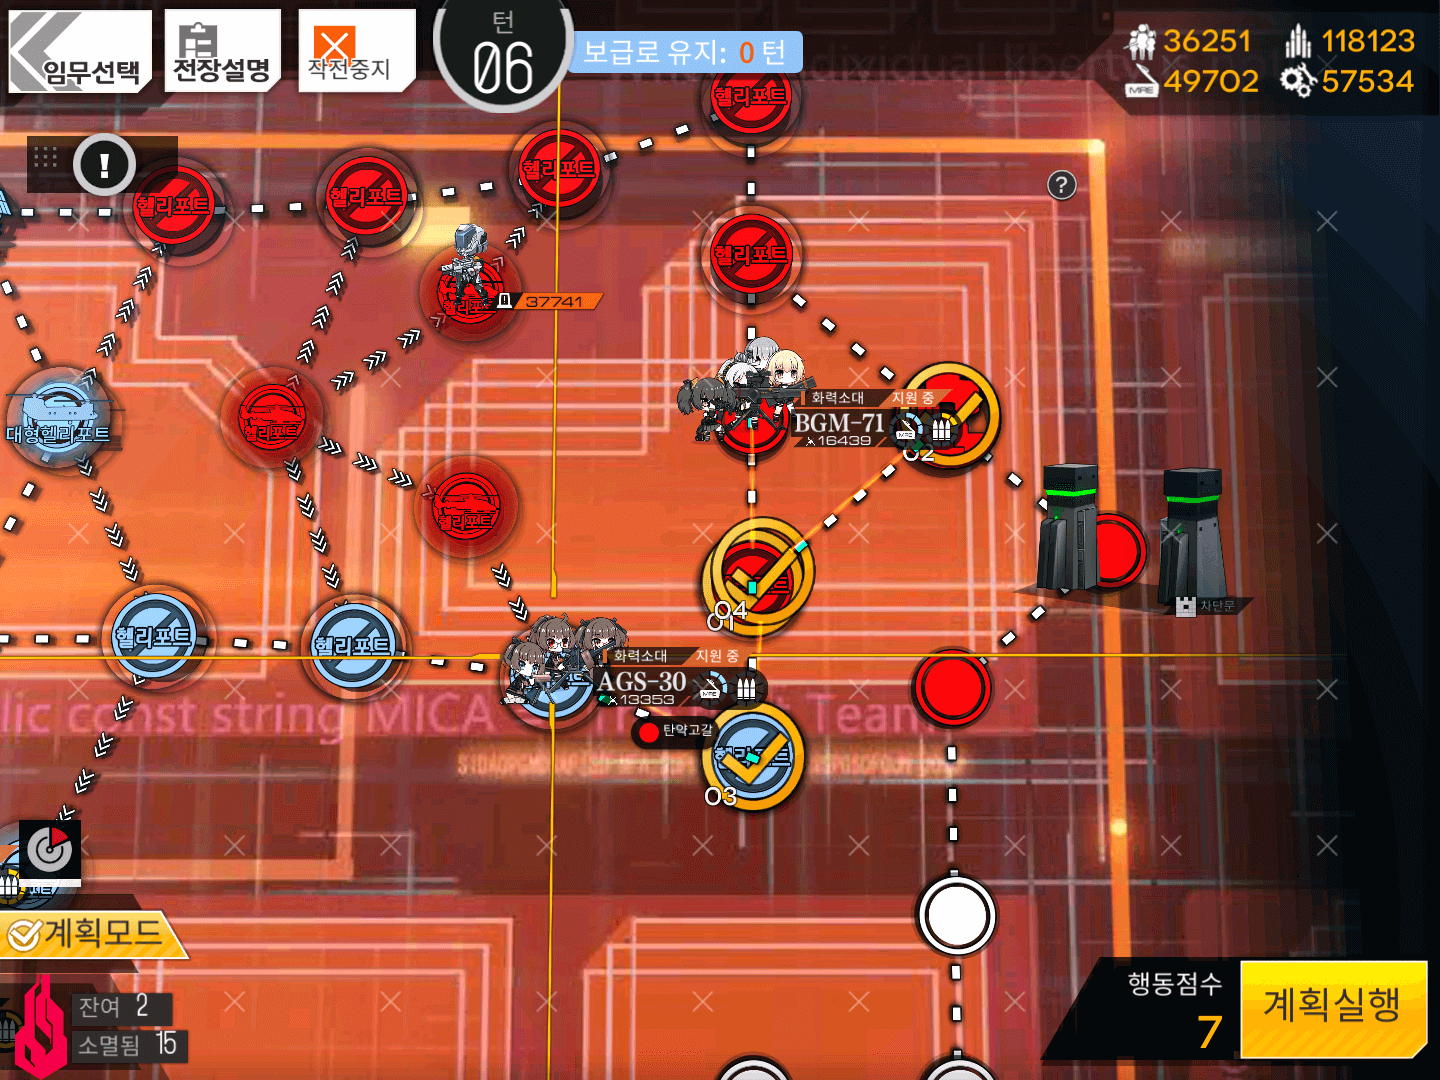
5.3
Move the right RFHG Echelon right three nodes.
Then move AGS down-right one node and then right two nodes and SWAP with your RFHG Echelon.
Your RFHG Echelon will have to fight another Strelet so your Supply Line won’t get cut off later.
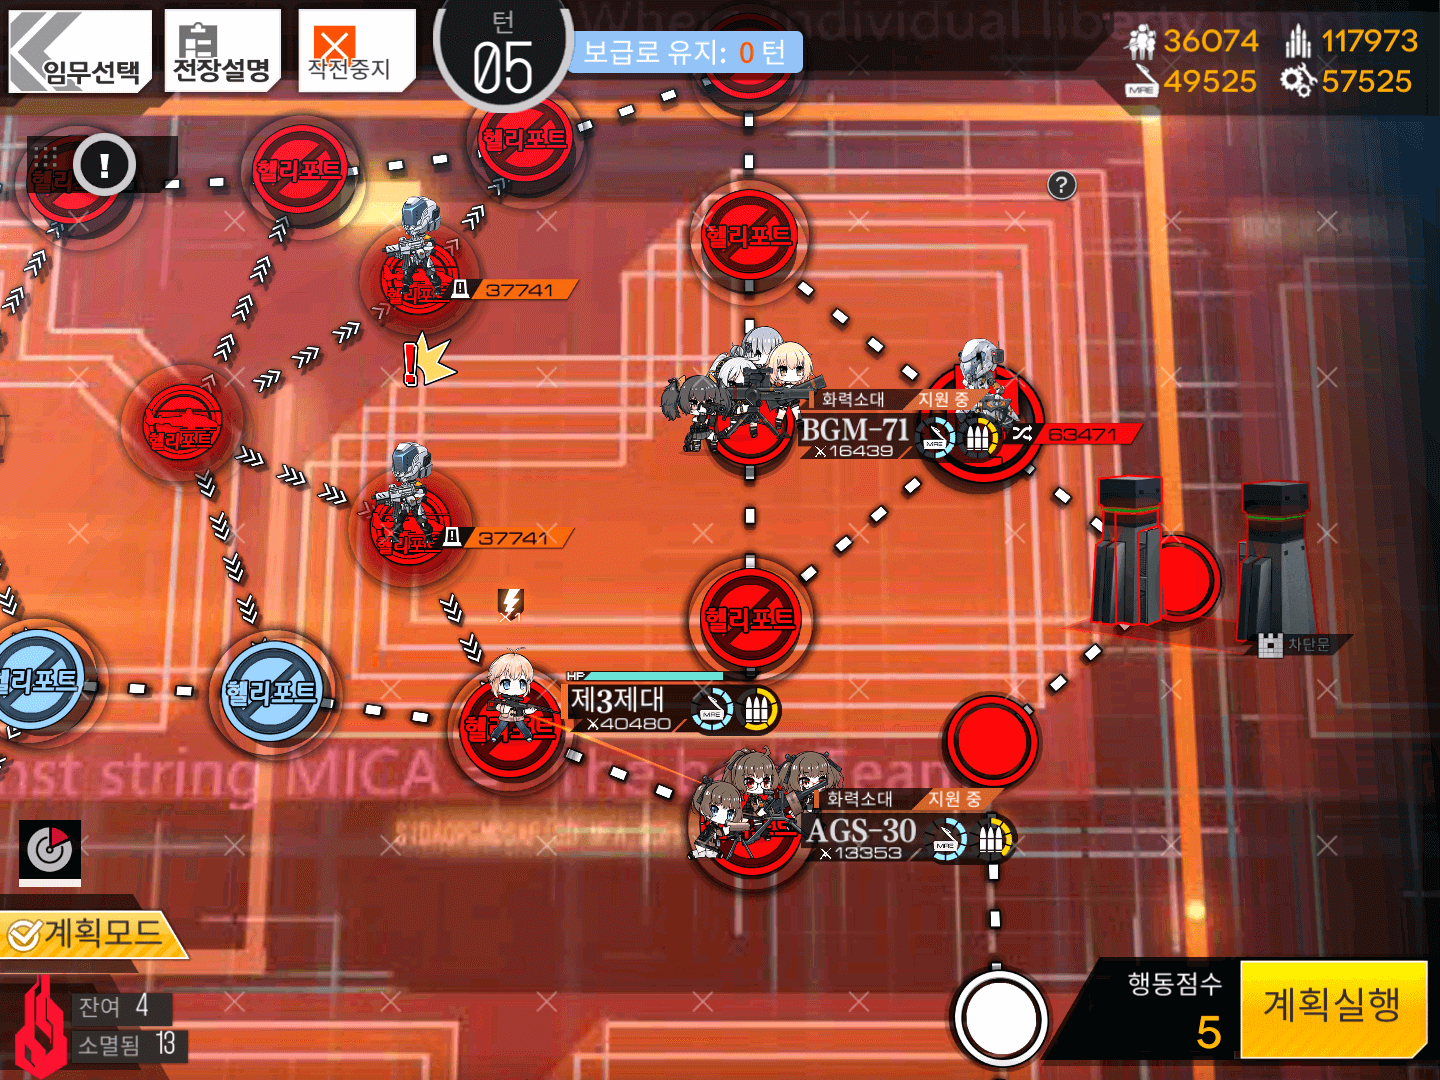
At the end of this turn, the right side of the map should look like this.
End your turn despite the remaining AP.
Turn 6

6.1
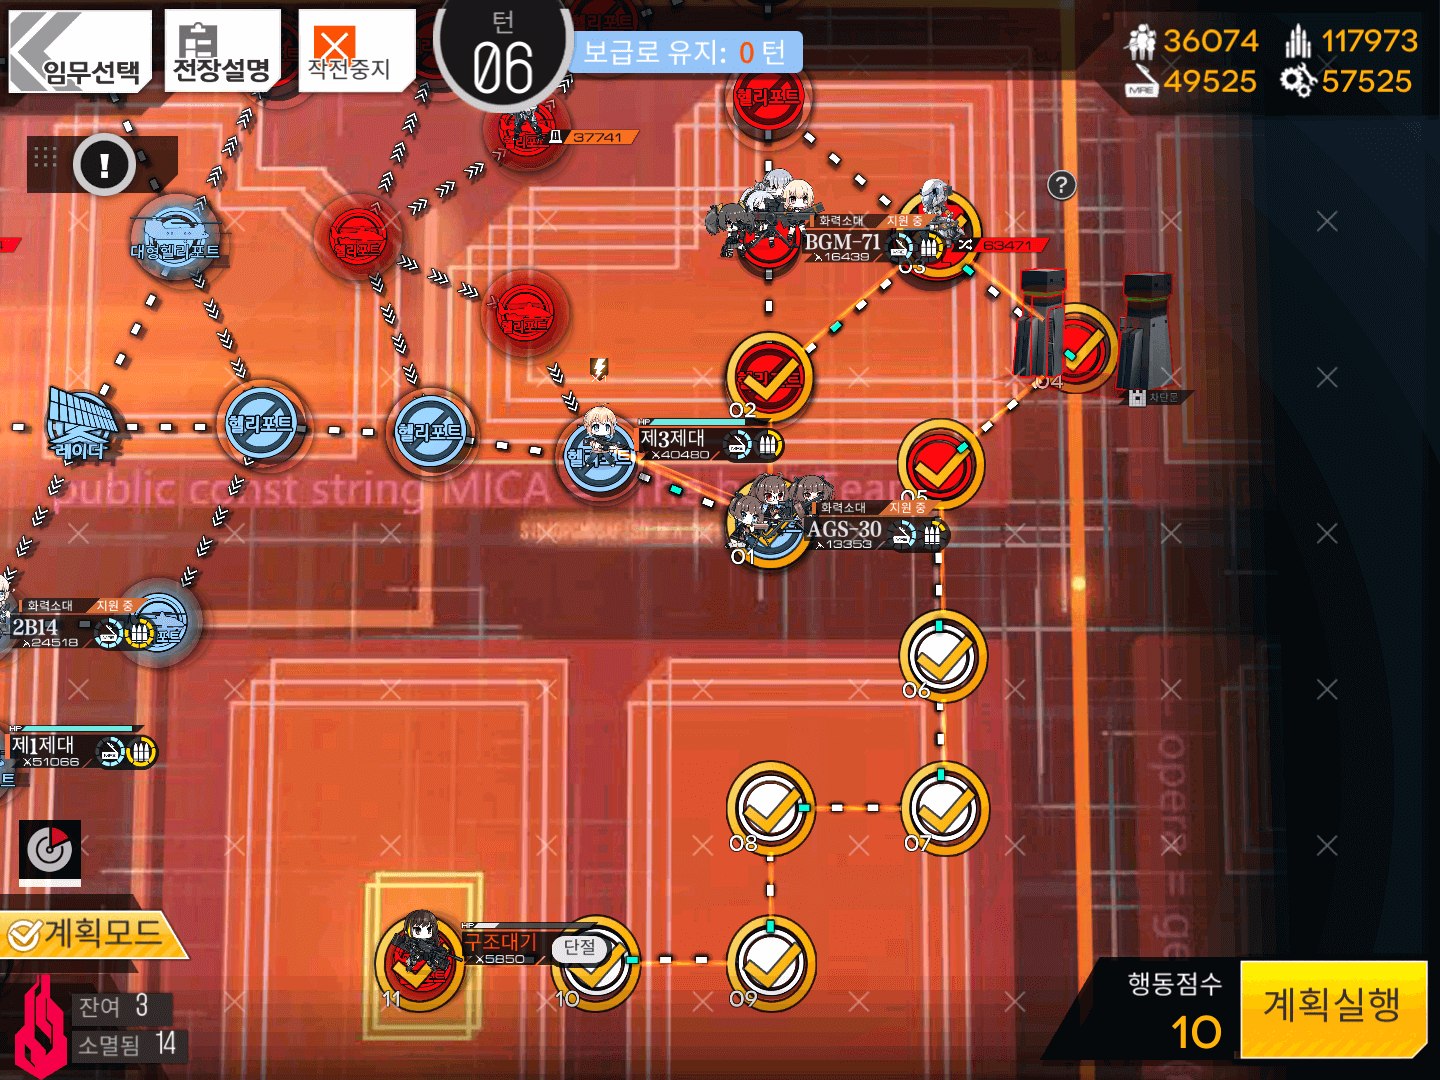
Swap the right side RFHG Echelon with AGS, then move up one node and one up-right, engaging the last Enemy in your way.
Move down-right one node, down three nodes, left one node, down one node and left two nodes, picking up M4.
This Echelon will simply wait here - the rescue objective will complete all by itself.
6.2
Move BGM down one node and up-right one node, then move AGS right one node and up one node to complete the Supply Line.
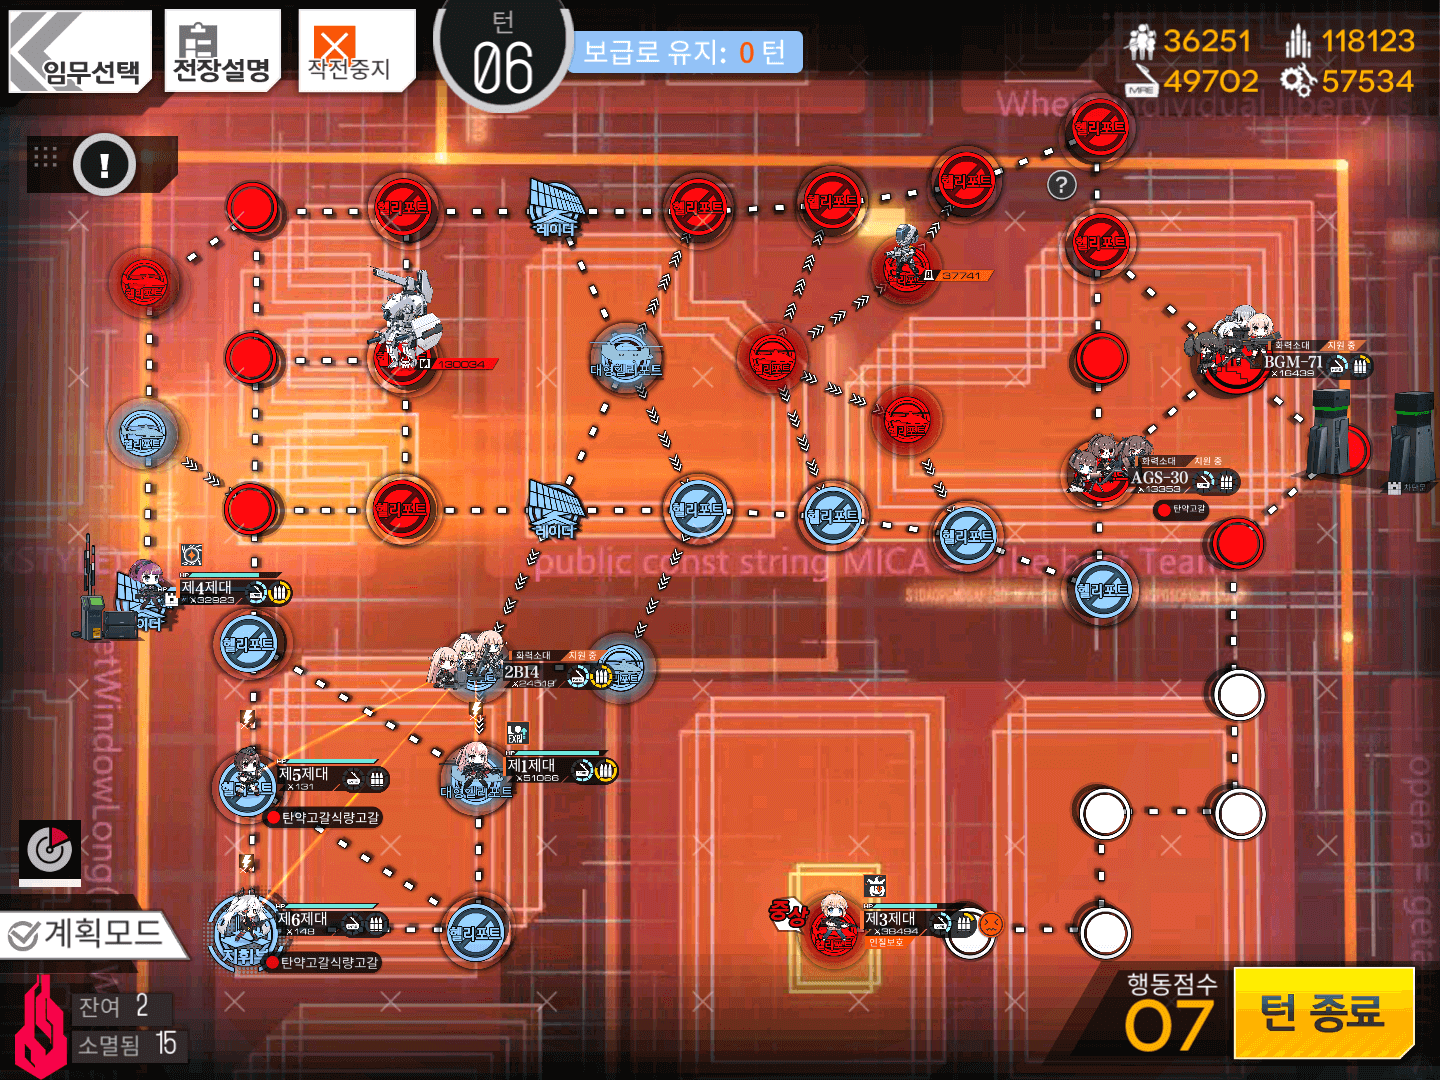
Your map should look like this in the end.
If everything is alright, just end your turn to beat the map.
Video Guides:
Next Chapter:
-
Chapter 12 Normal
-
Chapter 12 Emergency