Tip: If you are stuck on this map after clearing it, please try clicking the backtrack button (may need to click it twice). If the next stages are still not unlocked, complete the supply route objective as shown below and see if the right stage unlocks.
If that does not work still, restart the game and follow the above steps again.
Possible Drops:
--
Mission and Clear Conditions:
Mission:
Survive 5 Turns (Side Route)
OR
Hold the Supply Line for 2 Turns (Main Route)
Clear Guide:
Team Recommendations:
-
2 Combat Echelons, Level 70 4x linked
-
2 Dummy Echelons
-
Parachute fairies can make this map much less frustrating, but are not required.
-
-
1 HOC: BGM-71
-
If lacking BGM, a third Dummy Echelon can be used, but BGM helps to handle the Force Shielded enemies on this map for players with less experience with in-battle control, or bad at judging where the lasers will hit.
-
Clear Steps
Chapter 2’s first branching map is an interesting one. As the secondary objective is merely to survive for 5 turns, you have 3 turns to establish the supply line. This map introduces another new enemy, the Rodelero, or Leaping Laser, along with premiering Force Shields. While this map can be cleared without HOC, all Commanders should start working towards clearing Chapter 8-5 of the main story. A little micro and decent damage output can overpower them in spite of the shielding.
The allied 416 is much more helpful this time around, you will want her help to pull off this clear. There is a small chance she dies on the first turn, but this requires astronomically bad luck (over the course of at least 15 test clears, she came close to death only once). Some management of her AI will be needed to ensure things turn out well.
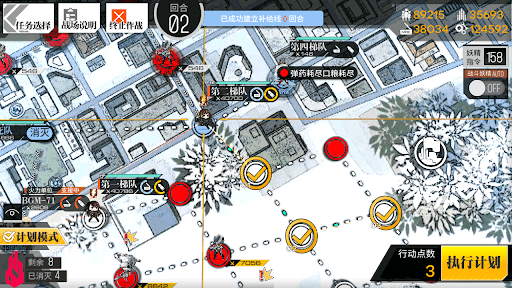
Supply Line:
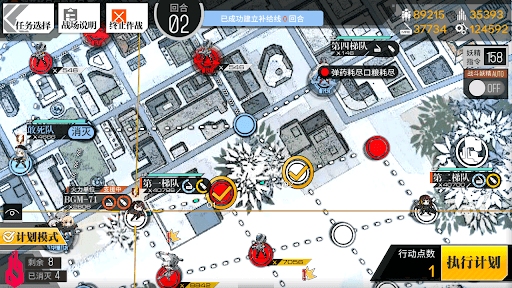
Turn 1
1.1

Deploy a Combat Echelon on the Command Post, and the Eastern Heliport. Move the Echelon on the Heliport left one node.
1.2

Move the Echelon on the Command Post down two nodes.
1.3

Deploy a Dummy Echelon on the Command Post, and the Heliport, then end your turn.
Writers Note: If you have a parachute Fairy, equipping it to one of your Dummy Echelons can simplify the rest of the map, as you can jump onto the Heliports locked behind the one way paths, providing both extra AP and preventing enemy spawns.
Turn 2
2.1

Swap the western Combat Echelon with 416, and move them one node to the right. Deploy either BGM or a Dummy Echelon on the Heavy Heliport. The example will use BGM.
2.2
Swap and resupply the eastern Combat Echelon, then move them down two nodes, and right one node, to encircle the Supply Point. Depending on your luck, there may be a Rodelero along this path. Please refer to the gif below discussing how to fight them if that is the case.
2.3

Move the Dummy Echelon on the Heliport left one node.
2.4
The other Combat Echelon should then move two more nodes to the right.
2.5
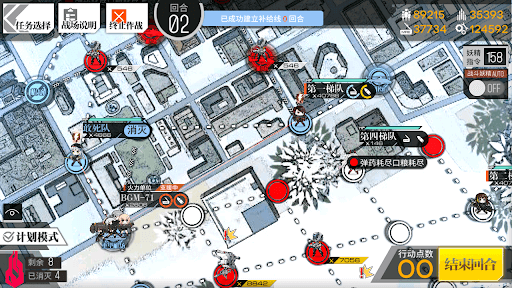
Swap the Dummy Echelon with the Combat Echelon, and end your turn.
Turn 3
3.1

The Supply Line should be established at this point, so all that reminds is to defend it. Depending on enemy movements this will vary, so it is perfectly fine to adapt the following turns to suit your situation better.
In the example, we want to clear out the units threatening BGM, so the Echelon surrounding the Supply Point moves four nodes to the left, killing both the Strelet and the Rodelero.
3.2
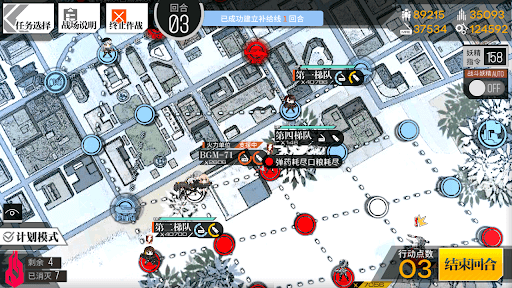
On the off chance the Supply Line is not established, or something threatens to break it, we will be adding a second ‘path’.
Move BGM to the right one node, and your Dummy Echelon to the left one node. This will create a second ‘branch’ of the supply line, just in case.
3.3
Feel free to move your Combat Echelon to hunt down any remaining enemy units. Remember to set 416 to Standby before ending your turn. This will brick the clear if not done.
Survive 5 Turns
Deploy a Combat Echelon on the Command Post. End your turn 5 times. Being the easier solution this is a bad end, so you’ll need to complete the other clear regardless.