Possible Drops:
--
Mission and Clear Conditions:
Mission: Hold Supply Line for 3 Turns
Clear Guide:
Team Recommendations:
- 3 Combat Echelons
- RF/HG Recommended, or Hybrid
One Combat Echelon will need to be able to handle some weird Typhon formations
- RF/HG Recommended, or Hybrid
- 1 HOC
- BGM assumed
Clear Steps
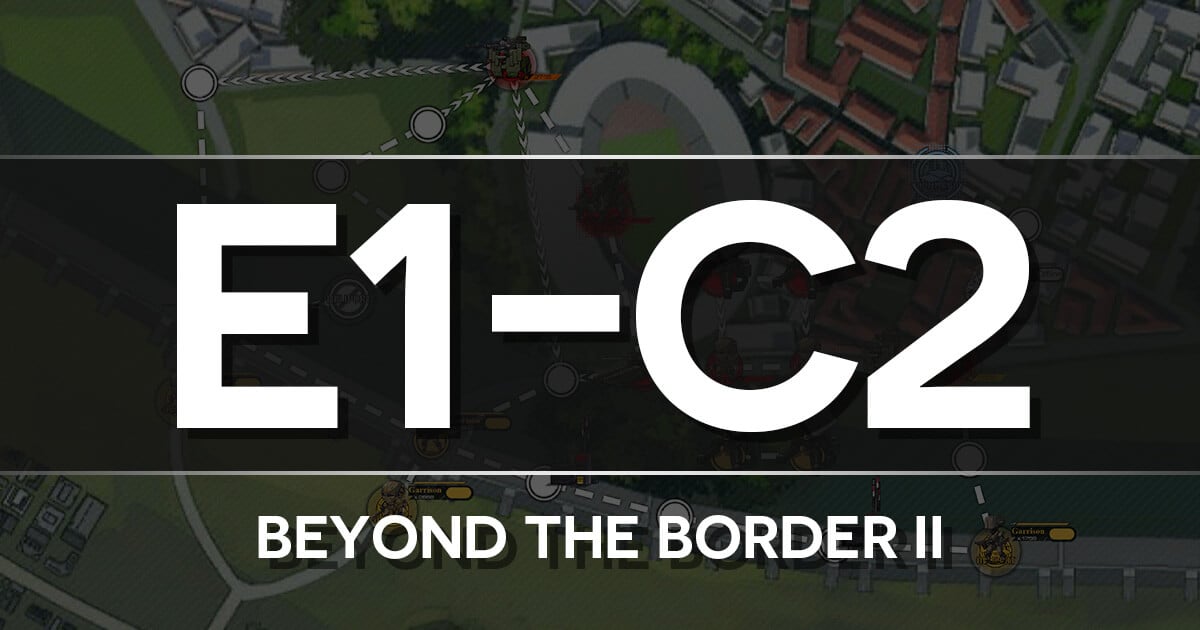
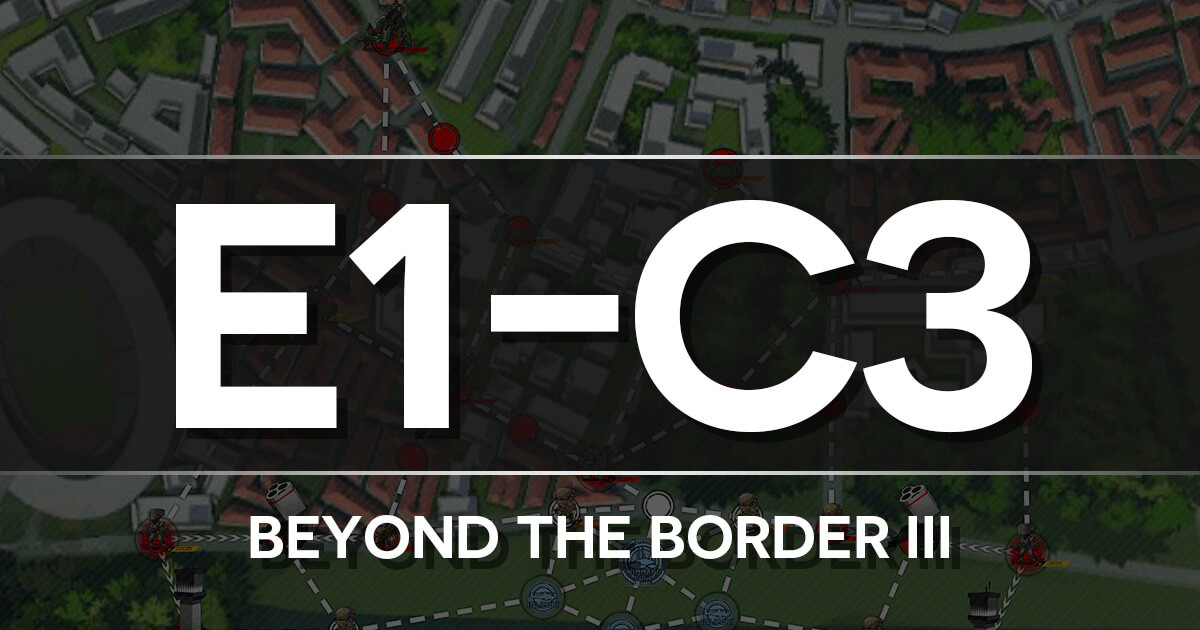
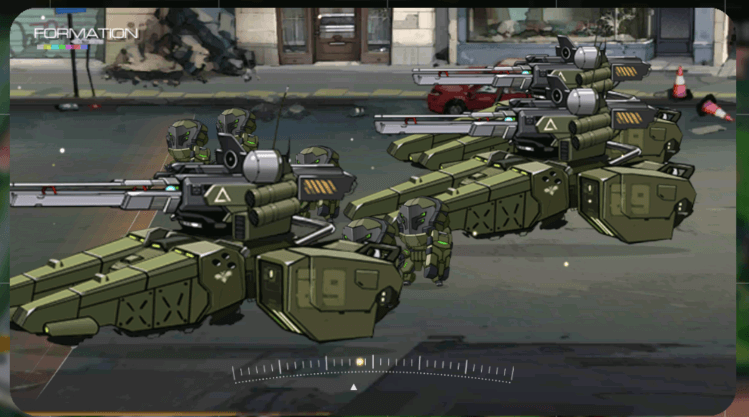
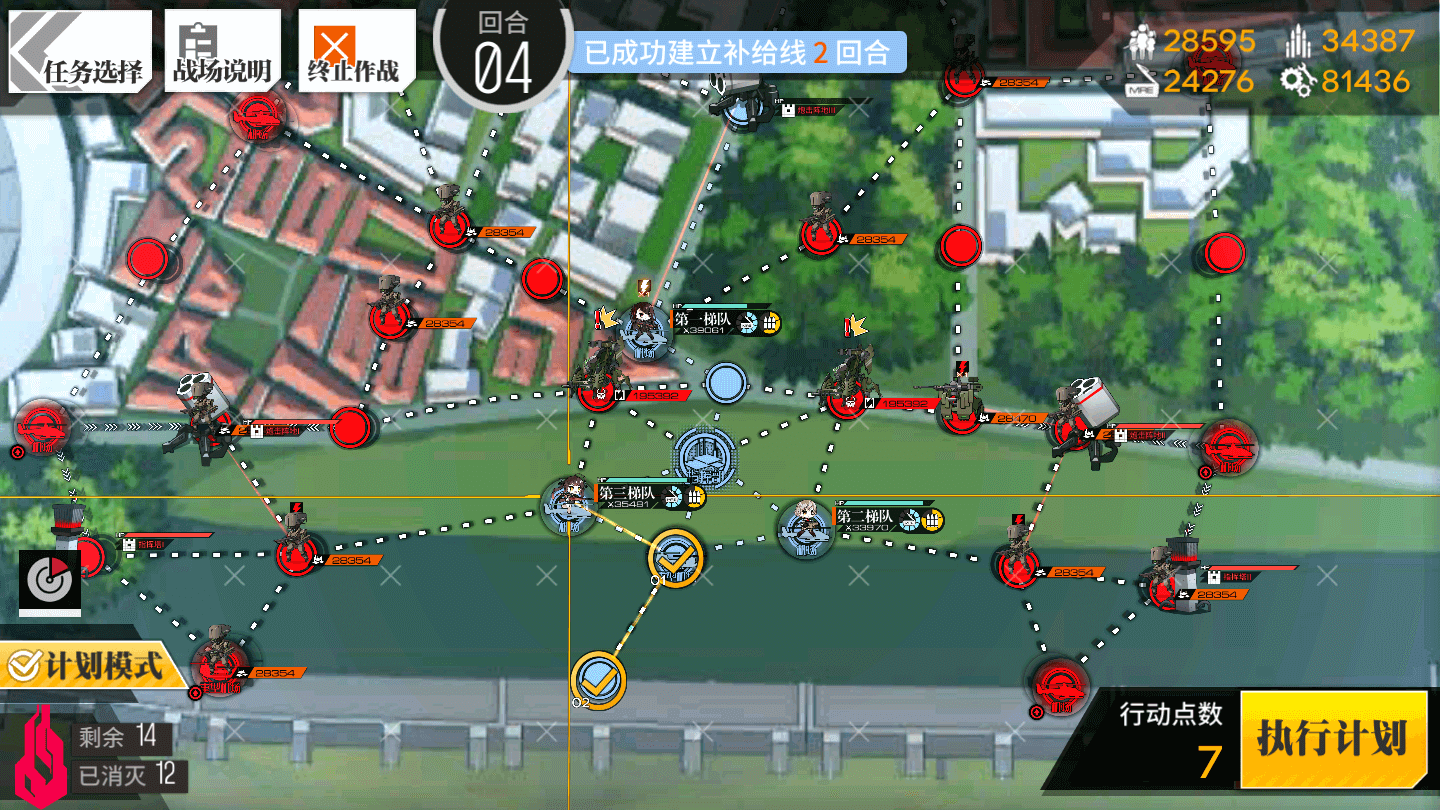
Beyond the Border III pulls out even more KCCO stops, now throwing the entire arsenal of heretofore seen KCCO units at Commanders, with Artillery Emplacements about the map to attempt to limit movement. Luckily, with proper preparation nothing here is overly threatening, except the Typhons, which come in a downright odd formation, with one Typhon set forwards from the others, as shown below. As long as your formation features enough outgoing Damage, you will be able to handle these without issue, as long as you remember to retreat dolls in the unsafe lanes.
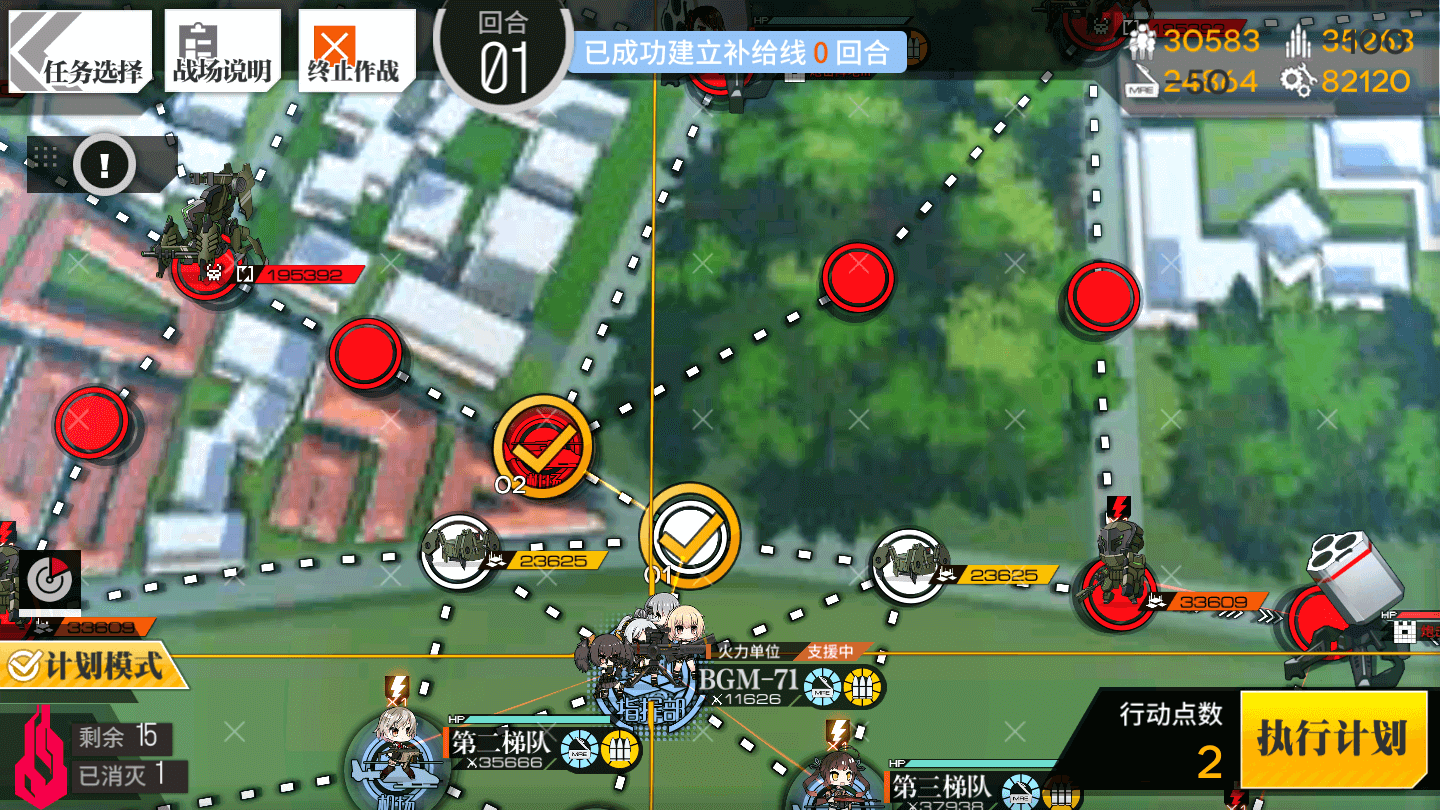
Turn 1
1.1

Deploy three Combat Echelons, on the Command Post, and the two flanking Heliports. Deploy a HOC on the Heavy Heliport.
1.2
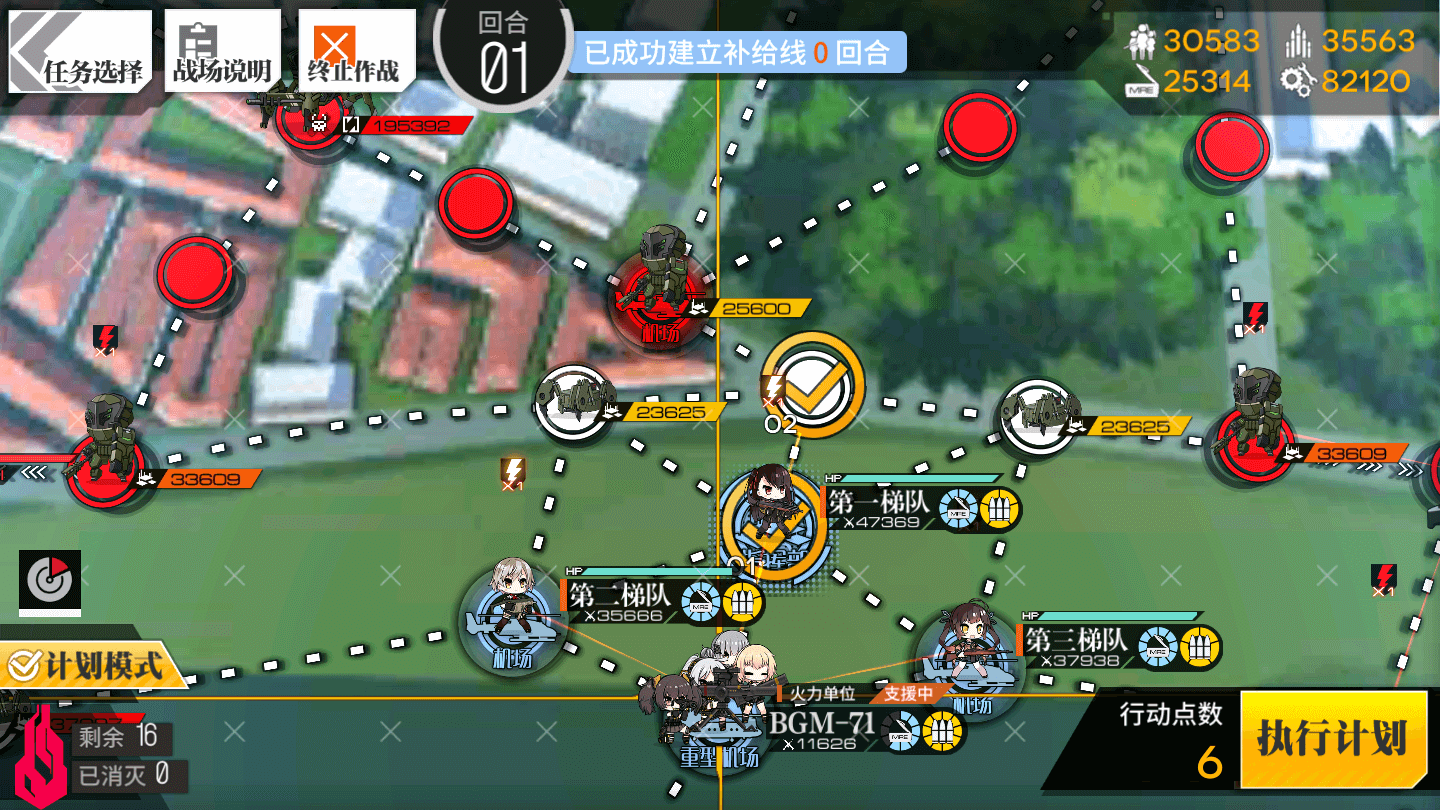
Move the HOC up two nodes. Bombard the northern Artillery emplacement.
1.3

Move the central Combat Echelon up two nodes, left one node, and up onto the Artillery.
1.4
Move the HOC up one node and left one node.
1.5
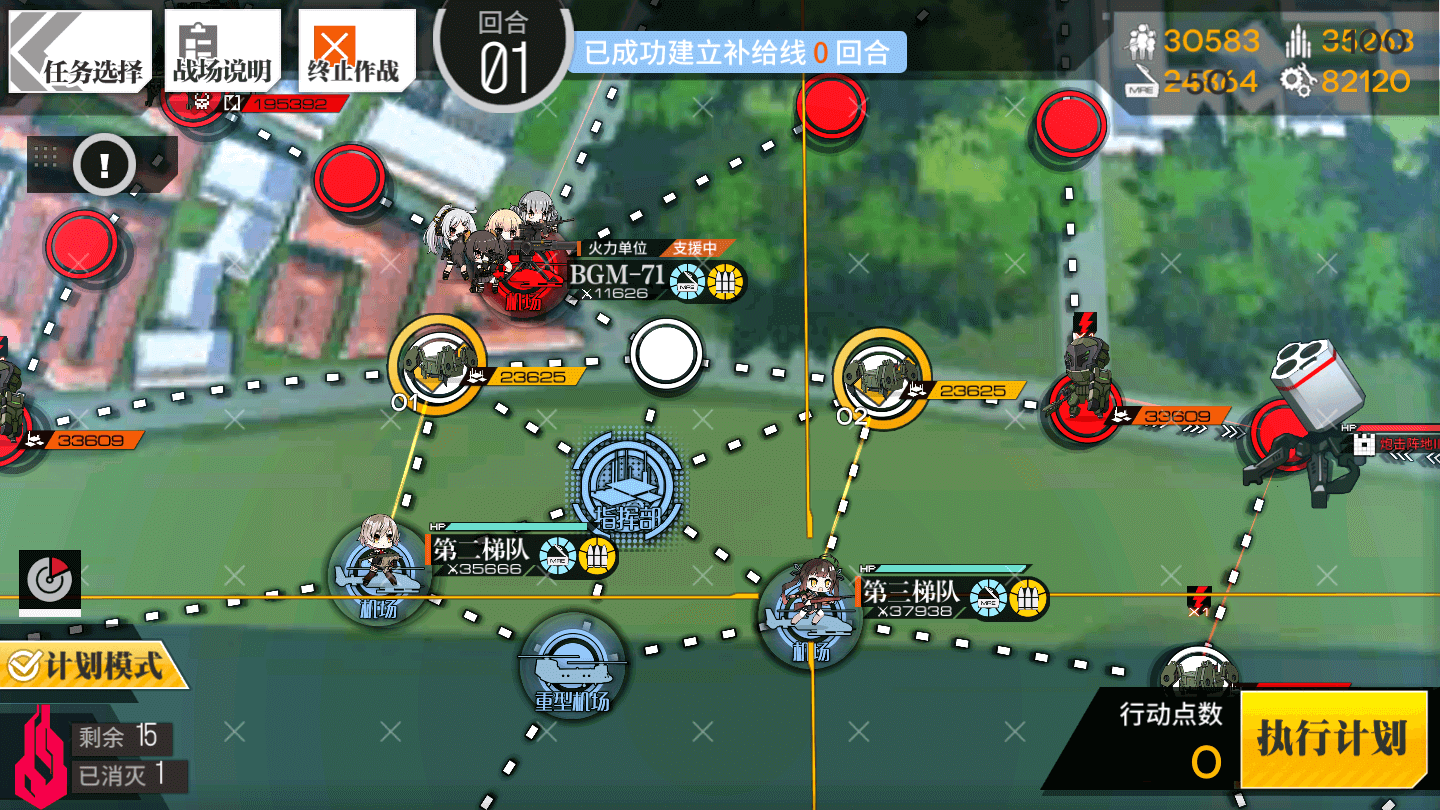
Move both remaining Combat Echelons up one node.
Turn 2
2.1
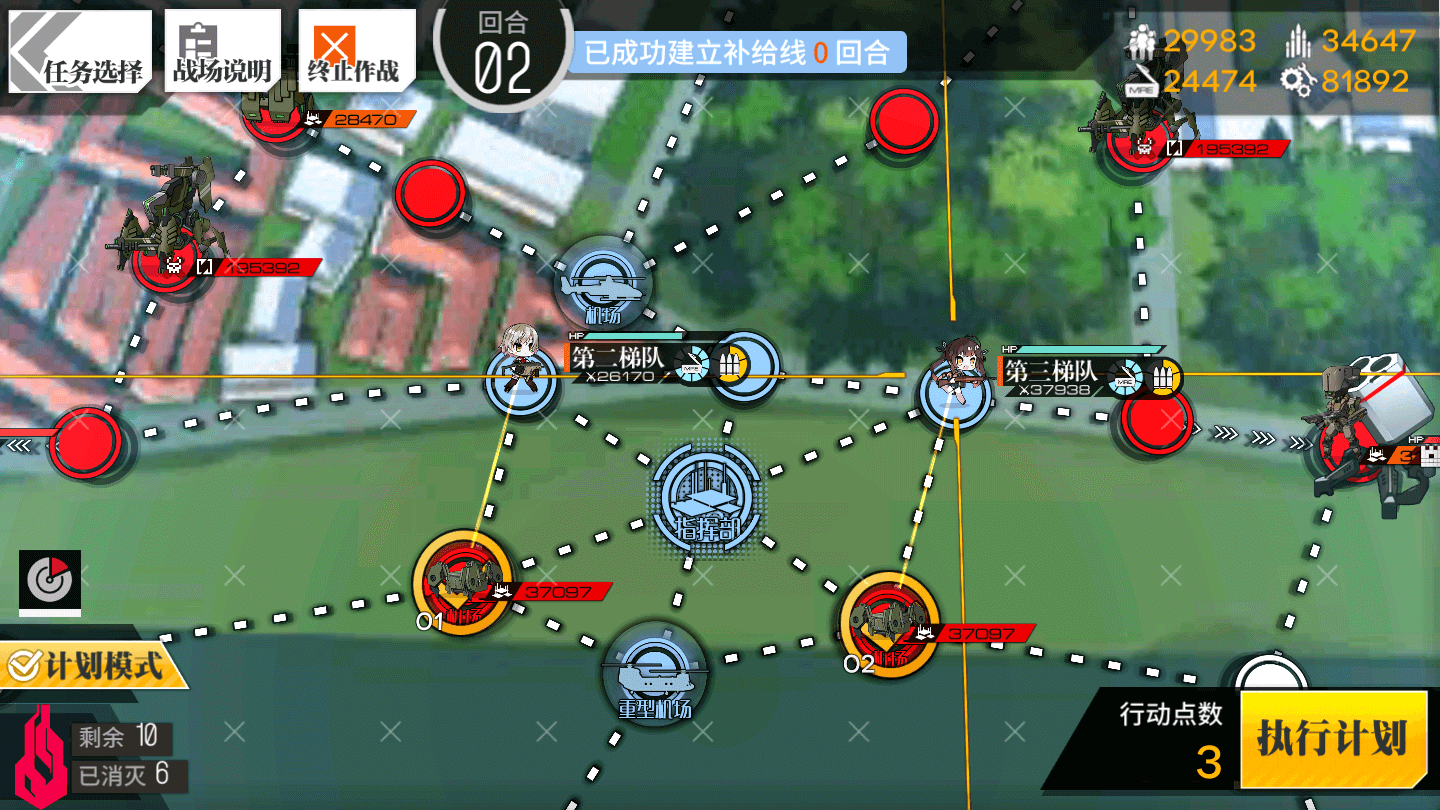
Move the bottom two Combat Echelons down one node each.
2.2

Swap the position of the upper Combat Echelon and the HOC. Move the HOC up one node onto the Supply Point.
2.3

Move the Combat Echelon up one node. End your turn.
End your Turn
Turn 3
3.1
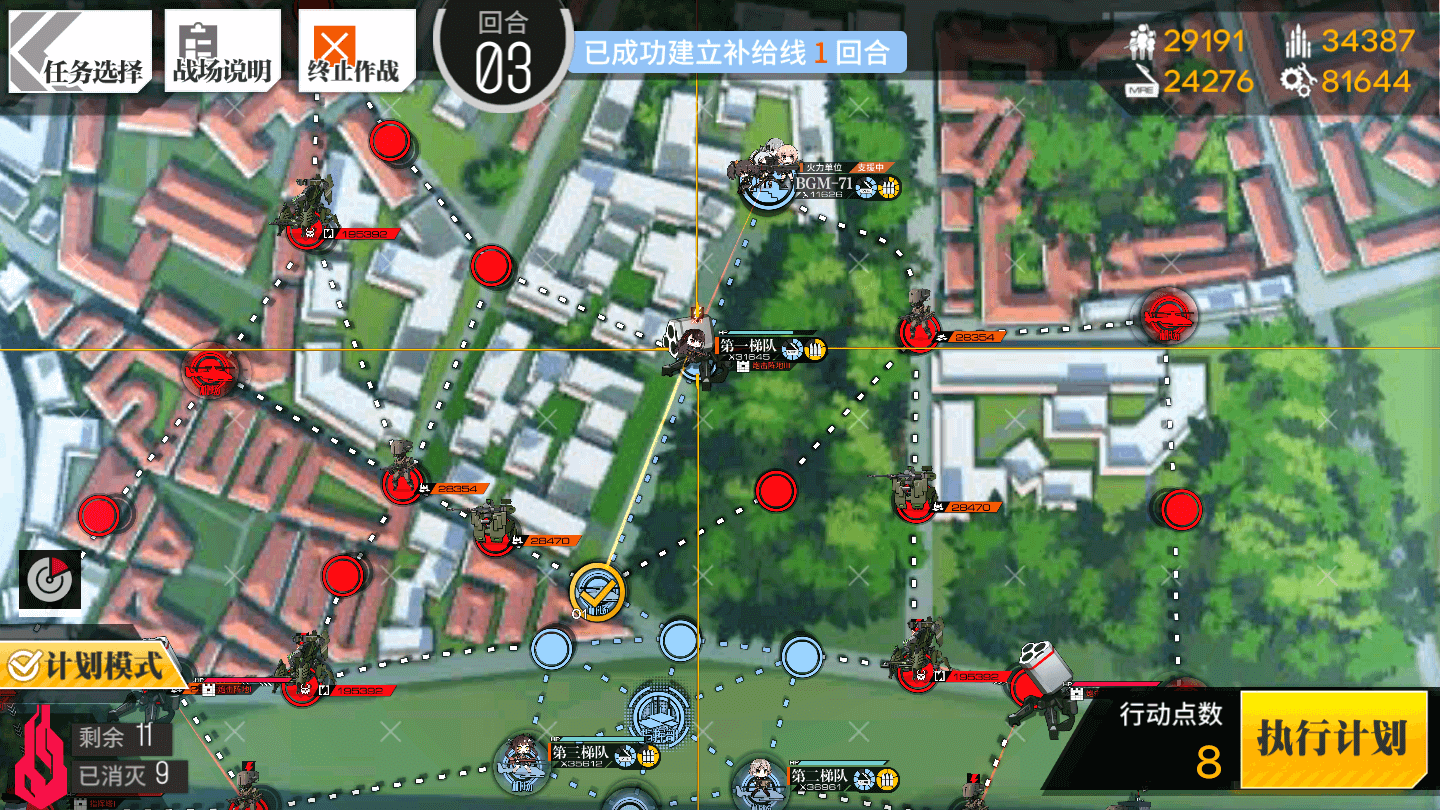
Move the upper Combat Echelon down one node to the Heliport. End your Turn.
Turn 4
4.1
Move the left-bottom Combat Echelon to the right, and down one node each.
4.2
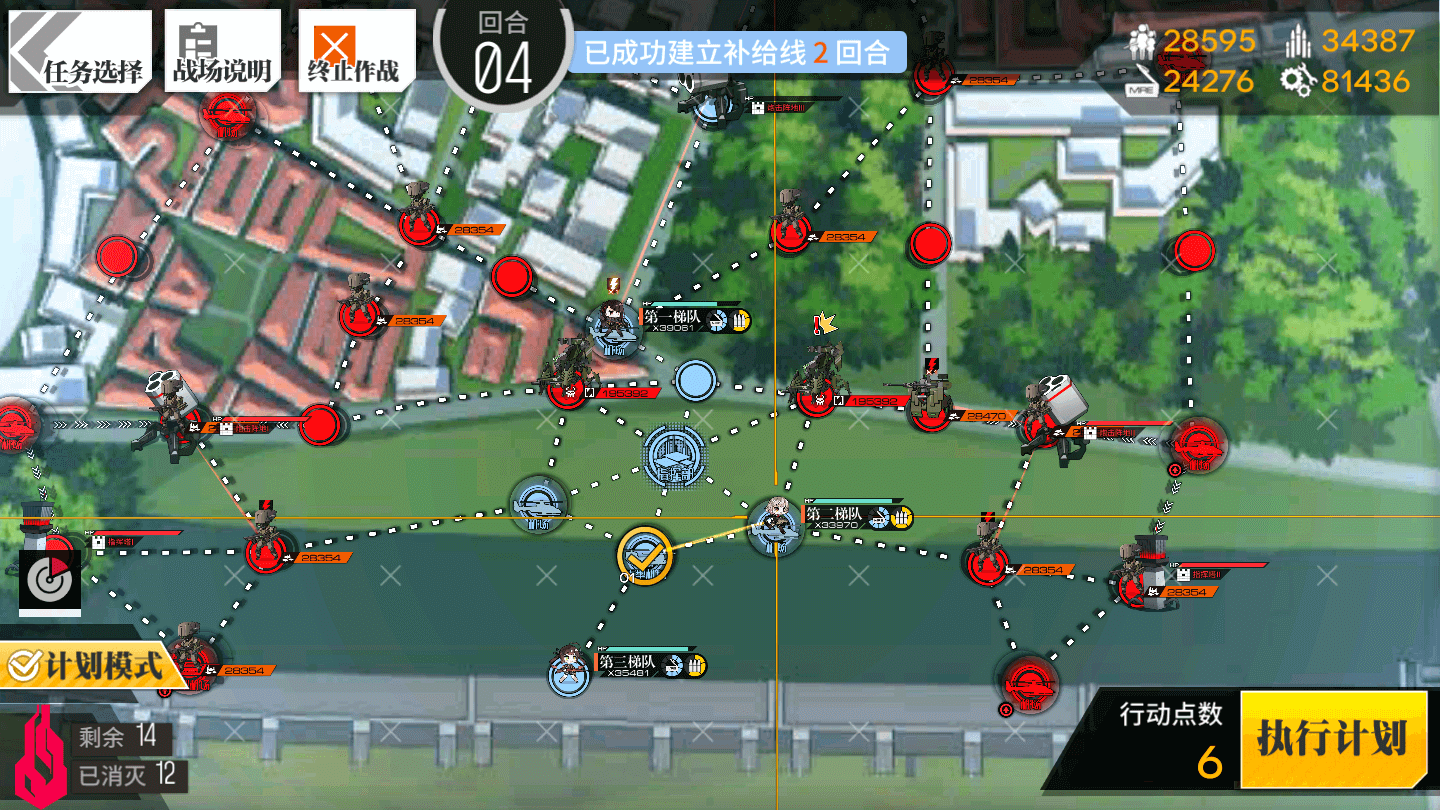
Move the left-bottom Combat Echelon to the right, and down one node each.
The Hydra Deathstacks don’t appear the smartest. While they should, by all rights, capture your Command Post, they appear to be more interested in chasing the Combat Echelons, so the map will clear just fine. Patrol AI is very good, I promise.


Video Guide:
Next chapter?
-
EX Guides
-
Normal Guides