Possible Drops:
--
Mission and Clear Conditions:
Mission: Capture Command Post
Clear Guide:
Team Recommendations:
- 2 Combat Echelons
- RF/HG highly encouraged, or Hybrid formations if your HGs struggle to survive.
- 2 Dummy Echelons
- HOCs can serve as Dummies if need be.
Overview & Step-by-Step Guide:
Foreshadowing the trend of EX maps being slight twists on their Normal counterparts, B-3 forces Commanders to fight or avoid the central Hydra Deathstack (92061 CE) in the process of opening the bottom gate so that the enemy Command Post can be encircled.
The enemies here are a brutal mix of KCCO troops. Sporting over 150 Armor, the Aegis need either AP, or very high Damage ARs, as they protect Cerynitis which will shred SMGs and HGs without any mercy. Beyond that, the enemy AI on this map make them easy to lead around, and with some careful play, even the threatening enemies can be overcome.
Turn 1
1.1
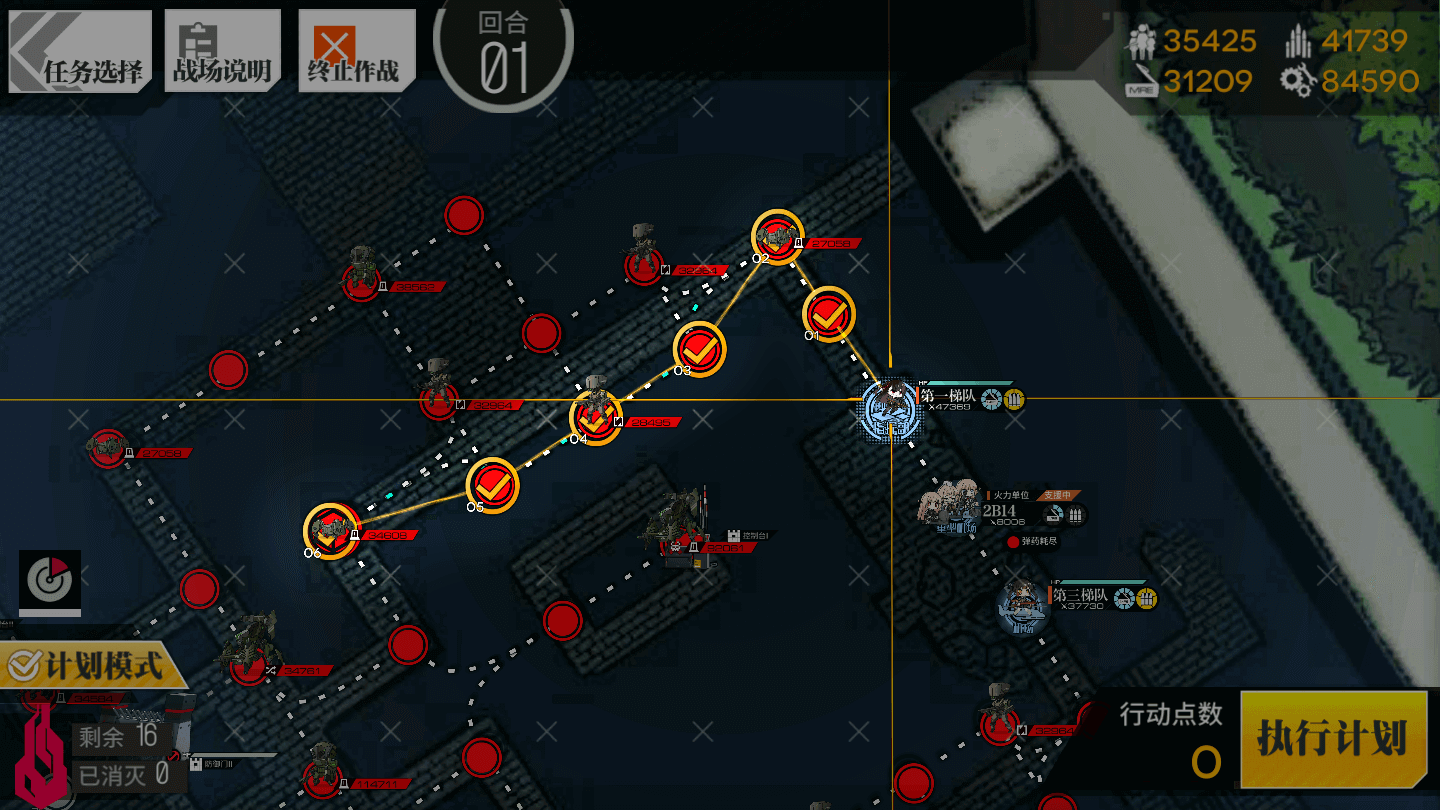
Deploy a Combat Echelon on both the Command Post and Heliport and a Dummy on the Heavy Heliport.
Move the Combat Echelon on the Command Post upwards two nodes, then left four nodes, taking the shortest route to the Supply Crate. Do not use the Crate to resupply at this time.
Turn 2
2.1
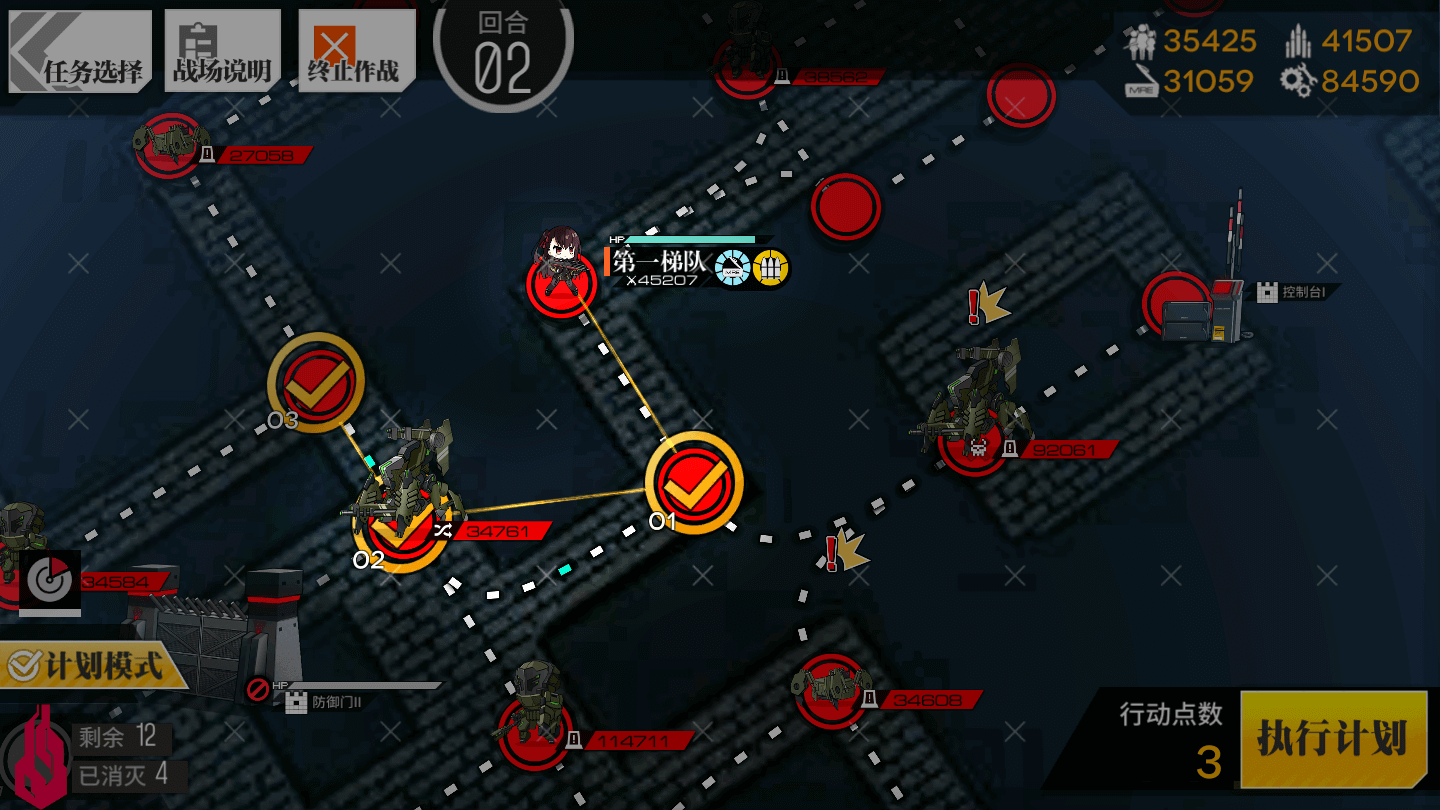
Resupply and move the left Combat Echelon one node down, one node to the left to fight the Hydra, and then up one node further. This is the start of the bait and switch with the big deathstack Hydra.
2.2
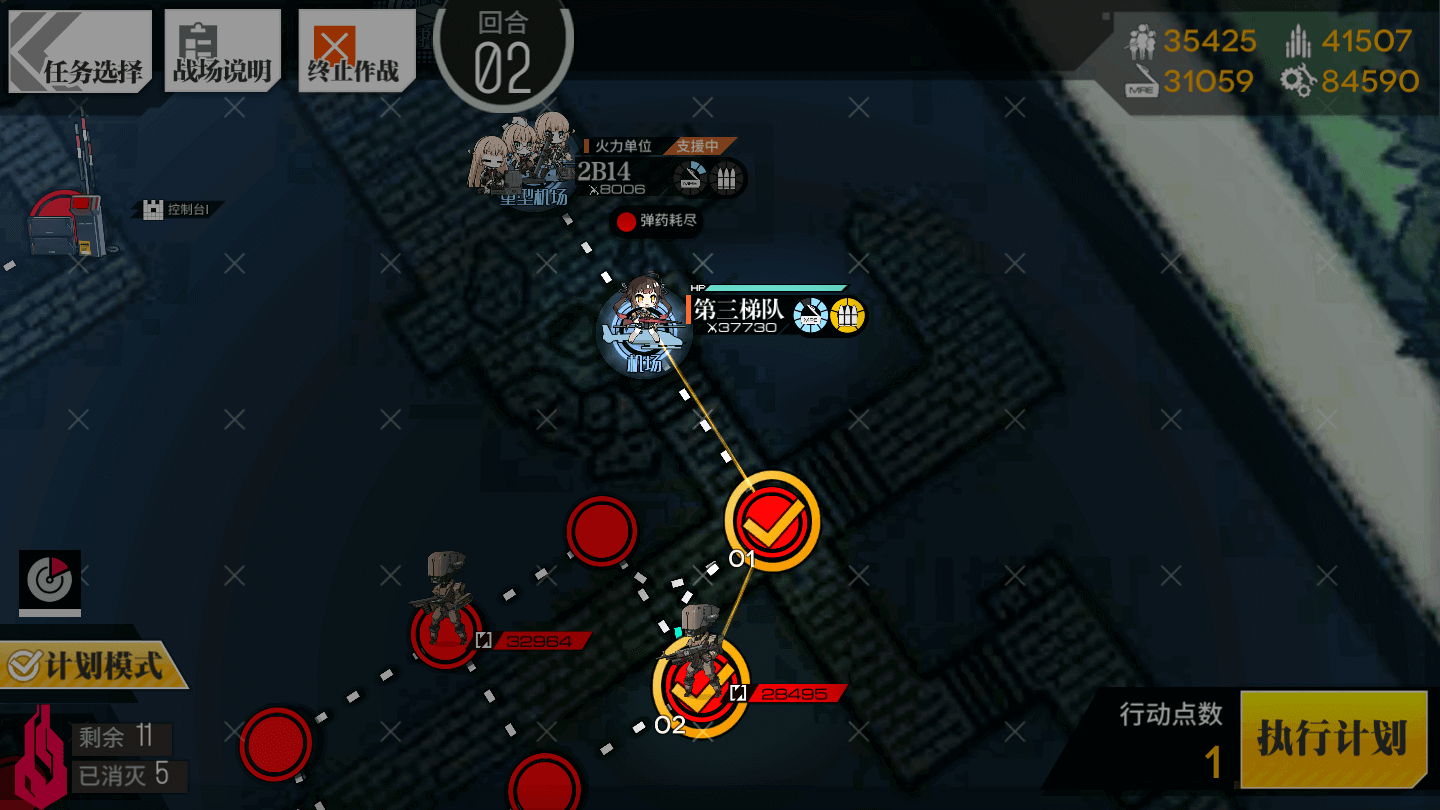
Move the other Combat Echelon down two nodes to fight the Cyclops.
2.3
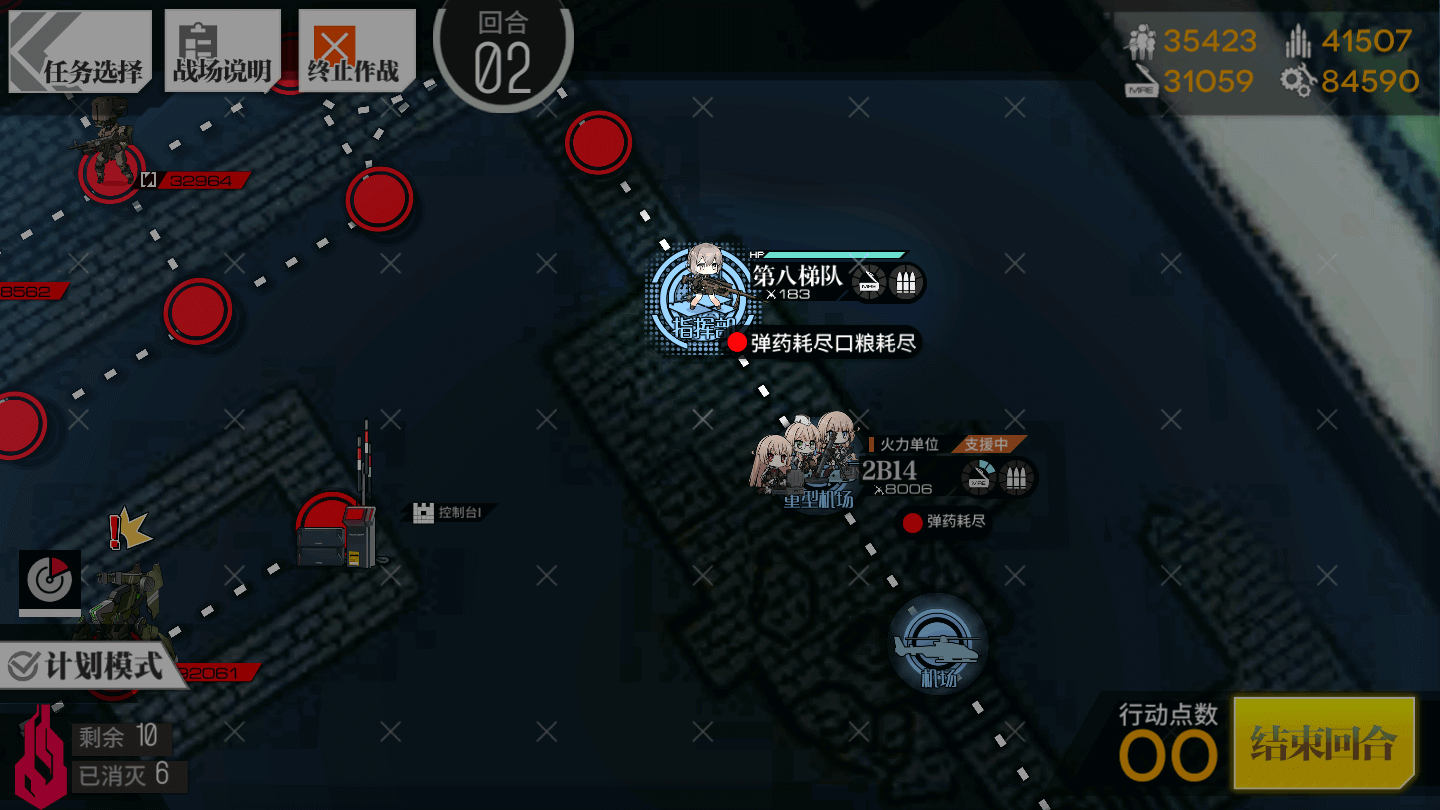
Deploy a Dummy Echelon on the Command Post.
Turn 3
3.1
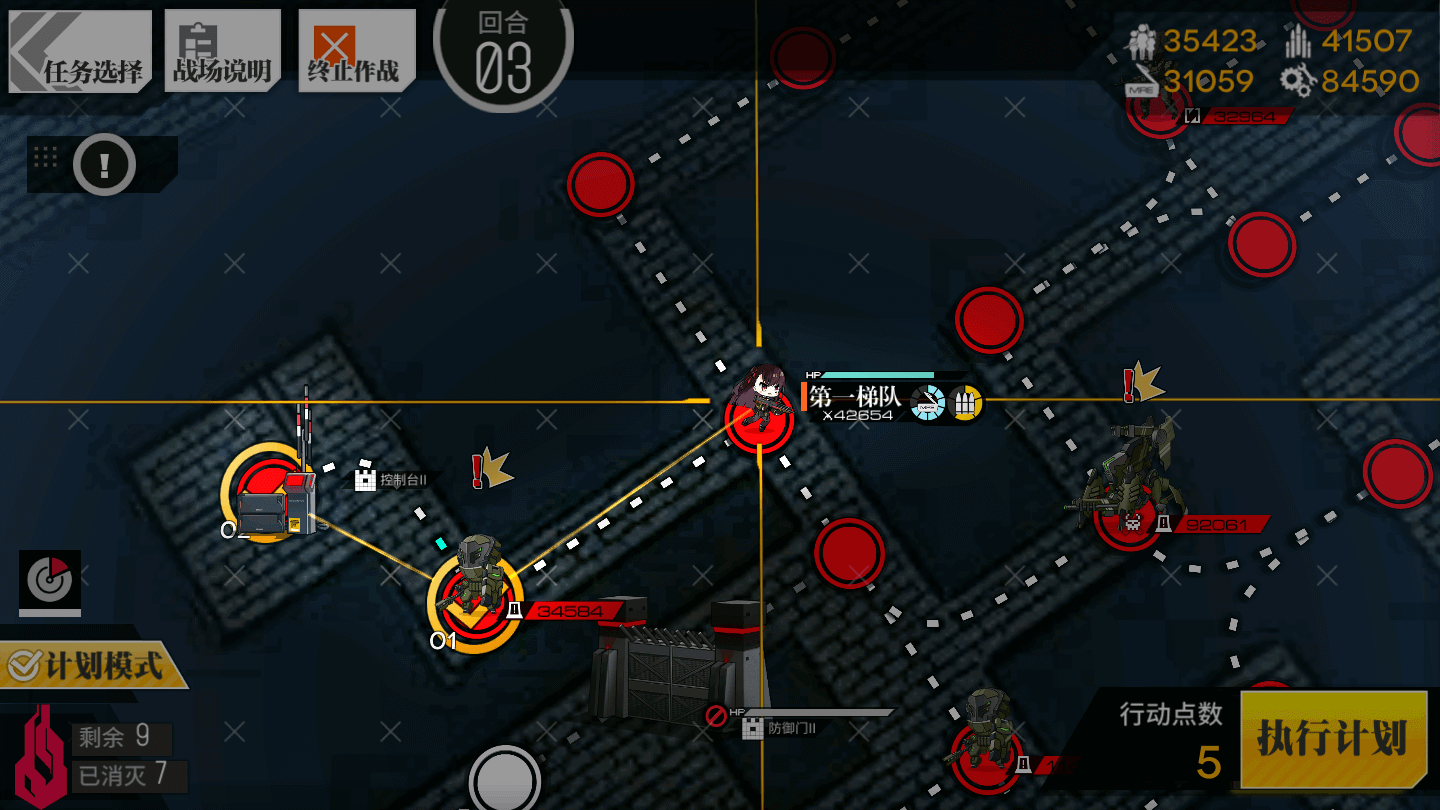
Move the left Combat Echelon left two nodes to the Console. Activate it, and open the Gate, as shown.
3.1.1
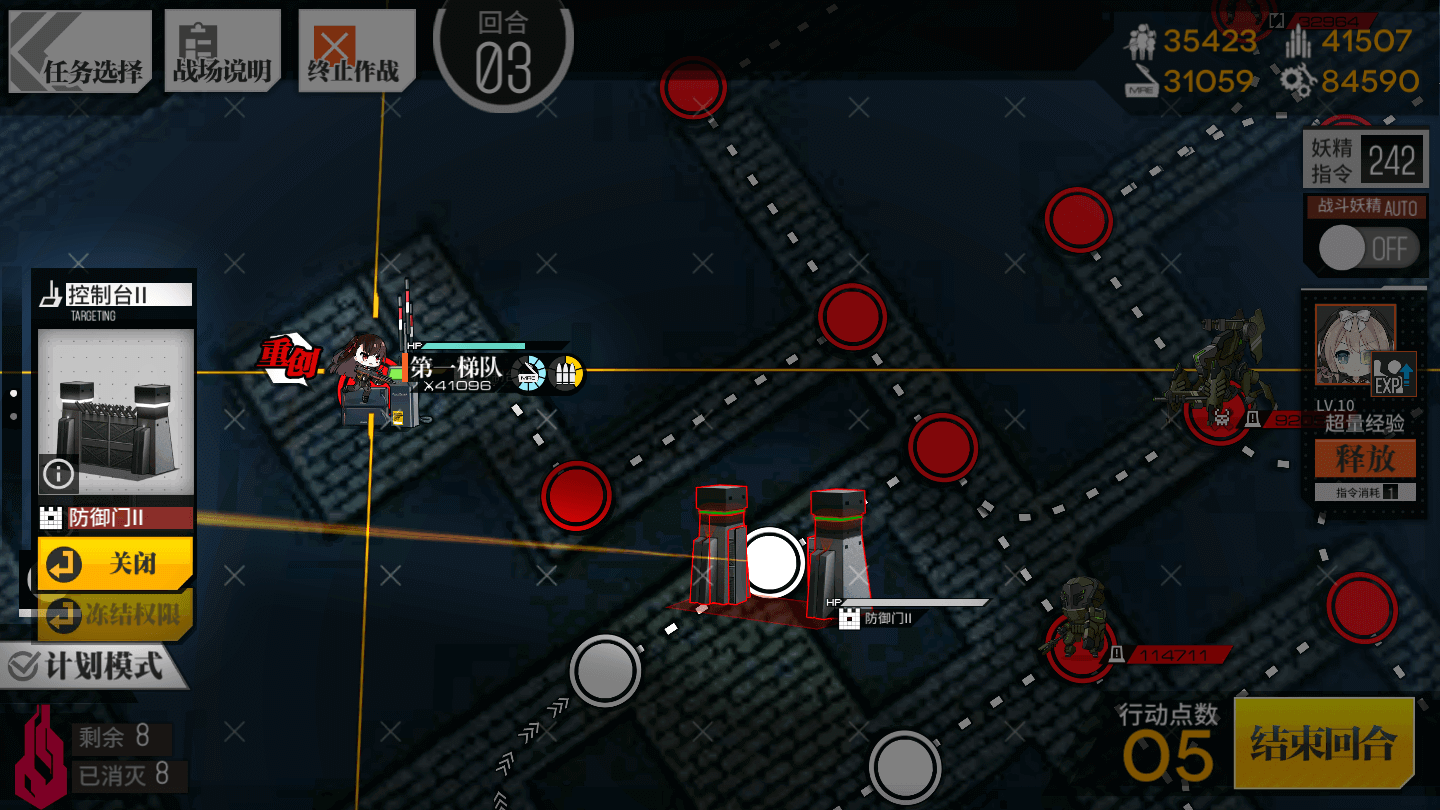
Make sure the Gate is open before proceeding!
3.2
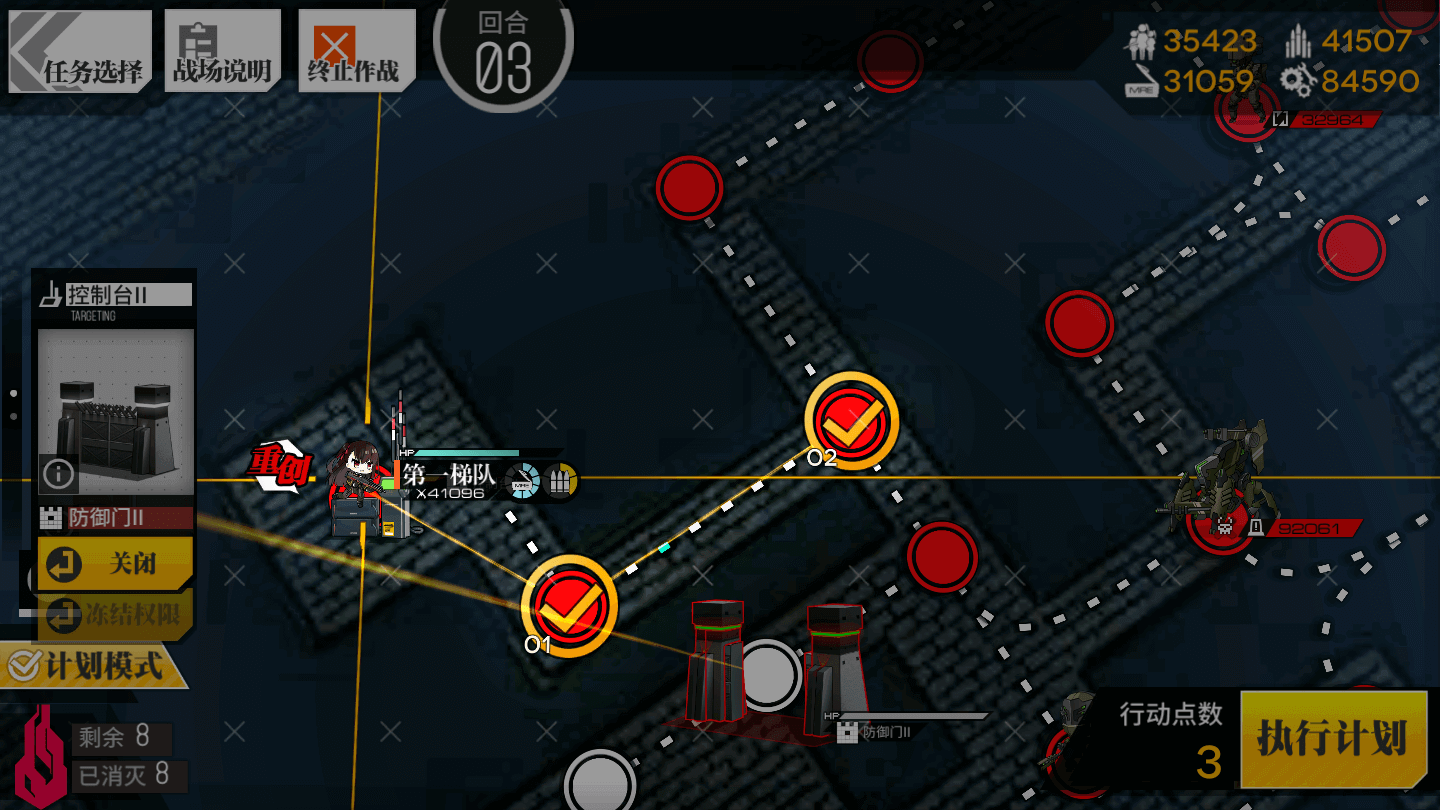
Move that same Combat Echelon back, two nodes to the right, to continue baiting the Deathstack Hydra.
3.3
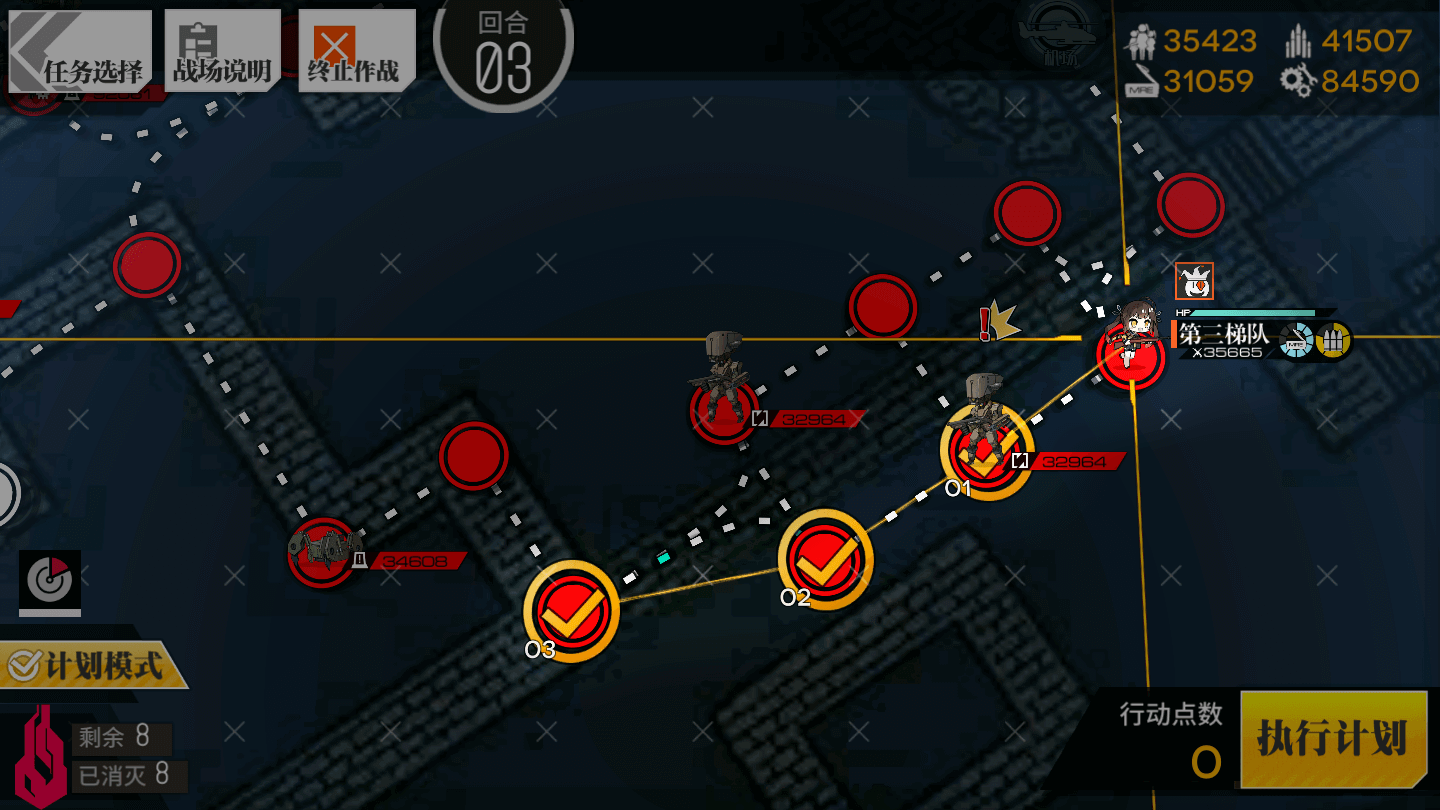
The other Combat Echelon should move three nodes to the lower-left. End your turn.
Turn 4
4.1

Move the left Combat Echelon down one node to avoid the Deathstack.
4.2
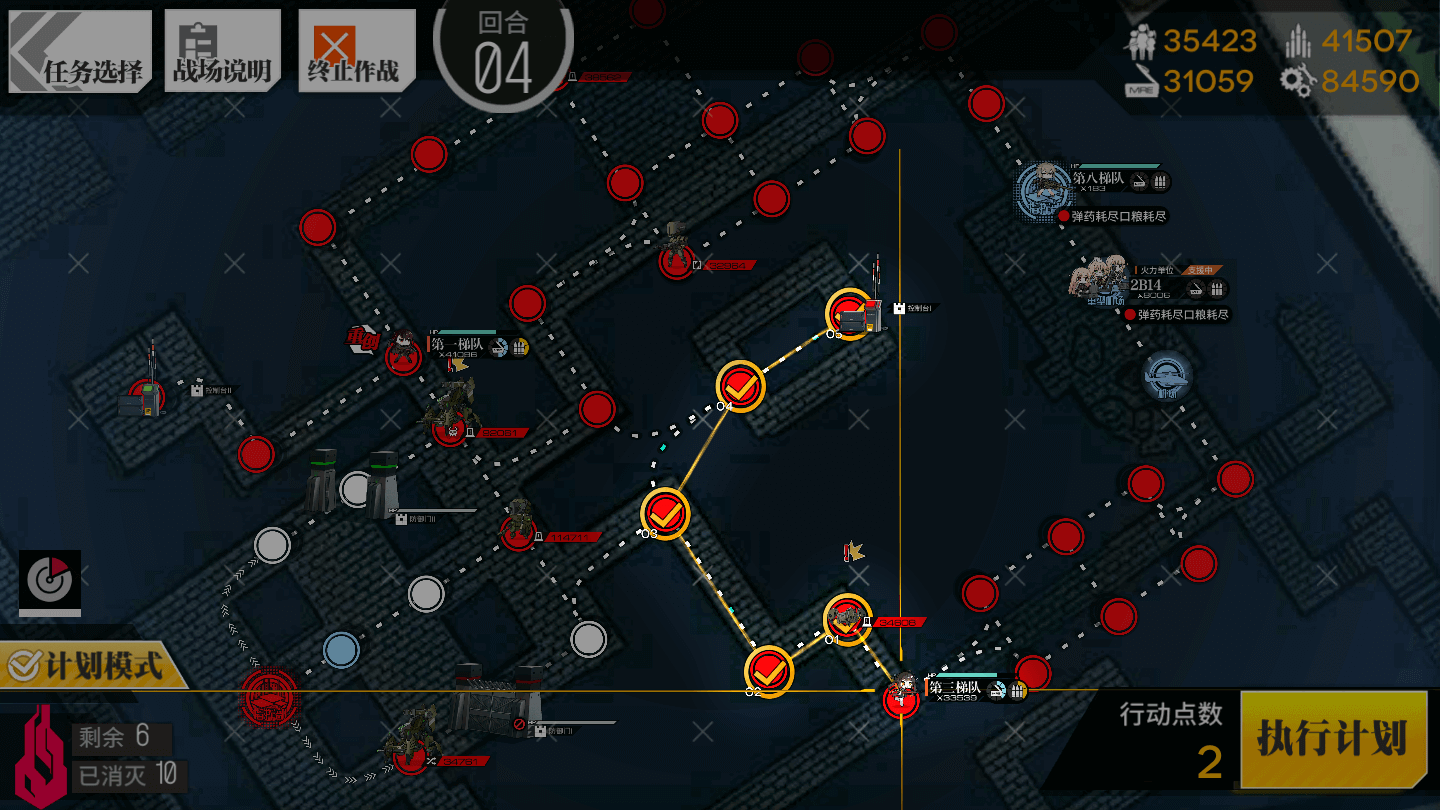
Move the rightmost Combat Echelon two nodes to the left and three nodes up, onto the central Console. Activate it, and open the gate!
4.3
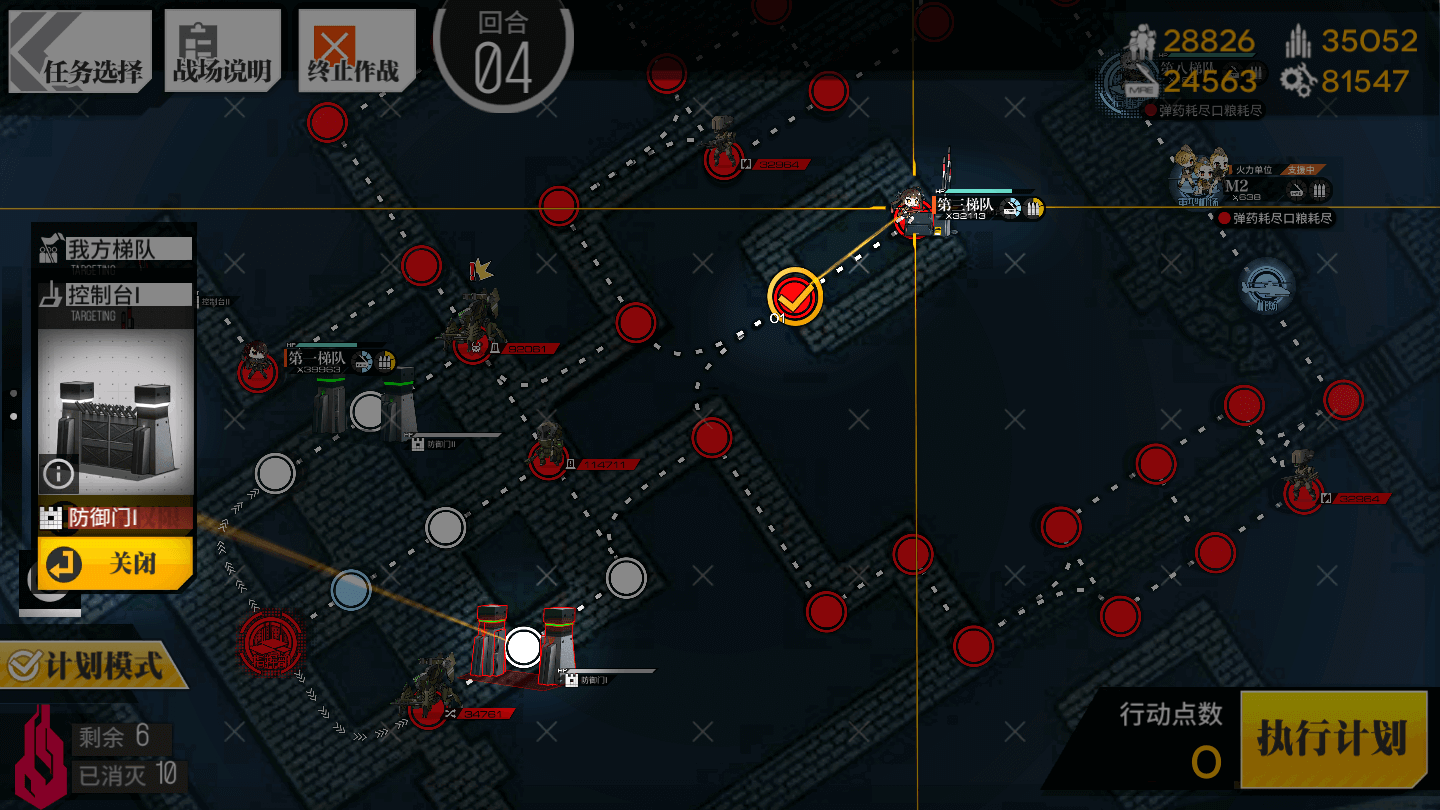
Again, make sure the gate is open before you proceed!
Move the right Combat Echelon down one node.
End your Turn.
Turn 5
5.1
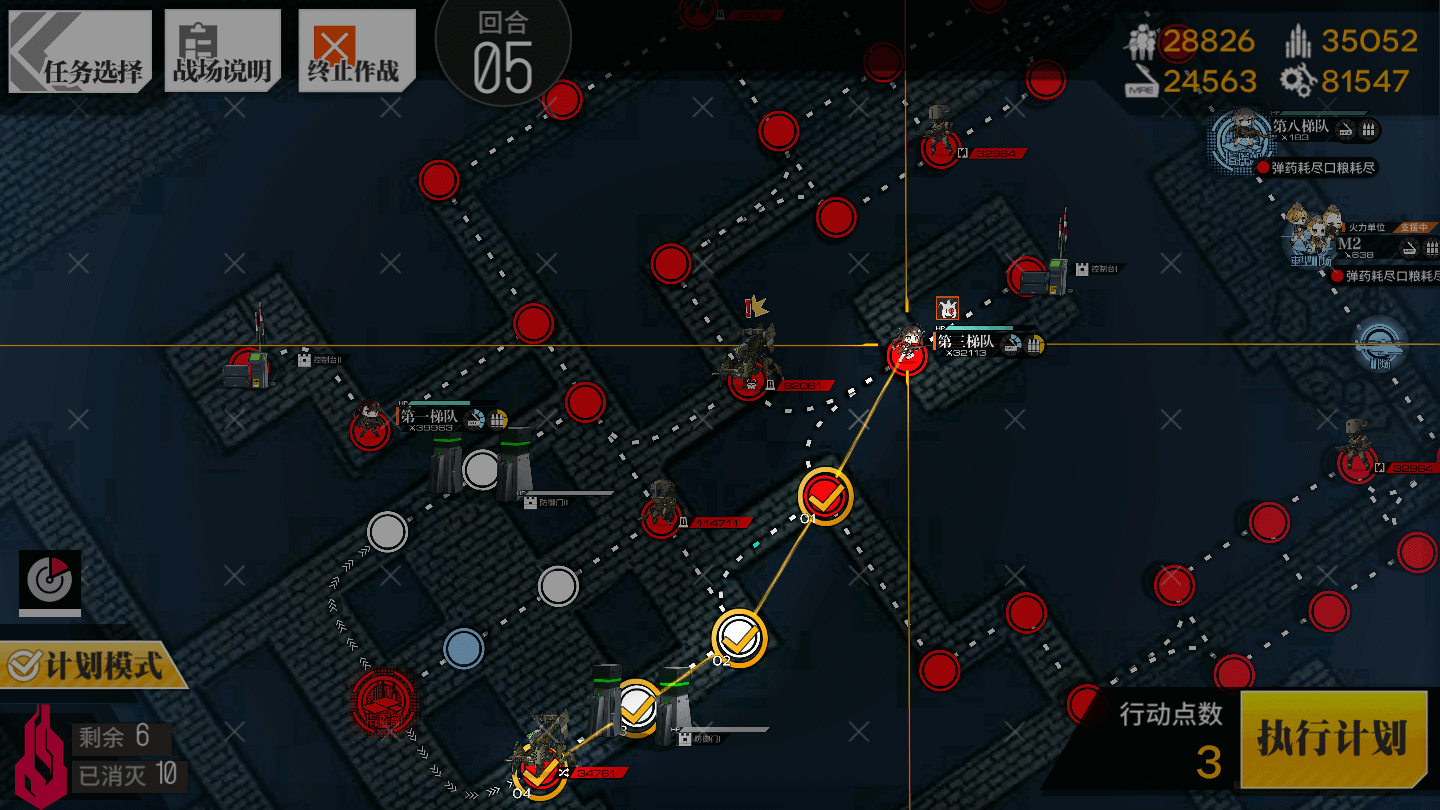
Move the right-most Combat Echelon to the lower-left four nodes to fight the Hydra near the enemy Command Post.
5.2
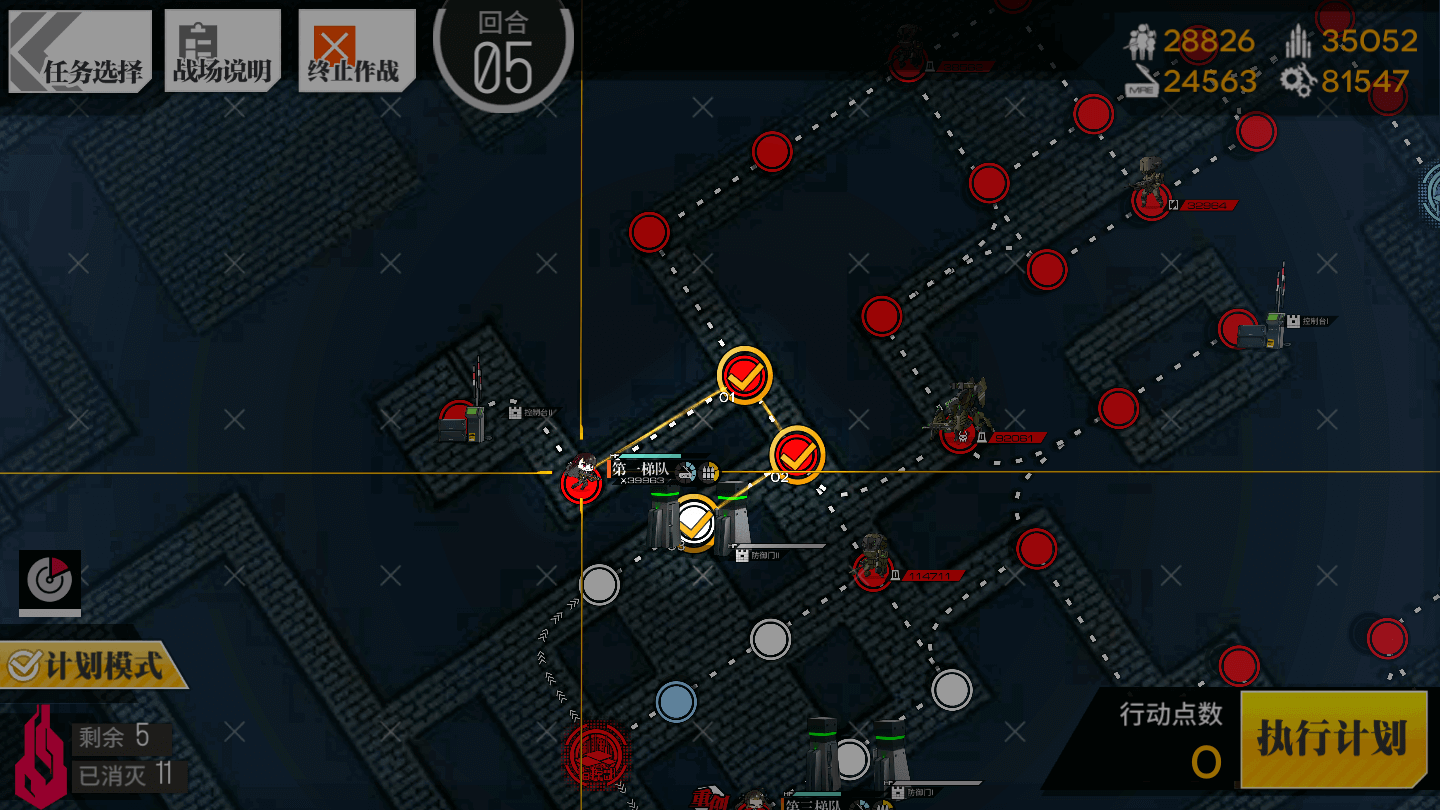
Move the other Combat Echelon right one node, down one node, and left one node, to the gate you opened earlier.
Turn 6
6.1
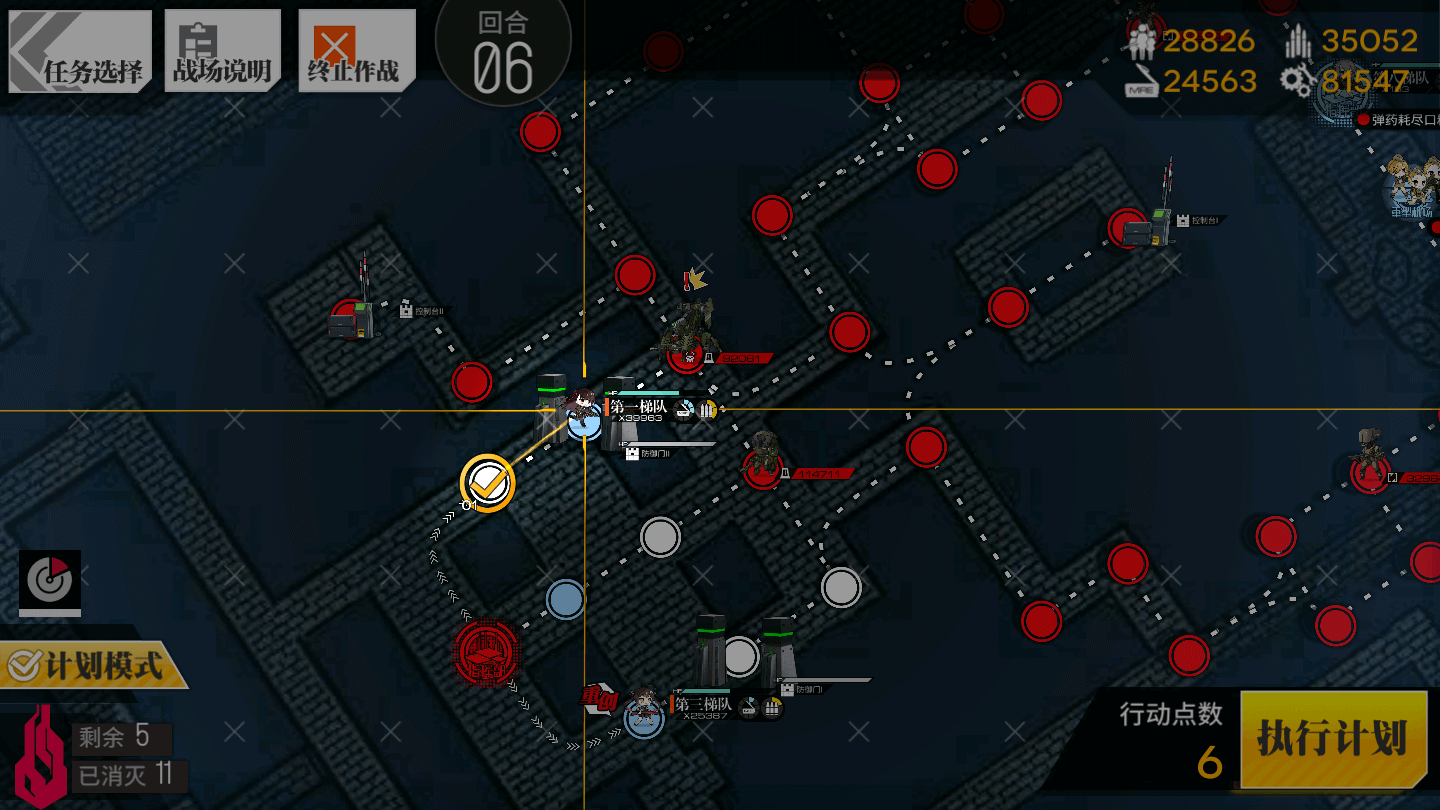
Move the upper Combat Echelon to the left one node further and end your turn to encircle the Command Post.
Video Guide:
Next chapter?
-
EX Guides
-
Normal Guides