Possible Drops:
--
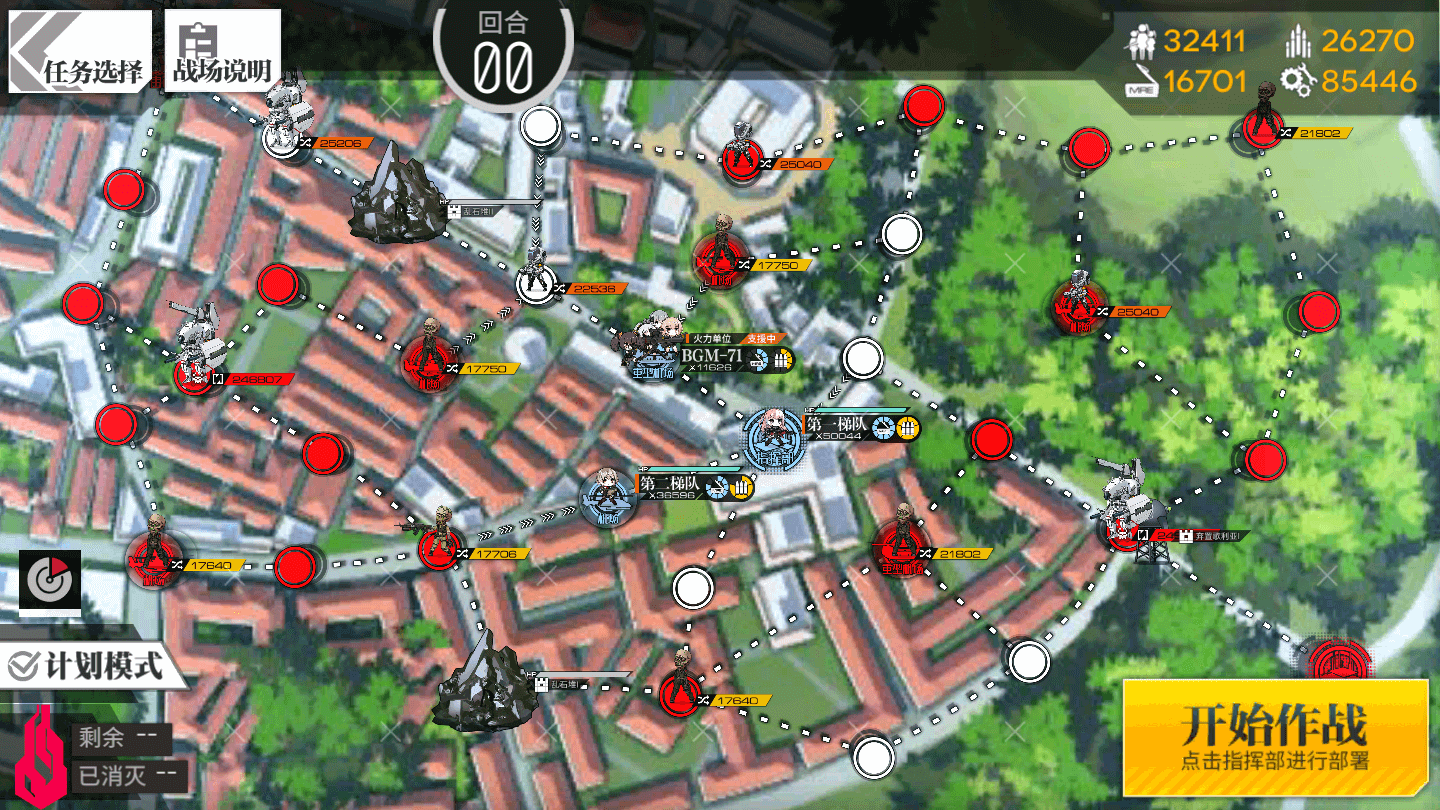
Mission and Clear Conditions:
Mission: Capture Radar
Clear Guide:
Team Recommendations:
- 3 Combat Echelons
- 2 AR/SMG Recommended. 1 RF/HG to kill Doppels
- 1 HOC
- With strong enough RF/HG echelons HOC can be replaced with a Dummy.
Clear Steps
Let’s get this out of the way. Yes, you can in fact, destroy the Rubble with a HOC. However, it has 9,999 HP, and BGM deals Damage equivalent to Peirce. That means that even a level 100 BGM with maxed, or near maxed Chips is going to need over 10 shots to destroy the Rubble. That is at least 1500 Ammo and Rations to kill that rock. If you wish to 1 Turn this map, you can do this, but it is not exactly recommended due to the extravagant resource cost.
With that out of the way ,this map stays fairly straightforward. The Deactivated Goliath (Bean) is the key past the Rubble, and the Doppelsoldner is kind enough to move away, removing the need to fight that one at all. After that, this map is a cinch to complete, just make sure you bring either HOC support, or enough firepower to fight the Doppelsoldners without on the way to the Radar.
Turn 1
1.1
Deploy a Combat Echelon on the Command Post and the Heliport, and HOC on the Heavy Heliport
1.2

Move the Combat Echelon on the Command Post down two nodes, and up-right one node.
1.3

Deploy an RF/HG Echelon capable of Doppelsoldner killing on the Command Post, and Swap them with your HOC.
Turn 2
2.1
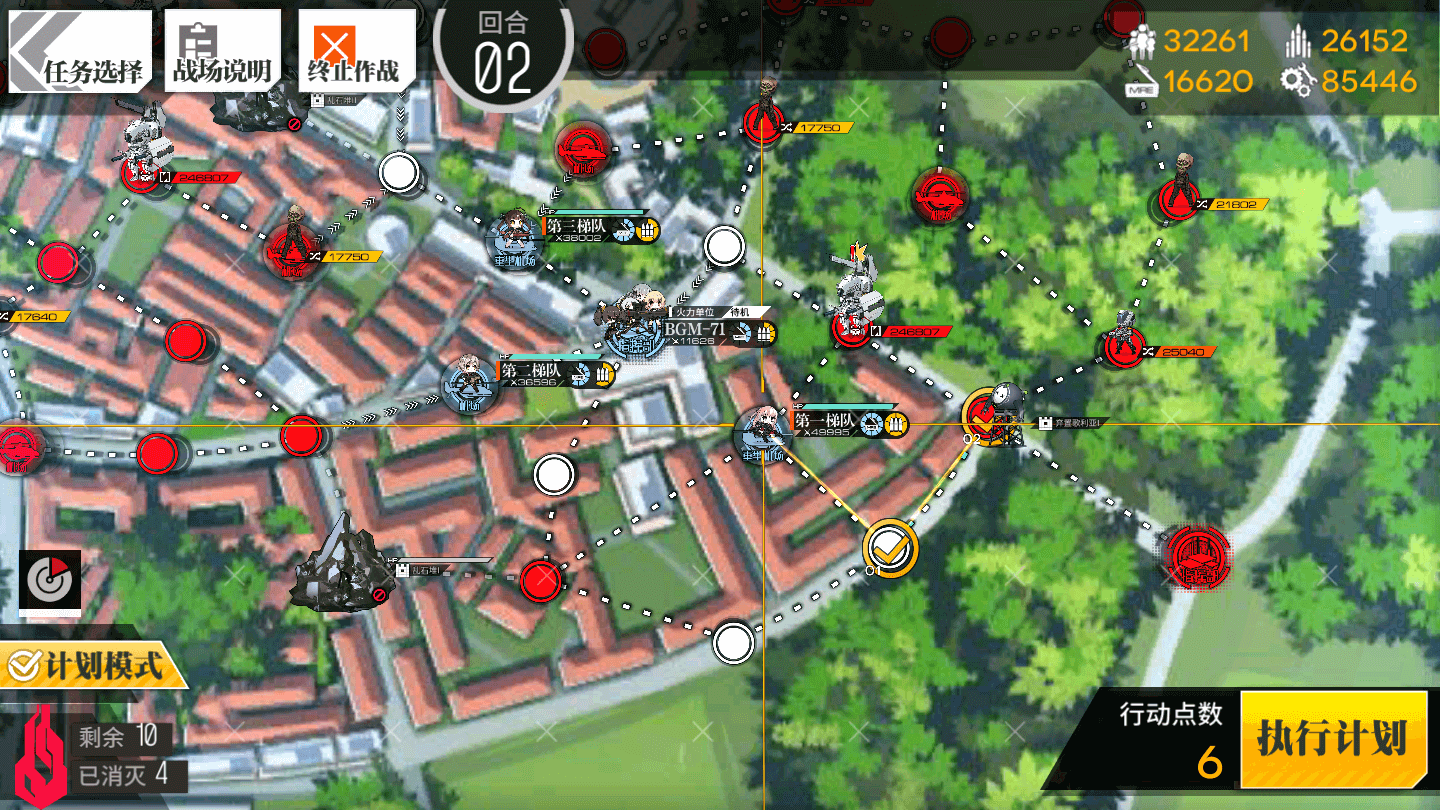
Move the right Combat Echelons right one node, and up one node. Pick up the Bean.
2.2
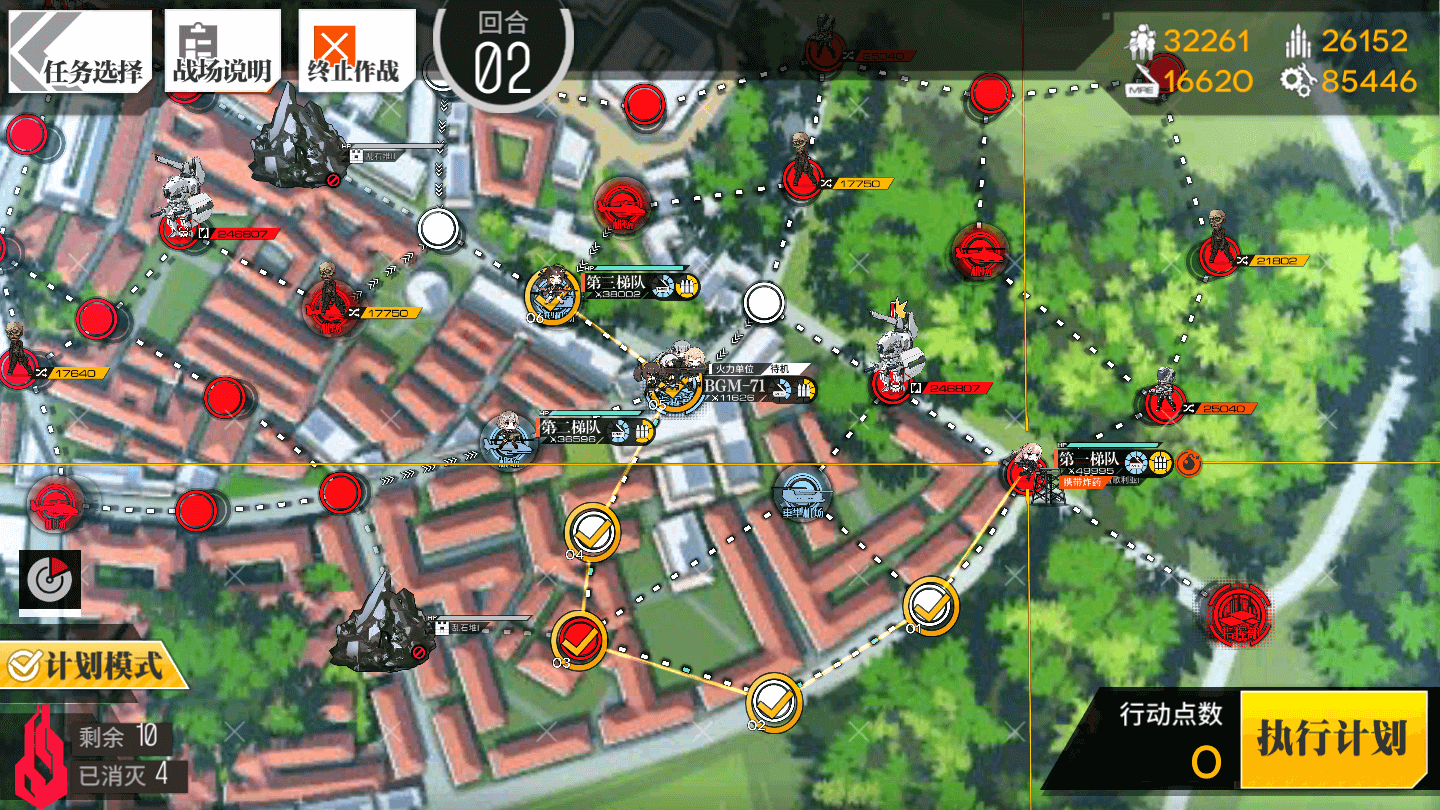
Move the right Combat Echelon to the left three nodes, up two nodes, swapping with BGM, then swapping with the RF Echelon as well.
2.3
Move the Echelon carrying the bomb to the left one more node.
2.4
Move the RF/HG Echelon up-left one node.
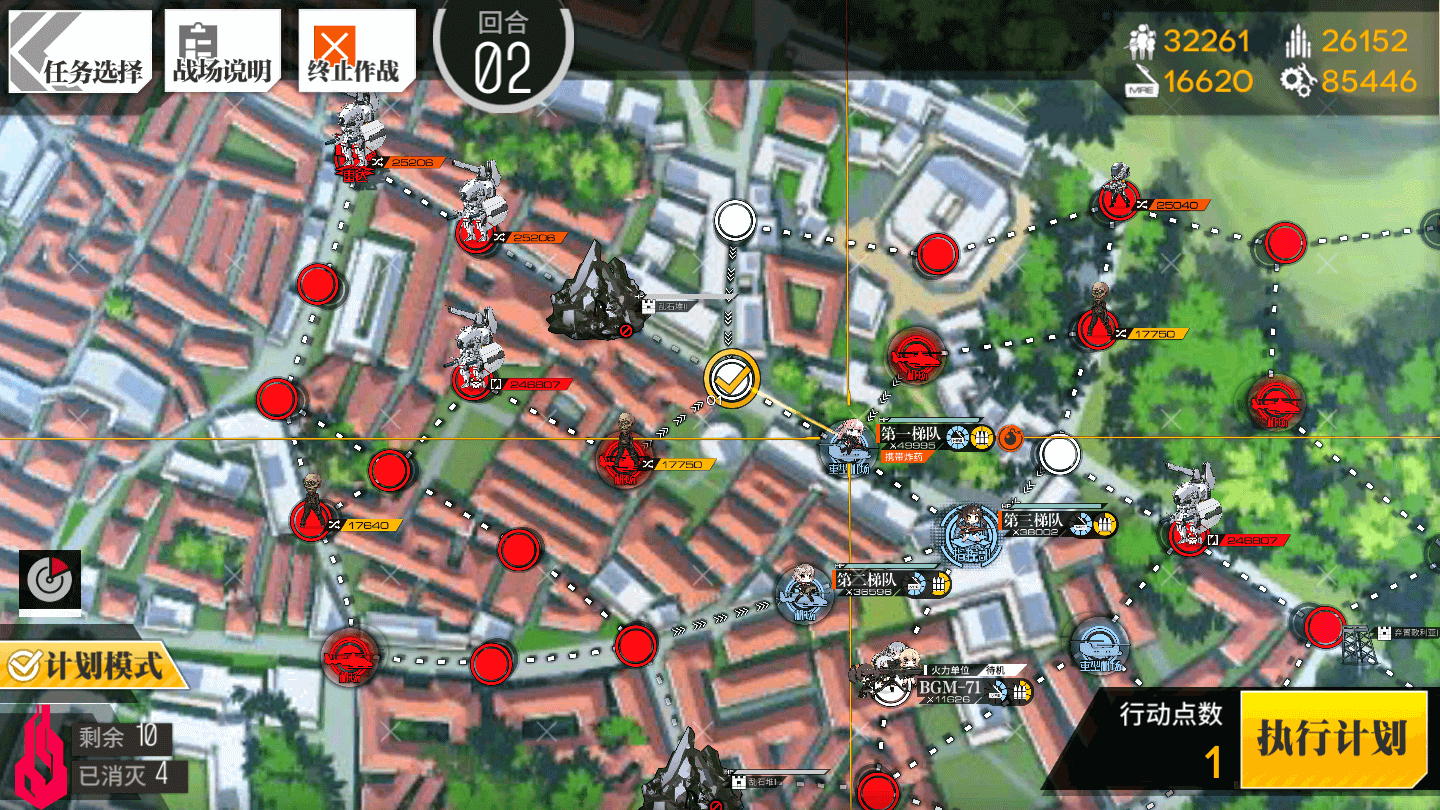
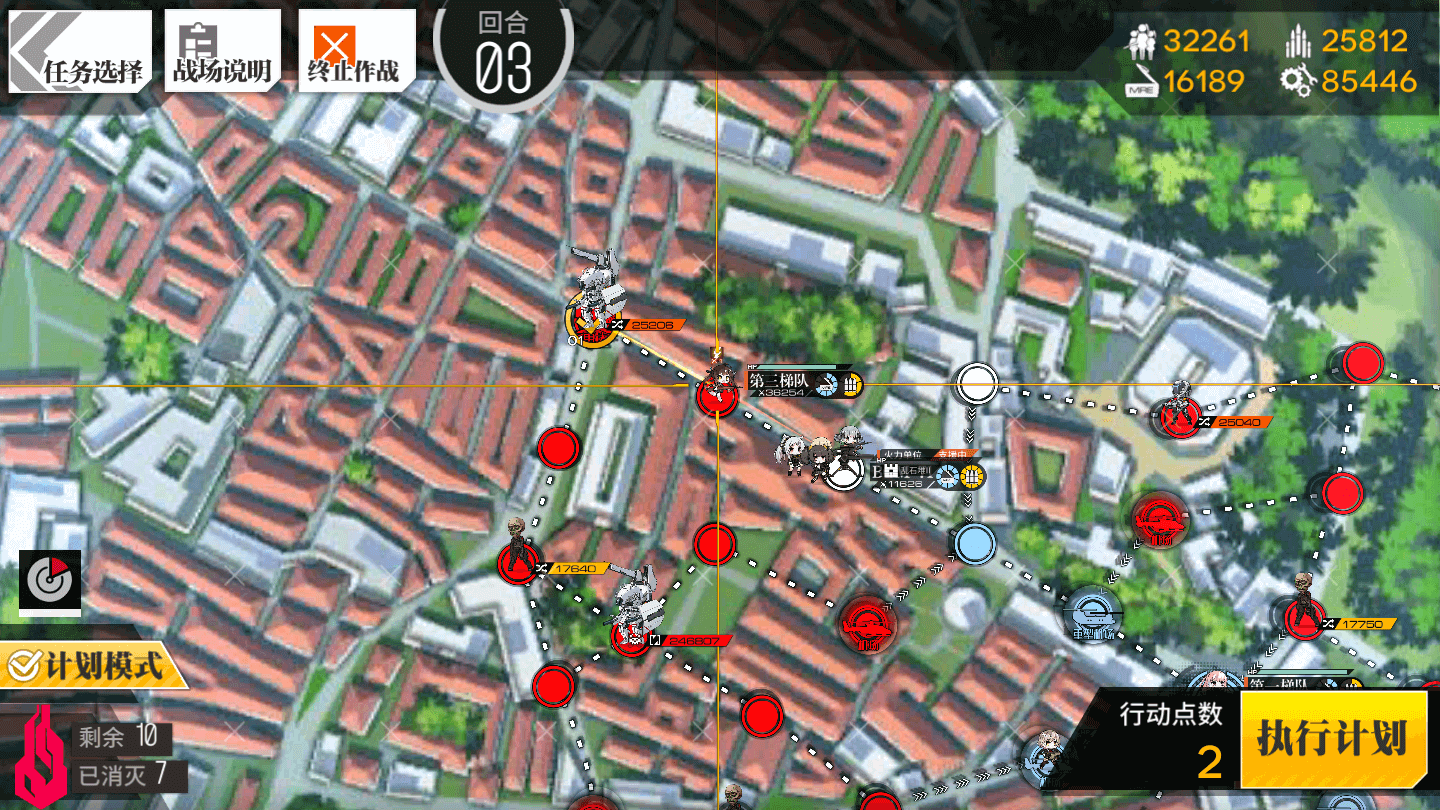
Turn 3
3.1
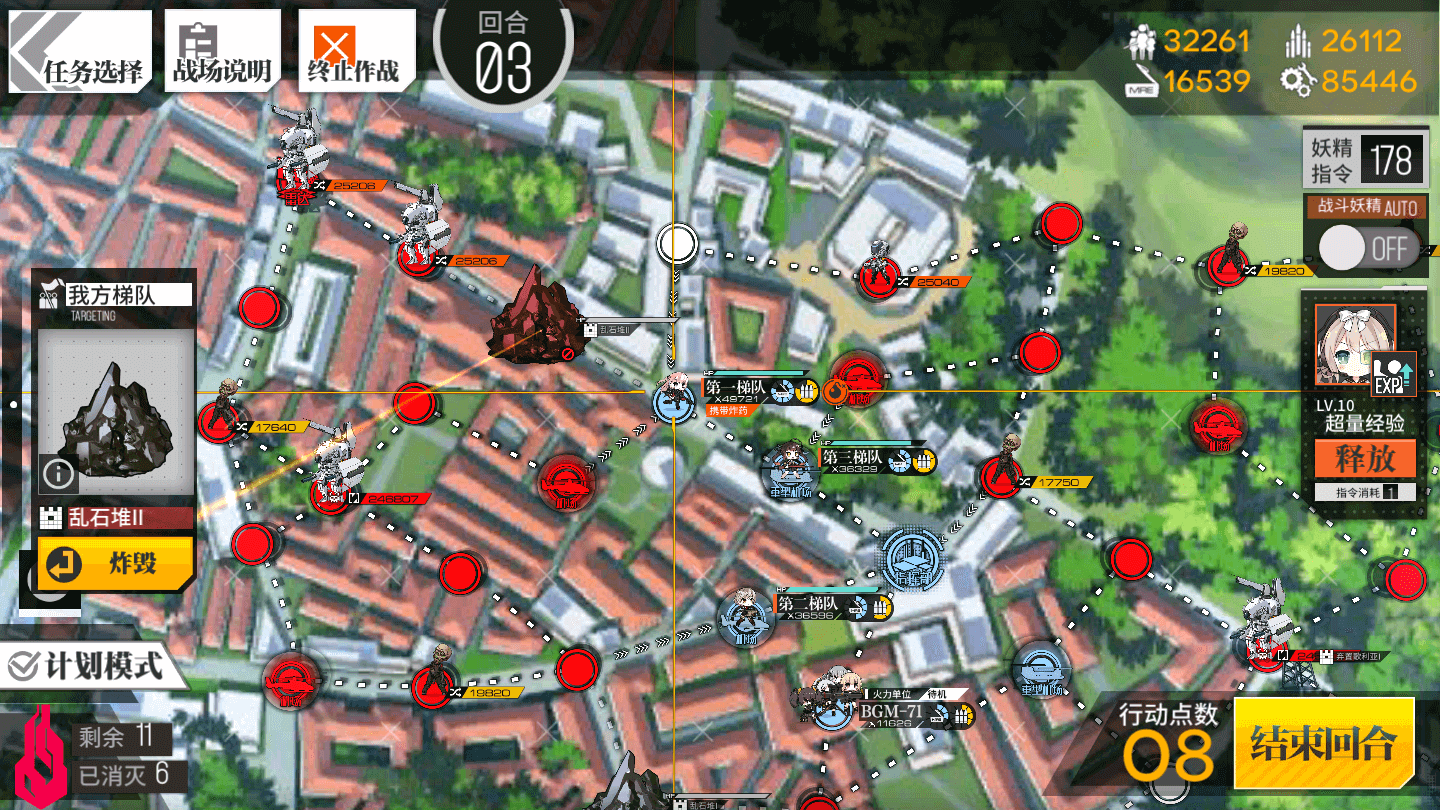
Blow up the Rock with the Echelon carrying the Bean.
3.2
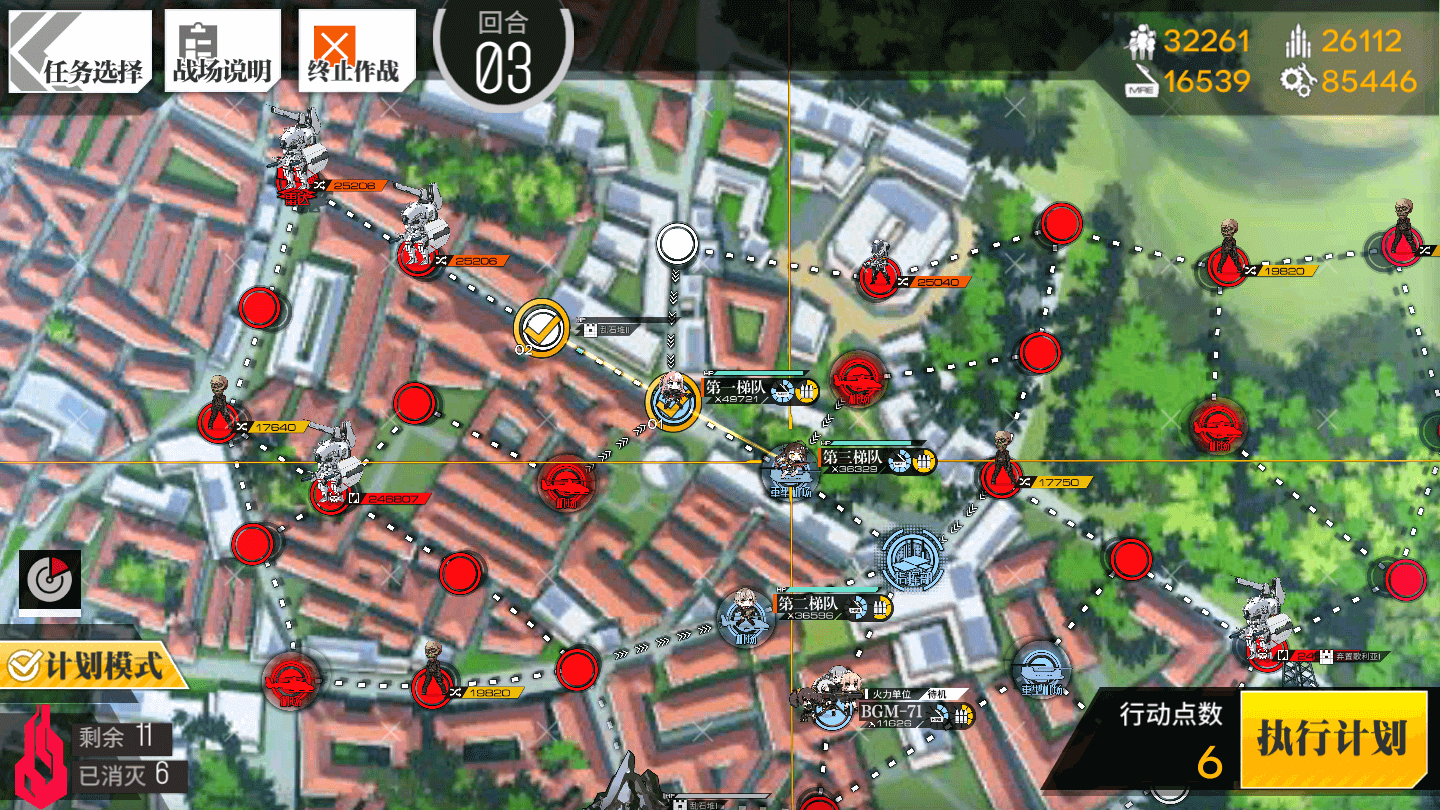
With the Rubble gone, you can move the RF/HG Echelon to the left two nodes.
If you're Echelon can kill the Doppelsoldners without HOC support, just run straight to the Radar
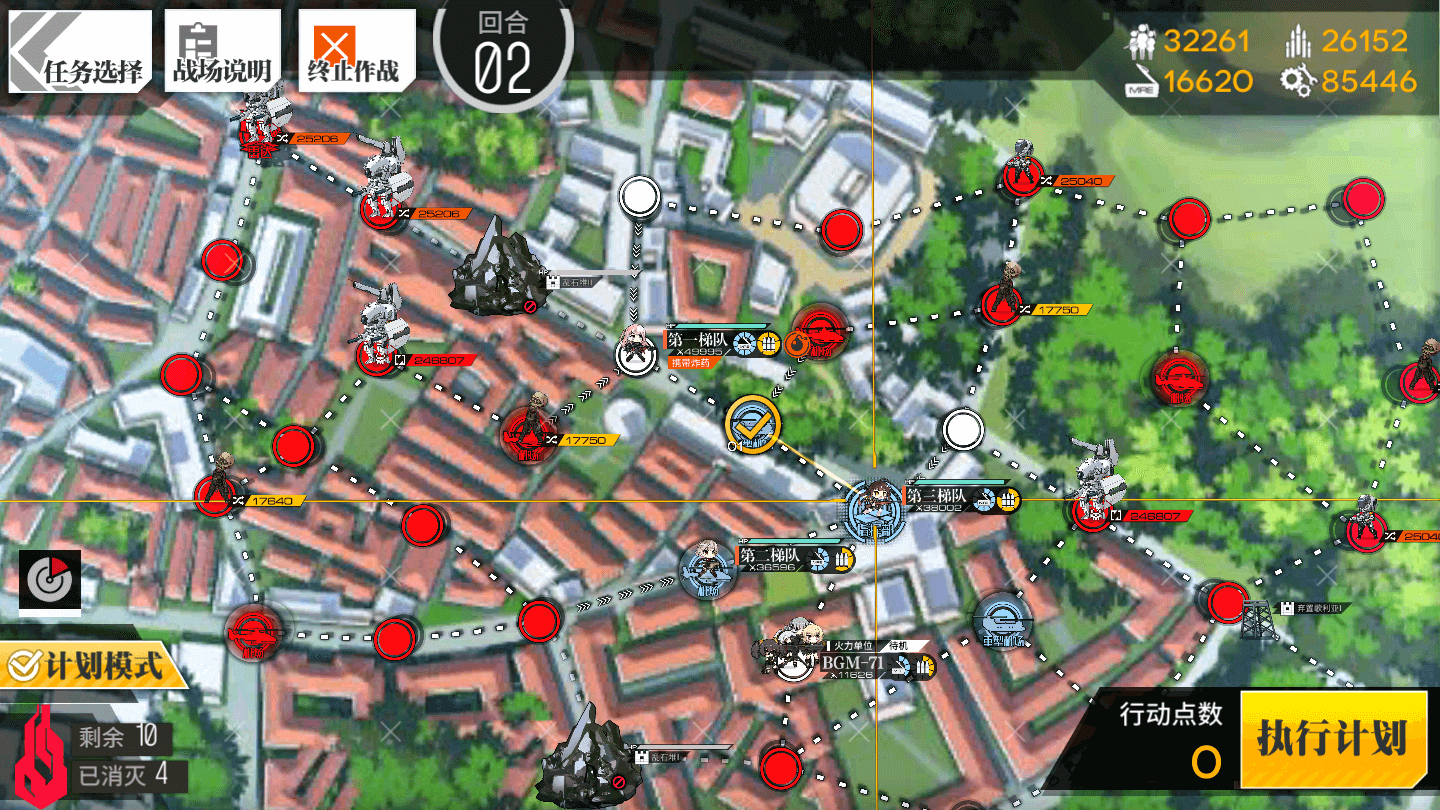
3.3
Move the HOC up one node, and up-left two nodes to support the RFs.
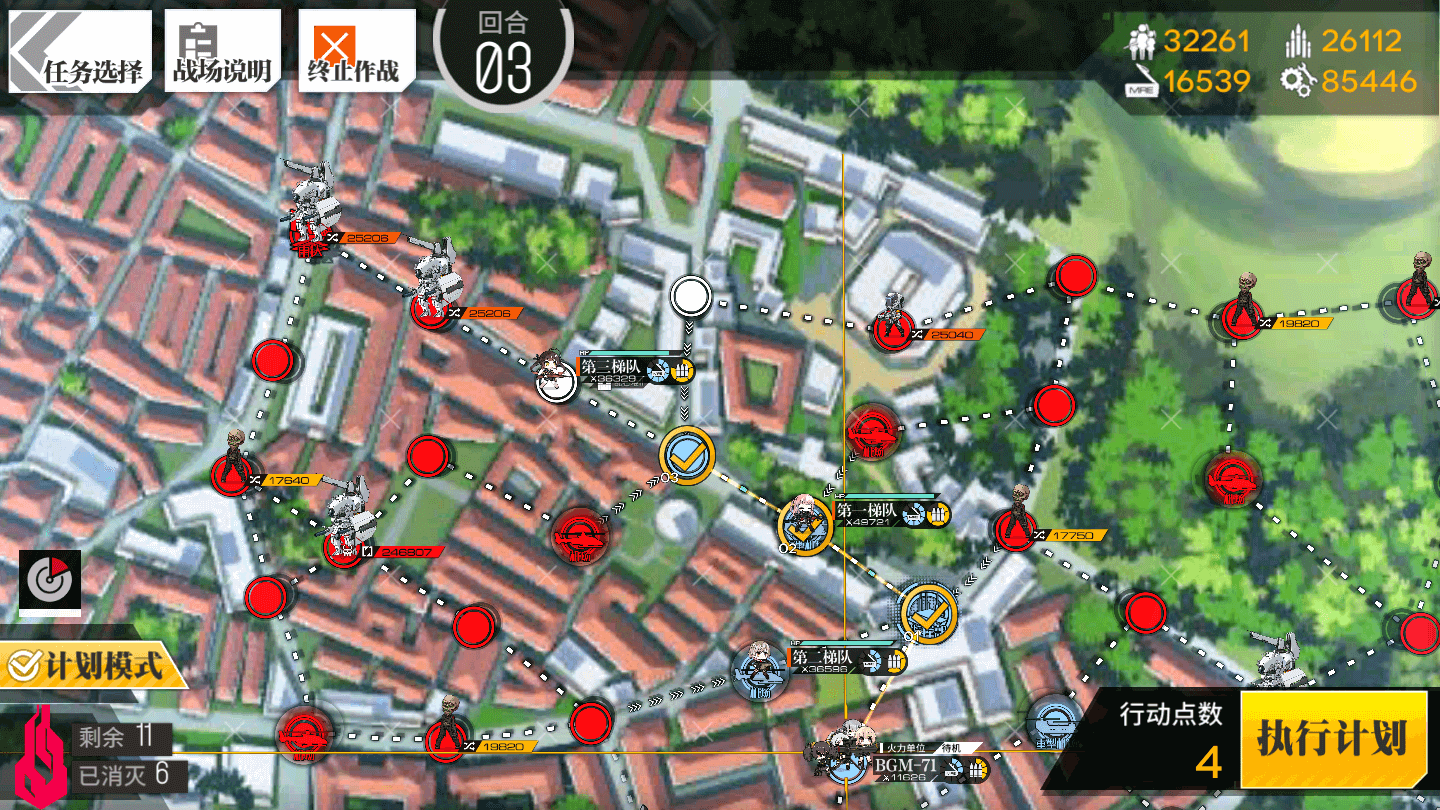
3.4
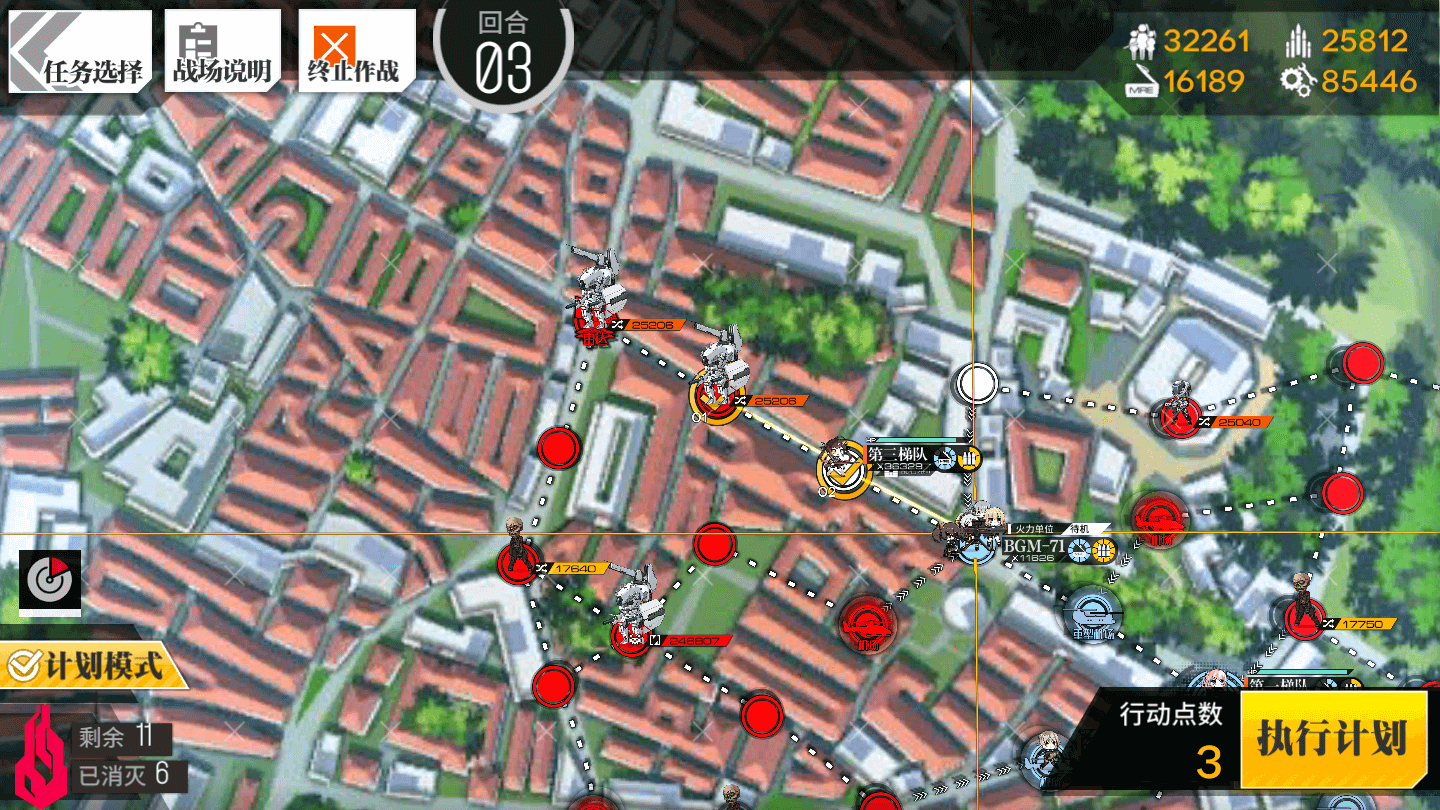
Move the RF Echelon to the left one node, and follow them with the HOC.
3.5
Move the RF’s in to capture the Radar to end the map.
Video Guide:
Next chapter?
-
EX Guides
-
Normal Guides