Possible Drops:
--
Mission and Clear Conditions:
Mission: Capture Command Post
Clear Guide:
Team Recommendations:
- 3 Combat Echelon
- Two of these need to be able to fight the Doppelsoldner without any HOC support.
- 1 Dummy Echelon
Clear Steps
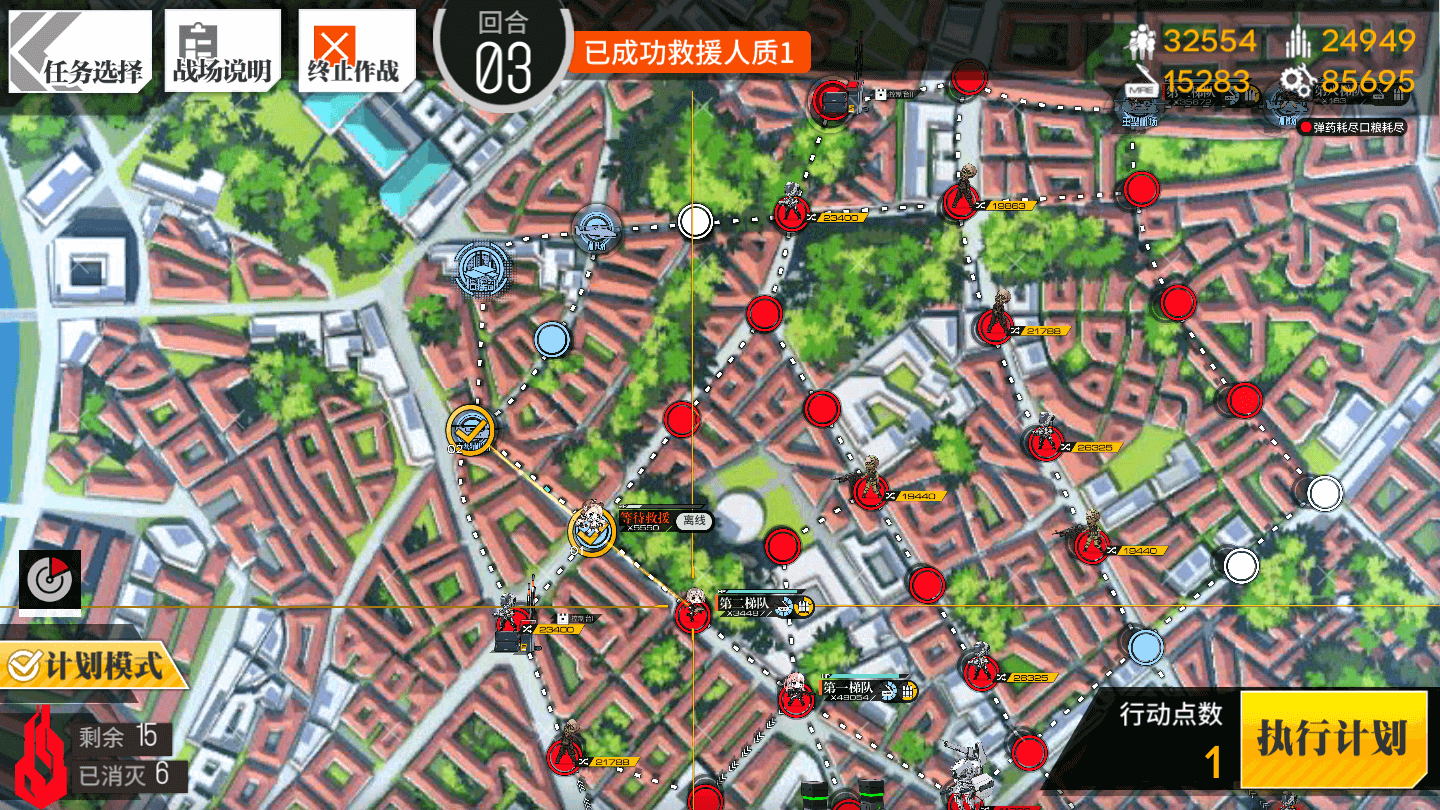
Unlike the normal version of this map, all three Hostages need to be rescued to complete the mission. You will need to move quickly to reposition the hostages to keep them safe, except the Middle one, which is ‘protected’ by the random movement AI Doppelsoldner. Said Doppelsoldner is probably the biggest potential threat, and so at least two Combat Squads able to engage it should be fielded. Outside of the rush to get the hostages out of harm's way, this map features nothing majorly different from its Normal counterpart.
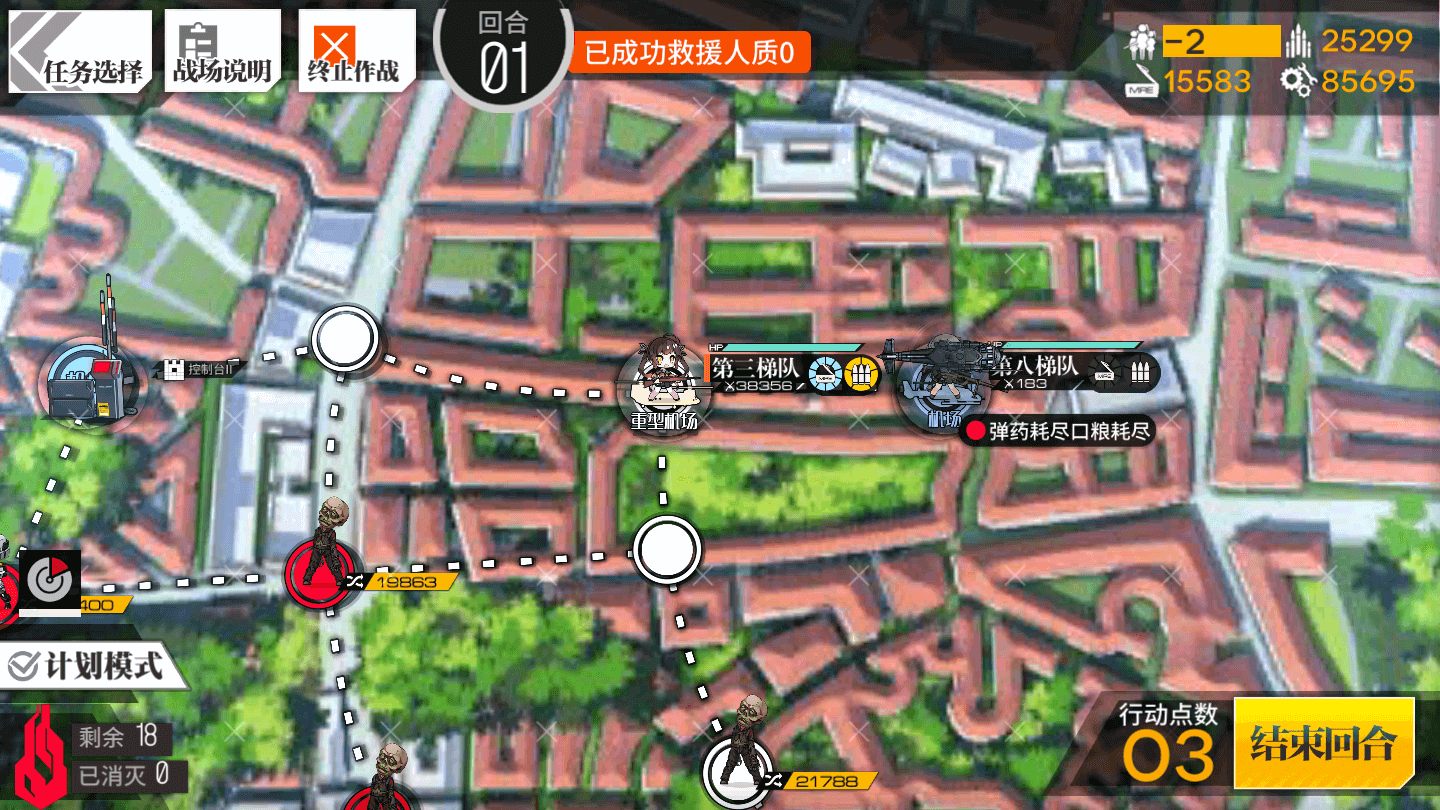
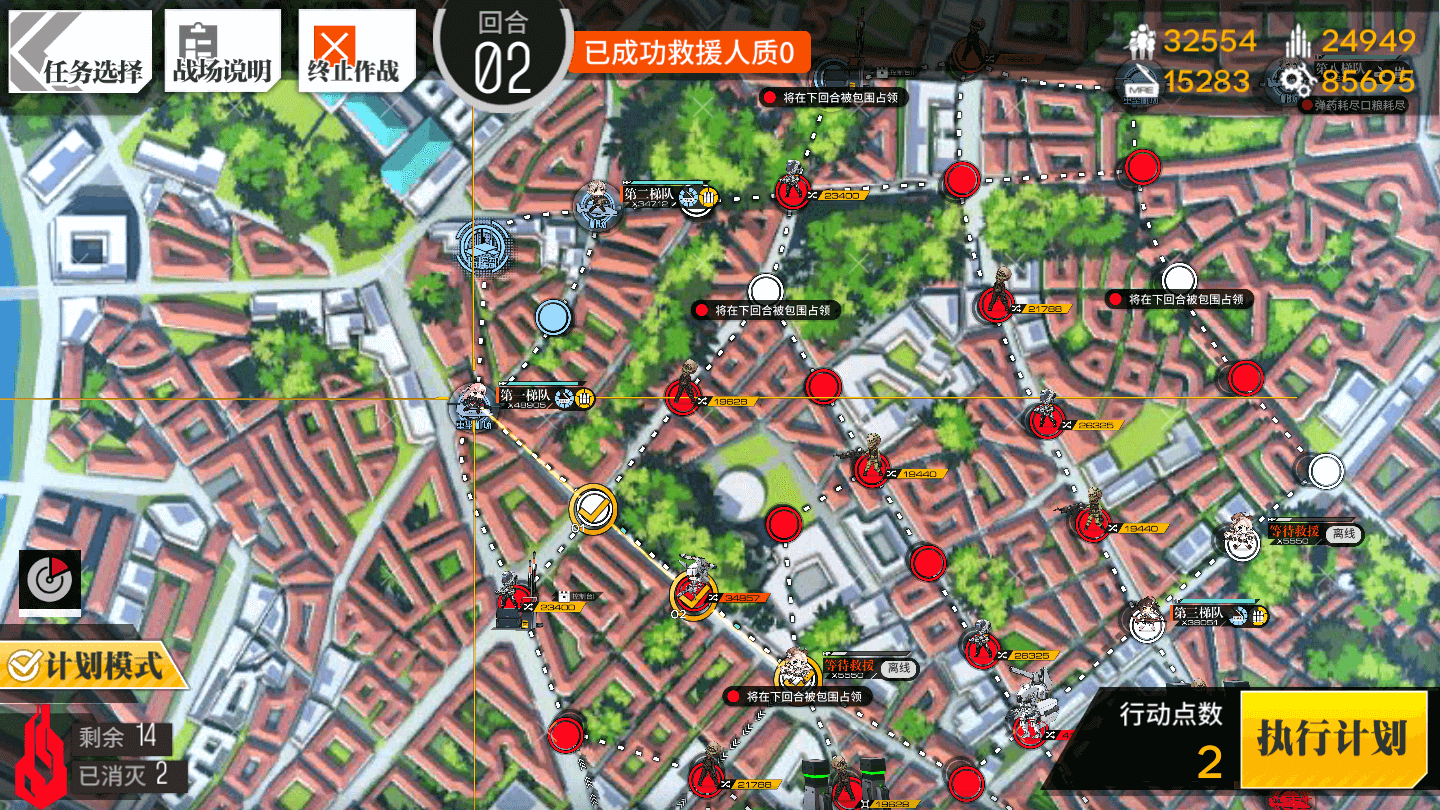
Turn 1
1.1
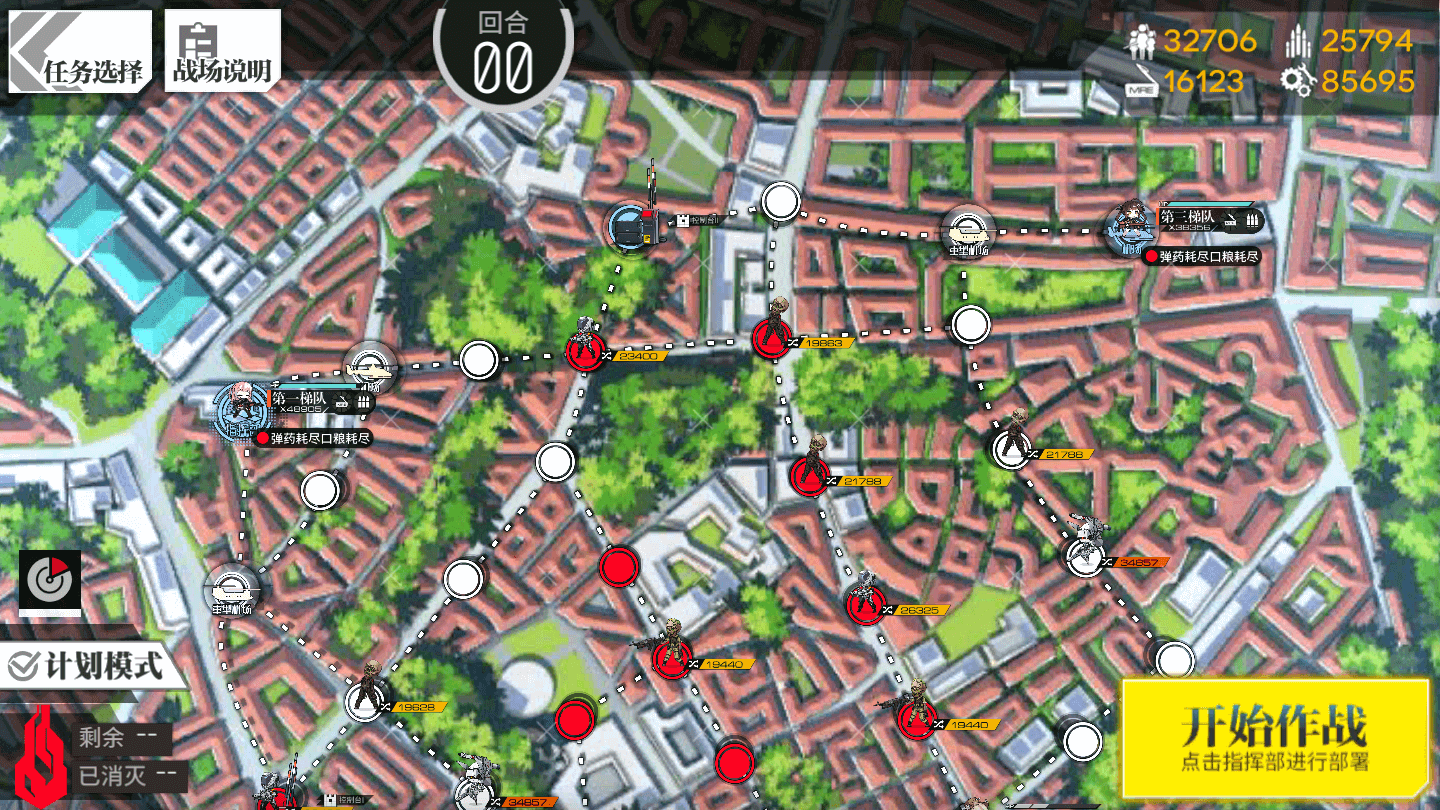
Deploy 2 Combat Echelons, one on the Command Post, and one on the Heliport. Both of these should be able to fight Doppelsoldners without HOC support. The Doppelsoldner at the bottom of the map moves randomly cannot be predicted or easily controlled.
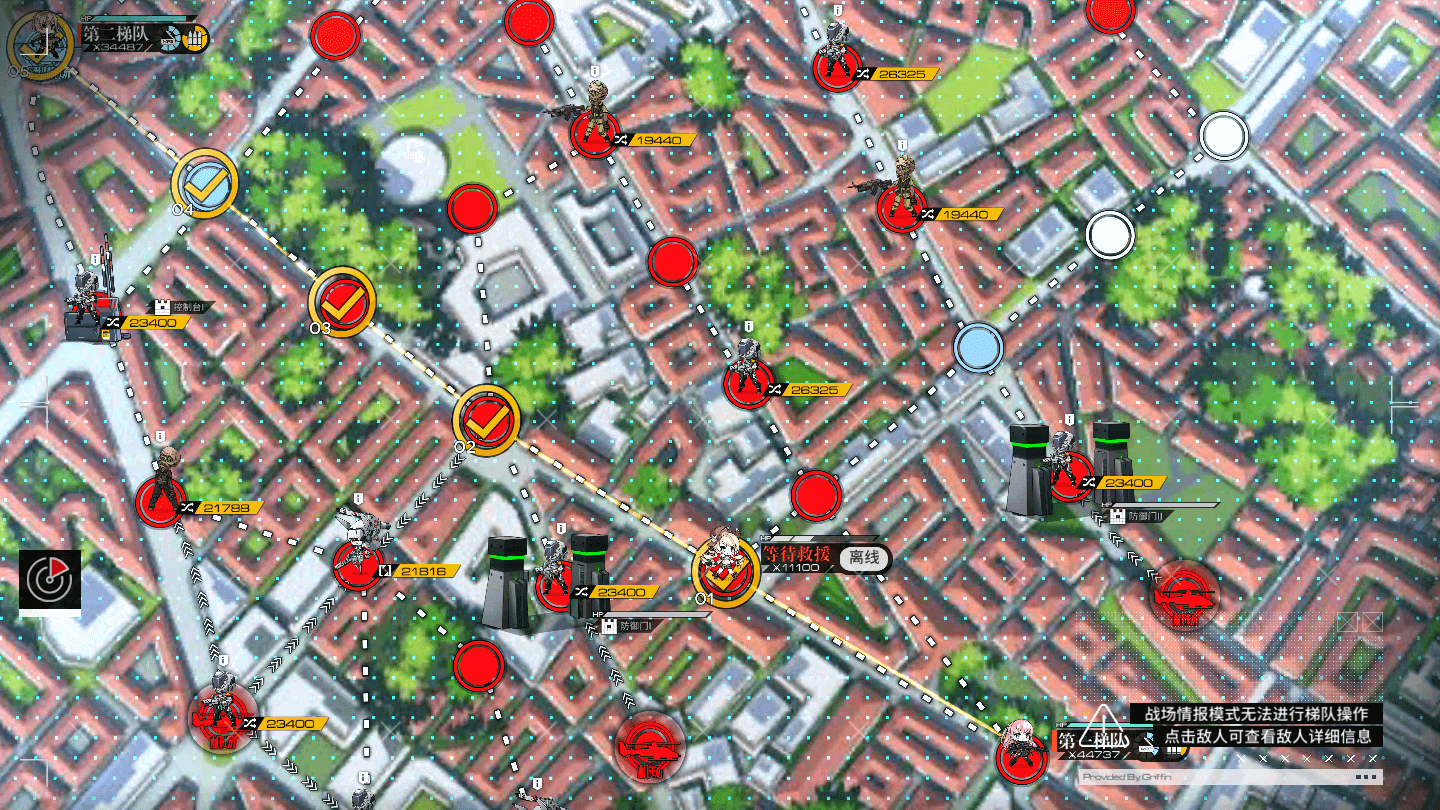
1.2
Move the Combat Echelon on the Heliport left one node. Deploy a Dummy on the Heliport.
1.3
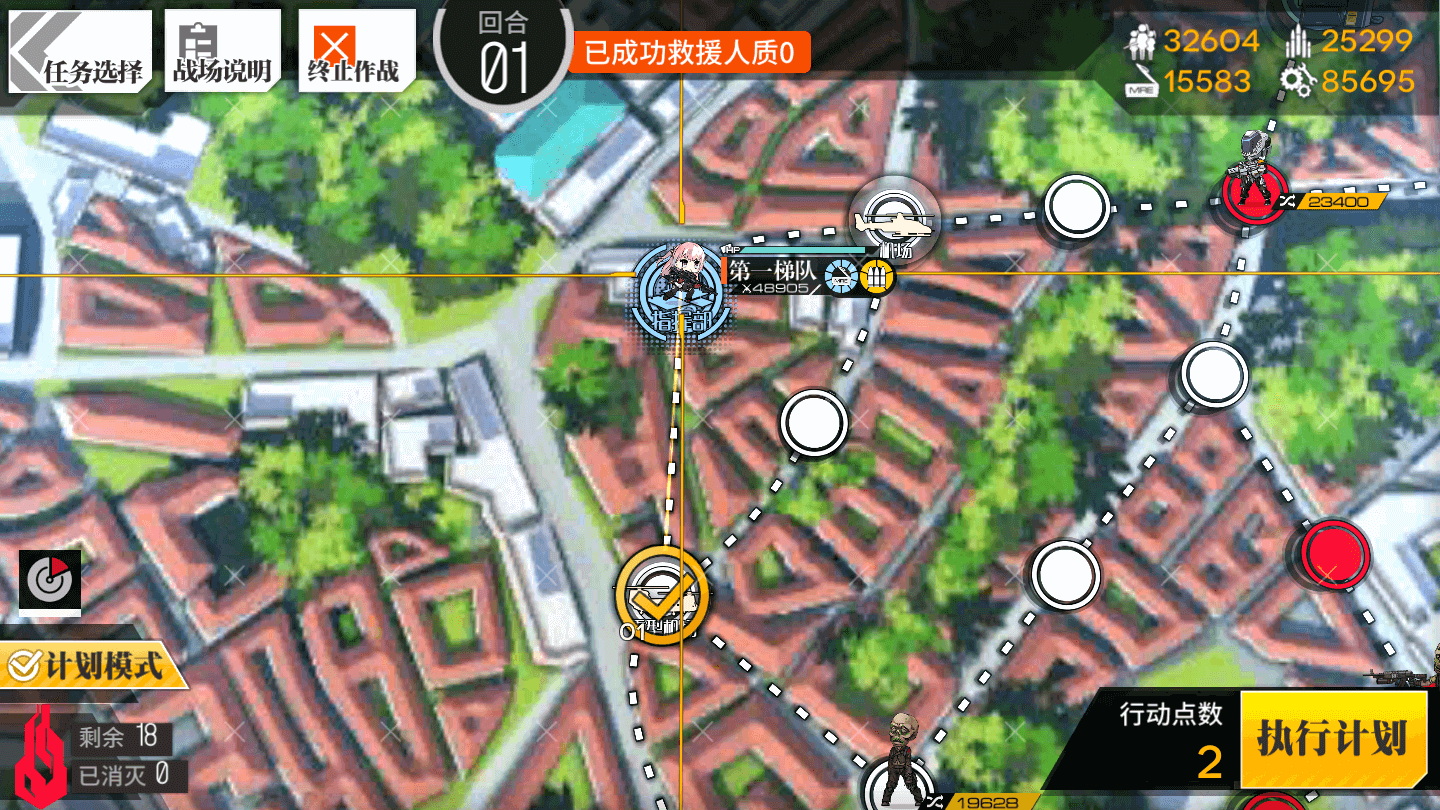
Move the Combat Echelon on the Command Post down one node.
1.4
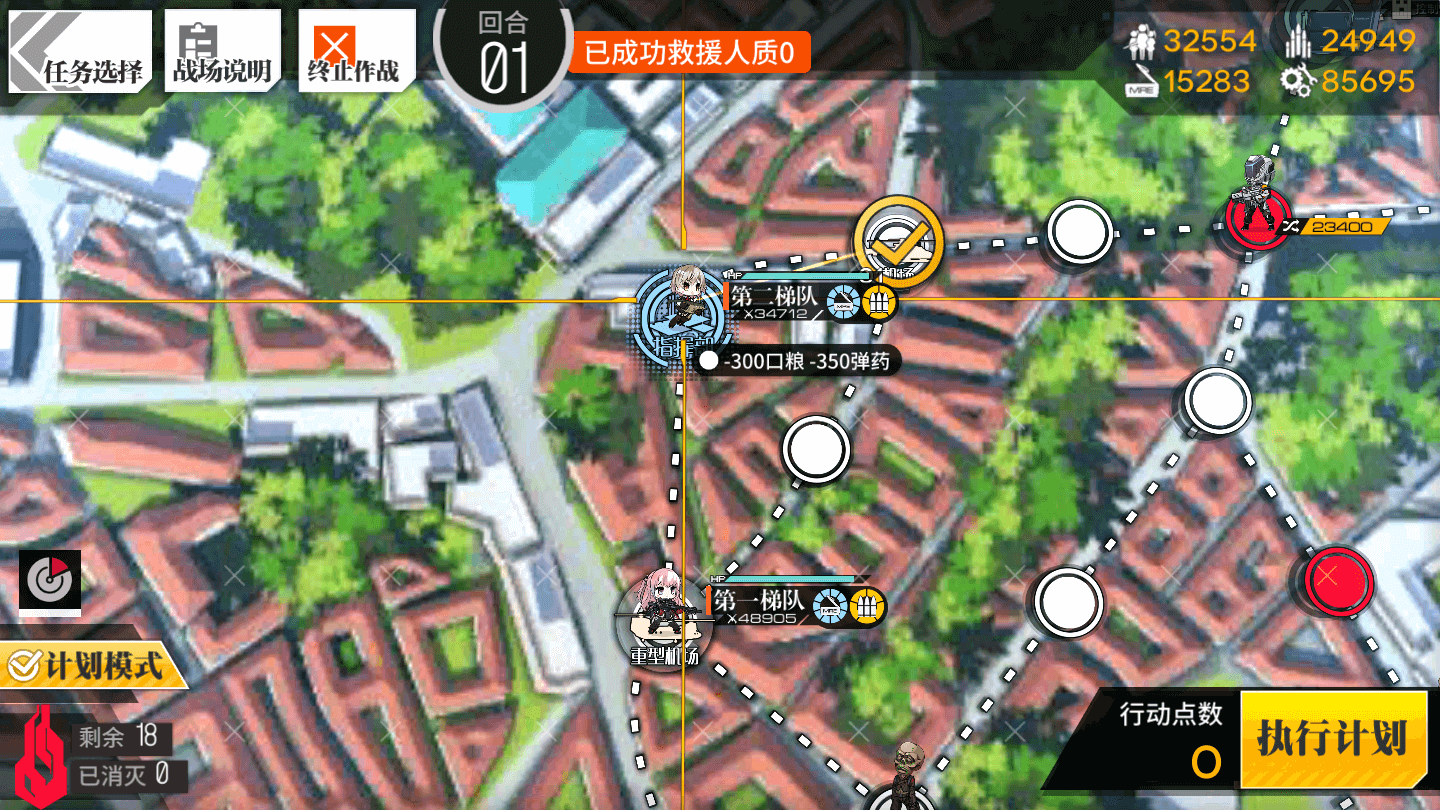
Deploy a third Combat Echelon on the Command Post. Move them to the right one node.
Turn 2
2.1
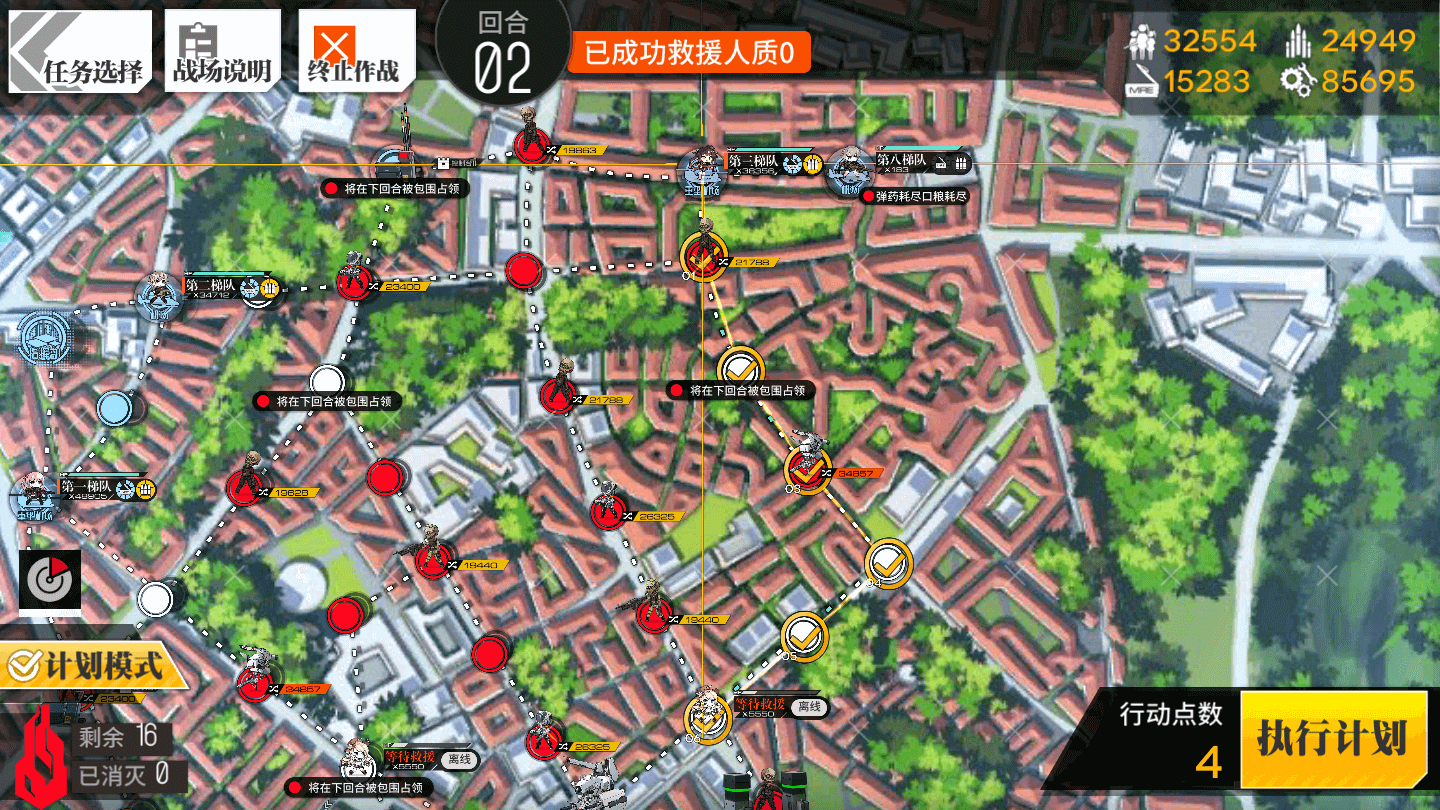
Move the rightmost Combat Echelon down four nodes, to the left one node, and SWAP with the SAA.
2.2
Move leftmost Combat Echelon down-left two nodes, and then SWAP with the hostage again.
2.3
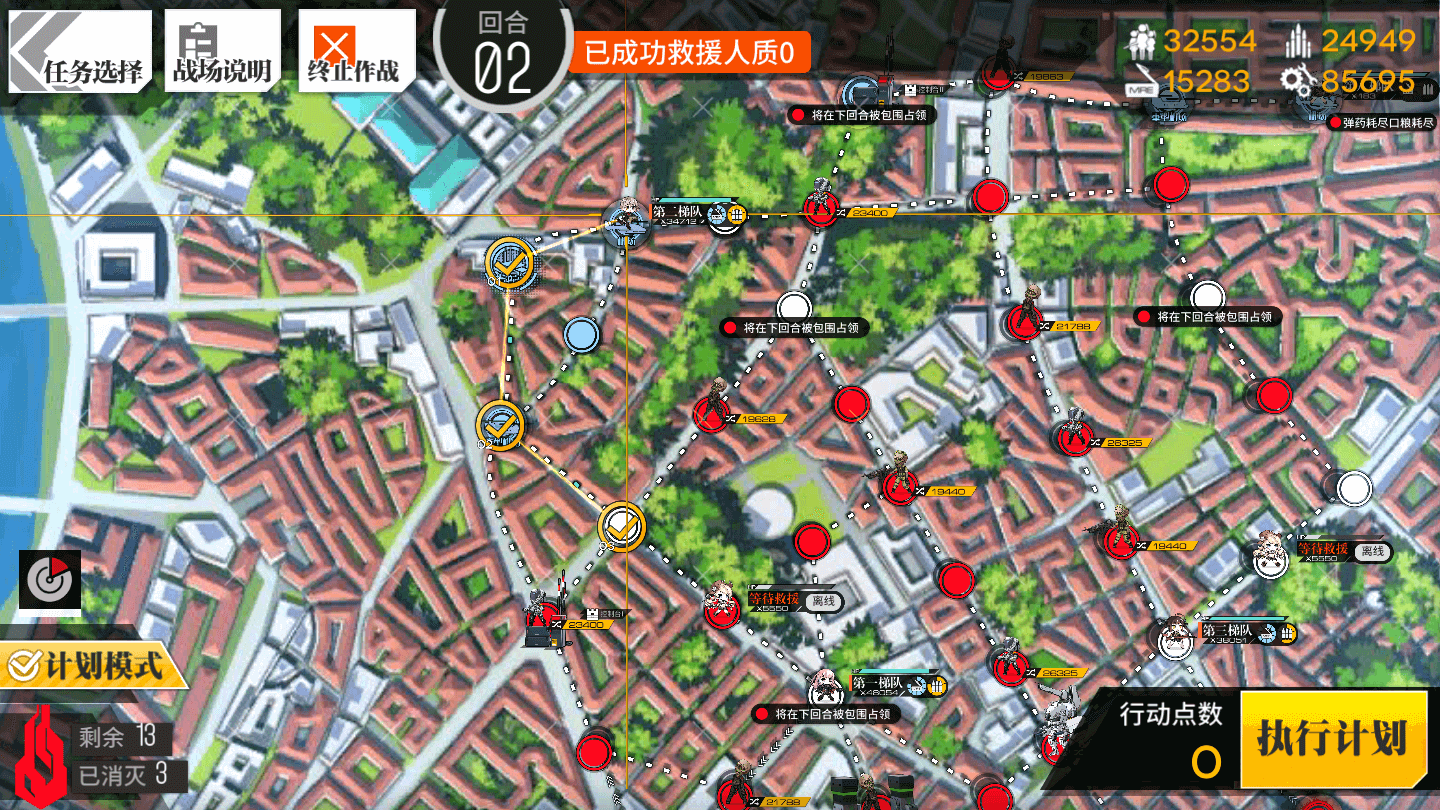
Move the now uppermost Combat Echelon to the left one node, down one node, and down-right one node. Do NOT pick up the Hostage at this time.
Turn 3
3.1
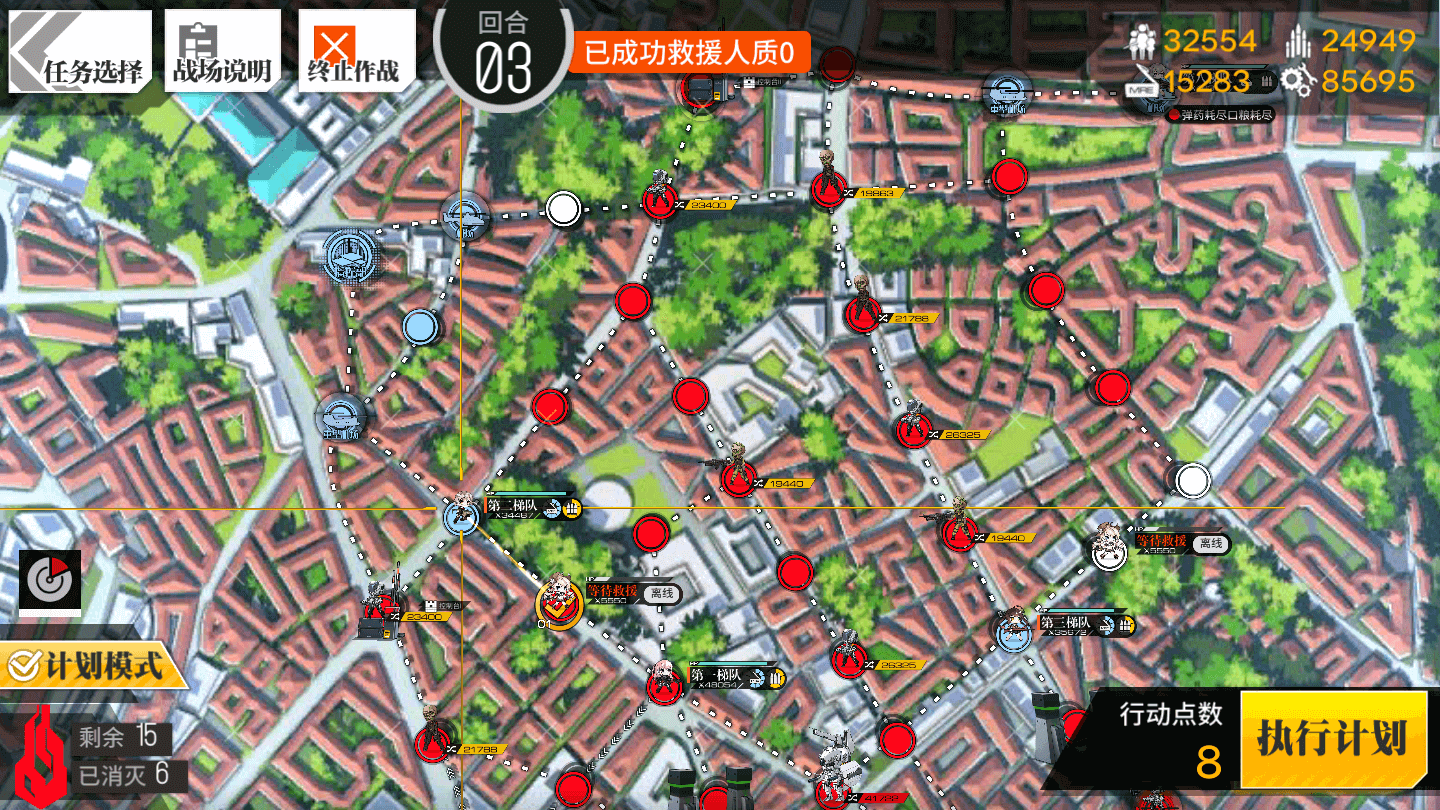
Move the leftmost combat Echelon right one node SWAPPING with the Hostage.
3.2
Move the right Combat Echelon to the right two nodes, picking up the Hostage on the way. Move them up four nodes.
3.3
Move the leftmost combat Echelon left two nodes, picking up the Hostage on the way.
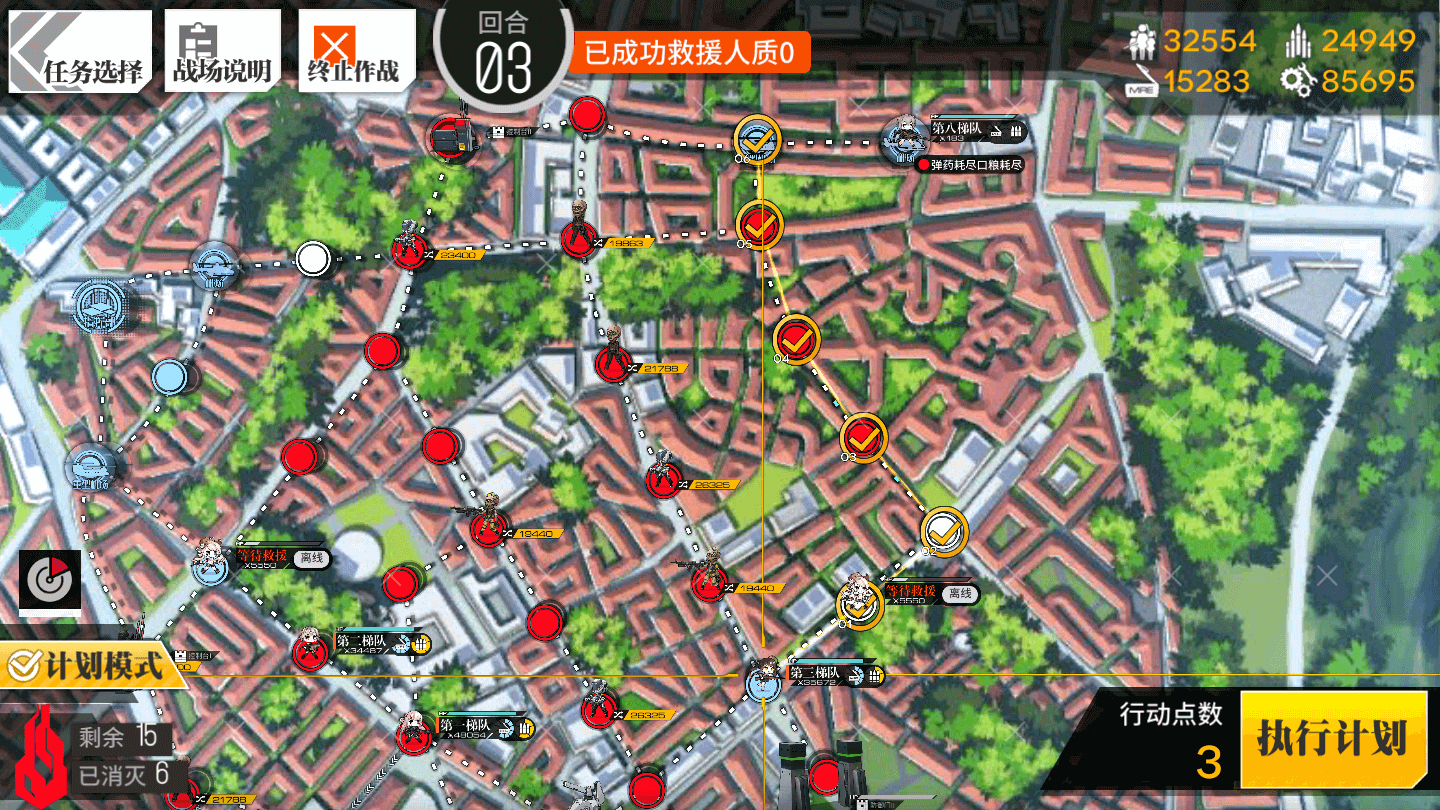
Turn 4
4.1

Move the central Combat Echelon down-right to SWAP with the remaining Hostage. Depending on what the Doppelsoldner has done, you may or may not fight it either on player or Enemy phase.
4.2
Move the bottom combat Echelon up left 5 nodes, picking up the Hostage and end the map by manually completing the rescue.
Video Guide:
Next chapter?
-
EX Guides
-
Normal Guides