Introduction
Upon clearing mission 7-5 you will unlock Protocol Assimilation, allowing you to capture Coalition units which are mostly Sangvis Ferri units with some various others here and there and field them in your own echelons.
Note that Coalition echelons cannot have any G&K units, and G&K echelons cannot have any Coalition units, they are completely separate for echelon building.
Getting Coalition units takes time and planning and while luck can help with this, getting the specific Ringleaders you want by careful resource planning is quite feasible.
Getting units
After unlocking Protocol Assimilation you will gain access to two new rooms. The Protocol Control Center where you can produce tactical Chips for Ringleaders as well as housing the Impulse Reactor which is how you will get your regular Impulses used to attempt capture on Coalition units. Note that maxing out your Impulse Reactor is of utmost importance as the time between each impulse is decreased by level down to 12 hours per Impulse at level 9. More on specific battery usage in the Battery section of Resource Allocation.
The other new room is Capture Operation where you will be able to see the currently running Banner, and attempt to capture your Coalition units. As part of the tutorial for Protocol Assimilation you will be made to do a 4-pull with Svarog Tickets, giving you 3 mooks and Scarecrow, before it converts to the current banner.

Using regular and Extra Impulses you can attempt to capture any of the 3 units currently on your screen but the chance of capture scales with the initial rarity of the units. There are 3 rarities of Coalition units split into Initial-1☆, Initial-2☆ and Initial-3☆ units, with Ringleaders being Initial-3☆s. 1☆ units have a 100% chance to be captured, 2☆ units have a 50% chance to be captured and 3☆ units only have a 25% chance to be captured.
There are also Svarogs (Aid Commission tickets) that allow you to 100% capture one unit. The drawback with this is that this unit is picked randomly from the entire pool, not from what is on your screen. With normal pools having around 70/100 of the units being 1☆ that have a 100% capture rate with impulses, using Svarogs while the pool is full is obviously not the most appealing with them being both expensive and very strong for Ringleaders and 2☆ units. Note that while the Tutorial does a 4-pull with free Svarogs, you should never do multi-pulls with your own Svarogs. Every time you spend one there is a chance you could capture the Ringleader, and as such you should always do single pulls.
Failing a capture on any 2☆ or 3☆ unit will still replace it on your screen with a new one as if you captured it, but the failed unit will instead go back into the pool.
The general idea when trying to capture a Ringleader is to try to empty out the pool as much as possible to allow the single copy of the Ringleader to show up in the first place. Seeing as only 1☆ units have a 100% capture chance, this means that you want to take as many 1☆ units out of the pool as possible to allow Svarogs a better chance at capturing 2☆ or 3☆ units.
The flow for trying to capture a Ringleader goes as follows:
- If you see a Ringleader and there are 4 or more units left in the pool, spend a Normal Impulse and try to capture her.
- Always refresh your pool before the next day, delaying it will give you less total refreshes across the banners duration. Capturing 1☆ units before refreshing is recommended if you have Normal Impulses for this.
- Prioritize 1☆ units with Normal Impulses, if there is a 1☆ unit on your screen simply capture it if you have Normal Impulses ready.
- If your screen is filled with 2☆ units check the following:
- If you will not cap on Normal Impulses before the next refresh, save them for the refresh.
- If you will cap on Impulses, spend them until you will no longer cap.
Near the end of the banner (usually the recommended is the last day as you get a final refresh on this day), and you still don’t have the ringleader, it is time to start spending extra resources:
- As with above, if there are more than 4 units left and you see the Ringleader, spend extra Impulses to try to capture her.
- If there’s a 1☆ unit on your screen, capture it.
- Finally, check how many units are left in the pool:
- If the majority are still 1☆ units, use Extra Impulses to reduce the 1☆ units.
- If the majority are 2☆ or it is equal, spend Svarogs.
Note that every time you try to capture a unit with Svarogs it can refresh what is on your screen, make sure to check what is on your screen before you spend more Svarogs as both the Ringleader and 1☆ units can show up there again.
Coalition Basics
Coalition units function somewhat differently from your regular Griffin and Kryuger (G&K) echelons. The deployment cost is a set 72 Manpower and resupplying costs 360/360. Like HOC they have 10 Ammo and 10 Ration pips, rather than only 5 Ammo like regular dolls.
At first glance this will make them seem terrible for farming, though with certain chips Coalition echelons can be the most resource efficient way to farm specific maps.
Coalition echelons have a “Cost” system, where you can fill it up with up to 9 units as long as the total Cost is 36 or lower. Various units have different costs, with Ringleaders having a cost of 8-10 and regular units having a cost of 2-10. Coalition echelons generally consist of one Ringleader and enough mooks to fill up the rest of the Cost capacity. While it is possible to make an echelon without a Ringleader as the leader, this is never recommended as Ringleaders are just much stronger than regular units. In addition to this only Ringleaders have tile buffs and can equip Chips.
In combat most Coalition units will always attack the closest target, but unlike G&K echelons the vast majority of Coalition units do not lock on. If a new target gets closer, they will swap targets. Similarly Jaegers and Jaguars work the opposite way, attacking the furthest target and swapping targets when a new one gets in range.
There are two exceptions to this rule, Strikers (SWAP) and Agent both function similarly to SMG/MGs for G&K, picking random targets and locking on until the enemy dies or they are moved.
Echelon Range
As opposed to G&K echelons, Coalition echelons do not gain a range benefit for filling the front column and instead each unit has a set range of which the highest range in combat is the maximum range of the entire echelon. Note that all ranged units will follow the echelon max range, irregardless of their own innate range. This also means that if you retreat the unit granting the echelon improved range, the echelon will now have lower range.
Range cheat sheet:
- Most Ringleaders and Ranged units have 7 range.
- Jaguars, Jaegers and Strikers have 9 range.
- Nemeums have only 3 range.
- Manticores have only 5 range.
- Melee units have 3-4 range.
For specifics for individual units, should this ever matter (which it generally doesn’t as Jaguars/Jaegers exist), see the Protocol Assimilation Stat Calc.
Unit Sizes
When you get a non-Ringleader unit it automatically gets assigned a random size from XS to XL, the bigger the unit is the more stats it gets. While the stat benefits aren’t very big, it is preferable to use larger ones or wait until you get a bigger copy before you start raising it.
Changing unit sizes can be done through the Symmetric Infusion Drive in the Protocol Control Center. Here you can swap the size between two Coalition units with the same name. This costs 50 Transfer Catalysts, which aren’t cheap and though they are available in the kernel shop for purchase you should avoid having to buy them when possible.
Kalina can also give these out through her daily gifts which can be enough for the occasional swap. You should try to raise and link higher size units from the start, but if you need a unit now, use the largest available and know that it is possible to upgrade it later while keeping all other progress and investment.
For more specific benefits from size, please see the Protocol Assimilation Stat Calc and check the detailed sheet.
Shiny/Golden Units
Shiny units have a special effect shown on their portrait and as a small glowing circle around the chibi. This is purely cosmetic and offers no gameplay benefits.
Leveling a shiny XL unit to 100 and maxing out its links and developing them to 5☆ will also add a red shine to their portrait. As before this offers no gameplay benefits and is only cosmetic. As Ringleaders have no size and cannot be ‘shiny’, the red shine only requires maxing out their links. This is not recommended to attempt to go for unless you are whaling.
As with unit sizes, swapping a shiny effect to another unit can be done through the Symmetric Infusion Drive in the Protocol Control Center with the toggle in the top right corner.
Teambuilding
Teambuilding with Coalition units is slightly different than with G&K echelons. While there certainly are synergies between certain units and ringleaders, these should in most cases be considered bonuses if they end up making it into your echelon and not be something you focus on attempting to fulfill. When building a Coalition echelon, your main goal is to look at the enemies presented to you on your mission and ensuring that your team can deal with them. For some extra examples on why you do not attempt to build around a Ringleader’s tiles for example, see BSJ’s page on this topic.
The most generic teams will be focused on simply filling the back column with damage units and abusing Manticores with their knockback effect, high evasion and high armor being able to both delay the enemy and tank anything that makes it through for any lower difficulty content. As the difficulty goes up and you face more specialized enemies, you will need to carefully consider which units you bring to make sure you can deal with all of them.
For the most basic of examples let’s look at Manticores again. High health, high evasion, fairly high armor and no links. For the majority of enemies especially in the early game this is just an “iwin” unit, but as you progress further certain units are not something you want to try to tank with Manticores. The best example of this is the Hymnal Organ (also known as Cherub), ignoring armor and dealing increased damage to targets the fewer their link count, absolutely wrecking Manticores.
Understanding the strengths and weaknesses of each unit is essential for good Coalition teambuilding in the more difficult stages of the game.
An example of basic teambuilding combined with correct unit positioning would be taking a pair of Manticores and a Jaeger/Jaguar/Nemeum and using them together. As with G&K unless there are reasons to put your units up near the enemy, this is to be avoided. Combine this with that Coalition echelon range is tied to unit selection and your normal teambuilding should look somewhat like this:

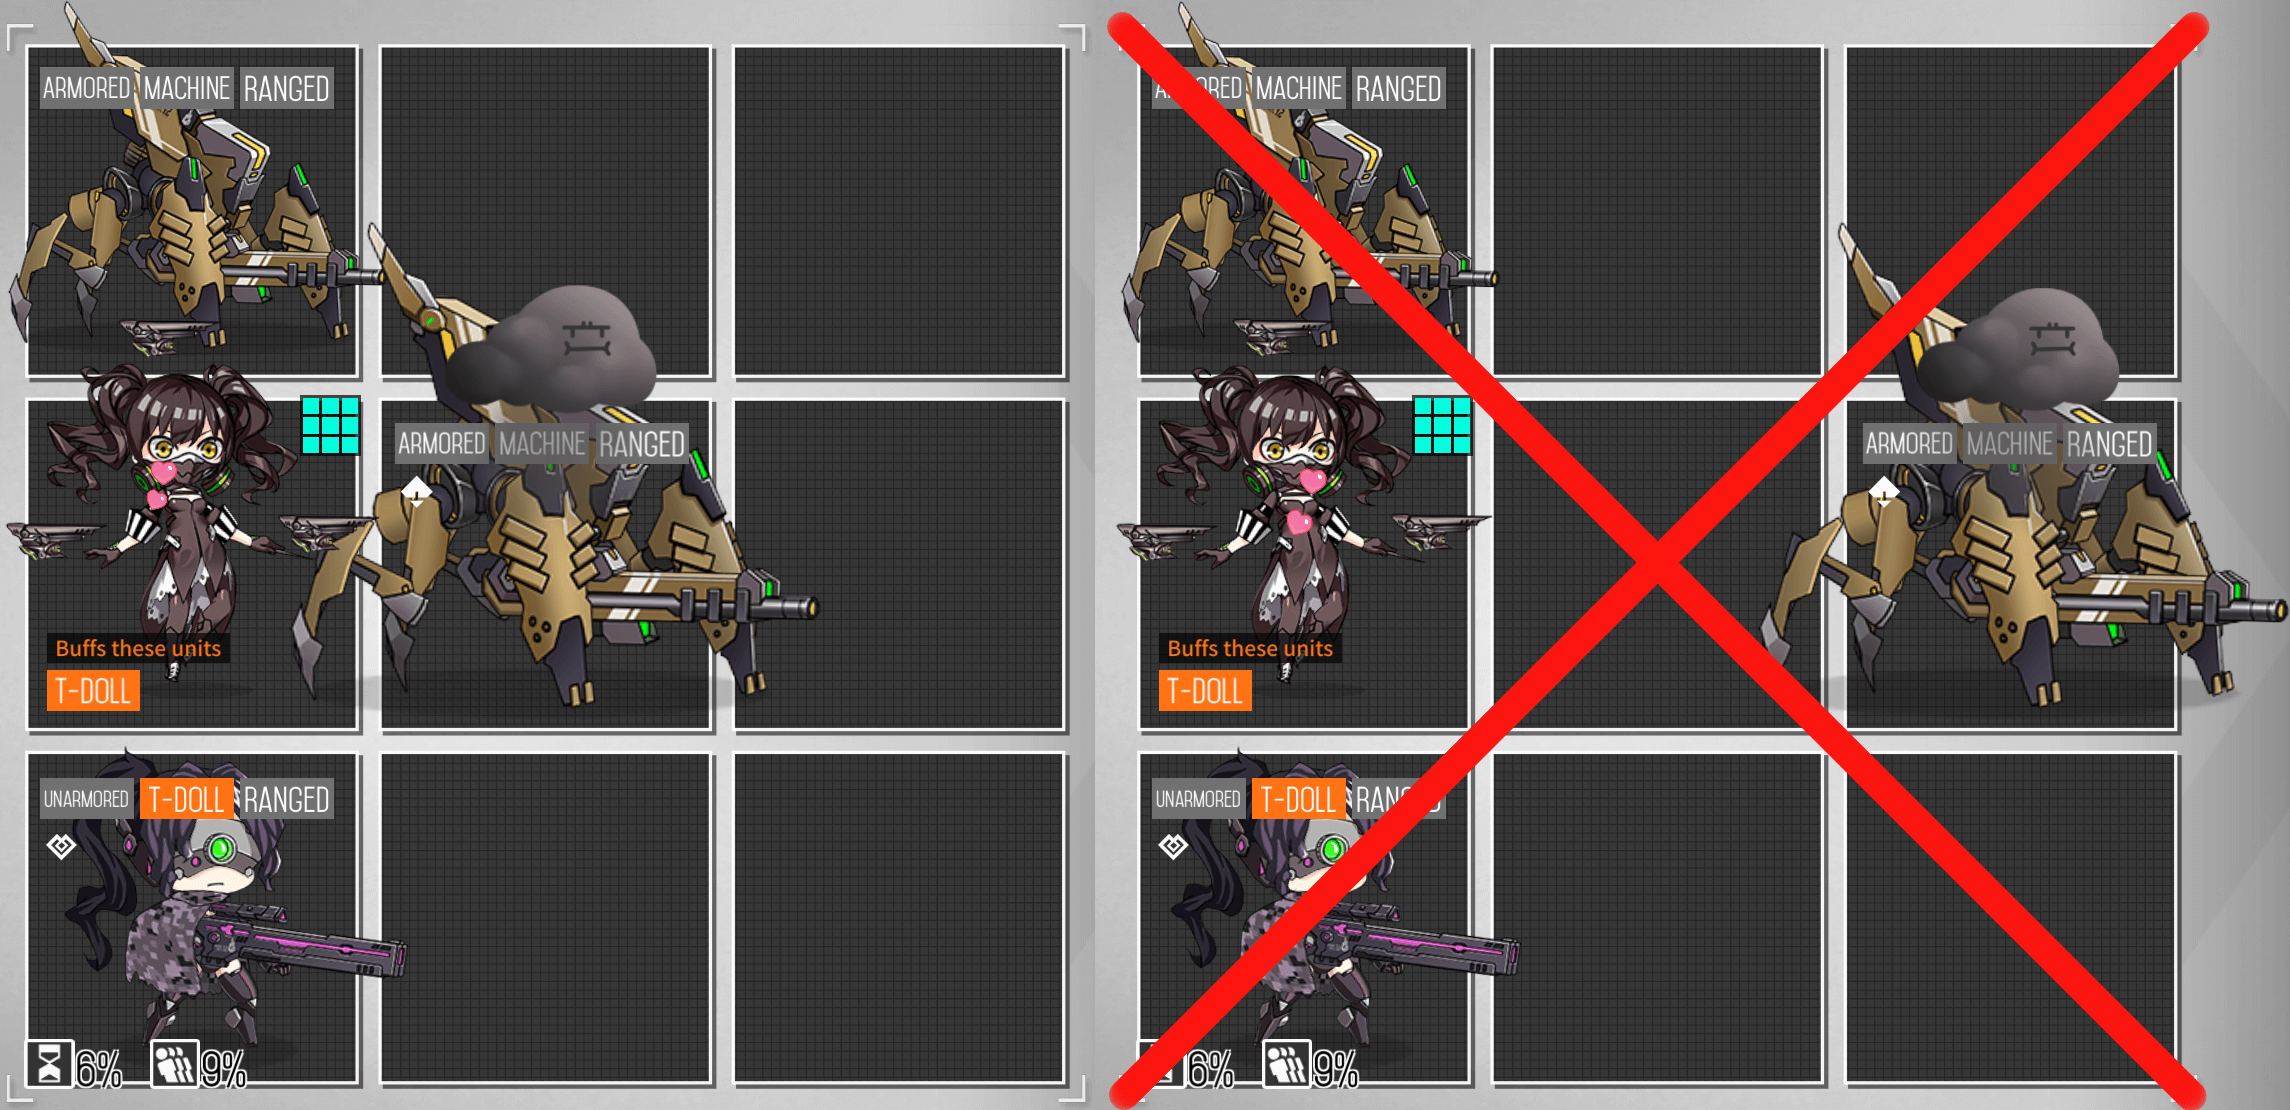
If there is no reason to put a unit in the front column, don’t.
Raising Units
Coalition units have two ‘thresholds’ being level 70 for 4☆ and level 90 for 5☆.
As you start out you’ll want most of your units to get to 70 and 4☆ as they are functionally useful here, but the goal is generally to have at least level 90 and also 5☆ when possible for your units.
As a new player you will have limited resources, but as you continue doing your Coalition Drills you will gain enough to raise all the units you will need.
| Petri Dish Cost | ||||
|---|---|---|---|---|
| Rarity | Level requirement | Initially 1☆ | Initially 2☆ | Initially 3☆ |
| 1☆→2☆ | 10 | 50 | --- | --- |
| 2☆→3☆ | 30 | 70 | 100 | --- |
| 3☆→4☆ | 70 | 100 | 150 | 300 |
| 4☆→5☆ | 90 | 200 | 300 | 450 |
| Total | 420 | 450 | 750 |
Ringleaders
Ringleaders come with tiles that often affect specific units types and while these increases are nothing to scoff at as mentioned earlier, these are bonuses and you must efficiently make a team that can tackle whatever you are fighting on a specific map over trying to drool at small increases that would limit your teambuilding options. Sometimes these bonuses come into play and that’s wonderful. Most of the time you ignore them and work around the strengths and weaknesses of your Ringleader.
A few examples:
- Alchemist wants to stay in Defend stance to gain passive shields and allow her to tank infinitely, this generally does not combine well with melee units as they need to be out of Defend stance to rush at the enemy.
Seeing as she’s so extremely tanky you can often fill the rest of the echelon with nothing but damage, outside of trying to use her against Gunners and Hymnal Organs. - Most ringleaders do not have a focus on tanking and including something that can withstand enemy fire is recommended. Provided the enemy doesn’t have AP or excessive firepower the most basic go-to is obviously Manticores or Aegis SWAP.
Should evasion tanking be needed swap to Ripper SWAPs. - Intruder and especially her Halloween version summons plenty of meatshields that can distract enemy fire, allowing for the inclusion of melee DPS units to be less detrimental.
Ringleaders cannot be ‘duplicated’ and any extra copies you obtain of the same Ringleader will automatically be linked to your already existing one. Should you for some reason get another copy after you have a max Petal one, the new one will be automatically scrapped for 100 Supernova Kernels. Note that Ringleader gains from Petals tend to be rather minor and is not recommended to rush for over getting more good Ringleaders.
- 1 Petal: Tile improvement.
- 2 Petal: Stat improvement.
- 3 Petal: Stat improvement.
- 4 Petal: Skill improvement.
For specific benefits for specific Ringleaders, see their individual pages.

Basic Units (Mooks)
When feeding a duplicate unit to another unit of the same type through analysis you will increase their ‘petal count’ with the benefits of this differing for the two base types of mooks, unlinked and linked units.
Linked units simply work similarly to your G&K units, gaining +1 link per duplicate fed to them up to 5, increasing health and damage output with links as every link will shoot at the enemy.
Manticores are an example of the unlinked type, not getting additional links as you analyze more units of the same type but instead gaining flat stat benefits. These can often be fielded before gaining full petal counts as the stat benefits are good but not crucial for the base performance of the unit.
Note that as new seasonal units are released, these are likely to be better versions of already existing units and are generally worth raising. At the time of writing Jaegers SWAP and Corpse Brides are the last ones added to EN, but there are more newer units than this on foreign.
Core units
The units that are of utmost importance to get to be able to field strong echelons:
- Manticores
A knockback and slow like from the Beach Fairy on a unit you can put in any Coalition echelon. Additionally has a sweeping bombardment attack for dealing AoE damage. - Nemeum
Shreds HP through their HP% based skill, allowing their damage output to scale with enemy health. - Aegis SWAP
Beefy armor tanking with shields. Takes less damage the higher the link count is. - Ripper SWAP
Evasion tanking with short immunity bursts through Force Shields. - Jaeger
Backline targeting and increased echelon range, low cost. - Jaguar
Backline targeting, splash damage and increased echelon range, low cost.
Notable units
Units that have uses against specific enemies, together with certain ringleaders or in niche situations:
- Dragoon SWAP
Strong damage, replenishing self-shielding. - Tarantulas
Armored Dinergates, functions similarly but with higher damage and more tanky. - Vespid SWAP
Hunter SPEQ, allowing her to always have debuffs on her target for maximum damage output. - Prowler SWAP
Buffs other melee units and shields echelon. - Jaeger SWAP
Higher damage output in exchange for higher cost compared to regular Jaegers. - Christmas Guard
Simply an improvement over Guard SWAP. - Corpse Bride
Moth Hunter SPEQ, allowing her to field Manticores. - Goliath Factory
Spawns continuous Goliaths for tanking enemy shots and potentially bypassing enemy frontline. - Dinergate
Spawns reinforcements continuously, distracting the enemy. Extremely cheap at 2 cost.
Disassembly
Most regular non-SWAP units end up here.
The following units can technically be used and aren’t terrible, but there are often so many other better options. Note that you are unlikely to ever need more than one of each of these if even that, so scrap any further ones you get:
- Striker SWAP
Buffs their own damage at the start of combat for 6s, cooldown is too long to ever be used again. Also increases echelon range. Provided the enemy has armor, does some extra damage based on the armor to AP difference. - Guard SWAP
Applies shields to the echelon, with a conditional buff depending on whether other units already had shields or not, as well as decreasing own damage taken. No armor.
The following are basically useless and aren’t worth raising unless you absolutely have to for some reason. Scrap them for kernels.
- Prowler
Prowler SWAP are flat out better in every way. - Scout
Very small aoe flat damage increase, too long cooldown, too low numbers and too low radius makes this not worth it. - Vespid
Doesn’t really serve any purpose, other damage units are stronger. - Guard
Even weaker than Guard SWAP. - Dragoon
Doesn’t replenish shield as opposed to her SWAP variant, also weaker stats. - Aegis
Weaker armor than Manticores, tries to reduce damage for other units in the same column. Weaker than Aegis SWAP in every way. - Brute
Tries to be a frontline with basically no defensive skills at all. Even dinergates are better than this. - Striker
Functions similarly to the SWAP variant but without the extra skill.
Skills
Coalition units have a different number of skills depending on their initial rarity, with all of them unlocking an additional skill when upgraded to 4☆ rarity. Initial 1☆ units only have this one skill unlocked by 4☆ rarity. Initial 2☆ units start with a skill and gain one more at 4☆ rarity. Ringleaders start with 3 skills and gain a fourth at 4☆ rarity.
Where T-Dolls and Fairies have Basic, Intermediate and Advanced data that each have their own sim, Coalition units have a single data sim with a random distribution of around 30% for getting Advanced data with the rest being Basic data. As such you will usually be drowning in Basic data and having some less of Advanced data. While you may struggle somewhat with Advanced data in the beginning, as you keep doing your daily sims, you should eventually be able to skill level everything you need to max and have data left over.
Coalition units also do not use the same data as regular T-Dolls and Fairies, instead having their own data sims. For optimizing these sims see Hassium’s weekly Coalition Drill page.
Skills are further split into two sections:
- Ringleaders’ active skills, skill 1 and 2, go all the way to skill level 10. These require skill training time.
| Skill Level | Training Keycode Cost | Time |
|---|---|---|
| 1→2 | 300 Basic Keys | 1 Hour |
| 2→3 | 400 Basic Keys | 3 Hours |
| 3→4 | 500 Basic Keys | 5 Hours |
| 4→5 | 600 Basic Keys | 8 Hours |
| 5→6 | 800 Basic Keys | 12 Hours |
| 6→7 | 200 Adv Keys | 16 Hours |
| 7→8 | 300 Adv Keys | 20 Hours |
| 8→9 | 400 Adv Keys | 27 Hours |
| 9→10 | 600 Adv Keys | 36 Hours |
| Total: | 2600 Basic, 1500 Adv Keys | 128 Hours |
- Ringleaders’ passive skills, skill 3 and 4, and all other units skills go to skill level 5. These do not require any training time and can be completed instantly.
| Skill Level | Training Keycode Cost |
|---|---|
| 1→2 | 400 Basic Keys |
| 2→3 | 600 Basic Keys |
| 3→4 | 200 Adv Keys |
| 4→5 | 400 Adv Keys |
| Total: | 1000 Basic, 600 Adv Keys |
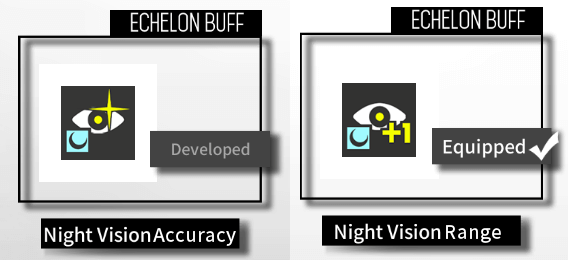
Night differences
Coalition echelons have 1 vision range by default, which can be improved to 2 with Night Vision Range chip.
They also have no night vision by default, and there is only one Night Vision Accuracy chip, so unless a Ringleader themselves allows Night Vision you must account for this.
The fix Mica can’t do.
Chips
Ringleaders can equip up to 2 chips which apply when they are deployed in missions.
There are currently 13 chips in the game, some of which have very strong effects, others with somewhat weaker ones. Here we will go over all the chips and their effects.
Note that Mica has not translated the Night Vision chips properly, and one of them affects Vision Range while the other counteracts the Accuracy penalty at night.
- Phantom Stance
The first movement of the echelon each turn does not consume AP. This is incredibly powerful to get your echelons into position or rushing shorter missions, effectively granting the echelon +1 AP per turn. - Pilfer
Allows the echelon to roll for loot on a nearby enemy. Note that the enemy gets a debuff after this is used on them, making it so that you can only use it once per enemy. This costs 1 pip each of Ammo and Rations, half a battle’s worth. - Night Vision Range
Indicated by the +1 on the icon, this increases Vision Range for the echelon by +1. - Night Vision Accuracy
Indicated by the shining eye, this negates the night penalty. - Ample Fuel
Increases the maximum Rations and Ammo pips from 10 to 12, allowing the echelon to take 6 fights in a row without resupplying. Note that this also increases total cost of resupply by 1.2x to 432/432 as you are adding 20% more ammo and ration capacity. - Frugal Mobilization
The first fight after deployment consumes no resources. Note that the echelon must still be supplied. - Weaken
Reduces the damage of any enemy unit within 2 nodes by 12%. - Defend
Increases echelon evasion by 100% and armor by 50% when on a friendly-controlled node (blue node). - Lone Wolf
Increases damage by 10% if there are no friendly echelon within 1 node range. (No friendly echelons adjacent.) - Fighting Spirit
Increases damage by 6% for allies within 3 nodes. - Strength in Numbers
Increases damage based on the number of units in the echelon, up to 15%. - Support
Increases the damage of reinforcement units of echelons within 2 nodes by 20%. Does not stack.
Note that “reinforcement units” are units that are summoned as reinforcements in battle, like Liu clones or Dinergate summons. This has nothing to do with HOC. - Quick Resupply
Expends 3 AP to resupply an echelon within 1 node.
Note that none of the damage increases work on HOC, be they Coalition HOC or otherwise.
Actual Combat
Ranged Coalition units behave mostly like G&K echelons and are always able to attack anything within range, as well as being kited normally when needed.
Note that all Mook skills are on autoskill, if you need to delay a skill activation you must kite them.
Example of force shields being deployed too early vs delayed with kiting.
Coalition stances
Melee units have limited range on their attacks and need to be within their attack range to hit enemies, as such they have stances to allow you to control their movement beyond their initial position in combat.
Note that some Ringleaders also change their skill effects depending on stances, see individual Ringleader pages for details if applicable.
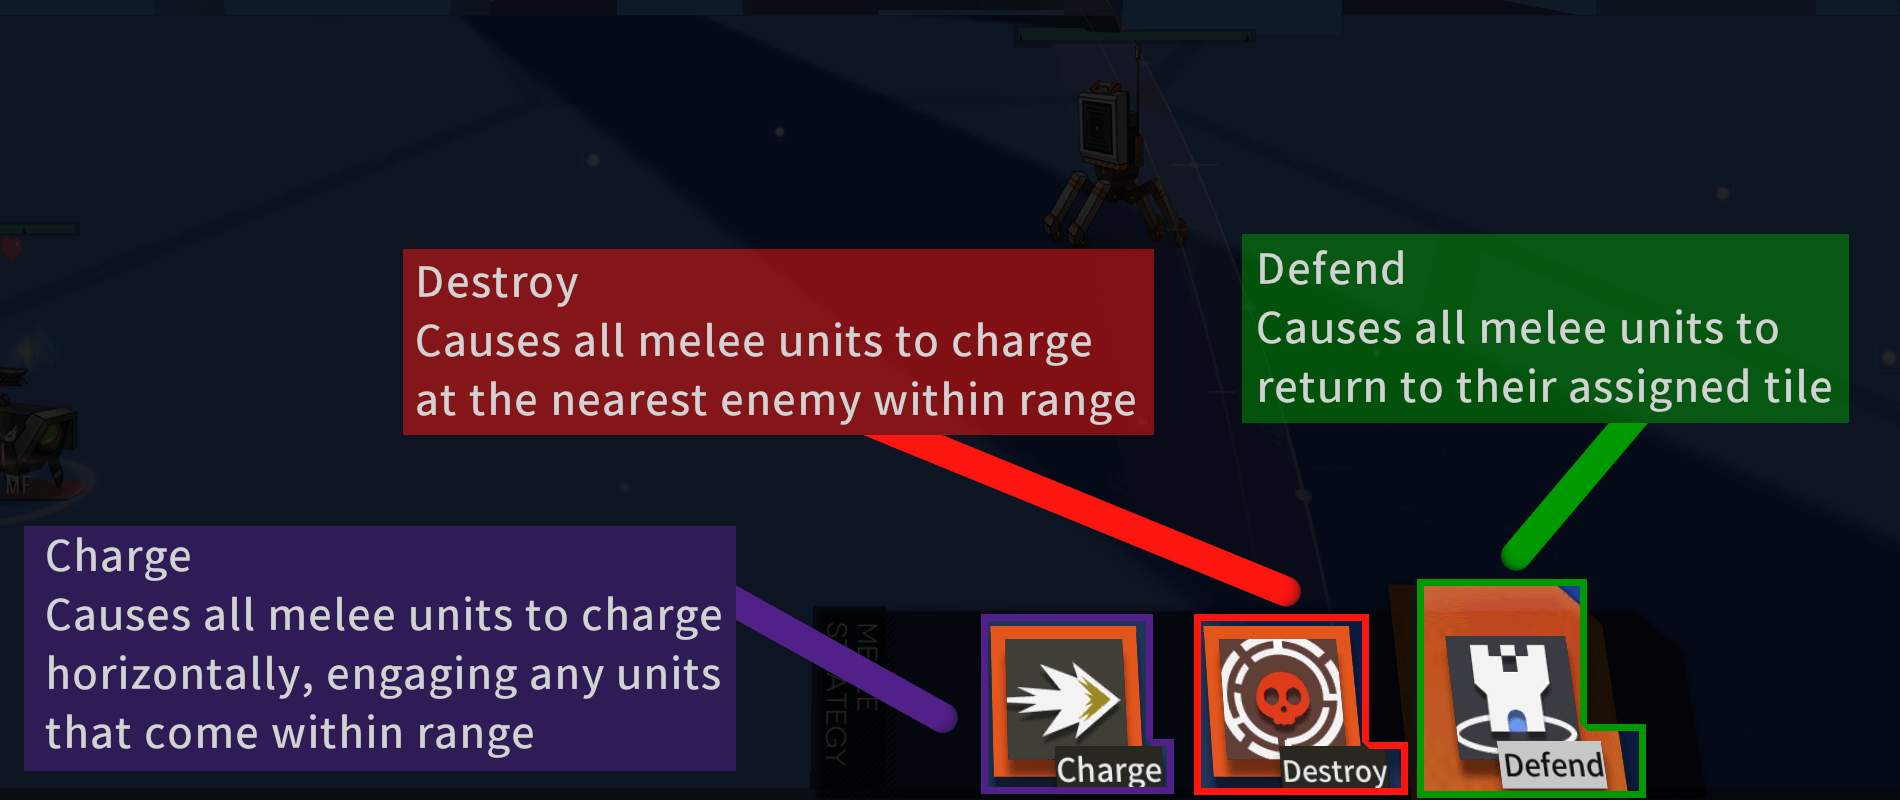
The three stances fairly straightforward in their naming, each causing melee units to take on a specific behavior:
- Charge: Melee units will charge directly forward and engage any enemies within range. Should none be found they will stop when they are within melee range of the echelon range limit.
- Destroy: Melee units will seek the nearest enemy to attack them.
- Defend: Melee units will defend their assigned tile location.
Note that melee units that are not on their assigned tile are not possible to move around with regular kiting, though you can change their assigned tile this will not take effect until the echelon is returned to Defend stance.
Example of stances.
How you use this in combat ultimately depends heavily on what you are fighting, see [varz kiting doc] for more advanced details on kiting and combat movement.
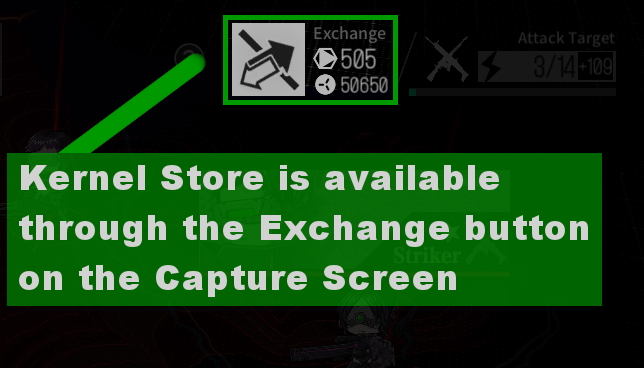
Kernel Store / Exchange
In the Capture Screen you can click on the Exchange button and be taken to the Kernel Store where you can exchange Supernova Kernels and Dark Star Kernels for various items and units.
Scrapping coalition units gives Kernels, Supernova for 2☆ units and Dark Star for 1☆ units.
Seeing as you can buy the previous banner’s Ringleader for Supernova Kernels, it is assumed that you will not spend Supernova Kernels on anything else than this. As such, we will be looking at the shop from the perspective of using Dark Star Kernels and noting the things that might be worth buying here.
Note that if there were multiple banners running concurrently, both Ringleaders will be in the Supernova exchange the following banner.
Items for exchange
Supernova Kernels
- Ringleader - 800 Kernels
- Everything else: No.
Dark Star Kernels
- Initial 2☆ unit: 5000 Kernels
- Initial 1☆ unit: 2000 Kernels
- Rapid Growth Disk x50: 375 Kernels
- Petri Dish x50: 625 Kernels
- Keycodes: Don’t.
- Transfer Catalyst x50: 1850 Kernels
- Ringleader Icon: 500 Kernels
- 2☆ Icon: 250 Kernels
- 1☆ Icon: 125 Kernels
- Cheesecake x10: 25 Kernels
The Cheesecakes being dirt cheap and always available has made this the best source of Cheesecakes if you end up needing these.
Sim energy to Kernel cost for a value comparison
Kernel shop costs:
- 7.5 Dark Star Kernels per Rapid Growth Disk
- 12.5 Dark Star Kernels per Petri Dish
- 25 Dark Star Kernels per Basic Training Keycode
- 30 Dark Star Kernels per Advanced Training Keycode
Energy use based on having -20% sims:
- 36 Rapid Growth Disks per 3 energy
- 22 Petri Dishes per 3 energy
- 252 (random) training keycodes per 3 energy
Kernels required for equal amount for 3 energy:
- 270 for 36 Rapid Growth Disks
- 275 for Petri Dishes
- 6300-7560 for Training Keycodes
Do not buy data.