Mission and Clear Conditions:
Mission:
Capture Command Post AND
Destroy Rubble Type 1 and Type 3
OR
Do not Destroy Rubble Type 1 and Type 3
Clear Guide:
Team Recommendations:
- 2 Combat Echelons
- AR/SMG with AoE recommended
- 1 Dummy Echelons
Clear Steps
This map is a weird one to be sure. While you can fight the very large Smasher stacks, this clear will be avoiding that for now. The primary crux of this clear centers on either destroying or not destroying the two rubble on the right side of the map, labled Type 1 and Type 3 if you squint. The only real trick here is in the way the Smashers behave and the time consumed to get them into position. So without further ado, lets get on with that.
Objectives will be labeled Destroy and Don't Destroy for brevity but the Don't Destroy Objective does destroy one of the rubble in question. This is allowed.
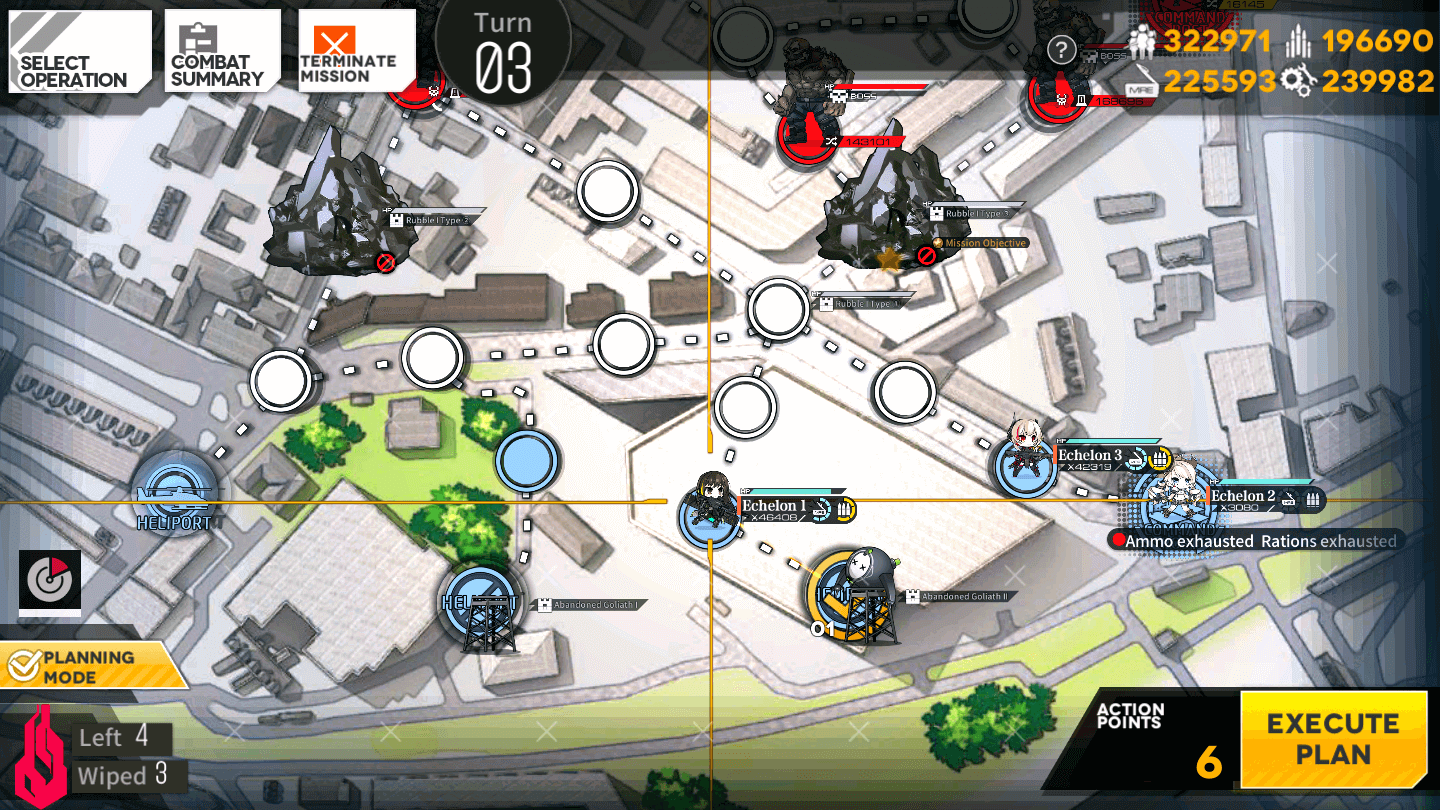
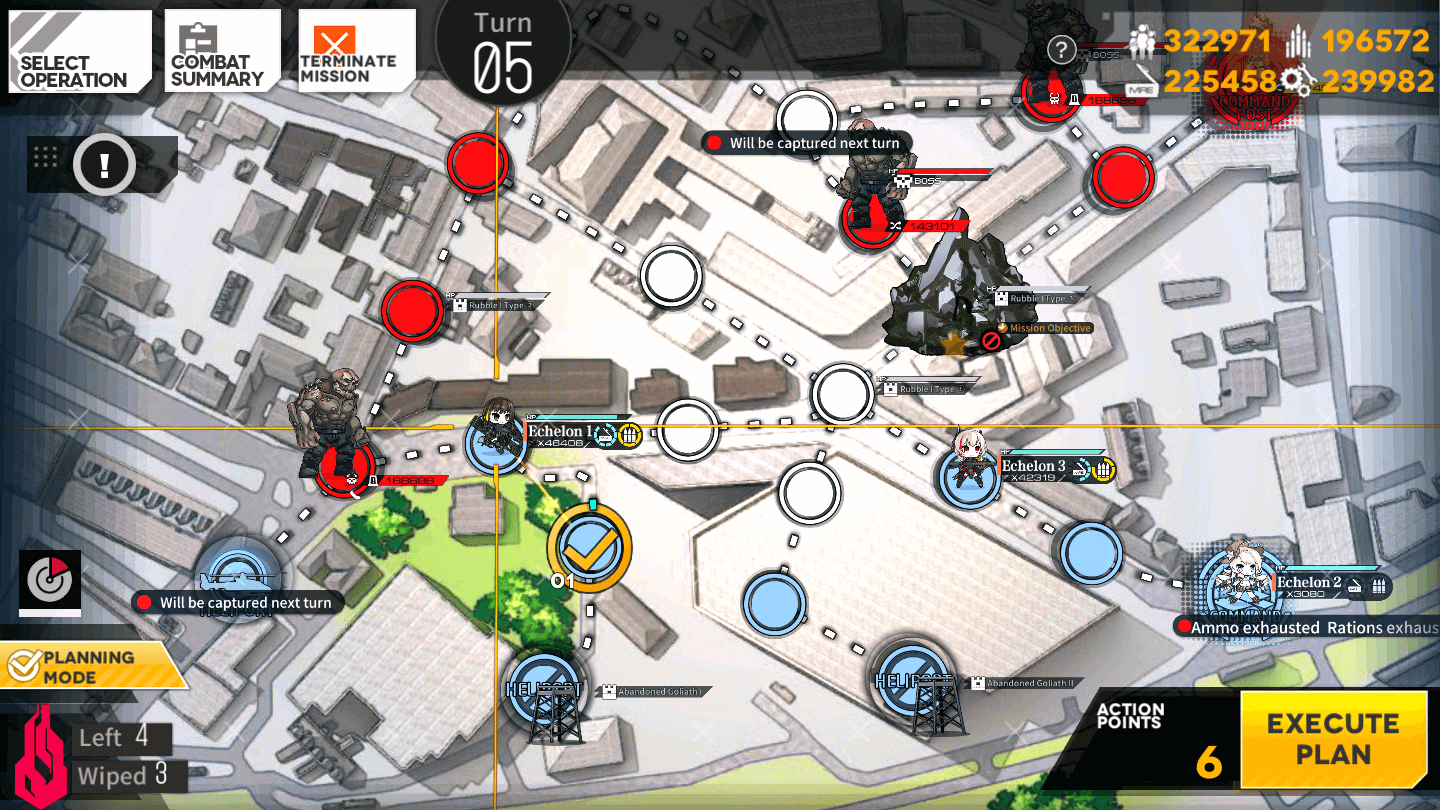
Turn 1
-
Both Routes
1.1
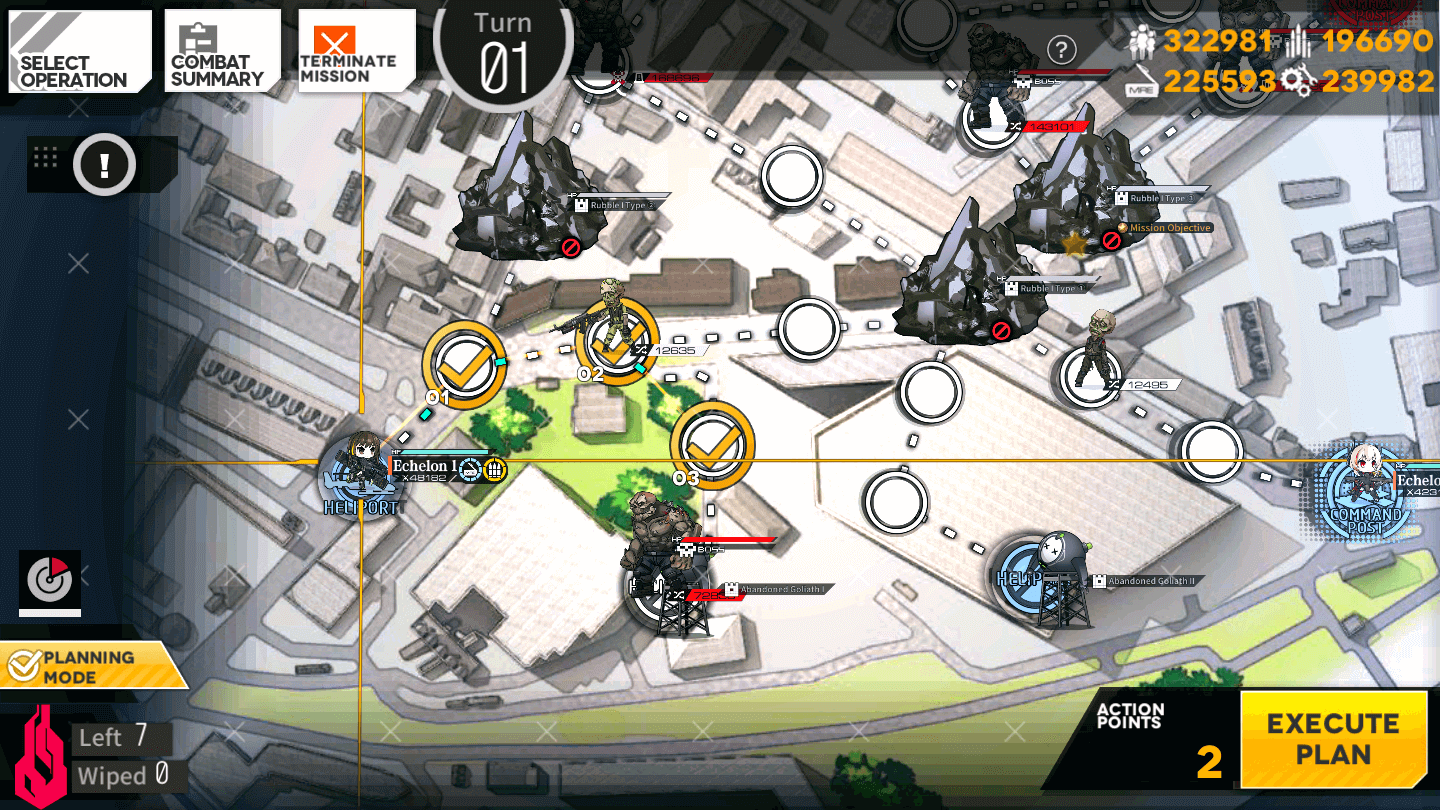
Deploy Combat Echelons on the Command Post and the Heliport. Move the Combat Echelon on the Heliport to the right two nodes, then down one node.
1.2

Move the Combat Echelon on the Command Post to the left one node, and Deploy a Dummy Echelon behind them. End your turn.
Turn 2
-
Both Routes
2.1
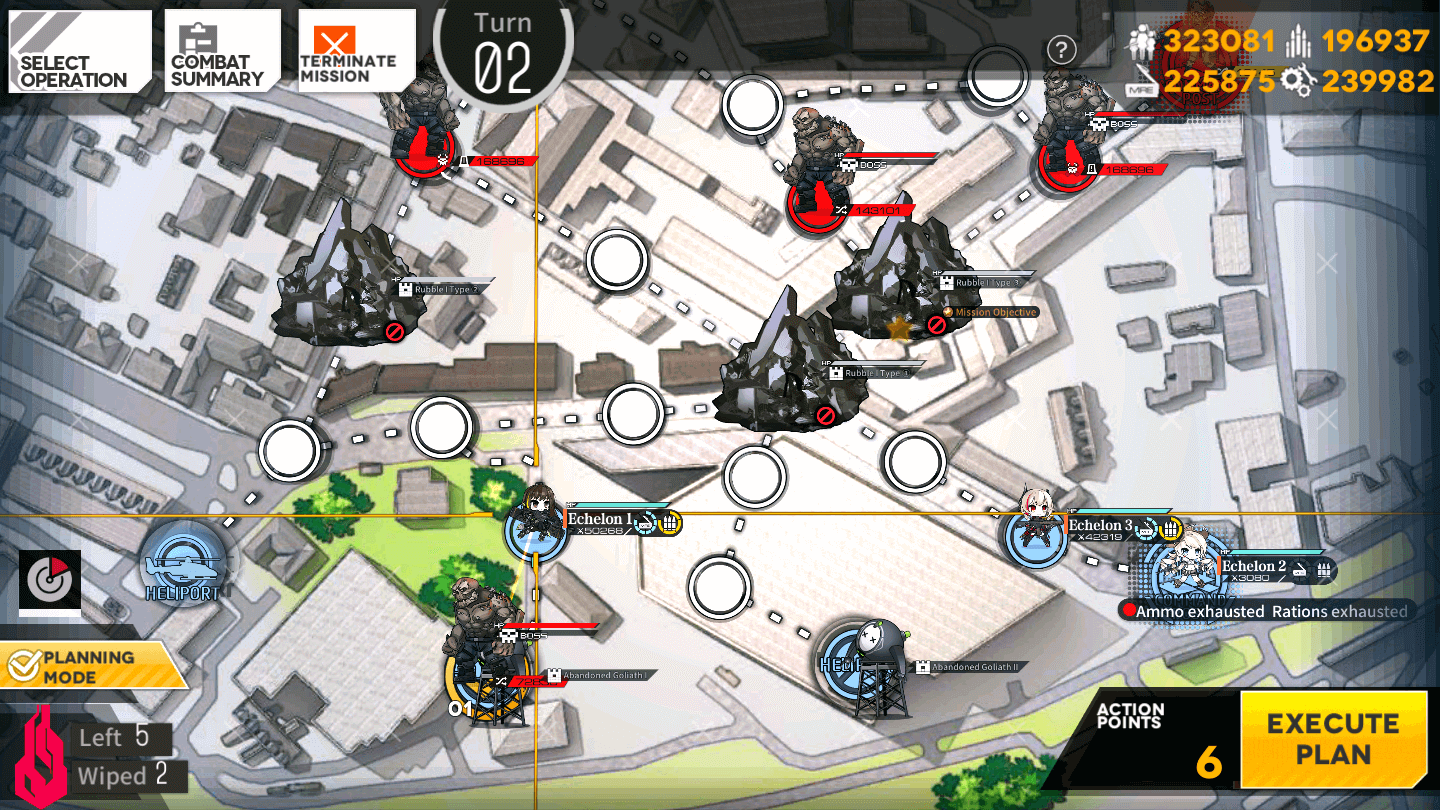
Move the left Combat Echelon down one node to defeat the Smasher and pick up the bomb.
2.2
Now holding the Bomb move the left Combat Echelon up two nodes and to the right one node. Blow up the Rubble.
2.2

Move the Combat Echelon to the right one node, and down two nodes.
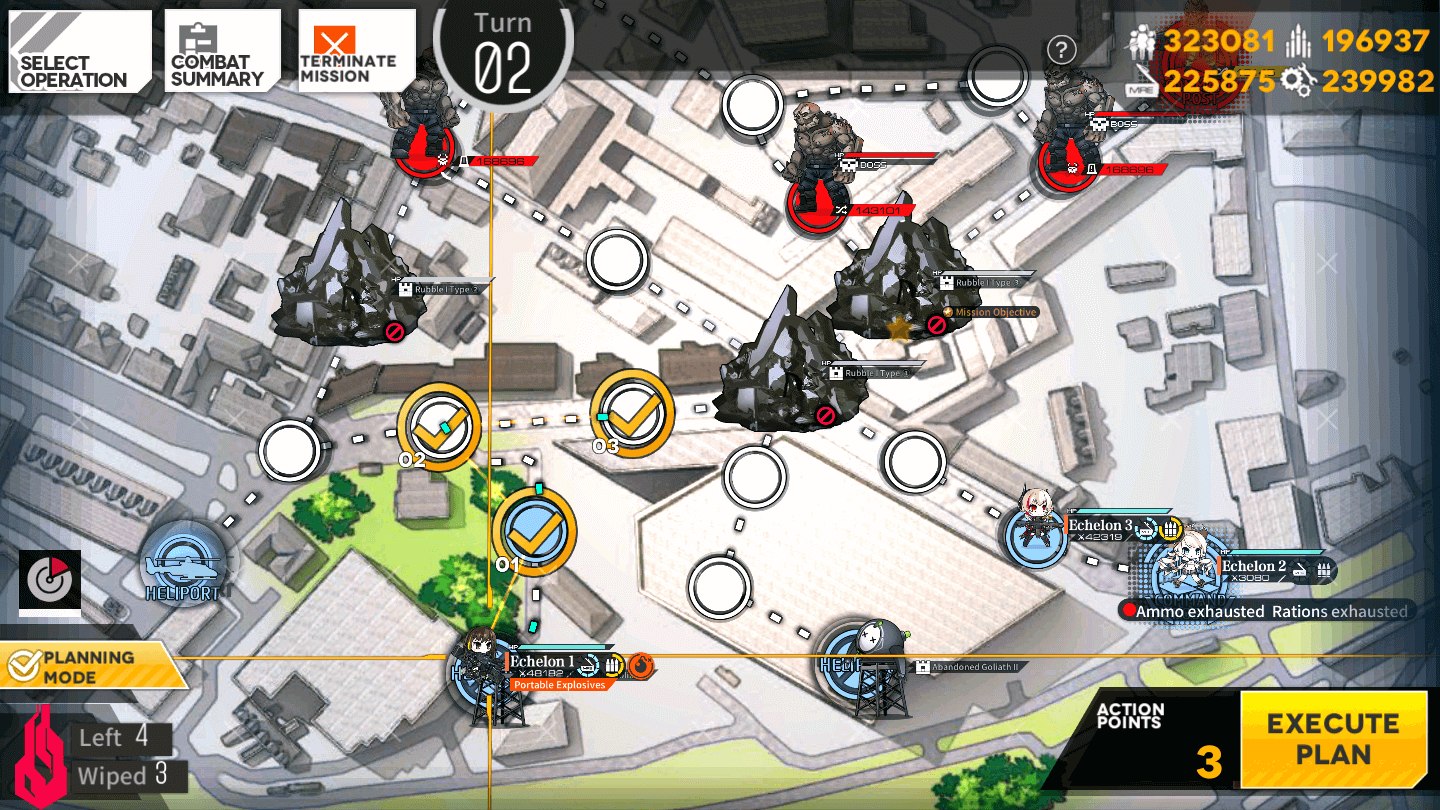
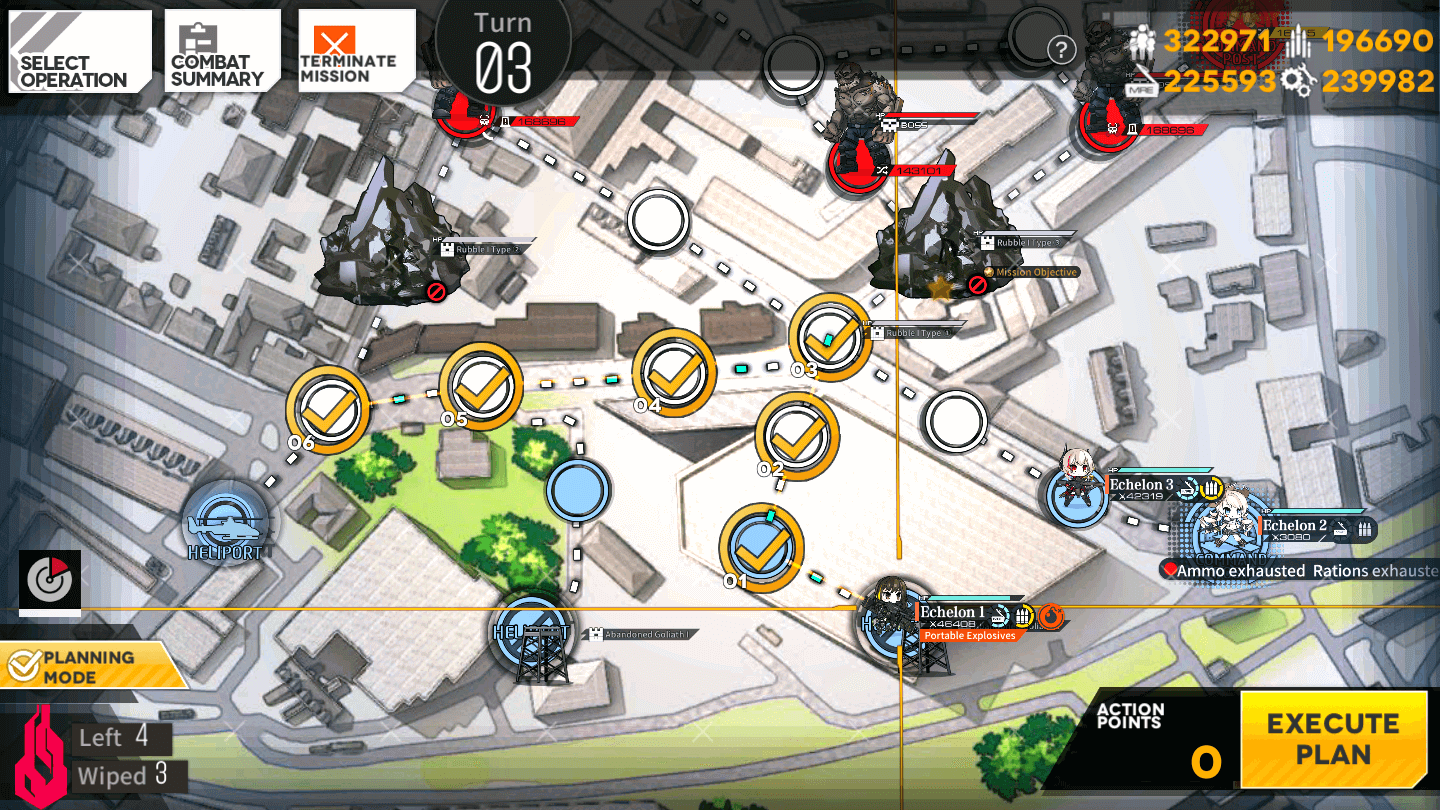
Turn 3
-
Destroy
-
Do Not Destroy
3.1
Move the Left Combat Echelon down one node to retrieve the second Bomb.
3.2

Move the Combat Echelon with the Bomb up three nodes. DO NOT use the use the Bomb at this time.
3.1
Move the left Combat Echelon to the right one node and pick up the Bomb.
3.2
Move the Combat Echelon with the Bomb up three nodes, and to the left three nodes. Use the Bomb to destroy the Rubble Type 2. End your Turn.
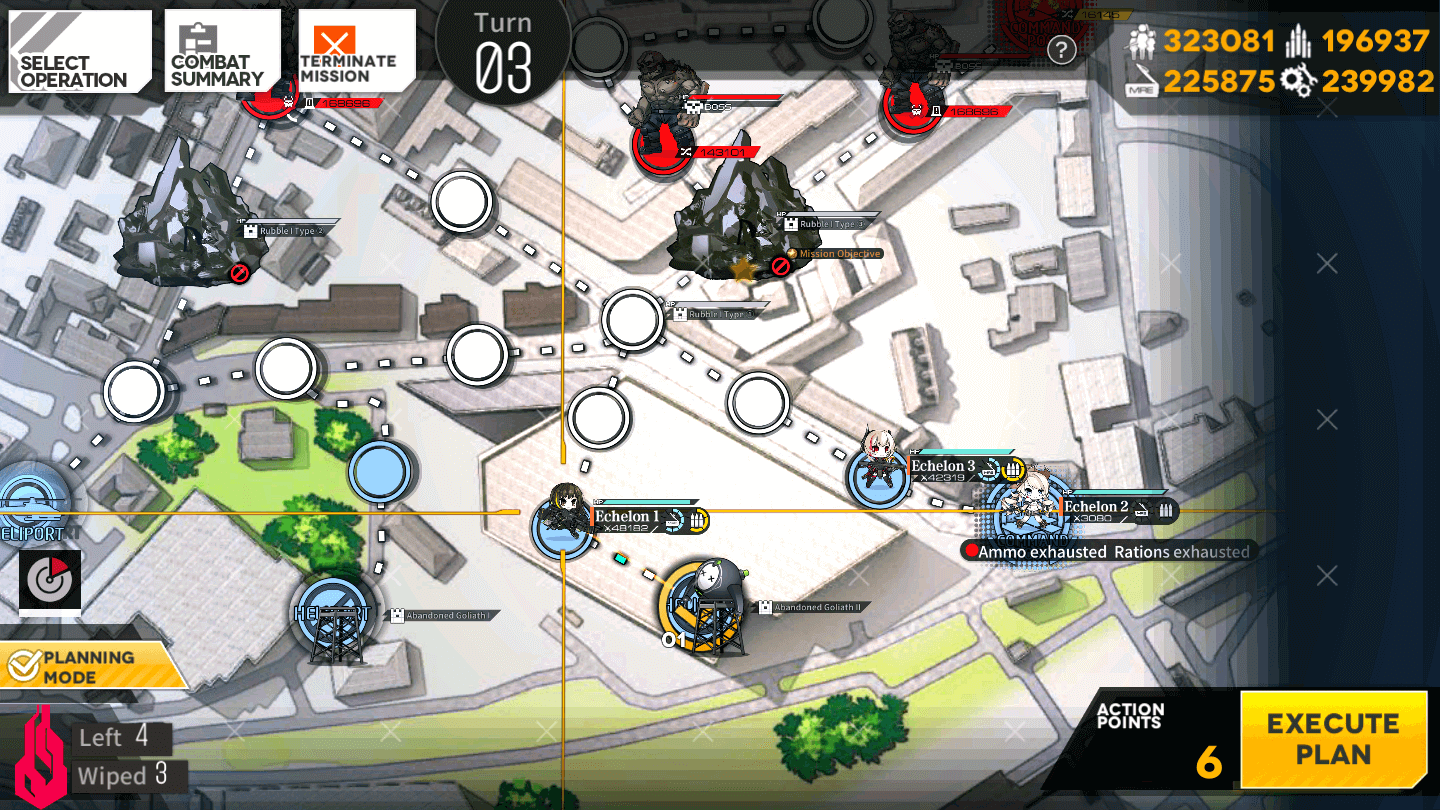
Turn 4
-
Destroy
-
Don't Destroy
4.1
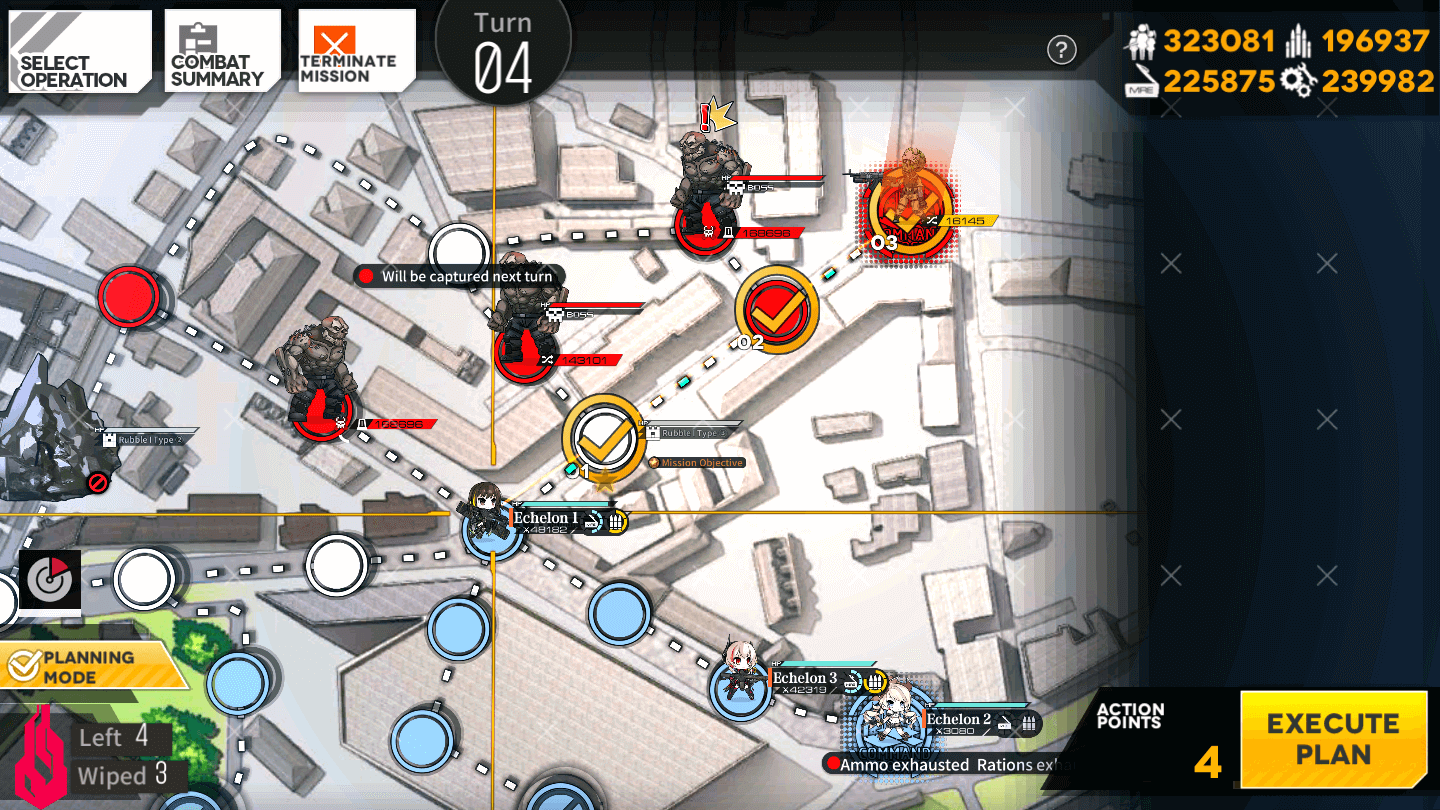
Blow up the Rock and run the Echelon to the right three nodes.
4.1
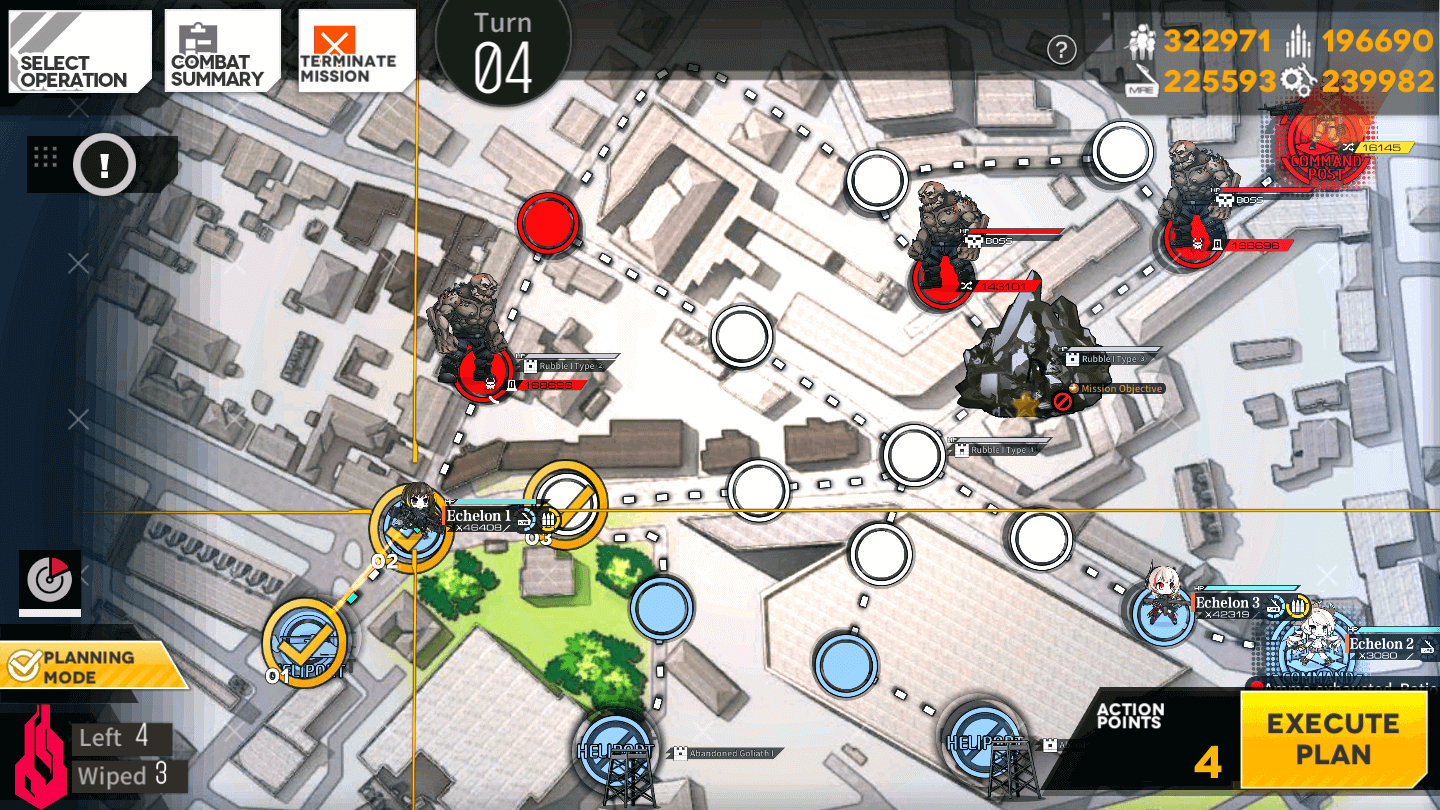
Move the left Combat Echelon down one node, onto the Heliport. Resupply at this time. Then, move back to the right two nodes.
4.2

Move the right Combat Echelon to the left one node.
Turn 5 (Do No Destroy Only)
5.1
Move the left Combat Echelon down one node. For some reason, the Smasher ignores this Echelon and goes over the one on the far right.
Turn 8

8.1
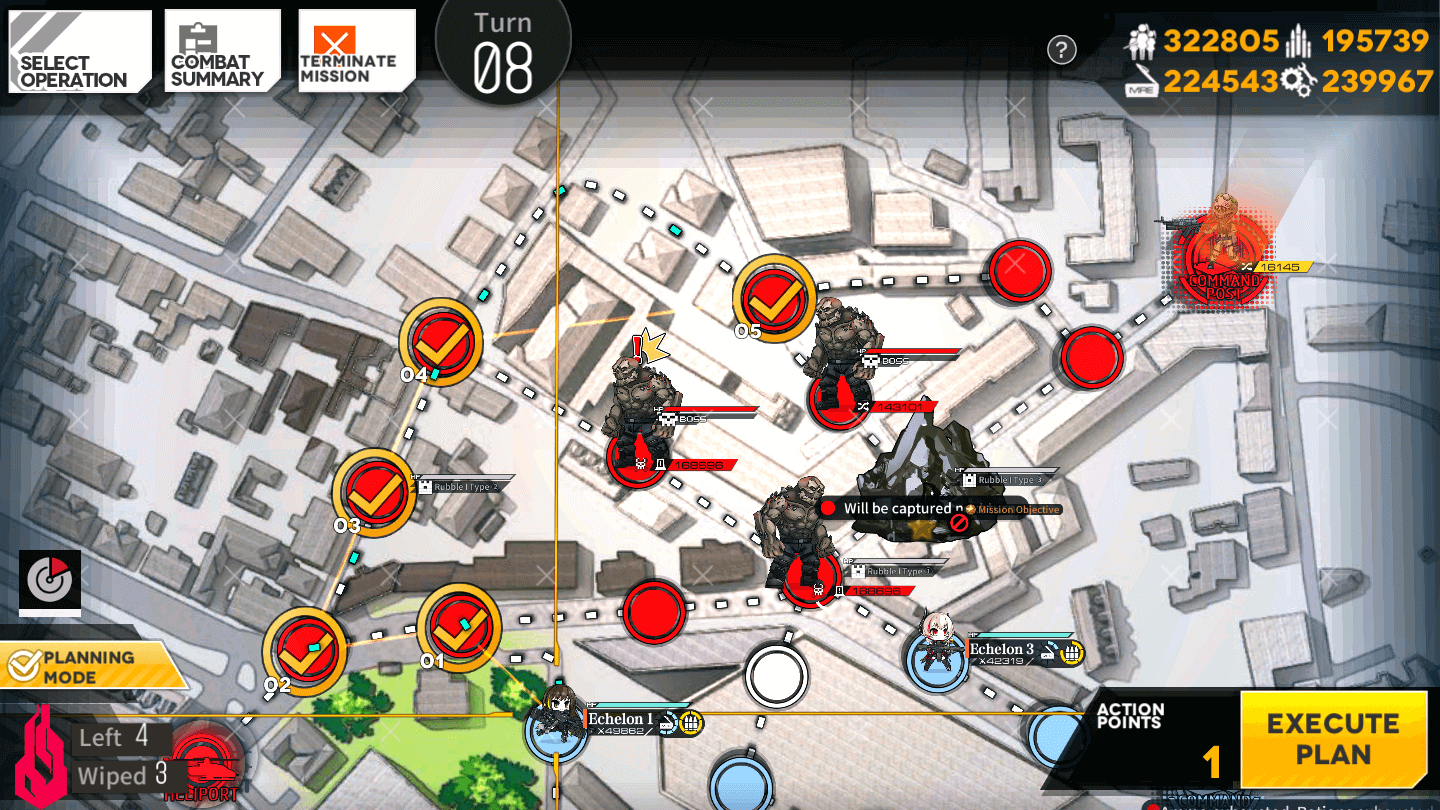
The left Combat Echelon should move up one node, left one node, up two nodes, and to the right one node.
8.2
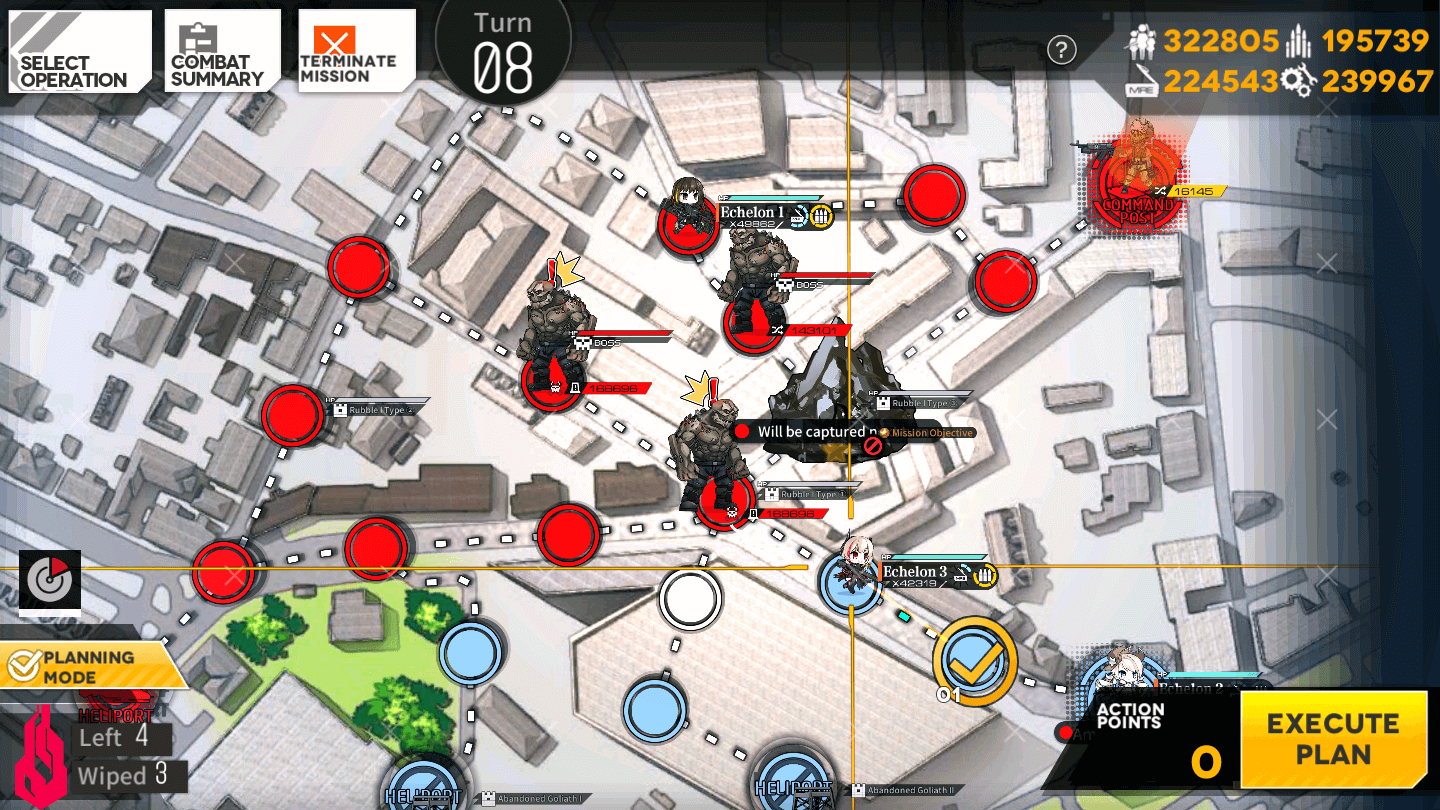
Move the lower Combat Echelon to the right one node, and out of Danger.
Turn 9
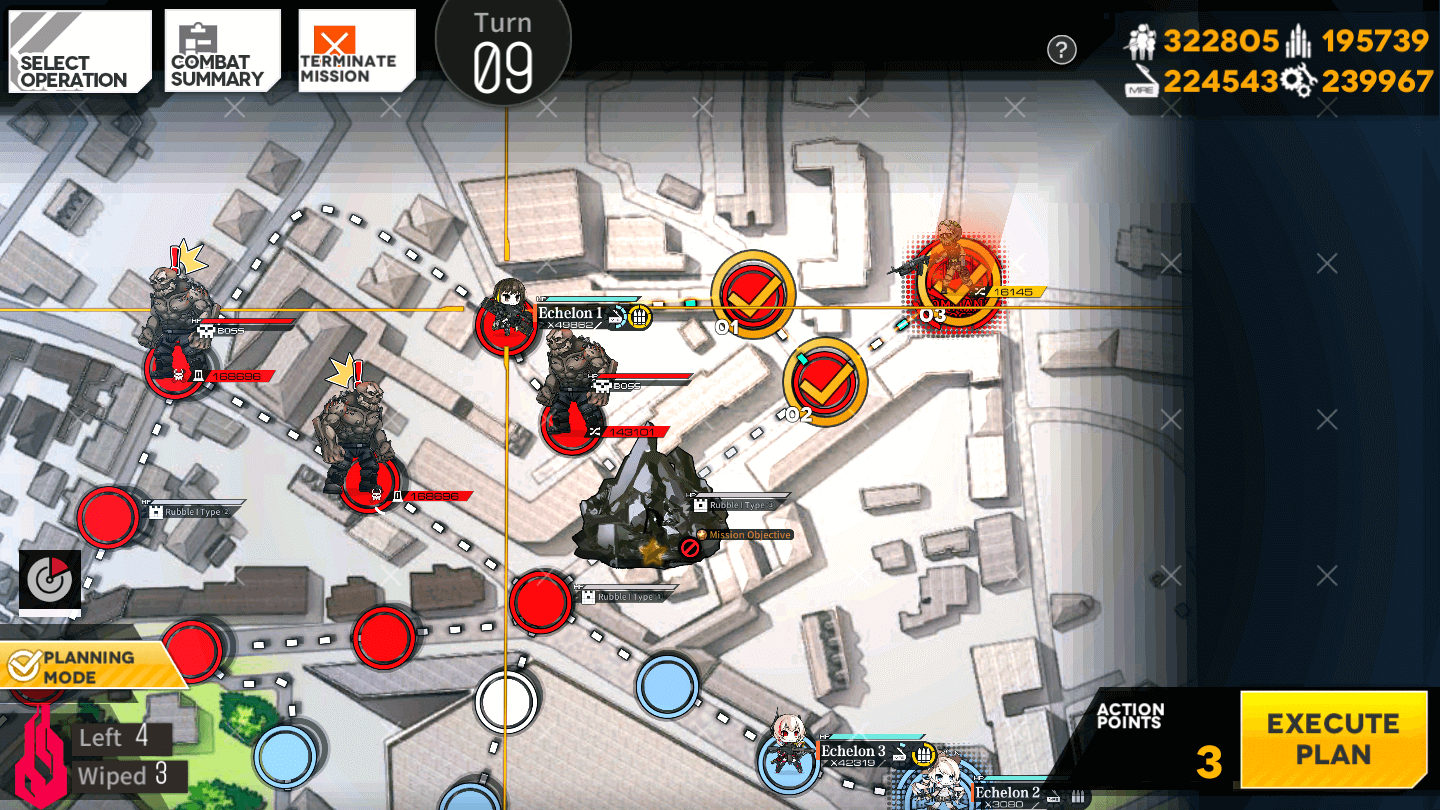
Move the upper Combat Echelon to the right three nodes to finish the map.
Video Guides:
Next Chapter:
-
EX
-
Normal