Mission and Clear Conditions:
Mission:
Capture Specific Node
OR
Eliminate All Enemies
Clear Guide:
Team Recommendations:
- 1 Gustav Killer Team
- 1 AR/SMG
- 1 Dummy Echelon/Pyxis Team
Clear Steps
Chapter 5-3 at last brings Normal Mode face to face with the Mighty Gustavs. Each Gustav acts as a separate battle, but these are not Boss enemies. Damage does not persist and Death loses affection! The rest of the map isn't a slouch either, you will need a team able to fight the Pyxis, which usually means 2 SGs, or a lot of alpha strike and an SG/highly evasive SMG on the front lines. But lets get to the start of the show, the KCCO Armored Train.
I will be largely reusing the EX mode advice, with a few addendums. Thus!
First: Taunt Fairy. Have it. Use it. This is not a negotiable requirement. Twin is not an acceptable replacement. SL 10 if at all possible. No, make it so regardless. HP shields can make up some of the difference, but SL 10 is assumed for these battles.
Second: DPS is recommended to be MGs, and 'tanking' left to an SG, probably SAT8. MGs with Armor tiles are very useful for this, specifically the second train segment, which features rapid-firing MG turrets that deal 30 Damage and have 20 Armor Pen. Hitting 50 Armor to reduce these volleys to 1 Damage isn't a requirement but boosting the Armor of your SGs beyond just the base of 35-36 with just Armor and a Taunt fairy will go a long way.
You can use RFs as DPS. However, the reqs for doing so are going to be much higher, and I will not be held responsible for the results if you try, even on Normal. Likewise, an SMG tank can in theory be used, but see the previous disclaimer. HGs should have strong tiles, and/or shield Skills. HS2k for instance can stand in for longer on the 2nd segment if you need the extra DPS kick or the survival help on SAT.
Third: These fights can be a little finicky. You want to have the DPS shoot the smaller turrets beside the big central turret first to reduce Damage on your Taunt Fairy. This will involve retargeting them, sometimes multiple times. They may, or may not play along. SL10 Taunt at 3* will allow you to clear with good gear, just keep at it. This is the primary issue with attempting to use RFs in these battles, as they attempt to target the central section first, leaving the smaller, more frequently firing ones to kill the Taunt. For the First and Third Segments, this isn't an issue. They do damage slow enough that the RFs can defeat the 'Boss' segement then lay into them without issues. the MGs on the second segment however, are not so kind, deleting the Taunt Dummy very quickly, even on Normal, although they attempt fewer warcrimes on our favorite Pizza Lion in the process.

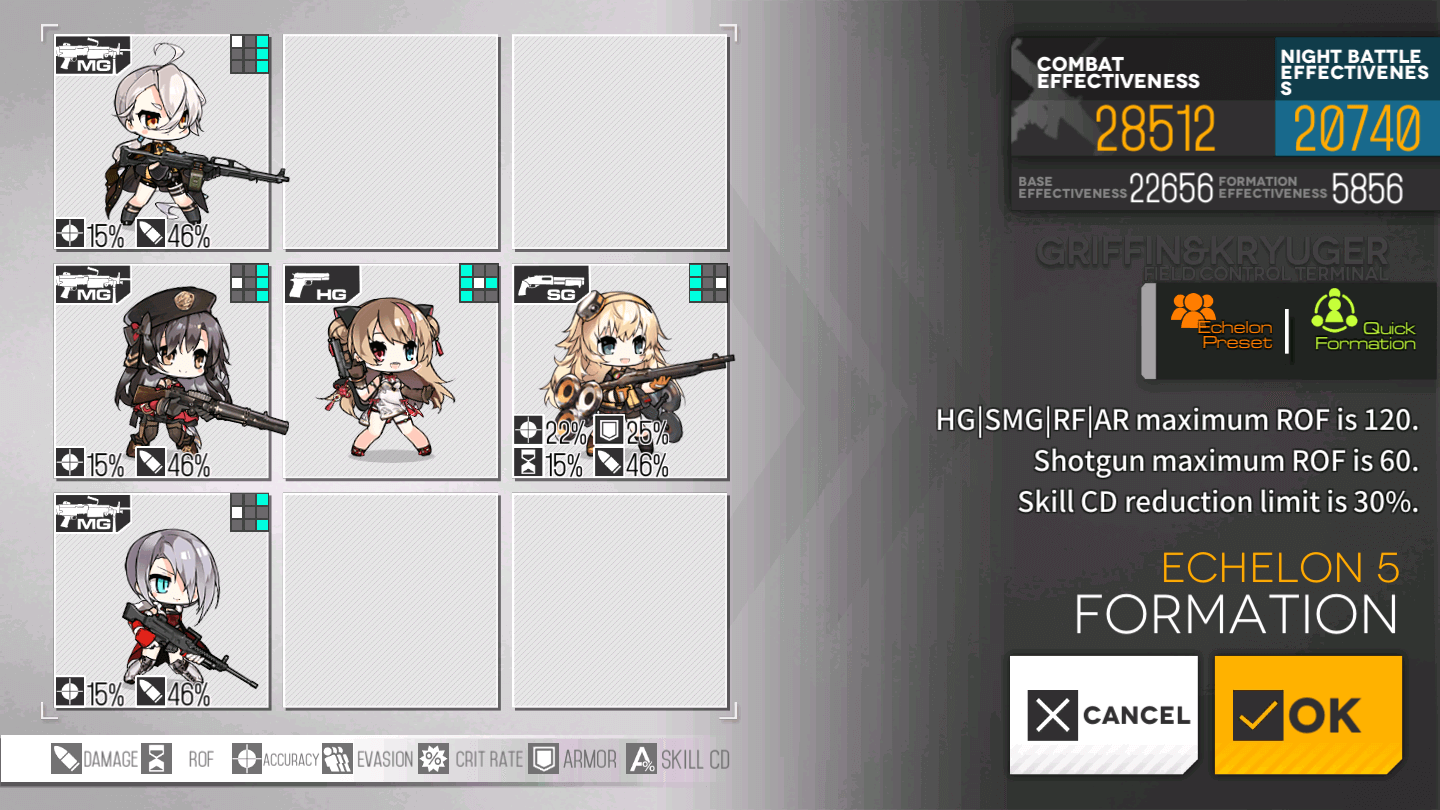
Right. That was a lot of words, and I can feel my own eyes starting to glaze over. Here is a quick and dirty Gustav team. If building this team, probably replace MG5 with Kord for best results.

Mk23 is a very flexible slot, many Damage Boosting HGs all go into her position fine, including P22, Px4 for tiles, Python or Contender. MGs picks as also reasonably flexible, but stick to known good MGS such as the Big 4, Kord, 1895, Kord or Lewis if you can. BAR mod also works well here if you have her.

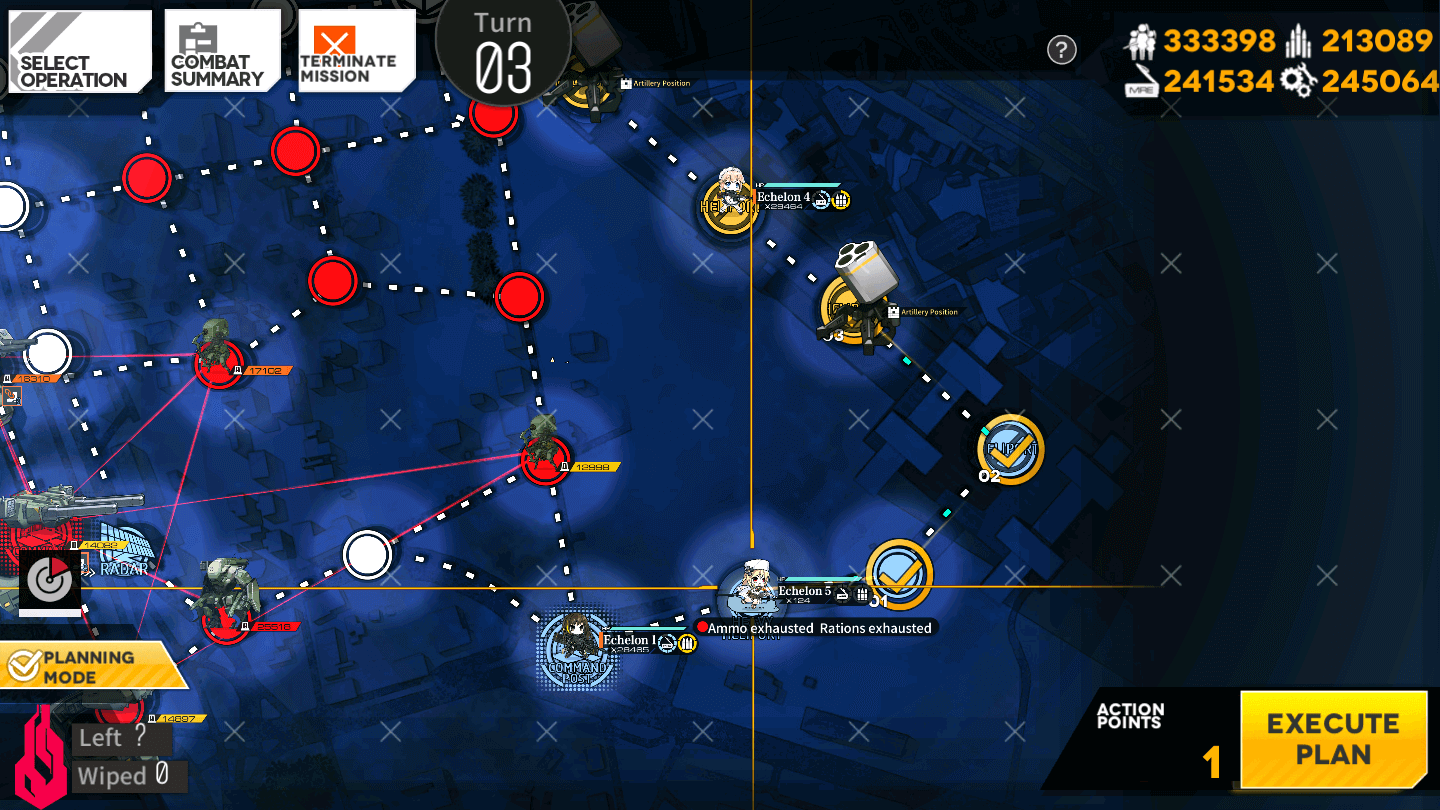
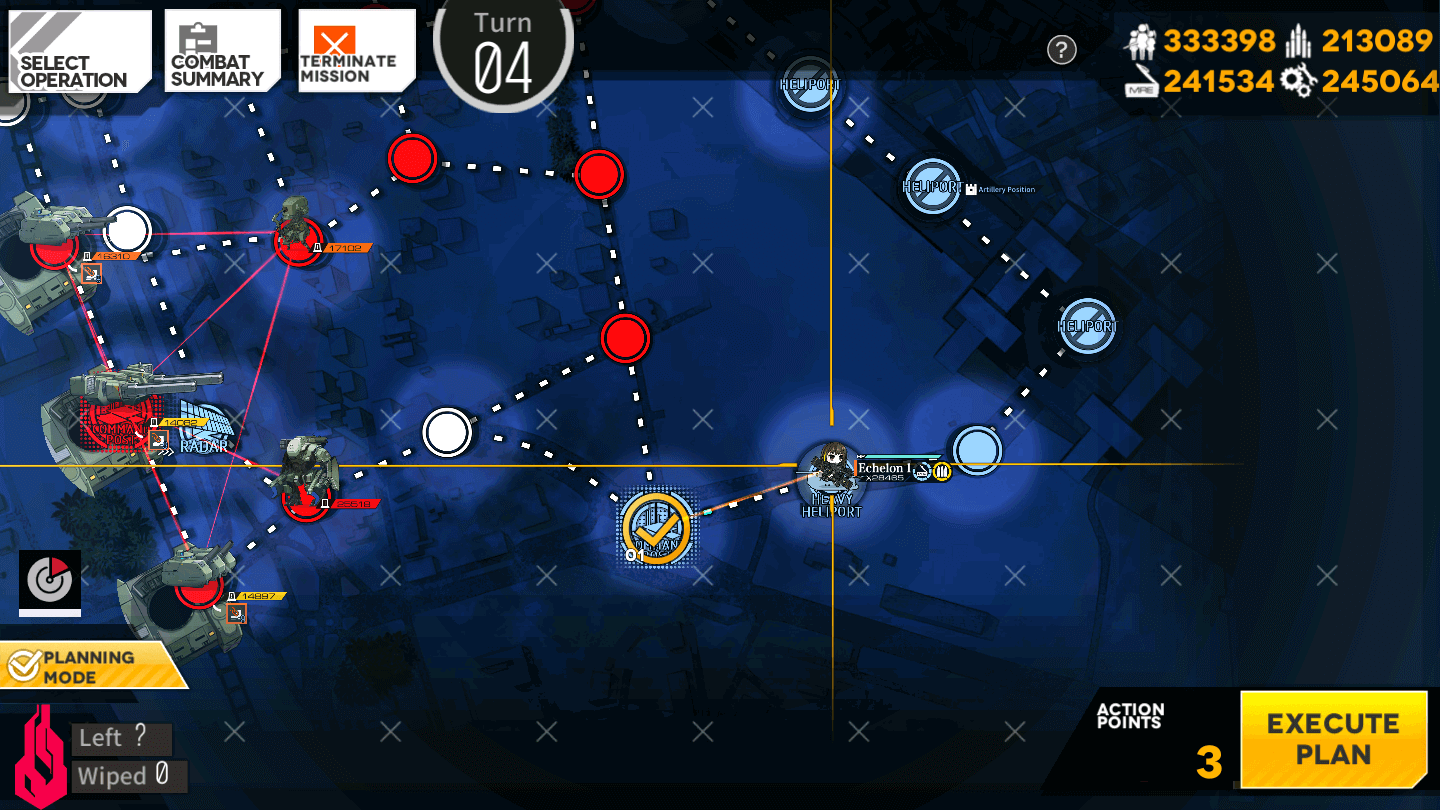
Turn 1
1.1
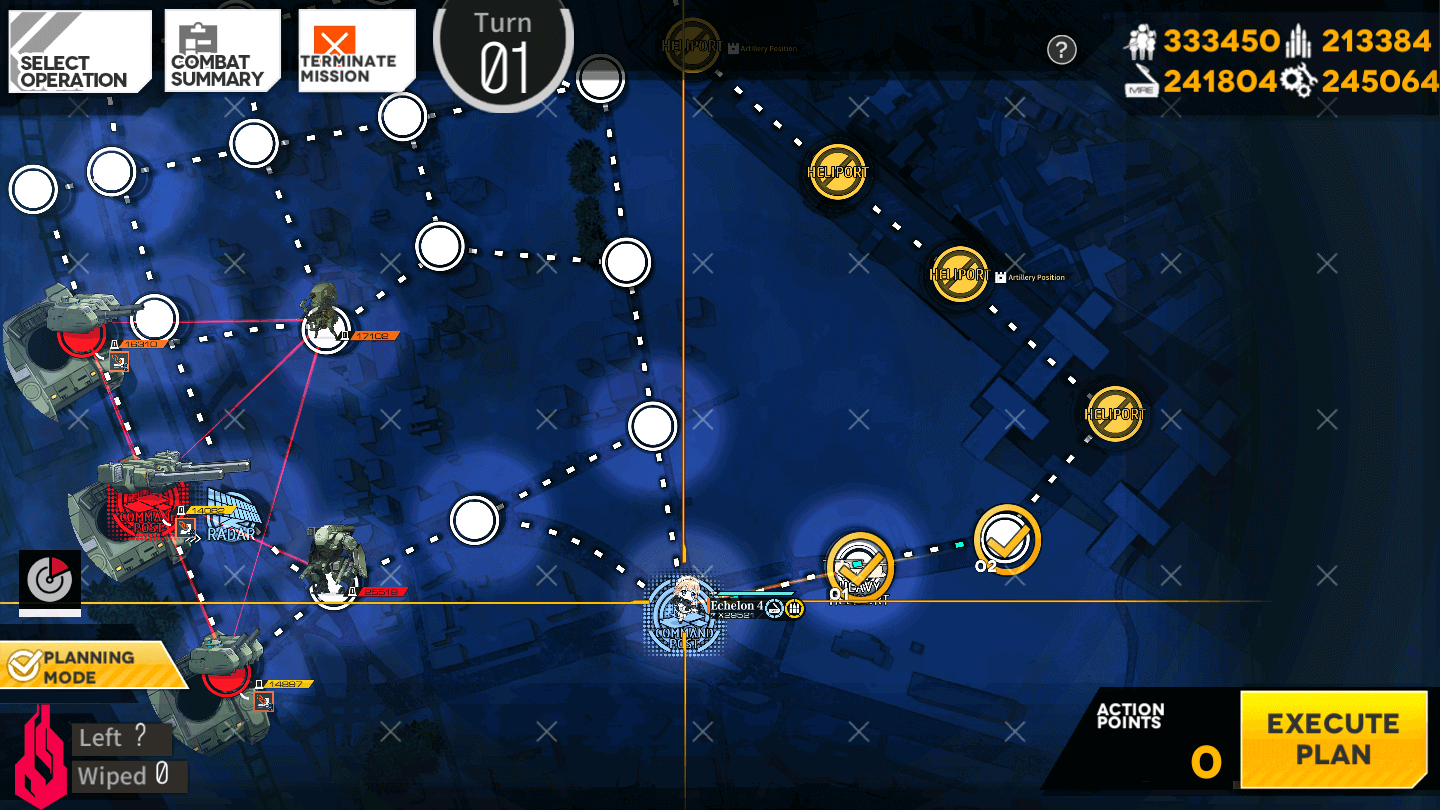
Deploy your Anti-Pyxis Team and move to the right two nodes.
Turn 2
2.1

Deploy the AR/SMG team on the Command Post, and either a Dummy Echelon or the Gustav Killer on the Heavy Heliport.
2.2
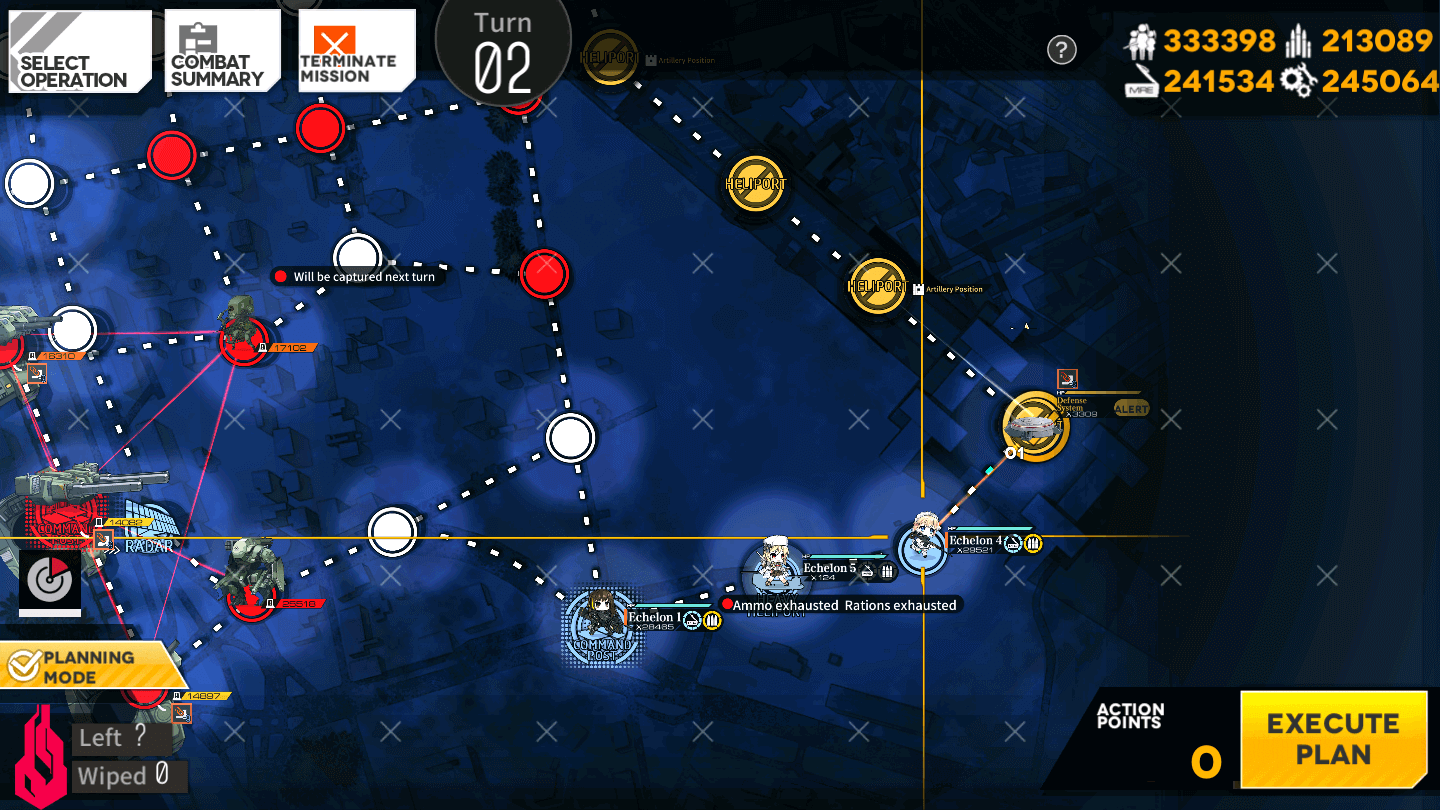
Move the team you wish to fight the Pyxis turret with to the right one node to fight the Pyxis.
Turn 3
3.1

Move the team that fought the Pyxis up two nodes.
3.2
Move the third Echelon to the right two nodes, and then up one node.
3.3
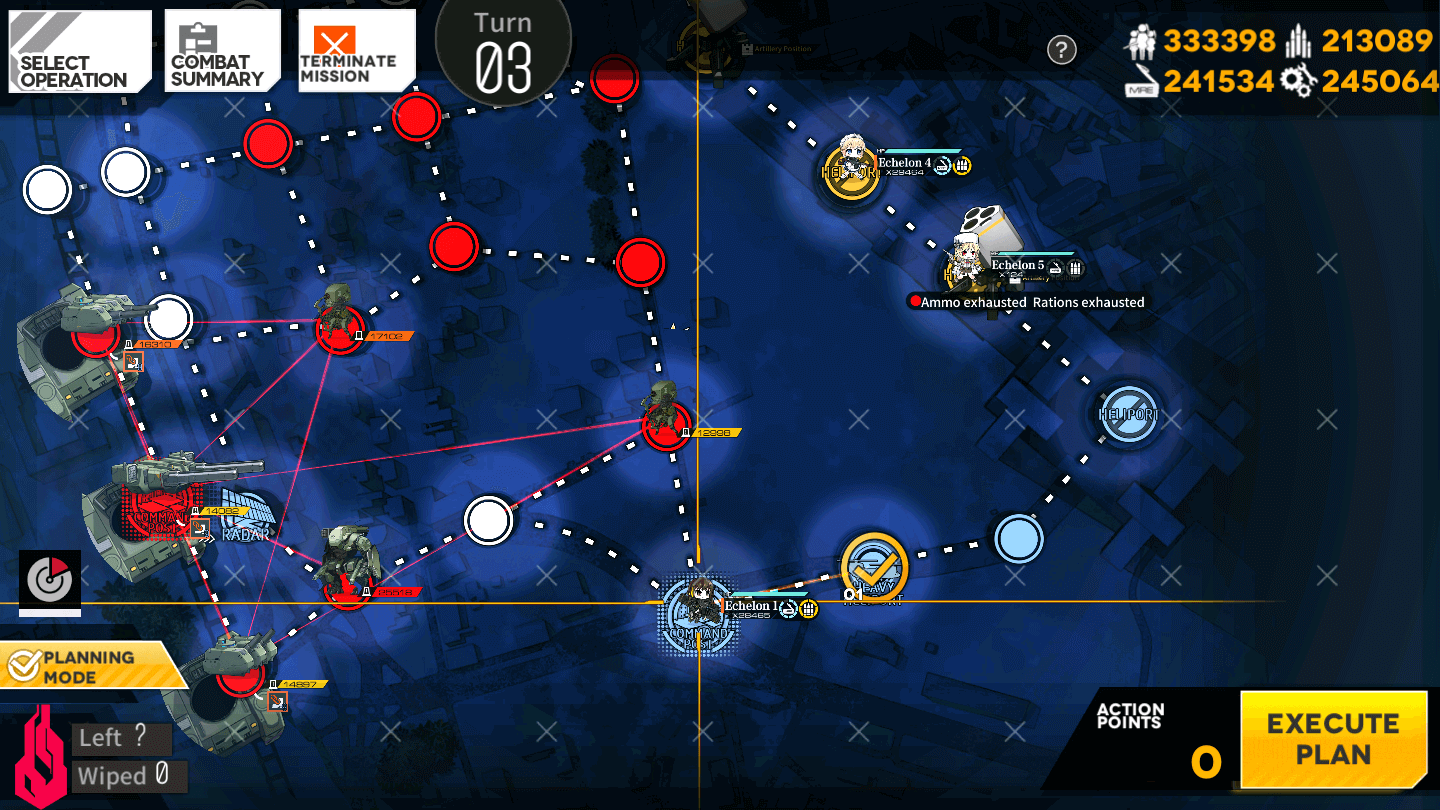
Move the AR Echelon to the right one node.
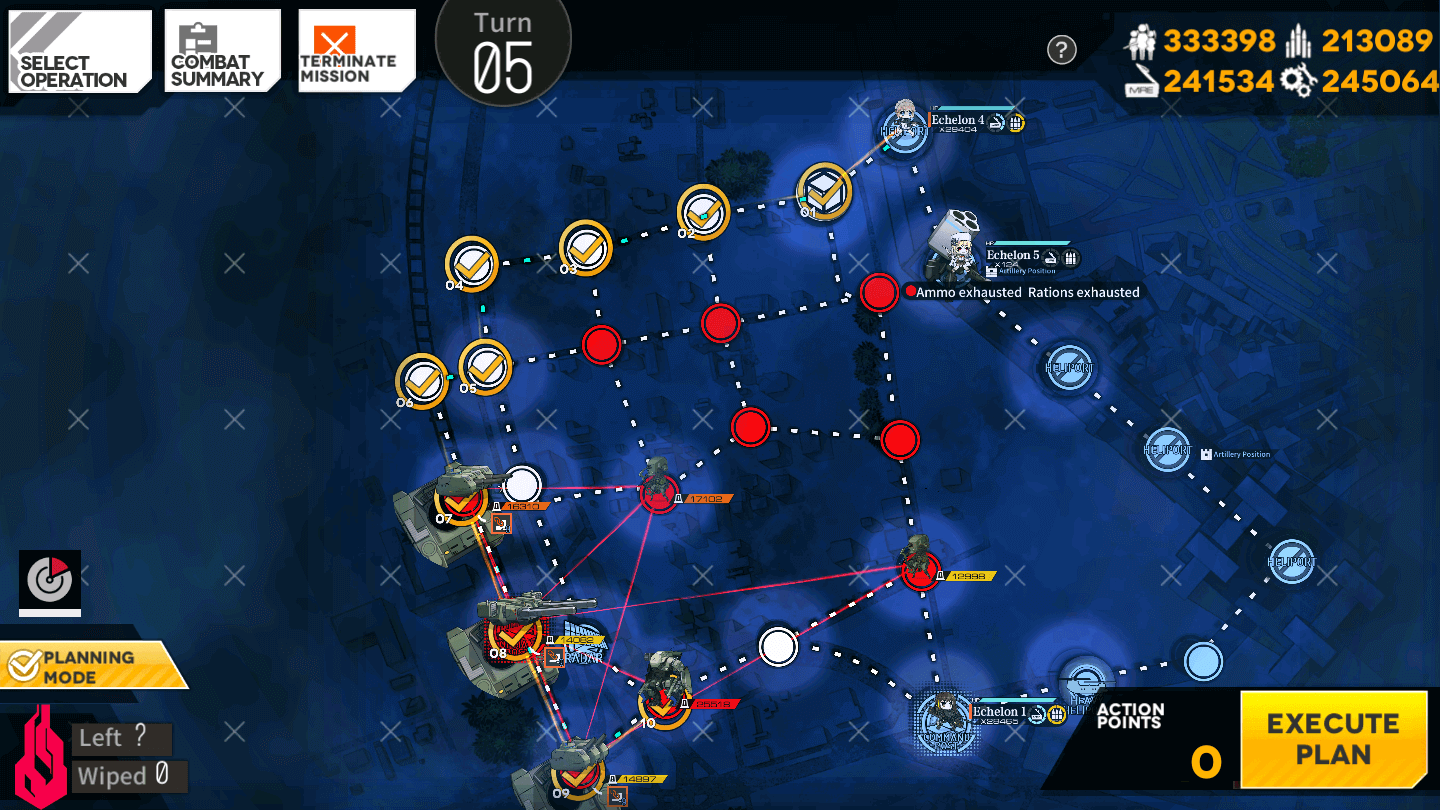
Turn 4
4.1
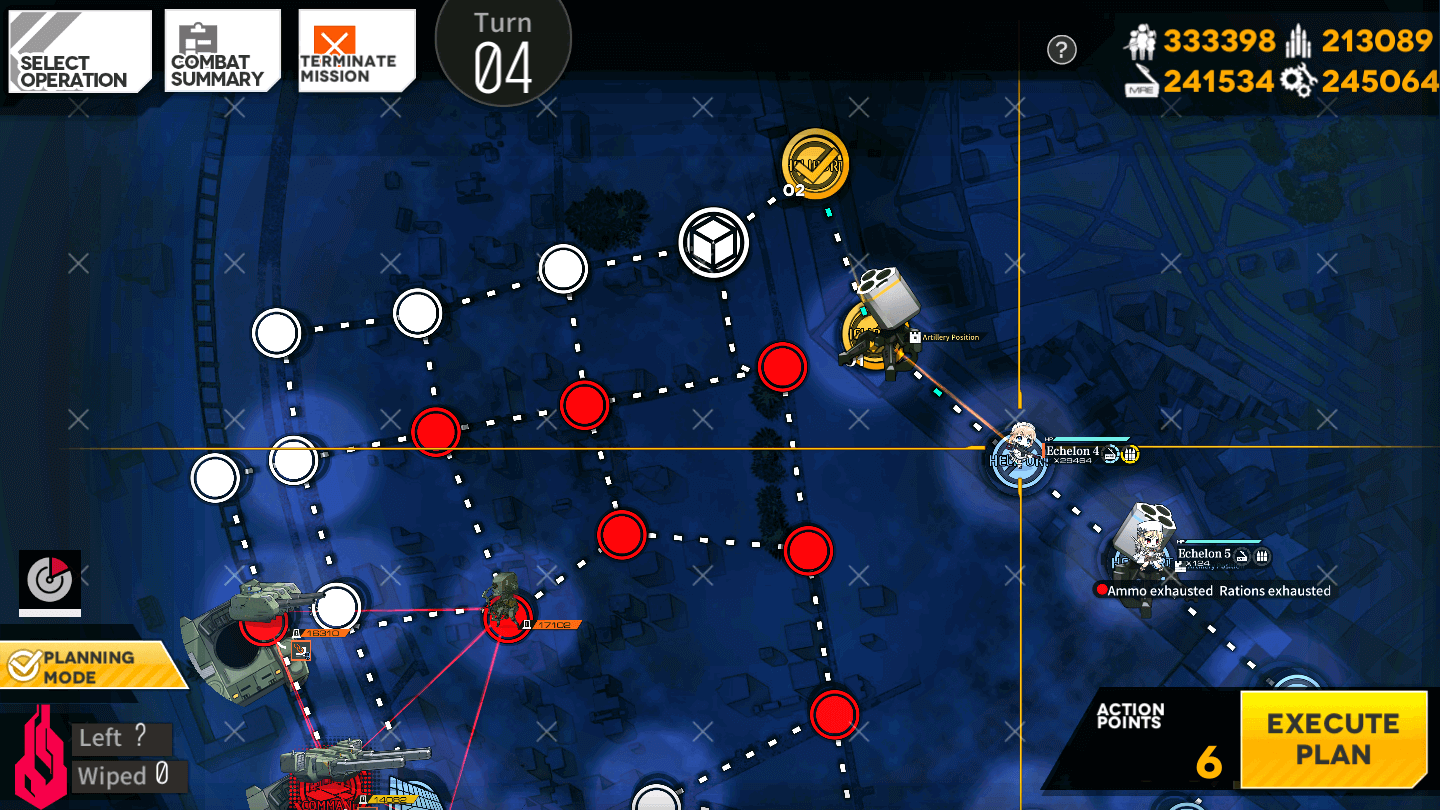
Move the team that fought the Pyxis up two nodes again.
4.2
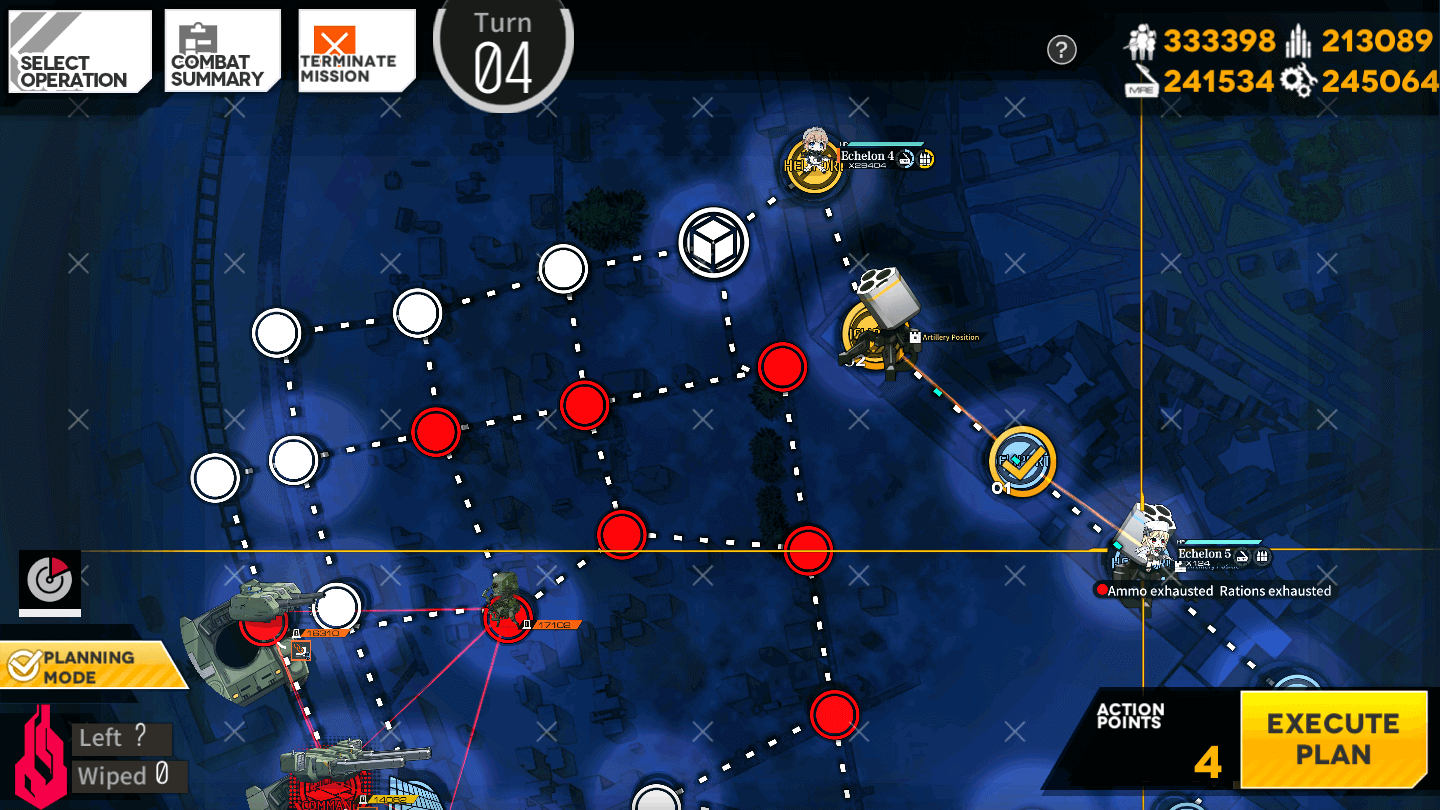
Move the third Echelon up two more nodes.
4.3
Move the AR Echelon to the right one node.
Turn 5
5.1
Each Gustav battle requires slightly different unit positioning micro, so lets have a speed round of battlefield micro!
Segement 1:
Gustav Segement one is fairly simple. Activate your Taunt, and retreat any units in the front two columns. Retarget the DPS on the smaller turrets as needed. This may take a few swings to get right. Segment 1 fires a giant mortar, and the side guns are smaller mortars. Massive AoE, very bad.
Segment 2

Segment 2 is the troublesome one. Activate your taunt, and move the MGs into the front column. Leave the units in the rear columns in as long as possible, but retreat before the gustav fires, unless you're doing something with a shield HG or something like that. Retarget the DPS on the turrets is paramount here. Do not perform warcrimes on SAT.
Segment 3
Segment 3 uses the same formation as Segment 2, but the micro is a bit different. Move the MGs up to the front. and retreat the back column units. However! There is a twist! This time, when the Central Gustav is not shelling the back lines the smaller guns will hit the Taunt with an AoE attack the hits position 6, so you'll need to micro the Doll standing in that spot back and further over the course of the fight. Segment 3 is also a massive fuck off mortar, just on the back rows this time, hence why we need to micro the Pos6 Doll.
This concludes Gustav mechanics in 60 seconds or less.
Send the Gustav killer team off on their appointed goal. Then will travel 4 nodes to the left, down one node, left another node, and then begin the Gustav fights. If you wish to capture the Command Post, end the turn on the Command Post having killed the first two Gustavs. Please consult the Gustav fights discussion earlier on this page.
After you kill the final Gustav part, move the Gustav killer to the right one node to fight the Minotaur.
Turn 6
6.1
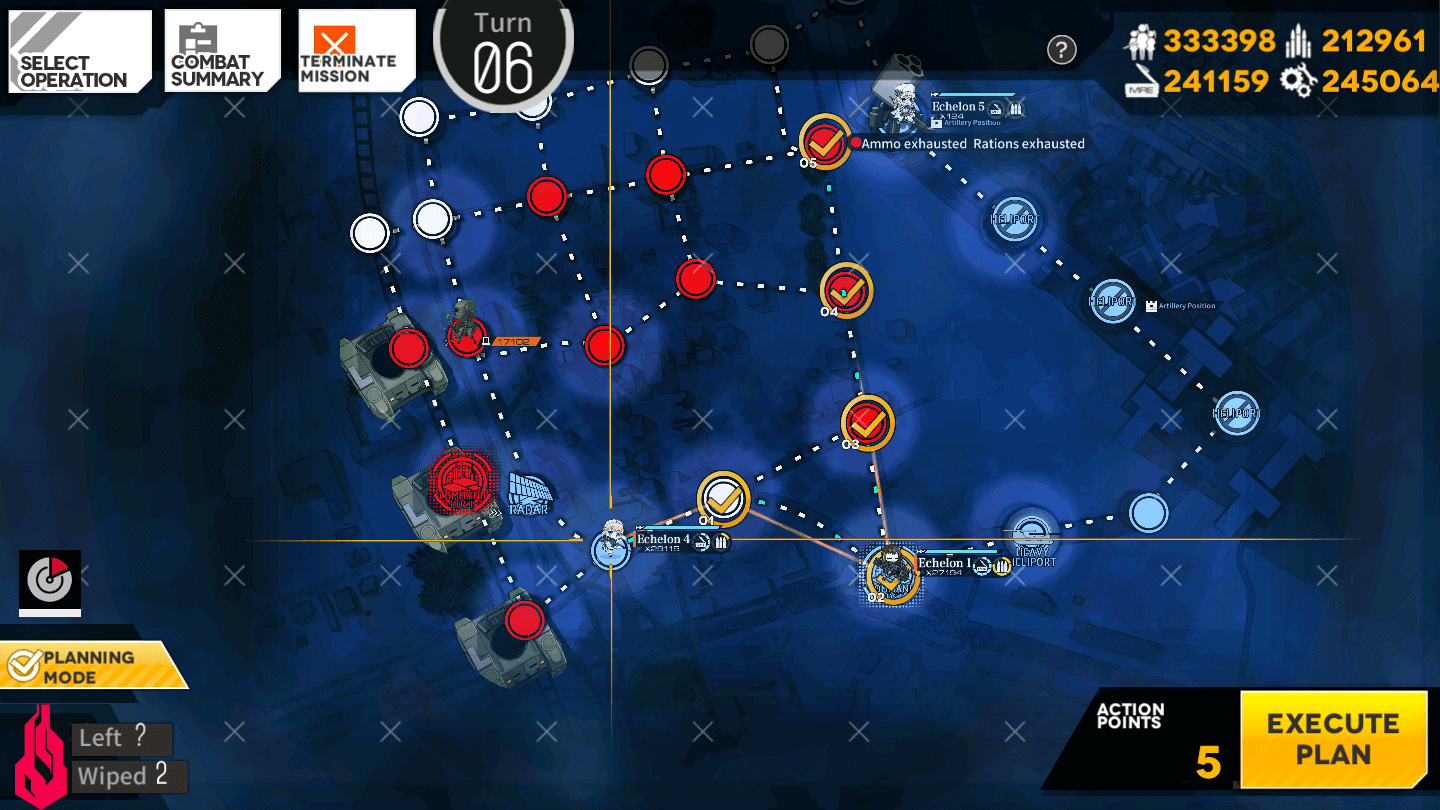
Move the Gustav Killer to the right one node, swap them onto the Command Post to resupply, then move up three nodes.
6.2
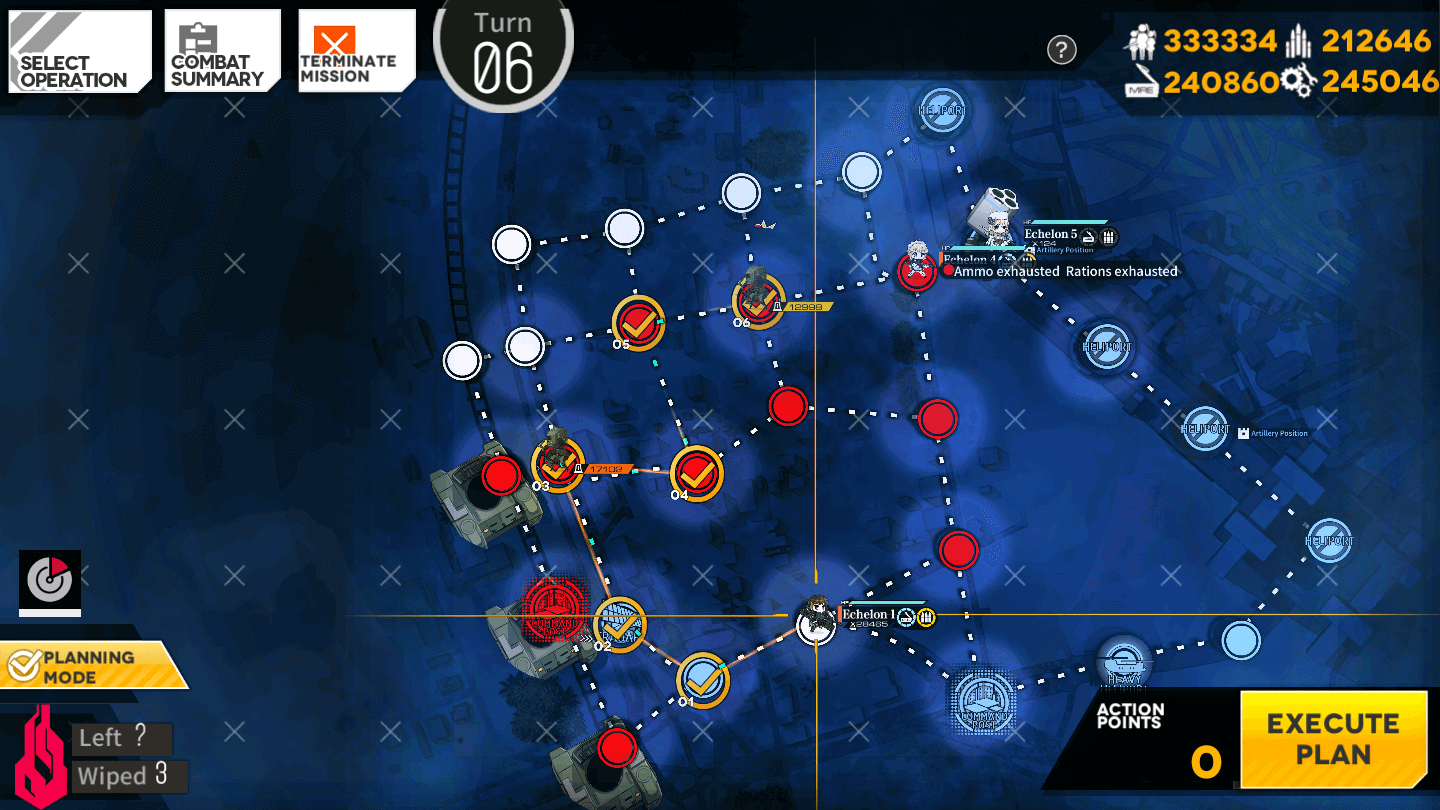
Finally, the AR/SMG team should move to the left one node, up two nodes, to the right one node, up one node, and to the right one further node to close out the Elimination Objective.
Video Guides:
Next Chapter:
-
Normal
-
EX