First Clear Rewards
 |
Basic Training Data x500 |
Possible Drops


Missions and Clear Conditions
Mission: Rescue both Hostage allies.
S Rank Clear Conditions: Rescue both Hostage Allies within 7 turns, Complete Stage without losing any Echelons
Clear Guide
No specific units, but recommend having three echelons with at least ~x3 links to comfortably clear the units of unknowns. Otherwise, one strong echelon can be moved around the map to clear out the enemies, utilizing the cluster of central heliports for position swapping in order to save AP.
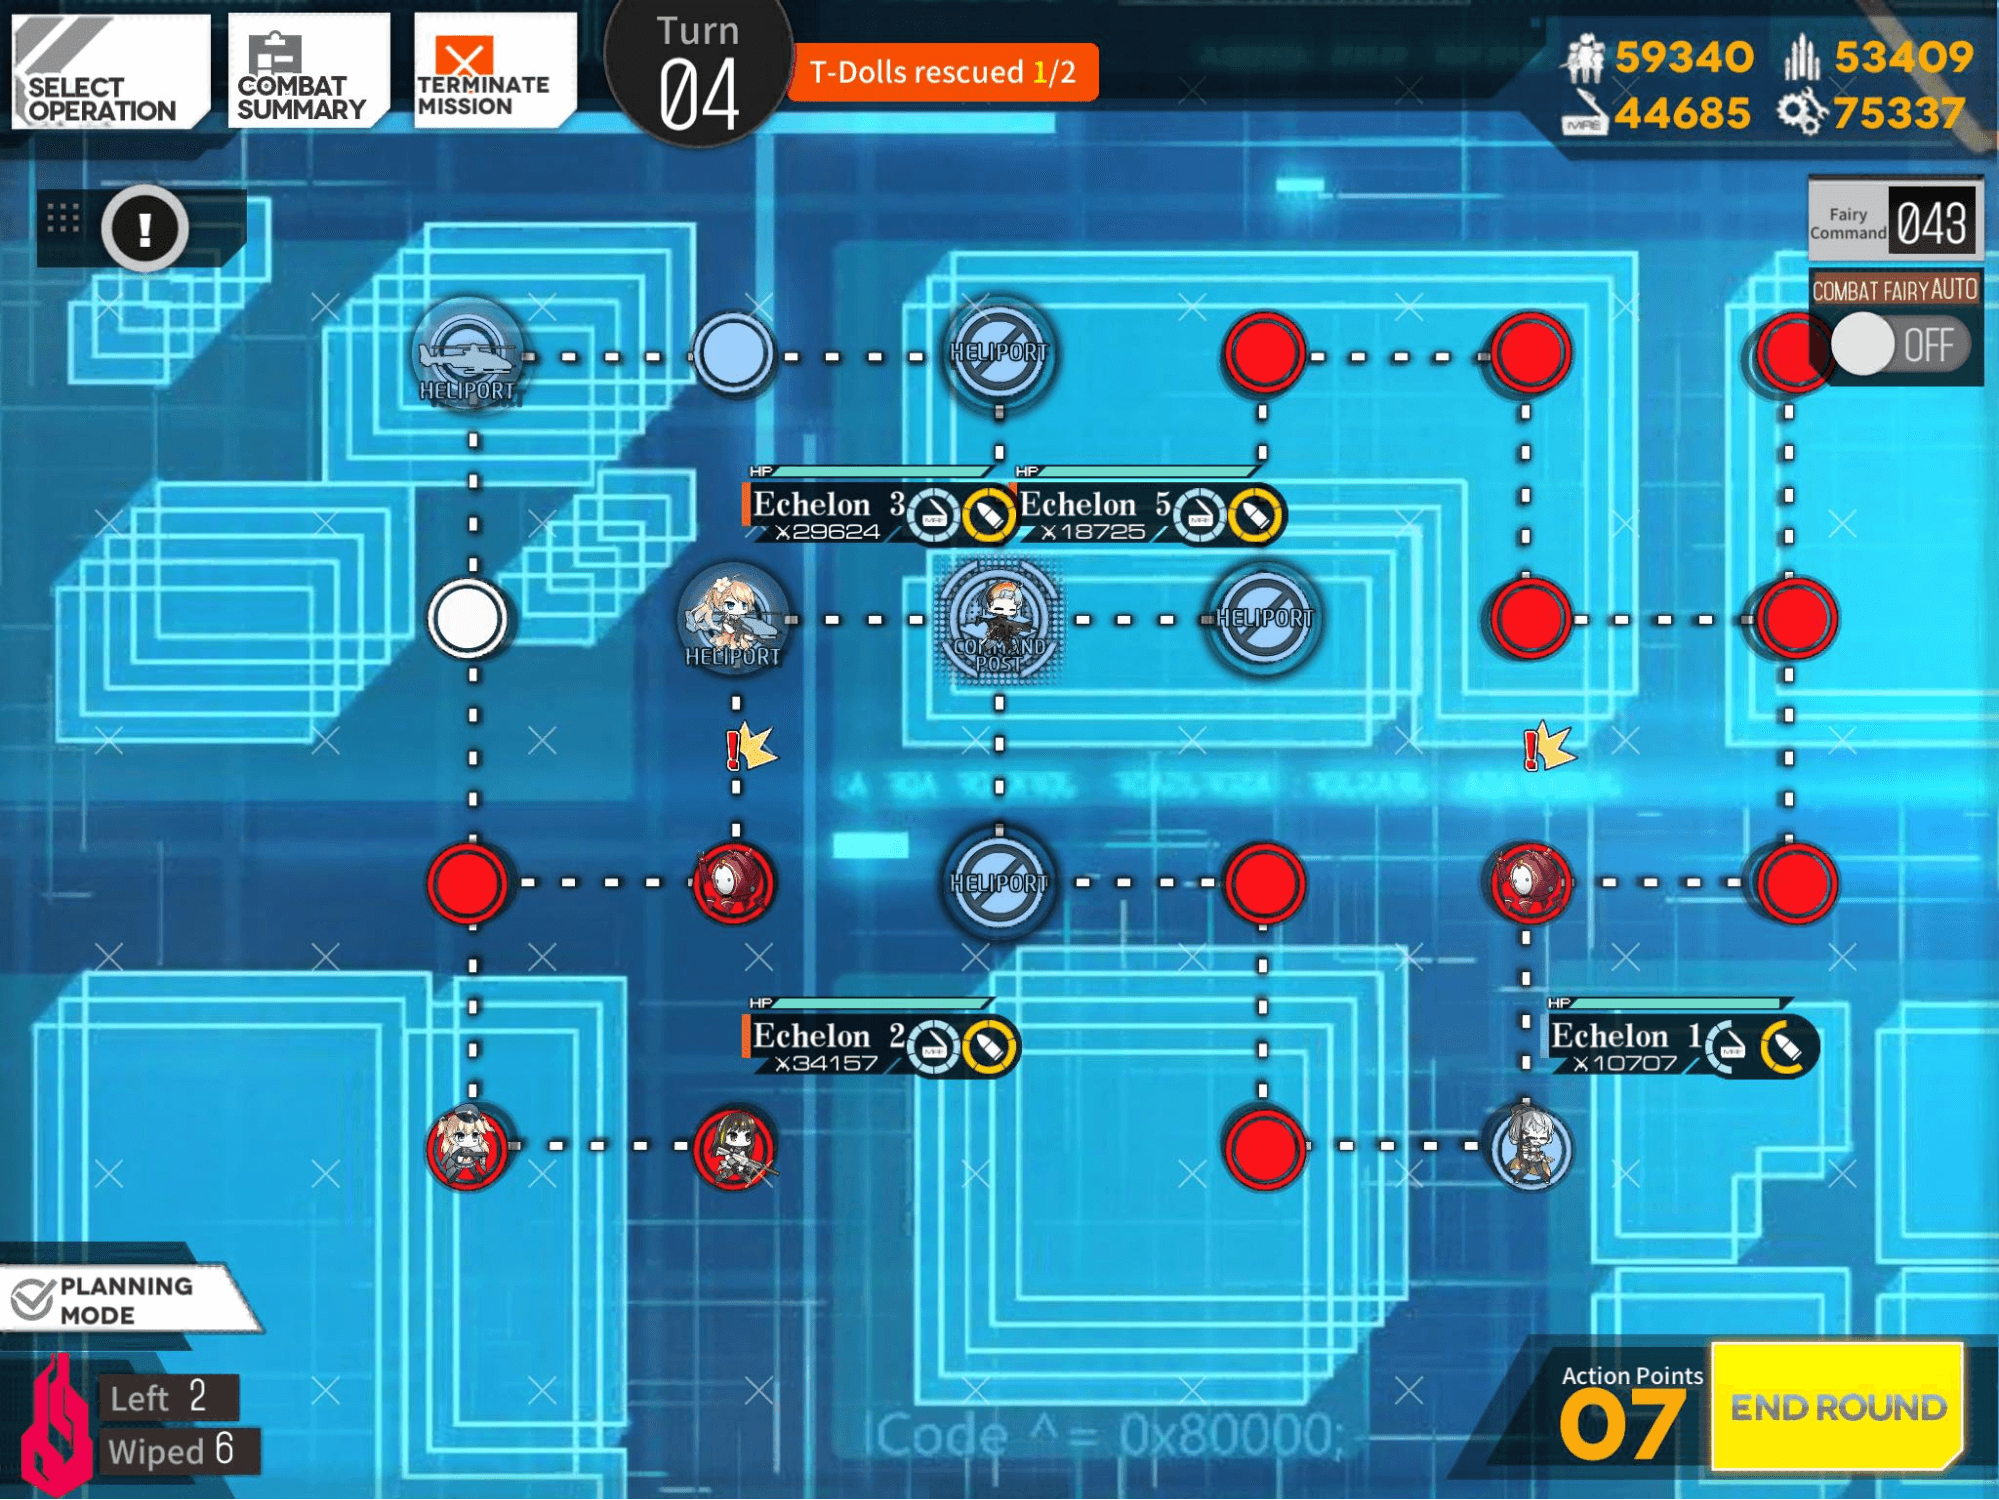
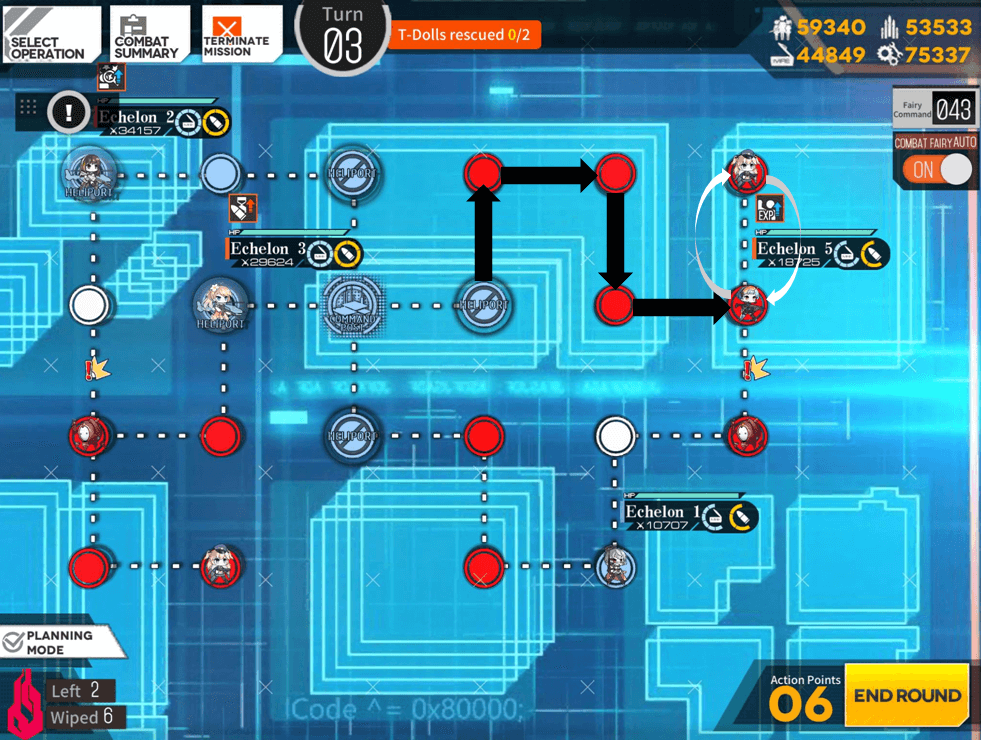
At first glance, this may seem difficult due to two enemy red Goliath units with ~96k Combat Efficiency, but fortunately it is not necessary to face these units head-on, and the rest of the enemy units on the map are fairly weak. Instead, each red Goliath unit has a specific aggro range, as shown by the red-circled nodes in the images below. Placing an allied echelon within these ranges causes the respective Goliath unit to move towards them, creating an opening for another allied echelon to rescue the Hostage unit. Start the mission by placing one echelon each on the allied Heliport and Command Post.

Aggro ranges of the Goliath units on either side of the map.
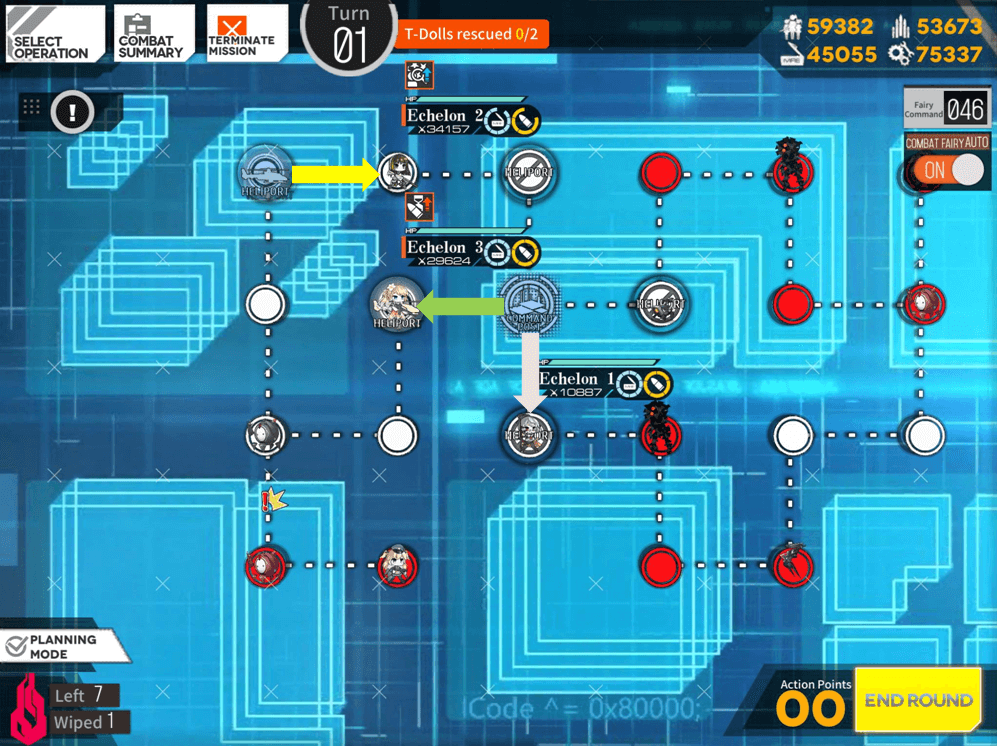
On the first turn, start by moving the echelon on the far northeastern Helipad one space to the right, engaging the unit of enemy unknowns. This sets up to capture the northern heliport by surrounding. Next, move the echelon deployed on the Command Post to either the southern or western heliports, and deploy a third echelon to capture the other one. Don’t worry about leaving the Command Post exposed; the Dinergate unit to the east does not advance when you end the turn.
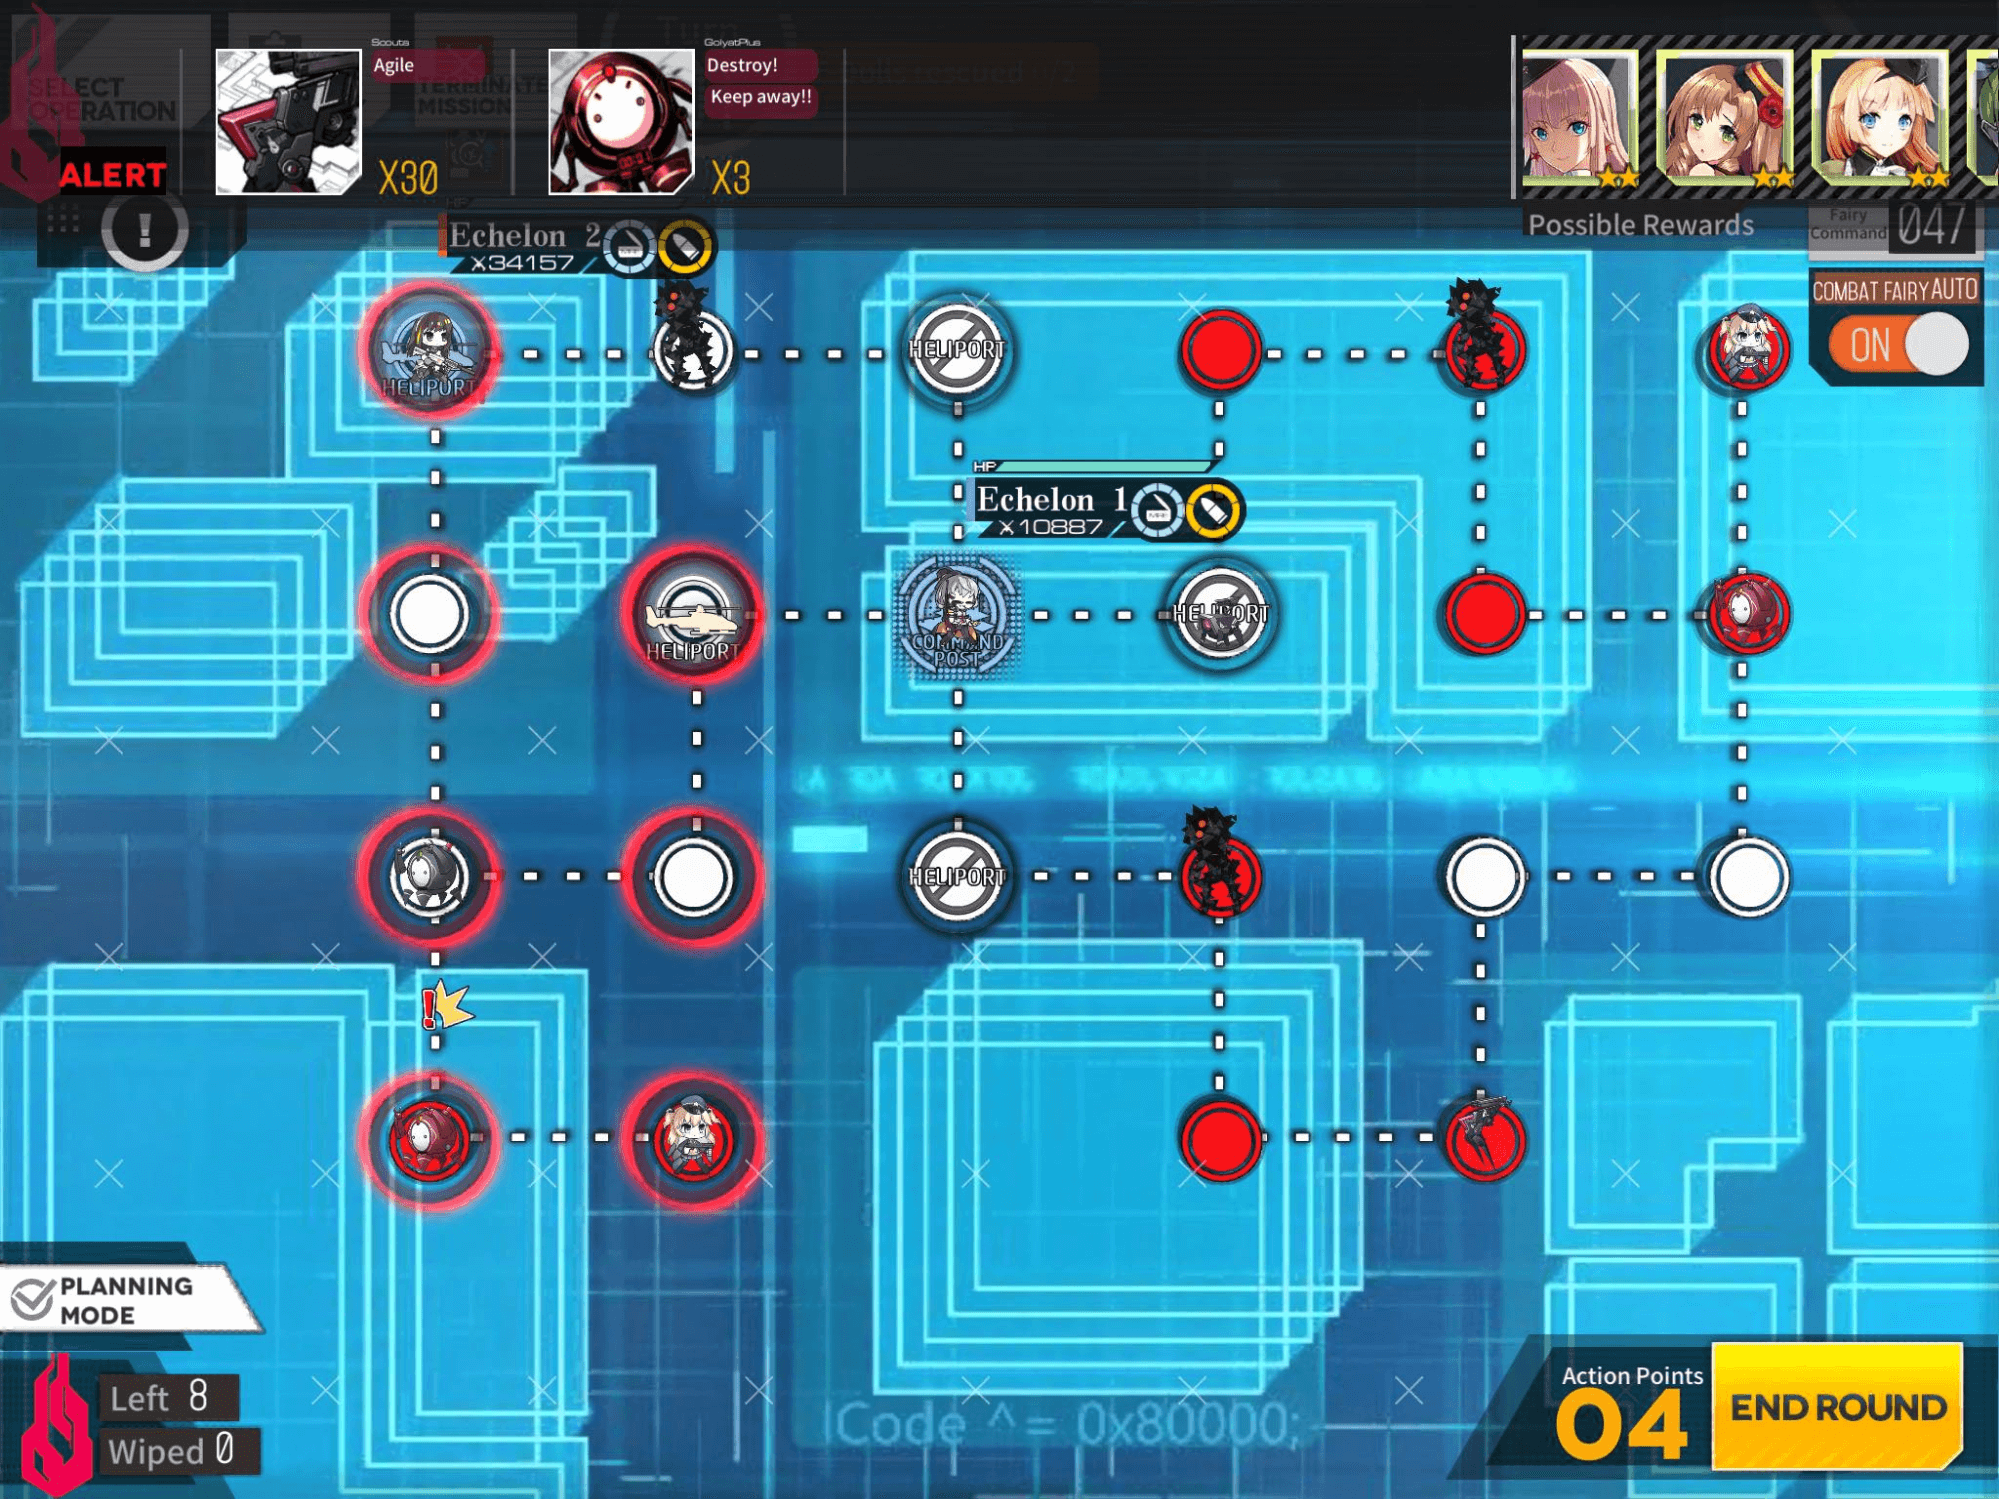
The goal for turn 2 is to start luring out the enemy Goliaths in order to create an opening to rescue the hostage on the east side of the map. Set up by first deploying a fourth echelon on the Command Post and moving it to the eastern heliport occupied by the Dinergate unit. Next, move the echelon on the southern heliport three spaces along that route, so that it is just within aggro range of the eastern Goliath. Finally, move your northernmost echelon back to the northeast heliport, and end the turn.
On turn 3, the eastern Goliath should have moved to the south, which allows the echelon from the eastern heliport to run in and rescue the Hostage unit. Remember to swap spaces with the Hostage unit before capturing, as it saves two vital Action Points required to get the hostage back to the Command Post on this turn. End the turn once the first hostage has been rescued.
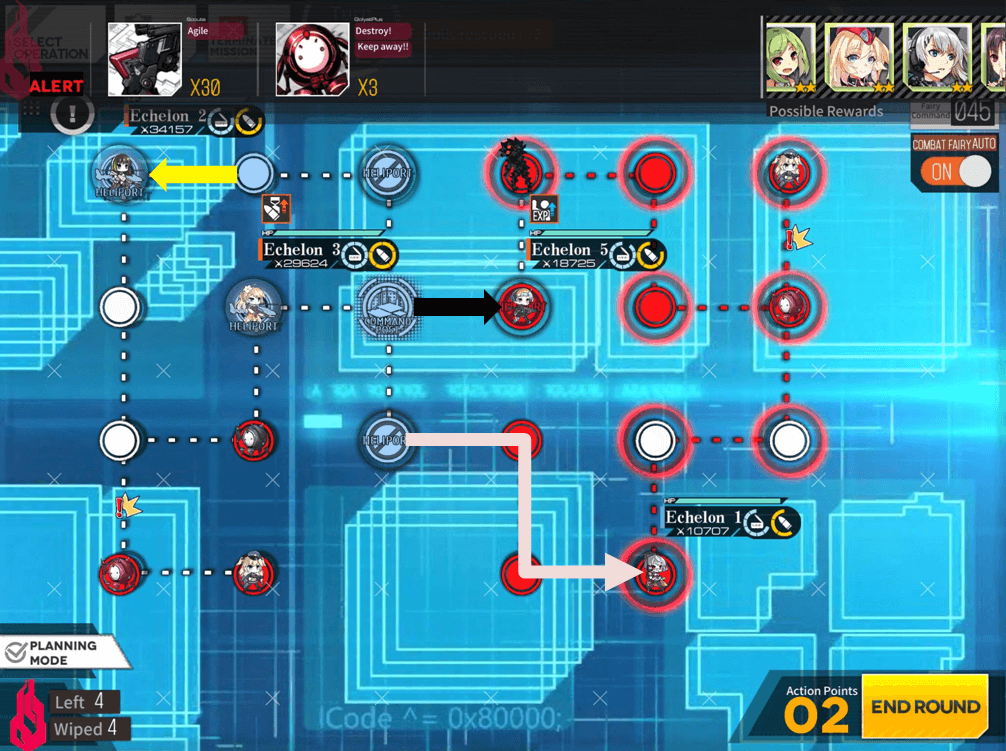
At this point, the western Goliath should have moved into the node directly below either the far northeastern or center eastern heliport. Either way, it is now possible to run the unblocked echelon down to rescue the second Hostage. Return to the appropriate heliport and deliver the hostage to end the mission.