Enemy Layout
| Drops |
|
|---|---|
| Rewards |
Boss Statistics
| BB Slots | BB Slots: Charm (5 turns). (Inflicted to a random front line party member at start of battle) |
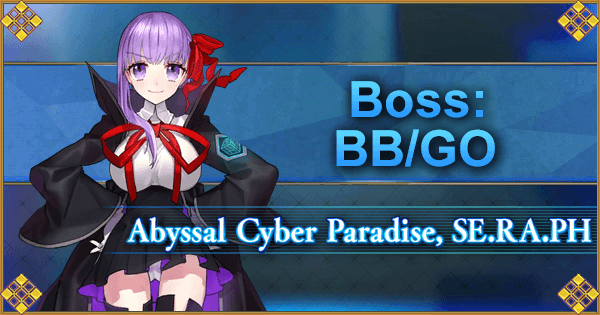
| BB/GO | ||
 |
| 135,783 |
| LVL | 90 | | 181,044 |
| LVL | 90 | | 149,870 |
| LVL | 90 | |
| Class | ||
| NP Bar |  | |
| NP Type | ST | |
| Actions | 3 per turn (1 per turn if at least one Shadow Servant is alive) | |
| Traits | Female, Humanoid, Servant, Weak to Enuma Elish | |
| Skill 1 | Domina Cornam D: Clear debuffs from an ally, recover their HP, and grant Debuff Immunity (1 time, 3 turns). | |
| Skill 2 | Aurea Poculum C: Inflict Stun on one enemy (1 turn), remove Evade or Invincibility buffs. | |
| Skill 3 | Self-Modification EX: Increase own Critical Strength (3 turns). Increase own Critical Rate (3 turns). | |
| Decrease Critical Star Drop Rate for all enemies (3 turns). | ||
| Decrease NP Gauge for all enemies by 100%. . | ||
| NP | Cursed Cupid Cleanser: Deal heavy ST damage. Inflict Debuff Resist Down (3 turns). Chance to charge 1 NP bar. |
Overview
Stage Overview
-
This is the final Encore quest for the CCC event. It is overall a fairly straightforward fight, although there are several gimmicks players should pay attention to.
-
The BB slot will charm a frontline Servant for 5 turns at the start of the fight. The Atlas Academy Uniform is an ideal choice for removing the Charm if a Servant with targetable debuff cleansing isn't available (or worth fielding).
-
This stage features multiple Shadow Servants (one of each standard classes) with HP pools between 45,000 and 60,000. While the Servants are individually easy to kill, their Extra Attacks (they are Shadow Servants after all) do hurt, and they should be eliminated quickly before this becomes a problem. Note that they can still stall with skills, and David in particular will slow down the battle with his Harp of Healing.
Boss Overview
- Moon Cancer: The Moon Cancer class is strong against Avengers and weak against Rulers, and both receives extra damage from Berserkers and deals extra damage to Berserkers as well.
 : Deal 0.5x damage and receive 2x damage from Moon Cancer.
 : Deal 2x damage and receive 0.5x damage from Moon Cancer.
 : Deal 1.5x damage and receive 2x damage from Moon Cancer.
- [Other Classes]: Deal 1x damage and receive 1x damage from Moon Cancer.
-
Three Actions: BB/GO has three actions when alone, and one action when at least one Shadow Servant is on the field with her.
-
Single-target NP: BB/GO’s NP is single-target, meaning it can be Taunted away safely. However, it deals quite a lot of damage, and utilizing Invincibility/Evasion, or defense stacking strategies, is recommended if Masters intend to face her NP head on.
-
Very fast-charging NP: Arguably the most difficult part of this encounter, BB/GO only has 3 charges on her NP bar. As her NP can randomly recharge one bar after she launches her NP, she might well launch her NP once every three turns.
-
Buffs own Critical Damage and Critical Chance: BB/GO normally doesn’t hit very hard thanks to her triple Arts deck. However, her critical hits can be rather painful (especially when Self Modification is stacked), and as she gets three actions when she is alone on the field, a couple of stray critical may be able to quickly eliminate a (Berserker) Servant.
-
Can Stun and Remove Invincibility/Evasion: Thankfully, she won’t do this right before using her NP, but the Stun aspect of her Aurea Poculum can be rather troublesome, and can wipe a run if a Servant with party-wide Invincibility or Evasion gets stunned in the turn before she uses her NP.
-
Can Heal + remove Debuffs + grant herself Debuff immunity: While the healing part of Domina Cornam is rather negligible, the other two aspects of this skill can considerably reduce the effectiveness of debuff-oriented Servants. Naturally, she can’t remove her own Stuns or Charms, but Masters utilizing attack/defense debuffs should apply them carefully.
-
Can reduce Debuff Resistance: BB/GO’s NP applies a Debuff Resistance debuff to the whole party, making it easier for her Stuns to land. While normally pretty minor, a Stun in the wrong timing is able to mess with the run.
-
Upon Break 1 - Critical Star Drop Rate debuff: Lasting for three turns, the debuff reduces the effectiveness of star-generating Servants such as Jack the Ripper. Still, the effect is not as detrimental as her other gimmicks, and it can be mostly ignored.
-
Upon Break 2 - Drain NP gauges of active Servants: This 2nd Break Bar gimmick denies any Master the ability to save NPs for her final HP bar. As such, make sure to not use NP-charging skills right before triggering her second Break.
Team Recommendations
-
For a safe and comfortable clear, Masters can field the following line-up. Alternatively, Masters can field a combination of support Servants, Arash and an AoE Berserker to utterly destroy the first 2 waves of Shadow Servants.
-
Front Line: Party Invincibility/Taunt Support + DPS + Heal/NP Gauge Support, optionally a Debuff Removal support
-
Back Line: Backup DPS/NP gauge support + Last Stand
-
Class Advantage: BB/GO herself doesn't actually have high HP per Break Bar and her HP is often broken by a single ST NP from a Servant with class advantage. Servants like Saint Martha (Ruler) and Cu Chulainn (Alter) will utterly destroy BB/GO with their damage.
-
Full Party Invincibility: While effects like these can also be used to tank BB/GO’s NP, another great boon is their ability to absorb the Extra Attack from a charged Shadow Servant. Hopefully, allowing the party to reach BB/GO without spending too many resources.
-
Healing Support: The Shadow Servants will deal some damage to the party, and leaving Servants at half health risks them being critted down by BB/GO once she comes out to play. Bringing a healing support would allow the party to neutralize incoming damage from Shadow Servants.
-
NP Gauge Support: The fight against BB/GO can quickly turn into a damage race. NP Gauge supports allow the party to rotate NPs faster, and also benefits the early fight by helping eliminate Shadow Servants more quickly. BB/GO herself doesn't actually have high HP per Break Bar and being able to charge quickly tends to scale better with her Break Bar mechanics.
-
NP Drain: BB/GO’s fast-charging NP can be hard to manage. Bringing along Servants with NP drains helps the party keep up in crucial phases of the fight. Unfortunately, stuns/charms/NP Seals tend to be inactive after BB/GO uses her Domina Cornam.
- Mystic Code: Atlas Academy Uniform: As mentioned previously, the Atlas Academy Uniform is highly recommended for this stage, not only for its debuff removal, but also for its Invincibility and cooldown reduction skills, each of which helps the party withstand BB’s NP in their own way.
Video Links
-
Note that these videos are not affiliated with GamePress, but showcase some lineups that are effective in clearing the final challenge. These can serve as a good reference for how to rotate skills during this quest or simply to have a look at the encounter before diving in.

