Introduction
- 12/21/2018: Walkthrough completed.
- The spoilers in this walkthrough are limited to what enemies you will face in a particular node.
- Every major boss encounter is initially hidden.
- Press the Boss Information or Raid Farming Guide headers to see specific spoilers, advice and/or tips.
- This Singularity contains a special bonus buff based on the bond level between you and your Servants, largely easing the difficulty even for newer Masters.
- The Boss guide contains a list of skills and attack for the Demon Pillars as well in-depth guides on difficult encounters.
- Have fun and enjoy the story!
Difficulty Scale
| Filler | Easy | Moderate | Hard | Very Hard |
Walkthrough
-
Part 1: Ceremonia (Ch1-2)
-
Part 2: Six Seats (Ch3-8)
-
Part 3: Throne (Ch9-??)
-
Part 4: Humanity (Ch??-??)
| Node | Enemy Classes | Enemies & Difficulty | Notes | |||||
Ch 1 |  | First chapter, first boss fight! Flauros is similar to the first encounter against him back in Septem. He takes 2x damage from Cavalry classes: He takes 1.5x damage from: Avoid Knight classes as they are weak against his attacks. With the correct classes, one should win the damage race with a good Support Servant. | ||||||
Ch 2-1 |  | Boss Fight! Melting Furnace Naberius has normal Saber class weaknesses to Archer class Servants, so bring your Archers and this fight should be straight forward. His multi-hitting normal attacks will fill your Servants' NP gauges quickly, enabling you to pile on the damage. Its NP hits AoE but can be nullified with Evade or Invincibility skills. | ||||||
Ch 2-2 | | Boss Fight! A repeat encounter with slightly more HP, although the rules of the fight are essentially the same. Bring Archer class Servants, saving Evade or Invincibility for his NP turn. | ||||||
Ch 2-3 | | Boss Fight! A third encounter with slightly more HP than the previous, although the rules of the fight are still the same. Bring Archer class Servants, saving Evade or Invincibility for his NP turn. | ||||||
Ch 2-4 | Pure story chapter. | |||||||
Raid Farming Guide
| ||||||||
| Node | Enemy Classes | Enemies & Difficulty | Notes | |||||
| ||||||||
Ch 3-1 | Pure story chapter. | |||||||
Ch 3-2 |  | Boss Fight! This is the final encounter when Flauros's raid is completed. Bringing ST Sabers is highly effective. Normal attack: AoE, Crits: ST NP: AoE dmg + NP gauge -30% Can buff its own ATK, charge its NP gauge by 1 + increase own NP damage, and debuff one target's ATK. Eliminating Flauros removes the raid-wide Arts debuff. | ||||||
Ch 3-3 | Pure story chapter. | |||||||
Ch 4-1 | Pure story chapter. | |||||||
Ch 4-2 |  | Boss Fight! This is the final encounter when Forneus's raid is completed. Bringing ST Riders is highly effective. Normal attack: ST, Crits: AoE NP: AoE dmg + NP dmg -50% Can give self buff immunity, decrease buff success rate for one target, and charge its NP gauge by 1 + drain all NP gauge by 30%. Eliminating Forneus removes the raid-wide Buster debuff. | ||||||
Ch 4-3 | Pure story chapter. | |||||||
Ch 5-1 | Pure story chapter. | |||||||
Ch 5-2 |  | Boss Fight! This is the final encounter when Barbatos's raid is completed. Bringing ST Casters or Berserkers is highly effective. Normal attack: ST, Crits: AoE NP: AoE dmg + DEF -50% Can skill seal 1 target, give self Invincibility Pierce for 3 turns, and charge its NP gauge by 1 + increase all enemies' skill cooldowns by 2. Eliminating Barbatos removes the raid-wide Invincibility Pierce buff. | ||||||
Ch 5-3 | Pure story chapter. | |||||||
Ch 6-1 | Pure story chapter. | |||||||
Ch 6-2 |  | Boss Fight! This is the final encounter when Halphas's raid is completed. Bringing ST damage dealers is highly effective. Normal attack: ST, Crits: AoE NP: ST dmg + NP Seal Can decrease 1 target's Star gen, buff own Crit chance, and charge its NP gauge by 1 + grant own attacks DEF down on hit. Eliminating Halphas removes the raid-wide Crit Chance buff. | ||||||
Ch 6-3 | Pure story chapter. | |||||||
Ch 7-1 | Pure story chapter. | |||||||
Ch 7-2 |  | Boss Fight! This is the final encounter when Amon Ra's raid is completed. Bringing ST Assassins is highly effective. Normal attack: AoE, Crits: AoE NP: ST dmg + NP dmg -50% Can decrease 1 target's NP gauge by 30%, charge own NP gauge by 1, and charge its NP gauge by 1 + heal self 100,000 HP. Eliminating Amon Ra removes the raid-wide Quick debuff. | ||||||
Ch 7-3 | Pure story chapter. | |||||||
Ch 8-1 | Pure story chapter. | |||||||
Ch 8-2 |  | Boss Fight! This is the final encounter when Sabnock's raid is completed. Bringing ST Lancers is highly effective. Normal attack: AoE, Crits: ST NP: ST dmg + Max HP -5,000 Can decrease 1 target's Max HP by 2,000, grant self 2,000 HP regen per turn, and charge its NP gauge by 1 + instantly kill 1 target. Eliminating Sabnock removes the raid-wide HP Recovery Down debuff. | ||||||
Ch 8-3 | Pure story chapter. | |||||||
| Node | Enemy Classes | Enemies & Difficulty | Notes | |||
Ch 10 | Pure story chapter. Note Ch10 unlocks before Ch9 (Upon completing either Chapter 7 or 8), and thus is listed beforehand. | |||||
Ch 9-1 | Pure story chapter. | |||||
Ch 9-2 |  | Boss Fight! This is the final encounter when Andromalius's raid is completed. Bringing ST Archers is highly effective. Normal attack: ST, Crits: ST NP: ST dmg + Remove buffs Can buff own ATK, buff own Crit chance, and charge its NP gauge by 1 + remove buffs. Eliminating Andromalius removes the raid-wide Buff removal resistance buff. | ||||
Ch 9-3 | Pure story chapter. | |||||
Ch 11-1 | Pure story chapter. | |||||
Ch 11-2 |  | Boss Fight! Click the Boss Information below for specifics. | ||||
Boss Information
| ||||||
Ch 12-1 | | Boss Fight! Click the Boss Information below for specifics. | ||||
Boss Information
| ||||||
Ch 12-2 | | Difficult Boss Fight! Click the Boss Information below for specifics. | ||||
Boss Information
| ||||||
Ch 13 | Pure story chapter. | |||||
Ch 14 | | Boss Fight! Click the Boss Information below for specifics. | ||||
Boss Information
| ||||||
Ch 15 | Pure story chapter. | |||||
| This is just a Spoiler Protection tab to create uncertainty for unspoiled players. There's nothing here, sadly. Go to one of the other tabs for the walkthrough. |
Singularity: Solomon
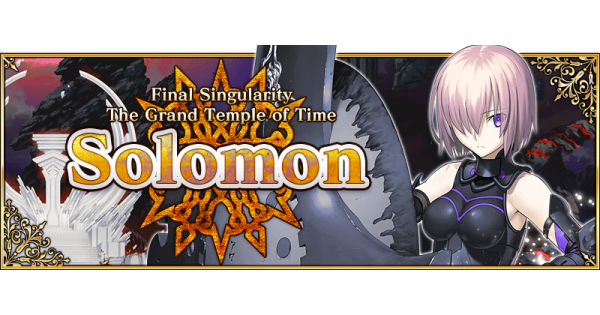

[SPOILERS] Solomon Quests