Introduction
The Walkthrough is essentially finished, barring slight errors and/or missing information. Work on the Boss Guides continues.
- The spoilers in this walkthrough are limited to what enemies you will face in a particular node.
- Every major boss and Servant encounter is initially hidden. Hover over unknown icons to see what mob/Servant is hidden via its hyperlink.
- Press the New Monster Information or Boss Information headers to see specific spoilers, advice and/or tips.
- Generally, Anastasia is rather story heavy, try not to rush through it.
- Break Bars are a standard feature once again, Masters who skipped the Epic of Remnant chapters may want to read up.
- A full Main Story clear requires 878 AP.
- Spotted an error, have a question, or ideas to improve the guide? Feel free to drop a comment on the Walkthrough forum thread or via the feedback form.
- Have fun and enjoy the story!
| Filler | Easy | Moderate | Hard | Very Hard |
| Node | Enemy Classes | Enemies & Difficulty | Notes | |||||||||
|
Prologue |
Pure Story Chapter | |||||||||||
|
St. 1-1 |
Pure Story Chapter | |||||||||||
|
St. 1-2 |
Pure Story Chapter | |||||||||||
|
St. 1-3 |
|
|
A new Monster approaches: Only Mash can be used for this encounter The fight ought to end after 3 turns. |
|||||||||
New Monster Information
|
||||||||||||
|
St. 2-1 |
Pure Story Chapter. Read an overview for the New Mystic Code here: |
|||||||||||
|
St. 2-2 |
|
|
Forced Story Support and lineup. Say hello to our new best friend. |
|||||||||
|
St. 3-1 |
|
|
A new Monster approaches: Combat now starts in earnest for this Lostbelt, although this node just consists of 3 waves of weak Yaga enemies. |
|||||||||
New Monster Information
|
||||||||||||
|
St. 3-2 |
|
|
This quest requires a bit of Single Target firepower for the final Berserker wave. The battle ends upon first Break. | |||||||||
|
St. 4-1 |
|
|
Bring some Sabers to mop up the Bicorn and Crabs. | |||||||||
New Monster Information
|
||||||||||||
|
St. 4-2 |
|
|
Giant Demon Boars rank highly on the annoying-enemy-scale. Bring a strong Single Target Servant for the final wave. | |||||||||
|
St. 5-1 |
Pure Story Chapter. | |||||||||||
|
St. 6-1 |
|
|
A new Monster approaches: Nothing special, just don't let the Berserkers overstay their welcome. |
|||||||||
New Monster Information
|
||||||||||||
|
St. 6-2 |
|
|
A new Monster approaches: More filler Yaga. |
|||||||||
New Monster Information
|
||||||||||||
|
St. 6-3 |
Pure Story Chapter. | |||||||||||
|
St. 7-1 |
Pure Story Chapter, except Masters need to make a Choice here. Choosing to avoid attention leads to path A. Choosing to fight leads to path B. Naturally path B is a lot harder, and 9 out of 10 Sizzles agree you should pick path B. |
|||||||||||
|
St. 8-A |
|
|
One large wave of Dragon lancer enemies with reinforcements. Nothing truly challenging with some Saber AoE damage. Make sure to read the mob info for the other path regardless, you'll meet those mobs soon enough. |
|||||||||
|
St. 8-B |
|
|
A new Monster approaches: Now this is much more of a challenge. This hydra variant packs 468k HP, and needs to be fought with either Casters or Berserkers. Bring some heavy Single Target firepower, or with a bit of bad luck this can turn ugly rather quickly. |
|||||||||
New Monster Information
|
||||||||||||
|
St. 9-1 |
|
|
Bring a Saber to dispose of the Bicorn. | |||||||||
|
St. 9-2 |
|
|
Battle ends after first Break. Beware of this Servant's short NP Bar and NP Charge capability. Note: NP has Sure Hit. |
|||||||||
|
St. 9-3 |
|
|
Mini Boss encounter. Click the Mini Boss Information below for specifics. |
|||||||||
Mini Boss Information
|
||||||||||||
|
St. 9-4 |
Pure Story Chapter. | |||||||||||
|
St. 10-1 |
Pure Story Chapter. | |||||||||||
|
St. 10-2 |
|
|
Bring some Saber AoE for these filler mobs. | |||||||||
|
St. 11-1 |
|
|
This is a pretty interesting node with two waves of massive reinforcements - but until the spooky Hydra appears, the mobs have extremely low HP. The best defense is a continuous offense here, but make sure to bring a strong Caster/Berserker/Alter Ego for the Hydra-type mob. |
|||||||||
|
St. 12-1 |
|
|
A new Monster approaches: Make sure to counter the Assassins in this node to speed things up. |
|||||||||
New Monster Information
|
||||||||||||
|
St. 12-2 |
|
|
An unending wave of Hunters! The battle ends upon breaking the leader's HP Bar once. | |||||||||
|
St. 12-3 |
|
|
Some beneficial effects will happen each turn, make short work of this quest. | |||||||||
|
St. 13-1 |
Pure story chapter. | |||||||||||
|
St. 13-2 |
|
|
Bring some AoE to move on quickly. | |||||||||
|
St. 13-3 |
|
|
Mini Boss encounter. Click the Mini Boss Information below for specifics. |
|||||||||
Mini Boss Information
|
||||||||||||
|
St. 14-1 |
|
|
Bring some AoE Casters/Berserkers to speed things up. | |||||||||
|
St. 14-2 |
|
|
Mini Boss encounter. Click the Mini Boss Information below for specifics. |
|||||||||
Mini Boss Information
|
||||||||||||
|
St. 15-1 |
|
|
This hydra flunkie is rather weak, bring something to blast it on the final wave and move on. | |||||||||
|
St. 16-1 |
|
|
2 waves of medium HP Berserkers, dispose of them quickly. | |||||||||
|
St. 16-2A |
|
|
Masters end up with this quest if they choose Option 1: Cutting the trees. Masters with a strong offensive Caster can go this route, but frankly neither of the two options are simple this time around. | |||||||||
|
St. 16-2B |
|
|
Masters end up with this quest if they choose Option 2: Digging a Tunnel. Masters with good AoE (spam) ought to go with this one. The quest consists of a large reinforcing wave of Giant Demon Boars, although none of the Giant Boars have very high HP. | |||||||||
|
St. 17-1 |
|
|
Filler node, all the mobs have medium-level HP. | |||||||||
|
St. 17-2 |
|
|
More of the same. | |||||||||
|
St. 17-3 |
|
|
And more medium HP mobs. | |||||||||
|
St. 17-4 |
|
|
Break the enemy's Berserker HP Bar once on wave 3 to end the fight. The boss starts with their NP Bar charged, but it is a non-damaging NP debuffing NP that isn't too worisome. They hit pretty hard though, but Masters can just have their NPs prepared for wave 3. | |||||||||
|
St. 18-1 |
|
|
Bring some decent AoE Caster Servants to speed things up. | |||||||||
|
St. 18-2 |
|
|
More of the same, clean 'em up quickly. | |||||||||
|
St. 19-1 |
|
|
The Soul Eater at the end is fairly beefy, so bring a strong single target Servant to blow it up before it starts Evading. | |||||||||
|
St. 19-2 |
Pure Story Chapter. | |||||||||||
|
St. 20-1 |
Pure Story Chapter. | |||||||||||
|
St. 20-2 |
|
|
The battle ends upon Break once more. Fortunately, Masters can again charge their NPs on wave 1. Since only a single HP Bar needs to be broken a wave of NPs from strong Single Target ought to do. | |||||||||
|
St. 20-3 |
|
|
Boss encounter. Click the Boss Information below for specifics. |
|||||||||
Boss Information
|
||||||||||||
|
St. 21-1 |
|
|
The active Mystic Code has been replaced with some new very awesome skills. This fight ends after 3 turns, but use those turns to get familiar with what each of the skills do, as they will be of great help soon. | |||||||||
New Story Mystic Code SkillsMystic Code Skills will be replaced with Golem Skills:
|
||||||||||||
|
St. 21-2 |
|
|
Boss encounter. Click the Boss Information below for specifics. |
|||||||||
Boss Information
|
||||||||||||
|
St. 21-3 |
Pure Story Chapter. | |||||||||||
|
St. 22-1 |
|
|
Mini Boss encounter. Click the Mini Boss Information below for specifics. |
|||||||||
Mini Boss Information
|
||||||||||||
|
St. 22-2 |
|
|
Boss encounter. Click the Boss Information below for specifics. |
|||||||||
Boss Information
|
||||||||||||
|
St. 22-3 |
|
|
Boss encounter. Click the Boss Information below for specifics. |
|||||||||
Boss Information
|
||||||||||||
|
St. 22-4 |
|
|
Boss encounter. Click the Boss Information below for specifics. |
|||||||||
Boss Information
|
||||||||||||


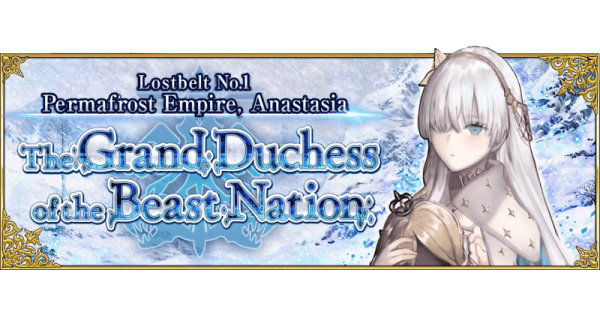
Permafrost Empire, Anastasia - The Grand Duchess of the Beast Nation
Content
Walkthrough and Boss Guides are under construction!