- Last update 02/25, fully completed/checked.
- The spoilers in this walkthrough are limited to what enemies you will face in a particular node.
- Every major boss encounter is initially hidden.
- Press the New Monster Information or Boss Information headers to see specific spoilers, advice and/or tips.
- Generally, Shinjuku is a continuation of Babylonia in difficulty. Some encounters are easier or harder depending on roster.
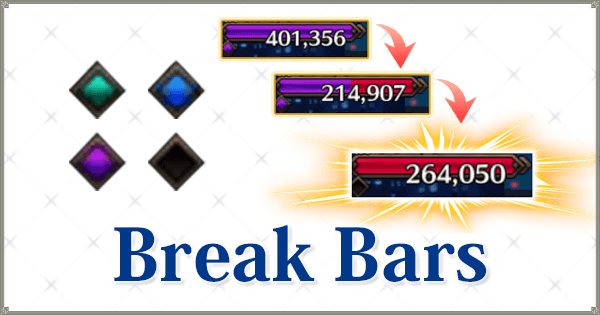
- As the first Singularity with Break Bars, bosses cannot be cleared within a single turn.
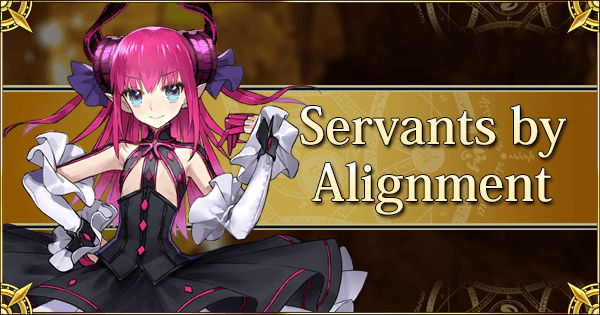
- Evil Servants receive double bond points! For veteran Masters, consider this a nice self-inflicted challenge. See the table below for a list of bonus Servants.
- General rule of thumb when using a bond bonus team is to be careful around quests marked as hard or very hard.
- Finally, there's a surprising lack of filler quests and plenty of bosses - a full clear is around 674 AP.
- Have fun and enjoy the story!
Evil Trait Servant List on Release
| Class | Evil Trait Servants |
|
|
|
|
|
|
|
|
|
|
|
|
|
|
|
|
|
|
|
|
|
|
|
|
Node Difficulty Scale
| Filler | Easy | Moderate | Hard | Very Hard |
| Node | Enemy Classes | Enemies & Difficulty | Notes | |||||||||
Ch. 1 |
A new Monster approaches: A new type of filler mob! They are relatively harmless. Click the New Enemy Information below for specifics. |
|||||||||||
New Monster Information
|
||||||||||||
Ch. 2 |
The first wave of Coloratura start with 1 bar charged. A new Monster approaches: Three waves of Assassins, third wave is pretty beefy. Click the New Enemy Information below for specifics. |
|||||||||||
New Monster Information
|
||||||||||||
Ch. 3 |
First Boss encounter. Click the Boss Information below for specifics. |
|||||||||||
Boss Information
|
||||||||||||
Ch. 4 - 1 |
Pure Story Chapter. | |||||||||||
Ch. 4 - 2 |
New monsters approach: This quest is a single wave affair with reinforcements. Every turn the entire party gets a 1 turn attack down debuff. It's not difficult, but bring Lancers to speed things up. |
|||||||||||
New Monster Information
|
||||||||||||
Ch. 5 |
a bunch of |
|||||||||||
Ch. 6 - 1 |
A new Monster approaches: Charge NP gauges on the first wave and there should be no problem. |
|||||||||||
New Monster Information
|
||||||||||||
Ch. 6 - 2 |
Second Boss encounter. Click the Boss Information below for specifics. Note: The background effects may slow your phone down. |
|||||||||||
Boss Information
|
||||||||||||
Ch. 7 |
Single wave of medium HP enemies, ideally come out the gate swinging. Their NP charge and Evasion remains annoying, but should be a quick clear. |
|||||||||||
Ch. 8 - 1 |
A continuous wave of enemy Coloratura. This quest can be dangerous if Masters stack too many weak Servants for the bonus bond points. However, it's trivial as long as the damage output keeps up with the enemy NP bars. |
|||||||||||
Ch. 8 - 2 |
Boss encounter. Click the Boss Information below for specifics. |
|||||||||||
Boss Information
|
Back to Chapter Selection | |||||||||||

| Node | Enemy Classes | Enemies & Difficulty | Notes | |||||||||
Ch. 9 - 1 |
Simple spank quest. | |||||||||||
Ch. 9 - 2 |
A new Monster approaches: A single Sprrigan-type enemy, beware and bring (an) Archer(s). Click the New Enemy Information below for specifics. |
|||||||||||
New Monster Information
|
||||||||||||
Ch. 10 - 1 |
Charge NP gauges on wave 1 to dispose of the faux-Spriggan quickly. | |||||||||||
Ch. 10 - 2 |
A new Monster approaches: Click the New Enemy Information below for specifics. Very easy single wave quest. |
|||||||||||
New Monster Information
|
||||||||||||
Ch. 11 |
Simple filler quest. | |||||||||||
Ch. 12 - 1 |
Simple filler quest. | |||||||||||
Ch. 12 - 2 |
The Massive Ghost is quite potent, but the first wave can serve to charge NP gauges. It's immune to any stun effect The ghost has a few skills: it can debuff a target's star generation for 20%, the entire party's Healing Recovery by 20%, or a 10% defense down for the entire party, each of them for 3 turns. Its special attack will heal it after 1 turn, try and not to let it charge its special attack in the first place. |
|||||||||||
Ch. 12 - 3 |
Boss encounter. Click the Boss Information below for specifics. |
|||||||||||
Boss Information
|
||||||||||||
Ch. 13 |
Boss encounter. Click the Boss Information below for specifics. |
|||||||||||
Boss Information
|
||||||||||||
Ch. 14 |
Boss encounter. Click the Boss Information below for specifics. |
|||||||||||
Boss Information
|
||||||||||||
Ch. 15 |
With 200 reinforcement, and Break Bars active, this fight looks worse than it actually is. The objective for clearing this fight is to break EMIYA (Alter)'s Break bar once. Note that the yellow Hornets will boost his NP damage, and that his NP pierces defense. His own defense buff has 3 charges, and any defense piercing NPs are very useful. Nonetheless, a competent (Lancer) team will make short work of this quest before long. |
|||||||||||
Ch. 16 - 1 |
A normal quest with increasing HP numbers. The Chimera at the end is quite beefy, have an NP ready for wave 3 to deal with it. |
|||||||||||
Ch. 16 - 2 |
A shadow Rama, with a guts buff (1 HP). Nothing truly dangerous, |
|||||||||||
Ch. 16 - 3 |
Three successive waves of beefy Lancer Spriggans. Bring some powerful (ST) Sabers, and keep up the pace. They are, as usual, brutal with multiple critical buffs. |
|||||||||||
Ch. 16 - 4 |
A final "normal" monster quest. Charge NPs on the first wave, then quickly delete the chimeras in the final wave with NPs before they start critting. |
|||||||||||
Ch. 17 - 1 |
Boss encounter. Click the Boss Information below for specifics. |
|||||||||||
Boss Information
|
||||||||||||
Ch. 17 - 2 |
Boss encounter. Click the Boss Information below for specifics. |
|||||||||||
Boss Information
|
||||||||||||
Ch. 18 |
Boss encounter. Click the Boss Information below for specifics. |
|||||||||||
Boss Information
|
Back to Chapter Selection | |||||||||||
| This is just a Spoiler Protection tab to create uncertainty for unspoiled players. There's nothing here, sadly. Go to one of the other tabs for the walkthrough. |