Preword
Rashomon is the first event in the North America (or Global) server that truly pushes the limits of difficulty. While it is a very daunting and demanding event due to the how hard-hitting the main event boss is, and how many times the main event boss must be defeated, preparation can ease a lot of pain when encountering the deadly oni.
This is by no means a complete guide on the event, but is intended to be a recommendation for what Servants a player can prepare (through leveling, ascending, raising skill levels or finishing their Interludes/Strengthening Quests) to not be overwhelmed by Ibaraki when she comes.
Servant Role Classification
In FGO, Servants’ roles are clearly defined. Prior to Rashomon however, the specialties of many Servants were never fully tested or exploited, as the content difficulty was not demanding enough for that level of attentiveness to detail and min-maxing.
With Rashomon however, one false move can lead to a wipe, particularly on 6m HP Ibaraki’s battle. Servants’ specialties become more than needed, and jack of all trades will most likely find themselves on the sidelines for this event.
Understanding the Servant role archetypes will help when constructing a team, as well as crafting a successful and reliable strategy to take on Ibaraki not one, nor two, but multiple times in a row.
Damage Dealers Aka the Brute
The heart of any team is the main Damage Dealer. Unlike story mission or previous events where 3 damage dealers or even two damage dealers in a main party can just brute force through, Rashomon’s event mechanic is more inhibiting in this regard, forcing most players to go for one true main damage dealer and a supportive cast. For this reason, we suggest focusing on one or two heavy hitters for the event and build a team around said unit.

The Hindu hero is particularly effective at two things: Buster Crit and taking out Magical enemies (which Ibaraki is). With Golden Carp being one of the main Craft Essences for this event, Rama gets even more reliable thanks to the supply of Stars he can get from it. While his NP generation is quite poor, his raw damage output is incredible and his lower cost compared to a 5 stars Servant means he is an amazing prospect for any team.

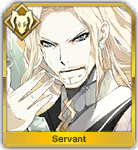
Contrary to most of the recommended Damage Dealers, Gilgamesh does not have a single target Noble Phantasm. However, his bonus modifier on his Noble Phantasm is frightening, and its nature as an AoE Noble Phantasm can allow him to wipe out the hands of Ibaraki effectively during the same turn. Gilgamesh operates very similar to Rama, relying on Buster Brave Chains fueled by the Critical Stars from Golden Carp with his Noble Phantasm leading the chain for maximum damage.
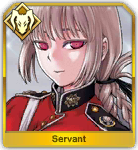
The queen of Buster Crit, Jeanne Alter, is easily one of the best abusers of buff stacking and the Golden Carp stacking strategy. Thanks to her enormous base attack and incredible steroids, Jeanne Alter can decimate Ibaraki with a well-timed Brave Chain. Jeanne Alter’s main problem, however, is that she is incredibly squishy and require good management to keep her alive until she can deliver the big blow. Nonetheless, if you already possess the dark saint, then look no further as she is the cream of the crop for this event.
Thanks to her massive bonus damage against females, Jack the Ripper is very capable of delivering big numbers with Maria the Ripper. Moreover, her NP generation is top notch and she can chain multiple Noble Phantasms in quick succession as long as the cards are right. Jack the Ripper, however, has very poor normal card damage, and as such the team can collapse if she cannot get her Noble Phantasm ready in time.
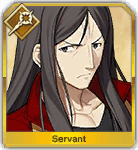
Scathach does not have any bonus modifier against Ibaraki Douji, nor is she a reliable Critical Damage Dealer to take advantage of the Event’s Craft Essences. However, what she can bring to the table is the single most reliable Stun packed into her hard hitting Noble Phantasm, making her amazingly well-suited to handle Ibaraki over several turns. Scathach’s downsides are her inconsistent NP generation as well as Star Absorbtion, and there will be time where RNG will dampen her damage output.

Often underestimated by the playerbase due to her unattractive Arts-based deck and generic skillset, Orion (after her Interlude) is one of the best boss slayers in the game. Orion has a vastly different playstyle compared to other damage dealers on this list, focused on both doing big numbers while controlling Ibaraki’s NP bar at the same time. Her Noble Phantasm is hard hitting, is guaranteed to drain 1 charge from Ibaraki’s NP gauge post-interlude, and lowers her Critical Damage chance, making it incredibly powerful in the right setup. Unfortunately, “right setup” is also her downfall. Orion requires a very expensive team to work, as she needs powerful Arts support to facilitate her Noble Phantasm being used several times over the course of the battle. Tamamo no Mae and Zhuge Liang are easily her two best friends, and while other supports may work to a certain degree, Orion’s effectiveness would go down dramatically.
Robin works in the same setup as Orion, but he is a lot more nuke-oriented as opposed to boss control. His Noble Phantasm is one of the hardest hitting ones in the game, and thanks to his low cost and easily accessible status, a NP 5 Robin is a serious breadwinner for the team. Robin however requires even more babysitting than Orion, as he is all about that nuke. Without an extensive lineup of strong support to provide him the steroid he needs, Robin’s damage output can be frustrating.
Honorable Mentions
 Okita Souji Okita Souji |
 Vlad III Vlad III |
 Sakata Kintoki Sakata Kintoki |
Supports AKA the Buff Bot
It is not an exaggeration to say a Support makes a Damage Dealer, not the other way around. Supports in Fate Grand Order are easily the most important and game-defining type of Servants. In Rashomon, SSR Supports like Zhuge Liang or Tamamo no Mae often define the composition and strategy that one can utilize. Getting strong Supports (either through punching the gacha god in the face, or by seducing that rich whale on reddit for his Friend Code) can lessen the pain from Ibaraki tremendously.
Whatever people call him, he is by far the single most important Servant for Rashomon. Getting a Support Zhuge Liang is highly recommended, even if you already have your own Zhuge Liang. He fits in every single team archetype that one can think of for this event thanks to his arsenal of powerful buffs and NP charging abilities. Stacking two Zhuge Liang alongside a hard hitting damage dealer is an incredibly consistent strategy that can get anyone over 99% of FGO content without much trouble, let alone one smol demon.
The core of Arts teams. With Tamamo no Mae, any Arts team, be it for stalling or for nuking, can be viable against Ibaraki. While she is obviously less versatile than Zhuge, her specialization cannot be undermined. With Robin Hood and Orion being prominent damage dealers for this event, Tamamo is an easy pick for players opting for Art teams.
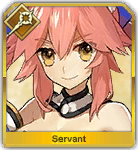
Possessing the currently best Buster buff in the game, it would be an egregious omission not to mention Nightingale. Her Berserker class won’t be as hindering to her as in other events, due to Ibaraki being a Berserker herself. Nightingale is only well-suited for Buster-centric teams, but due to many Buster damage dealers lacking a Buster card performance self-buff (such as Rama or GIlgamesh), her buff is incredibly valuable. Furthermore, Nightingale has an emergency heal to buy more time until the right Brave Chain is ready.

Shota Dio’s biggest advantage is his instant NP charge to himself and his low cost. Andersen can easily slot in any team thanks to how good his buffs are on most of the main damage dealers for this event, and is a prominent carrier of Golden Carp to pull off his Noble Phantasm immediately (to buff first turn or to help raising certain Servants overcharge effect, such as Jack or Rama, by using his Noble Phantasm before theirs). He is, however, incredibly frail and should not be expected to last long on the battlefield.

Nero Bride fits the mould of a hybrid support/damage dealer thanks to her potent buffs. She is versatile enough to put in most teams as her buffs are strong on any recipient. As a dedicated support however, she is not the best carrier of Golden Carp due to her high party cost, and often will compete with Zhuge Liang or Tamamo no Mae for a slot in the team, as her support capability in the long run is not at their level.

Despite both of them having not received their respective strengthening quest yet, these two low rarity Casters are both incredibly useful and cheap to max. Both provide hefty card performance boosts to their respective party (Shakespeare for Buster and Mozart for Arts) with very low Party cost and minimum investment. They are, however, bad at everything else and are often used in conjunction with Chaldea Combat Uniform to get them out immediately after using their buffs.
Stallers AKA Insurance Policy
A sub-archetype of Support, these Servants are mainly focused on improving the survivability of the team. As Rashomon’s boss battle has a limit of 15 turns, stalling is a legitimate option for players without hard-hitting Servants. Even for offensive teams, having options off the backline who can provide one or two turns of protection to wait for cooldown recovery is incredibly valuable. Support from these Servants can range from Taunt, Healing, Invulnerability/Dodge Buffs or any combination of these.
If you haven’t paid attention to your precious kouhai already, then this event is a good excuse to start doing so. Mash’s skills are incredibly useful in tough situations, as she possesses three amazing support skills that vastly improve the team’s survival. Her Taunt + Invulnerability can help buy two turns when used right, and her 0 Party Cost makes her invaluable for carrying event Craft Essences. It is worth noting that Mash is also the only Servant in the game that does not take bonus damage from Ibaraki, and thus she can last much longer than most.
Medea Lily is the best healer in the game and is the quintessential “I want to heal now” button. With High Speed Divine Words, she can immediately bring the party to full health without the need to rely on CEs or teammates with NP charge. Her main problem is that she is a 4 star with next to no combat ability, so she will take party cost from other potential offensive supports or Craft Essences, while also being pretty much useless after using her Noble Phantasm.
He has one of the best Taunt in the game that last for 3 turns, making him a very effective unit to buy time. Similar to Medea Lily however, D’eon has very little combat ability and costs more than other taunters like George or Leonidas.
Last Stand Servants or Zombie
Sometimes things just don’t go the way they are supposed to. Every teamcomp can get blindsided or screwed by RNG factors like random crits or bad card layouts. Fortunately, killing Ibaraki is not the only way to win the battle, and trying to outlast her within 15 turns is a valid option. It is always a good idea to have a backup plan in case things go wrong, and having a guy who can last several turns in a row to get to that magical number of 15 turns can be a life saver (or AP saver in this case). Do note that the job of these Servants are different from the Taunters, as they can only operate as the last man standing on the field to abuse the Guts mechanic in the game, and their job isn’t to take attention away from their more important teammates, but as the last resort.
Dying is not in Herc’s dictionary, especially after he gets his Bond Craft Essence. With effectively 4 Guts buffs and an on-demand dodge, Herc can buy time like no other as the last man, with the added benefits of being able to do Buster Brave Chains every turn for some much needed Damage Points.
After completing her Strengthening Quest (requires clearing London), Nero gains an incredible survival skill in Thrice Setting Sun, allowing to come back to life for three times within 5 turns, which essentially allows her to buy 3 whole turns if she is the last member of the team. As doing strengthening quests are much easier and faster than getting Bond Level 10, Nero Claudius would be the go-to choice for players who possess her.
The most accessible Servant of this archetype. Thanks to the combination of Protection from Arrows and Battle Continuation, Cu Chulainn can buy at least two turns for the team and is fairly easy to raise as well, requiring little investment for the job. Furthermore, Cu Chulainn also has lower cost than Heracles and Nero due to him being a 3 star.