

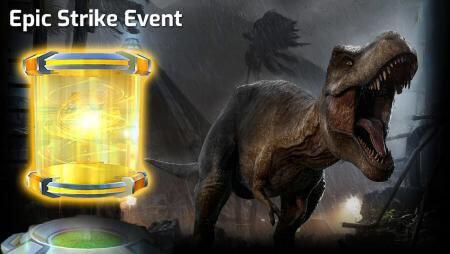
Jurassic World Alive: Baryonyx Strike Guide
Explorers!
We've got another powerful epic strike today and if you're not sure where to start, we've got you covered! But before we get into our tips and tricks for beating these fierce foes, we have to say the following obligatory statements:
These strikes with 3 level 30's are extremely challenging for low level players. If your highest rarity creature is an epic, you are going to really struggle to beat this strike, particularly because any set of three level 30's is going to mean you need to survive a long time to win and teams of lower level creatures generally can't kick out the damage necessary to do so.
Let's dive into the guide!
Enemy
Big thanks to OrangeRex for our amazing graphics as always. Check out OrangeRex on Instagram.
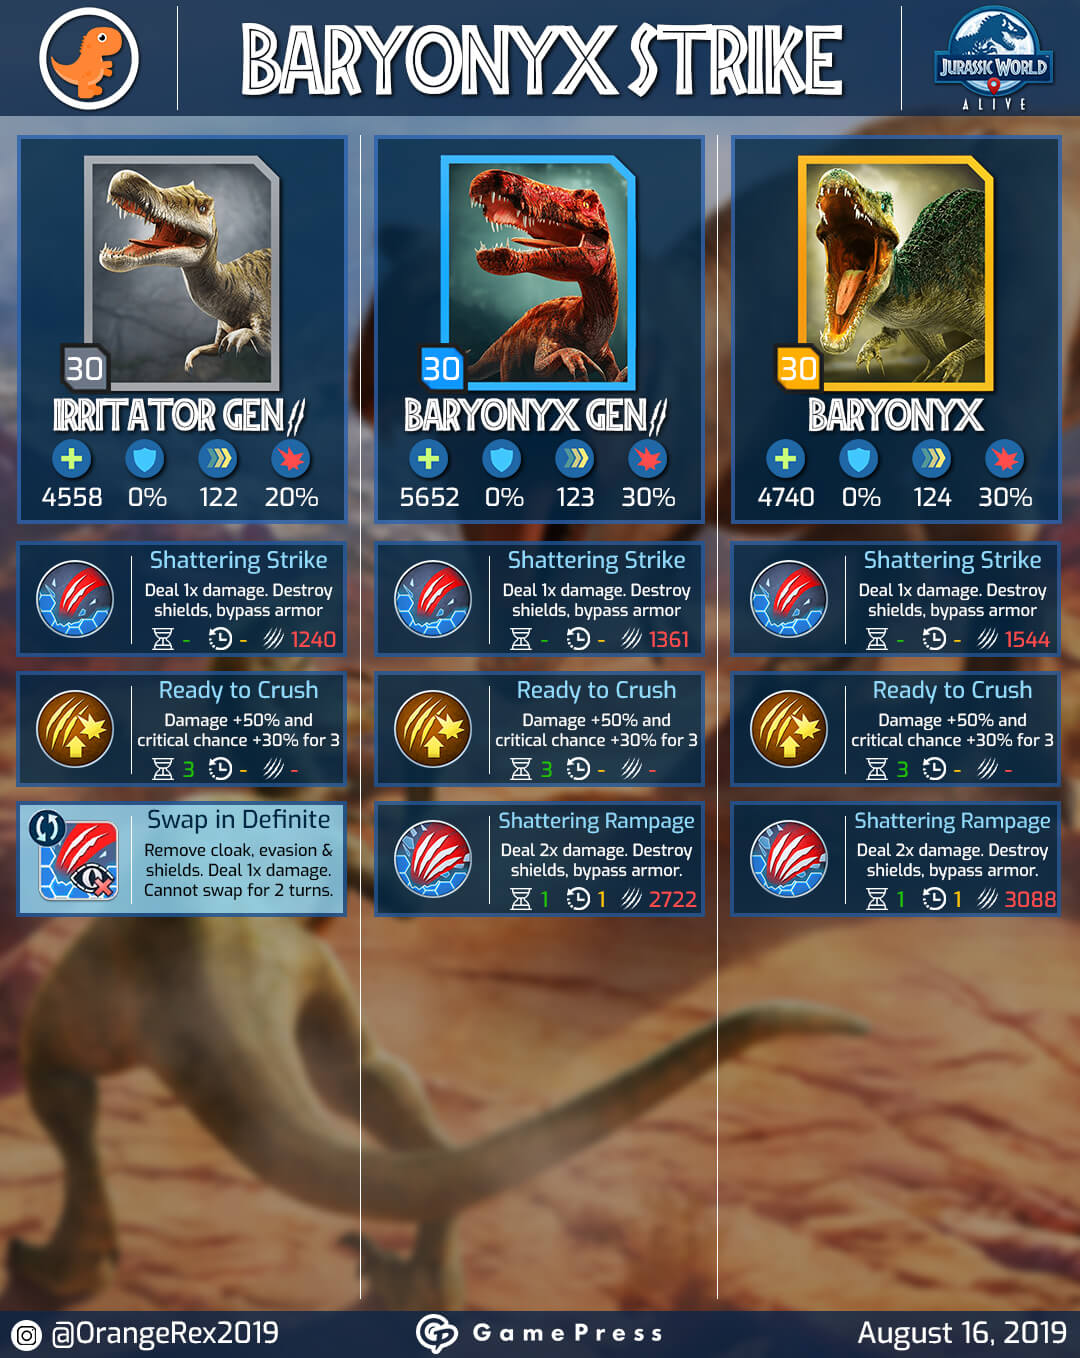
Baryonyx is the master of the one-two punch. At 124 speed, it is often faster than other unboosted creatures. And by using Ready to Crush (buffs damage 50% and crit rate 30%) and the massive Defense Shattering Rampage, it can kick out enough damage to make anything feel the pain. At level 30 without R2C, that damage is 3088. With it, it's 4632. With a critical hit, it's 5790. That's one strong hit.
But lucky for us, the computer loves swapping so much that it prioritizes swapping moves over most everything else (including one-two punches and setup moves) so often Baryonyx will enter the arena, use Ready to Crush, then swap into something like Irrirator Gen 2 for that swap in strike.
But the other two creatures in this strike event are no slouches either.
While Irritator Gen 2 may look innocent enough, that swap in strike and combo of ready to crush and defense shattering strike can cause a lot of pain if you can't dispatch it fast enough.
And Baryonyx Gen 2 is just a higher health and slighly slower version of Baryonyx. So how do you possibly stand a chance defeating these foes? Well there's a few ways to pull it off. Here are my three rules to beating these beasts:
Be faster. Hit harder. Bring Distraction/Nullification.
Let's jump into the low level counter guide.
Low Level Counter Guide
Possible Counters:
- Allosaurus
- Tanycolagreus
- Dracorex Gen 2
- Procerathomimus
- Suchotator
- Tyrannosaurus Rex
- Tyrannosaurus Rex Gen 2
- Stegoceratops
Now, if you have something in your arsenal that can do all three (be faster, hit harder, and distract/nullify) then by all means, use it. None of these Bary's have anything close to armor plating, so if you've got something faster than Bary that can kick out 2500 damage per turn, use it. If not, you're looking for some of the beefier options to run cleanup against these beasts. But here are some tips.
The One-Two Punch Requires A Two
Alone, a Baryonyx can really cause heartache in the arena. As a closer, it can be devastating when you don't see it coming and can't slow it down. But among two other one-two punch types in a line, what you're looking at is a length of time race. Because these creatures will ALWAYS buff before striking, that means you ALWAYS get a free turn off before you take the big hit. You need to use this to your advantage.
Stegoceratops can help by slowing down Baryonyx and then stunning it on the next turn. Things that slow and stun are going to do well. And swap in rampage is also your friend. Send out Stegoceratops as a lead and see if you can't take one out with a lucky stun chain.
Another clever strategy is using a slower chomper paired with a swap in dodge or swap in rampage. Since we know when the "two" punch is coming, putting in a T-rex for that massive Defense Shattering Impact and then swapping into either a 100% dodge creature like Monomimus or even Phorusrhascos (who will still take 33% of the total damage but with a decent level it should survive hopefully) should help you a lot.
And while bleeding (lethal wound) is normally a great strategy, It may be a bit too long of a play for a strike like this. After all, it takes 3 turns to bleed something with lethal wound. And that means you'll take at least one or two one-two punches while you wait to bleed out teams. But Suchotator could still be a great option as an opener. Since the AI should swap on turn one or turn two -- using Lethal wound as a first move is a free 33% hit, and you'll likely get to use it again by having instant distract in the back pocket to take one big one-two punch. Plus the nullifying helps to make those one-two punches a lot more manageable.
Just don't rely on Suchotator to carry you through 3 bleed-out sessions and we wouldn't recommend stacking a team of bleeders.
In the same line of thinking, Carnotaurus and other rending counter attackers like Purutaurus aren't going to be a best bet here either. You need to take a hit with those creatures in order to get that counter attack damage, and you likely won't survive the hit you've gotta take.
Still, as we said before, speed boosts change everything. If you've got something speed-boosted above 124, use it. Especially if it kicks out a lot of damage fast.
In Conclusion:
Strikes with 3 level 30's -- even in a boosted world -- can be a real challenge for early players. Low level guides are hard to come by and vary greatly based on the level of dinos on your team, and what you've invested boosts into (if you've unlocked boosts). So above all else, stick to what you think will work, but if you don't have legendary dinosaurs and are looking for some other creative strategies, use the above and see if you can't pull off a win!
For more tips and tricks, or to find dinosaurs enthusiasts like you, be sure to join our discord server with the link below and jump into the conversation!
Good luck explorers!

