


Stats


Races
Element Type Chart


Character Shots

 | Solo | Moon-Eating Dragon   | x6 | Yin |  |
| Solo | Moon-Licking Dragon   | x2 | Yin | 1 |
| Solo | Moon-Munching Dragon | x2 | Yin | 2 |
| Solo | Moon-Biting Dragon  | x2 | Yin | 2 |
| Solo | Moon-Chewing Dragon | x2 | Yin | 2 |
| Solo | Moon-Devouring Dragon | x2 | Yin | 3 |

| All | Dragon Stomp  | x3 | Yin | |
| All | War Dragon  | x2 | Yin | 1 |
| All | Dragon Slam | x2 | Yin | 2 |
| All | Attack Dragon | x2 | Yin | 2 |
| All | Dragon Crash | x2 | Yin | 2 |
| All | Bombing Dragon  | x2 | Yin | 3 |
Character Spell Cards


|
All |
Malicious Lily

|
x16 | Yin |
|
|
|
All |
Malicious Morning Star Lily

|
x4 | Yin | 1 |
|
|
All |
Malicious See-Through Lily

|
x4 | Yin | 2 |
|
|
All |
Malicious Coral Lily
|
x4 | Yin | 2 |
|
|
All |
Malicious Tiger Lily
|
x4 | Yin | 3 |
|
|
All |
Malicious Green-Tinge Spiderlily
|
x4 | Yin | 3 |

|
|
Solo |
Mandala of Logic
|
x22 | Yin |
|
|
|
Solo |
Mandala of Thought

|
x4 | Yin | 1 |
|
|
Solo |
Mandala of Emotion

|
x4 | Yin | 2 |
|
|
Solo |
Mandala of Illogic
|
x3 | Yin | 2 |
|
|
Solo |
Mandala of Sensation

|
x3 | Yin | 3 |
|
|
Solo |
Mandala of Intuition
|
x2 | Yin | 3 |

|
All |
Perfectly Mixed Color
|
x20 | Yin |
|
|
|
All |
Perfectly Lengthed Time

|
x4 | Yin | 1 |
|
|
All |
Perfectly Flat Space
|
x4 | Yin | 2 |
|
|
All |
Perfectly Realized Will
|
x4 | Yin | 3 |
|
|
All |
Perfectly Organized Thoughts
|
x4 | Yin | 3 |
|
|
All |
Perfectly Permeated Mind
|
x4 | Yin | 3 |
Character Ability
Character Skills
Character Characteristics
 Character Change Effect
When switching places with a front-guard unit, front guard's Spirit Power UP.
Upgrade Costs
| Rank | Coins | Materials |
|---|---|---|
| 0 -> 1 | 1000 | |
| 1 -> 2 | 2,000 | |
| 2 -> 3 | 5,000 | |
| 3 -> 4 | 10,000 | |
| 4 -> 5 | 15,000 |


Character Analysis
B2 Junko was released on March 31st, 2022 in "Ultra Festival Prayer: Nameless Space Terror." For more up-to-date analysis, be sure to visit the ![]() Official Discord Server.
Official Discord Server.
The B3 universe Lunar Capital is under constant attack from kaiju, which the likes of Kannagi (B3 Yorihime), Otohime (B3 Toyohime), Azusa (B3 Sagume) and the others protect the Capital from. And perhaps the most terrifyingly powerful of them all is Junko, the Nameless Space Terror. Much like her universe L1 form, she is driven by her unfettered desire to crush the Lunar Capital underfoot, only in this universe it's unknown what her motivations for this are. Universe L1 Junko's ability, to "purify", seems to be present in this Junko as well; but there is still too much mystery surrounding her to say for sure that it is the same. All that is for sure is that she is a true threat to the peace of the Lunar Capital, and that her hatred for Chang'e remains true, even if the reasoning may be different.
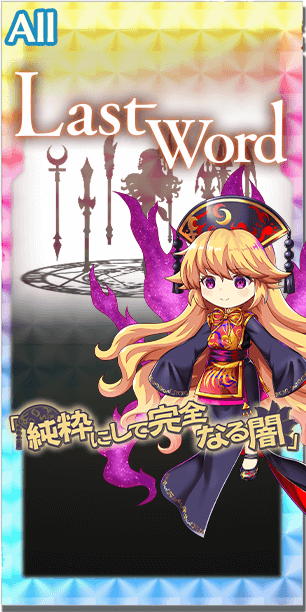
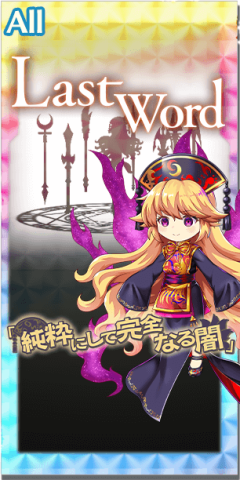
Farming wise, Junko is nothing short of amazing. Her Last Word, Pure and Perfect Darkness has NO elements, which allows it to deal consistent damage regardless of enemies' resistances. She pairs this consistency with powerful buffs and debuffs on her skills. For story card farms, she can farm The Witch of Scarlet Dreams (2-7-1) at 8 SP, Mysterious Sword Master (3-3-3) at 8 SP, The Secret God of the Sky (3-6-3) at 12 SP, Puppeteer and Necromancer (3-11-1) at 8 SP, as well as a future story card stage at 8 SP. However, using Junko to farm 3-6-3 is not recommended because her awakening scaling isn’t as useful generally.
When it comes to challenging content, Junko is an extremely powerful character when fit with the right tools. Her 1st skill, Fear Purification, gives 2 stages of Yin DEF and CRIT Evasion down to all enemies as well as inflicting 3 Freeze anomalies to a targeted enemy. These debuffs allow her to brute force her way through enemies while also setting up damage from other characters with a high CRIT rate. Her 3rd skill, Grudge Purification, also gives team support with 2 stages of Yin ATK up, 3 stages of Accuracy up, as well as 0.5 P to the party. Finally, her 2nd skill, Impurity Purification, selfishly gives her 1.25 P and charge, while also inflicting 3 poison to the targeted enemy for her role to break barriers. Her 1st spell card, Malicious Lily, provides 2 stages of CRIT DEF down and 1 burn anomaly to all enemies for 2 turns while also inflicting 1 extra burn anomaly to an enemy you target. Her spread shot, Little Moon Eater, is notable as it also provides 100% Yin ATK up to herself for 3 turns at 1P.
Her ability to both inflict and break anomalies make her a strong contender for being the best breaker in the game alongside the right teammates. Her spread shot is filled with Star breaks and refunds enough power to repeatedly use 2 boosts as long as her Accuracy is supported. Her 1st spell card breaks both burn and poison anomalies, which already synergize with its burn anomaly inflicting pre-effect and her 2nd skill which applies poison. Her 2nd spell card, Psychedelic Mandela, breaks freeze, paralysis, and blind anomalies. However, the blind anomaly is back loaded which makes it impractical to use for the most part. While her anomaly breaking potential is powerful, it can be chaotic to use. Her 1st passive, Pitch-Black Nebula, is difficult to utilize outside of single enemies due to its random nature and Junko’s relatively hard time accessing blind breaks.
Ultimately, Junko has a kit that is oriented around barrier breaking with anomalies and outputting insane non-elemental damage. While she may need team support to bring out her full potential, she will purify anything that goes her way with no remorse. No matter which way you put it, she won't play around.
Here are the relevant scalings which Junko has:
Spread shot (Little Moon Eater):
Self Yin ATK up (3 turns): 0%/100%/0%/0%/0%/0%
Hard: 0%/0%/0%/40%/0%/0%
Poison Spray (1 poison anomaly for 3 turns): 100%/0%/0%/0%/0%/0%
Focus Shot (Chipper Dragon):
Hard: 40%/0%/40%/0%/0%/0%
Self Yin DEF up (3 turns): 50%/0%/0%/0%/0%/0%
Enemy CRIT DEF down (3 turns): 0%/35%/0%/50%/0%/0%
Fire Bomb (1 burn anomaly for 3 turns): 0%/0%/0%/0%/0%/100%
1st Spell Card:
Self Yin DEF up (3 turns): 0%/100%/0%/100% (2 stages)/0%/0%
2nd Spell Card:
Self Yin DEF up (3 turns): 0%/100%/100% (2 stages)/0%/0%/0%
Last Word:
Hard: 160%/0%/0%/0%/0%/0%/
Enemy Yin DEF down (3 turns): 0%/100%/0%/0%/0%/0%
Self Yin DEF up (3 turns): 0%/0%/100%/0%/0%/0%
Self Yin ATK up (3 turns): 0%/0%/100%/0%/0%/0%
Story Card Recommendations
(Card recommendations last updated on July 05, 2023)
Spell Card
Spirit Power especially valuable for B2 Junko as she is very power hungry with her spell cards in order to reach her anomaly breaks and the like. For setting up, cards like Miracle Mallet helps a lot with CRIT ATK buffs, especially with how wide ranged her Killers are. Yin ATK buffing cards like Overwhelming Firepower will help make her damage numbers get even higher! If you want to combine the CRIT ATK and Yin ATK buffs though, as well as give them a long duration, New Year's Shrine Visit VI covers this perfectly! Finally, if you just plan to use her Spell Cards for pure damage for some reason instead of set up for her Last Word, you can use cards like Puppeteer and Necromancer as well as Infinity Garden for a 50% Boost in either Non-Elemental or Laser bullets.
Last Word
Puppeteer and Necromancer would be the best slot for B2 Junko as it gives her stats as well as a boost in 50% Non-elemental bullets. On the other hand, we also have +50% Slash in the form of Mysterious Sword Master, a viable alternative. There is also The Moon and Izayoi with the same Slash effect, minus its +2 Accuracy boost, although it's hard to find a situation to use this over Mysterious Sword Master.
Character Skill Level Up Recommendations
Junko wants her 2nd skill raised up first as it grants her the most power for her to add to her attacks. Next, you can focus on her 1st skill to help optimize damage as Yin DEF down will increase her damage more than her 3rd skill. Finally, her 3rd skill should be raised up as it’s powerful team support. However, if you want to use Junko as a team supporter, it may be better to raise her 1st and 3rd skills first before her 2nd skill.
Character Strengths
Amazing Anomaly Breaks
B2 Junko has a ridiculously high amount of anomaly breaks. Spell Card 1 inflicts Burn and breaks Poison and Burn at 1P and 2P respectively, Spell Card 2 inflicts Paralyze on a target, then breaks Freeze, Paralyze and Blind at 1P, 2P and 3P respectively, then her Last Word breaks them all! On top of this, Skills 1 and 2 subject an enemy to 3 layers of Freeze and Poison respectively and has a Passive that always inflicts an enemy with Blind every turn.
Decent Skill Utility
B2 Junko carries what you would typically expect in a strong attacker. She has both Yin ATK buffs and Yin DEF debuffs, a fair amount of Hard scaling on her Last Word and an immensely wide Killer range to seal the deal, meaning she will be seeing Critical Hits all day and every day.
Decent Skill Utility
While B2 Junko's focus isn't to buff her allies, she ends up doing well to support them anyway. Skill 3’s buffs are party-wide, providing a good amount of Yin ATK, Accuracy, and even some Spirit Power to all allies. Additionally, the Yin DEF debuffs and anomaly inflictions that B2 Junko applies to foes are indirectly buffs to other Friends as well due to being able to take advantage of the crippled opponents.
Cannot Be Fully Broken in a Conventional Battle
It is even impossible to Full Break B2 Junko! She has no elemental weaknesses and is immune to every anomaly in the game, meaning she just cannot break her own barriers. It is unfortunate that she does not gain buffs from Grazing, as there would be no concern about being Full Broken after using all of her barriers. Do note however that if Junko’s Ability is sealed as a result of specific VS Divergent Spirits Special Rules, she becomes susceptible to being anomaly broken. However, that won’t be an issue much of the time.
Character Weaknesses
Breaking Potential can End up Being Awkward
When it comes down to it, an elephant in the room regarding B2 Junko’s kit is her Spell Cards and their elements just vanishing. There is her Spread Shot with 6 Star Bullet Lines, but outside of that, even her anomaly inflictions could find themselves clashing with each other, especially if you don’t plan them out accordingly.
Lacking CRIT ATK Buffs in Kit
With an incredible Killer range, it’s a shame B2 Junko kit doesn’t take more advantage of those guaranteed CRITs due to her lacking CRIT ATK buffs. And while her Spell Card 1 reduces the CRIT DEF of her enemies a bit, it’s not quite satisfactory enough sadly.


Spirit Power especially valuable for B2 Junko as she is very power hungry with her spell cards in order to reach her anomaly breaks and the like. For setting up, cards like Miracle Mallet helps a lot with CRIT ATK buffs, especially with how wide ranged her Killers are. Yin ATK buffing cards like Overwhelming Firepower will help make her damage numbers get even higher! If you want to combine the CRIT ATK and Yin ATK buffs though, as well as give them a long duration, New Year's Shrine Visit VI covers this perfectly! Finally, if you just plan to use her Spell Cards for pure damage for some reason instead of set up for her Last Word, you can use cards like Puppeteer and Necromancer as well as Infinity Garden for a 50% Boost in either Non-Elemental or Laser bullets.


Puppeteer and Necromancer would be the best slot for B2 Junko as it gives her stats as well as a boost in 50% Non-elemental bullets. On the other hand, we also have +50% Slash in the form of Mysterious Sword Master, a viable alternative. There is also The Moon and Izayoi with the same Slash effect, minus its +2 Accuracy boost, although it's hard to find a situation to use this over Mysterious Sword Master.
Junko wants her 2nd skill raised up first as it grants her the most power for her to add to her attacks. Next, you can focus on her 1st skill to help optimize damage as Yin DEF down will increase her damage more than her 3rd skill. Finally, her 3rd skill should be raised up as it’s powerful team support. However, if you want to use Junko as a team supporter, it may be better to raise her 1st and 3rd skills first before her 2nd skill.
Amazing Anomaly Breaks
B2 Junko has a ridiculously high amount of anomaly breaks. Spell Card 1 inflicts Burn and breaks Poison and Burn at 1P and 2P respectively, Spell Card 2 inflicts Paralyze on a target, then breaks Freeze, Paralyze and Blind at 1P, 2P and 3P respectively, then her Last Word breaks them all! On top of this, Skills 1 and 2 subject an enemy to 3 layers of Freeze and Poison respectively and has a Passive that always inflicts an enemy with Blind every turn.
Decent Skill Utility
B2 Junko carries what you would typically expect in a strong attacker. She has both Yin ATK buffs and Yin DEF debuffs, a fair amount of Hard scaling on her Last Word and an immensely wide Killer range to seal the deal, meaning she will be seeing Critical Hits all day and every day.
Decent Skill Utility
While B2 Junko's focus isn't to buff her allies, she ends up doing well to support them anyway. Skill 3’s buffs are party-wide, providing a good amount of Yin ATK, Accuracy, and even some Spirit Power to all allies. Additionally, the Yin DEF debuffs and anomaly inflictions that B2 Junko applies to foes are indirectly buffs to other Friends as well due to being able to take advantage of the crippled opponents.
Cannot Be Fully Broken in a Conventional Battle
It is even impossible to Full Break B2 Junko! She has no elemental weaknesses and is immune to every anomaly in the game, meaning she just cannot break her own barriers. It is unfortunate that she does not gain buffs from Grazing, as there would be no concern about being Full Broken after using all of her barriers. Do note however that if Junko’s Ability is sealed as a result of specific VS Divergent Spirits Special Rules, she becomes susceptible to being anomaly broken. However, that won’t be an issue much of the time.
Breaking Potential can End up Being Awkward
When it comes down to it, an elephant in the room regarding B2 Junko’s kit is her Spell Cards and their elements just vanishing. There is her Spread Shot with 6 Star Bullet Lines, but outside of that, even her anomaly inflictions could find themselves clashing with each other, especially if you don’t plan them out accordingly.
Lacking CRIT ATK Buffs in Kit
With an incredible Killer range, it’s a shame B2 Junko kit doesn’t take more advantage of those guaranteed CRITs due to her lacking CRIT ATK buffs. And while her Spell Card 1 reduces the CRIT DEF of her enemies a bit, it’s not quite satisfactory enough sadly.