


Stats


Races
Element Type Chart


Character Shots

 | Solo | Non-Existent White Raven       | x8 | Yin |  |
| Solo | Little White Raven | x2 | Yin | 1 |
| Solo | Regular White Raven | x2 | Yang | 1 |
| Solo | Big White Raven  | x2 | Yang | 1 |
| Solo | Giant White Raven | x2 | Yin | 2 |
| Solo | Devil's White Raven | x2 | Yin | 3 |

 | All | Cat in a Box   | x4 | Yin | |
| All | Black Cat in a Box | x2 | Yin | 1 |
| All | Calico Cat in a Box   | x2 | Yin | 1 |
| All | Tiger Cat in a Box   | x2 | Yin | 2 |
| All | White Cat in a Box | x2 | Yin | 2 |
| All | Bakeneko in a Box | x2 | Yang | 3 |
Character Spell Cards
But if you can grasp the positions and momentums of a given moment, you can determine the past and the future. It is exactly the same with right and left, up and down, or forward and backward.

|
Solo |
Front-Back Coordinates Control Bullet

|
x14 | Yin |
|
|
|
Solo |
Left-Right Coordinates Control Bullet
|
x4 | Yin | 1 |
|
|
Solo |
Vertical Coordinates Control Bullet
|
x4 | Yin | 1 |
|
|
Solo |
Front-Back Momentum Control Bullet
|
x3 | Yin | 2 |
|
|
Solo |
Left-Right Momentum Control Bullet
|
x3 | Yin | 2 |
|
|
Solo |
Vertical Momentum Control Bullet
|
x3 | Yin | 3 |


|
All |
Older Brother's Spaceship Bullet
|
x17 | Yin |
|

|
All |
Younger Brother's Earth Bullet

|
x4 | Yang | 1 |
|
|
All |
Light-Speed Ship Bullet
|
x4 | Yin | 2 |
|
|
All |
Stand By to Return Bullet

|
x3 | Yang | 2 |
|
|
All |
Light-Speed Return Bullet
|
x3 | Yin | 2 |
|
|
All |
Welcome Return Bullet
|
x3 | Yang | 3 |

|
All |
Information Machine Engine
|
x18 | Yin |
|
|
|
All |
Information Machine Gear
|
x5 | Yin | 1 |
|
|
All |
Information Machine Chain
|
x5 | Yin | 1 |
|
|
All |
Information Machine Bearing
|
x4 | Yin | 1 |
|
|
All |
Information Machine Spring
|
x4 | Yin | 2 |
|
|
All |
Information Machine Shaft
|
x3 | Yin | 3 |
Character Ability
Character Skills
Character Characteristics
 Character Change Effect
When switching places with a front-guard unit, heals front-guard unit's Barrier Status.
Upgrade Costs
| Rank | Coins | Materials |
|---|---|---|
| 0 -> 1 | 1000 | |
| 1 -> 2 | 2,000 | |
| 2 -> 3 | 5,000 | |
| 3 -> 4 | 10,000 | |
| 4 -> 5 | 15,000 |


Character Analysis
E1 Koakuma was released on September 27, 2022 in "Ultra Festival Prayer: Compendium of Advanced Magic." For more up-to-date analysis, be sure to visit the ![]() Official Discord Server.
Official Discord Server.
Universe E1 Koakuma, The Compendium of Advanced Magic, is much like Koakuma in more familiar universes; she is Patchouli's devil familiar who tends to the library of the Scarlet Devil Mansion, as well as assisting Patchouli or any of the other members of the SDM with whatever they may need. However, unlike the normal SDM, Remilia and Flandre have a strangely different dynamic between them, Sakuya is nowhere to be found, and the air seethes with unease and danger. Nevertheless, Koakuma has come to love the SDM's residents like her own family, past the title of a mere familiar. The cute butler of the Scarlet Devil Mansion will try her hardest to protect them in this uncertain world as an EX Tier Friend.
As the butler of the E1 universe, Koakuma can provide not only utility that could support any character, but also powerful barrier breaks as well as nuking powers augmented by her wide range of killers.
Having Gensokyo and Youkai Killers mean that she guarantees critical hits to the majority of the cast in the game, allowing her damage potential to be naturally high. Another factor that affects her damage potential are her Hard and Slicing bullet scalings. As an Ultra Festival Friend, it is expected for her stats to be on the high spectrum and these can further be improved through the use of stat sticks. Having been said that, she does lack an innate CRIT ATK source to take advantage of her Killers plus she lacks accuracy buffs which can impede with the consistency of her damage potential. Hence, she will need to rely on external sources for these effects, which in turn will allow her to excel more.
In the perspective of barrier breaks, E1 Koakuma puts an emphasis on her wide range of Metal and Moon elements. This is ever-present in all of her attacks and becomes more apparent in her Spell Cards, with Metal being the most as her Last Word only consists of it. Her shots offer a good amount of these elements and have a decent enough accuracy to be used as elemental breaking attacks.
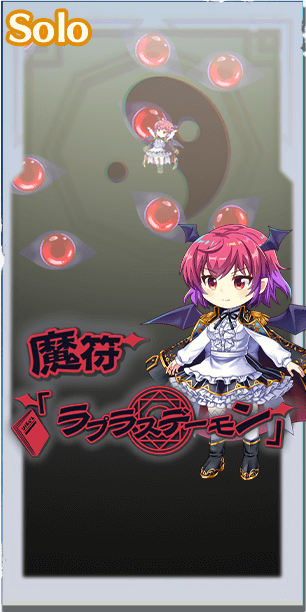
Her 1st spell card, Magic Sign: Laplace’s Demon, starts with Metal breaks on the first 3 lines and Moon breaks on the latter, which are complemented with Incineration (Burn break), Melting (Freeze break), and Toxic (Poison break). These anomaly breaks can be very useful if dealing with an enemy that is neither weak to Metal nor Moon elements as 4 of the target’s barriers will be guaranteed to break, provided that the target is not immune to the Burn anomaly, which her Pre-ATK effect inflicts.
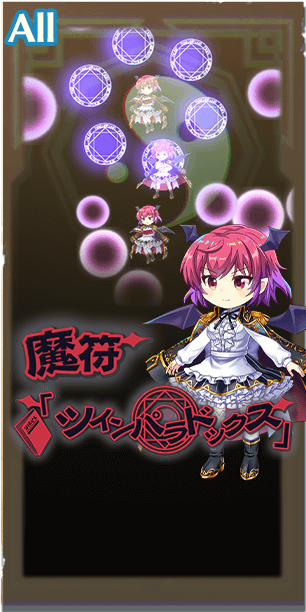
Her 2nd spell card, Magic Sign: Twin Paradox, also presents the same elements, however this time they are placed in an alternate manner, not to mention that she also inflicts Freeze anomalies to all her targets, which allows party members with Melting break the enemies’ barrier with ease.
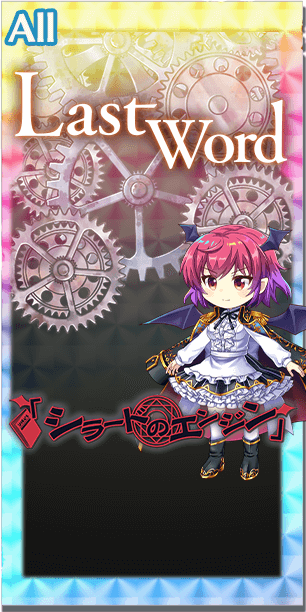
Finally her Last Word, Szilard’s Engine, only consists of the Metal element, with Incineration and Melting at the latter part of the spell card to further supplement the breaks that she can achieve.
Now comes her use when it comes to utility. She is able to consistently supply her party with YIN ATK and YANG ATK buffs using her skill 2, Magic Supply. At max level, this will allow the cooldown of the skill to be reduced to 3 turns, which is parallel to the effects' duration. Her 3rd skill, Dealing Blaze, enables her to dispel 1 of the party’s lock, the same effect as B3 Toyohime. She can also just do it to herself when she uses her 1st spell card, Magic Sign: Laplace’s Demon, as it is the Post-ATK effect of that spell card. Finally, as a Healer unit, we should not forget that she heals the party’s HP and recovers their barriers + barrier status using her 1st skill, Evil Healing.
With the current factors considered, E1 Koakuma cannot prove her dormant potential until a Metal-centric challenge content comes by as she has a natural bias towards the aforementioned element. Make no mistake however, as this does not mean that her worth is reliant towards it. The cute butler will continue to offer high amounts of barrier breaks, not to mention that she possesses an innate capability to dish out high damage and utility despite her flaws.
Story Card Recommendations
(Card recommendations last updated on October 24, 2022)
Spell Card
Using Underworld Party Night on her 1st spell card allows her to supplement her lack of CRIT ATK related buffs by debuffing the enemy's CRIT DEF, plus it also provides YIN support in the form of YIN DEF DOWN to further improve her damage against the target.
You can use Standing Behind You as a story card for her 2nd spell card as it provides buffs to the Moon element as well as CRIT ATK UP support to improve her damage. In the case where she is set-up to already have maximum CRIT ATK support, you may use Heat of My Fingertips instead for nuking purposes.
If she is unable to acquire accuracy buffs from her team, using any accuracy card that gives at least 2 ACC UP is sufficient. However, it is recommended to use a MLB copy of Dark Mastermind? as not only does it provide the buff she needs but it also serves as a stat stick to improve her damage later on due to Hard scaling. If you want to be fancy, you can use Ability Cards? for that party ACC UP if needed.
Some other mentions include the usage of Witch of Scarlet Dreams instead of Dark Mastermind? if you feel that she does not require further accuracy boosts and would rather focus on giving her more power to access the latter lines. Puppeteer and Necromancer comes in as an alternative story card for her 1st spell card as it provides a 50% damage boost due to that particular spell card only having the Light Bullet type. Lastly, if you have Solo Act, you may also use it as she is able to use the effects of it.
Last Word
As her Last Word consists of the Heavy Bullet type, The Secret God of the Sky, will be her default best in slot currently as not only does it provide her with 50% Heavy Bullet UP but it also provides 2 CRIT ATK UP which is heavily beneficial for her due to her lack of innate CRIT ATK UP sources. An alternative story card to use would be Underworld Party Night for its YIN ATK UP and CRIT DEF DOWN support.
Character Skill Level Up Recommendations
Focus on raising her 2nd skill, Magic Supply as it allows her to constantly provide your party with YIN ATK UP and YANG ATK UP buffs at max level. Next up will be her 3rd skill, Dealing Blaze, as despite its dispel lock effect not increasing in value, it allows her to do more Burn anomaly inflicts and give 1.25P to herself, which is generally better. Last but not the least, would be her 1st skill, Evil Healing, for its healer based effects.
Character Strengths
Excellent Barrier Breaks
Barrier breaks are one of the factors that our butler excels in. Coming out with an emphasis on Metal and Moon elements to offer as well as anomaly breaks, mainly Incineration (Burn breaks).
Amazing Damage Output
Gensokyo and Youkai Killers cover the majority of the cast in the game in which E1 Koakuma has access to all her spell cards including her Last Word. This will guarantee critical hits against them and thus, ranks her on the high spectrum of damage potential. Additionally, she also has access to Slice and Hard scalings which further increases her damage with Agility and Defense buffs respectively.
High Utility
E1 Koakuma can inflict anomalies via spell card and skills, although she can also do so towards her team which can prove beneficial or detrimental depending on who is slotted in the party with her. The main course, however, is the fact that she is able to dispel her party’s locks. In addition, she also has the ability to consistently provide Yin ATK + Yang ATK buffs, Spirit Power support, and healing related effects.
Character Weaknesses
No Innate Source of CRIT ATK and Accuracy Buff
As excellent as E1 Koakuma is, she has her own demerits as well, one of the most observable factors is how she does not have any innate source CRIT ATK buffs at all. This impedes her damage potential as she is not able to fully maximize her powerful Killers and scalings. Hence, she needs to constantly rely on external sources - story cards and her party’s buffs.


Using Underworld Party Night on her 1st spell card allows her to supplement her lack of CRIT ATK related buffs by debuffing the enemy's CRIT DEF, plus it also provides YIN support in the form of YIN DEF DOWN to further improve her damage against the target.
You can use Standing Behind You as a story card for her 2nd spell card as it provides buffs to the Moon element as well as CRIT ATK UP support to improve her damage. In the case where she is set-up to already have maximum CRIT ATK support, you may use Heat of My Fingertips instead for nuking purposes.
If she is unable to acquire accuracy buffs from her team, using any accuracy card that gives at least 2 ACC UP is sufficient. However, it is recommended to use a MLB copy of Dark Mastermind? as not only does it provide the buff she needs but it also serves as a stat stick to improve her damage later on due to Hard scaling. If you want to be fancy, you can use Ability Cards? for that party ACC UP if needed.
Some other mentions include the usage of Witch of Scarlet Dreams instead of Dark Mastermind? if you feel that she does not require further accuracy boosts and would rather focus on giving her more power to access the latter lines. Puppeteer and Necromancer comes in as an alternative story card for her 1st spell card as it provides a 50% damage boost due to that particular spell card only having the Light Bullet type. Lastly, if you have Solo Act, you may also use it as she is able to use the effects of it.

As her Last Word consists of the Heavy Bullet type, The Secret God of the Sky, will be her default best in slot currently as not only does it provide her with 50% Heavy Bullet UP but it also provides 2 CRIT ATK UP which is heavily beneficial for her due to her lack of innate CRIT ATK UP sources. An alternative story card to use would be Underworld Party Night for its YIN ATK UP and CRIT DEF DOWN support.
Focus on raising her 2nd skill, Magic Supply as it allows her to constantly provide your party with YIN ATK UP and YANG ATK UP buffs at max level. Next up will be her 3rd skill, Dealing Blaze, as despite its dispel lock effect not increasing in value, it allows her to do more Burn anomaly inflicts and give 1.25P to herself, which is generally better. Last but not the least, would be her 1st skill, Evil Healing, for its healer based effects.
Excellent Barrier Breaks
Barrier breaks are one of the factors that our butler excels in. Coming out with an emphasis on Metal and Moon elements to offer as well as anomaly breaks, mainly Incineration (Burn breaks).
Amazing Damage Output
Gensokyo and Youkai Killers cover the majority of the cast in the game in which E1 Koakuma has access to all her spell cards including her Last Word. This will guarantee critical hits against them and thus, ranks her on the high spectrum of damage potential. Additionally, she also has access to Slice and Hard scalings which further increases her damage with Agility and Defense buffs respectively.
High Utility
E1 Koakuma can inflict anomalies via spell card and skills, although she can also do so towards her team which can prove beneficial or detrimental depending on who is slotted in the party with her. The main course, however, is the fact that she is able to dispel her party’s locks. In addition, she also has the ability to consistently provide Yin ATK + Yang ATK buffs, Spirit Power support, and healing related effects.
No Innate Source of CRIT ATK and Accuracy Buff
As excellent as E1 Koakuma is, she has her own demerits as well, one of the most observable factors is how she does not have any innate source CRIT ATK buffs at all. This impedes her damage potential as she is not able to fully maximize her powerful Killers and scalings. Hence, she needs to constantly rely on external sources - story cards and her party’s buffs.