


Stats


Races
Element Type Chart


Character Shots

 | Solo | Standard Ofuda Pack A   | x8 | Yang |  |
| Solo | Ofuda Expansion Pack A1.1   | x2 | Yang | 1 |
| Solo | Ofuda Expansion Pack A2.1   | x2 | Yang | 2 |
| Solo | Ofuda Expansion Pack A3.1 | x2 | Yin | 3 |
| Solo | Ofuda Expansion Pack A3.2 | x2 | Yang | 3 |
| Solo | Ofuda Expansion Pack A3.3 | x2 | Yang | 3 |

| Solo | Standard Ofuda Pack B | x3 | Yang | |
| Solo | Ofuda Expansion Pack B1  | x2 | Yin | 1 |
| Solo | Ofuda Expansion Pack B2.1  | x2 | Yang | 2 |
| Solo | Ofuda Expansion Pack B2.2 | x3 | Yin | 2 |
| Solo | Ofuda Expansion Pack B2.3 | x3 | Yang | 2 |
| Solo | Ofuda Expansion Pack B3.1 | x3 | Yang | 3 |
Character Spell Cards

|
|
All |
Standard Ofuda Pack P
|
x13 | Yang |
|
|
|
All |
Ofuda Expansion Pack P1.1
|
x4 | Yang | 1 |
|
|
All |
Ofuda Expansion Pack P2.1
|
x4 | Yin | 2 |
|
|
All |
Ofuda Expansion Pack P2.2
|
x4 | Yin | 2 |
|
|
All |
Ofuda Expansion Pack P3.1
|
x4 | Yang | 3 |
|
|
All |
Ofuda Expansion Pack P3.2
|
x4 | Yin | 3 |
|
|
Solo |
Standard Ofuda Pack D
|
x15 | Yang |
|
|
|
Solo |
Ofuda Expansion Pack D1.1
|
x5 | Yang | 1 |
|
|
Solo |
Ofuda Expansion Pack D2.1
|
x5 | Yin | 2 |
|
|
Solo |
Ofuda Expansion Pack D2.2
|
x5 | Yang | 2 |
|
|
Solo |
Ofuda Expansion Pack D2.3
|
x5 | Yang | 2 |
|
|
Solo |
Ofuda Expansion Pack D3.1

|
x5 | Yin | 3 |
|
|
All |
Standard Ofuda Pack H
|
x15 | Yang |
|
|
|
All |
Ofuda Expansion Pack H1.1
|
x4 | Yang | 1 |
|
|
All |
Ofuda Expansion Pack H2.1
|
x4 | Yang | 2 |
|
|
All |
Ofuda Expansion Pack H3.1
|
x4 | Yang | 3 |
|
|
All |
Ofuda Expansion Pack H3.2
|
x5 | Yang | 3 |
|
|
All |
Ofuda Expansion Pack H3.3
|
x5 | Yang | 3 |
Character Ability
Character Skills
Character Characteristics
 Character Change Effect
When switching places with a front-guard unit, heals front-guard unit's Barrier Status.
Upgrade Costs
| Rank | Coins | Materials |
|---|---|---|
| 0 -> 1 | 1000 | |
| 1 -> 2 | 2,000 | |
| 2 -> 3 | 5,000 | |
| 3 -> 4 | 10,000 | |
| 4 -> 5 | 15,000 |


Character Analysis
B3 Reimu Hakurei was released on December 24th, 2021 in "Ultra Festival Prayer: Lunar War Shaman." For more up-to-date analysis, be sure to visit the ![]() Official Discord Server.
Official Discord Server.
From a world on the brink of ruin, where _____ has been sealed away and all hope seems lost against the Lunarians, Reimu Hakurei rises up once again, as the Lunar War Shaman. Sure, she can’t throw out talismans herself anymore, and her ability to channel the gods is basically null now. But with her handgun “Chen” and her rifle “Ran,” the miko can simply shoot the talismans instead.
In farming, Reimu is unfortunately saddled with a complete lack of Accuracy. Between this and the 1-1-3 layout of her Last Word, she’s not a particularly great farmer - though if you give her two or three turns to set up first and load up her guns with ofuda, she’ll blast away anyone and anything.
Solo Stage Farms: 2-7-1 (slow), 3-3-3, Future Story Card Stage
Instead, Reimu’s kit is nearly entirely built for harder, longer fights. Firstly, her skills provide fantastic support to herself and her team - False Barrier/Hakurei amps up both Yin and Yang DEF by 3 levels (3T) alongside providing 0.25 Spirit Power UP, False Barrier/Shinra gives a decent 2 levels of Agility UP (3T), and thanks to her character ability she gains 1 level of Focus UP (1T) every time she grazes. This combines well with her Basic Shots, which both, in spite of the wording, always give her 1 level of Focus UP upon use, and her passive Virtual Senjutsu, which has a 75% chance of raising her Focus by 1 level (3T) every time she’s attacked - whilst not a 100%, it’s after each time she’s attacked, meaning she will quickly rack Focus up.
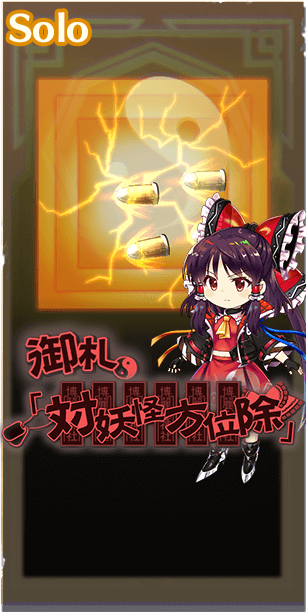
All of that Focus would just get her killed normally, but that’s where the rest of her kit steps in. False Barrier/Hope recovers 70% of her HP on a 4 turn cooldown, which is bolstered by some absurd passives - Equippable Shikigami has a 50% chance of giving her a Barrier each turn, and Yin-Yang Orb Drive restores 20% of her HP every single turn. Should she need even more survivability, her Spell Card Charm: Anti-Youkai Houi-Yoke Prayer gives her 3 Yin and 3 Yang DEF UP (3T), which combined with False Barrier/Hakurei will leave her virtually immortal - so long as you don’t try to stretch fights out forever.
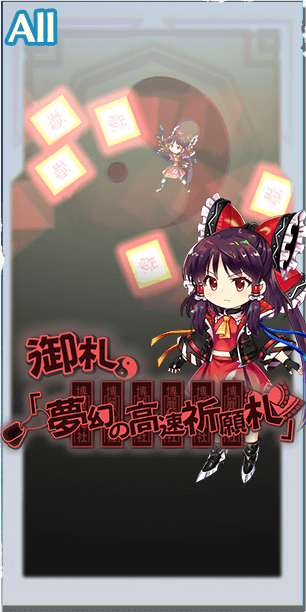
All the DEF UP in her kit isn’t just for defensive purposes either - sure, she may be buying time for her teammates to set up, but she herself makes great use of that setup time with perhaps one of the most devastating Last Words in the game, the All targeting Hakurei Talisman - Fantasy Nature. With tremendous dual scaling in 100%/100%/0%/100%/100%/125% Hard and 80%/80%/0%/90%/90%/100% Slice, alongside its layout and great base stats , Reimu will hit very hard in any fight that affords her the chance to gain Spirit Power. Additionally, should even more damage be required, she can max out her own buffs between Charm: Fantastic high-Speed Prayer Talismans and Charm: Anti-Youkai Houi-Yoke Prayer providing Agility and Yang DEF UP, respectively.
Lastly, she also has fantastic Breaks too. She has P0 access to both Wood and Sun on her basic shots, which goes extremely well with their Focus UP. Charm: Fantastic High-Speed Prayer Talismans provides an average 0/1/2/3 Solo targeting Wood Breaks for 0/1/2/3 Spirit Power (and 1 Sun, which is usually useless but on rare occasions is a bonus Break). Charm: Anti-Youkai Houi-Yoke Prayer, meanwhile, has a great 3 Sun and 2 Wood All targeting Breaks for 3 Spirit Power in total. Finally, whilst it will probably do enough damage to end the fight anyway, Hakurei Talisman - Fantasy Nature features a great 4 Sun and 2 Wood All targeting Breaks for 3 Spirit Power in total.
In conclusion, this gun-toting miko’s superior firepower will shoot down any enemy foolish enough to stand in your way - so long as she gets the proper setup time. She’s not the fastest draw - simply the most utterly overpowering one.
Shaman's secondary scalings are as follows:
Hakurei Amulet:
Slice: 0%/0%/30%/0%/40%/0%
Youkai Buster:
Hard: 0%/20%/0%/40%/40%/0%
Charm: Fantastic High-Speed Prayer Talismans:
Slice: 50%/50%/60%/0%/70%/80%
Charm: Anti-Youkai Houi-Yoke Prayer:
Hard: 70%/70%/70%/80%/80%/80%
Hakurei Talisman - Fantasy Nature:
Hard:100%/100%/0%/100%/100%/125%
Slice: 80%/80%/0%/90%/90%/100%
Story Card Recommendations
(Card recommendations last updated on October 08, 2023)
Spell Card
B3 Reimu needs a lot of buffs to really get the most out of her damage output, mainly for her Last Word, but the main things to consider are Spirit Power, Accuracy, CRIT ATK, Yang ATK, Yang DEF, even Agility. That's a lot of things to worry about when it comes to maximising her power, but it's still doable. However, if you can manage to pull that off and/or are looking to go all out on Spell Card damage, Ofuda cards are the way.
Team Spirit Power UP: Divine Spirit Tajikarao, Myouren Temple Anniversary, Dancers Take the Stage!, Utopia Tea Time
Spirit Power UP: The Witch of Scarlet Dreams, Let the Oil Money Flow, Dancer in the Puddle, Mountain of Faith, Post-Training Kinako Milk, Taking a Breather in Spring, Road of Liminality’s Ennichi, Youkai Mountain AnniversaryOur Dream,
Accuracy UP: Ability Cards?, Secret Hobby, Shichi-Go-San School Visit?!, 8th Hakurei Shrine Fall Reitaisai, Taking a Breather in Spring, Dark Mastermind?, Valued Tools of the Trade, The Lunar War, Poltergeist Sisters’ Concert
Yang ATK UP: How Irrational…, Nameless Adventurers, Ordinary Magician, Satellite TORIFUNE, Kasen’s Senkai, Members of the Yakumo Family, By the Underground Lake, Waiting in Comfort
CRIT ATK UP: Divine Spirit Tajikarao, Worlds in Hand, 19th Hakurei Shrine Reitaisai, Ordinary Magician, New Year’s Shrine Visit VI, Bloody Order, Standing Behind You, Miracle Mallet, Ordinary Magician
Ofuda Bullet Power UP: Summer God Fantasy Sea, Shrine Maiden Reborn, 19th Hakurei Shrine Reitaisai, Reimu's Great Exorcism
Top Yang ATK Stat Sticks: Myouren Temple Anniversary, Serene Sage, Summer God Fantasy Sea, Two Girl Rock Band, Congress of Sages, Silver Gale, Lunar Capital Stasis Plan, Moriya Anniversary, The Moon and Izayoi, Night Splitting Light, Little Sister and Sweets, Shooting Star Magician, Mountain of Faith, Fleeting Spring Dream
Top Yang DEF Stat Sticks: The Lunar War, Great Suwa War, Kasen’s Senkai, Dancer in the Puddle, A Curious Festival
Top Agility Stat Sticks: Thunder Beat, Undercover Reporter, Protection of Cerpinus, Eat and Walk, My Favourites, I'll Borrow This Till I'm Dead!, Touhou LostWord, Members of the Yakumo Family, Heavenly Backup Dancers
Yang ATK + Yang DEF Stat Sticks: Silver Gale, Lunar Capital Stasis Plan, Idola-Deus, Hakurei Shrine Anniversary, Allow Me, 20th Hakurei Shrine Reitaisai, Photogenic Girls, Nameless Adventurers, Dancer in the Puddle
Yang ATK + Agility Stat Sticks: Two Girl Rock Band, The Moon and Izayoi, Night-Splitting Light, Shooting Star Magician, Resort Stars, Cleaning, Undercover Reporter, Detective Phantom Thief?!
Last Word
 Summer God, Fantasy Sea
 Shrine Maiden Reborn
 First Tea of the Season
 19th Hakurei Shrine Reitaisai
 Reimu's Great Exorcism
 A Curious Festival
 Divine Spirit Tajikarao
B3 Reimu’s best bet is Ofuda Power UP, meaning there are a few options that she can use, but there are currently 2 that stand above the rest for their 50% Boosts in Ofuda: Summer God, Fantasy Sea and Shrine Maiden Reborn. However, if those options are not available, lesser options like First Sea of the Season's 30% Ofuda Boost and some options that boost Ofuda by 25% like 19th Hakurei Shrine Reitaisai, Reimu's Great Exorcism and A Curious Festival are also viable. And finally, for a boost in 4 of the Last Word's Sun Bullets by 25%, Divine Spirit Tajikarao could be a fun option for its Boost in Sun as well as providing the whole team some CRIT ATK and Spirit Power.
Character Skill Level Up Recommendations
Put at least a few levels first into False Barrier/Hope for the massive gains relative to the EXP required - afterwards, False Barrier/Hakurei does the best job of fulfilling her role (keeping her team alive and doing damage at the same time) and should be the priority, with the other two leveled to your personal taste (with False Barrier/Hope providing even more sustain, and False Barrier/Shinra amping up her personal damage output alongside some alright Agility support).
Character Strengths
+Great Killer bullet types and amazing damage when at full Spirit Power boost
+Fantastic team support, among the best if not the best in keeping a team alive
Character Weaknesses
-1-1-3 Bullet layout makes her 1-Turn damage mediocre without Spirit Power support
-Really wants accuracy support for consistency


B3 Reimu needs a lot of buffs to really get the most out of her damage output, mainly for her Last Word, but the main things to consider are Spirit Power, Accuracy, CRIT ATK, Yang ATK, Yang DEF, even Agility. That's a lot of things to worry about when it comes to maximising her power, but it's still doable. However, if you can manage to pull that off and/or are looking to go all out on Spell Card damage, Ofuda cards are the way.
Team Spirit Power UP: Divine Spirit Tajikarao, Myouren Temple Anniversary, Dancers Take the Stage!, Utopia Tea Time
Spirit Power UP: The Witch of Scarlet Dreams, Let the Oil Money Flow, Dancer in the Puddle, Mountain of Faith, Post-Training Kinako Milk, Taking a Breather in Spring, Road of Liminality’s Ennichi, Youkai Mountain AnniversaryOur Dream,
Accuracy UP: Ability Cards?, Secret Hobby, Shichi-Go-San School Visit?!, 8th Hakurei Shrine Fall Reitaisai, Taking a Breather in Spring, Dark Mastermind?, Valued Tools of the Trade, The Lunar War, Poltergeist Sisters’ Concert
Yang ATK UP: How Irrational…, Nameless Adventurers, Ordinary Magician, Satellite TORIFUNE, Kasen’s Senkai, Members of the Yakumo Family, By the Underground Lake, Waiting in Comfort
CRIT ATK UP: Divine Spirit Tajikarao, Worlds in Hand, 19th Hakurei Shrine Reitaisai, Ordinary Magician, New Year’s Shrine Visit VI, Bloody Order, Standing Behind You, Miracle Mallet, Ordinary Magician
Ofuda Bullet Power UP: Summer God Fantasy Sea, Shrine Maiden Reborn, 19th Hakurei Shrine Reitaisai, Reimu's Great Exorcism
Top Yang ATK Stat Sticks: Myouren Temple Anniversary, Serene Sage, Summer God Fantasy Sea, Two Girl Rock Band, Congress of Sages, Silver Gale, Lunar Capital Stasis Plan, Moriya Anniversary, The Moon and Izayoi, Night Splitting Light, Little Sister and Sweets, Shooting Star Magician, Mountain of Faith, Fleeting Spring Dream
Top Yang DEF Stat Sticks: The Lunar War, Great Suwa War, Kasen’s Senkai, Dancer in the Puddle, A Curious Festival
Top Agility Stat Sticks: Thunder Beat, Undercover Reporter, Protection of Cerpinus, Eat and Walk, My Favourites, I'll Borrow This Till I'm Dead!, Touhou LostWord, Members of the Yakumo Family, Heavenly Backup Dancers
Yang ATK + Yang DEF Stat Sticks: Silver Gale, Lunar Capital Stasis Plan, Idola-Deus, Hakurei Shrine Anniversary, Allow Me, 20th Hakurei Shrine Reitaisai, Photogenic Girls, Nameless Adventurers, Dancer in the Puddle
Yang ATK + Agility Stat Sticks: Two Girl Rock Band, The Moon and Izayoi, Night-Splitting Light, Shooting Star Magician, Resort Stars, Cleaning, Undercover Reporter, Detective Phantom Thief?!
B3 Reimu’s best bet is Ofuda Power UP, meaning there are a few options that she can use, but there are currently 2 that stand above the rest for their 50% Boosts in Ofuda: Summer God, Fantasy Sea and Shrine Maiden Reborn. However, if those options are not available, lesser options like First Sea of the Season's 30% Ofuda Boost and some options that boost Ofuda by 25% like 19th Hakurei Shrine Reitaisai, Reimu's Great Exorcism and A Curious Festival are also viable. And finally, for a boost in 4 of the Last Word's Sun Bullets by 25%, Divine Spirit Tajikarao could be a fun option for its Boost in Sun as well as providing the whole team some CRIT ATK and Spirit Power.
Put at least a few levels first into False Barrier/Hope for the massive gains relative to the EXP required - afterwards, False Barrier/Hakurei does the best job of fulfilling her role (keeping her team alive and doing damage at the same time) and should be the priority, with the other two leveled to your personal taste (with False Barrier/Hope providing even more sustain, and False Barrier/Shinra amping up her personal damage output alongside some alright Agility support).
+Great Killer bullet types and amazing damage when at full Spirit Power boost
+Fantastic team support, among the best if not the best in keeping a team alive
-1-1-3 Bullet layout makes her 1-Turn damage mediocre without Spirit Power support
-Really wants accuracy support for consistency