


Stats


Races
Element Type Chart


Character Shots

 | All | Suppression Yin-Yang Orb - A   | x8 | Yang |  |
| All | Suppression Yin-Yang Orb - B   | x2 | Yang | 1 |
| All | Suppression Yin-Yang Orb - C | x2 | Yang | 2 |
| All | Suppression Yin-Yang Orb - D  | x2 | Yin | 2 |
| All | Suppression Yin-Yang Orb - E | x2 | Yin | 2 |
| All | Suppression Yin-Yang Orb - F  | x2 | Yang | 3 |

| All | Eradication Yin-Yang Orb - A    | x6 | Yang | |
| All | Eradication Yin-Yang Orb - B | x1 | Yin | 1 |
| All | Eradication Yin-Yang Orb - C | x1 | Yang | 2 |
| All | Eradication Yin-Yang Orb - D | x1 | Yin | 2 |
| All | Eradication Yin-Yang Orb - E | x1 | Yang | 3 |
| All | Eradication Yin-Yang Orb - F | x1 | Yin | 3 |
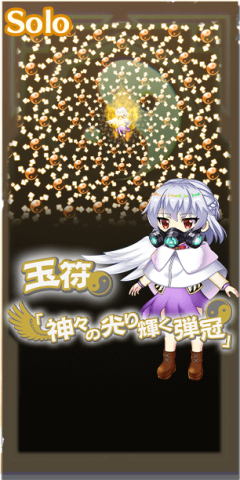
Character Spell Cards


|
All |
Impurity Detection Yin-Yang Orb - A

|
x12 | Yang |
|
|
|
All |
Impurity Detection Yin-Yang Orb - B

|
x5 | Yang | 1 |

|
All |
Impurity Detection Yin-Yang Orb - C
|
x5 | Yin | 1 |
|
|
All |
Impurity Detection Yin-Yang Orb - D
|
x5 | Yang | 2 |
|
|
All |
Impurity Detection Yin-Yang Orb - E
|
x5 | Yang | 2 |
|
|
All |
Impurity Detection Yin-Yang Orb - F
|
x5 | Yin | 3 |
The act of avoiding impurity by forcing it onto someone or something else is rooted in the traditional concept of sacrifices and scapegoats. According to Shinto mythology, Ame no Sagume is familiar with such things.
|
|
Solo |
Impurity Proxy Yin-Yang Orb - A
|
x16 | Yang |
|
|
|
Solo |
Impurity Proxy Yin-Yang Orb - B
|
x4 | Yang | 1 |
|
|
Solo |
Impurity Proxy Yin-Yang Orb - C

|
x4 | Yang | 2 |
|
|
Solo |
Impurity Proxy Yin-Yang Orb - D
|
x4 | Yang | 2 |
|
|
Solo |
Impurity Proxy Yin-Yang Orb - E
|
x4 | Yang | 3 |
|
|
Solo |
Impurity Proxy Yin-Yang Orb - F
|
x4 | Yang | 3 |

|
All |
Word Fact Scan
|
x18 | Yang |
|
|
|
All |
Heart Fact Scan

|
x4 | Yang | 1 |
|
|
All |
Brain Fact Scan
|
x4 | Yang | 2 |
|
|
All |
Soul Hash
|
x4 | Yang | 2 |
|
|
All |
Mind Hash
|
x4 | Yang | 3 |
|
|
All |
Recognition Hash
|
x4 | Yang | 3 |
Character Ability
Character Skills
Character Characteristics
 Character Change Effect
When switching places with a front-guard unit, front guard's Spirit Power UP.
Upgrade Costs
| Rank | Coins | Materials |
|---|---|---|
| 0 -> 1 | 1000 | |
| 1 -> 2 | 2,000 | |
| 2 -> 3 | 5,000 | |
| 3 -> 4 | 10,000 | |
| 4 -> 5 | 15,000 |


Character Analysis
B3 Sagume Kishin was released on April 14th, 2022 in "Ultra Festival Prayer: Masked Words of Truth." For more up-to-date analysis, be sure to visit the ![]() Official Discord Server.
Official Discord Server.
Universe B3 Sagume Kishin, Codename: Azusa, is a Lunarian divine spirit, leading political figure and protector of the Lunar Capital alongside Otohime (B3 Toyohime) and Kannagi (B3 Yorihime). Much like her universe L1 self, she has the ability to reverse a situation by speaking about it. If she were to speak about someone defeating her in battle, the reverse would happen. But the ability is very double-edged, as she can cause misfortune for herself and her allies if she does not choose her words carefully. However, in her B3 version, she wears a mask over her mouth which nullifies her ability. She is very strong as a divine spirit regardless, so she wears the mask in order to communicate succinctly without having the possibility of calamity brought upon by her words.
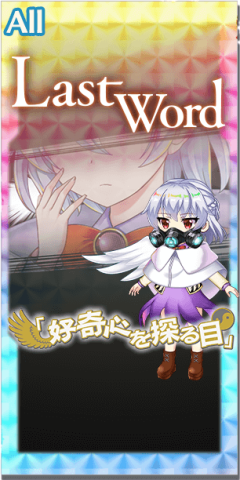
For farming, Sagume keeps up with the best. Her Last Word, Curiosity Probing Eye, can do great damage with her killers and ability to reach 6 stacks of Yang ATK and Crit ATK on the first turn. Sagume can farm The Witch of Scarlet Dreams (2-7-1) if awakened, Mysterious Sword Master (3-3-3) at 8 SP, Puppeteer and Necromancer (3-11-1) at 8 SP, and a future story card stage at 8 SP.
Sagume truly shines in challenging content, where she acts as a swiss army knife. Her 1st skill, Basophil Orb, restores 1 barrier with a 50% chance to give 2 barriers and gives 3 stages of Yin and Yang DEF to the party for 3 turns. Her 2nd skill, Eosinophil Orb, is her main claim to fame with a whopping 1.0 P to the party, 3 stages of Crit ACC, and Quick to herself, the latter synergizing with her Last Word. Finally, her 3rd skill, Neutrophil Orb, gives the party 2 stages of Yang ATK, 3 stages of Yin ATK, and 3 stages of Crit ATK to the party for 2 turns. With a 6 turn cool down, her 2nd skill’s power support is a major boost to her teammates, but will usually only be used once in any given fight. Sagume’s 1st spell card, Orb Sign: Impure Body Detection Mines V2, gives the party 2 barriers, helping to augment its survivability even further. Her 2nd spell card, Orb Sign: Shining Shotgun Coronation of the Gods, provides 2 stages of Agility to the party for 3 turns and a party wide 0.75 P up. Her Last Word finally gives the team 2 stages of Yang ATK, 3 stages of Yang DEF, and 3 stages of Crit ATK to the party for 2 turns for additional utility. Her Last Word also deals great damage as it contains wide reaching killers like Youkai killer and both Slice and Hard scaling. Her passives also give her some major boons with her 1st passive reducing damage against Youkai, 2nd passive healing barrier anomalies, and her final passive being a 50% barrier restoration. Thus, her survivability is helped somewhat despite her being fairly frail with herself giving focus down on her spell cards. With her Boosts and Grazes giving party wide Yang ATK and Accuracy respectively, Sagume’s utility and damage are all great for challenging content. One thing to note about Sagume though are her specular bullets. With her Yin bullets actually being mirrored to target enemy Yang defense, Sagume is easier to support. However, her damage may be lackluster towards enemies who have high Yang defense as a result.
Her barrier breaks are also no slouch, starting off with a P0 Moon basic shot. While her main breaks are Metal and Moon, Sagume also has Paralysis and Blind breaks with her 1st and 2nd spell card respectively. Her 1st spell card also has some decent breaks there with 2 Star, 2 Moon, and 2 Metal. However, her main claim to fame here is the pre-effect her 1st spell card has. As it inflicts 2 Paralysis barriers as a pre-effect, her Paralysis break will proc and break the barriers. On the other hand, her 2nd spell card is more focused with 4 Metal breaks and 2 Moon breaks. Her 2nd spell card suffers from lacking in terms of blind support and thus cannot be used as practically as her 1st spell card. Finally, her Last Word has 3 Moon breaks and 3 Metal breaks while also having Blind and Paralysis breaks as a back up plan to barrier break the enemies. Another thing to note is that her barrier breaks are back loaded aside from her first spell card. Therefore, using her barrier breaks to their max potential in terms of elements may be a bit difficult.
Overall, Sagume is a jack of all trades, master of none. However, her support is so close to the best that she can trade blows with the best of the bunch at their respective buff. Sagume will enable your team to reach new heights by herself and while she may not provide any specific kind of support as well as more specialized friends, none quite sum it all up like her.
Here are the relevant scalings which Sagume has:
Spread Shot:
Hard Scaling: 40%/0%/0%/0%/0%/0%
Self Yang DEF up (3T): 0%/100%/0%/0%/0%/0%/
Paralysis Inflict (3T): 0%/0%/0%/0%/0%/50%
Focus Shot:
Slice Scaling: 40%/40%/0%/0%/0%/0%/
Self Agility up (3T): 100%/100%/0%/0%/0%/0%
1st Spell Card:
Hard Scaling: 20%/0%/0%/0%/0%/0%
Self Focus Down (3T): 100%/0%/0%/0%/0%/0%
Blind Inflict (3T): 0%/25%/0%/0%/35%/0%
Self Yang DEF up (3T): 0%/0%/100%/0%/0%/100%
2nd Spell Card:
Paralysis Inflict (3T): 0%/25%/0%/0%/50%/0%
Self Focus Down (3T): 100%/0%/0%/0%/0%/0%
Self Agility up (3T): 0%/0%/0%/100%/0%/0%
Last Word:
Hard Scaling: 100%/100%/0%/120%/0%
Slice Scaling: 100%/100%/0%/0%/120%
Enemy Yang DEF down (3T): 0%/100%/0%/100%/0%/0%/
Story Card Recommendations
(Card recommendations last updated on July 04, 2023)
Spell Card
As with all characters, Spirit Power is always great to have on these characters and Sagume wants the power to break more barriers with her attacks. Alternatively, using A Curious Festival on her 1st spell card is a decent idea due to how hard it can hit. Finally, for stat filler, look for Yang ATK filler with a preference for Yang DEF.
Last Word
With how many types of killers her Last Word has, World In Hands provides Sagume the best boost in damage with 2 stages of Crit ATK and a 25% boost energy bullets for her Last Word. Alternatively, Standing Behind You provides 1 stage of Crit ATK and a 30% to her Moon Bullets. Finally, Where the Wind Priestess Is serves as the best baseline when not fighting enemies that the killer bullets will crit. However, a future story card will come that gives her better damage than the options listed.
Character Skill Level Up Recommendations
Sagume wants her 2nd skill raised up first. Her 2nd skill allows her to reach 2P on the first turn and thus use her barrier breaks to the fullest. After that, her 3rd skill should be prioritized to optimize her damage as it provides her with Yang ATK and Crit ATK. Finally, her 1st skill should be leveled to help with her Hard scaling on her Last Word.
Character Strengths
Great Breaks via Elements and Anomalies
B3 Sagume's breaking potential is rather insane. All of her spells have good Moon access on them, from the 2 on both Spell Cards to the 3 on her Last Word. Metal is also spread out well on all of her spells, with 2 on Spell Card 1, 4 on Spell Card 2 and 3 on her Last Word. Furthermore, she holds anomaly breaks on some spells: specifically Paralyze breaks on her Spell Card 1, Blind breaks on her Spell Card 1, and both on her Last Word. She can only inflict these anomalies via spells (either in Pre-ATKs or chances during the spell), but the accessibility only makes her easier to synergize well on different teams.
High and Versatile Utility
When it comes to wide utility, B3 Sagume and what she offers might be what you're looking for. Outside of selfish CRIT Accuracy UP on Skill 2, all Skill effects revolve around helping the party. Spirit Power, offensive buffs, defensive buffs, Barriers... she has all of it! Even her Spell Cards join the fun, with Spell Card 1 restoring even more Barriers, Spell Card 2 giving Agility and more Spirit Power, and her Last Word serving as another offensive buff. The vast coverage allows her to work with a variety of other units in the game.
Well Rounded Damage
B3 Sagume is even capable of dealing very good damage as well. She easily reaches 6 levels of Yang and CRIT ATK UP with due to Skills and her Last Word's Pre-ATK effects, the CRIT buff is also benefited greatly thanks to her Killer coverage, including Human and Youkai.
Character Weaknesses
Slight Issue with Skill 2’s Cooldown Rate
She is very well rounded to the point of not having many glaring flaws, but a grievance to be had is that taking advantage of Skill 2’s 1.00 Spirit Power for the team can only be achieved every 6 turns. This isn’t the worst cooldown rate in the world, but 6 Turns definitely leans toward the longer side of things, especially given that other Ultra Festival Supporters can provide more Spirit Power to the team in less turns.


As with all characters, Spirit Power is always great to have on these characters and Sagume wants the power to break more barriers with her attacks. Alternatively, using A Curious Festival on her 1st spell card is a decent idea due to how hard it can hit. Finally, for stat filler, look for Yang ATK filler with a preference for Yang DEF.


With how many types of killers her Last Word has, World In Hands provides Sagume the best boost in damage with 2 stages of Crit ATK and a 25% boost energy bullets for her Last Word. Alternatively, Standing Behind You provides 1 stage of Crit ATK and a 30% to her Moon Bullets. Finally, Where the Wind Priestess Is serves as the best baseline when not fighting enemies that the killer bullets will crit. However, a future story card will come that gives her better damage than the options listed.
Sagume wants her 2nd skill raised up first. Her 2nd skill allows her to reach 2P on the first turn and thus use her barrier breaks to the fullest. After that, her 3rd skill should be prioritized to optimize her damage as it provides her with Yang ATK and Crit ATK. Finally, her 1st skill should be leveled to help with her Hard scaling on her Last Word.
Great Breaks via Elements and Anomalies
B3 Sagume's breaking potential is rather insane. All of her spells have good Moon access on them, from the 2 on both Spell Cards to the 3 on her Last Word. Metal is also spread out well on all of her spells, with 2 on Spell Card 1, 4 on Spell Card 2 and 3 on her Last Word. Furthermore, she holds anomaly breaks on some spells: specifically Paralyze breaks on her Spell Card 1, Blind breaks on her Spell Card 1, and both on her Last Word. She can only inflict these anomalies via spells (either in Pre-ATKs or chances during the spell), but the accessibility only makes her easier to synergize well on different teams.
High and Versatile Utility
When it comes to wide utility, B3 Sagume and what she offers might be what you're looking for. Outside of selfish CRIT Accuracy UP on Skill 2, all Skill effects revolve around helping the party. Spirit Power, offensive buffs, defensive buffs, Barriers... she has all of it! Even her Spell Cards join the fun, with Spell Card 1 restoring even more Barriers, Spell Card 2 giving Agility and more Spirit Power, and her Last Word serving as another offensive buff. The vast coverage allows her to work with a variety of other units in the game.
Well Rounded Damage
B3 Sagume is even capable of dealing very good damage as well. She easily reaches 6 levels of Yang and CRIT ATK UP with due to Skills and her Last Word's Pre-ATK effects, the CRIT buff is also benefited greatly thanks to her Killer coverage, including Human and Youkai.
Slight Issue with Skill 2’s Cooldown Rate
She is very well rounded to the point of not having many glaring flaws, but a grievance to be had is that taking advantage of Skill 2’s 1.00 Spirit Power for the team can only be achieved every 6 turns. This isn’t the worst cooldown rate in the world, but 6 Turns definitely leans toward the longer side of things, especially given that other Ultra Festival Supporters can provide more Spirit Power to the team in less turns.