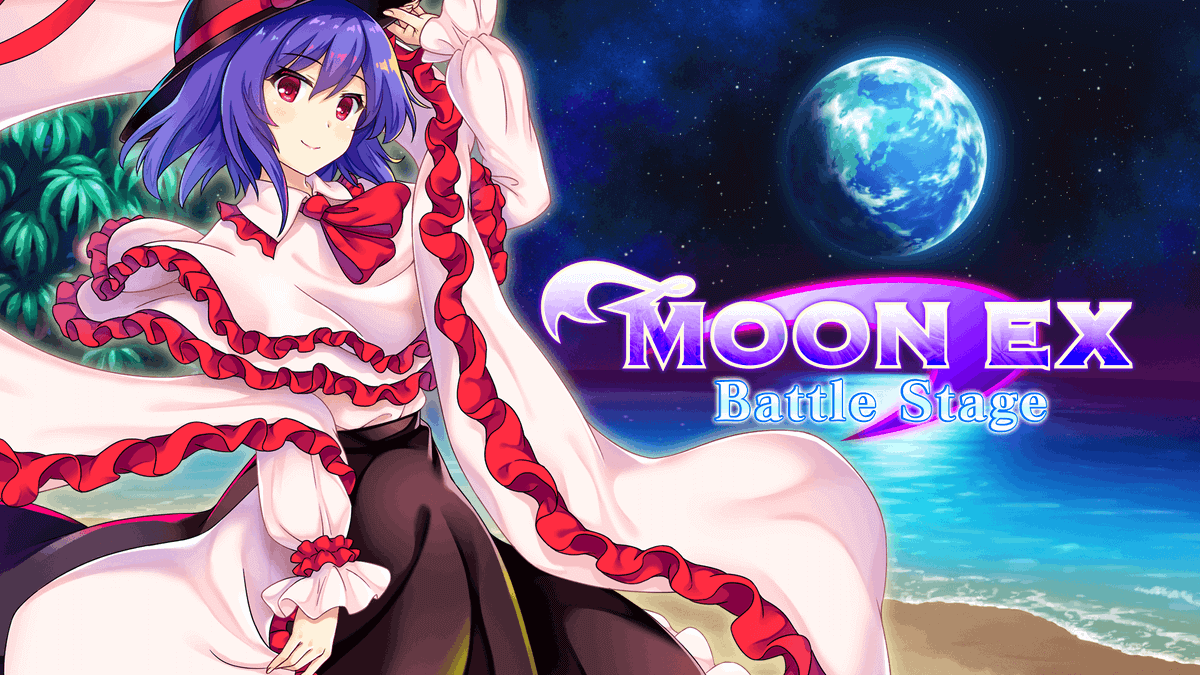
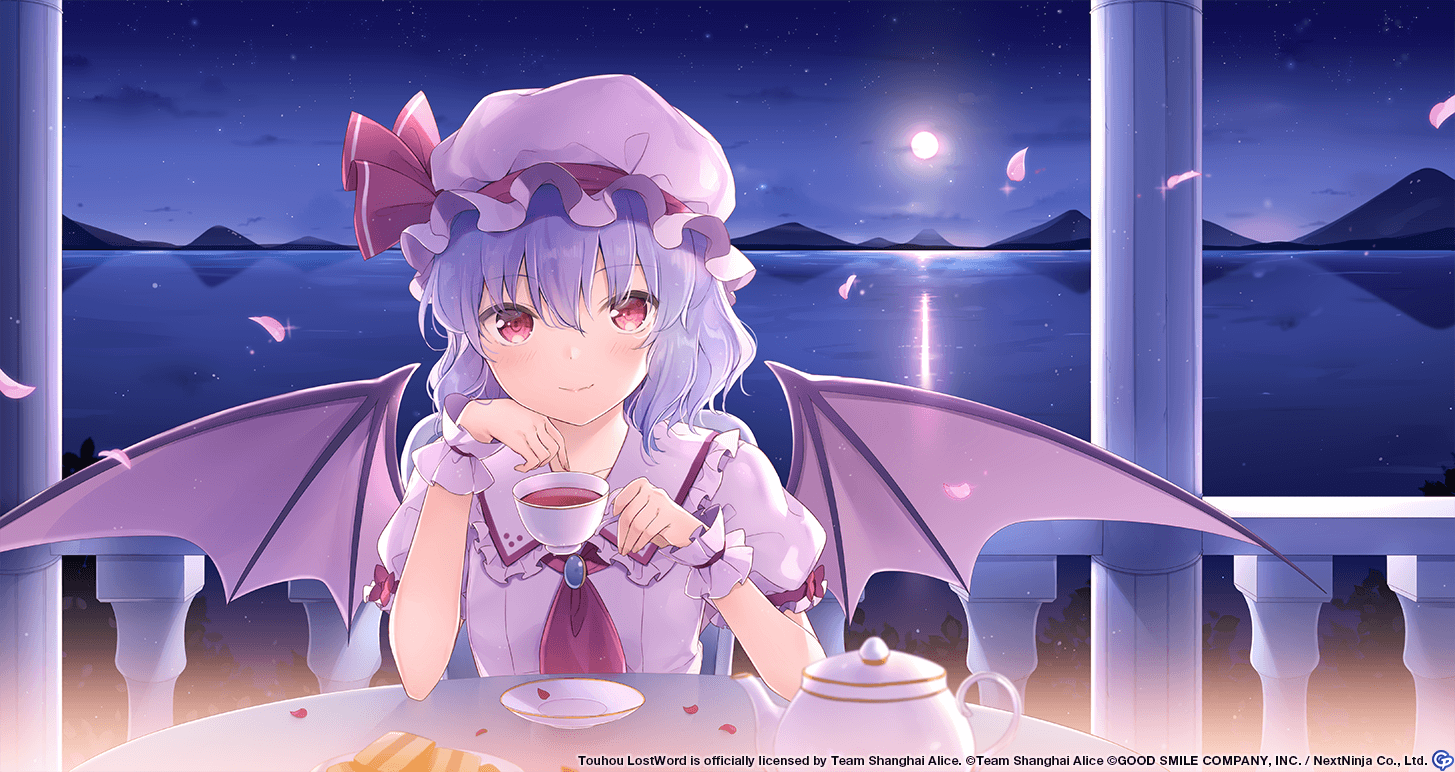
Introduction
Welcome to the Moon EX Battle Stage Info, now as a permanent challenge quest for everyone to tackle! This stage is designed to have natural bias for Moon elements against L1 Iku and the 2 Moon Rabbits.
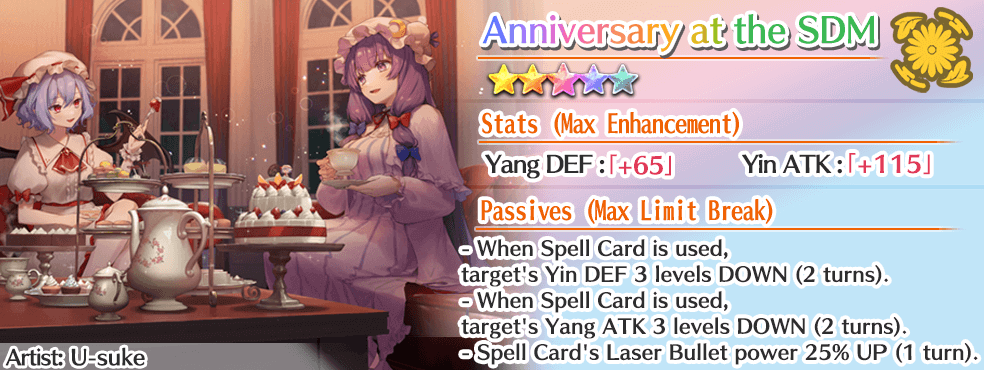
The featured Anniversary at the SDM story card highlights the powerful 3 YIN DEF DOWN to target effect, which tremendously helps for YIN units as defense debuffs are multiplicative with attack buffs. The other two effects — 3 YANG ATK DOWN and 25% Laser Bullet UP — are good effects to consider in case you need survivability and extra damage to take note of.
Fight Overview
Wave 1
Enemy Info
|
Wants a Break Drops: |

750,000

7

N/A

Moon

Sun

Fire

Water

Wood

Metal

Earth

Star
|
||||
Additional Info
|
|||||

L1 Iku Nagae |
1,500,000


1,500

2,700

800


7
1
Moon
Sun
Fire
Water
Wood
Metal
Earth
Star
|
||||||||
Additional Info
|
|||||||||
|
Wants to Share Drops: |
750,000
7
N/A
Moon
Sun
Fire
Water
Wood
Metal
Earth
Star
|
||||
Additional Info
|
|||||
L1 Iku's Special Effects
All attacks are 2.00P.
Ability:
- When using Boost, own YANG ATK 1 level UP (1T).
- For every layer of Paralyze: Agility, Accuracy, and Evasion UP by 1 level.
Spell Cards and Last Word:
- SC 1: Inflicts 1 layer of Barrier Status: Blind to all targets (10T).
- SC 2:
- Inflicts 1 layer of Barrier Status: Blind to all targets (10T).
- Cleanses 2 layers of own Barrier Status.
- LW:
- Breaks Barrier Status: Blind.
- Adds 4 layers to own Barrier.
Stage Analysis
Moon EX Battle Stage consists of a 1 wave battle which re-introduces the Spell Card item mechanic where it restores a spell card that has already been used (including Last Words).
One threat to take note of would be Iku's Last Word. With Iku's Last Word, it not only hits hard, but also restores 4 barriers and breaks any Blind anomalies she inflicted. Iku also gives herself 5 Evasion buffs on the final gauge break and even more when below 50% HP, which is fairly tricky to overcome. At the same time, the rabbits will inflict switch lock and graze lock on their gauge break respectively which can be painful to deal with as Iku's basic shots hit really hard.
What does the stage drop?
After you clear the battle stage, you will be rewarded with 400 Player EXP and 1300 Friend EXP plus a chance to drop Anniversary at the SDM, All Gold Materials, and All Silver Materials. Alongside that is a task that rewards you one copy of Anniversary at the SDM for your first clear.
Recommendations
Friends:
As seen by the context of this article, it will be easily understood that the basic factor to keep in mind is to bring Friends that have heavy access to the Moon element. To further enhance your damage output, the next best idea is to bring Friends that have effective Killers against Iku and/or the Rabbits. Examples for this are Youkai and connection to Moon tags. Another idea is to do anomaly barrier breaking using Poison and/or Paralyze. However, please keep in mind that you should be careful when doing Paralyze break strategies as this anomaly buffs Iku's Evasion by 1 per layer thanks to her Ability.
Right below, we have a list of Friends that are categorized based on their roles for this specific stage. Core Friends are Friends who have tremendous overall impact over the course of the battle. Nukers are described as Friends whose primary purpose is to dish out high amounts of damage to quickly deal with the enemies at hand. Barrier Breakers as the name implies, are Friends who excel at barrier breaking, in this case, it is sub-categorized into two sections, Moon Element Breaks and Anomaly Breaks. Lastly, we have the Utility and Breaks category, where the Friends listed mostly supports the party through party buffs and enemy debuffs, with the added benefit of doing barrier breaks.
NOTES:
- The list below is ordered properly from left (highest) to right (lowest) based on their effectiveness for the category.
- As everyone noticed, this list is currently outdated! This section will be reworked to be fully updated as much as possible in the near future.
UPDATE LOG:
- 5/27: Added the list of Friends below. Note that this will be consistently updated accordingly as time goes by.
- 5/28: Moved A8 Reisen to Utility + Barrier Breaks instead as her nuking potential is not that high.
| Core Friends | |
|---|---|
|
|


Character Page: Watatsuki no Yorihime (Peace Temple of Modesty and Devotion) Nothing in here yet.
Character Page: Watatsuki no Toyohime (Plentiful Temple of Wealth and Equality) Nothing in here yet.
Character Page: Sagume Kishin (Truth Temple of Legitimacy and Integrity) Nothing in here yet. |
|
|
Character Page: Reisen Udongein Inaba (Lunatic Space Youkai) Nothing in here yet. |
| Utility + Barrier Breaks | |
|---|---|
|
|


Character Page: Reisen (Peacekeeper of the Capital) Nothing in here yet.
Character Page: Eirin Yagokoro Nothing in here yet.
Character Page: Sagume Kishin Nothing in here yet. |
|
|


Character Page: Reisen Udongein Inaba (Eternal) Nothing in here yet.
Character Page: Sakuya Izayoi (Scarlet) Nothing in here yet.
Character Page: Rin Kaenbyou Nothing in here yet. |
| Nukers | |
|---|---|
|
|


Character Page: Sakuya Izayoi (Lunar War Servant) Nothing in here yet.
Character Page: Reisen Udongein Inaba (Lunar War Soldier) Nothing in here yet.
Character Page: Youmu Konpaku (Cherry Blossom) Nothing in here yet.
Character Page: Youmu Konpaku Nothing in here yet.
Character Page: Suika Ibuki Nothing in here yet. |
|
|

Character Page: Remilia Scarlet (Tiny Devil Mistress) Nothing in here yet.
Character Page: Seija Kijin Nothing in here yet. |
| Barrier Breakers | |
|---|---|

|

Character Page: Hecatia Lapislazuli Nothing in here yet. |

|

Character Page: Minoriko Aki Nothing in here yet. |

|


Character Page: Minoriko Aki Nothing in here yet.
Character Page: Medicine Melancholy Nothing in here yet.
Character Page: Junko (Nameless Space Terror) Nothing in here yet. |
Story Cards:
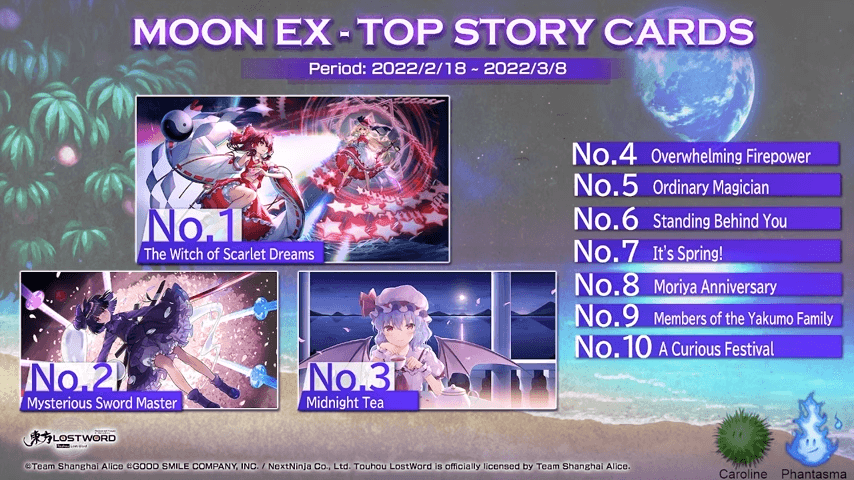
As for Story Card recommendations, multiple MLB copies of the Witch of Scarlet Dreams story card will be immediately recommended as having access to multiple bullet lines will be essential if you want to give your units more fighting power and barrier breaking potential. An alternative would be MLB Youkai Mountain Anniversary which gives the same effect. If you are lacking in both of these story cards, other options include MLB Midnight Tea, MLB It's Spring for 1.5 P UP. Now, to bring out your Friend's damage potential, it is recommended to use the best card for each Friend's Last Word which is augmented with buffs and/or debuffs you are looking to take advantage of.


Team Comp Guides
Having trouble with the Battle Stage? Then you've come to the right place! This section contains some guides that may help you out on your journey in defeating Iku and the Rabbit Officers. Taken from the 9th Dev Letter, we have witnessed the friends and story cards that people usually used to deal with this stage. Below is the list of the said friends and story cards that you can use as reference:
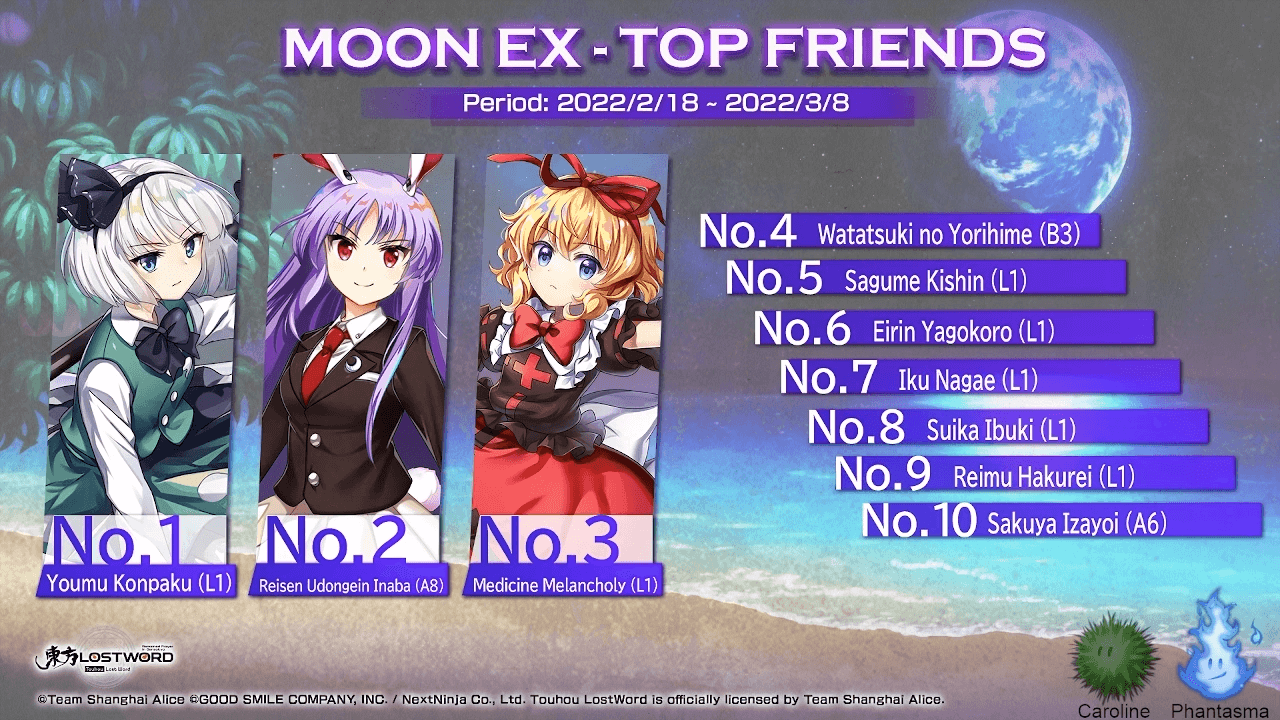
Right below we have an example of my farm comp for Moon EX Rerun that you can use as reference if you have the Friends involved. Fellow writer Delta Rune also made a video regarding his farm comp for this stage.
Community Guides
These are some of the community made clear and farm comps for the stage that can serve as further reference for your endeavors. These are split into two categories, namely Clear Comps and Farm Comps. Clear Comps do not take account battle consistency in mind because its purpose is to give an idea on how to approach the stage in an uncouth manner, whereas Farm comps take account consistency and/or SP efficiency so that players can grind the stage more.
Note that these videos are not affiliated with Gamepress and are made solely by their respective creators. The author has also asked for permission from the creators about their content being featured in this article.