GamePress

Star EX Battle Stage Info

Submit Feedback or Error

Introduction

Welcome to the fourth Elemental EX Battle Stage, with the theme of using units that have strong Star elemental affinity.

The current article is a guide including an overview of the stage, unit recommendations, and team compositions to clear or even farm it. So of course we'll start with a detailed look at how the stage goes.

Fight Overview

Wave 1

Stats

1
100
500
2,000
500
2,000
N/A
N/A
Star
Sun
Moon
Fire
Water
Wood
Metal
Earth
2,500,000
1,500
1,800
2,000
1,800
2,000
7
1
Star
Sun
Moon
Fire
Water
Wood
Metal
Earth
1
100
500
2,000
500
2,000
N/A
N/A
Star
Sun
Moon
Fire
Water
Wood
Metal
Earth

Enemy Details

Name Drops Wave Start Skill Gauge 1 Break Gauge 2 Break Skill 1 Skill 2
Tengu With a Plan Spell Card Item

[Layered Bullet Immunity B]
Own Sharp Bullet RES UP by 100% (10T).

Own Laser Bullet RES UP by 100% (10T).

Own Light Bullet RES UP by 100% (10T).

[Layered Bullet Immunity C]
Own Ofuda Bullet RES UP by 100% (10T).

Own Body Bullet RES UP by 100% (10T).

Own Heavy Bullet RES UP by 100% (10T).

None

[Layered Bullet Immunity A]
Own Light Bullet RES UP by 100% (10T).

Own Sharp Bullet RES UP by 100% (10T).

Own Heavy Bullet RES UP by 100% (10T).

None
Red Supergiant
(Z1 Marisa Kirisame)
None

[Nature's Seal]
Seals Graze usage (4T).

Own Wood RES UP by 70% (4T).

Reduces YANG DEF of all enemies by 2 levels (1T).

[Land's Defense]
Own YIN DEF UP by 5 levels (4T).

Own YANG DEF UP by 5 levels (4T).

Own Earth RES UP by 70% (4T).

[Eluding Chains]
Seals Switch usage (3T).

Seals Graze usage (3T).

Own CRIT EVA UP by 5 levels (3T).

[25-100% HP: Nourishing Evasion]
Recovers 5% of own HP.

Cleanses 2 of own barrier anomalies.

Own CRIT EVA UP by 2 levels (2T).

[0-25% HP: Supergiant's Last Stand]
Recovers 25% of own HP.

Inflicts 7 Burn anomalies to all enemies (2T).

Inflicts 7 Paralyze anomalies to self (2T).

Tengu Reluctantly Brought Along Spell Card Item

[Layered Bullet Immunity C]
Own Ofuda Bullet RES UP by 100% (10T).

Own Body Bullet RES UP by 100% (10T).

Own Heavy Bullet RES UP by 100% (10T).

[Layered Bullet Immunity B]
Own Sharp Bullet RES UP by 100% (10T).

Own Laser Bullet RES UP by 100% (10T).

Own Light Bullet RES UP by 100% (10T).

None

[Layered Bullet Immunity D]
Own Body Bullet RES UP by 100% (10T).

Own Light Bullet RES UP by 100% (10T).

Own Heavy Bullet RES UP by 100% (10T).

None

Z1 Marisa's Notable Effects

  • Ability: Immune to Barrier Status: Burn & Freeze. DMG to resisted elements 25% UP. DMG from resisted elements 25% DOWN.

  • Spell Card 2: Recover 5% of own HP. All enemies YIN DEF DOWN by 1 level (4T).

  • Last Word: Recover 15% of own HP. All enemies YIN DEF DOWN by 3 level (2T). Own YIN ATK UP by 6 levels (2T).

Stage Analysis

Star EX Battle Stage consists of a 1 wave battle with Z1 Marisa Kirisame, also known as the Witch of the Scarlet Dreams, along with two Raven Tengus. This time, the enemies will introduce the CRIT EVA and Bullet Type Resistance mechanics. Right below, you will know why these mechanics are something to take note of as well as some tips you can do to workaround them.

Z1 Marisa:

  • The immediate threat for this stage would be her 4 turn Graze Seal as this happens the moment the battle starts. This effect locks your units out from using their graze, which might cause some survivability issues for your units. Thus, this becomes a core obstacle for this stage as she is able to one shot your Friends even with her Shots without proper preparation.
  • Be aware that Z1 Marisa will constantly supply herself with CRIT EVA UP which can render your CRIT reliant units hopeless if left unchecked. However, this does not affect Killer bullets since this mechanic allows your units to have a guaranteed critical hit on the enemy regardless of your units' critical hit chance (CRIT ACC) and the enemies' CRIT EVA buffs. So if you plan to go to this route, make sure to bring Friends that have effective Killer bullets for Z1 Marisa. The most prominent examples for these are Youkai Killer, Gensokyo Killer, and/or Magician Killer. Keep in mind that her CRIT EVA UP buff will be dispelled once she enters Full Break status.
  • For those pursuing the anomaly break path, Z1 Marisa will constantly cleanse 2 of her barriers from anomalies within the 25% to 100% HP range making it hard to do a Full Break approach using anomalies.
  • If you somehow lacked damage, which made you reach Z1 Marisa's 0-25% HP range, she will heal 25% of her HP and your front line Friends will be inflicted with 7 Burn barrier anomalies for 2 turns. Be warned that if you put her in this HP range within the first four turns of the stage, you will not be able to graze the anomalies away. This is quite important as Burn barrier anomalies reduces YIN ATK and YIN DEF by a certain percentage and inflict a percentage of damage based on MAX HP. However, this also comes with a price for her as she inflicts herself with 7 Paralyze barriers for 2 turns. This can become a golden opportunity if you have Friends that can break Paralyze anomaly barriers, with an added benefit of decreasing her Evasion plus a chance to be Stunned for a turn, where the chance of occurrence is relative to the amount of Paralyze barriers she has.
  • Be extremely careful whenever she is able to use her Last Word as it will be a literal death wish if you face it head on without grazing.
  • Onward to the 1st Gauge Break, the notable effects she will receive are the 5 levels of YIN DEF UP and YANG DEF UP for 4 turns which can be troublesome to deal with if you cannot Full Break her instantly to dispel the defensive buffs.
  • As Z1 Marisa's last stand, her 2nd Gauge Break will give 3 turns worth of Graze Seal and Switch Seal to your Friends as well as 5 levels of CRIT EVA UP which also lasts for 3 turns. You will have to Full Break her immediately once again as your team may fall from her firepower.

Raven Tengu (ST):

  • First thing to note is that they drop Spell Card Items which restores all of your units' spellcards, with Last Word as the priority to restore. You may take advantage of this mechanic in many ways such as defeating only one of the mobs that drop them while keeping the other one alive for later. However, keep in mind that Spell Card Items only drop after the enemy dies, and not when you break one of their HP gauges.
  • At first glance, you will rejoice over the fact that the two mobs only have 1 HP to deal with. However do not be easily fooled as they have 0 Barriers and have the capability of taking no damage at all thanks to the 100% Bullet Type Resist. If you are an old player that have participated and remembered last year's Mochi Event, you will understand how difficult this is as you are fundamentally locked out of barrier breaks in order to deal with them immediately, not to mention that this limits your options in choosing what Bullet Type they can take damage from.
  • A common workaround for this would be to use bullet types that are not resisted. Normal, Slash, Energy, Missile, and Liquid bullets are not resisted against by the two Tengus so keep an eye out for potential Friends that have these bullet lines. A more specific workaround is to find Friends that have the Piercing mechanic on their bullet lines as this completely ignores Bullet Type Resists.

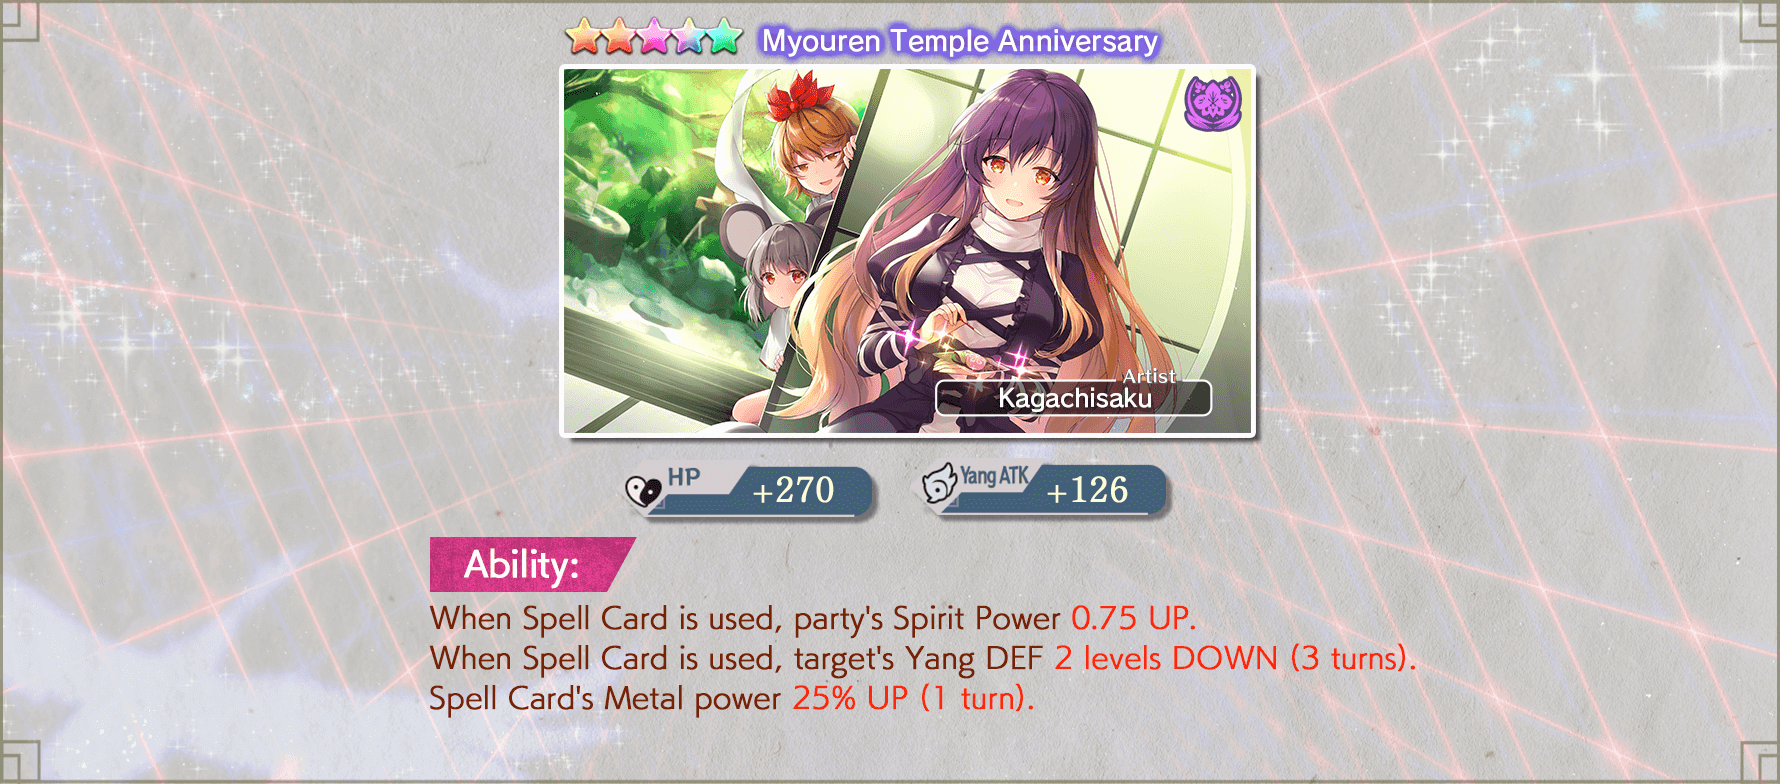
What does the stage drop?


After you clear the battle stage, you will be rewarded with 400 Player EXP, and 1300 Friend EXP plus a chance to drop Myouren Temple Anniversary, All Gold Materials, and All Silver Materials. And if the clear is your first time, you'll get one extra copy of Myouren Temple Anniversary from a task reward.

Recommendations

Friends:

As seen by the context of this article, it will be easily understood that the basic factor to keep in mind is to bring Friends that have heavy access to the Star element. Additionally, as this stage emphasizes on Z1 Marisa's continuous supply of CRIT EVA UP buffs, your CRIT reliant Friends will normally have a hard time to deal critical damage hits to her. So, the next best idea to keep in mind is to bring Friends with access to Killer bullets exclusive for Z1 Marisa as it allows your Friends to guarantee critical hits. Gensokyo, Youkai, Scarlet Devil Mansion, and Magician are her most prominent character tags, which means that you should consider bringing Friends with these types of Killers. If you constantly find yourself reaching Z1 Marisa's 0-25% HP threshold, you may find it useful to bring Friends that can break Paralyze anomaly barriers as this will instantly help you out in bringing her to Full Break status, which makes her easier to deal with.

Right below, we have a list of Friends that are categorized based on their roles for this specific stage. Core Friends are Friends who have tremendous overall impact over the course of the battle. Nukers are described as Friends whose primary purpose is to dish out high amounts of damage to quickly deal with the enemies at hand. Barrier Breakers as the name implies, are Friends who excel at barrier breaking, in this case, it is sub-categorized into two sections, Star Element Breaks and Paralyze Anomaly Breaks. Lastly, we have the Utility and Breaks category, where the Friends listed mostly supports the party through party buffs and enemy debuffs, with the added benefit of doing barrier breaks.

NOTES:

  • The list below is ordered properly from left (highest) to right (lowest) based on their effectiveness for the category.
  • As everyone noticed, this list is currently outdated! This section will be reworked to be fully updated as much as possible in the near future.

UPDATE LOG:

  • 5/19:
    • Removed Doremy's red border as her Last Word with capped buffs cannot reach high values (~1.5M).
    • Moved B3 Sagume to Utility and Breaks as she is better fit for that category.
  • 5/21:
    • As the character analysis for this stage will be implemented, the red borders now indicates that the Friend icon is clicked.
    • Added a draft analysis for E1 Flandre and A6 Marisa.
    • Moved B3 Yorihime to the Utility + Breaks category.
    • Removed L1 Sanae from the Utility + Breaks category.
  • 5/26:
    • Z1 Marisa's damage capabilities for this stage is lower than initially theorized and she is mostly used for her abundance of star breaks, thus, she has been moved to the Barrier Breaker category.
    • In relation to this, Meiling (Fantasy Rebirth) proved that she has high damage potential than Doremy through her SC 1 and Last Word, therefore, she has been moved above Doremy.
Core Friends

Character Page: Marisa Kirisame (Scarlet)

A6 Marisa boasts high amounts of elemental breaks, starting off with her SC 1 with has a total of 4 Star lines, SC 2 with 3 Star lines, and LW with 3 Star lines. Despite having backloaded Star access on her Last Word, her damage potential peaks around ~700-1M+ for this stage which is dependent on her SDM Killer as well as how buffed she is. This potential is considered good and can be taken advantage of for when your other nukers cannot kill Z1 Marisa in one go. Lastly, her party utility is excellent as she is able to provide superb amounts of CRIT based support as well as decent amounts of Agility support. A party which consists of Friends with Killers that are effective for Z1 Marisa will find this extremely useful because A6 Marisa won't have trouble keeping the uptime of CRIT DEF DOWN coming.

Character Page: Flandre Scarlet (Vampire Pursuing the Hunter)

E1 Flandre is one of the best Friend to bring in this stage as she is able to dish out phenomenal amounts of damage with just a bit of party support. Her nuking ability is at the pinnacle, reaching up to 3M+ if supported enough. She also provides good amounts of elemental breaks and have decent utility. Be aware that while her Skill 3 provides party CRIT ATK and CRIT ACC, it has the demerit of inflicting Freeze anomalies to the party. As a general tip, unless the Friends involved in the party benefit or are immune to the anomaly, do not use it as Delay may end up wiping your party.

Character Page: Reisen Udongein Inaba (Lunatic Space Youkai)

Nothing in here yet.
Utility and Breaks

Character Page: Tewi Inaba

Nothing here yet.

Character Page: Mai Teireida

Nothing here yet.

Character Page: Sanae Kochiya

Nothing here yet.

Character Page: Star Sapphire

Nothing here yet.

Character Page: Junko (Nameless Space Terror)

Nothing here yet.

Character Page: Satono Nishida

Nothing in here yet.

Story Cards:

As for Story Card recommendations, multiple MLB copies of the Witch of Scarlet Dreams story card will be immediately recommended as having access to multiple bullet lines will be essential if you want to give your units more fighting power and barrier breaking potential. An alternative would be MLB Youkai Mountain Anniversary which gives the same effect. If you are lacking in both of these story cards, other options include MLB Midnight Tea, MLB It's Spring for 1.5 P UP. Now, to bring out your Friend's damage potential, it is recommended to use the best card for each Friend's Last Word which is augmented with buffs and/or debuffs you are looking to take advantage of.

Team Comp Guides

Having trouble with the Battle Stage? Then you've come to the right place! This section contains some guides that may help you out on your journey in defeating Z1 Marisa and her Raven Tengu accomplices. Right below I have made a farm comp directly based from HakumeiJin#3182's initial 28 SP clear comp in #lostword-strategy, which you can use as reference.

[24 SP] A6 Marisa + E1 Flandre + B3 Marisa

Requirements
Expand

Story Card Recommendations:
• A6 Marisa: MLB Witch of Scarlet Dreams | Worlds in Hand | MLB Worlds in Hand | YANG ATK statstick | MLB Secret Sealing Club Girls or MLB Eating Contest
• E1 Flandre: MLB Overwhelming Firepower | MLB Overwhelming Firepower | MLB Overwhelming Firepower | YIN ATK stat stick | MLB Secret Sealing Club Girls
• B3 Marisa: MLB Ordinary Magician | Worlds in Hand | MLB Worlds in Hand | YANG ATK stat stick | MLB Secret Sealing Club Girls

Minimum Requirements:
• A6 Marisa: MLB, Level 100, 1*, Rank 4, 10/10/10, Pink Heart
• E1 Flandre: MLB, Level 100, 1*, Rank 4, 10/10/10, Pink Heart
• B3 Marisa: MLB, Level 100, 1*, Rank 5, 10/10/10, Pink Heart

Strategy
Expand

Strategy:
Turn 1
• A6 Marisa: Use Skill 1 and Skill 2, boost twice, then use SC 1.
• E1 Flandre: Use Skill 2, boost twice, then use SC 1.
• B3 Marisa: Use Skill 1 then use SC 2.
Turn 2
• A6 Marisa: Use Skill 3, boost twice, then use LW.
• E1 Flandre: Use Skill 1, boost twice, then use LW.
• B3 Marisa: Use Skill 2 and Skill 3 then use LW.
Turn 3
• A6 Marisa: Boost twice then use SC 3.
• E1 Flandre: Use SC 3.
• B3 Marisa: Boost twice then use SC 3.
Turn 4
• A6 Marisa: Use Skill 1, boost once, then use LW.
• E1 Flandre: Boost twice then use LW.
• B3 Marisa: Boost twice then use SC 1.
Turn 5
• A6 Marisa: Use Skill 2, boost thrice, then use SC 2.
• E1 Flandre: Use SC 2.
• B3 Marisa: Boost thrice then use LW.
Turn 6
• A6 Marisa: Boost once then use LW.
• E1 Flandre: Use Skill 2 and Skill 3, boost twice, then use LW.
• B3 Marisa: Use Skill 1 and Skill 2, boost twice, then use any Shot.

Community Guides

Below are some of the community made clear and farm comps for the stage that can serve as further reference for your endeavors. These are split into two categories, namely Clear Comps and Farm Comps. Clear Comps do not take account battle consistency in mind because its purpose is to give an idea on how to approach the stage in an uncouth manner, whereas Farm comps take account consistency and/or SP efficiency so that players can grind the stage more.

Note that these videos are not affiliated with Gamepress and are made solely by their respective creators. The author has also asked for permission from the creators about their content being featured in this article.

Clear Comps

[12 SP] E1 Meiling Clear by solver1104#2401

25 Turn Setup

[24 SP] L1 Tewi Inaba + B5 reisen Udongein Inaba Clear by MoKSeM#0973

7 Turn Setup

[38 SP] L1 Meiling (Rebirth) + A6 Marisa + E1 Flandre Clear by i.suk#1092

6 Turn Setup

Requirements
Expand

Story Card Recommendations:
• L1 Meiling (Rebirth): MLB Worlds in Hand | MLB Anniversary at the SDM | MLB Worlds in Hand | MLB Shichi-Go-San School Visit?! | MLB Anniversary at the SDM or MLB Puppeteer and Necromancer
• A6 Marisa: MLB Worlds in Hand | MLB Witch of Scarlet Dreams | MLB Witch of Scarlet Dreams | MLB Worlds in Hand | MLB Anniversary at the SDM
• E1 Flandre: MLB Puppeteer and Necromancer | MLB Midnight Tea | MLB Puppeteer and Necromancer | MLB Shichi-Go-San School Visit?! | MLB Secret Sealing Club Girls

Minimum Requirements:
• L1 Meiling (Rebirth): MLB, Level 100, 5*, Rank 5, 10/10/10, Pink Heart
• A6 Marisa: MLB, Level 100, 5*, Rank 5, 10/10/10, Pink Heart
• E1 Flandre: MLB, Level 100, 5*, Rank 5, 10/10/10, Pink Heart

Strategy
Expand

Strategy:
Turn 1
• L1 Meiling: Use skill 1 and 2 then use SC 2.
• A6 Marisa: Use skill 1 and 2, boost twice, then use SC 2.
• E1 Flandre: Use skill 1 and 2 then use SC 2.
Turn 2
• L1 Meiling: Use skill 3, boost thrice, then use SC 1.
• A6 Marisa: Use skill 3, boost thrice, then use SC 1.
• E1 Flandre: Use skill 3 boost thrice, then use SC 1.
Turn 3
• L1 Meiling: Use SC 4.
• A6 Marisa: Use SC 4.
• E1 Flandre: Boost once, then use SC 4.
Turn 4
• L1 Meiling: Boost twice then use SC 3.
• A6 Marisa: Use skill 1, boost twice, then use SC 3.
• E1 Flandre: Boost thrice then use SC 3.
Turn 5
• L1 Meiling: Use skill 1 and 2 then use Spread Shot.
• A6 Marisa: Use skill 2, boost thrice, then use LW.
• E1 Flandre: Boost once then use Spread Shot.
Turn 6
• L1 Meiling: Boost once then use LW.
• A6 Marisa: Boost once then use Focus Shot.
• E1 Flandre: Use all skills, boost thrice, then use LW.

Notes:

  • You can use L1 Meiling's LW on Turn 5 instead.

[73 SP] Starless Gen Clear by Bon#4729

17 Turn Setup

Farm Comps

[16 SP] E1 Meiling + L80 Alice by MaxSally#7709

7 Turn Setup

[16 SP] L1 Shinmyoumaru + E1 Meiling by aajohans#4216

8 Turn Setup

[17 SP] E1 Flandre + C3 Marisa by ! some dood#9675

8 Turn Setup

[18 SP] E1 Flandre + L80 Alice by MaxSally#7709

8 Turn Setup

[19 SP] L1 Marisa (Rebirth) + C3 Marisa by Nazumi#7716

10 Turn Setup

[20 SP] E1 Flandre + L1 Shinmyoumaru by i.suk#1092

5 Turn Setup

[21 SP] A6 Marisa + B3 Sagume + E1 Flandre by Cheeser#0626

6 Turn Setup

[22 SP] A6 Marisa + B3 Sagume + E1 Flandre by taiyou#1432

6 Turn Setup

Requirements
Expand

Story Card Recommendations:
• B3 Sagume: MLB Witch of Scarlet Dreams | MLB Worlds in Hand
• E1 Flandre: MLB Shichi-Go-San School Visit?! | MLB Witch of Scarlet Dreams | MLB Overwhelming Firepower | YIN ATK stat stick | MLB Secret Sealing Club Girls
• A6 Marisa: MLB Witch of Scarlet Dreams| MLB Ordinary Magician

Minimum Requirements:
• B3 Sagume: 0 LB, Level 70, 1*, Rank 4, 10/10/10, Purple Heart
• E1 Flandre: MLB, Level 100, 5*, Rank 5, 10/10/X, Purple Heart
• A6 Marisa: 0 LB, Level 70, 1*, Rank 4, 10/10/10, Purple Heart

Strategy
Expand

Strategy:
Turn 1
• B3 Sagume: Use all skills, boost twice, then use SC 1.
• E1 Flandre: Use Skill 1, boost once, then use SC 1.
• A6 Marisa: Use all skills, boost thrice, then use SC 1.
Turn 2
• B3 Sagume: Use any Shot.
• E1 Flandre: Boost twice then use LW.
• A6 Marisa: Use any Shot.
Turn 3
• B3 Sagume: Use SC 2.
• E1 Flandre: Use Skill 2, boost twice, then use SC 3.
• A6 Marisa: Boost thrice then use SC 1.
Turn 4
• B3 Sagume: Use any Shot.
• E1 Flandre: Boost twice, then use LW.
• A6 Marisa: Use Skill 1 then use any Shot.
Turn 5
• B3 Sagume: Use Skill 2, boost twice, then use SC 1.
• E1 Flandre: Boost once, then use SC 2.
• A6 Marisa: Use Skill 2, boost thrice, then use SC 1.
Turn 6
• B3 Sagume: Use Skill 1 boost thrice, then use SC 2.
• E1 Flandre: Use Skill 1 and 3, boost thrice, then use LW.
• A6 Marisa: Use Skill 3, boost thrice, then use SC 2.

[22 SP] E1 Flandre + L80 Alice + L1 Tewi by Voisenyer Asylum#7979

6 Turn Setup

[23 SP] A6 Marisa + B3 Sagume + E1 Flandre by HakumeiJin#3182

6 Turn Setup

[24 SP] F1 Reimu + E1 Flandre by haos_terry#2353

5 Turn Setup

Requirements
Expand

Story Card Recommendations:
• F1 Reimu: MLB Protection of Cerpinus | MLB Mansion of Memories | Yin ATK Stick | Yin ATK Stick | MLB Behind the Bullets: Reimu
• E1 Flandre: MLB Anniversary at the SDM | Yin ATK Stick | MLB Anniversary at the SDM| Yin ATK Stick | Unknown Barrier Team

Minimum Requirements:
• F1 Reimu: MLB, Level 100, 5*, Rank 5, 10/10/10, Pink Heart
• E1 Flandre: MLB, Level 100, 5*, Rank 5, 10/10/10, Pink Heart

Strategy
Expand

Strategy:
Turn 1
• F1 Reimu: Use Skill 2/3, Boost twice, SC2.
• E1 Flandre: Use Skill 1/2, SC1.
Turn 2
• F1 Reimu: Boost once, SC1.
• E1 Flandre: Use Skill 3, Boost twice, LW.
Turn 3
• F1 Reimu: Use Skill 1, SC2.
• E1 Flandre: Use SC3.
Turn 4
• F1 Reimu: Boost thrice, LW.
• E1 Flandre: Boost thrice, LW.
Turn 5
• F1 Reimu: Boost twice, LW.
• E1 Flandre: Boost twice, LW.

Notes:
There is a very low chance of E1 Flandre getting hit twice and dying. Should this happen, Superior Enhance her HP and Yin DEF.

[24 SP] F1 Reimu + E1 Flandre by Yukikaze#2828

5 Turn Setup

[24 SP] A6 Marisa + E1 Flandre + L1 Saki by HeavenGaming#0945

6 Turn Setup

[24 SP] B5 Reisen + L1 Shinmyoumaru by MoKSeM#0973

7 Turn Setup

Requirements
Expand

Story Card Recommendations:
• L1 Shinmyoumaru: MLB Worlds in Hand | MLB Hakurei Shrine Anniversary | MLB It's Spring | MLB Witch of Scarlet Dreams | MLB Witch of Scarlet Dreams
• B5 Reisen: MLB Bloody Order | MLB Bloody Order | MLB Bloody Order | MLB Worlds in Hand | MLB Secret Sealing Club Girls

Minimum Requirements:
• L1 Shinmyoumaru: MLB, Level 100, 5*, Rank 5, 10/10/10, Pink Heart
• B5 Reisen: MLB, Level 100, 5*, Rank 5, 10/10/10, Pink Heart

Strategy
Expand

Strategy:
Turn 1
• L1 Shinmyoumaru: Use all skills then use SC 1.
• B5 Reisen: Use Skill 1 and 3, then use SC 2.
Turn 2
• L1 Shinmyoumaru: Boost thrice, then use LW.
• B5 Reisen: Use SC 1.
Turn 3
• Shinmyoumaru: Use Focus Shot.
• B5 Reisen: Use Skill 2, boost twice, then use LW.
Turn 4
• L1 Shinmyoumaru: Boost thrice, then use LW.
• B5 Reisen: Use SC 3.
Turn 5
• L1 Shinmyoumaru: Use skill 1 and 2, graze thrice, then use Spread Shot.
• B5 Reisen: Use Skill 1, boost twice, then use LW.
Turn 6
• L1 Shinmyoumaru: Use skill 3, boost twice, then use LW.
• B5 Reisen: Use SC 4.
Turn 7
• L1 Shinmyoumaru: Boost thrice, then use Focus Shot.
• B5 Reisen: Boost twice, then use LW.

[24 SP] B5 Reisen + B3 Yorihime by mp9, o roxo#2364

7 Turn Setup

[25 SP] E1 Flandre + L1 Shinmyoumaru + B3 Sagume by OwlDotte#0324

4 Turn Setup

[25 SP] L1 Shinmyoumaru + E1 Flandre + L1 Satono by Yukikaze#2828

4 Turn Setup

[26 SP] E1 Flandre + L1 Shinmyoumaru + L1 Saki + Switch Partner by fuujin3#2435

6 Turn Setup

[27 SP] L1 Marisa (Rebirth) + L1 Shinmyoumaru + E1 Koakuma by Nazumi#7716

4 Turn Setup

[28 SP] E1 Flandre + B3 Marisa + B3 Yorihime by levitas#3622

6 Turn Setup

[28 SP] E1 Flandre + L1 Shinmyoumaru + A6 Marisa by Alex.393#0812

6 Turn Setup

Requirements
Expand

Story Card Recommendations:
• E1 Flandre: Yin ATK 3 Levels Up (eg: A Curious Festival) | Any | Yin ATK 3 Levels Up (eg: A Curious Festival) | The Witch of Scarlet Dreams | Unknown Barrier Team/Secret Sealing Club Girls
• L1 Shinmyoumaru: Any | Any | Any | Any | Secret Sealing Club Girls
• A6 Marisa: Any | Any | Any | Any |Worlds in Hand

Minimum Requirements:
• E1 Flandre: MLB, Level 100, 5*, Rank 5, 10/10/10, Pink Heart
• L1 Shinmyoumaru: MLB, Level 100, 1*, Rank 5, 10/10/10, Pink Heart
• A6 Marisa: MLB, Level 100, 1*, Rank 5, 10/10/10, Pink Heart

Strategy
Expand

Strategy:
Turn 1
• E1 Flandre: Use Skill 1/2, Boost once, SC1.
• L1 Shinmyoumaru: Use Skill 1/2, Boost twice, LW.
• A6 Marisa: Use Skill 1/2/3, Boost twice, LW.
Turn 2
• E1 Flandre: Boost twice, LW.
• L1 Shinmyoumaru: Use Spread Shot.
• A6 Marisa: Use Spread Shot.
Turn 3
• E1 Flandre: Boost once, SC3.
• L1 Shinmyoumaru: Boost twice, LW.
• A6 Marisa: Boost twice, LW.
Turn 4
• E1 Flandre: Boost twice, LW.
• L1 Shinmyoumaru: Use Skill 3, Spread Shot.
• A6 Marisa: Use Skill 1, Spread Shot.
Turn 5
• E1 Flandre: Boost once, SC4.
• L1 Shinmyoumaru: Use Skill 1/2, Boost thrice, LW.
• A6 Marisa: Use Skill 2, Boost twice, LW.
Turn 6
• E1 Flandre: Use Skill 1/2/3, Boost thrice, LW.
• L1 Shinmyoumaru: Boost max, Spread Shot.
• A6 Marisa: Use Skill 3, Boost max, Spread Shot.

Notes:
- Turn 5 can be rather flexible when it comes down to how you want to go about E1 Flandre's Second Spell Card and with what Story Card you want to put on it, as long as her LW on Turn 6 still delivers the finishing blow.
- The superior wood doesn't affect the outcome of this comp, as even E1 Flandre, who is the main attacker, has room to use stat sticks on her SC2 for example.
- Due to Worlds in Hand being farmable in Fire EX, you may need to get yourself an MLB copy of that card before using this specific comp here. But other than that, it's relatively easy to emulate once you have the basic requirements down.

[29 SP] E1 Flandre + B3 Marisa + A6 Marisa by JosExp#7395

6 Turn Setup

[30 SP] A6 Marisa + B3 Marisa + A10 Sanae by Metriname#2827

6 Turn Setup

[34 SP] A6 Marisa + L1 Mai + L1 Shizuha + A10 Sanae by starsama

6 Turn Setup

[34 SP] E1 Flandre + L1 Meiling + L1 Saki by haos_terry#2353

6 Turn Setup

[36 SP] B2 Junko + B3 Toyohime + L1 Shinmyoumaru by dy 1n#4946

7 Turn Setup

[37 SP] L1 Hecatia + A6 Marisa + L1 Shinmyoumaru + L1 Shizuha by aajohans#4216

6 Turn Setup

[42 SP] L1 Marisa + A7 Ran + E1 Koakuma + L1 Shinmyoumaru by ! some dood#9675

5 Turn Setup

Requirements
Expand

Story Card Recommendations:
• L1 Marisa: MLB Midnight Tea | Yin ATK Stick | Yin ATK Stick | Yin ATK Stick | MLB Stand-In Shrine Maiden
• A7 Ran: Mansion of Memories | Empty | Empty | Empty | Empty
• E1 Koakuma: Empty | Empty
• L1 Shinmyoumaru: MLB Witch of Scarlet Dreams | AGILITY Stick | MLB Witch of Scarlet Dreams | AGILITY Stick | MLB Mansion of Memories

Minimum Requirements:
• L1 Marisa: MLB, Level 100, 5*, Rank 5, 10/10/10, Pink Heart
• A7 Ran: MLB, Level 100, 1*, Rank 5, 10/10/10, Pink Heart
• E1 Koakuma: MLB, Level 100, 1*, Rank 5, X/10/X, Purple Heart
• L1 Shinmyoumaru: MLB, Level 100, 5*, Rank 5, 10/10/10, Pink Heart

Strategy
Expand

Strategy:
Turn 1
• L1 Marisa: Graze twice, SC1.
• E1 Koakuma: Use Skill 2/3, Graze twice, Spread Shot.
• L1 Shinmyoumaru: Use Skill 2/3, Graze twice, SC1.
Turn 2
• L1 Marisa: Boost thrice, LW.
• A7 Ran: Swap in, Use Skill 2/3, Graze twice, Boost twice, Focus Shot.
• L1 Shinmyoumaru: Boost thrice, LW.
Turn 3
• L1 Marisa: Graze twice, Spread Shot.
• A7 Ran: Graze twice, SC1.
• L1 Shinmyoumaru: Graze twice, SC3.
Turn 4
• L1 Marisa: Use Skill 1/2, Boost thrice, LW.
• A7 Ran: Boost once, Focus Shot.
• L1 Shinmyoumaru: Boost thrice, LW.
Turn 5
• L1 Marisa: Boost thrice, LW.
• A7 Ran: Boost once, Spread Shot.
• L1 Shinmyoumaru: Use Skill 1/2, Boost thrice, LW.

Notes:
1. Shinmy doesn't need to be max awakened, her only job is to break and to sustain Marisa's Yin ATK UP and as such she suffices at 8SP. You must only ensure that her agility is at least 1.2 times higher than Marisa's.
2. A7 Ran doesn't need any limit breaks and only her skill 1 and 3 need to be leveled. However at a lower level she may not be able to out-speed the tengu and an Agility Stick should be in SC2.
3. E1 Koakuma can stay at 0LB since all she does is cleanse the Graze Lock and provides Marisa with Yin ATK UP, as well as party-wide P Up. Only her second skill needs to be maxed.
4. The Mansion of Memories on Shinmy's Lastword likely does not need to be MLB as it only serves to extend Marisa's Yin ATK UP.
5. A +10 Eating Contest can replace the Stand-In Shrine Maiden on Marisa's Lastword because a 5% damage should be negligible. An extremely unlucky crit and damage RNG roll still may have the possibility of happening but the chances should also be negligible.

[53 SP] Power Link Character + A6 Marisa + L1 Hecatia + A10 Sanae + E1 Meiling by Arventic#0940

7 Turn Setup

Enjoyed the article?
Consider supporting GamePress and the author of this article by joining GamePress Boost!
Join!

About the Author(s)

I usually write about strategy guides as I try to fix my skill issue. I can be contacted via Discord (Minzhire#0225) but mainly on Touhou LostWord Official Discord's #lostword-strategy channel. If you got any feedbacks and/or suggestions regarding the articles I've worked on, please use the #gamepress-feedback channel.
local bocchi and artoria simp. discord @ is deltarune
Writer. Event Organizer. People Person. Focused on growing the local Touhou scene while contributing content to larger online communities. I copywrite for a living. Reach out to me at Kairyu#2386 on Discord to discuss any work you'd like done for yourself or your organization.

Comments