Should You Pull?
Very good deals make this a tempting Prayer to pull. These Prayers are a callback to previous limited Prayers that were done around the start of LostWord Global’s life. For those who are new to the game, complete the Prologue and these Prayers will start running. For everyone else, these will begin immediately after logging in between March 24th and April 21st. After being initiated, like the title implies, the Prayer will end 72 hours from when it starts. From there, Part 1 ends and Part 2 will begin for an additional 72 hours.
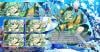
As for the content of the Prayers themselves, 6 Festival Friends are offered for a special deal. While you can only pull 3 times on each Prayer with 300 God Crystals, you get the usual 10 Fortune Dust along with guaranteeing one of the Festival Friends shown! This is a very generous opportunity to possibly pick up a Festival Friend you might have missed or pick up a helpful Friend early on. Of course, gunning for one Friend only may be risky, as it is only a 1 in 6 chance you are ensured that Friend, and subsequent pulls can even give the same Festival Friend. Helpful if you need to Limit Break the limited Friend, but it still might lead some to disappointment.
With 12 Festival Friends accessible at once, this is definitely a banner to consider pulling on. Unfortunately, the main catch are the co-runners: B3 Watatsuki no Toyohime, A6 Reimu Hakurei and Marisa Kirisame, Fire Elemental Festival, and even B3 Sakuya Izayoi and Youmu Konpaku are all other powerful options. It doesn’t help that the time bomb begins right when you log in for those who have completed the Prologue, which at this point would be most players. The reduced God Crystal cost does make this a relatively safe and even cheap Prayer to go for, so just remember to make your decision before these Prayers are gone.
Rather than go into great detail on the 12 different Festival Friends available, a brief paragraph will be given to highlight each Friend's uses and capabilities. As always, the characters' pages are also linked for any specific information you might desire.
Part 1 Quick Overview

+Amazing amount of Healing and Barrier restoration
+Great Poison Barrier support, for either Anomaly Breaks or supporting Yang Attackers
+Last Word can deal a lot of damage if given a turn to set up
-Poor Barrier Break potential
-Backloaded Last Word (1-1-3 bullet line spread)
-Hard to support

+Devastatingly powerful DEF DOWN debuffs
+Extremely strong Solo last word that's also frontloaded, making her good for farming and hard fights alike
-Breaks are still kinda average, even if she has a good amount of Fire

+Very high and front-loaded damage which partially ignores elemental resistances
+Both Spell Cards are All targeting, useful in farming and Arena alike
-Minimal utility; purely a damage-dealer
-Poor Breaks

+Powerful AoE and Yang damage
+P0 Wood/Water breaks on her shots.
+Can inflict up to a total of 7 Paralyze Barriers on all foes
+Last Word possesses 2 levels of 2 Yang DEF DOWN
-Applies Paralyze barriers to her allies
-Weaker in longer fights, where she must spend Barriers to survive and thus cannot benefit as much from her character ability

+Great burst damage to singular targets
+P0 All targeting Sun on a Basic Shot
+Self Charge makes her easy to support
+Decent amount of teamwide Accuracy and Yin ATK support
-Can't hit as hard as the highest tier of attackers, and her support doesn't make up for that
-Yin ATK support isn't particularly helpful with top-tier attackers and Miko doesn't benefit from it herself
+Respectable Solo targeting Last Word that deals tremendous damage with set up.
+Slightly above average access to Water breaks; maximum of 3 per spell
-Requires some setup time to get the most out of her
-No team utility
Part 1 Kit Overview
Eirin Yagokoro
Eirin’s main claim to fame is her Type: Heal. With her very high HP pool, her healing on her first and third skills are very effective and even have rather low cooldowns, at 4 and 5 turns respectively. She can easily raise her own Spirit Power by 1.0 on her second skill and first spell, with the spell providing 2 layers of Poison on all enemies as well. While 1 layer of Barrier restoration from her second spell and Last Word is also great support, it is unfortunate these are locked to spells rather than reusable skills. Still, Eirin will prove her status as a doctor and keep her team healthy while buffing her own stats rather well.
Shion Yorigami
As a misfortune god, Shion prefers to keep the enemy down with constant debuffs rather than buff her own Friends. Fortunately for the team, these are mostly crucial debuffs, including defensive debuffs on her Last Word (3 levels Yin DEF DOWN for 3T) and second skill (2 levels Yin and Yang DEF DOWN for 2T) and Evasion debuffs on her second spell (2 levels Evasion DOWN for 2T) and her third skill (2 levels Evasion DOWN for 2T for all, with an additional 2 on the target). Even her first skill, providing 2 Burn anomalies to all targets, is a very handy Yin debuff for herself and other Yin nukes. Combined with a good access to Fire breaks, Shion still remains as one of the more powerful Friends.
Yuuka Kazami
Yuuka’s end goal is pure, raw damage. Her first skill provides 1.0 Spirit Power while granting herself Charge, an important attribute for a nuke that allows herself to be supported by other Friends first before going all out. Her single-target 2 Poison anomalies and 2 levels of Evasion DOWN (2T) is even more self-support to prepare for the final damage numbers. Her third skill grants her 1.0 Spirit Power combined with 3 levels of Yang ATK UP (1T), meaning she can unleash a 3P Last Word immediately on turn 1. A powerful farmer for sure, but outside of the helpful 0P Wood break on her Focus shot, she doesn’t have much else going for her. A very powerful Friend for certain, but power isn’t everything, especially compared to what other Friends can do now.
Iku Nagae
Iku is arguably the best Friend in this first batch of Festival Friends. She already has 0P Wood breaks from her Spread shot and 0P Water on her Focus shot, not to mention how most of her spells have elemental breaks on them and the 6 out of 6 Wood Last Word. She will raise her Agility from her first spell (3 levels Agility UP for 2T) and her first skill (2 levels Agility UP for 2T) to synergize well with her strong Slicing scaling. While strange at first, the ability to inflict Paralyze on herself with her second and third skills is a very heavy boon, as her character ability makes each Paralyze layer 1 level of Accuracy and Agility UP, boosting her even quicker. Of course, just make sure your other Friends aren’t stuck Paralyzed after her third skill, though it is at least only 1 layer to deal with. Iku hits very hard and has pretty decent utility outside of that, making her a very high-ranking Friend.
Toyosatomimi no Miko
Miko is a very decent Solo-target nuke with a combination of self-buffs and solid collection of breaks. Most notably are the 0P Sun break on her All-target Spread shot and the mix of 3 Sun and 3 Metal on her Last Word. She comes with her own Accuracy support on her second spell (2 levels Accuracy UP for 2T), her first skill (2 levels Accuracy UP for 2T), and even 1 level UP for each boost. Her second skill grants herself 2.0 Spirit Power, giving the ability to unleash a 3P Last Word turn 1 once again and even get some Accuracy support from it. One of the strange parts of her kit is the Yin ATK UP located on her first spell (2 levels Yin ATK UP for 2T) and her third skill (2 levels Yin ATK UP for 2T). Most of her spells’ damage will be Yang-based, and even though her first spell is a party-wide buff, her third skill is for herself and is rather meaningless. At the very least that skill gives her Charge, making her a very useful Attack-type Friend.
Koishi Komeiji
Koishi might appear strange compared to what the other Festival Friends are doing, but she is still a useful unit. Her kit is purely for her own benefit, with her spells giving no pre-attack or post-attack effects (instead relying on chances to debuff Evasion or Yin or Yang DEF on her bullet lines) but at least being serviceable for Water breaking, with 3 breaks on each spell. She has her own 2 levels of Accuracy support before unleashing her Last Word, along with many other CRIT ATK and Accuracy support on her skills. That’s about all she has going for her though: a decently strong Solo-attack Yin nuke in the right situations. Bring her along to support her, but she won’t be doing much of the return the favor buffing-wise.
Part 2 Quick Overview

+ Powerful Solo Last Word that deals high damage in 1 turn and an incredible amount at 3 Power
+ Access to Water, Earth, and Fire
- No team support/utility
- Self-Quick can make it tricky to support her fully
- Average elemental breaks (3 on each spell and Last Word)

+Incredible Turn 1 Damage
+Extremely high set-up damage
+Very notable Killer bullets (Anti-human, youkai, and Gensokyo)
+Yin-Only spells allow her to do damage outside of her Last Word relatively better than other attackers
-No team utility
-Almost no Breaks

+Extremely high Turn 1 damage as well as set up damage.
+Good set of elemental access with Moon and Star being the predominant ones.
+Self-inflicts anomalies which allows her to counter fights which inflict anomalies
+Great spread of Killer bullets with Anti Gensokyo.
-No notable utility.
-Full auto will gimp her damage.

+Great damage in short and long fights alike
+Incredible support for Yang attackers
+Good Accuracy support
-Most notable Yang DEF DOWN debuffs only last one turn
-Slightly lacking break potential

+ Unparalleled team-wide Barrier restoration, restoring 2 Barriers every 5 turns team-wide (Only better with Focus rework)
+ Access to Earth on a Basic Shot at 0 Power
+ All-targeting Spell Card with 2 Earth and Sun Breaks at 3 Power
+ Very solid damage on All Last Word at 3 Power
- Low damage at 1 Power; needs that setup time
- Utility is entirely defensive, leaving her somewhat lacking for shorter fights

+Respectable damage turn 1 on a Solo-targeting Last Word
+Slightly above average access to Fire breaks; at most 3 per spell
-No party utility
-Somewhat low ceiling on damage
Part 2 Kit Overview
Kasen Ibaraki
Kasen is a Technical Friend befitting of the title: she is all about the buffs and preparation. All of her spells are there to give her 2 levels of both Yin and Yang ATK UP alongside 2 levels of CRIT ATK UP. Her third skill is an additional 2 levels to those offensive stats along with 1.0 Spirit Power UP. Her kit might be selfish, but the payoff for setting her up with the right order of buffs and equipped Story Cards more than makes up for it. Her elemental breaking isn’t the most incredible, but she still has a small amount of 3 Water, Earth, and Fire breaks on her first spell, second spell, and Last Word respectively. Give her the time to prepare, and Kasen will prove why her utility has only gone up as the game has progressed with her grand Solo-target strikes.
Watatsuki no Toyohime
Toyohime is another example of a great self-supportive attacker, although she has something special up her sleeve compared to other contestants. Her Killer bullets, which guarantee critical hits on any enemy with the respective race tag, are targeted toward humans, youkai, and residents of Gensokyo, titles that many units of the game have. This makes her turn 1 damage even more impressive when combined with her heavy Accuracy support (2 levels UP first spell for 3T, 2 levels UP from second skill for 2T, and 2 levels UP from third skill for 1T) and Yin ATK buffs (2 levels UP second spell for 3T, 3 levels UP first skill for 2T, and 2 levels UP on Last Word activation). However, just like other Attack-based Friends, damage output is really all she has going for her, as she heavily lacks any significant elemental breaks or team support. Toyohime is a crucial Friend when it comes to wiping out most opponents, but she won’t be doing everything for you.
Hecatia Lapislazuli
Hecatia is the most recent Festival Friend in this entire selection, and it really shows. Not only does she have a 0P Star break on her Spread shot, all of her spells have elemental bullets with varying elements. If that wasn’t enough for you, her first spell gives herself 1.25 Spirit Power to spam her spell’s bullet lines even more. Her skills are a mix of self-buffs, mainly coming from inflicting Poison and Freeze on herself, the former raising her offense (Yin and Yang ATK) and CRIT offense (CRIT ATK and Accuracy) by 1 level for each layer and the latter giving 0.20 Spirit Power for each layer absorbed. If that wasn’t enough, she can even restore 2 of her own Barrier on her third skill and even has a slight amount of team support on her second spell, giving 2 levels of Yin ATK UP to everyone (3T). She does almost everything, though in a way this makes it so she does not excel in one category incredibly. Still, this goddess will not be shy of showing off all of the powers of Hell itself.
Sagume Kishin
Sagume specializes in Yang-centered debuffing along with average Moon break potential on her spells. While the All-target 2 levels of Yang DEF DOWN from her Last Word and 3 levels from her second skill only last 1 turn, her first spell decreases the Yang ATK and DEF of a single target by 2 levels for 2 turns. She can still set up properly to unleash heavy Yang damage to all targets, especially with her other self-Yang buffs, but it will be a bit more limited than the usual nuker. However, Sagume still has use for supporting other Friends, particularly other Yang nukes that can take advantage of her Yang DEF debuffs. She also has Accuracy support in the form of 2 levels of Evasion DOWN for 2 turns on her third skill, making her still rather decent on her own.
Yukari Yakumo
Yukari is the first and only Defense-oriented Friend out of this selection, and a very powerful one at that. While pretty middling in elemental breaks, she at least makes up for it with a spammable 0P Earth break on her Focus shot. Where Yukari truly shines is in tanking, as not only can she heal 35% of her HP with her first skill, but she can increase her Yang DEF through her second skill (3 levels for 3T). This both allows her to take more damage while increasing her Focus as well as deal more damage through her pretty decent Hard scaling. Most important of all is her third skill, as having the ability to restore two Barriers to the party every 5 turns is a very special attribute. Even as a defensive unit, Yukari has the capability to hit rather hard, making her a valuable asset to any team.
Satori Komeiji
Last but not least, Satori finds herself in a situation similar to her younger sister. Her first spell is more explicitly useful by decreasing a single target’s Evasion by 2 levels for 3 turns, but the rest of her spells effects rely on randomness of her bullet lines properly activating. Instead of serviceable Water breaks, Satori gets 3 Fire breaks on each of her spells with a small mix of Earth thrown into her Last Word. Unfortunately, her skills provide rather little in terms of utility, and the Quick gained from her third skill can make her rather difficult to support. The aspect that brings Satori back is her Last Word, standing out as a very strong Solo-nuke option with 7 levels of Yin ATK UP merely upon activation. However, note how the Yang ATK buff works: it starts at only 3 Yang ATK UP at 0 Spirit Power, and then goes up to 5, 6, and 7 for 1, 2, or 3 boosts respectively. Sadly, her lack of any other uses can make Satori one of the less unique Festival Friends of this pool.