Latest Additions
The Slow Shock batch includes:
- DP-12 (High Priority) - DP-12 MOD is the new queen of shotguns, boasting unrivalled tankiness even compared to the other higher tier shotguns.
- K5 (High Priority) - A great HG, getting even better. K5 MOD grants buffs dependant on present enemy types, which most notably includes high threat enemies allowing K5 to grant a teamwide force shield.
- 100 Shiki (Medium Priority) - All parts of 100 Shiki’s upgrade come together to raise her defensive capabilities to be slightly above that of R0635 MOD. A good upgrade in it, but vastly overshadowed by the far superior Suomi MOD.
- M1919A4 (Low Priority) - This upgrade is ok by itself, but the SPEQ-Set does grant M1919A4 a unique niche in removing HP Shields from giant enemies.
Other Changes:
Details on Grey Zone Speqs and the SPEQ-Sets created as a result have been added to relevant dolls. These dolls have a new level of recommendation based on the value of the SPEQ-Set itself. For the most part, this has not changed anyone's priority ranking, with a couple of exceptions:
- 416 (Medium Priority to High Priority) - 416's SPEQ-Set is insanity that bolsters 416 not just to high, but the new second place ranking in both the New Player Priority and the regular rankings. This SPEQ-Set greatly increases her destructive power. She can also be your 13-4 corpse dragger.
- Type64 (No Priority to Medium Priority) - With her SPEQ-Set in tow, Type64 is completely rescued from complete nothingness. With it, she has new defensive and support utility from clones she summons, and can stun anything that isn't a boss. If you can't complete her SPEQ-Set, still avoid.
- ST AR-15 and G11 (Swapped Places) - ST AR-15's SPEQ-Set pushes her back into the limelight, bringing her DPS to the same level as G11 MOD, though without the FCC cost. As such, the two have effectively swapped their places, with ST AR-15 now being in High and G11 being in Medium.
The guide overall has undergone a huge sweep of grammatical/punctuation fixes, rewordings, and general future proofing that should greatly increase readability of the guide. Practically every entry has been touched in this regard, most receiving general fixes, while some such as NTW-20 have received a complete rewrite.
Introduction
The Neural Upgrade system (Otherwise simply referred to as “modding”) allows you to enhance the performance of certain dolls. Those dolls which have access to Neural Upgrade can enjoy better stats, new/improved skills, Special Equipment, and even a rarity and art upgrade - often making them much stronger and more usable.
With the process being costly however, it can be daunting for commanders who are getting into modding for the first time to choose where to start. This guide aims to help those commanders who might be struggling to decide on where to start, or even anyone simply trying to select an upgrade candidate among their own short-list of T-Dolls they want to upgrade next. While this article does provide a general overview of all currently available Digimind Upgrades and rank them by priority, knowledge of the basic system mechanics are assumed.
Before continuing, reading the below guide to obtain a good understanding of the system as a whole is recommended if you’re new to the concept of Mods/Neural Upgrades:
Ranking Explanation
- In terms of priority, dolls are sorted into six tiers: High, Medium, Night, Low, Minimal, and No.
- For High, Medium, Night, and Low Priority dolls, they have been ordered within the tier based on their overall value. Even within the same tier, some mods do still take clear precedence over others.
- For Minimal and No Priority, they are ordered alphabetically. When you’re at the point of doing these mods, order is mostly irrelevant.
- Neural Upgrades are ranked based on overall value vs cost. Dolls with higher priority will generally have a higher return on investment: they offer more to the average player for the resources required compared to lower priority dolls.
- This does NOT mean that Lower Priority MODs are bad. Certain Lower Priority Dolls actually have great upgrades, but they simply don’t have as much value as other higher priority dolls for whatever reason.
- Certain upgrades may be more or less valuable to you depending on certain personal factors such as if you have access to comparative dolls, or if you simply like the doll a lot and would like to upgrade them ASAP.
New Player Priority
This guide is overall catered to highlighting the highest priority mods to enhance your arsenal for high end GFL content, such as the ranking maps. However, if you’re a new commander, you may want to take a different upgrade path to what’s highlighted in the guide. This is mainly due to needing to allocate your resources with more care. As such, this sections highlights a basic path for newcomers to get the most out of their early resources:
- M4A1 MOD2: M4A1 MOD is incredible and should be taken to at least MOD2 at the start. MOD3 can wait for now, as there’s cheaper upgrades that will offer more at this point.
- 416 MOD2: if you wish to perform dragging (where you use 1 doll to carry 4 dolls through a map for levelling), 416 should be upgraded to MOD1 as she can effectively drag one of the best maps in the game, 13-4.
- UMP45 MOD1: UMP45 gets the most benefit from her MOD1 overall so she’s a cheap upgrade for a nice boost in power. Worth doing simply because it’s so cheap.
- M4A1 MOD3: at this point, taking M4A1 to MOD3 will be a good option to round off her upgrade.
- ST AR-15 MOD1: since chances are you will have levelled ST AR-15 anyway as she’s given to you for free early in the story, you can go ahead and do her first upgrade for another quick and cheap boost to her power.
From this point on, your path through upgrading will become a lot more open and you will need to decide for yourself what your optimal path is.
High Priority
These Neural Upgrades are highly valuable for what they offer and should be the first dolls that you invest into.
M4A1 Mod III

Normal

Damaged

Stopping at MOD1: Not Recommended. The stat and skill upgrades are nice but you’re missing out on what truly elevates M4A1 by stopping here.
Stopping at MOD2: Budget. The minimum for M4A1. With her new Skill 2 in tow, you can now lay waste to her enemies. However, you’re still missing the final piece.
Stopping at MOD3: Recommended. Taking her all the way, M4A1 can now benefit from her amazing Special Equipment.
M4A1 is objectively the most valuable MOD in the entire game and should be the first MOD performed by everyone. The amount of applicability that M4A1 MOD has to almost all important aspects of the game is unparalleled. She can do everything she could before and much much more.
The most important aspect of her upgrade is her new Skill, Seal of the Avenger. While her Damage Focus skill is active, she will mark whoever she is targeting and, more importantly, will pull out and use a cannon when there are three or fewer friendly dolls on the field. This cannon majorly reduces her fire rate, but gives a massive damage boost and splash damage capabilities. This cannon lets M4A1 deal absolutely ridiculous amounts of damage and enables team compositions that can kill otherwise impossible enemies. Look at her insane damage output:
The sheer power and utility of M4A1 cannot be understated. At an absolute minimum, she should be brought to MOD2 to get Seal of the Avenger. MOD3 is absolutely recommended though in order to obtain her amazing Special Equipment.
HK416 Mod III
Normal
Damaged

Stopping at MOD1: Very Super Budget. If you are new or really strapped for resources, keeping 416 at MOD1 for a little while isn’t an awful idea, especially since she can corpse drag 13-4 by this point. Definitely return to finish though.
Stopping at MOD2: Super Budget. Time for 416 to get her true new BOOM! Best place for new players to temporarily stop.
Stopping at MOD3: Budget. 416 really enjoys her MOD3 Special Equipment because it leads to her SPEQ-Set, as well as being good on its own.
Completing the SPEQ-Set: Recommended. The SPEQ-Set gives her additional weak grenades that activate Skill 2, but most importantly, allows her to activate Skill 1’s kill effect even if the target is not killed. It’s a huge upgrade to 416’s overall damage output.
This Doll’s SPEQ-Set is currently unobtainable. It will become available in a future update to Gray Zone.
You like boom? If the answer is yes, 416 MOD has got all the boom you’ll ever need. After her upgrade, 416 MOD becomes a very powerful grenadier AR.
How does 416 achieve a lot of boom? Well, she gets a fairly good boost to all stats across her upgrade and also receives stronger tiles and coverage. The big buffs though come from her Skill 1 and new Skill 2. Her grenade not only receives a stronger Damage modifier, but gets a whopping two second reduction to her ICD, meaning her bonkers powerful grenade gets fired in 6 seconds, significantly faster than most of her competition.
Her Skill 2 is Parasitic Grenade, which makes one of two additional effects happen depending on whether or not 416 kills the main target with her grenade. If she does kill the main target, a second explosion with lower damage but a larger (4 units!) blast radius will occur. If she doesn’t kill the main target, that enemy will instead take damage over time and also take more damage from other sources. Note that this does not make her a good option against single-link targets, and she still firmly remains in the niche of a grenadier.
Can she go even further? Of course she can! 416’s SPEQ-Set delivers a number of bonuses that greatly increase 416’s power. The most notable of which is that the effect from killing the target with her Skill 1 will now always activate. This alone is already amazing, but she also gets weak grenades every 4 seconds which will let her activate the damage over time and bonus damage first before delivering this grenade-sized nuclear bomb onto the unfortunate foes.
If you want to deliver a nuclear blast unto the enemies quickly, 416 MOD has your needs more than covered. SPEQ-Set is ideal for 416, as you can probably guess from the last paragraph. All of 416’s other upgrade levels have value from a budget standpoint, but it is hugely advised to get her to MOD3 and with her SPEQ-Set ASAP. Yes, we know that involves farming Singularity, but it is absolutely worth it.
Suomi Mod III

Normal

Damaged

Stopping at MOD1: Budget. If you’re low on resources, MOD1 actually does give Suomi one of her most important aspects that already takes her from bad to great: Her upgraded Skill 1.
Stopping at MOD2: Recommended. Suomi’s Skill 2 packs even more survivability, and even flat HP% damage to the enemies she hits.
Stopping at MOD3: Optional. Her Special Equipment is an upgraded flare and helps in the typical way flares do.
So Suomi has quite the MOD. Quite the excellent and outstanding MOD in fact. The sort of upgrade that only makes her pretty much the best SMG in the entire game.
So what’s so amazing here? The main thing is, Suomi MOD’s raw survivability is outstanding. A large part of this actually comes from her upgraded Skill 1, which is a rarity among MODs. When Cover Focus activates, she will now grant herself a 165 HP Shield that lasts until it is broken and even removes any multiplicative debuffs she may have on her or even receive while Cover Focus is active, effectively making her debuff immune. To top it off, that same shield gives a whopping 35% Damage reduction. In case you want even more shields, her Skill 2, Snowfield Wraith, will give her even more shields. Suomi’s overall tankiness surpasses that of even Alchemist.
Skill 2 in itself is very wordy but quite simple in practice. Suomi now shoots randomly, basically changing her target constantly. This is actually a good thing, because all her shots now apply a stack of Chill regardless if it hits. Every 4 seconds, every Chill stack will be consumed which will damage the enemy and give them various debuffs. The damage is a flat 10% of their current HP, capped at 100000 HP (don’t worry much about this cap, only some of the newer bosses will actually be able to reach it). Most importantly though, each Chill stack consumed gives a 4 HP shield. This shield works alongside the bigger shield from Skill 1, and even activates the damage reduction if Skill 1’s shield is currently down.
With almost permanent shield uptime, it’s easy to see why Suomi has ascended to the top of the SMG hierarchy. She requires so little effort from your part, giving you so much in return. There’s no fancy bells or whistles to how she works, she keeps up all her own shields and protects everyone else while doing so. MOD2 is where she reaches the apex of her survivability, but even MOD1 is a strong upgrade if you’re currently low on resources.
M950A Mod III

Normal

Damaged

Stopping at MOD1: Budget. A great upgrade to her tiles and skills for a low amount of FCCs makes MOD1 a good budget option.
Stopping at MOD2: Recommended. Calico’s Skill 2 is her real meat. Absolutely get at least one MOD2 M950A.
Stopping at MOD3: Not Recommended. Her Special Equipment only improves her own performance, not worth the cost.
M950A (Calico) MOD brings some powerful and interesting upgrades to the mix. She’s already an amazing HG and only goes up from here.
Even at just MOD1, Calico already gains an excellent boost from her enhanced tile formation and improved Skill 1 multiplier. Not only does her tiles’ buff amount improve, she even gets a new tile positioned straight behind her, giving her more tile flexibility.
Skill 2 from M950A’s second Neural Upgrade stage is where things get really interesting though. SOUL LIVE! grants one of two different effects depending on the type of node that her echelon enters combat in.
- If it’s an allied node, a deceleration zone in front of the echelon will be made that reduces enemy Movement Speed and evasion.
- If it’s not an allied node, she’ll give everyone a small RoF boost for a short time and also massively buff non-HG doll Movement Speeds up to exactly the same speed that HGs enjoy (excluding any Movespeed-modifying equipment/skills).
On allied nodes, the whole echelon will enjoy the safety that comes from the reduced enemy Movement Speed, buying them more time before they enter attack range - especially useful due to the long initial cooldowns and low initial DPS of RFHG echelons. On non-allied nodes, the extra ally Movement Speed allows for some otherwise impossible micromanagement potential when such a thing is needed - like dodging enemy AoE attacks with otherwise slow RFs.
Overall, this is an extremely impressive MOD for an already strong HG. It’s absolutely worth getting her up to MOD2 for the new Skill. Even then, if you’re really short on fragments or cores, MOD1 is still a strong enough option to be worth considering if you don’t need the FCCs for anyone else.
Kar98k Mod III

Normal

Damaged

Stopping at MOD1: Not Recommended. Basically just a stat upgrade and her Skill 1 can now crit. Not worth staying here.
Stopping at MOD2: Budget. Her new Skill 2 adds initial stacks to her Skill 1 and double damage potential.
Stopping at MOD3: Recommended. Kar’s new SPEQ comes with a whopping 23% Crit Damage buff. Very much worth getting.
The classic Kar98k, the first doll everyone sees when going onto the store page to download the game, to even being on the initial loading screen alongside Lee. Finally, she is done true justice, and has an excellent MOD that aims to enhance her original capabilities massively.
Kar’s upgrade is all about taking her original Skill, Chain Shot, to the next level. The upgraded Skill 1 now has the ability to crit and targets the enemy she last attacked, already quite nice. Her new Skill 2, Crown of Shackles, places an additional Accuracy check onto her Skill 1, dealing double damage if it succeeds. No bells and whistles, just a 100% additional damage on a typically high success rate. On top of this, she gets a medal with each victory up to 4 times, which permanently increases her initial number of Skill 1 stacks for the rest of the battle.
Needless to say, Kar’s nuke damage potential simply skyrockets with this upgrade. Her raw damage per Chain Shot is immense and will make short work of even the hardiest enemies. Imagine Carcano M91/38, except working on everyone. Grape is still preferable in most fights where she can function, but in any other case, Kar is the girl for the job. Since nuking is highly useful, Kar stands proud as an extremely desirable upgrade that everyone should aim to do. Taking her all the way to MOD3 is recommended as her unique cape replacement has a whopping extra 23% Crit Damage over a normal cape, and even does away with the movement penalty.
DP-12 Mod III
Normal

Damaged

Stopping at MOD1: Super Budget. This upgrade only brings the knockback effect on Skill 1 and stat and tile improvements.
Stopping at MOD2: Budget. Skill 2 contributes a large chunk to DP-12’s newfound tankiness and is a fine stopping point for those tighter on resources at the moment.
Stopping at MOD3: Recommended. DP-12 has an amazing Special Equipment that is very much worth obtaining, not to mention that MOD3 is also when she gets her final point of Armor (specifically at level 117).
The enemies are up against the wall, and DP-12 is the f***ing wall!
DP-12 started as a fairly good SG that used her reloads to increase her tankiness. Now with her Neural Upgrade, she sets a new standard for tanky SGs. She will just stand there menacingly, endlessly reloading her gun, and the enemies can not do much about it.
By default, DP-12 MOD is already one of the tankiest SGs before any skills. With her MOD 3, Special Equipment, and Flash Shells, she has 37 Armor and -4 Damage Reduction. Things only get more crazy when you consider her new Skill 2 Shattered Illusion. With this skill, every reload grants her a 40% Rate of Fire Boost, 5 points of Armor, and a HP shield matching 50% of her current Armor stat. The most crazy part of this is that the Armor boost stacks infinitely and each stack lasts a staggering 99 seconds. Her Rate of Fire boost helps her to empty her magazine faster and get to the next reload too. You can also opt for Birdshot on her instead of Flash Shells to further aid with this, while keeping the ability to negate damage entirely from the SPEQ’s -1 Damage Reduction.
In long fights, this skill gives her up to roughly 20 stacks on average for a whopping boost of 100 Armor. With this on top of the HP shields and additional damage reduction she gets from both Skill 1 and Skill 2, it’s easy to see why DP-12’s tankiness far exceeds that of any other shotgun. Other benefits she gets from her upgrade include enemy knockback on reload (a new effect on Skill 1) and improved tiles.
DP-12 at MOD3 is a very easy recommendation. MOD2 and MOD1 both still come with nice upgrades, but the benefits of MOD3 cannot be understated. Generally, it is only recommended to stay below MOD3 if you happen to be low on resources at the current time. Otherwise, get her to MOD3 and let her become the true impenetrable wall she is destined to be.
UMP45 Mod III

Normal
Damaged

Stopping at MOD1: Recommended. For the cheap price, MOD1 is a great upgrade to UMP45 and offers a lot more for the price than any of her higher MOD levels.
Stopping at MOD2: Not Recommended. UMP45 sadly got an underwhelming MOD2 that is overall not worth the cost.
Stopping at MOD3: Not Recommended. Same story, UMP45’s Special Equipment does little to justify MOD3.
Completing the SPEQ-Set: Optional. With the SPEQ-Set, UMP45’s Skill 2 finally offers some good defensive utility. It is up to you if the Damage and Accuracy debuff to enemies is worth the MOD3 cost.
This Doll’s SPEQ-Set is currently unobtainable. It will become available in a future update to Gray Zone.
UMP45 MOD… is actually not that substantial of an upgrade overall. So why on earth is she in High Priority and this high? It’s simply because of how cheap she is compared to other MODs in the game.
UMP45 is one of the few upgrades where MOD1 is the most beneficial. This gives her even stronger tiles, a stronger Skill 1, and a nice stat bonus. Overall, MOD1 is a simple but effective upgrade for a cheap price. Her Skill 2 and MOD3 SPEQ are pretty underwhelming upgrades and are not worth the extra memory fragments and cores by themselves.
MOD2 and MOD3 for UMP45 are definitely lower priority. Getting her to MOD1 however is highly recommended simply because it’s so cheap to do for what you get. For only 20 cores and 200 memory fragments, UMP45 MOD1 is a more than worthwhile upgrade.
What might be worth your consideration though is her SPEQ-Set, which buffs the radius on her smoke grenade and reduces the Damage and Accuracy of those affected. This finally makes her Skill 2 worth a damn, but does require MOD3 and isn’t strictly necessary.
Type 88 Mod III

Normal

Damaged

Stopping at MOD1: Not Recommended. The stats and other improvements alone are not enough to justify leaving her at MOD1.
Stopping at MOD2: Recommended. Hanyang’s Skill 2 is where things really get crazy for her.
Stopping at MOD3: Optional. Her Special Equipment is great, but not necessary for her to perform well.
Completing the SPEQ-Set: Optional. The SPEQ-Set bolsters her variety of less important Skill 2 attacks. It won’t sell you on MOD3 if you didn’t already want it, but it’s nevertheless a decent upgrade.
This Doll’s SPEQ-Set is currently unobtainable. It will become available in a future update to Gray Zone.
Now… this is certainly one hell of an upgrade to try and explain.
Well, while it can seem overwhelming at first, there’s only a couple of key points you need to actually understand so that you can see why Hanyang MOD is so beloved. She gets one of the most overwhelmingly unique neural upgrades available. Previously an undesirable night focused RF, her upgrade boasts insane levels of AoE capabilities not seen on any other RF.
Let’s start with the meat of the upgrade, her new Skill 2: Almighty Combat Skills. This skill is overloaded with a ton of different effects, the most important of which is her giant freakin’ laser beams! Specifically, all of Hanyang’s shots will gain the pierce effect when Skill 1 is active. Having pierce is a massive boon, particularly for large clusters of enemies and helps her outperform many other general RFs. The full benefit of pierce doesn’t even require you to upgrade Skill 2 at all, and the benefits from skill levelling it are minimal.
Skill 2’s other effects include a variety of different attacks to her regular shots. When enemies are directly in front of her, she’ll switch to a melee attack that will send out waves of energy that hit the entire row. She’ll also launch either a cluster grenade or a missile at her target when Skill 1 triggers. The missile will launch if the enemy with the highest HP is armoured, while the cluster grenade will launch if said enemy is unarmoured.
As for the other new components of her kit, she receives a healthy boost to both her Damage and Rate of Fire, two upgrades she sorely needed. Her Accuracy also gets a considerable boost, though she still remains on the lower side of Accuracy for RFs. Damage Focus N also receives more damage and a much needed reduction in Initial Cooldown. On top of all this, Damage Focus N receives a new effect: a whopping 500% Movement Speed increase. If Hanyang ever needs to move for whatever reason, this will be of great value.
It’s a lot to take in at once, but put together the pieces and you’ll see why she’s such a powerful RF. With her massive laser beams and all her additional sources of damage, Hanyang boasts unrivalled AoE performance. Whether you’re looking to rank or just have another insanely fun RF to use, Hanyang Type 88 should be one upgrade on everyone’s radar. MOD2 is where Hanyang receives the majority of her power due to the Skill 2. MOD3, while not necessary, does come with a nice Special Equipment, making it still worthwhile for those that really like her.
Hanyang also has a SPEQ-Set that bolsters her variety of lesser Skill 2 abilities (the melee, grenade, and rockets). The SPEQ-Set is not going to sell you on getting her to MOD3 unless you already wanted to, but if you are going to upgrade her to MOD3 regardless, you may as well aim to get the SPEQ-Set as well. The Grey Zone Speq itself is nice on its own with 5 Rate of Fire (a 13% buff overall) and more Crit Damage, so it’s worth trying to get this regardless even without completing the SPEQ-Set.
AK-15 Mod III

Normal
Damaged
Stopping at MOD1: Not Recommended. The stat and Skill 1 upgrades are obviously nice, but you would be missing out on so much nuclear potential by stopping here.
Stopping at MOD2: Budget. AK-15 will now have access to her nuclear retaliation. This is great, but we can go even further…
Stopping at MOD3: Recommended. AK-15’s Special Equipment grants 20 Damage and 20% Critical Damage. It’s extremely good and very much recommended.
Just when you thought AK-15 could not be any more angry, here she is with her upgrade, to achieve MAXIMUM ANGERYNESS!!! AK-15 MOD comes with a few interesting gimmicks, but all you really need to know is she can pump out absolutely ludicrous amounts of burst damage.
Her new Skill 2, Blood-Curdling Howl, is a passive skill that coincides with her first skill. Whenever she monitors more than 5 targets at once or loses a dummy link, she will unleash a retaliation strike against the highest Damage enemy. This retaliation deals a staggering 25x Damage that scales with enemy links and ignores HP Shields and Armour. It’s even doubled while she has Rage active, though since this is still on a 15% activation rate, it’s not something you can rely on always being in effect. There are more benefits to this Skill but they’re all defensive in nature and mostly gimmicky and irrelevant.
You may think this kind of makes her akin to an AR version of Carcano M91/38, and well it kind of does. Yeah it’s more complex and relies on there being enough enemies in the enemy group to activate the retaliation, but her ability to just delete the highest Damage target immediately is extremely useful. On top of that, she also remains a strong AR in general and becomes even better thanks to stat upgrades, improved Skill 1, and her Special Equipment. While MOD2 is functional, she really benefits from MOD3 because of her extremely strong Special Equipment.
ST AR-15 Mod III

Normal

Damaged

Stopping at MOD1: Recommended. MOD1 provides a cheap and notable boost to ST AR-15’s performance.
Stopping at MOD2: Not Recommended. Skill 2 alone doesn’t do enough in today’s meta to warrant staying at MOD2.
Stopping at MOD3: Budget. If you want to go past MOD1, you should MOD3 her for her good Special Equipment, which is needed to complete ST AR-15's SPEQ-set.
Completing the SPEQ-Set: Recommended. ST AR-15’s SPEQ-Set greatly increases her damage output and secondary weapon performance. With all parts of the SPEQ-Set permanently available, this is one of the ones totally worth going for.
ST AR-15 has been through some ups and downs with the meta. She was once upon a time the pinnacle of ARs when it came to DPS, then her usability fell off for quite some time, but she is now back in the spotlight once more!
ST AR-15’s Skill 2, Crime and Punishment, has her pull out a secondary weapon that deals 10% of her normal damage (bumped up to 20% if she is attacking an opponent marked by Seal of the Avenger). This gives ST AR-15 good sustained DPS in long fights against unarmoured or lightly armoured enemies. Since she fires two shots at once as well, she mitigates the issue of leaving enemy dummy links with a tiny amount of health left, which is somewhat helpful for her DPS capabilities.
ST AR-15’s newfound success in recent times though is found in her SPEQ-Set! Not only is it always accessible for everyone (all parts of the SPEQ-Set are permanently available in game), it also helps to offset a large portion of her shortcomings. With the SPEQ-Set, her second weapon now comes with surehit and ignores all Armor. She also gets a 6% Damage increase every time a unit leaves the battlefield (including summoned entities, such as T64’s clones) up to 10 times for a considerable 79% Damage boost at max. This brings her up to the same DPS level as G11 overall, but without the FCC cost.
If you choose to upgrade ST AR-15, it is definitely advised to go for the SPEQ-Set overall. MOD2 and MOD3 alone don’t do enough in today’s meta to truly shine, but with all parts of the SPEQ-Set permanently available anyway, there’s no excuse not to get it! For newer commanders, it is recommended to upgrade her to MOD1 for a quick and cheap performance boost, then upgrade her further when you’re ready to complete the SPEQ-Set.
Ribeyrolles Mod III

Normal
Damaged
Stopping at MOD1: Not Recommended. Doesn’t enhance her support capabilities anywhere near enough to make her relevant again.
Stopping at MOD2: Recommended. Now with Skill2, the true support potential of Ribeyrolles is unleashed!
Stopping at MOD3: Not Recommended. Oh boy, a unique ITI!! (/s) Unless you really want the new art, save your resources.
Isn’t it precious? Seeing our sickly little friend Ribeyrolles doing so much good? Once a friend of many AR echelons, Ribeyrolles did fall off as the meta went on. With her upgrade, she now returns to the fray as a highly effective support AR.
Only one aspect of her Neural Upgrade even really matters, and that’s her new Skill 2 Mechanical Longitudinal Wave. In addition to the usual buffs she gives during Skill 1, she now also applies the “Echo” effect. This grants 10% Damage and Accuracy to ARs, and 15% Evasion and Damage Reduction to SMGs. The buff lasts for 6 seconds, and stacks up to 3 times.
But what’s really special is that units will spread Echo to adjacent units 2 seconds after they receive it. Then any newly affected units will again spread Echo. As Echo can stack 3 times, this means you can keep Echo going basically forever.
This doesn’t mean you should avoid kiting and doing movement just to keep Echo going. If someone needs to move to avoid major damage, please do so! Avoiding damage in the first place is still far superior to taking slightly reduced damage.
With her new and improved support capabilities that highly benefit both ARs and SMGs, Ribeyrolles makes for a standout doll. As the only important part of her new kit is her Skill, MOD2 is all you need.
G36c Mod III

Normal
Damaged

Stopping at MOD1: Not Recommended. This upgrade only adds some stats and a taunt effect to her Force Shield.
Stopping at MOD2: Recommended. The real meat of G36c MOD which grants her the gift of temporary immortality.
Stopping at MOD3: Not Recommended. Her Special Equipment is a nice Exo upgrade with a Movement speed bonus, but doesn’t help her immortality.
Have you ever wanted a tank that just doesn’t die? Like actually, under immense enemy fire, will not die because she just refuses to? Well that’s G36c MOD for you. Now naturally, to achieve her temporary immortality, she does the obviously sensible and logical thing: she damages herself. With some easy play around this downside, G36c will not let anything past her.
Her new skill is called Refuge Consensus. When the battle starts, she will inflict 50 flat HP points of damage on herself to grant the “Refuge” buff. This buff prevents G36c from losing dummy links. Flat out, does not matter what comes her way, she could proceed to then be hit by 50 Hydras at once and her 1 HP frontmost dummy will just shrug it completely off, effectively rendering her immortal for the duration of Refuge.
Speaking of, the skill lasts for 4 seconds for every AR or SMG in the team, so up to a max of 20 seconds assuming everyone is an AR or SMG. Now the downside is every time her team is victorious, the duration of Refuge is reduced by 20% up to three times, and this persists even if G36c is retreated and redeployed. After 3 battles, she will have 8 seconds of Refuge, but since this lines up with her Force Shield, it is still 12 seconds of immortality at the start of the battle. One other thing worth noting: as with most skills, they start when the unit first stops moving, meaning you can kite G36c to deliberately delay Refuge and make it last longer for when it matters.
Given she is literally f***ing invincible (Sundowner would be proud), I’m sure you can see why G36c holds such a high ranking here. She would’ve been perfect for Fixed Point… y’know if she didn’t come out right as that event ended. Still though, an extremely worthwhile upgrade. Make sure she goes to MOD2 for the skill. Her MOD3 SPEQ doesn’t do anything for her immortality, and is not worth the extremely steep cost.
K5 Mod III

Normal

Damaged

Stopping at MOD1: Budget. In a pinch, K5’s MOD1 offers a good upgrade to her base form with an improved Skill 1 and tiles.
Stopping at MOD2: Recommended. K5’s Skill 2 is amazing, given its ability to allow your entire team to shrug off any major boss attack should you time its use correctly.
Stopping at MOD3: Not Recommended. K5’s SPEQ offers nothing to improve her overall capabilities in any significant way.
K5 being a desirable Neural Upgrade should not be a surprise to anyone familiar with her. She is already a great HG, and only gets even better with her upgrade.
Her new Skill 2 is Astrological Divination, which grants buffs depending on the types of enemies present on Skill 1’s activation. If there are any Elite enemies, she grants all units a 12% Rate of Fire buff and 50% Movement boost for Skill 1’s duration. But more notably, if there are High Threat units present, she gives everyone a 100% Force Shield for one second. On top of this, she gets the typical array of upgrade bonuses like stronger tiles, and her Skill 1 now grants additional ammo to MGs and SGs.
The “High Threat” tag includes every single boss. With this, K5 can make the entire team shrug off any massive boss attacks she wishes, provided the skill activation is timed correctly. A very straightforward but extremely potent tool that few dolls can provide for sure, which does also mean K5 will want to be used on manual skill for such fights, so you can time this as you please. The Rate of Fire bonuses that Skill 2 provides are also a pretty nice buff to almost anyone, and will happen fairly frequently as elite enemies are pretty common.
Overall, this is simply a case of an already strong doll getting even better in a big way, so K5 is very much worth your time. Raising her to MOD2 is the ideal stopping point, as MOD3 offers her very little.
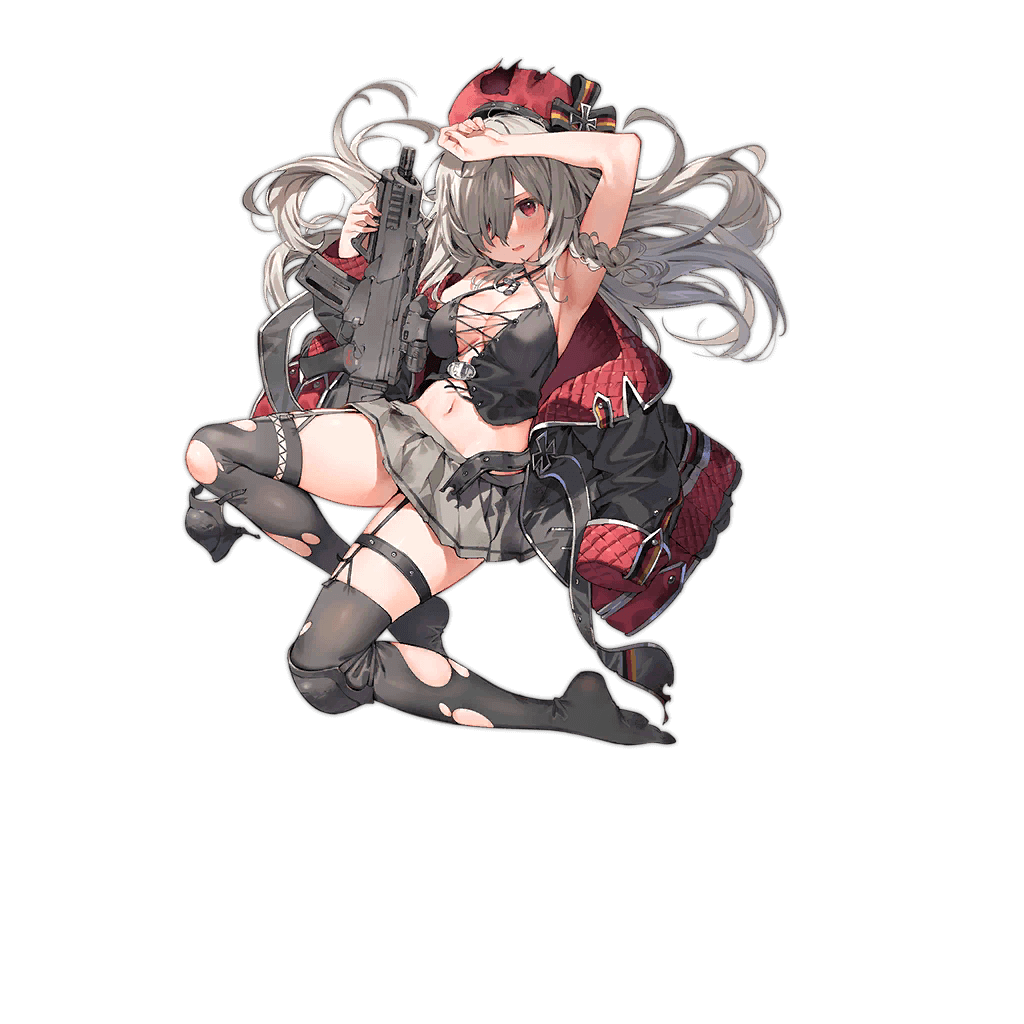
Stechkin Mod III

Normal

Damaged

Stopping at MOD1: Recommended. For the low price, Stechkin’s support capabilities improve greatly.
Stopping at MOD2: Not Recommended. Stechkin’s Skill 2 does little to improve her support potential and mostly focuses on herself. Not worth the cost.
Stopping at MOD3: Not Recommended. Same story, the Special Equipment aims to capitalise on the Skill 2 so again it’s not worth it.
Completing the SPEQ-Set: Optional. Stechkin’s SPEQ-Set focuses primarily on RFHG team capabilities, with up to 3 instances of teamwide taunt towards the highest Damage enemies and also additional damage that can crit for RFs during Skill 1. Decent but not necessary.
Stechkin MOD is a worthwhile upgrade to an already strong HG, but not in a way you’d normally expect a HG to be. She’s a member of the illustrious MOD1 club and actually doesn’t offer too much beyond her initial upgrade.
Her Skill 2, Percussion, is actually a fairly loaded skill in terms of effects. She will increase her own Damage and double her Crit Rate when her Skill 1 is active. She’ll also target whoever has the lowest HP and reduces evasion of enemies below 30% HP. In practice though, this skill doesn’t offer as much as one would probably hope. The one support centric aspect of it (the evasion debuff) is tied to a rather harsh below 30% HP requirement and then also hitting the opponent.
MOD1 is therefore Stechkin's most cost-effective upgrade. For a relatively low price, Stechkin will enjoy improved Skill 1 and tiles that make her buffs even stronger than many 5-star HGs. It is advised to only go beyond MOD1 if you are interested in her SPEQ-Set, which grants a teamwide taunt mechanic against the three highest Damage enemies if there are only 2 types of doll in the echelon, as well as an additional 10% Crittable Damage for any RFs while Skill 1 is active. A decent bonus for RFHG teams, but not a necessary one.
SAA Mod III

Normal

Damaged

Stopping at MOD1: Budget. A good budget option to give SAA a nice boost to her support.
Stopping at MOD2: Recommended. Her Skill 2 is what cements SAA’s niche, so is definitely worth acquiring.
Stopping at MOD3: Not Recommended. Her Special Equipment only improves her own performance, not worth the cost.
Rejoice, for at long last we can finally complete Singularity!
Memes aside, SAA MOD is a strong HG and offers a lot to all players. On top of her enhanced tiles and Skill 1, her new Skill 2, Duel Survivor, periodically increases the Rate of Fire and Accuracy of all allies every 4 seconds (up to 3 stacks). Combined with her already decent damage boosting capabilities, what you have now is an incredible HG who buffs team DPS while also synergizing with dolls that proc off of receiving buffs like M500 MOD. As a fun fact, you can even reduce the interval between her Skill 2 boosts with RF cooldown reduction tiles..
The versatility of what SAA MOD offers makes her a worthwhile Neural Upgrade for most commanders. As she is a support through and through, her MOD3 Special Equipment is not particularly beneficial, so it is recommended to upgrade her to MOD2.
Medium Priority
These Neural Upgrades offer great value for the cost and are worthwhile to be invested in. Certain factors however make them not as necessary or desirable as those in High Priority.
Lee-Enfield Mod III

Normal
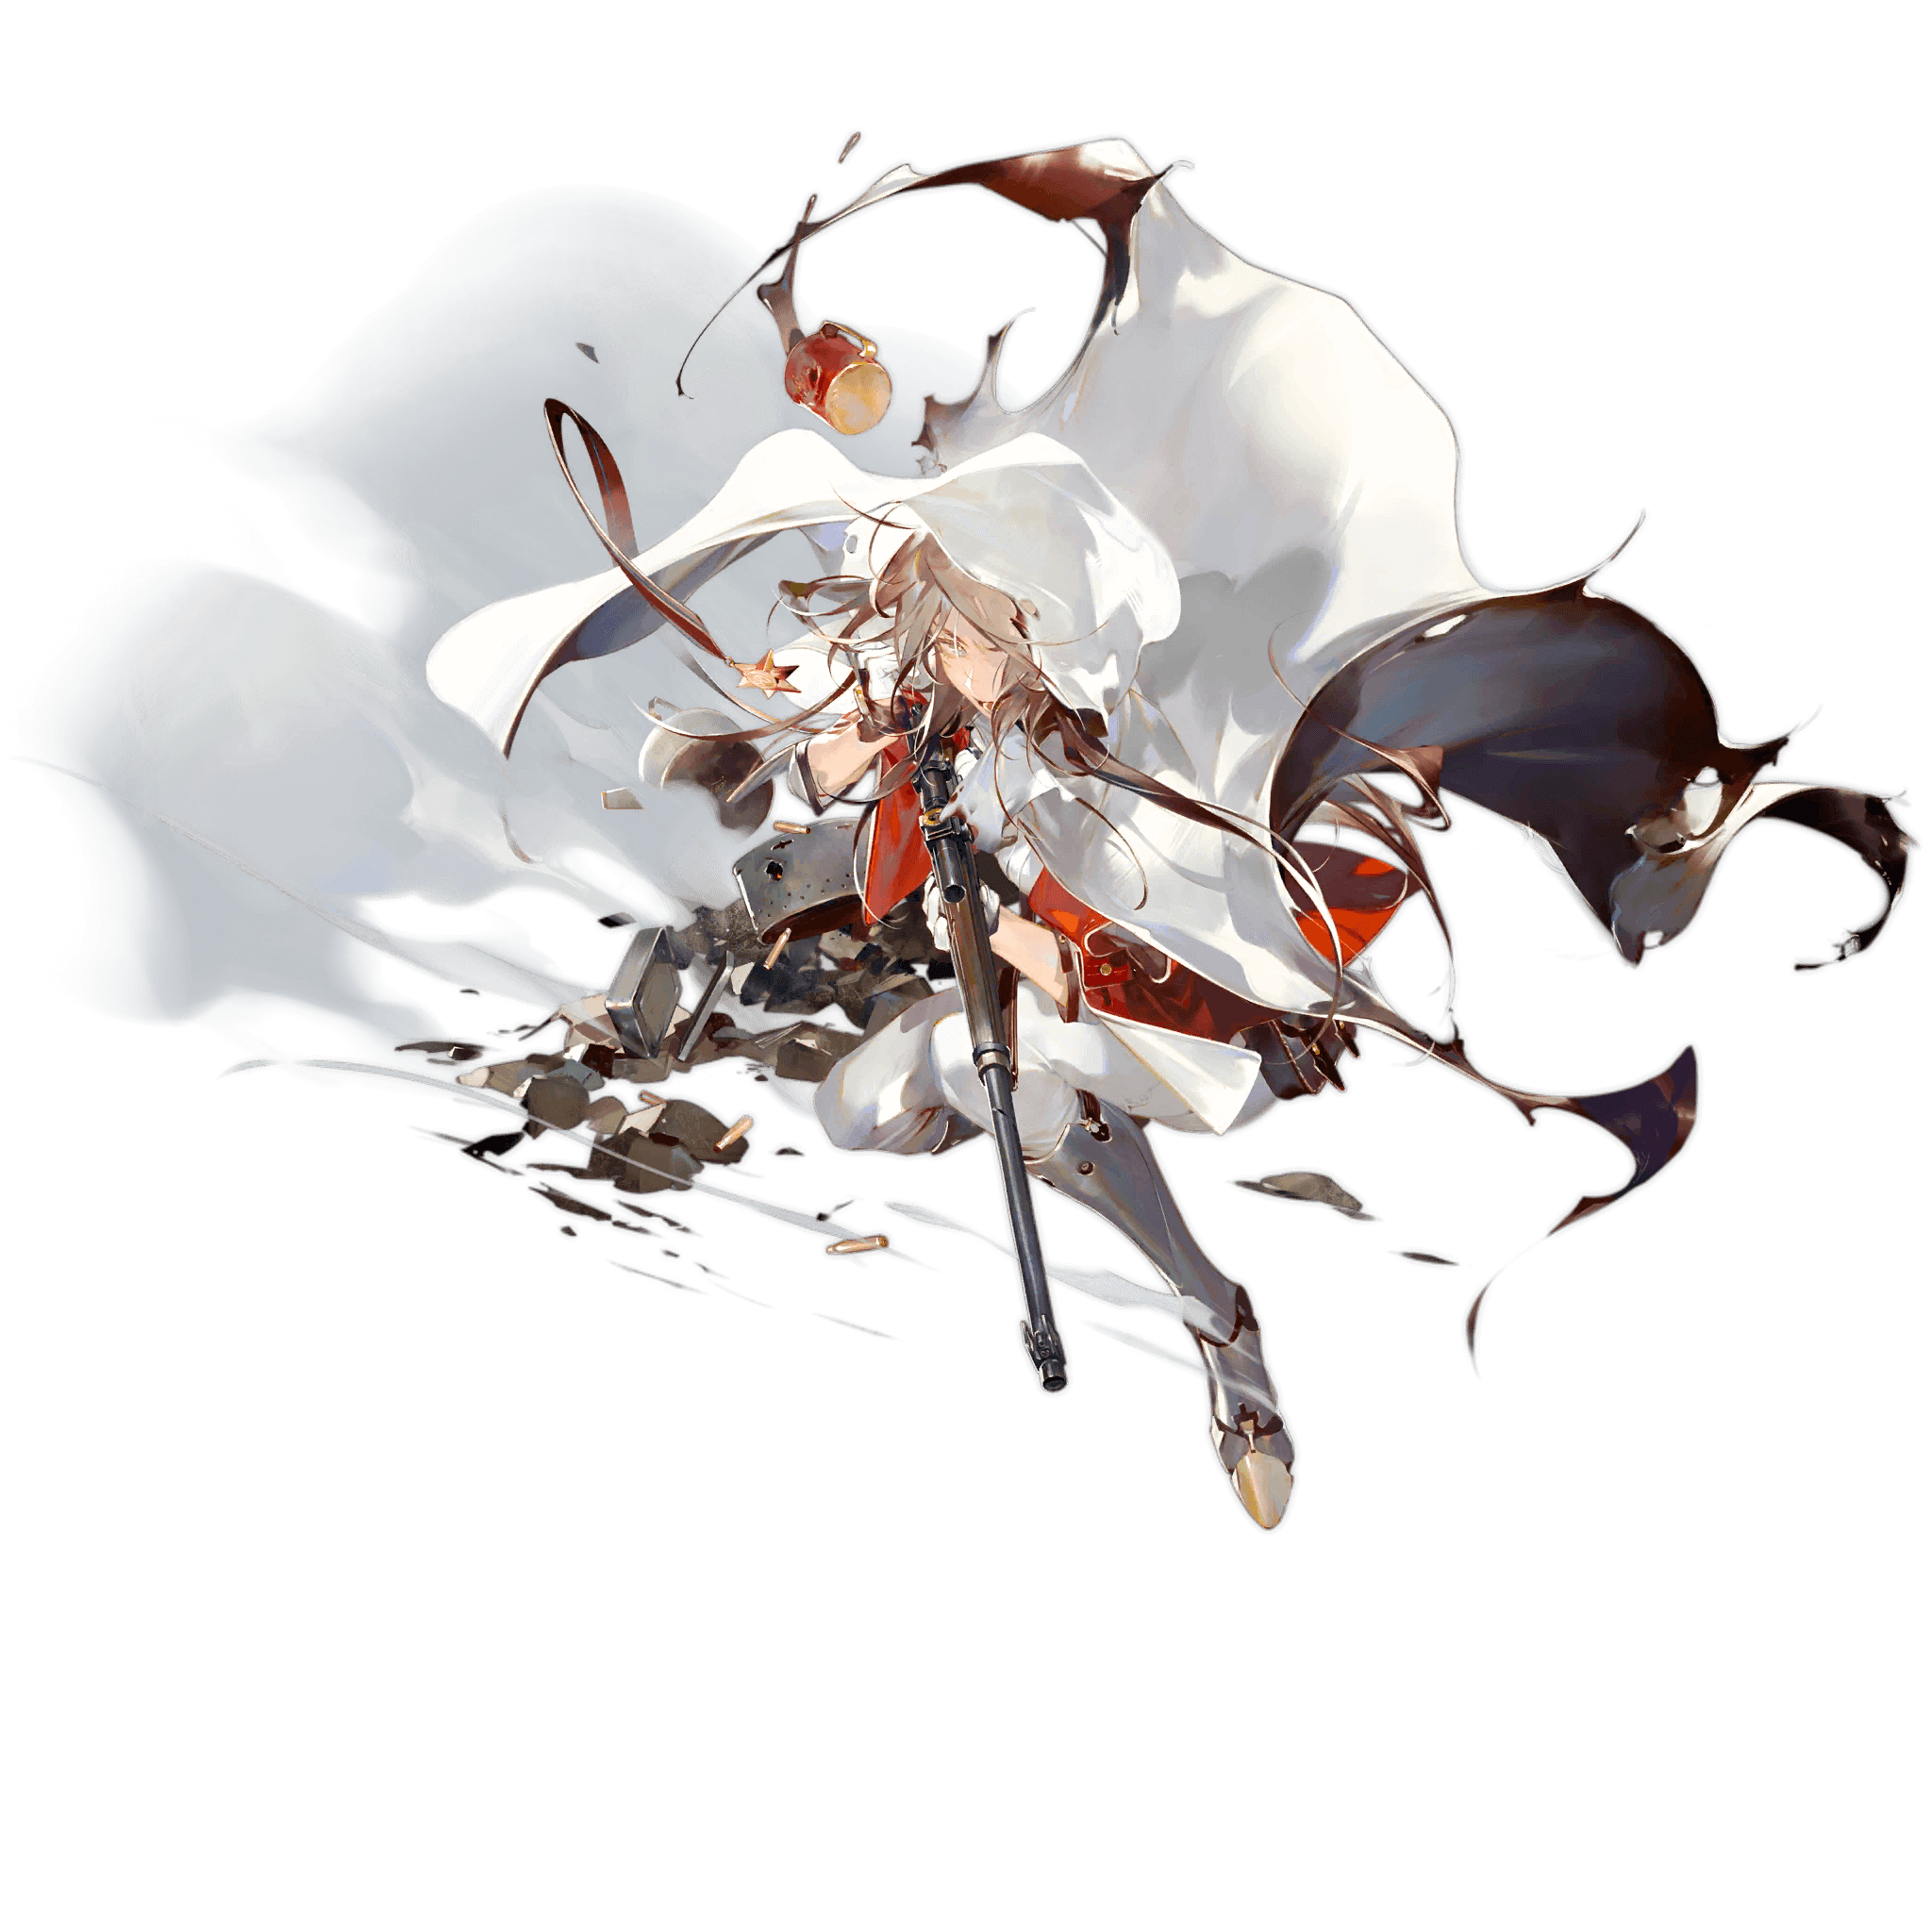
Damaged

Stopping at MOD1: Budget. Lee basically becomes a better version of her existing self, now with some support potential thrown onto Skill 1.
Stopping at MOD2: Recommended. Her Skill 2 is a Webley-esque skill that either offers a considerable boost to herself or a considerable teamwide damage boost.
Stopping at MOD3: Optional. Her Special Equipment is a nice upgrade, offering stronger AP than typical AP ammo as well as a Damage bonus. However, you can live without it.
Oh Lee, my darling Lee, my beloved Lee. Lee-Enfield is my personal favourite doll, I cannot describe how happy I was when her upgrade was revealed, and am very pleased to say it’s a great one at that. Given Lee was already a great base to build from, there was very little chance of this upgrade being bad. It’s pretty generic though, and for the most part she’s just a better version of her original self with some new bells and whistles.
In terms of damage dealing, an non-upgraded Lee still remains a good and safe choice, though one now overshadowed by many of the newer RFs. Lee MOD does aim to improve her raw capabilities quite a bit, with her boosted Damage and Rate of Fire stats, her special AP ammo from MOD3, and the boosts from Skill 2. However, the new main thing going for her is her brand new support capabilities.
First, Lee’s Skill 1 was improved to now give a Damage boost to any doll on her tiles upon activation. Her new Skill 2, Proof of Glory, aims to take it even further. This is a skill similar to Webley where the effect changes depending on whether Lee is leader or not. Whenever she receives a buff, she will either buff the entire team’s Damage if she’s the echelon leader, or buff her own Rate of Fire if she isn’t. The maximum amount of stacks depend on the amount of allies on her tiles, so make sure her tiles are occupied whenever possible. Skill 2 is up to either a teamwide 26% Damage buff or a 52% Self Rate of Fire buff. Both are very effective, though in general you’d prefer to opt for the teamwide Damage, as it affects both DPS.
So overall, you get an improvement on an already effective base, with additional support capabilities that let her fill a new niche. Lee MOD is a very nice package, and a worthwhile upgrade overall. Her lack of a true defining speciality does hold her back a little bit, just enough to keep her from being a true High priority, but still one I can heartily recommend in general. MOD2 is where she will reach the peak of her new support niche, though MOD3 also brings with it a very nice Special Equipment albeit at a high cost. Even MOD1 is nice on a budget, just making her a better version of her original self.
OBR Mod III

Normal

Damaged

Stopping at MOD1: Not Recommended. Doesn’t offer anywhere near enough to be worth staying here.
Stopping at MOD2: Recommended. Her Skill 2 offers what makes OBR MOD strong: her highest Damage targeting, as well as considerable damage boost.
Stopping at MOD3: Optional. Her Special Equipment is basically a VFL with extra Damage on it, not necessary but a nice SPEQ regardless.
OBR, a classic case of a login doll. That being, pretty much remembered by nobody outside of like one really cute yukata skin. OBR MOD comes back with a vengeance though, coming with an upgrade that gives her a solid niche.
Her Skill 2, Frost Edge Rehoning, is her main selling point. While her Skill 1 is in effect, she will target the enemy with the highest Damage stat and apply a stack of Frost Edge with each shot. Once the target reaches 3 stacks or the skill duration ends, each stack will be consumed and deal guaranteed damage that ignores armour and shields.
The main benefit here is actually the targeting, which lets OBR serve as a highest Damage enemy killer. Getting rid of the highest priority enemies first is beneficial for obvious reasons, while the stacks that deal guaranteed damage help to offset her original poor DPS.
Overall a simple and straightforward but strong upgrade. OBR will be a worthwhile addition to your roster with a useful niche. MOD2 is necessary to allow her to fulfill said niche, with MOD3 being a nice optional upgrade.
Type 56R Mod III

Normal

Damaged

Stopping at MOD1: Not Recommended. The stats and other improvements alone are not enough to justify leaving her at MOD1.
Stopping at MOD2: Recommended. 56R’s Skill 2 lets her do some crazy damage against high priority enemies.
Stopping at MOD3: Optional. Her Special Equipment is good, but can be ignored if you have Sniper Ammo available for her.
I think all of us love a good case of zero to hero. Type 56R is just that, coming in with an extremely good Neural Upgrade.
Her biggest boost comes from her Skill 2, Glorious Release. She will always target enemies with the least dummy links first, and will gain a 10% Critical Damage boost for each missing dummy link below 5, including enemies that start below 5 links. This means that 56R will always activate the max 40% Critical Damage buff against threatening single link enemies like Cherubs, Gladiators, and bosses. She will also get double damage on her first shot after moving, which can be activated every 3 seconds.
The Critical Damage bonus is what makes 56R MOD such a powerhouse. Not only does she typically target high priority enemies, she also gets a substantial damage boost against them too. That buff's usefulness is not limited to those dangerous enemies though, as she’ll also be mopping through other lesser enemies. If you really want, you can also do very quick jiggles with 56R to keep her double damage activating, though this is very tedious and absolutely not required for her to be strong.
On top of this, she receives the usual suite of goodies. Her Damage gets a substantial boost, as well as a slight Rate of Fire boost. Her Skill 1 gets a slight enhancement, as well as also granting 5 points of movement. Even her Special Equipment is nice, basically combining the power of Sniper Ammo and AP Ammo into one.
So overall, of course Type 56R is worth it. She’s a solid contender for being one of the best generalist RFs in the game and a very worthwhile MOD overall. So, why is she in Medium? Well it’s simply because she is a generalist, which means she can be replaced pretty effectively by many different RFs. MOD2 is her recommended level as that’s where she receives the main bulk of her power. Her Special Equipment is nice but if you have Sniper Ammo already available, you can forego her MOD3.
M1895 Mod III

Normal

Damaged

Stopping at MOD1: Budget. MOD1 is technically an okay upgrade if you just desperately need a Damage debuff HG.
Stopping at MOD2: Recommended. MOD2 is where M1895 sets herself apart from the crowd.
Stopping at MOD3: Not Recommended. Her Special Equipment only improves herself, so it can be ignored.
The time-tested Nagant Revolver brings a solid MOD to the table, packing both good offensive and defensive support.
Her main upgrade lies in her Skill 2, Seven Tone Paean. This skill gives all allies a nice buff to Damage and Accuracy for 4 seconds after every 7 shots (including before the first shot at the start of battle) . On top of this, her already legendary Damage/Crit tiles get even stronger, and her first skill sees a further bump in effectiveness.
All in all, a great MOD for any battle you need a boost to both power and survivability. In particular, M1895 can help lower armour requirements for some SG fights or boost the effectiveness of HP shields (although TEC-9 can be a different budget option if you don’t want to pay the MOD cost). Do note that the defensive nature of Nagant Revolver’s first skill does mean she won’t typically be the first choice for general use.
You will want to get her to MOD2 for her Skill 2. Her Special Equipment is not worth the cost (though her MOD3 art is amazing).
PPK Mod III

Normal

Damaged

Stopping at MOD1: Not Recommended. You basically get a slightly improved PPK. With how cheap her upgrade is anyway, no reason to stay here.
Stopping at MOD2: Recommended. Her new Skill 2 is what brings PPK back into the spotlight, offering considerable buffs based on the amount of enemies defeated.
Stopping at MOD3: Optional. Her Special Equipment is basically just an expensive flare.
Completing the SPEQ-Set: Optional. The SPEQ-Set makes enemies that die debuff the Damage and Accuracy of the enemies around them. An alright defensive upgrade, but one can live without it.
This Doll’s SPEQ-Set is currently unobtainable. It will become available in a future update to Gray Zone.
A true weapon for those with a licence to kill, PPK was typically quite common early on as a cheap 2 star HG. Now, she’s back in a fancy dress for your eyes only, fully upgraded and ready to help her team shoot the living daylights out of any enemy that opposes you.
Her new Skill 2, Lingering Authority, turns her into a more conventional buffer, granting the team escalating Damage and Rate of Fire buffs based on the amount of enemies killed in the current battle. At 3 enemies, she’ll give a Damage boost for 5 seconds. At 6 enemies, a Rate of Fire boost for 5 seconds. At 9 enemies, she grants both for 5 seconds. Finally, after reaching a whopping 15 enemies killed, the Damage and Rate of Fire boosts remain for the rest of the battle. That being said, PPK becomes on par with most generalist buffers after around only 6 kills, so you hardly need to ramp her up all the way.
Elsewise, she’s just a better version of her regular self. She got new tiles that allow her to be in Position 4, while she can still be in front if needed. PPK also has a SPEQ-Set that reduces the Damage and Accuracy of enemies in close proximity to a dying enemy.
Overall, PPK MOD is a desirable support package at a cheap cost. If you upgrade, you will want at least MOD2 for her new skill. MOD3 basically just gives her a unique flare, so you can safely ignore it unless you want to complete her SPEQ-Set. Also unless you want her art I guess, which I couldn’t blame you for. She looks so elegant and deserves everything, even the world is not enough for her.
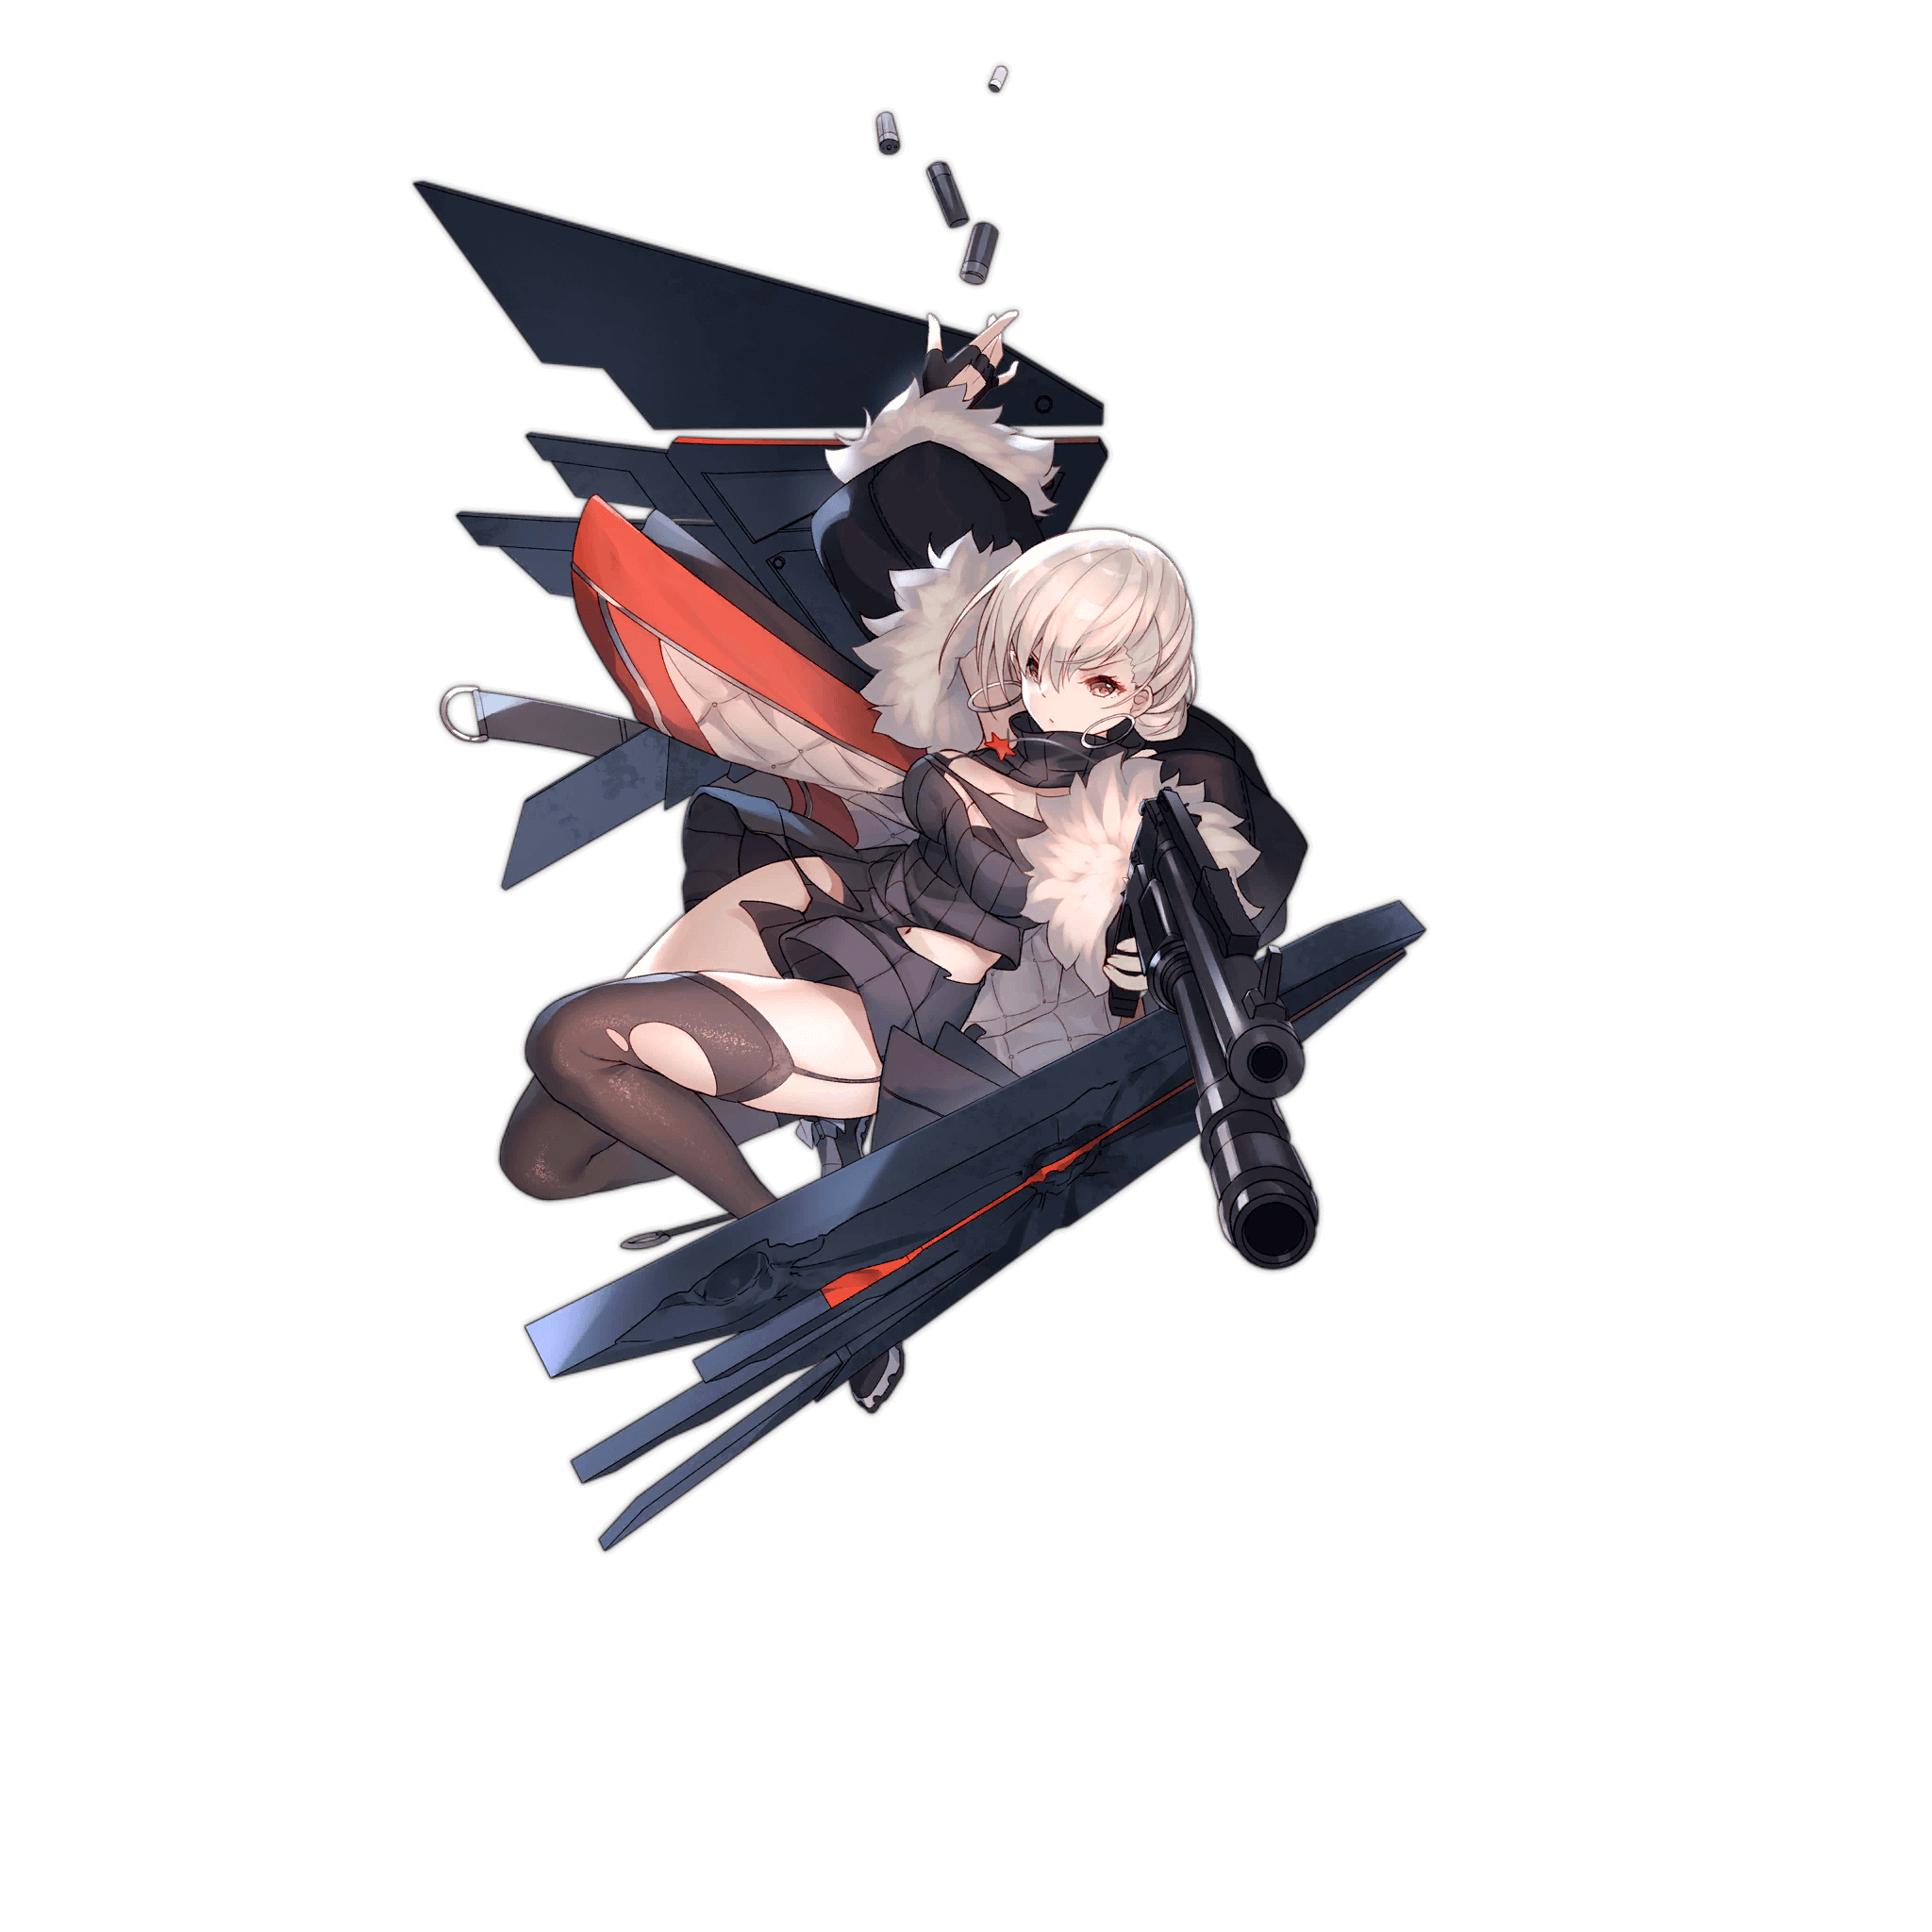
NTW-20 Mod III

Normal

Damaged

Stopping at MOD1: Not Recommended. While the changes to Skill 1 come at this level, they are designed to combo with Skill 2.
Stopping at MOD2: Recommended. NTW’s Skill 2 allows her to perform her new niche as a high priority target slayer effectively.
Stopping at MOD3: Optional. Her Special Equipment is good, but not necessary for her to perform well.
NTW-20 MOD is something quite interesting on paper. Her base form may be a typical nuke RF, but her upgrade plays anything but such a role. She is one of the best RFs in the game for her brand new niche as a priority target eliminator, and demand for this niche shows up pretty often in newer events.
The upgrade reworks her first skill, now named Hunter’s Mania, to change her targeting mechanics, ignore HP shields, and gain better damage output. This is to go along with her new skill 2, Chain Reaction, where if her first skill kills an enemy, she shoots again up to three times with no aiming time and a flat 4x modifier, though sadly now with the possibility of missing. This Skill 2 also has a passive component that buffs NTW-20’s normal attack and Skill Damage against enemies above 50% HP.
Sounds pretty cool, right? Well, it is cool and grants her some utility that you wouldn’t normally expect from a nuke RF. Rather than trying to follow that crowd (Grape, M82A1, etc), NTW instead finds her own niche in high priority target slaying. With her new Skills and a Rangefinder equipped, she can quickly kill up to 4 low HP but high priority targets, such as Snytos, Cyclops MGs, or Ceryns before they even have a chance to strike. Being able to dispatch such enemies quickly will be a massive boon in the right scenarios.
While NTW is not overly useful in all places, for those moments when her skills come into their own, she will prove herself invaluable to have around. Just MOD2 for the skill is sufficient, her Special Equipment is basically Sniper Ammo and AP Ammo rolled into one. It is nice, but RFs will usually only need one or the other. Nevertheless, MOD3 is not a bad option if you’re willing to spare the FCCs.
Type 64 Mod III

Normal

Damaged

Stopping at MOD1: Not Recommended. Only upgrade Type 64 if you can complete the SPEQ-Set.
Stopping at MOD2: Not Recommended. Only upgrade Type 64 if you can complete the SPEQ-Set.
Stopping at MOD3: Not Recommended. Only upgrade Type 64 if you can complete the SPEQ-Set.
Completing the SPEQ-Set: Recommended. Complete reinvigorates Type 64 with more stun applicability and new defensive and support utility.
This Doll’s SPEQ-Set is currently unobtainable. It will become available in a future update to Gray Zone.
Type 64, after what feels like an eternity in No Priority, actually has a chance in the sun.
Now do not be fooled: her upgrade by itself is still not worth it at all. She’s a weak SMG in a class of already niche SMGs. Her Stun Grenade offers an Accuracy debuff and can remove buffs and shields from enemies that get stunned if you have her login SPEQ. It’s a pretty underwhelming upgrade given that the vast majority of enemies you’d want this to work against cannot be stunned.
However, Type 64 can become worth it, as long as you can complete her SPEQ-Set. With said SPEQ-Set, she can finally stun anything that isn’t a boss, and also spawns 10 clones at the front of the echelon at the start of battle. These clones can take 5 instances of damage, and upon being defeated, they apply 3% Vulnerability to all enemies for 20 seconds.
With these simple changes, Type 64 has new life completely breathed into her Neural Upgrade. The clones bring good defensive utility and also increase teamwide damage as they get whittled down, and she can now actually stun the enemies you’d actually want to stun! If you have the means to complete her SPEQ-Set, Type 64 is now worth consideration. If you can’t complete the SPEQ-Set though, stay away.
Welrod Mod III

Normal

Damaged

Stopping at MOD1: Not Recommended. The stats and other improvements alone are not enough to justify leaving her at MOD1.
Stopping at MOD2: Recommended. Welrod’s Skill 2 is what enables her new capabilities as a tank HG.
Stopping at MOD3: Optional. Welrod’s Special Equipment is great at helping her do her role, but not necessary for her to perform well.
It’s a common pitfall among newer players to believe that a HG doll makes a suitable tank. Now this pitfall is definitely still true, but Welrod’s Neural Upgrade does a valiant attempt to break that mould, offering some strong and interesting defensive capabilities.
Welrod MOD’s new Skill 2, Riot Shield, does what you would expect from the name: gives her a riot shield. She will place it down when she receives damage and will make anyone behind it completely invulnerable. Usually this “anyone behind it” will just be herself, since it only protects the tile Welrod was on when it was placed. This shield is also extremely resilient, requiring 15 hits to be taken down, can actually evade somehow, and is completely immune to any damage below 24. It is a short lived shield though, being on the field for only 4 seconds and having a cooldown of 8 seconds before it can be placed again (even if the cooldown can be reduced by RF tiles).
Welrod also gets a suite of upgrades for herself. Her tiles received a complete change, now making her a Position 8 HG. Her stats received a nice boost overall, primarily focusing on her evasion. Her Skill 1 now debuffs enemy Damage. When she is equipped with her MOD3 SPEQ, she also takes 30% less Damage from her current target. That SPEQ also gives her 5 points of armour, something that no other HG has.
So overall, does this make Welrod an effective HG tank?… To some extent. She’s considerably more resilient by default, and her ability to completely block damage from herself half of the time as long as she is under fire is quite useful in the right cases. However, we do also have plenty of traditional tanks, so the need to upgrade Welrod is not as high as one might think at first. If you do upgrade Welrod, MOD2 is what offers the bulk of her power, but her MOD3 is worth considering for that Special Equipment.
Makarov Mod III

Normal

Damaged

Stopping at MOD1: Not Recommended. Her Skill 1 upgrade is decent, but you would still not want to use Makarov over other HGs at this upgrade level.
Stopping at MOD2: Recommended. Skill 2 is what grants Makarov her brand new niche of evasive tanks and more accurate RFs.
Stopping at MOD3: Optional. Her Special Equipment is basically a combo of Flare ammo and Hollow Point ammo. Not particularly worth it unless you just don’t have Flare ammo to give her otherwise.
Completing the SPEQ-Set: Recommended.
Makarov MOD appears to be a bit more confusing than the average upgrade at first, mainly just due to the wording of the Skill 2. In reality though, there’s only a couple of key simple points you need to understand about Makarov that makes her worthwhile.
Her Skill 2, Mark of the Astral Guardian, looks at the dolls on her tiles and selects the one with the lowest Evasion and the one with the lowest Accuracy. Then, those dolls are buffed by half of the difference between Makarov’s respective stats and their own stats. For example, let’s say Makarov has 150 Evasion and the doll in question has 10 Evasion. The difference is 140, which is halved to 70, so the 10 Evasion doll gets an additive 70 Evasion buff. The same formula applies to the lowest Accuracy doll.
So what’s the use for this you may ask? The main benefit is the Evasion buff when using SGs or a Taunt Fairy. Imagine one of the really strong SGs, like LTLX-7000, having all their normal raw defensive capabilities but now also having an effective Evasion stat. This even works with the Taunt Fairy, just make sure to move Makarov up before Skill 2 activates, and you’ve now got a Taunt Fairy that can somehow dodge.
The Accuracy buff, while less important overall, still proves effective with dolls like RFs and MGs at night. Since the buffs are additive, these units that can normally never equip PEQs can now get workable Accuracy at night.
In her use cases highlighted above, Makarov MOD proves to be an exceptional addition to the team. Her general usage, though, remains as bad as it was before, as she lacks any notable raw offensive boosts outside of her tiles. MOD2 is the recommended stopping point. Her MOD SPEQ is just a combination of Flare Ammo and Hollow Point Ammo, a nice bonus when completing the SPEQ-Set.
Speaking of, her SPEQ-Set is quite a nice boost to her overall capabilities. Her Skill 1 lasts an additional 2 seconds for increased defensive capabilities and also gives her 100% Night Vision, and Skill 2 now buffs the affected dolls with a nice 15% Damage. Her SPEQ-Set is quite strong, and you should aim to complete it if you choose MOD Makarov.
RMB-93 Mod III

Normal
Damaged

Stopping at MOD1: Not Recommended. The stats and improvements to Skill 1 are not enough to justify stopping at this level.
Stopping at MOD2: Recommended. Skill 2 is the defining aspect of RMB’s entire kit.
Stopping at MOD3: Optional. Gets a nice Special Equipment that results in a very high Armour stat. Also grants increased Movement Speed. Not necessary, but has good value to it.
RMB-93 sets off with one goal and one goal only: to facetank everything. Everything about her upgrade is designed to just give damage itself the middle finger.
With her new Skill 2, Pendulum Fortress, RMB-93 can stack a flat damage reduction of 4 points on herself whenever anyone in the team reloads. This caps at 3 stacks for a total of 12 points of damage reduction. Combined with Flash ammo, RMB negates up to 15 points of Damage.
Now, I’m sure some would point out “but you need to wait for dolls to reload which will take time!” and you would be right, but there is a perfect key to this problem: Defender. Defender is a 4 star SG that can be farmed from chapter 13 of the campaign and is very special because she needs to reload after EVERY shot, and a fixed reload time of 2 seconds. As you can probably surmise, Defender allows RMB-93 to quickly gain her full damage reduction with zero downtime as she’ll keep refreshing the stacks.
Now, if you don’t have Defender, then first of all please go farm for her from 13-4E immediately, but also understand that RMB-93 does lose quite a lot of her potential. Nevertheless, she still sets out to do one thing and she does that one thing very well. MOD2 is recommended for most. Her MOD3 is nice because it comes with a strong Special Equipment, but it isn’t a hard requirement. She’ll be very tanky with or without it.
Gr G11 Mod III

Normal

Damaged

Stopping at MOD1: Not Recommended. Leaving G11 here would mean missing out on what makes her special.
Stopping at MOD2: Budget. While her Skill 2 alone is enough to elevate G11’s performance substantially, it can go further still.
Stopping at MOD3: Recommended. G11 has a fantastic Special Equipment that is absolutely worth getting.
G11 is one of the laziest members of Griffin, but there is sure as hell nothing lazy about this upgrade. G11 MOD boasts extremely high burst damage capabilities letting her tear through some enemies far more quickly than most other ARs.
Her Skill 2, Stance of the Assaulter, causes her to deal an extra hit of damage whenever she hits the same enemy 3 times. This extra hit deals 2% of the target’s max HP, capped at 300% of G11’s Damage stat. It is affected by armour, but does ignore HP shields. We know G11’s Rate of Fire is monstrous, so she is going to be putting out a lot of these extra hits effortlessly, not to mention that her Skill 1 makes her shoot 3 times per volley. In practice, her DPS increase is phenomenal.
Statwise, G11 primarily improves her Damage stat, which was the stat most in need of boosting. Her new tiles can boost 2 SMGs at once now and her improved Skill 1 lasts for half a second longer. Much like her Skill 2, these buffs are appreciated.
If you have G11 in your arsenal, this is definitely an upgrade to pick up. While ARs are falling out of favour in the meta as time goes on, they are still used from time to time, and G11 is a strong option for this but comes at a much higher cost than ST AR-15, who has similar long-term performance with her SPEQ-Set and does not cost FCCs. If you do mod her, she is one of the only 5 star MODs which I can recommend taking to MOD3. Her Special Equipment is exceptional, it is a chip replacement that is far better suited for her and definitely worth the cost.
AN-94 Mod III

Normal

Damaged

Stopping at MOD1: Recommended. A level 110 AN-94 MOD1 gets a substantial upgrade to her performance for a good price.
Stopping at MOD2: Not Recommended. Skill 2 does not offer enough for the price. If you go past MOD1, you may as well go all in.
Stopping at MOD3: Optional. Her Special Equipment is pretty nice, granting a good Critical Damage boost. Also her new art is nice.
AN-94 is a bit of an unfortunate case sadly. It’s fairly cheap to get some notable benefit, hence why she is placed here in Medium priority. Unfortunately, her Skill 2 is mostly occupied with DEFY and AK-12 synergy which can be basically ignored, while the rest is fairly costly for what it offers.
MOD1 is overall a fairly nice upgrade. She gets more stats and her Skill 1 lasts for an additional second. Not much else to say, straightforward and to the point. MOD2 gives her Trailing Wolf Shadows, which grants AN-94 a mark every time she switches target or activates Skill 1. The marks stacks up to 3 times, lasting for 5 seconds. Each mark gives her an additional 10% damage that can crit. It’s not very exciting, and comparable to ST AR-15 MOD with her damage increase and synergy to Seal of the Avenger.
Her Skill 2 also carries a lot of pointless synergy with DEFY that may one day be useful, but that day isn’t today. I can only assume this problem will be addressed whenever AK-12 MOD comes into existence, but until then… Ouch.
For the low cost, AN-94 MOD1 does serve as a great upgrade. But going beyond that, she is one of the few dolls where MOD2 can’t be recommended. If you go beyond MOD1, you may as well go all the way to get the Special Equipment.
MP5 Mod III

Normal

Damaged

Stopping at MOD1: Not Recommended. The stats and other improvements alone are not enough to justify leaving her at MOD1.
Stopping at MOD2: Budget. Skill 2 grants MP5 with substantial Evasion boosts after her force shield expires, thus granting a significant boost to her defensive capabilities.
Stopping at MOD3: Optional. Her Special Equipment is good, but not necessary for her to perform well.
Completing the SPEQ-Set: Recommended. The SPEQ-Set grants an ICD reduction and bonus Damage Reduction with each Skill 2 stack, increasing MP5’s defensive utility even further.
This Doll’s SPEQ-Set is currently unobtainable. It will become available in a future update to Gray Zone.
From a meme to a force (shield) to be reckoned with, MP5 MOD sets out to eliminate the bad rep she got from appearing in everyone’s heavy constructions.
Besides the objectively badass art upgrade, MP5 MOD receives some shiny new tools to allow her to serve her Main Tank role a lot better. Statwise, she primarily improves her HP which was previously lacking. She also gets her Force Shield brought up to the 4 seconds duration that G36c and Thompson enjoy.
MP5's new Skill 2, Immaterial Defense, boosts her Evasion by 20% for every remaining enemy group when Force Shield expires, up to a maximum of 72.8% with 3 or more enemy groups present. With fights becoming longer thanks to tougher enemies, and MP5's special GSG UX Exoskeleton that has more Evasion on it (58) than an entire max-leveled Thompson (56), this all offers MP5 an overall significant boost to her tanking abilities. Thanks to Gray Zone, MP5 now also has access to a strong SPEQ-Set that reduces her Skill 1 ICD to 6 seconds, grants 6% Damage Reduction with each Skill 2 stack, and increases the stack limit to 5, bringing her maximum evasion buff up to 149%, while also reducing damage taken by up to 27%.
Another feature of MP5 MOD is her rare tiles affecting RFs. This doesn’t mean you should always use MP5 in RF squads. You’ll want to decide, as per usual, which squad needs her the most instead of just defaulting her to any old RFHG team. That extra survivability usually won’t be as beneficial as raw damage buffs from a HG!
For the average player, MP5 MOD is a worthwhile upgrade but not one you would necessarily miss. If you do upgrade her, it is recommended to farm the GSG UX Exoskeleton from 4-4N and acquire her SPEQ-Set. If you’re on a budget, you can bring her to only MOD2, but completing her SPEQ-Set is recommended.
M500 Mod III
Normal
Damaged

Stopping at MOD1: Not Recommended. The stats and other improvements alone are not enough to justify leaving her at MOD1.
Stopping at MOD2: Recommended. Skill 2 is the selling point of the M500 package, allowing her to supply constant shields when at least one other ally is in her column.
Stopping at MOD3: Not Recommended. Her Special Equipment is an ITI with some extra crit. Entirely ignorable, save your resources.
IDW’s American cousin bursts her way onto the Neural Upgrade scene as our first upgradeable SG. Thankfully, M500 got the memo on what a great MOD should be, unlike her British cousin.
Her Skill 2, Hunting Instinct, will grant herself and other units in her column with a 30 HP shield for 5 seconds whenever she receives a multiplicative stat buff. Note that this shield can stack up to 3 times and also REQUIRES another ally in her column, otherwise the skill does nothing. She synergises perfectly with dolls and fairies that provide constant buffs, such as SAA MOD, whose Skill 2 provides M500 with repeating buffs as long as she’s on the field.
The rest of her neural upgrade is not too important. The most important part is the extra point of Armour she receives, helping more than one might think at first. She also gains a boost to HP. Her tiles now also buff Accuracy and her Armour boost from Skill 1 is higher, though this hardly matters. Skill 2 is the definitive selling point of the package, hence why MOD2 is her recommended upgrade level. Her Special Equipment is an ITI with some extra crit damage, so it can be safely ignored.
MG4 Mod III

Normal

Damaged

Stopping at MOD1: Not Recommended. A stat boost and improved Skill 1 are not going to save her base form.
Stopping at MOD2: Budget. Her Skill 2 is good, but a lot of the value for it comes from her Special Equipment.
Stopping at MOD3: Recommended. Her Special Equipment is what grants MG4 her full potential through gaining access to ricochet rounds. If you upgrade MG4, you really want to go all the way.
Completing the SPEQ-Set: Recommended. Did you want MG4’s ricochets to be even stronger? Well guess what, now they always crit and never miss! She also has huge ramping buffs based on the amount of team reloads.
This Doll’s SPEQ-Set is currently unobtainable. It will become available in a future update to Gray Zone.
I think when it comes to Neural Upgrades, we all love a good zero to hero story. MG4 was always a cutie but never deployed as she just was never a good MG… until now. While you do need to go all in on her, MG4 does offer a really strong upgrade.
Let’s just get straight into the meat of it, which for once is not just the Skill 2. With MG4, it’s actually her Special Equipment. The SPEQ itself is not anything special, it’s basically SLAP ammo with more AP and a slight Damage reduction, but what’s significant is how it interacts with her Skill 2, Haunted House Hammer. With the SPEQ equipped, all of her shots will now ricochet up to three times, effectively increasing her DPS by 30%. She also reduces the Damage of anyone her ricochets hit, helping the SGs do their job.
If you then set out to also acquire her SPEQ-Set, MG4’s ricochets get even better! They now not only do twice the base damage, but are also guaranteed to crit and cannot miss. Furthermore, she grants additional bonuses based on the total number of reloads across the whole echelon. On 5 reloads, she gives all MGs and SGs 50 HP Shields. On 10 reloads, she gives all MGs and SGs 30% Crit Damage. On 20 reloads, she gives all MGs and SGs 100 Damage.
The rest of her Skill 2 sets off to make Lock and Load not a crap skill. The Extra Ammo that this skill grants is now used first and gets bonus damage equivalent to 25% of her excess AP stat, and also grants her a stacking damage bonus that does affect all shots. This is all topped off with very nice stat boosts to her Damage and Accuracy, a bigger clip, and even stronger tiles.
MG4’s main downside is simply the extreme cost and the fact she is still a conventional MG. MOD3 is imperative, to the point where MOD2 can only be recommended as a budget stopping point, making her one of if not the most costly upgrade in the game. The SPEQ-Set, while not technically required, is very much recommended regardless. She’s really an all in or bust situation, but if you do choose to take that deep dive, you will find yourself one strong MG that’ll mulch through the targets for breakfast.
Gepard M1 Mod III

Normal
Damaged

Stopping at MOD1: Not Recommended. Her Skill 1 now ignores HP Shields, but this is a niche she is still outclassed in.
Stopping at MOD2: Recommended. The Skill 2 carves her a unique niche revolving around permanent uptime IWS with an additional execution effect.
Stopping at MOD3: Optional. Her Special Equipment is a nice AP Ammo upgrade, but not needed for her to do her job.
Gepard M1 has been a mostly forgotten doll. Now armed with her upgrade, she carves out a decent niche for herself as a softer-hitting but permanent uptime IWS-2000 with a fancy instadeath flair.
Her new Skill 2 is Pact with Death. She will start by prioritising enemies that have not been attacked yet. This is done as all her attacks apply a Mark of Death to the enemy. When a non-elite foe with this mark reaches 30% HP, they just die. Nothing fancy, straight into the ground and out. On top of this, while her Skill 1 is charging (available to use), she increases her Damage substantially while reducing her Rate of Fire.
Her Skill 1 always remains an option though, if you happen to need that immediate high burst of damage. Sadly, do note that due to her Skill 2 condition, this means she loses the immense Damage boost prior to the Interdiction Shot.
All in all, Gepard M1 MOD carves out an interesting and unique niche for herself. The ability to eliminate enemies earlier than usual and make herself a permanent uptime IWS is quite fun to use. Pretty good stuff for a previously unremarkable doll. MOD2 is what you want mostly, though MOD3 does come with a decent Special Equipment.
100 Shiki Mod III

Normal

Damaged

Stopping at MOD1: Budget. This upgrade is decent and enhances her base form to more usable levels, but lacks a lot of the potential power of her upgrade.
Stopping at MOD2: Recommended. 100 Shiki’s Skill 2 combined with the buffs to her Skill 1 greatly enhances her defensive capabilities.
Stopping at MOD3: Optional. 100 Shiki’s Special Equipment is a more potent Signal Flare, granting 20% Accuracy instead of the typical 10%. This would be nice with dolls in need of additional Accuracy or when against more evasive enemies, but ultimately unneeded since a regular Signal Flare still does a good job.
100 Shiki, after so long, can finally make a true name for herself outside of the JP server with her new fancy Neural Upgrade. The core ideas behind 100 Shiki remain the same: If her HP Shield breaks, she will receive defensive buffs, if her HP Shield expires, she will receive offensive buffs. An interesting idea for a hybrid SMG but one that never really paid off.
Now, she has much more substantial defensive benefits when her shield breaks thanks to her Skill 2, Sakura Blizzard, which prevents the first instance of damage that would kill one of her links and grants an HP shield which gets stronger as her HP drops. Combined with a much reduced ICD and Cooldown on Skill 2, this greatly enhances her defensive capabilities to become slightly stronger than that of RO635 MOD (without setup).
100 Shiki’s main downside is not even one really with herself, but more with her competition. Suomi MOD boasts incredible survivability that far exceeds 100 Shiki at the exact same cost in terms of resources. Nevertheless, 100 Shiki MOD is strong on her own merits and worthy of consideration. MOD2 is where she gets the bulk of her new power from, with MOD3 being an optional upgrade thanks to her nice but ultimately unneeded Special Equipment.
RO635 Mod III

Normal
Damaged

Stopping at MOD1: Budget. The stats and skill improvements are a good upgrade to RO635. While you should go further, leaving her here for a short while is fine if you’re new or low on FCCs.
Stopping at MOD2: Recommended. MOD2 is where RO really begins to shine, granting her the ability to potentially shrug off any and all damage.
Stopping at MOD3: Optional. Her Special Equipment is good, but not necessary for her to perform well.
RO635 MOD is something quite interesting. Have you ever wanted to see a doll that can theoretically stare an enemy right in the face and give it the middle finger as its attacks bounce off her with not a scratch dealt? That… typically won’t happen, but RO635 could do it if RNG goes her way.
Her Skill 2, Righteous Judgement, allows her to potentially dodge a lot of incoming attacks. When she is hit by an attack that deals less than one link’s worth of HP (before linksplash), she has a base 20% to roll a second evasion check that also works on surehit attacks. The chance to roll the second evasion check increases with the amount of (certain types of) debuffs on an enemy, with each layer granting RO an additional 10% chance. When Skill 1 is active, the base chance to roll the second check goes up to 40%.
The main downside to this skill is how it can be potentially ignored. However, there are very few enemies which would actually deal enough damage in a single instance to ignore it, and typically you wouldn’t be having RO fight these enemies in the first place anyway. Besides that, it is still pure RNG how much this skill will protect her. Sometimes it will work in her favour, sometimes it will not. When we’ve now got other upgrades that offer consistent protection for the tanks, RO has fallen behind.
Besides this, RO gets your typical suite of upgrades. Statwise, she focuses primarily on HP and Evasion upgrades to bring her default tankiness up even further. Her Skill 1 gets a second debuff and her tiles also get slightly stronger.
With 2 layers of evasion checks and really good stats, with proper setup, RO635 MOD does serve as an effective tank. However, there are other SMGs that tank better with less effort, most notably Suomi MOD. MOD2 is her best stopping point, you’re here for the skill and everything else is bonus. MOD3 is a good upgrade, but for 5 FCCs you really want more than just 1 point of HP and an improved T4 Exo.
…Actually, MOD3 does have her incredible art. She looks so cool and mature and comforting… Is this definitely RO MOD? Seems more like RO MOM to me.
MP-443 Mod III

Normal

Damaged

Stopping at MOD1: Budget. The upgrade to her tiles and Skill 1 is nice.
Stopping at MOD2: Recommended. This gives MP-443 her full support potential.
Stopping at MOD3: Optional. If you really need a flare for her, then it’s an OK upgrade. Otherwise, just pass.
The good old Grach gets herself a straightforward, simple, and effective upgrade for a good price.
Her new Skill 2, Star Trail, grants a 20% Damage boost for 4 seconds to allies on her tiles when her Skill 1 activates. She also receives a stronger Skill 1 and her tiles now give a stronger Damage bonus. That’s… basically everything you need to know.
Firepower Suppression HGs have good defensive value, and now Grach packs that alongside extra damage bonuses all for a good price thanks to her 3 star rarity. Grab MOD2 for cheap and you’ve got yourself a great and useful HG. MOD3 is OK if you really need the flare, but far from needed.
XM8 Mod III

Normal

Damaged

Stopping at MOD1: Budget. She gets some stats, tile improvements, and reduced ICD. This upgrade is okay, but misses out on what makes XM8 unique.
Stopping at MOD2: Recommended. Her area of interference is very useful for team survivability.
Stopping at MOD3: Optional. Her Special Equipment is nice but not needed.
The prototype XM8 nets herself an upgrade befitting a weapon seemingly of the future. Her grenades go full electric for lingering debuffs.
Restraining Matrix is her new Skill 2, and definitely has an appropriate name. Her grenades cause a lingering area of interference for 8 seconds, within which any enemy receives a 25% Damage and 50% Accuracy reduction. On top of this, the field will randomly attack and stun one enemy within it every second. The area of effect is roughly the same size as her grenade explosion. On top of this, XM8 also receives the usual boosted stats and the important ICD reduction to Skill 1.
XM8 MOD has a strong grenade and her area of interference provides handy stuns and debuffs that help keep the team alive. Overall a solid package of a grenade AR. MOD2 is the most helpful upgrade, but MOD3 is also a decent upgrade. Even MOD1 on its own can be OK, but sticking with that is missing out on what makes XM8 special.
Micro Uzi Mod III

Normal

Damaged

Stopping at MOD1: Not Recommended. The stats and other improvements alone are not enough to justify leaving her at MOD1.
Stopping at MOD2: Recommended. Everyone loves to see the enemies burning like crazy in Uzi’s blaze!
Stopping at MOD3: Optional. Her Special Equipment is good, but not necessary for her to perform well.
Uzi was tired of being a joke in the community and decided to bring up her game! Micro Uzi MOD brings a pretty strong upgrade that can stand out in the right situations.
While she still possesses a lower Damage stat than one would like, Micro Uzi does make up for it with her peerless Area of Effect potential. Burning Chain, her Skill 2, will cause the burning damage effect from her grenade to spread around. This spreads both through new burning ground being created and through enemy groups simply burning each other. Against dense groups of enemies, this proves to be devastating due to the amount of damage ticks that enemies will experience.
Outside of dense enemy groups, Uzi will still enjoy good performance as an incendiary grenade off tank. She even has her tiles fixed so now she’ll buff the AR behind her!
For those looking to do corpse dragging (where you use a sole doll with ammo and rations to carry 4 empty dolls through a battle, usually done for levelling purposes), Uzi can do very well. Two of the best maps to perform dragging on are 13-4 followed by 12-4E. On both maps, Uzi can sweep through all the enemy teams she will face.
If you’re looking for another relatively traditional incendiary grenade SMG with some insane potential against clusters of enemies, Uzi will be a good choice to upgrade. This AoE is very fun to play with and very strong against the right types of enemies. Bringing Micro Uzi to MOD2 for the Skill is recommended. Her Special Equipment is good, but not that much better than a typical EOT.
M14 Mod III

Normal

Damaged

Stopping at MOD1: Recommended. Many new commanders use M14 as their first RF, so giving her a boost with MOD1 is a cheap and good investment.
Stopping at MOD2: Optional. Skill 2 is just a bump in Crit Damage during Skill 1, which is nice but not necessary.
Stopping at MOD3: Not Recommended. The SPEQ only offers 10 Accuracy on a normal VFL.
M14 MOD plays on all of her original strengths and simply makes her even stronger. While the need for her has dwindled over time, she still stands as a decent RF.
Her primary issue before the upgrade was her low Damage stat. The upgrade helps this through a minor raw Damage stat increase and her new Skill, Clear Fighting Spirit, that buffs her Crit Damage while her Skill 1 is active. This compounded buff brings M14’s DPS up to other powerful DPS RFs such as WA2000.
All this considered, she’s still all she was before: a strong generalist RF. That being said, with the constant influx of new top tier generalist RFs, her upgrade has become less and less attractive as time has gone on. Whether or not you consider her for upgrading will be very armoury dependent: if you have the likes of R93, General Liu, Lee-Enfield, etc., then there is really no need to upgrade M14. If you’re a newer commander or just lacking these strong dolls, M14 is worth considering.
M14 is another doll that is useful at any level of her upgrade. MOD1 funnily carries the most value, as levelling M14 further has gotten much less valuable as time has gone on. MOD2 is still good for the skill, while hardcore fans can go up to MOD3 for the art, but it’s not worth it for her SPEQ alone.
Night Priority
These Neural Upgrades are designed to be good in night battles and night battles only. They are effective at what they do, but only have real value if the current meta revolves around night battles.
XM3 Mod III
Normal

Damaged

Stopping at MOD1: Not Recommended. The stat boosts and improved Skill 1 are not enough on their own to give enough value to XM3.
Stopping at MOD2: Recommended. Her Skill 2 helps a ton with mopping up the weaker enemies at night.
Stopping at MOD3: Optional. Comes with a nice Special Equipment that combines AP, Damage, and Accuracy into one. Not needed, but does help nicely.
Poincaré Recurrence brought with it a really solid set of upgrades. XM3, while the least important of that batch overall, is still a great MOD. Her overall desirability does depend on the prevalence of night battles at any given time, but for those night battles, she has a unique niche.
Her new Skill 2, White Ghost, makes her first shot against an enemy during Skill 1 to be surehit and deal increased Crit Damage (the bonus Crit Damage is only at night, but you’re only using her at night to begin with anyway). Combined with her updated Skill 1 which has her prioritize targeting the lowest HP enemy, she becomes very effective at mopping up the weaker and potentially more evasive enemies at night, the kind that RFs can sometimes struggle to deal with.
Other nice bonuses she gets are a substantial Damage stat boost, but also notably a reduction in her Skill 1 ICD to 6 seconds. She previously suffered with a 8 second ICD, but she’s now in line with other standard RFs. Overall a solid upgrade, but her value is highly dependent on whether or not the meta of the week revolves around night combat. MOD2 is the ideal upgrade point, but MOD3 does come with a nice Special Equipment.
AS Val Mod III

Normal

Damaged

Stopping at MOD1: Not Recommended. The stats and other improvements alone are not enough to justify leaving her at MOD1.
Stopping at MOD2: Optional. Skill 2 is the minimum to get AS Val to what makes her special.
Stopping at MOD3: Recommended. AS Val has a great Special Equipment.
AS Val MOD is a nice zero to hero story. AS Val rises from one of the weakest base ARs to being one of the strongest ARs for night performance assuming you can give her the right support to reach her max potential. This isn’t always needed in the Girls Frontline meta, but it’s nice to have her whenever night battles become relevant.
What makes AS Val MOD strong is Faith, her Skill 2. Whenever AS Val receives a damage buff from any source (Fairy Skill/Talent, HG buff, or even her own Skill 1), she gains surehit for 3 seconds. When combined with certain support, she can completely forego using a PEQ at night in favour of a VFL.
It should be noted that if you lack the means to give her this Skill 2 coverage, then AS Val does become considerably less worthwhile against unarmoured enemies due to a lack of continuous Faith activation, forcing her to wear a PEQ.
AS Val MOD also enjoys a nice stat boost, an upgraded Skill 1, tiles that finally face forward , on top of a good Special Equipment that bumps her raw damage up further. Everything combines to give her some of the highest DPS at night for ARs.
Unfortunately for AS Val, even when night maps come up and you happen to need an AR, plenty of other ARs can perform perfectly well without needing to go through the upgrade. If you do upgrade her, getting her to MOD2 for the skill is the minimum, but getting her to MOD3 allows her to enjoy her great Special Equipment.
C96 Mod III
Normal

Damaged

Stopping at MOD1: Recommended. The improvements to her tiles and Skill 1 is what grants C96 her decent niche as a support HG for Night against evasive enemies.
Stopping at MOD2: Optional. The 20% Critical Damage bonus from Skill 2 is a nice DPS boost but not strictly necessary.
Stopping at MOD3: Not Recommended. Her Special Equipment is downright pointless. You would want to use a Tactical Light over it at any time.
C96 is a Flare HG, which used to be completely and utterly useless. Due to the changes to Flares now offering Night Vision instead, C96 now suddenly has a niche long after her MOD was released.
MOD1 improves C96’s Skill 1 to give 90% Night Vision, returning all dolls to almost daytime Accuracy. Her new Skill 2, Night Sky Pursuer, grants allies 2 ammo to their current clip (if they even have a clip size) and raises their Critical Damage by 20%. She also gets the usual array of buffs, like stat upgrades and improved tiles.
You may feel like C96 is forced into Position 5 if you're using her as an HG in RF teams at night, thanks to her odd tile layout, but her tiles only offer Accuracy so they can often be safely ignored. The 20% Critical Damage bonus may as well be an effective 20% DPS increase for RFs with their natural nearly-capped Crit Rate, while the huge amounts of Accuracy she effectively gives can really help RFs a lot against evasive enemies. With how SCAR-L’s additive damage benefits greatly from having a high Critical Rate, C96 is a decent option for allowing SCAR-L to wear a VFL at night.
Note that you would never want C96 with MGs, because Nova does exactly this except way WAY better (she gives a flat 80 Accuracy to MGs at night, C96 does not even come close).
There’s nothing particularly remarkable about C96, but all in all, what she gains does make her a fairly decent HG to pair with RFs for night battles particularly against more evasive enemies. MOD1 alone is cheap and offers pretty much all of this new support capabilities for her. MOD2 is nice as well for the Crit Damage buff but also not strictly necessary. Her Special Equipment just offers herself some Crit Rate and Evasion; don’t bother and use a S.F. Modified Tactical Light instead.
Low Priority
These Neural Upgrades are good upgrades for their respective dolls, but typically don’t offer as much or don’t offer enough for the price as other upgrades.
M1919A4 Mod III

Normal

Damaged

Stopping at MOD1: Not Recommended. The simple upgrades to her stats, tiles, and Skill 1 do not offer enough to make M1919A4 worth considering.
Stopping at MOD2: Budget. Her new Skill 2 can be decent with the Damage buff to Giant enemies and the knockback, but this is generally only recommended as a temporary stopping point as you work on obtaining what is needed for the SPEQ-Set.
Stopping at MOD3: Not Recommended. Her MOD Special Equipment just gives her some more Damage and reduces Movement Speed and Reload Time. Only bring her here if you can complete the SPEQ-Set.
Completing the SPEQ-Set: Recommended. The full SPEQ-Set grants M1919A4 her an occasionally useful niche of immediately stripping HP Shields from Giant enemies.
This Doll’s SPEQ-Set is currently unobtainable. It will become available in a future update to Gray Zone.
M1919A4 is an overall okay upgrade by itself, but comes with some decent utility if you can complete her SPEQ-Set.
So what does the MOD offer without the SPEQ-Set? Her Skill 2, Devouring Terror, makes her always prioritise the closest unit and Crits now have a small chance to knockback non-elites and stun them for a short duration. She also deals 50% increased Damage to Giant enemies. On top of this, she gets the usual array of stat buffs and tile buffs, and her Skill 1 now grants additional Critical Damage.
Overall a fairly unimpressive upgrade, but if you can complete her SPEQ-Set, things get more interesting. Most notably, her Skill 1 activation will remove all HP Shields from any enemy Giants. This is pretty good, as HP Shields are plentiful and frequently found on Giant enemies (such as Hannibals and Patrollers). She also reduces all enemies’ Damage during Skill 1, though given the short 6 second duration, this doesn’t add much overall to the upgrade.
If you are capable of completing the SPEQ-Set, M1919A4 MOD does offer something that could be worthwhile. Overall though, it’s simply an OK upgrade for an OK doll, and generally not worth too much consideration if you can’t complete the SPEQ-Set.
MG3 Mod III

Normal

Damaged

Stopping at MOD1: Not Recommended. MG3 base is bad and MOD1 does not make her any more relevant.
Stopping at MOD2: Recommended. Her new Skill 2 is what gives MG3 her new niches. The Crit Damage buff that she gets also offsets the penalties of the Infinite Ammo Box.
Stopping at MOD3: Optional. Her Special Equipment is a nice VFL upgrade, but you don’t really need it.
Completing the SPEQ-Set: Optional. The SPEQ-Set grants extra Crit on Skill 1 and her Skill 2 stacks now give bonus damage. It’s pretty nice.
This Doll’s SPEQ-Set is currently unobtainable. It will become available in a future update to Gray Zone.
For the longest time, MG3 has been a joke. A cute joke, but still a joke of an MG you’d never want to use. However, I’m now very happy to say that MG3 MOD is… viable. She has a niche anyway, albeit not one in high demand, but she still does have things going for her.
MG3 MOD’s niche is simple: she’s an MG that can pierce HP shields, which is quite the rarity. Her new Skill 2, Supercompressed Bulletswarm, makes all her shots do this, so nothing special is even required. She’s also an MG that can actually hit things at night. Her Skill 2 grants her a flat 5 points of Accuracy for 10 seconds after every single shot, stacking up to 30 times. This is after the night penalty already takes effect, so she becomes highly accurate even at night after just a few seconds of shooting. If you get her to her max stacks of 30, she even gets a Crit Damage and Movement boost for the rest of the battle. This basically offsets the damage penalty of the Infinite Ammo Box SPEQ.
Speaking of that, if you want to use MG3 MOD, now’s the time to go and get that piece of equipment. Because of the stacks lasting only 10 seconds, the Infinite Ammo Box is completely required for her to reach 30 stacks.
The niche of a MG that pierces HP shields and can perform accurately at night by herself is not one you really need, but it’s still something that can come in handy on occasions. The niche of nighttime Accuracy can be covered elsewhere, most notably with Nova and M240L. She does still suffer in other areas too, such as no armour buffs on her tiles, but nevertheless I’m still just happy I can finally say MG3 has some sort of a purpose, some value she can claim as her own. Take her to MOD2 minimum for the Skill 2. MOD3 does offer a pretty good VFL upgrade, but you don’t need it for MG3 to do her thing.
If you do choose to take her to MOD3, MG3 does have a SPEQ-Set that does two main things. Her Skill 1 now grants 30% Crit Rate and her Skill 2 stacks now boost her Damage by 2. All in all, two nice bonuses, but nothing that would make MG3 MOD3 a huge contender in the MG world.
UMP 9 Mod III

Normal

Damaged

Stopping at MOD1: Not Recommended. The stats and other improvements alone are not enough to justify leaving her at MOD1.
Stopping at MOD2: Recommended. Skill 2 grants UMP9 her huge Damage buffing capabilities and is the main purpose of upgrading her at all.
Stopping at MOD3: Not Recommended. UMP9’s Special Equipment is a decent upgrade over a suppressor, but doesn’t offer enough to justify the cost.
Completing the SPEQ-Set: Optional. A hefty 50% Vulnerability infliction on stunned enemies is nice, though sadly this doesn’t work on unstunnable enemies.
This Doll’s SPEQ-Set is currently unobtainable. It will become available in a future update to Gray Zone.
UMP9 MOD gets an overall good upgrade to her abilities, though still suffers from most of the same issues that her base form does.
Statwise, her Evasion sees a nice improvement. Her tiles also see a boost in how much Rate of Fire they give, and her Stun Grenade now lasts for slightly longer. Her Skill 2, Snowy Owl’s Roar, allows UMP9 to buff herself and the others in her column depending on what the Stun Grenade does.
If the Stun Grenade doesn’t stun her main target or said main target dies before the grenade hits, she and the others in her column get a small HP Shield and vasion buff. If she does stun her main target however, she instead gives a significant 50% Damage buff. With the right timing, you can take advantage of this by moving UMP9 into the back column so she gives said Damage buff to your DPS dolls.

Source: 命运の乐章
Sadly though, UMP9 is still a stun grenadier. Her ICD didn’t receive an upgrade, still too volatile in targeting, and the stun grenade still does not work on threatening enemies or bosses. Her usability remains niche overall.
UMP9 is definitely a good upgrade to a doll who’s sadly past her prime. She’s overall a low priority upgrade in terms of performance, but I know most of you will upgrade her anyway because of her story involvement and adorable smile. In that case, MOD2 is the optimal stopping point. Her Special Equipment from MOD3 is a nice upgrade over a suppressor but not worth the cost.
Her SPEQ-Set buffs the radius of her Stun Grenade and inflicts stunned enemies with 50% Vulnerability. This is a pretty significant damage increase, but sadly still doesn’t work against unstunnable enemies.
Mosin-Nagant Mod III

Normal

Damaged

Stopping at MOD1: Not Recommended. The stats and other improvements alone are not enough to justify leaving her at MOD1.
Stopping at MOD2: Recommended. Skill 2 grants Mosin nice bonuses to her general performance, allowing her to branch off from being more than just another Aimed Shot skill RF.
Completing the SPEQ-Set: Optional. Mosin’s SPEQ-Set does set out to enhance what Mosin already does well, but the high cost and low priority of Mosin overall means this is not totally necessary.
You wouldn’t typically expect a RF with a bamboo skill to be an effective generalist RF. Mosin Nagant decided she didn’t like that mindset and tried to become just that with her MOD.
With both of her Special Equipment, Mosin Nagant’s damage output is stronger than before. Her new skill, Pale Reaper, boosts her damage for 3 seconds when she kills with a normal shot, and boosts her Rate of Fire for 5 seconds when she kills with her Skill 1.
Sadly, in practice, this is not as effective as it once was. With a large variety of high HP enemies now being prevalent in the latest content, she struggles to kill these enemies with her Skill 1, and thus cannot consistently proc her Rate of Fire boost in many fights.
If you do upgrade her, bringing her to MOD2 will be sufficient. Her SPEQ is not worth the cost, even with the slightly higher Crit Rate it offers. MOD3 is not advised.
Mosin’s SPEQ-Set gives her Skill 1 a 1 second ICD and doubles its Damage against Elites, and also allows Skill 2 to stack up to 3 times. Both are nice boosts to make Mosin better at what she does, but are not necessary especially given Mosin’s already low priority for upgrade.
Minimal Priority
These Neural Upgrades have very low to no real value for the average player, but they are nevertheless still good upgrades that perform well.
M1911 Mod III

Normal

Damaged

Stopping at MOD1: Not Recommended. The stats and other improvements alone are not enough to justify leaving her at MOD1.
Stopping at MOD2: Recommended. The Skill 2 is what granted M1911 her cheap farming capabilities.
Stopping at MOD3: Not Recommended. M1911’s Special Equipment has never had any notable effect on her farming ability, so it can be ignored.
The MOD for this classic handgun gives her a rather unique identity, with M1911’s new upgrade leaning more towards a damage dealing role than the buffing/debuffing that is typically expected for most HGs.
Her Skill 2, Desperate Sharpshooter, has M1911 fire off 7 quick attacks after throwing her smoke grenade - they deal double damage and target the furthest enemy first, then targeting progressively closer enemies. Thanks to being a smoke grenade user (the only HG to be so at time of writing), M1911 can be useful for keeping the team safe from threatening enemies; her MOD skill’s appreciable early burst can help deal with any potential smaller mobs, or for using M1911 as the solo farmer in low-difficulty event maps.
That’s right, M1911 MOD is also good for cheap farming! The burst damage can be enough to take out weaker formations by herself, and M1911 works great when paired with either another HG or AR as a flexible and low-resource farming team if her own DPS is insufficient. Running these budget teams can save you a lot of resources when farming the same map hundreds of times in events - the reduced cost adds up pretty quickly.
However, as time has gone on, the amount of enemy echelons M1911 MOD can effectively solo has decreased. HP values are only increasing, and the dedicated farming maps simply don’t have enemies weak enough for her to solo. This is not to say M1911 does not have her place in farming, she’s still good at it and some might find value in her. She’s still a HG and is held back by HG stats and lack of Armour Penetration, but M1911’s unique abilities make her a decent Neural Upgrade candidate. MOD2 is the best value overall as her SPEQ is an underwhelming upgrade over regular Hollow Point ammo.
MP-446 Mod III

Normal

Damaged

Stopping at MOD1: Not Recommended. The stats and other improvements alone are not enough to justify leaving her at MOD1.
Stopping at MOD2: Recommended. MP-446 MOD2 is nothing fancy, but it’s cheap and makes her a mediocre buffing HG.
Stopping at MOD3: Not Recommended. Her Special Equipment does nothing to help her support potential.
The precious little Viking gets a simple boost to her capabilities from her MOD.
The most important of her upgrades is her new Skill, Tidal Breach. This grants her allies a decent Rate of Fire boost for a short 4 seconds when her Skill 1 activates. Her tiles also now give even more Damage. This sadly doesn’t change the usefulness of her Skill 1, however. Decreasing the enemy Rate of Fire is not typically useful for increasing survivability when compared to debuffing Damage, which in itself is already niche in usage.
It’s not a fancy upgrade, but it’s cheap. The ability to boost Rate of Fire while having Damage tile buffs is rare, though the RoF buff duration is shorter than what’s offered by a dedicated buffer. She will want to be taken to MOD2 to unlock her Skill 2, as her Special Equipment is not impactful overall on her performance.
LWMMG Mod III

Normal

Damaged

Stopping at MOD1: Not Recommended. The stats and other improvements alone are not enough to justify leaving her at MOD1.
Stopping at MOD2: Recommended. LWMMG MOD2 is a nice and cheap upgrade for those lacking better MG options.
Stopping at MOD3: Optional. Her Special Equipment is good, but not necessary for her to perform.
LWMMG MOD is a good upgrade that has ultimately come too late to be useful.
Statwise, she receives a nice Damage bonus and a boost to her clip size. Hunting Impulse also receives more accuracy. Shining Barrier, her new Skill 2, can grant a 5 HP shield to dolls on her tiles. This is at a 20% chance to activate per shot, bumped up to 100% during Hunting Impulse. This works out to be very little HP Shields compared to newer constant sources, such as MPL or Nova.
Getting her to MOD2 is a nice and cheap upgrade. Her SPEQ isn’t anything too Special.
M1918 BAR Mod III

Normal

Damaged

Stopping at MOD1: Not Recommended. The stats and other improvements alone are not enough to justify leaving her at MOD1.
Stopping at MOD2: Recommended. MOD2 grants Auntie BAR her battlefield magic (quite literally) and improves her.
Stopping at MOD3: Optional. Her Special Equipment is alright, but not necessary for her to perform well.
While the Reload Canceling days have passed her, Auntie BAR nevertheless still has a decent MOD.
Battlefield Magic, her new skill, makes the initial shots in each volley come with a substantial damage boost. This improves her first volley significantly and makes her second volley relatively strong due to both skills being active at that time. This skill also gives her a flat reload time, but does not work with Bipods, making her performance suffer compared to other MGs that want to reload.
Overall, she is an overall costly but decently effective option who gets most of her potential unlocked at MOD2. Her Special Equipment is not worth it.
G36 Mod III

Normal
Damaged

Stopping at MOD1: Not Recommended. The stats and other improvements alone are not enough to justify leaving her at MOD1.
Stopping at MOD2: Recommended. Skill 2 is far from flashy, but helps G36 to improve both her own performance and also support the tanks.
Stopping at MOD3: Not Recommended. Her Special Equipment is also not something she will miss.
G36 MOD may not be extremely flashy, but is still a decent upgrade to an already decent AR.
Her new Skill, Arclight Contract, combines support for the tanks with further buffs for herself. She will raise the Evasion of allies on her tiles while also buffing her own Rate of Fire based on the number of allies on her tiles. On top of this, she gets nice boosts to her overall stats, first skill, and tiles. This allows her to be an overall versatile AR that doesn’t falter in any particular area.
Overall though, G36’s actual biggest drawback is the need for more specialised ARs. Her versatility is hindering her overall usefulness for newer content and there are now many better options than her in most cases. She still won’t be a terrible pick for most cases, but you’ll often find yourself desiring other ARs over her for most content.
If you do raise G36, it is recommended you get her to MOD2. Her Special Equipment, while decent, is not something she’ll miss a whole lot.
PP-19 Mod III

Normal

Damaged

Stopping at MOD1: Not Recommended. The stats and other improvements alone are not enough to justify leaving her at MOD1.
Stopping at MOD2: Recommended. PP-19's MOD2 is what makes her do more than just a regular Hand Grenadier.
Stopping at MOD3: Not Recommended. PP-19 has a pretty weird Special Equipment that enables a passive in her Skill 2. However, in most cases you’ll prefer the consistency of an EOT.
PP-19 MOD has a fairly good upgrade. Meta shifts are sadly not kind to her though, which leads to the simple fact that PP-19 MOD doesn’t really offer anything you need.
Let’s go over the good regardless, because there is good to be found here. Her Skill 2, Savage Instinct, has her mark the enemies she damages with her grenade. If marked enemies are still alive after a grenade throw, each of her remaining dummy links will throw an additional weaker grenade. This does mean that she is link-dependent for her grenade DPS, which is not desirable on an off tank.
The other part of her skill is based around her MOD3 Special Equipment. If she has it equipped, she’ll check her own HP every 6 seconds against everyone else in her column. If she has the highest HP, she will boost her Damage for 15 seconds; otherwise she’ll boost her Evasion. Note that due to PP-19’s HP being lower than popular main tanks, she can struggle to get the Damage boost. These buffs always stack, so she can get up to a theoretical extra 33% Damage or 33% Evasion this way. On top of this skill, PP-19 gets the usual assortment of buffs. A nice increase to her HP and Damage particularly, as well as a stronger Skill 1 and tiles.
PP-19’s main issue primarily stems from the meta. ARSMG teams in general are losing favour compared to RFHG teams, while offensive tanks are becoming less and less desirable in general. In situations where you want an offensive tank, most would turn to Uzi MOD first, and really that’s mostly all you need. As such, there’s just not much need to do PP-19’s upgrade. Her fans will find an enjoyable upgrade though, she’s still decent and by no means bad at all. MOD2 is the recommended level.
Type 80 Mod III

Normal

Damaged

Stopping at MOD1: Not Recommended. The stats and other improvements alone are not enough to justify leaving her at MOD1.
Stopping at MOD2: Recommended. Type 80’s new Skill 2 is her most interesting aspect, allowing your shotguns to rapidly move and gain shields during reload.
Stopping at MOD3: Optional. Her Special Equipment is good, but generally replaceable with SLAP Ammo (which this SPEQ is not).
Type 80’s upgrade is certainly interesting to say the least. It has some good potential, but not enough that would make you consider her for anything serious.
Her most interesting aspect is her new Skill 2: Formation Enhancement. Any MGs and SGs on her tiles receive 10 points of Movement Speed (this does not include herself). Once Type 80 activates her Skill 1, she also grants 20% Damage to dolls on her tiles, and reloading also gives a 10 HP shield.
Being able to rapidly move your shotguns and give them shields when reloading is a nice novelty, but does not have much application overall. Besides this Skill 2, she also gets the usual stat bonuses, tile improvements, and her Skill 1 buff adds a passive effect where the first shot against a new target deals 50% increased damage.
Overall though, despite some interesting potential, Type 80 will be a skip for most players. She doesn’t offer much substantial compared to stronger MGs that don’t need MODs. However, the novelty from her MOD2 can still be useful on occasion, so some may enjoy what she offers.
FF FN49 Mod III

Normal

Damaged

Stopping at MOD1: Not Recommended. The stats and other improvements alone are not enough to justify leaving her at MOD1.
Stopping at MOD2: Budget. By this point, FN49 has improved a decent amount but is still far behind other cheaper RFs.
Stopping at MOD3: Recommended. She really wants her Special Equipment to even be usable.
FN49 MOD actually addresses a lot of the issues that her base form had, taking her from a bad RF to a usable one.
With the raw stat increase, the new and enhanced Skills, and her new Special Equipment, FN49 sets out to fix her DPS issues and make herself comparable to the likes of Lee-Enfield.
While FN49 MOD is usable, she is very costly. Getting her to MOD3, levelling her skills, and enhancing her Special Equipment leads to a doll that’s only comparable to Lee-Enfield before Special Equipment or MOD. For the cost, can I say it’s worth it? I’d honestly say no overall. That being said though, she is nevertheless an upgrade that can perform, so you won’t be hurting if you upgrade her for waifu purposes. Outside of her fans though (such as myself, she’s so cute!), she does not carry much value.
M4 SOPMOD II Mod III

Normal
Damaged

Stopping at MOD1: Not Recommended. The stats and other improvements alone are not enough to justify leaving her at MOD1.
Stopping at MOD2: Not Recommended. MOD2 isn’t bad for SOPMOD, but it’s more a case of “if you’re upgrading her for the first time nowadays, you may as well go all in.”
Stopping at MOD3: Recommended. At MOD3, SOPMOD has all her tools of destruction. Her Special Equipment does help nicely.
While lagging behind the other AR team members in terms of raw DPS, SOPMOD nevertheless has a decent MOD.
Her Skill 2, Hysterical Circus, turns her grenade into a cluster bomb. After the initial explosion, it splits into three smaller grenades which each deal a small amount of AoE damage (you can mostly ignore the synergy with M4A1 MOD’s Seal of the Avenger; see her page for more details). The extra smaller grenades don’t have the same destructive power, but free damage on top ofSOPMOD’s already decent AoE damage potential is always welcome.
Outside of her grenade, SOPMOD also enjoys a nice stat boost and even a base crit rate boost. Her SPEQ is also great, being an improved EOT with far better stats. This lets SOPMOD maintain decent DPS outside of her grenade.
SOPMOD’s Neural Upgrade has lost considerable value since its launch. She’s suffered with time, especially with how newer grenadier MODs have received reduced ICDs that she did not. However, she is still usable. If you’re going to upgrade SOPMOD, you may as well go all for MOD3 as all aspects of her upgrades improve her notably.
Type56-1 Mod III
Normal

Damaged

Stopping at MOD1: Not Recommended. Improved stats and a grenade that can now crit, still not good.
Stopping at MOD2: Recommended. Her Skill 2 is what gives her any sort of potential, the rather meme ability to deal big damage when she’s damaged herself.
Stopping at MOD3: Not Recommended. Her Special Equipment is worse than a generic Focus Chip.
Outside of being a cutie, Type 56-1 never had anything going for her. Even now with her Neural Upgrade, she’s still pretty much a meme. But at least it’s now a funny meme that can actually pull off some funny plays.
Her new Skill 2, Split Pain, increases the damage of her grenade based on the amount of HP she’s lost. This boost goes all the way up to a whopping 200% Damage boost if she’s at literally 1 HP. To get here reasonably, Type 56-1 harms herself for 20% of her HP (effectively killing 1 link) each time she launches her grenade. Besides this, she also gets the usual array of stat buffs, including a pretty nice buff to her tiles, and her grenade can now Crit. Sadly though, no ICD reduction, still stuck with an 8 second ICD.
It’s quite funny seeing her grenade go off while she’s at the point of death, delivering one hell of an explosion while she’s barely standing. But the usefulness doesn’t exactly go beyond that. It’s a novelty and a meme pick, but nothing you would use seriously. If you do upgrade, then take her to MOD2 to actually enable her meme. Don’t bother with MOD3 unless you just seriously want the new art, as the Special Equipment is worse than a generic Focus Chip.
KSVK Mod III

Normal
Damaged
Stopping at MOD1: Not Recommended. The stats and other improvements alone are not enough to justify leaving her at MOD1.
Stopping at MOD2: Recommended. Skill 2 is by far KSVK’s biggest selling point and is what grants her AoE.
Stopping at MOD3: Optional. Her Special Equipment is good, but not necessary for her to perform well and is generally replaceable by Sniper Ammo.
As the first non-construction doll to receive an upgrade, KSVK originally stood out. KSVK MOD does pack a lot of fun, but most importantly of all: floofier ears than ever.
KSVK MOD’s main selling point is her Skill 2, Shockwave Demolition Round. When there’s any enemy under the effect of a negative status effect, she will prioritise the closest enemy with a negative effect and her shots will deal a small amount of damage in a cone behind the target. She’ll also see a stat improvement primarily to Damage and Accuracy, increased modifiers on Skill 1, and an interesting new set of tiles that affects SGs.
Sounds good in theory, but the main downside is that she simply doesn’t do enough AoE damage, especially compared to other dolls in the same niche like Hanyang MOD. On the other hand, if you want a frontline-targeting RF, General Liu is more accessible, stronger, and more flexible.Her other downside is her fairly rigid team requirements. She needs someone that can provide consistent debuffs, such as M950A MOD, HP-35, or the Beach Fairy. Without this, her performance drops off even harder.
All considered, she’s still a fun upgrade for commanders that want something interesting. Do note though that you’ll need a well-developed arsenal of dolls first for her to shine, so she’s not recommended for newer commanders. MOD2 is her ideal stopping point: her SPEQ from MOD3 is good, but it is basically Sniper Ammo and AP Ammo rolled into one, so you can live without. If you happen to be low on Sniper Ammo or just really love KSVK and her new art, MOD3 is not a terrible option.
Type92 Mod III

Normal

Damaged

Stopping at MOD1: Not Recommended. While Skill 1 gets a nice upgrade, it’s not enough to make Type92 worthwhile.
Stopping at MOD2: Recommended. Her unique Skill 2 is theoretically decent and makes Type92 stand out, but we don’t have the right use cases for this right now.
Stopping at MOD3: Not Recommended. Her Special Equipment is just an expensive flare, can safely avoid.
Type 92 started life as a weird HG that aimed to try and buff everything at once but failed quite miserably. Her upgrade is decent in theory, there is something here that could be useful one day, though not at this moment.
Her new Skill 2 is Apex Fire, which aims to give her debuffing and targeting potential. When Skill 1 activates, Type 92 will redirect everyone’s focus to the highest HP enemy or to the boss if one is active (which would usually be the highest HP enemy to begin with). The target receives a massive Evasion debuff, and killing said target will debuff the Damage of all remaining enemies.
In theory, this Skill 2 is pretty decent. Being able to massively debuff Evasion is nice, but unfortunately, there’s not really any use case for this. For some bosses it could be good, but beyond that, Type 92 offers not a lot else. Her tiles are still terrible, but she does have a good Skill 1.
Type 92 is very much a doll you’d only really consider if you had done basically everything else, but maybe one day she could get a spotlight. We just need the right enemies, at the right moments, to make that Skill 2 work well. To prepare for then, may as well make her MOD2 if you actually do the upgrade.
No Priority
These Neural Upgrades have next to no reason to be done.They are sorted alphabetically.
Bren Mod III

Normal

Damaged

Recommended Upgrade Level: No
Bren MOD is special. I always thought these upgrades were supposed to improve the doll. Now don’t get me wrong, Bren’s MOD is technically an improvement on her base self, but it’s so poor of an upgrade that it is never worth it.
For some reason, Bren MOD decides to hyper focus all aspects of her kit on her Accuracy. She already enjoyed a good Accuracy stat, but now she pushes it to unnecessary extremes. Her Skill 2, Interval of Strength, gives her a stack of Accuracy and extra ammo after every reload up to three times. It’s like Lewis, except without the good. Her SPEQ is also an EOT on crack, cranking the Accuracy buff up drastically. She’s going to be reliably hitting targets for sure, but so are all of the other better MGs without all this Accuracy padding.
With so much focus on Accuracy, her damage gets left in the dust. She does get a pretty big raw Damage stat buff, but that’s it. Not even the enhanced Lock and Load helps, since she decided more bullets was more important. Even with all the extra Ammo, she still falls behind the primary MG competition.
Bren MOD is painful. Such a revered Machine Gun deserved better than this. If she focused on her Damage more, she could have potentially been a decent alternative to Lewis. But that’s not what we have. What we have instead is a doll too fixated on hitting her targets to understand she also needed to hit them harder. If you upgrade her, you’re probably doing it either to get the spot in collection or her amazing new art.
F1 Mod III

Normal

Damaged

Recommended Upgrade Level: No
G’day mates! It’s time to talk about F1 MOD, crikey!
I know I may seem excited from that first sentence alone, but sadly there isn’t a lot of good to say about this upgrade. F1 was a bad smoke grenade tank with bad tiles before, and she’s still pretty much that after upgrading as well.
F1’s new Skill, Let’s Make a Mess!, grants the whole echelon a 15% Damage boost and 5 points of Movement Speed whenever they are fighting on a neutral or enemy node. Besides that, she gets some minor stat boosts to Evasion, HP, and Damage, as well as improved Skill 1 and Tiles which now also buff SMGs. The tiles themselves are still pretty bad, but at least the other SMG in the team would enjoy the 20% Evasion I guess?
When much better tanks exist, even among those with Smoke Grenades, there is no reason to upgrade F1. I think even the three fans of F1 will find her upgrade underwhelming. Her MOD art is indeed very cute though, that smile and wink is so good.
G3 Mod III

Normal

Damaged

Recommended Upgrade Level: No
While not an outright terrible upgrade, G3 sadly continues to be weak in the grand scheme of grenadiers.
Let’s start with the good: her raw stats get a good buff that helps her offensive capabilities, plus she gets improved values on her grenade and her tiles. On top of this, her tiles finally face forward and she has a decent Special Equipment.
That probably all sounds well and dandy, but she still has notable faults. She still has poor DPS compared to top grenadiers thanks to her low Rate of Fire and an underwhelming Skill 2. The Freezing Point of Courage gives her grenade an additional effect depending on the enemy health. Enemies hit below 50% HP take additional damage, while everyone else gets stunned for a brief moment. Sounds good, but in practice does not offer much benefit. The additional damage will typically only add overkill unless against very high HP enemies (which shouldn’t be fought with grenadiers in the first place), while the stun comes out too late to hinder enemies effectively.
G3 lovers will probably find an alright upgrade that will satisfy them. For most people though, there is basically no reason to upgrade her. The one niche she did have, which was being able to corpse drag 11-5, is now irrelevant with 13-4 and 12-4E being available.
Galil Mod III

Normal

Damaged

Recommended Upgrade Level: No
There was initially a lot of buzz in the air about Galil MOD, at least within my circle. We thought “Wow, any AR can now be AS Val!”, but we were short sighted and not considering the whole picture. Now on paper, Galil should actually enable ARs to use VFLs at night much like AS Val can. But within the current GFL meta, Galil MOD doesn’t have any major value to speak of.
Her new Skill 2, Eagle Eye Awakening, primarily aims to capitalize on her otherwise useless Skill 1. First, when her Accuracy is higher than the enemy Evasion, 20% of the Accuracy value over Evasion will be added as Crit Rate. This will barely benefit her for day fighting, but at night will let her Crit more consistently with a PEQ equipped.
The more interesting part though is she will give 10% of her own Accuracy to any AR or SMG on her tiles, at the cost of herself losing 20% Accuracy. While Galil’s Skill 1 is active at night and she has a PEQ equipped, she’ll be handing off a decent chunk of Accuracy to her AR teammates, thus enabling them to have good Accuracy at night even with a VFL.
Sounds great right? Well, not really actually. In practice, this is little more than a fun gimmick that doesn’t really help all that much. The Accuracy increase is hardly comparable to AS Val, who gets surehit shots.
Galil MOD is a fun cutie, but she’s nothing more. Basically just a gimmick to mess around with when everything else is said and done. Outside of love for Galil, and I know Galil has her few fans, there is basically no reason to do her upgrade.
GSh-18 Mod III

Normal

Damaged

Recommended Upgrade Level: No
Our adorable little medic GSh-18 sadly doesn’t improve a whole lot with her upgrade. While there is an interesting idea at play, it is ultimately not that practical.
Her new Skill 2, Twin Star Protection, gives her a chance per shot to grant all allies on her tiles with a 1-HP shield. This chance is equal to her Crit Rate and can be stacked indefinitely. Also, her Crit Damage during Skill 1 is increased and she receives all the usual upgrades like better stats, improved tiles, improved Skill 1, etc.
The concept of infinitely stacking shields is an interesting one, but it sadly falls flat once you account for two major flaws. One, the chance being equal to her critical rate means these shields proc unreliably. Two, the shields just don’t have enough HP to be useful compared to other sources of HP Shields like MPL.
While you could theoretically have GSh-18 proc her shields on each attack and improve the tank’s survivability quite a bit, it is ultimately too small of a shield and too unreliable in its activation chance. Her upgrade is not downright awful, but it is not worthwhile for most commanders.
IDW Mod III

Normal
Damaged

Recommended Upgrade Level: No
Everyone’s favourite meme comes back with a new upgrade and a vengeance!... Except not really, considering IDW MOD remains pretty bad.
Her upgrades do little to fix her primary issues and certain aspects of the MOD itself actually conflict with one another. Statwise, she remains with low HP and instead decides to buff her Evasion even more, despite this being the one area she didn’t need improvement. Her tiles are now slightly better too with a 10% Crit Rate buff (still bad overall though) and her Skill 1 sees a decent improvement.
Her new Skill, Electro Hijinks, goes against her main tank nature and tries to buff her DPS potential for whatever reason. It gives her 3 charges which boost Damage and Rate of Fire, with charges going away every 2 seconds and refreshing when her Skill 1 activates. You can probably guess this still doesn’t make her good at DPS. Then her Special Equipment, which is barely an improvement over a T4 Exo to begin with, still penalizes her Damage stat as hard as usual.
With all factors considered and an already abundant pool of strong main tanks available, IDW MOD offers nothing worthwhile to justify the costs. If you’re someone who’s just collecting MODs, get her to MOD1 and then forget she’s there. Not that you can actually forget IDW, since you’ll probably get her again in your next doll production.
M1897 Mod III

Normal

Damaged

Recommended Upgrade Level: No
The meido has obtained angery! Now she’s gotta Sweep Sweep Sweep!!!!
M1897 MOD is a meme. You’ve probably seen one of the GIFs posted somewhere of her just spraying flechette goddamn everywhere. If you haven’t, here’s one to feast your eyes on:
While this is a hell of a spectacle to watch, the actual effectiveness in practice leaves a lot to be desired.
If you’re confused how this is even happening, just look at her Skill 2, Explosive Cleaning. Every time someone on the field reloads, M1897 gains a flechette, which she prioritizes using over her regular shells. Each flechette fires a whopping 20 hits of damage, each one randomly targeting enemies within range. This is how all those clips exist. Note that each hit only has a 1x multiplier to begin, which actually gets lower with consecutive hits on a single target. Beyond this meme of a skill, M1897 receives the usual range of upgrades: increased HP, an extra point of Armour, improved tiles, and so on.
In theory, this MOD was supposed to “sweep” through the mobs you find yourself facing, staying true to the Trench Gun’s legacy. A really cool and fun idea, but in practice, the applicability of this is extremely limited. Offensive shotguns in general are not desired, and even then, the reliance on needing people on her team to reload to get her flechettes makes it inconsistent in the best case.
Don’t let all those hilarious clips make you think M1897 is anything more than a meme. A fun meme for sure, but if we’re being serious for a moment, upgrading M1897 can’t be recommended. If you’ve got nothing else to do and just want a silly spectacle to watch though, go for it I suppose.
M38 Mod III

Normal

Damaged

Recommended Upgrade Level: No
M38 is a real cutie. If that was the only factor in upgrading, I’d say “yes, go and upgrade!”, but it’s not. M38 is the second 2 star stun SMG to get a MOD, the first being Type 64. While she doubles down on the stun grenade, M38 instead tries to branch off for more offensive utility… though this still falls just as flat.
Her Skill 2, Scarlet Flame Pursuit, is quite literally just an incendiary grenade. Except on a longer ICD and with REALLY bad modifiers. The initial impact of M38 MOD’s incendiary grenade deals 2.8x damage, which is downright pathetic. To put this into more perspective, MP40 is a 2 star with an incendiary grenade and her direct impact deals 5.5x damage. M38’s DoT is also 0.6x, as opposed to the typical 1x that other incendiary users have.
M38’s advantage over these is the radius of her incendiary is 2.5 units, as opposed to the 1.5 units of other incendiary users. This means that M38 can theoretically stack up to the others when there’s a lot of enemies present and she can hit enemies that the other incendiary users cannot. But this is a very specific scenario and even though her damage can add up, it’s more likely that she’s going to fail to kill her enemies. M38 is safe to ignore for practically everyone.
PPSh-41 Mod III

Normal

Damaged

Recommended Upgrade Level: No
PPSh-41 MOD is undeniably cute as heck, but an upgrade can’t live on cuteness alone.
Hand grenades are not good, and PPSh doesn’t do anything to change this. Instead of trying to salvage hand grenade damage, she instead opts to tie her grenades into incremental buffs for other SMGs. With her Skill 2, Million Medals, she gets a medal every time she throws a grenade. She can earn up to 3 medals, each one granting increasingly stronger buffs to SMGs. Even more, these medals persist across all battles in that map unless her echelon retreats.
This effect is close to being good… if only it buffed ARs instead. She already has AR tiles in that weird pattern that only works from Position 4, and the tiles themselves aren’t great but they aren’t terrible either. But as she is, Skill 2 only buffs SMGs and that’s really unfortunate. Even with her SPEQ-Set’s additional buffs, the buffs still really don’t do enough to be anything more than a meme.
If she buffed ARs, I still don’t think PPSh-41 MOD would’ve been that great, but she would at least have offered something of value. As she is though, she cannot be recommended.
Sten MkII Mod III

Normal

Damaged

Recommended Upgrade Level: No
Sten MOD packs a decent boom, but it’s far from enough to make her a worthwhile investment.
One the one side of good, her Hand Grenade does pack a decent punch after her upgrade thanks to the buffed Skill 1 and improved Damage stat. Her new art is also really good, but that’s hardly going to help her in combat.
Her new Skill 2 is Valiant Shield. She places down a shield that reduces incoming damage by 35%. It’s a decent defensive multiplier, but marred by a poor uptime and cooldown. It lasts for just 5 seconds and comes with a 16 second cooldown, which simply cannot compete with other SMGs like Suomi MOD who have insane 180% Evasion buffs with double the uptime, not to mention the other survivability buffs.
To make matters worse, she continues to maintain her trademark awful tiles. Evasion and Accuracy is the worst practical combination you could have for ARs, especially with Evasion being largely irrelevant for backline units. If this was changed to something like Damage, then we would’ve had a good set of tiles. Alas, that is not the case.
All in all, Sten MOD is a completely forgettable upgrade when it comes to gameplay investment. Nobody but her biggest fans will be in a rush to perform this upgrade, but her fans will be happy at least, since she is a real cutie after all with a great set of MOD 3 art.
StG44 Mod III

Normal

Damaged

Recommended Upgrade Level: No
Being the first successful Assault Rifle in history, StG44 deserves so much, but sadly got so little. Like with G3, StG44 MOD is not a terrible upgrade, but it is one that won’t convince anyone that doesn’t already love her to give her another glance.
Her new Skill 2, Firestorm, sounds a lot more powerful on paper than it actually is in practice. Her raw grenade damage is increased by 20% and there will be 3 secondary explosions after the initial, each one occupying a different radius of her HE grenade splash damage. Enemies can be hit by multiple of these secondary explosions, but when this occurs, the damage is often less than expected thanks to how linksplash damage works. StG44 MOD still deals passable grenade damage in most cases, but she is forced to compete with other AR grenadiers like 416 with a terrible 8 second initial cooldown.
The core problem of High-Explosive Grenades is that they are just so utterly dreadful that this doesn’t make them anywhere close to competitive, especially with the high HP, low dummy link enemies that are far more prevalent nowadays. StG44's overall damage as a grenadier is going to be low: in cases where you’d want a grenadier, her DPS will be comparable to just using an ordinary self buffer. Honestly kinda sad to think about.
As a fun side note, StG44 does get a slightly interesting change to her tiles. She now also buffs ARs and gains extra tiles similar to what Ribeyrolles has. The problem here is that she is hardly a support AR, since her tiles buff Accuracy and Evasion. The stat boost StG44 gets from the Neural Upgrade is relatively good, gaining a decent chunk of Damage and Rate of Fire.
As with pretty much all dolls in this tier, StG44’s biggest selling point is just the art, which IMO is some of the best art that Neural Upgrades has to offer. She will actually be the first and likely only doll in No Priority that I will personally oath and raise to MOD3. For anyone who doesn’t already love StG44 like myself, there won’t be anything worthwhile found in her upgrade.
Super SASS Mod III

Normal
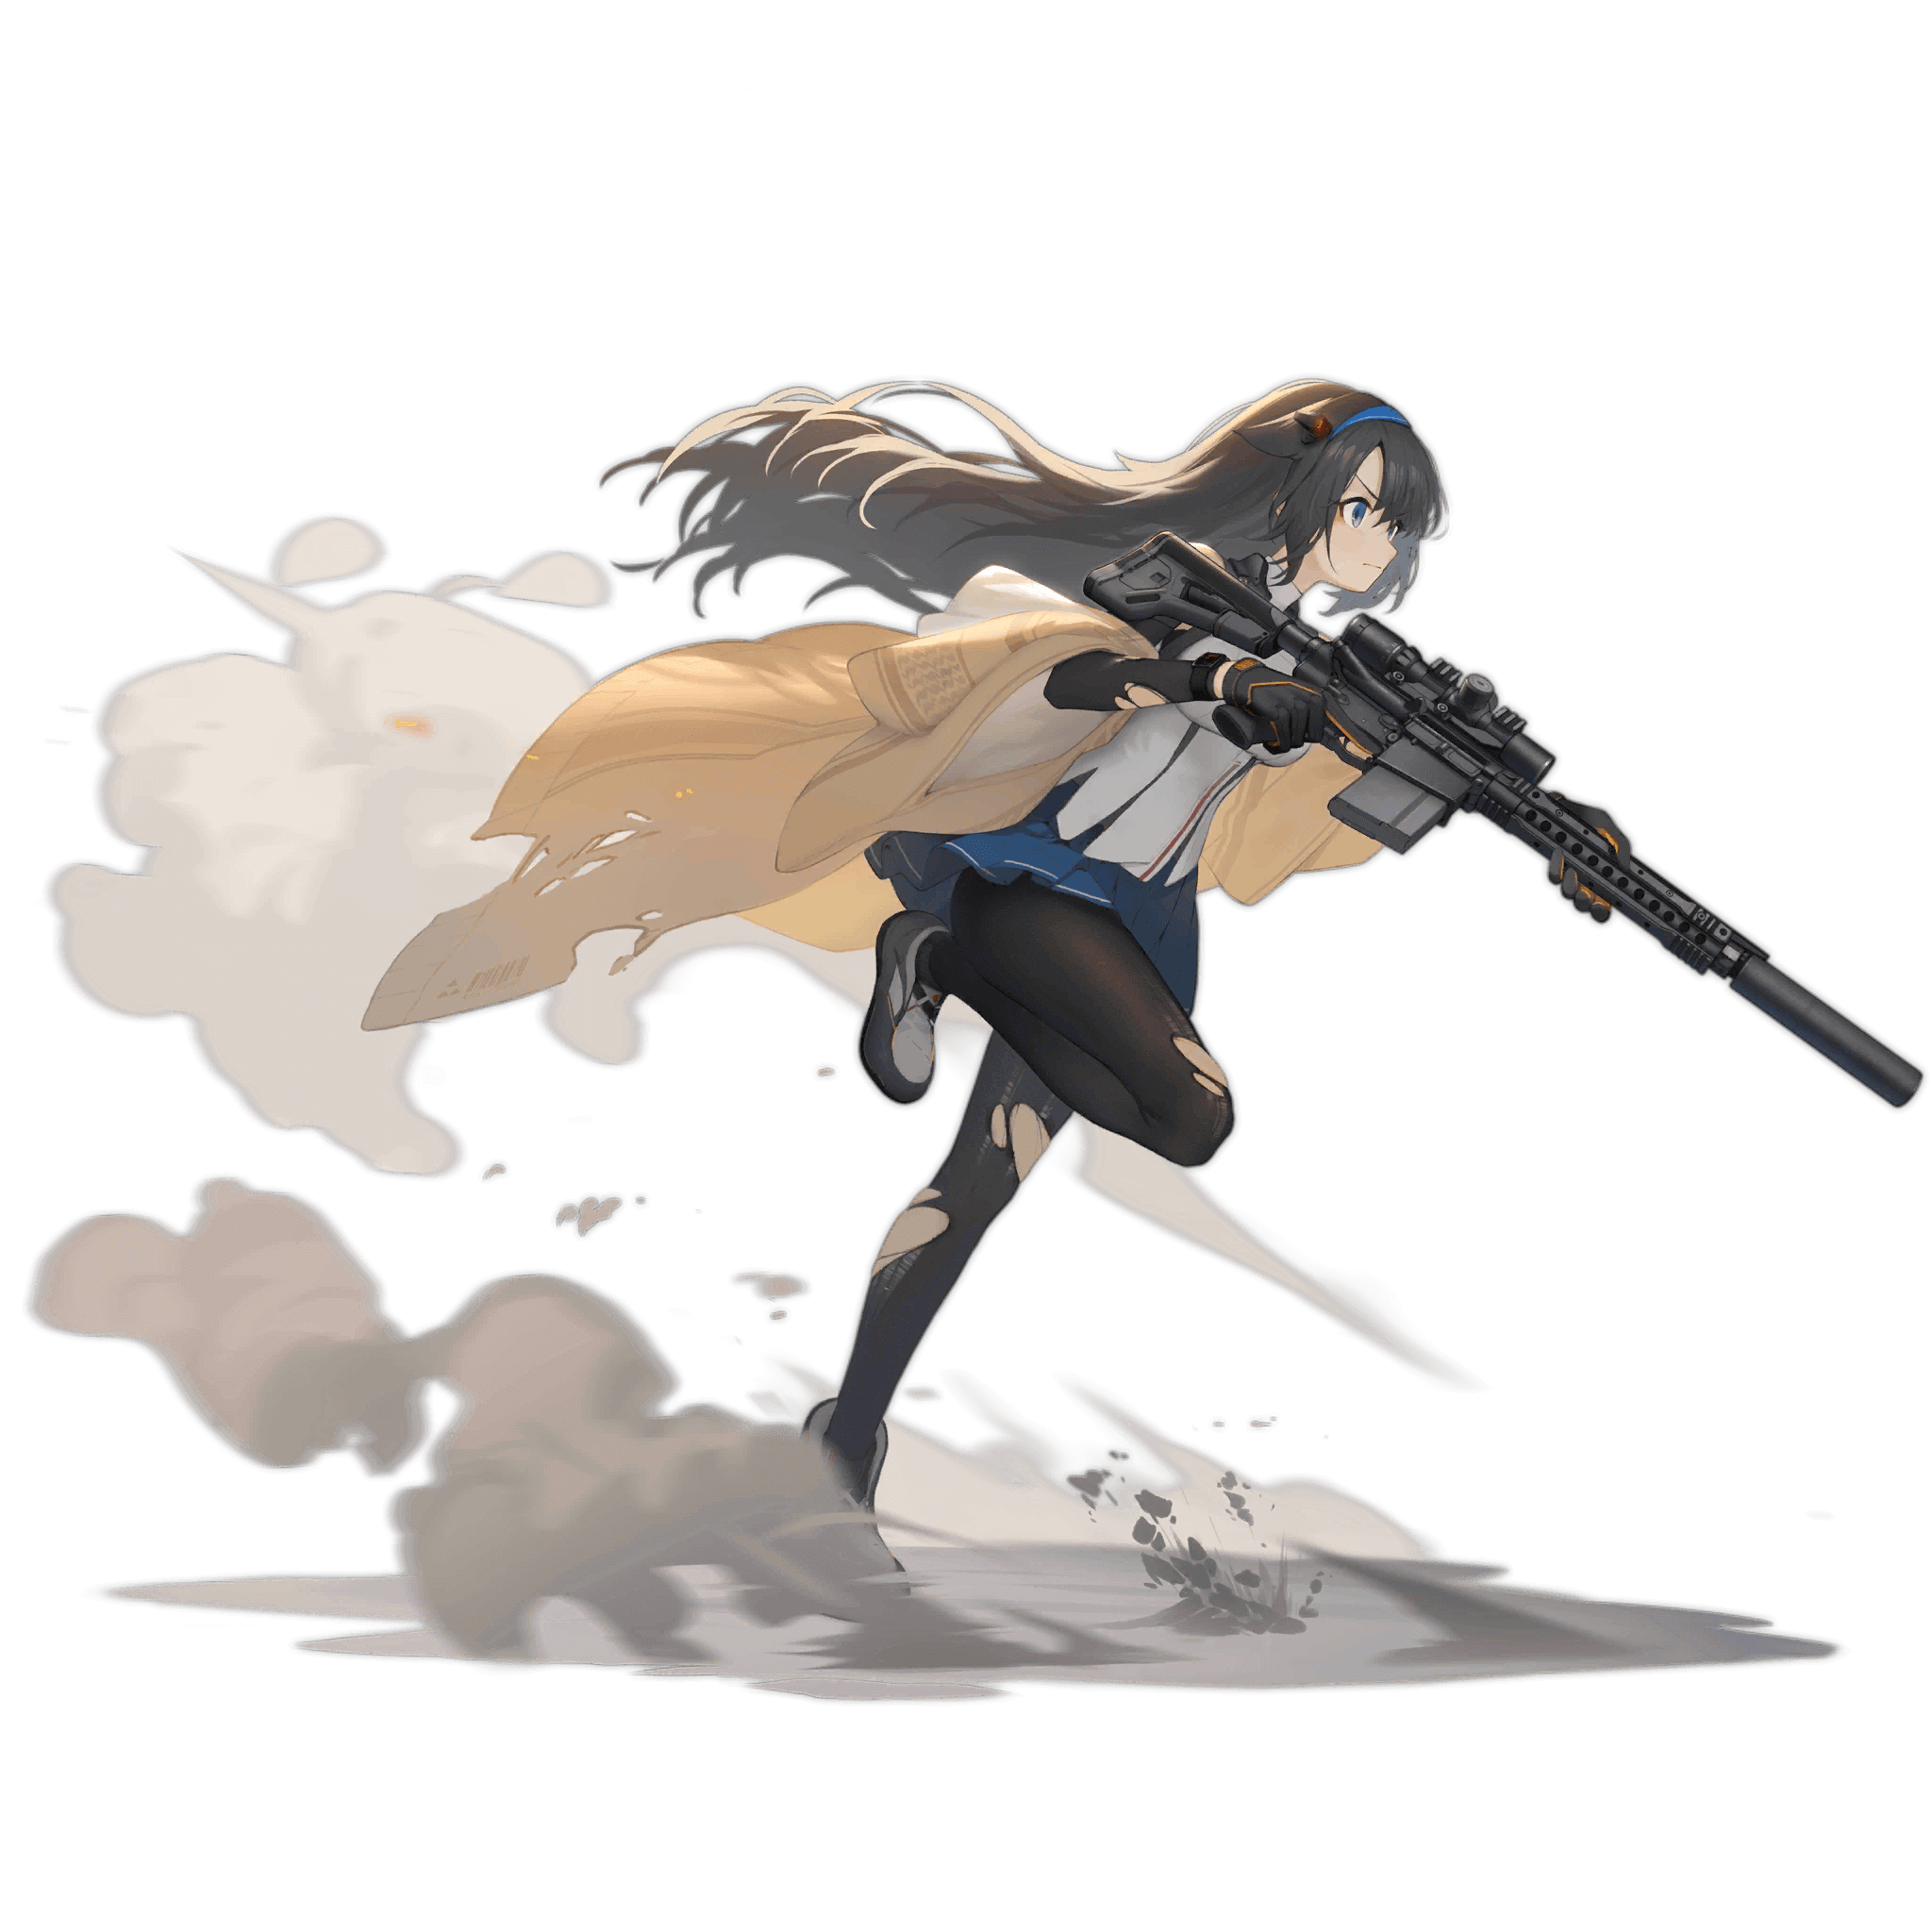
Damaged

Recommended Upgrade Level: No
The main protagonist has finally arrived!... Sadly, not in a good way.
I know Super SASS has her fans, and I’m sure many were excited when DR first dropped on the CN server to see what sort of upgrade she got. Sadly, her upgrade takes her original concept (being a very generic bamboo RF) and barely enhances it.
Her Skill 2, Follow-up Shot, basically gives her follow-up shots against her Skill 1 target if she fails to kill it. The amount of follow-up shots she gets depends on the amount of charges Skill 1 had when used. The big kicker is these follow up shots deal 1x damage, can crit, and don’t ignore armour. In other terms: they’re just normal shots. It’s basically the same thing as saying she’ll continue to target her Skill 1 target for a number of shots, which she may have done without Skill 2 anyway! The only real benefit is these follow-up shots are surehit. Skill 2 also passively boosts her damage against enemies with less than half HP, whoopie-freakin-do.
Besides this, it’s just the typical upgrades to stats, tiles, Skill 1, and her Special Equipment, which ironically would’ve been an amazing SPEQ on anyone but her. I think the point has been made clearly enough. It’s a shame to say, but Super SASS really has gotten one of the worst MODs to date. To the point where I don’t know if I could even say “her fans will like it”. Her fans will at least like the art, because a lot of these bad MODs get impeccable art and Super SASS is no exception.
SV-98 Mod III

Normal

Damaged

Recommended Upgrade Level: No
SV-98 is sadly one of the bottom of the barrel upgrades. While it’s not the absolute pits like Bren and IDW, there’s still basically no reason to ever do this MOD outside of love.
SV-98 had the base to form a decent MOD from. Her stats were fairly good for a 3 star but suffered from her Skill, Interdiction Shot. Her upgrade decides to focus more on improving her damage with this skill instead of her general performance. Her Damage sees a decent boost and her new Skill 2, Shadow Savior, does give a small Accuracy and Rate of Fire boost when she’s cloaked.
Still though, the primary focus is on improving Interdiction Shot as this Skill 2 also boosts her Skill 1 damage by 18% when she’s cloaked.
One look at the DPS numbers shows this direction was the entirely wrong path to take. Her DPS at level 120 while oathed is comparable to T-CMS… a 3-star login RF. Yeah sure, T-CMS is one of the decent login dolls, but visualise that for a second. T-CMS is comparatively the same DPS, but with much MUCH lower costs.
Overall, SV-98 MOD is an upgrade that only her hardcore fans will like, and those people are still likely only doing it for the art. For everyone else, it’s a completely ignorable upgrade that’s not worth the cores and fragments.
Type97S Mod III

Normal
Damaged

Recommended Upgrade Level: No
The freebie shotgun you get after 10 heavy doll productions, Type 97S has such a simple MOD that you’d think she’s just a launch doll.
Through upgrading, she gets improved stats (including 2 points of Armour), improved tiles, Skill 1 now boosts Accuracy, and all her shots slow enemy Movement Speed. That’s it, that’s the entire MOD done. Her Special Equipment, if you care, is just a Ballistic Plate that buffs Evasion instead of reducing it.
Now, I’m not bashing on this upgrade simply because it’s simple. I’m bashing on it because it’s not good. Her slow is a 50% Movement Speed decrease, which would be really good for something that’s always active. The issue arises from the fact that it only lasts for 1 second, so in practice this only delays retaliation from enemies by 1 or 2 seconds at most, if even that. Beyond that, her Skill 1 is heavily offensive oriented, and there’s no real way to have this skill active before shooting starts to try and do AoE slow. Instead, she’s heavily reliant on knockback or something like the Beach Fairy to get use out of Skill 2 beyond the first couple of seconds.
Given all this, there’s basically no point to upgrading Type 97S. You’re far better off making use of the much better and easier to get M500 and then using a True Core Mask to get one of the amazing 5 star shotguns, like LTLX.