
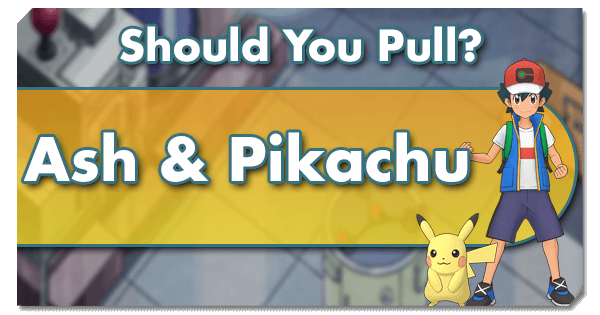
TL;DR: Should You Pull?

Should You Pull Score: 10/10
Lightning in a bottle unleashed on Pasio to teach all to live in fear of the ageless child and his unnaturally powerful rodent.
- + Able to unleash huge single-target damage once per battle via B Thunderbolt and maim the entire enemy team in one blow with powerful Sync Moves at 3/5.
- + Capable of one-move offensive setup with no drawbacks while displaying great Move Gauge management.
- - it’s Ash Ketchum.
Author's Note
This article initially stated that the Sync Grid tile Trainer Sync Redemption could be utilized to enable an MP Refresh on B Thunderbolt. This has turned out to be false, as it was based on incorrect information that I found while the article was still being written. I've only just achieved 3/5 on Ash & Pikachu after the article was already published, so I have been unable to test this for myself until now. I apologize for this incorrect information, and have updated the article to reflect the way that this tile actually operates in-game.
Scoring Criteria
1 : No discernable niche, or so totally outclassed in what it does have that it could never conceivably be worth F2P gems.
2-3 : One or two applications on gimmicky, sub-optimal team comps that are nevertheless occasionally worth using due to fun factor or highly specific situations.
4-5 : Fulfills a viable niche on at least one viable team comp or role, but kept from anywhere near "must-pull" status by limited versatility or stiff competition.
6-7 : Efficient in its primary role or flexible enough to see use on variety of teams - This is where the pairs worthy of serious F2P consideration begin to appear.
8-9 : An excellent choice for a huge plethora of compositions and/or the defining force behind a dominant archetype - This unit's power and versatility make it a great pull for almost anyone.
10 : Poised to take a centralizing role in the metagame - This undisputedly Top Tier unit is the kind of game-defining force that can be seriously compared to our current absolute best Sync Pairs in its sheer dominance over whatever situation is thrown at it.
Note : The timing of the banners and the scout-method are not accounted in the scoring system but rather mentioned in the Outro to keep the SYP Score / Ranking comparison cohesive.
What Does It Do?
We all knew that it had to happen. The moment that Jessie and James made their way to Pasio, many of us started looking in the general direction of Kanto and said to ourselves “he’s coming”. It took longer than expected, but the protagonist of the Pokemon Anime, Ash Ketchum, has finally formed a Sync Pair with his Legendary Pikachu and set foot on Pasio. Here as the headliners for the 3-Year Anniversary, they’re hitting the island in a big way, and bringing with them the debut of a whole new mechanic in the form of “Buddy Moves”. So now comes the big question; just how much of a splash can we expect from the eternal ten year old and his living power plant of an electric mouse?
Ash & Pikachu have hit Pokemon Masters as an Electric Type Striker unit. They have middling Speed and Bulk, and very high Special Attack that approaches many of the top units in the game. To make use of this Special Attack stat, we start the movelist out with Thunder. We all should be pretty familiar with Thunder by now; 3-bars, decent power, low accuracy outside of Rain, relatively high chance to paralyze. However, this time it’s a little different, as we’ll talk about in the next section. Next up is Not Gonna Lose! (which anyone who watches the anime may scoff at). This 1-MP Trainer Move restores about 20% of Pikachu’s HP, applies the Gradual Healing, Damage Guard Next, and Super Effective Up Next effects, and restores a full 6 bars to the Move Gauge. Skipping forward a bit, Ash’s second Trainer Move is Going All Out!. At 1-MP, it grants +4 Special Attack, +3 Critical Rate, and then an additional +2 Special Attack and Speed if Pikachu’s HP is over 50% on activation…. which it will be as everyone is obviously going to click this button as soon as the battle begins. To finish off moves, we’ve got a bit of a big one to talk about: B Thunderbolt. This is a unique attack called a “Buddy Move”, which is an attack with limited MP and very specific requirements to be able to actually use. In this case, B Thunderbolt can only be used if Ash & Pikachu have selected moves 3 times in battle. Note that this isn’t attacking, it’s using moves, so Trainer Moves count towards that total as well. Once the condition has been met and B Thunderbolt unlocks, this attack is… really something. It has a base power that eclipses just about everything else in the game at 480, and that power is enhanced for every Move Gauge bar that’s consumed when the move is used, to a maximum of 6. When set up properly, this attack has the potential to rack up over 1,000 base power, turning it into a downright cataclysmic ball of energy that can even be comparable to or stronger than many fully setup Tech EX Sync Moves. Sadly, it only has 1 MP, but 1 MP is generally all that it needs to get the main job done.
Moving on to Passive Skills, we start with Kanto Spirit. This is Ash & Pikachu’s Master Skill, and like previous Spirit variants that we’ve seen in the past, this focuses on Special Attack/Special Defense, which gives even more power to Pikachu’s crazy-strong attacks and only ramps up with more Kanto Sync Pairs on the team. Next is Ash’s Passion, which focuses exclusively on the move Thunder. This skill increases Thunder’s base power, reduces its Move Gauge cost by 1, and ensures that Thunder never misses. In the end, Thunder becomes a monster of an attack that rivals many of the mid-low power 4-bar moves in the game despite only costing 2 bars and never missing. Next is Ash’s Tenacity, which grants the Enduring effect to Pikachu if it enters the field at full HP and re-activates the Enduring effect when it’s activated for the first time. It’s a nice skill that can help out with Longevity and Pinch effects, but it’s important to remember that Sync Moves ignore Enduring effects. Finally, Initial Special Boost 2 grants 2 stacks of the Special Move Up Next effect when Ash & Pikachu are in a pinch, which is substantially more likely to actually happen here than with many other Sync Pairs thanks to the previously highlighted skill.
All kidding aside, Ash & Pikachu are absolute monsters. With lightning-fast setup, access to a Thunder so powerful that it rivals many 4-bar moves despite only taking two bars to use, and a Buddy Move that crashes down like lightning from on high, Ash & Pikachu are nothing if not absolute forces of nature. And when adding their Sync Grid into the mix, they also have a potentially devastating AoE Sync Nuke that we can add to the list for even more electrical carnage. In another unexpected advantage that comes way out of left-field, it’s even possible to use Ash & Pikachu to tank! Yes, they are pretty squishy and won’t survive onslaughts very long under normal circumstances, but they can potentially survive deadly hits twice via their double-Endurance, and then survive another hit with their Damage guard Next effect. As an added bonus, this also allows them to take advantage of the pinch effects from their base kit and grid to cause huge damage in short order. Granted, this setup will only work if the goal is a super-quick-kill, but Ash & Pikachu have the raw potential and defensive resources needed to achieve this goal with a bit of team support. All-in-all, this Sync Pair is shockingly powerful and able to fry a lot of stages with ease.
While it’s easy enough to beam and gush about just how offensively skilled Ash & Pikachu, we must always follow the glowing review with our own critical report. Alongside their numerous strengths, it’s important to recognize this Sync Pair’s weaknesses as well. Yup, we’ve got to review weaknesses… so, Ash & Pikachu don’t really have any. We could nitpick and say that they aren’t stupidly bulky on their own or aren’t outstanding at setting up Paralysis in order to activate Static Shock on their grid, but these aren’t weaknesses so much as quirks that make Ash & Pikachu less than perfect. All-in-all, this is definitely one of the most all-around powerful Strikers in the game.
Champion Stadium: Master Mode
When a weakness to Electric rears its head, Ash & Pikachu show up in a big way and can very quickly fry most stages with their high-powered kit. And when the opposing team isn’t weak to Electric, then as a specific quote goes; “do you know what happens to a toad when it’s struck by lightning? The same thing that happens to everything else”. The one caveat here is that if you go too hard and strike down the center too early, the sides could potentially prey on Ash & Pikachu’s not-quite-amazing bulk with their powerful AoE moves, so balancing damage and possibly even delaying B Thunderbolt can be an important strategy.
Legendary Arena & Gauntlet
With the ability to drop what can be tantamount to a powered up Tech EX Sync Nuke nearly at will and drop devastating Sync Moves after that, this is a Sync Pair that has the potential to outright invalidate HP bars.
Extreme Battles
Kanto has a lot of representation in Pokemon Masters, so having an additional Kanto unit might be another drop in the bucket for some. However, the sheer power behind Ash & Pikachu can make them useful on many stages by virtue of their ability to score quick KOs, even when used off-theme.
Battle Villa
Reliance on MP to self-max their offensive stats and to use B Thunderbolt means that Ash & Pikachu will likely fry a single stage, and then proceed to burn out. However, if you pick up Trainer Sync Redemption 1, it’s possible to score an MP Refresh on all of Ash & Pikachu’s moves by using their Sync during the stage, though B Thunderbolt doesn't refresh.
How To Use It?
Sync Grid
These are generally the most important tiles to pick up:
- Brain Sync 8 (⅗) offers a huge Sync Move damage boost that takes literally no additional work to activate.
- Static Shock 8 (⅗) is a bit harder to activate, but once done it’s a reliable and powerful steroid for Ash & Pikachu’s Sync Move.
- Thunder: Hostile Environment 1 (⅖) makes it significantly easier to setup Static Shock.
Next are the tiles that are nice to have, but are either niche or not generally worth going out of the way for:
- Rejuvenate 6 (⅗) is useful for keeping the Move Gauge up post-sync, especially if you pair Ash & Pikachu with other powerful attackers.
- Trainer Sync Redemption 1 (⅗) can be used to score an MP Refresh on both of Ash's trainer moves, which makes it potentially useful in some game modes.
- Push Pinch 3 (⅗) can cut a full rotation off of a Sync Move cycle, which can lead to a hail-Mary Sync Move to hopefully save the game. And while we normally don’t encourage pinch effects, Ash & Pikachu have enough built-in support for this tactic to make it worth considering.
- Shock Recovery 1 (⅗) is nice for some longevity on an Electric Terrain team.
- Thunder: Power Reserves 5 (⅗) is a very respectable boost, and can be levied for a last-ditch attempt at winning. However, it’s not the best strategy to lean into it.
- Thunder: Move Gauge Refresh 3 (⅕) is always handy, but not that necessary on a 2-bar move most of the time.
- Turbo Charge 2 (⅖) can be outstanding if Ash & Pikachu are paired with a move-gauge heavy Electric Terrain setter… the problem with that statement is that the game doesn’t really have anything that fits that description super-well. Still, it can also be useful if your chosen Support unit is particularly sluggish.
- Not Gonna Lose! Propulsion 9 (⅗) can be great if paired with team mates that have similar effects.
- Not Gonna Lose! Master Healer 1 (⅖ & ⅗) provide a bit more healing, which is handy though not game-changing most of the time.
Finally, these are the tiles that are probably best to ignore unless they somehow play into a bigger strategy in some way:
- Not Gonna Lose! Shake Off 9 (⅖) can be nice for status-heavy stages.
- On the Run 3 (⅖) is nice if you’re dead-set on attempting a pinch build, as it may give an additional turn or two to your game-plan. Just remember that Sync Moves ignore Evasion and Enduring effects!
- Quick Cure (⅖), Lithe (⅕), Dauntless (⅕), and Haste (⅕) have their utility for stopping specific gimmicks on specific stages.
- Going All Out! MP Refresh 2 (⅕) gives an additional 2 speed total if the skill is used properly and this actually takes effect. Ignore this outside of the Villa.
Sync Grid Levels & EX Viability
When it comes right down to it, Ash & Pikachu are perfectly fine at ⅕. They have a lot of power behind them, and don’t really gain much out of hitting ⅖. Sure, a few of the tiles that unlock have some nice quality-of-life improvements for everyone’s favorite Anime Sync Pair, but nothing is particularly huge. However, this changes at ⅗. Unlocking Static Shock 8 and Brain Sync 8 in particular patches up the one “weakness” that Ash & Pikachu may have had by giving them access to an extremely powerful AoE Sync Move if EXed. So, in the end, planning to go for either ⅕ or ⅗ should definitely be the play.
EXing Ash & Pikachu should be a priority, but mainly if you plan to raise them to ⅗ at some point. The power of their Sync Move has the potential to be tremendous, and the ability to make it AoE makes them substantially better at clearing out stages with ease. Without reaching ⅗, their Sync capabilities are a bit lackluster.
Lucky Skills
Critical Strike 2 is the old classic, and it holds up extremely well here as well. The way that it scales with B Thunderbolt in particular is potentially higher than a mere 1.2x bonus depending on how many Move Gauge bars are consumed, so sticking with the gold-standard is definitely the way to go.
Team Comps
Ash & Pikachu are pretty self-sufficient for the most part, but they do have a few general needs and wants that should be fulfilled for maximum effectiveness. First of all, we have the standard-fare of some Electric Terrain support for even more damage may be overkill in many cases, but it’s certainly fun! The main picks here include Volkner & Luxray, New Years Volkner & Electivire, and Classic Elisa & Emolga. However, the absolute strongest option here has to be Sygna Suit Thunderbolt Red & Pikachu. Our latest incarnation of the classical Pokemon protagonist melds incredibly well with Ash & Pikachu, allowing their two rodents to come together and outright fry just about any stage with ease. Second, a bit of help with the Move Gauge might be appreciated. If you don’t intend to use Not Gonna Lose! in order to fill up the Move Gauge and ensure that B Thunderbolt can hit for maximum damage on the following turn (which you definitely should if the target is weak to Electric Type attacks due to the Super Effective Up Next effect). Then Sync Pairs like Sygna Suit Morty & Ho-oh, Skyla & Swanna, or Fall Caitlin & Sableye can help ensure that the stage is set for the oncoming storm. Finally, B Thunderbolt will generally be ready very close to the end of the first Sync Move cycle in most cases, so bringing basically any EXed Support unit to get the Support EX boost can lead to a huge damage increase for this.
These setups aside, Ash & Pikachu are actually surprisingly easy on the Move Gauge, only needing 2 bars to drop Thunder and able to self-setup B Thunderbolt with Not Gonna Lose!, so they can pair well in a neutral scenario with other attackers and disruptors like Sygna Suit Leon & Eternatus, Bede & Hatterene, or Sygna Suit Renegade Cynthia & Giratina. It’s also worth noting that this is a Sync Pair that invites the skills of potentially powerful yet offensively limited Support units like Sygna Suit Aura Cynthia & Lucario, Sygna Suit Steven & Deoxys - Defense, or Dawn & Torterra, as Ash & Pikachu really don’t need help when it comes to setting up their offenses.
Is It Worth Pulling?
As the first of the 3-year units, Ash & Pikachu are definitely strong contenders for your gems in just about any scenario. They hit extremely hard, and can clear stages with ease. However, they do have some hefty competition in Sygna Suit Thunderbolt Red & Pikachu, who utilize an extremely well rounded offensive approach that has a more tactical edge than Ash & Pikachu’s strategy of brute power while still dealing outstanding damage.
Ash & Pikachu may be worth considering over the competition for another reason as well; DeNA hasn’t been great about re-running Master Pairs up till now, and Ash & Pikachu are a slightly special case due to being an Anime crossover Sync Pair, so it might be a good idea to nab them now, as they may be the least likely Master Pair to make a return any time soon.
But on that note, they’re definitely not needed for our current content, and will be here for a long time, so it’s probably safe to hold off into mid-October before spending, just in case something else good shows up along the way.


About the Author(s)


