TL;DR: Should You Pull?
What Does It Do?
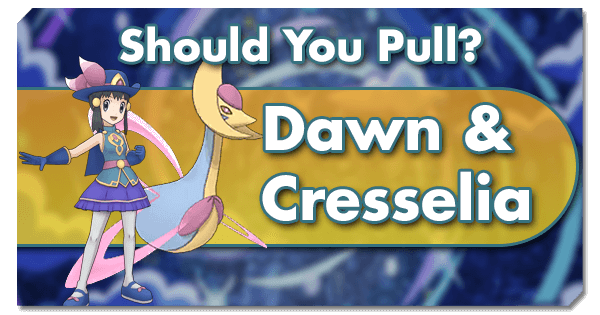
Finishing out the Sinnoh portion of the Villain's arc, Dawn & Cresselia are here to bring some shining moonlight in what would otherwise be a very dark night. The direct counterpart to the nefarious Darkrai, Cresselia has long been known for her (yes, this is a Pokemon with a strictly defined gender) bulkiness and longevity, and oh boy did DeNA do her justice here! One of the absolute strongest walls to date, this is the Sync Pair that is made to weather any storm!
For a defensive unit like Dawn & Cresselia, the most important staticular metric to look at is arguably going to be bulk. And on this front, they do not disappoint. Among the bulkiest Sync Pairs in the entire game, they are designed to tank. They back this up with decent Speed, and Attack/Special Attack that don’t really matter for the most part. For attacks, we have Confusion for an easy-spam single-bar move, and Moonblast for a stronger attack of admittedly limited utility. These are backed up by Moonlight, which is similar to Potion but a Pokemon move with higher recovery when it’s sunny and lower when rain, hail, or a sandstorm is active. Finally, Sweet Dreams! Boosts the team’s Defense, Special Defense, and Critical Rate by 2 ranks per use at the cost of 30% of Cresselia’s HP. The cost is fairly steep, but we’ll get back to that shortly!
Moving on, Dawn & Cresselia start their passive skills with Fortify 3, which provides a huge 30% boost to Defense and Special Defense when Cresselia is at or below 50%. This makes our dear lunar duck stupidly bulky, and makes the cost of Dawn’s trainer move that much easier to stomach. Team Brainstorm 9 is an okay skill that grants the Special Move Up Next effect to the team any time that Cresselia uses a status move. And since Moonlight is the only move that fits this bill, its utility is fairly limited but still an appreciated bonus. Finally, Sync Damage Guard grants the Damage Guard Next effect to Dawn & Cresselia when they use their Sync Move. This provides even more longevity, and makes an EXed Dawn & Cresselia all the more attractive. Ah, but we’re not done yet! Unlike most Sync Pairs, Dawn & Cresselia have a status Sync Move! Nightmares Begone Lunar Dance restores the HP of the entire team except for Dawn & Cresselia by 20% plus an additional 5% per Sync Pair level, cleanses all status including Confusion, Flinch, and Traps, and grants +6 Move Gauge bars as well. In short, a Sync Move spent on Dawn & Cresselia is a Sync Move spent on keeping the team happy and healthy.
When all is said and done, Dawn & Cresselia have one job that they really excel at: survival. Almost all of their focus is based on survival, and they survive very well! Between high base bulk that increases at low HP, Defense and Special Defense buffs, Damage guard capabilities, self-recovery, and a status cleansing Sync Move, they are hard to take down. And as if that wasn’t enough, they also can also max team Critical Rate and grant the Special Damage Up Next effect to the entire team when using Moonlight with 50% HP or less. And while this last effect may not be easy to rely on, it still makes a nice, situational bonus.
But, in the end, we do have a few shortcomings to consider when talking about Dawn & Cresselia. First up is the fact that their offensive buffing profile is a bit lackluster. They can max team Critical Rate and grant Special Damage Up Next here and there, but it doesn’t do a whole lot.
Champion Stadium: Master Mode
The sheer bulk of Dawn & Cresselia and their ability to max the team’s Critical Rate can make offensive bonuses far more viable to pick up for the opposing team, which also sets the stage for powerful attackers to steamroll the opposing team before they have the opportunity to build up momentum. However, their limited offensive profile means that they won’t pair well with every Striker.
Legendary Arena & Gauntlet
Dawn & Cresselia can make a huge difference in arena stages due to their ability to protect the team through even prolonged setup periods while helping out with a few offensive buffs and potentially even a Support EX buff. If put together with attackers that can synergize with their offensive buffing profile, this Sync Pair is outright great for getting through Legendary Arena/Gauntlet stages
Extreme Battles
High incoming damage? Dawn & Cresselia can take it. Status effects? Dawn & Cresselia can remove them. This is generally an outstanding catch-all wall. It’s also worth mentioning that we have a bit of a lack of walls that sport the Sinnoh tag, so they may end up coming handy in future content.
Battle Villa
Reliance on skills for a fair bit of utility is a pain in the neck here, though the ability to restore 1 MP to Moonlight on first Sync Move use each stage helps substantially. They’re fine, but definitely not a replacement for Sycamore & Xerneas.
How To Use It?
Sync Grid
These are generally the most important tiles on Dawn & Cresselia's grid:
- Sync Heal Refill 1 (⅗) adds one additional use to Moonlight, which can be very useful for Dawn & Cresselia’s defensive performance.
- Moonlight: Catalyzing Recovery (⅗) is a great way to score a bit of Move Gauge support.
- Desperate Team Freebie (⅗) can set up a single, large burst of damage for the team.
- Moonlight: Master Healer 1 (⅗) is nice for a bit of additional healing.
Next are the tiles that are nice to have, but are either niche or not generally worth going out of the way for:
- Moonblast: On a Roll 1 (⅖) is nice for allowing Cresselia to break down enemy Special Attack if your team has the speed/move gauge support needed to make use of it.
- Moonblast: Move Gauge Refresh 3 (⅖) is great if you want to focus on Moonblast for its Special Defense dropping qualities when paired with On a Roll 1.
- Sync Regen (⅗) is nice for building up extra longevity.
- Endurance (⅗) can be a literal life-saver, but it’s also not easy to justify its high cost.
- Sweet Dreams! MP Refresh 2 (⅖) can enable a full +6 for the team’s Defense and Special Defense, but the recoil from a 3rd use of this skill could be devastating.
- Confusion: Aggravation 2 (⅖) could be nice if not for the fact that most of the more difficult battles in the game tend to carry high Confusion resistance, meaning it will only rarely have a tangible effect on the battle.
- Sweet Dreams! All Ramped Up 1 (⅗) offers a very small bonus for its large cost. Still, it will be useful for some teams.
- Confusion: Move Gauge Refresh 3 (⅖) is nice for helping out with the move gauge, but it’s ultimately not extremely high priority.
- The two Crisis Countdown 9 (⅗) tiles can be useful if combined with one other Sync Move countdown effect or by running Head Start 1, but they’re extremely expensive to reach.
- Adrenaline 1 (⅗) is useful when combined when similar effects. Unfortunately, it’s quite far from Crisis Countdown 9.
- Moonlight: Move Gauge Refresh 3 (⅖) isn’t particularly useful on its own, but the fact that it’s on the way to other useful nodes can make it worth picking up.
Finally, these are the tiles that are probably best to ignore unless they somehow play into a bigger strategy in some way:
- Sweet Dreams! Move Gauge Refresh 3 (⅖) doesn’t really offer any strategic benefit.
Lucky Skills
As always, the top pick from the main pool of lucky skills is Vigilance. HP-management is important for Dawn & Cresselia, so taking a random critical hit at the wrong time can be problematic. From the Deluxe pool, Healthy Healing is an okay choice for even more longevity for Dawn & Cresselia, but Regeneration can also be picked up via their Sync Grid. Head Start 1 is the other top pick here for helping to shave the Sync Move timer down a bit, and can even cut the full -3 turns off when combined with the two Crisis Countdown tiles, but going that route will strip Dawn & Cresselia of a lot of other potential options along the way.
Team Comps
Dawn & Cresselia’s main offensive buff is Critical Rate, so the natural pairing here is attackers that lack the ability to self-buff Critical Rate, take too long to max it themselves, or can’t quite hit the coveted +3 themselves for one reason or another. And while a slight emphasis can be put on Special attackers to take advantage of the occasional Special Damage Up Next effect, that’s more of a special bonus than an effect that makes it a must-pair with Special attackers.
Top picks here are Serena & Whimsicott, N & Zekrom, Raihan & Duraludon, May & Lopunny and Cynthia & Kommo-o. On the other hand, Sync Pairs that are capable of maxing their Critical Rate themselves but would really rather be doing something else instead can also appreciate Dawn & Cresselia. Examples here include Hala & Crabominable, Steven & Metagross, Diantha & Gardevoir, and Lusamine & Necrozma. Maxie & Groudon in particular get a special mention here because as their auto-set Sun powers-up Moonlight. It’s a small boost, but a boost nonetheless!
Beyond this, Dawn & Celesteela can pair very well with just about any self-sufficient Striker. While taking advantage of their offensive buffs is very nice, their ability to keep themselves and their team alive just makes them outright great for many setups.
Is It Worth Pulling?
Dawn & Cresselia are going to be very good for just about anyone that pulls them, especially with the new emphasis on harder content in the future and the newly released Legendary Gauntlet. If you find yourself having trouble with team longevity on some game modes, then give our dear little girl and her moon-duck a try, and you’ll likely be amazed at the results. Just do keep in mind that their offensive presence is pretty limited, and that the 2.5 year celebration datamine is ready to drop very soon.


