
TEPPEN: Season 5 & 6 Meta Snapshot
- Introduction
- Tier List
- Meta Overview
- Meta Decks

- Introduction
- Tier List
- Meta Overview
- Change Log
- Meta Decks
- Tier 1
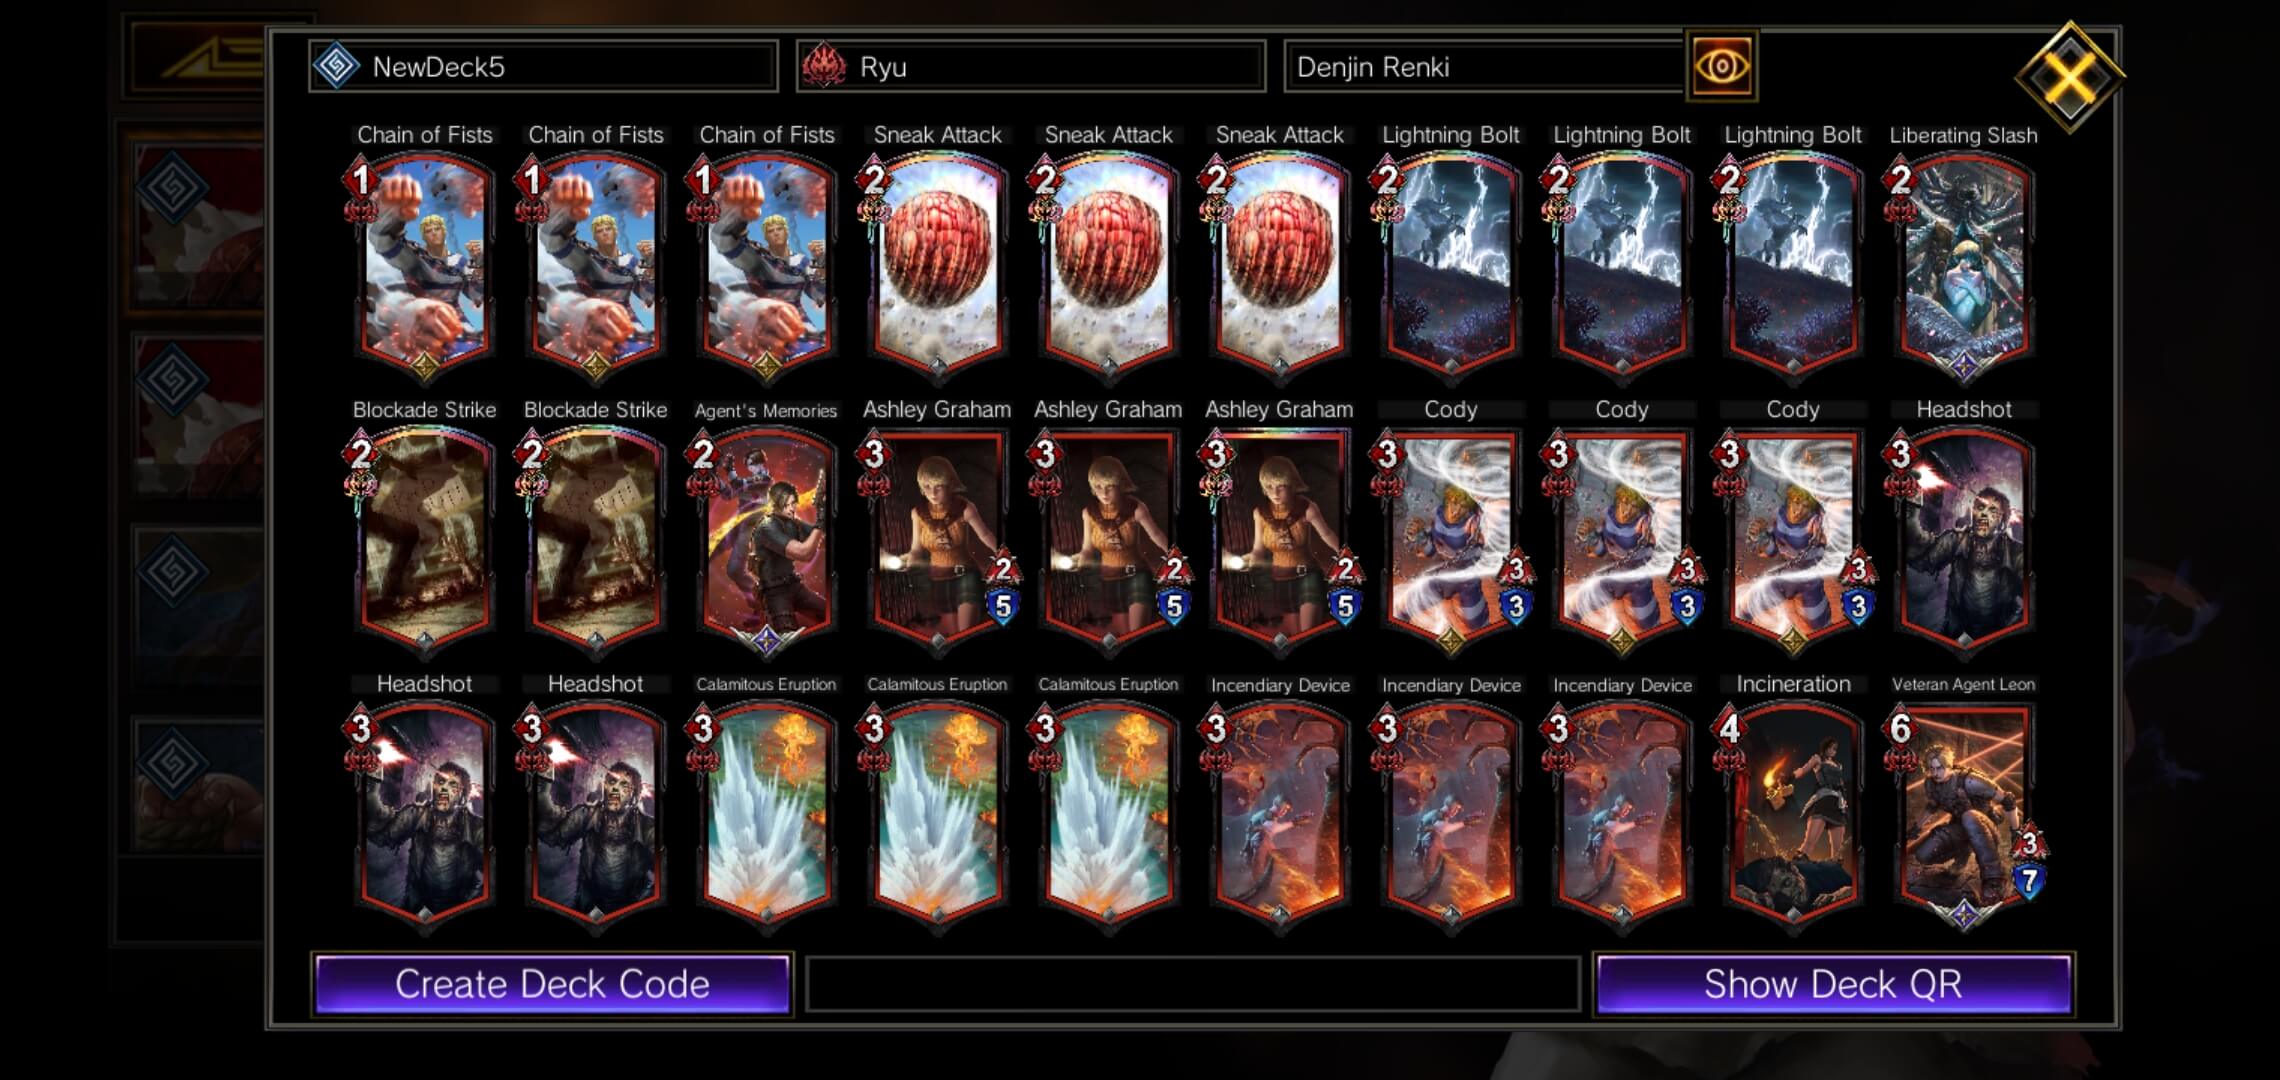
- Ryu Denjin Renki - Time Rocker
- Ryu Zombie Burn - Kyle P
- Rathalos Blazing Wall - Ryuuzu
- Rathalos Blazing Wall - Tarakoman
- Zero Exodia
- B/G Nergigante Zombie Rush
- R/B Nergigante Zombie Rush
- Tier 2
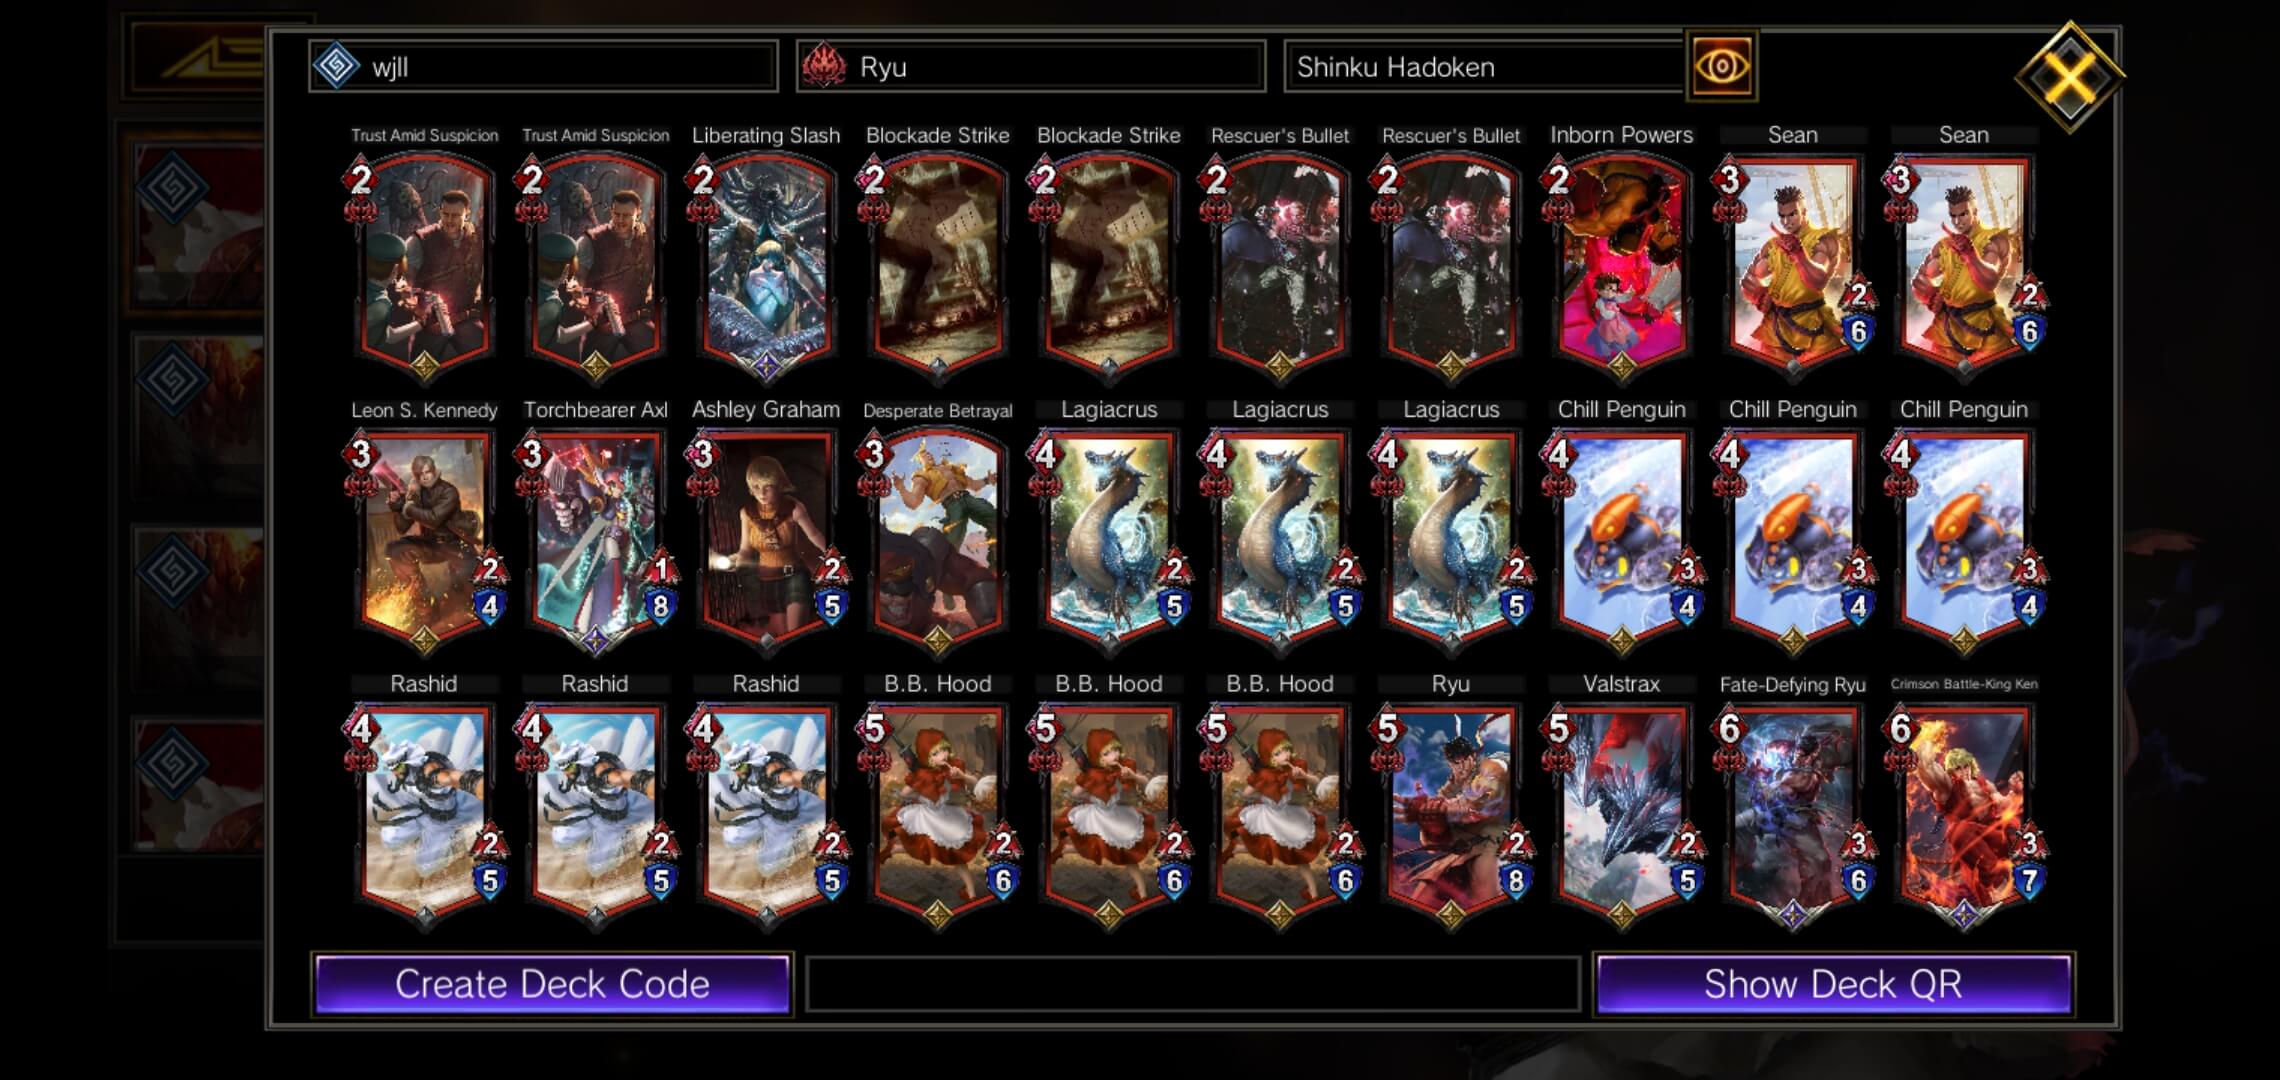
- Traditional Ryu
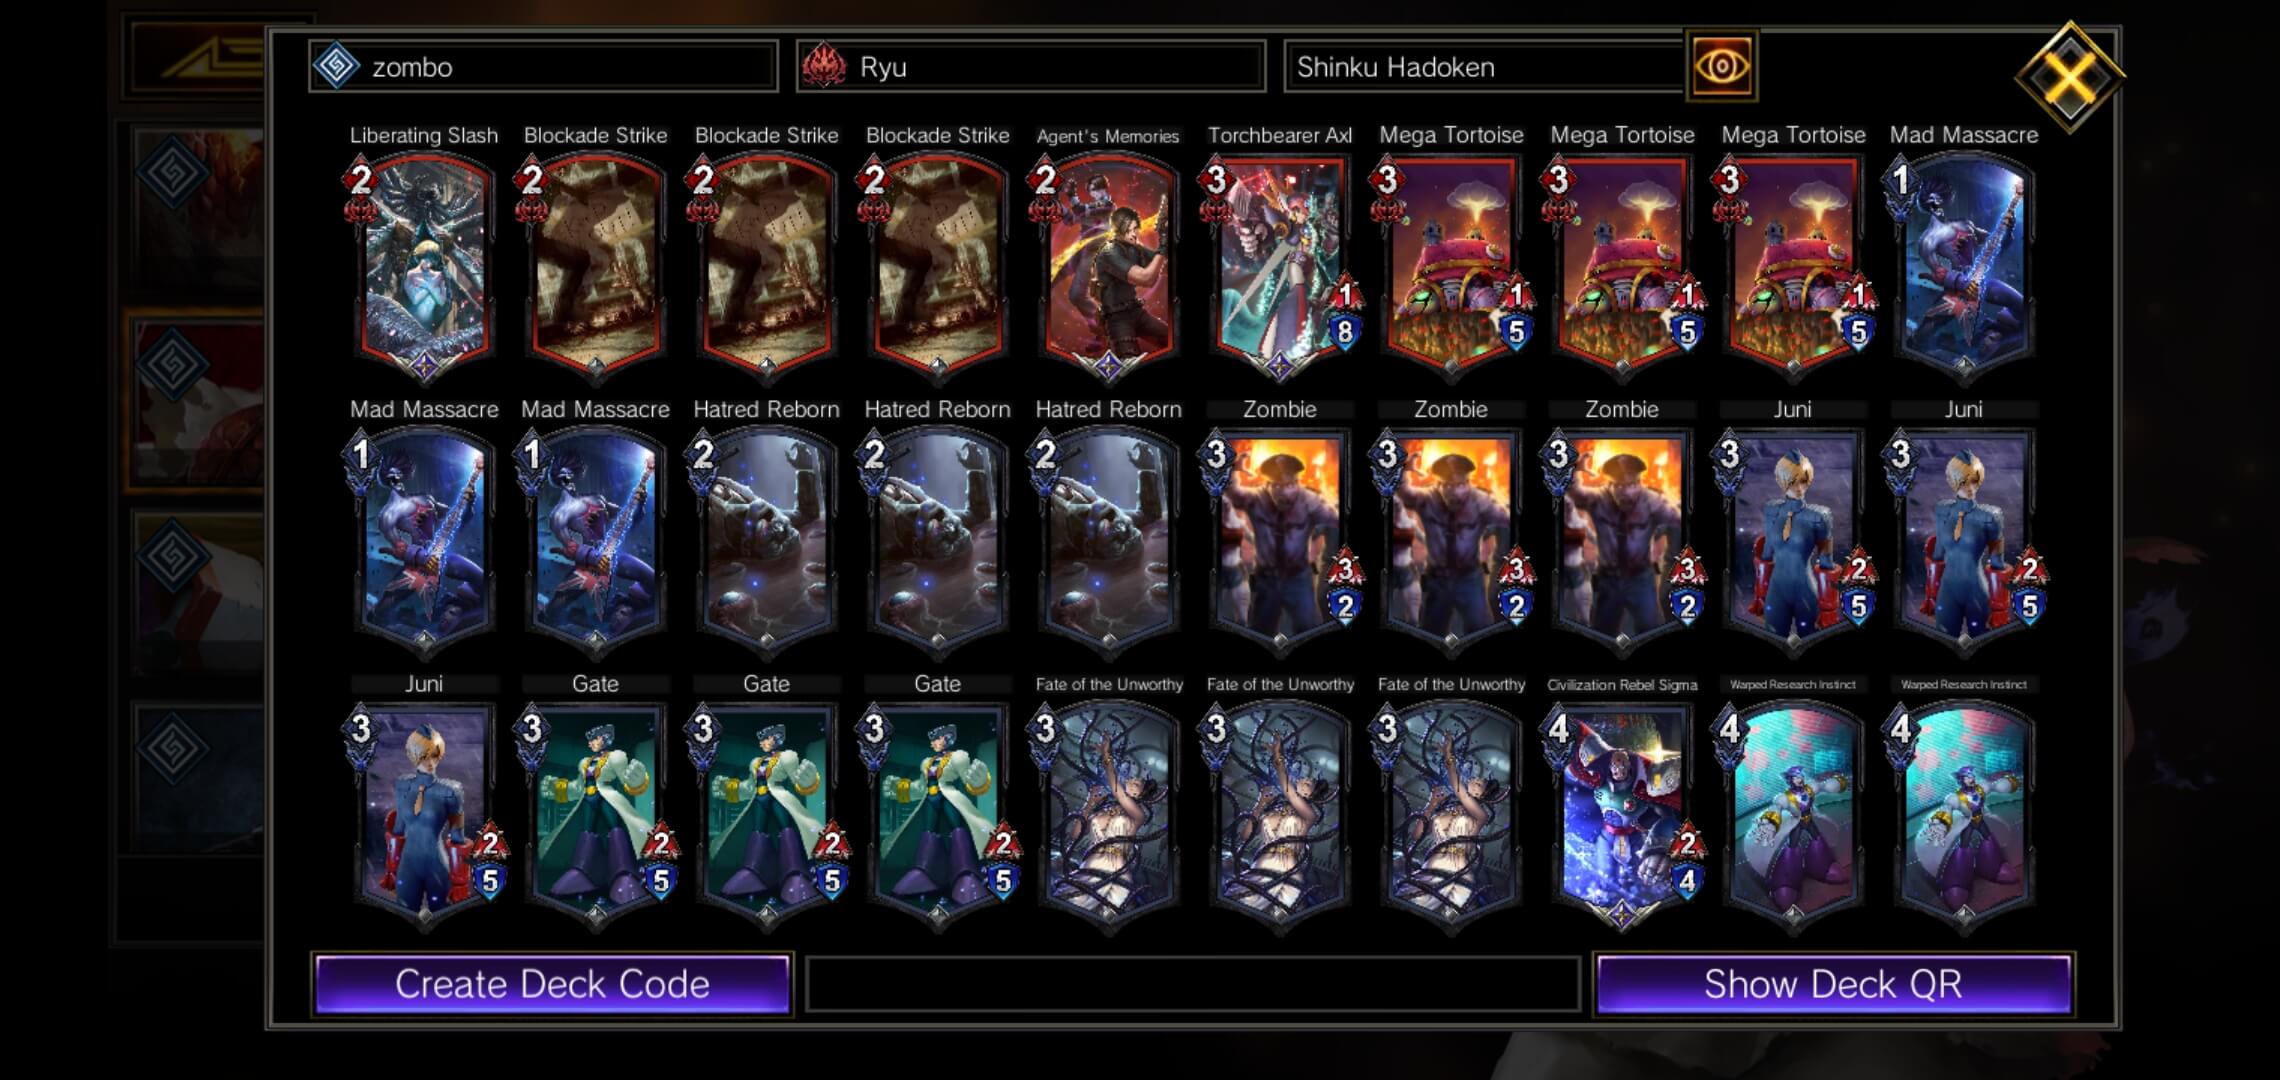
- Ryu Zombie Rush
- Rathalos Zombie Rush
- X Charge Shot
- Dante Burn
- Zero Zombie Rush
- Ryu Zombie Burn - Kyle P
- Mono Black Nergigante Spike Launch - Hayakeo
- Akuma Senku - iowa
- Akuma Raging Demon
- Tier 3
- Jill Antibody Activation - Keiji Maeda
- Nero Dalamadur
- Wesker Cammy Uroboros

What's up everyone, it is i-iowa. The host of the meta snapshots went down unexpectedly and was very unfortunate which left us about a week without a meta snapshot online. Luckily for me, I saved a back up of all my meta snapshots. Good job iowa. Oh thanks for the pat on the back iowa.
I took extra time to make sure that while we are graciously now hosted by GamePress, shout outs to them. The meta snapshots are receiving new structuring, a makeover, and additional deck lists for the community's pleasure.
I will be uploading older meta snapshots in the future, because those snapshots contained viable decks in TEPPEN, but are not heavily played in today's meta. Be on the look out.
Without further ado, enjoy.

Tier 1 - Top of the meta, decks that have a clear advantage to consistently win games.
- Ryu Denjin Renki
- Ryu Zombie Burn
- Rathalos Blazing Wall
- Zero Exodia
- G/B Nergigante Zombie Rush
- R/B Nergigante Zombie Rush
Tier 2 - Decks that are still strong but not quite Tier 1, against the Tier 1 there is a sense of earning wins. Some Tier 2 decks may have gimmicks that place them in a Tier 2 status but is not consistent enough for Tier 1.
- Ryu Traditional
- Ryu Zombie Rush
- Rathalos Zombie Rush
- X Charge Shot
- Dante Burn
- Zero Zombie Rush
- Mono B Nergigante Spike Launch
- Akuma Senku
- Akuma Raging Demon
Tier 3 - Decks that will see play in the ladder but are either remnants of previous metas or just plain gimmicks.
- Jill Antibody Activation
- Nero Dalamadur
- Wesker Cammy Uroboros
We are now in Season 6 of TEPPEN, which is just the same meta of Season 5 but more developed. I say it time and time again, if you were here for other meta snapshots, I've said that innovation will always continue in TEPPEN. We will definitely see it here with Kyle P's Zombie Burn decks and a Rathalos Dive Attack Zombies deck with a intriguing twist that reached Rank 1 early season.
Back in Season 5, players all dreaded to play against Zero Exodia, it was revered as the Tier 0 deck to some people, and we still dread it. However most will say that Zero Exodia is no longer the top dog of the meta, it's up there but other decks and Heroes have grinded with strong results. Arguably the best decks could be B/G Nergigante Divebomb, Faceburn Ryu Denjin Renki, or just about anything because there's a lot of strong decks in the field. It is notable that Zero Exodia is just not alone anymore.
As of writing, this meta overview, I had just finished a podcast with my lovely co-hosts MalletMoogle, Chris D, and TheThirstyGames. Chris D made a statement that resonated with me, the meta is either full control or highly aggressive. There's not much room for in between, while all decks are still seeing play, it is apparent that full control or hyper aggressive decks see more success.
Due to COVID-19 we were without a content update, and that left many players bored of the meta, since the meta we are playing in has been powercrept. Powercreep meaning designing new cards to be stronger versions of previous mechanics/abilities. All card games powercreep, so it is natural for the gaming community. I am still hopeful and I enjoy this meta, a handful of new decks and archetypes joined the meta in just the past few weeks. Even in what should have been a 2 month meta, there's always innovation in the TEPPEN community. Coming into this third month, I am excited for surprises awaiting.
I want to speak on behalf of the peers within the TEPPEN community and say that your patience and understanding of COVID-19 affecting all of us not just as gamers, developers, but humans, is truly appreciated. We are keeping eachother all within our thoughts, wishing for safety and strength to make it out of this pandemic. COVID-19 has been very unfortunate, but we will come back stronger, and I am hopeful to looking forward to new expansion updates possibly later this month... (not guaranteed).
<Memory> Mechanic
Memory is a mechanic that unlocks new abilities on cards when the required amount of memory gained from the player playing Action cards during a game is met.
5/28/20
- Table of Contents added!
- Zero Exodia deck list updated.
- Dante Burn and Akuma Raging Demon added to meta snapshot.
- Word choice revised and updated.

Decks are separated under Tier 1, Tier 2, and Tier 3.

T1 Ryu Denjin Renki - TimeRocker
Hero Art: Denjin Renki
Adds +2 damage to friendly units and cards in your hand and EX Pocket (additional damage can stack).
Deck Type: Face Burn/Board Control
Difficulty: (4.0/5.0)
Viability: (4.0/5.0)
Strength: Consistently burn the enemy board and face. Face burn for the win can get away majority of match ups.
Weakness: Nonoptimal starting hands against aggressive decks and opponents who draw into excessive shields.
dyWWWXNv0yWWWVd6AHJWXyJwRwWRRoKLWJlnjrKLWfU5StWWgtbgu3UWtT1LWWGZu9WWA90LWWk22WWH4qWWVYyhnEWWSJlZPqWWI9TyWIILWWS5YQlZLJlZRHIW
Goal: Burn the enemy’s health total to 0
Denjin Renki for a long time has been an underdog Hero Art, quickly has become a menace in the ladder. Denjin Renki specifically received multiple cards to be potent at controlling the board with the Hero Art. Viable board control options on top of scaling face burn allows for this deck to consistently win.
There are 2 types of cards I see in this deck, cards that deal damage to units and cards that deal damage to face (direct damage). Ideally, we want to use deal damage to unit cards to effectively control the board, and save as many damage to face cards for Denjin Renki activation. Although there will be times where you will have to use a face burn card to draw new cards, in that case [Headshot] is the better face burn card to cycle (play the card for the sole purpose of drawing a new card).
Generally I see this deck playing very similar to Zero Exodia, I often find myself using all free blue MP during the action phase to play unit damaging actions for nonoptimal numbers, but it is optimal for charging AP and sifting through cards in our deck. Due to the meta, it is common against Zero Exodia to cap at 10 MP without any targets, in this case, I will throw the weakest unit damage action from my hand and use it even if there is no value to charge AP and potentially draw a face burn action. Quickly getting to Denjin Renki activations for our face burn cards is important.
One thing I've learned from TimeRocker, is save your [Incendiary Devices], buff them with Denjin Renki, and use them to out value the opponent. Incendiary Device is the most important card in the deck.
Opening Play
Mulligan for single target unit damage cards, having [Ashley Graham] or [Leon S. Kennedy] makes for a strong opener against most matchups.
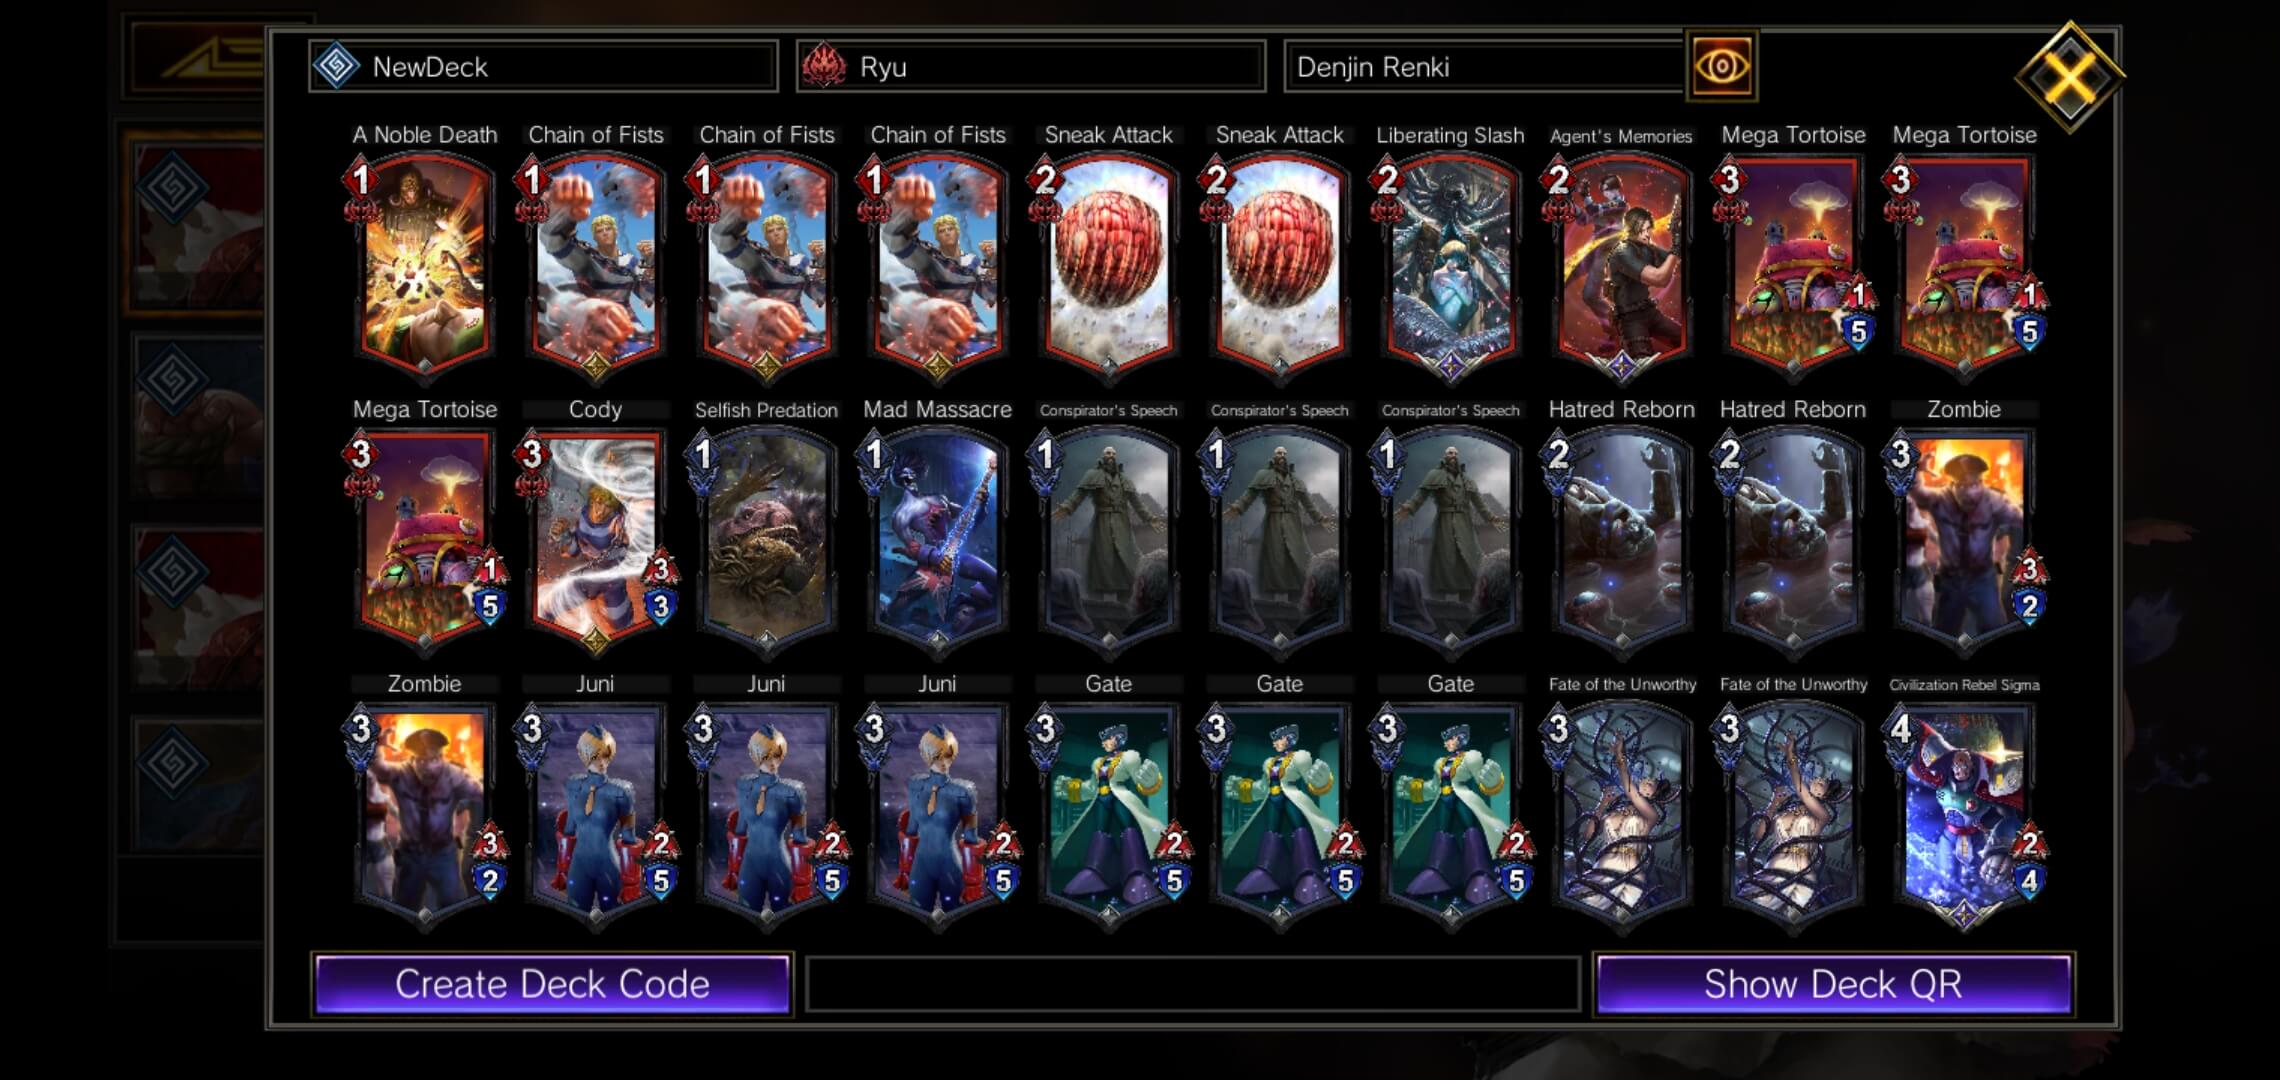
T1 Ryu Zombie Burn - Kyle P
Hero Art: Denjin Renki
Adds +2 damage to friendly units and cards in your hand and EX Pocket (additional damage can stack).
Deck Type: Swarm, Faceburn
Difficulty: (3.0/5.0)
Viability: (4.0/5.0)
Strength: Swarm early aggression, and win the game with direct damage mid-late game.
Weakness: Very strong defense.
dyWWWW3v0yWWWVdrLtBWUg5WzVnW5ParRwWRRoKLWnlnjrKLWW15LchZLJZZuVXW3X4O7Wg4iqWWW8lZ4SXWZ90b7WWuqQXWQ9xV7WgnjWFR7WgnZf8y7WWR3goa7WWRQ9xe7WWTWXbOpSXW3jF9RwIRsQXWLW
Goal: The goal is to swarm the board with out cheap cost efficient units. Then we stack up [Conspirator's Speech] and [Agent's Memories] for a good 19 damage.
This zombie deck dominates early game, controlling the field and applying pressure, our back up plan is to win the game through direct damage that the opponent cannot stop.
Opening Play
Swarm board. [Gate] is high priority to play, because he is a Growth unit, all of his abilities come from having units played after him to trigger
T1 Rathalos Blazing Wall - Ryuuzu
Hero Art: Blazing Wall
Gives +2 HP and <Shield> to a friendly unit.
Deck Type: Aggro
Difficulty: (2.0/5.0)
Viability: (4.0/5.0)
Strength: Protect high damage units.
Weakness: Limited defensive options if being overpowered by the opponent.
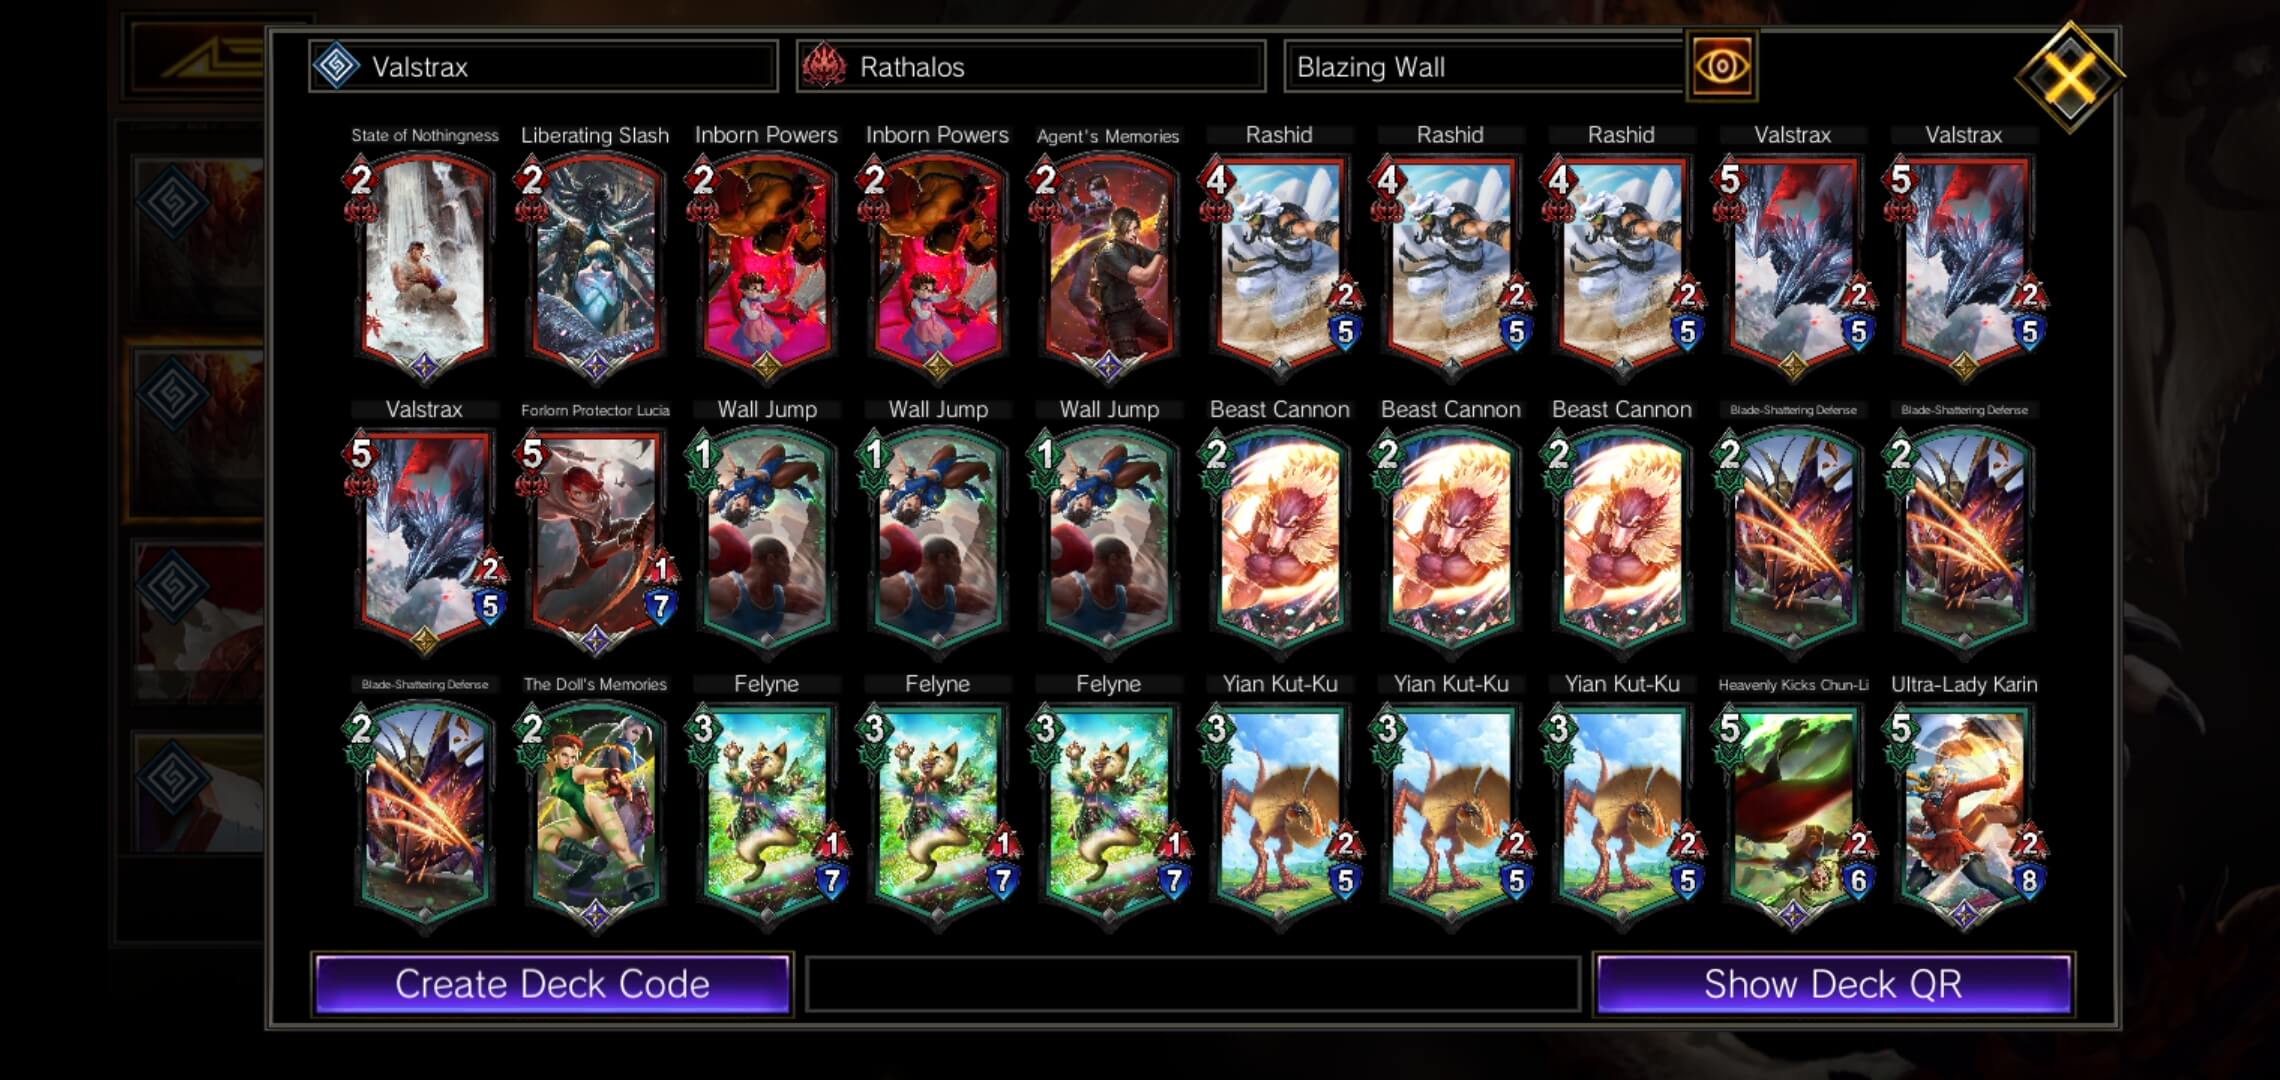
dyWWWvCv0yWWWVdiHteWHg5WzVXWjPlRRwI5LchZLJlZTEWWJTPHtWWHlAWWSXy0qtWWeL8ZLYZCmqWW+g5L7WIB7VXWVtOP7WW6ZSXWVvO2RwJnuKKLWtyRNbtLWW1=RwJnFbcZLXZFg4JW
Goal: Create and protect unstoppable threat(s).
Blazing Wall has often been seen as a useless Hero Art. Arguably, this archetype and Hero Art are at a Tier 1 status having a handful of top players reach #1 near the end of Nergigante season with Blazing Wall.
What made Blazing Wall stronger this time around with no adjustments to the Hero Art itself? Blazing Wall costs merely 14 AP and has always been efficient to use. The application of the Hero Art to strategy in TEPPEN has just never been relevant, until now. With the release of [Valstrax] and players running less unit removal/counters due to “Zero Exodia,” Blazing Wall is able to be played into matchmaking without fear of running into counters. By playing strong threats and protecting them, Blazing Wall rises to the top.
Opening Play
[Valstrax]
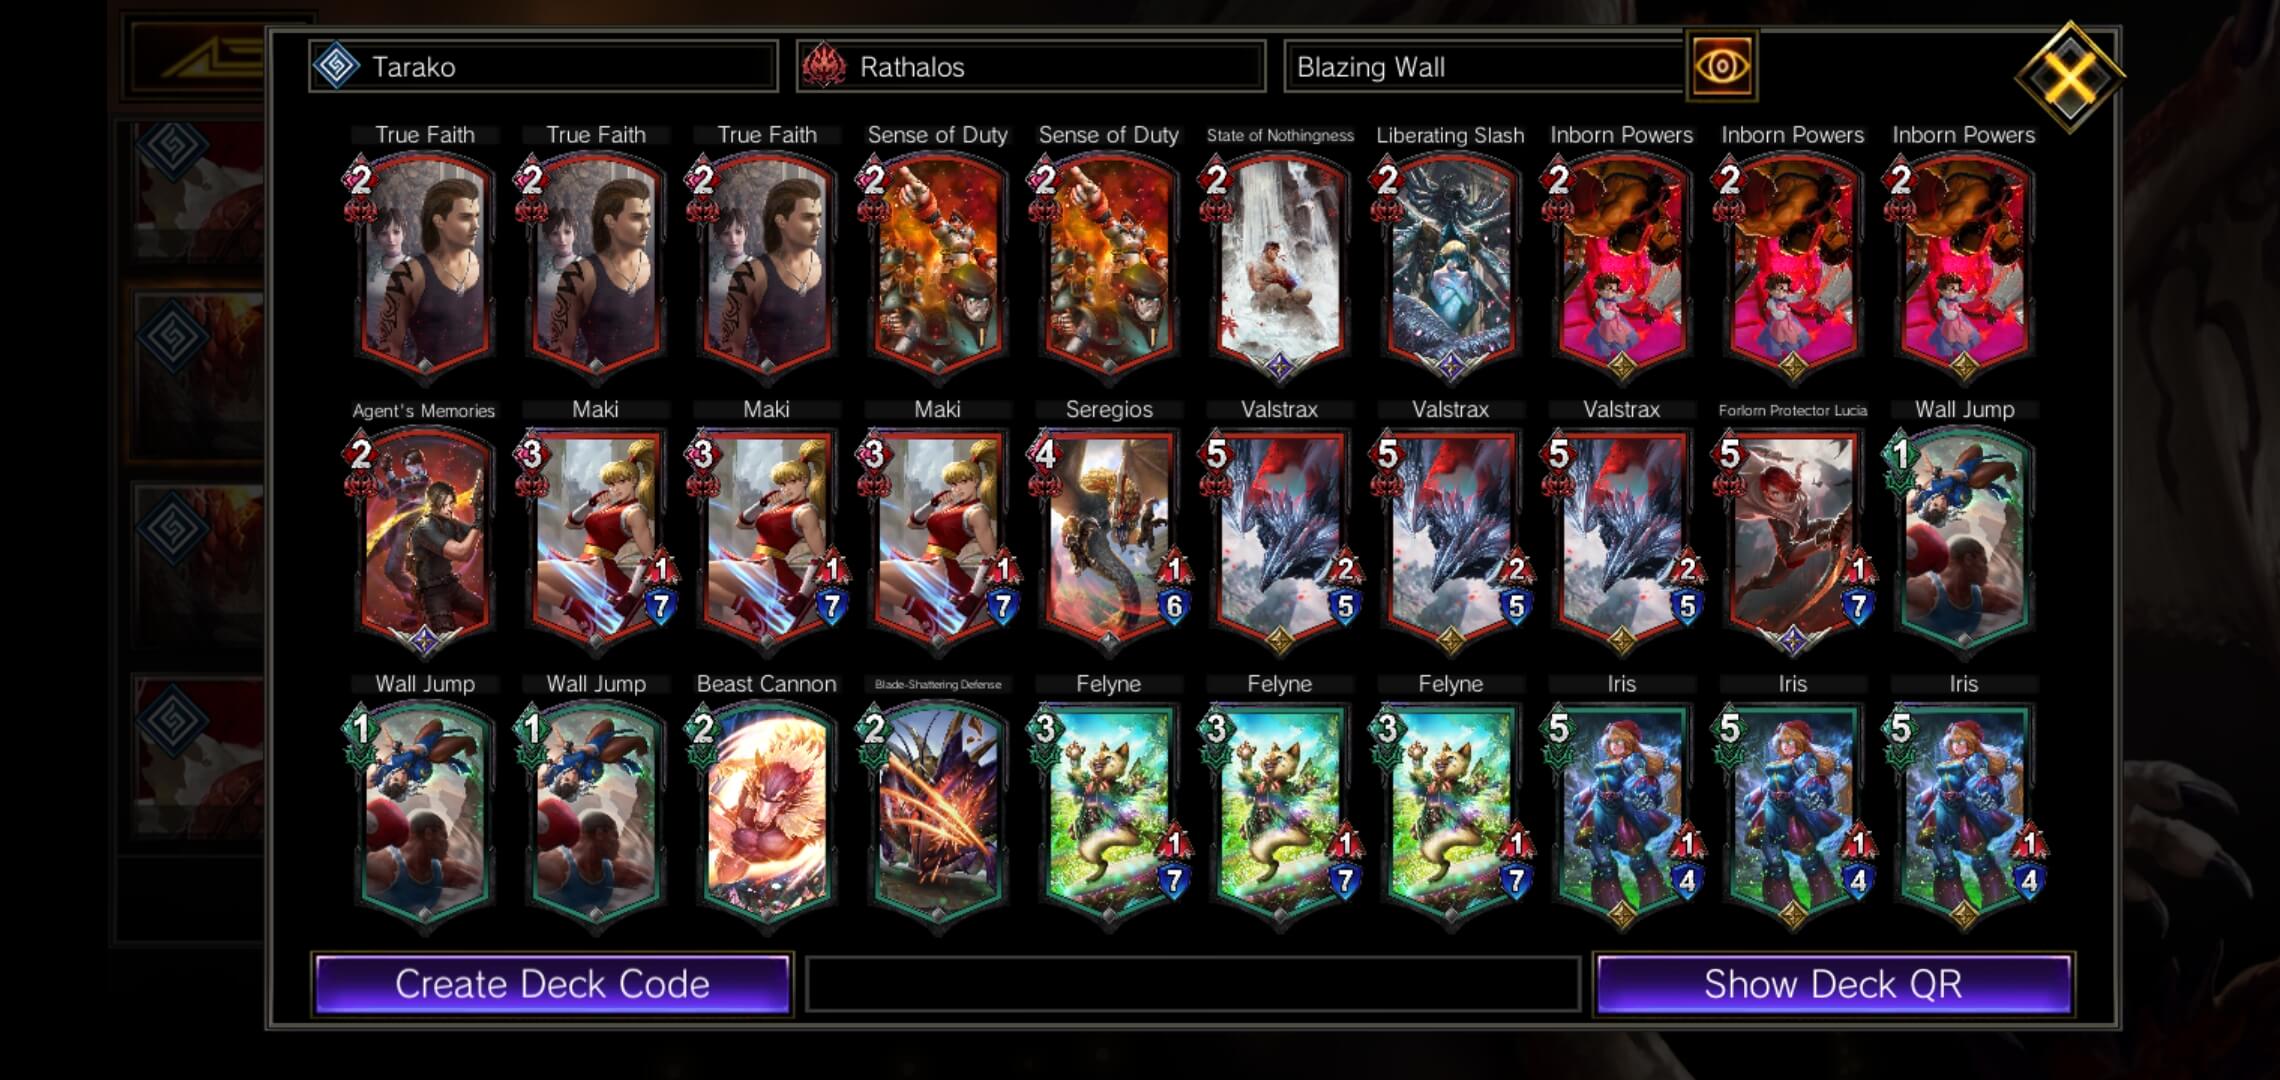
T1 Rathalos Blazing Wall - Tarakoman
Hero Art: Blazing Wall
Gives +2 HP and <Shield> to a friendly unit.
Deck Type: Aggro
Difficulty: (2.0/5.0)
Viability: (4.0/5.0)
Strength: Protect high damage units.
Weakness: Limited defensive options if being overpowered by the opponent.
dyWWWtCv0yWWWVe6A2JLXyJwRwJnjHzLWWkSMWIrLP6ZLIZRSVXWN4PCRwWRRZKLW93ZuVXWj9ZE7WJu+SXW3Jf77WIuJVXWGPiO7WIGXEJZLJbiZSXWG9ii7WWVFZ9ZLYZCnSXWGP1lLYW
This is Tarakoman's version of Blazing Wall Rathalos. Tarakoman was the 2nd place finalist for the TEPPEN World Championship 2019. An amazing player that has shown incredible skill, Tarakoman wrote a guide for Blazing Wall. Check out his guide here which can be translated via Google Chrome translate
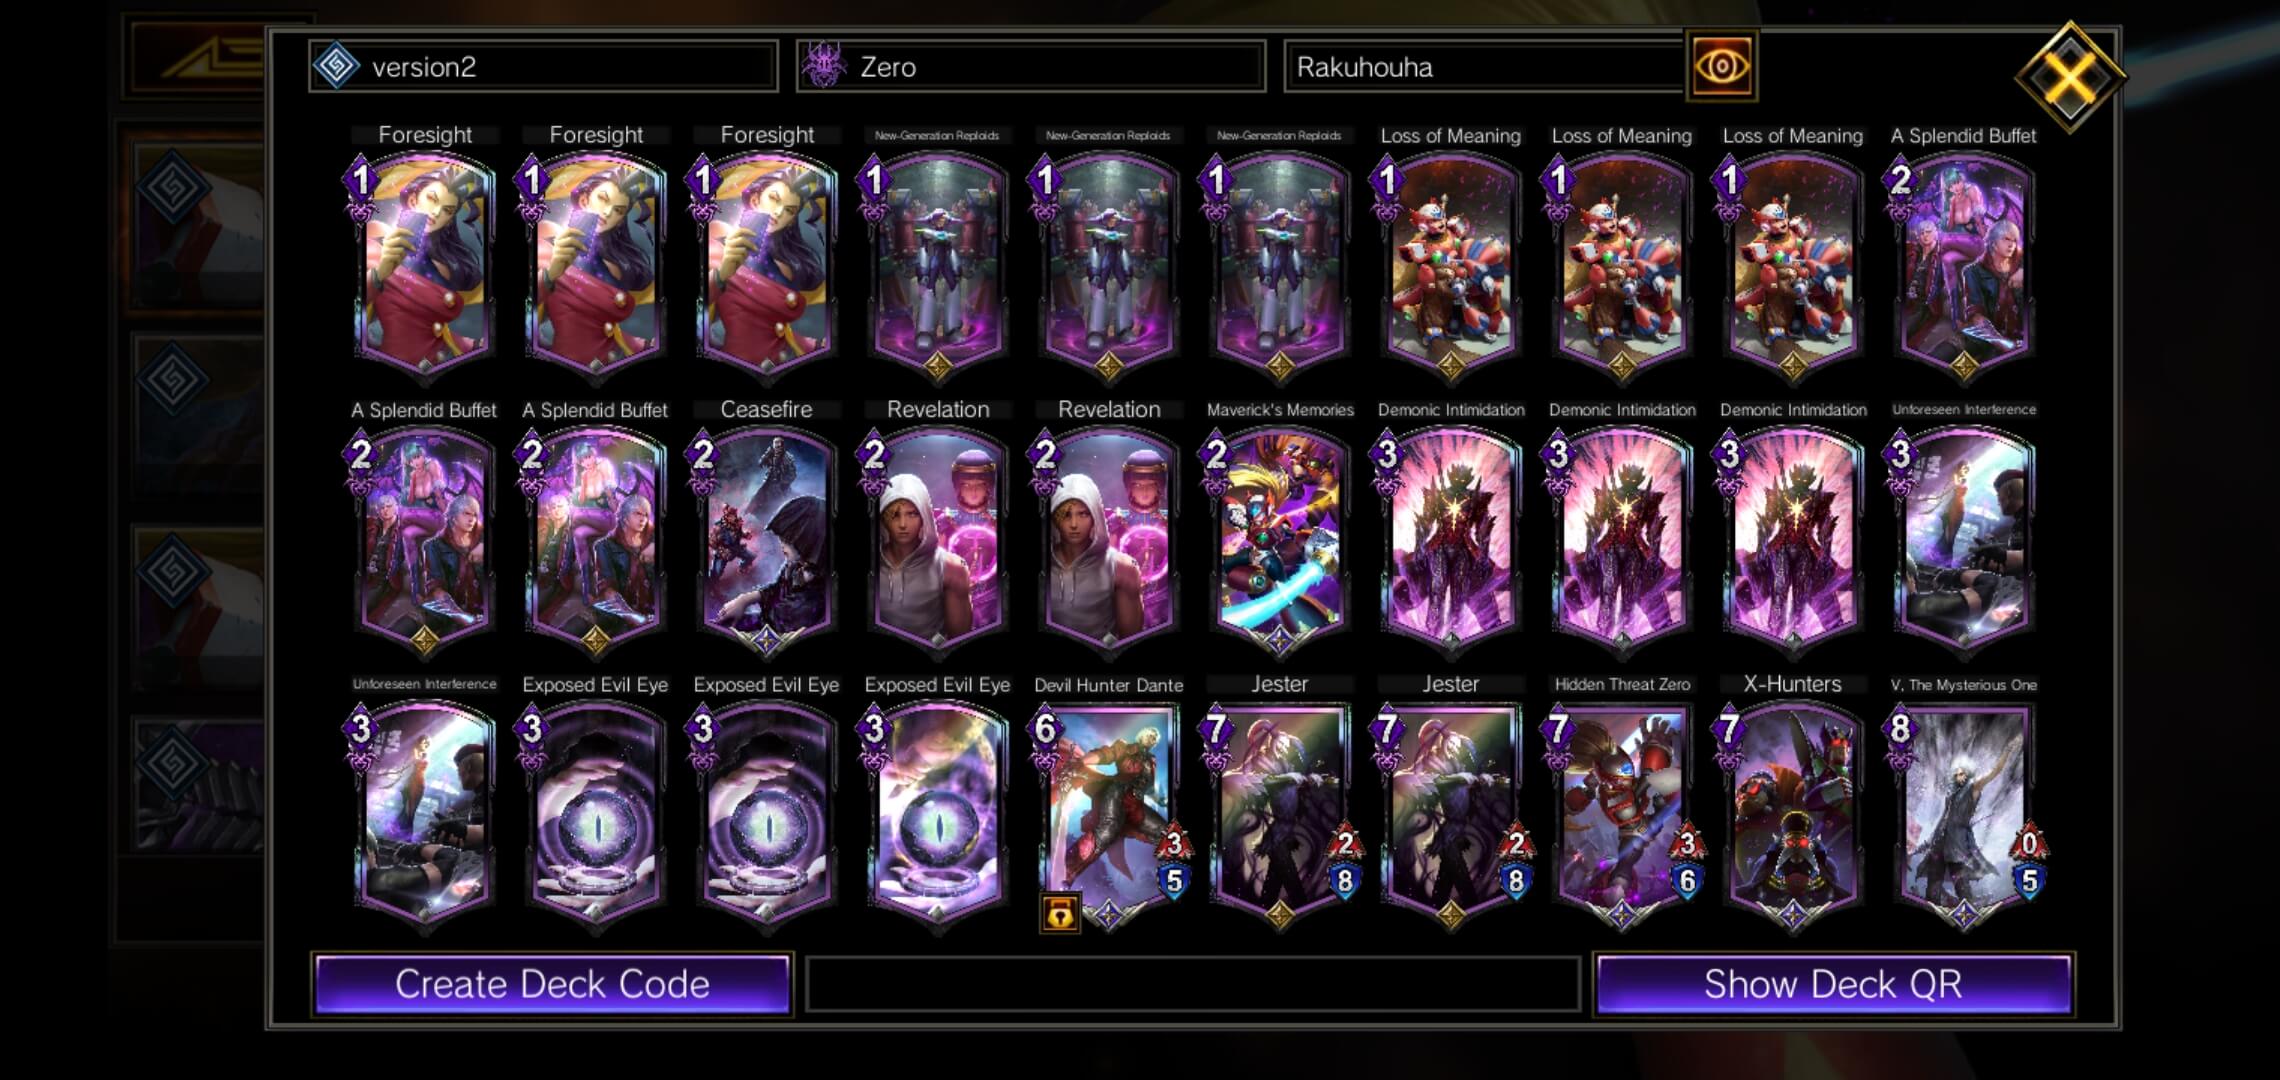
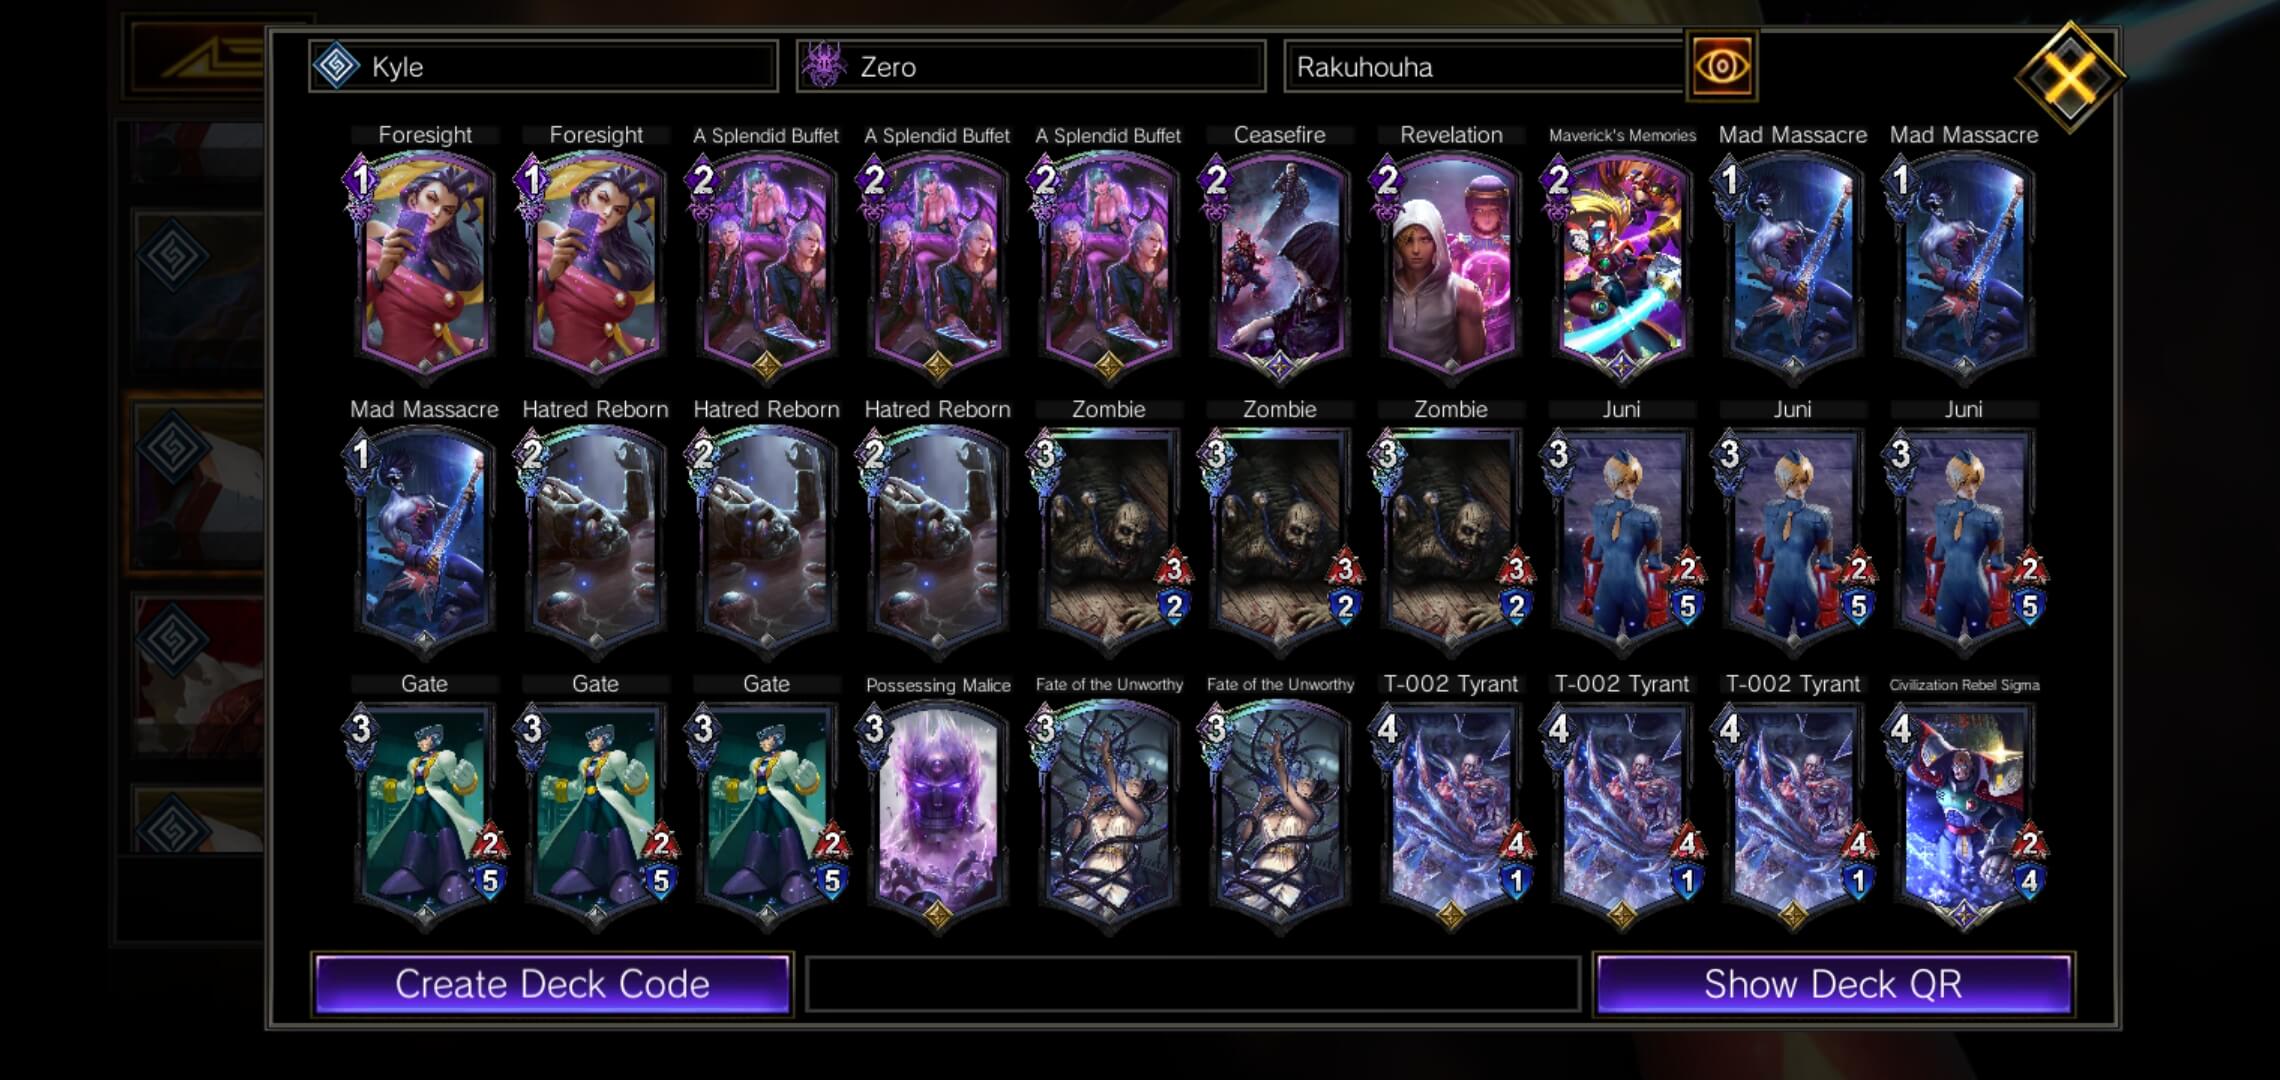
T1 Zero Exodia
Hero Art: Rakuhouha
- Deals 4 damage split among enemy units.
- Deals 7 damage split among enemy units instead. <Memory>: 4
- Deals 12 damage split among enemy units instead. <Memory>: 10
Deck Type: Control
Difficulty: (4.0/5.0)
Viability: (5.0/5.0)
Strength: Insane amount of removal, especially Rakuhouha being very inexpensive to remove the board many times.
Weakness: Loses to aggressive decks and negates.
dyWWWXCv0yWWWVd6AGgYXyJwRwgnyPILWJy5dUALWJbR1g=LWty5d80LWIF2Rwg5qseZLfywqEWW3NL=RyIUC+ALWntWZYgZ7WI5QgL67WW4S0LWItXLWn=P7WWTWfyw6SXWQjpRRwJ5MWuWnW
Goal: Get to 15 memory, control the board state, play [X Hunters] and have [Maverick's Memories] on hand to complete "Exodia."
This deck is one of the few decks that have been wreaking havoc this meta, many players praise this as a Tier 1 deck. The way this deck plays is considered "lame" for it's amazing control capabilities as well as it's limited interaction.
The name Zero Exodia comes from Yu-Gi-Oh (card game), an infamous card combination in Yu-Gi-Oh immediately wins the game and cannot be stopped or countered. It's a lot similar to how this deck functions, we work up to a card combination and instantly win the game.
When facing this deck, one can expect to not see any units being played, this would mean that target unit cards end up being unusable in this match up until late game. Because the cards are unusable this makes your cards "bricked," unable to play because there's no targets. Additionally if units are played against Zero Exodia, Zero Exodia excels in removing units with Actions or the 16 AP Hero Art that deals 7 or 12 damage quickly (16 AP Shinku Hadoken or Spike Launch).
With the absurd amount of removal options, stalling, and Actions that do nothing but filter for memory count. Mid-late game, this deck can assemble 15 memory, [X Hunters] and [Maverick's Memories] for the guaranteed win.
It's often thought that [X Hunters] is the overpowered piece in this deck, but I would argue that [Maverick's Memories] is the biggest problem card TEPPEN has ever seen. A card that costs only 2 MP but can negate any Action card regardless if the opponent spent 8 or 10 MP on their card, is too strong. [Maverick's Memories] is the reason why Exodia exists, because it guarantees for win conditions to run rampant, if not [X Hunters], another card in Purple could be used to win the game for Zero Exodia.
EDIT: +2 [Jester] has been added to reflect the meta utilizing unit spawning as a "buying time" mechanism for Zero decks to drop X Hunters late game.
Opening Play
Some cards in this deck are actions that are purely for drawing or doing nothing for cheap. These are the best cards to see early game, because you want to get those cards out of the way early to fill up Rakuhouha and not see them mid-late game
T1 B/G Nergigante Zombie Rush - Rana
Hero Art: Spike Divebomb
Gives +4/+4 and self-destruct on attack to a friendly unit.
Deck Type: Aggro/Board Contest
Difficulty: (3.0/5.0)
Viability: (5.0/5.0)
Strength: Aggressive swarming and answer enemy units.
Weakness: Large rampant threats that we fail to destroy run us over.
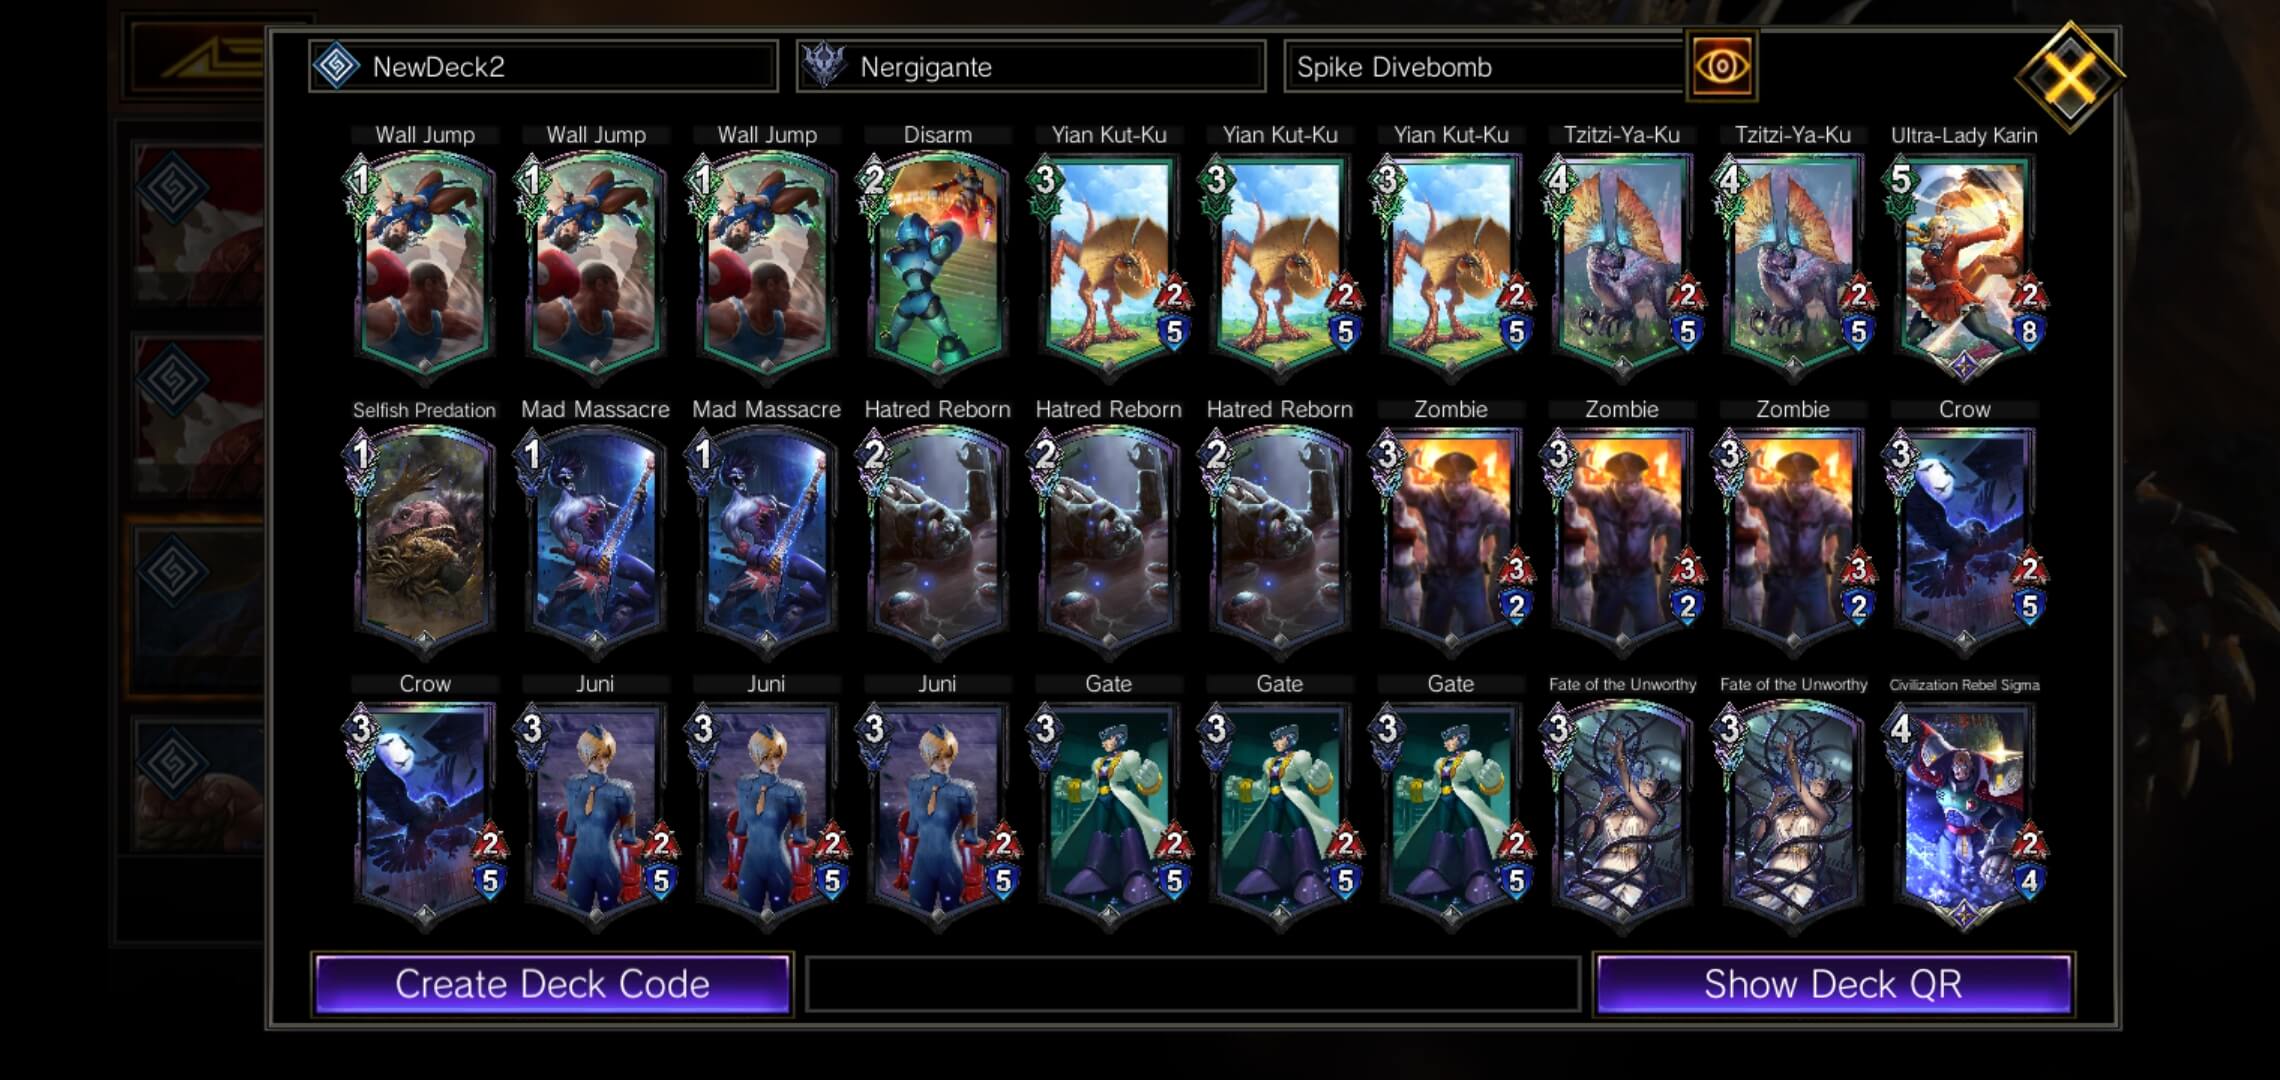

dyWWWnCv0yWWWVe6A8J7XyJwRwJnFmFLWtCjRwWRNbtLWW==zWg4wAWWWzZFgVXWZ90b7Wg4qAWWVIyPQtWWSnb2RtWWIPGyWJC2Rwg5TGzLWJbRsBuLWWMW3jF9Rwg5iHsZLfluRwWU
Goal: Rush down the opponent.
This deck is one of Rana's many ladder climbing decks. Early on, Zombie Rush was only known to be black and splash with red or purple. Later last season, Rana shared us this green variant which has had the most recent consistent success for many players. What makes this deck so strong? With [Wall Jump] shield we are able to protect high priority units against Denjin and Rakuhouha which are the most used Hero Arts in high level Champion ranl. We play 4 seals to deal with problem units/match ups.
The flow of this deck is to generally play the same as any other Zombie Rush deck, swarm the board. We use Divebomb early to get us ahead on board by activating before blocking an enemy unit attack, then we continue to play more units than our opponent can keep up. [Yian Kut-Ku] synergizes very well with Divebomb because Divebomb becomes a distraction for the enemy player while [Yian Kut-Ku] chips for fast damage.
Opening Play
Swarm board. [Gate] is high priority to play, because he is a Growth unit, all of his abilities come from having units played after him to trigger.
T1 R/B Nergigante Zombie Rush
Hero Art: Spike Divebomb
Gives +4/+4 and self-destruct on attack to a friendly unit.
Deck Type: Aggro/Board Contest
Difficulty: (3.0/5.0)
Viability: (5.0/5.0)
Strength: Aggressive swarming and answer enemy units.
Weakness: Large rampant threats that we fail to destroy run us over.
dyWWWYCv0yWWWVd6A8J7XyJwRwWRRoKLWW15LchZLJZZuVXW3X4O7Wg4iqWW3nl2qAWWvUWysreZLIyPQtWWVnb2RtWWVXyOPEWWVfluxqWWZnl2jAWWZXbOpqWWJRb2CSXWQ9xZLJW
Goal: Swarm board, destroy enemy problem units
Nergigante Zombie Rush is Tier 1 level because of Spike Divebomb making effective trades and [Mega Tortoise] synergizes with this deck immensely. By having Tortoise, whenever one other unit dies, it will deal 3 spread damage to the enemy board, which adds up for a lot of value.
It's important to note that Nergigante Spike Divebomb on a [Civilization Rebel Sigma] will always make out Sigma safe to play and win the trade in the mirror lane of Sigma versus Sigma.
Opening Play
Swarm board. [Gate] is high priority to play, because he is a Growth unit, all of his abilities come from having units played after him to trigger.
T2 Ryu Traditional
Hero Art: Shinku Hadoken
Deal 7 damage to target enemy unit.
Deck Type: Split Damage Control/Board Contest
Difficulty: (2.0/5.0)
Viability: (4.0/5.0)
Strength: Hard control options ie. burn the enemy board.
Weakness: Our only win condition is chip damage, we rely on keeping the opponent’s board in check. If we fail to clear the board, we lose.
dyWWWTCv0yWWWVBhAHIWXyJwRwI5LFXLWtxCRwWRRm1LWWLS2WIW7WWvTaXWGncs7WWvcSXWGIcXGWW42SLWJh8ZLJZZHILWvXbLW9b5LyALWWkvMWWL7WWRGIap7WWT7XZ=VaXW3Jf7RwJnjseZLtbgWHIW
Goal: Burn the enemy board.
Ryu Shinku Hadoken is the original archetype of 2-for-1s. A lot of Ryu’s card choices are Units that have on-play split damage abilities. Because of this, Ryu gets to play decent stat Units to fight for him and destroy enemy Units almost instantly. This results in Ryu having Unit(s) and an MP lead. Because Ryu destroyed the enemy unit and kept ahead on Units on board, this gives Ryu players a MP lead, meaning that Ryu has everything to show for the MP they spent, and the opponent has nothing to show for the MP they spent. This strategy paired with Shinku Hadoken just makes Ryu a monster at controlling the board.
Ryu relies on clearing the board and pushing chip damage. Chip damage is small amounts of damage hitting the opponent over time. Ryu will not have many ways to push a large amount of damage quickly besides [Valstrax] and [Fate Defying Ryu]. Ryu not having many ways to push a large amount of damage, makes Ryu Shinku Hadoken players’ games rely heavily on clearing the board. Normally if Ryu cannot clear the enemy board state for any reason, it becomes a losing game for the Ryu player.
Opening Play
Conserve enough MP to play 2-3 Units and reactively destroy the first unit your opponent plays using your burn units
T2 Ryu Zombie Rush
Hero Art: Shinku Hadoken
Deal 7 damage to target enemy unit.
Deck Type: Aggro/Board Contest
Difficulty: (3.0/5.0)
Viability: (3.0/5.0)
Strength: Aggressive swarming and answer enemy units.
Weakness: Large rampant threats that we fail to destroy run us over.
dyWWWICv0yWWWVdTLtBWLg5WzVXWN4PCRwWRRa1LWIk37WWYMc=HWWx8Rwg5wkFLWn=O7WWRZ98A7WWRjWFR7WWRZf8y7WWR3goa7WWRQ9xe7WWR3jF97WWTWfluRaXWQPH7RwIRc==WLW
Goal: Swarm board, destroy enemy problem units
There is nothing special about this deck. This deck is an early iteration of Zombie Rush and will stay to show what the deck used to be. This deck still plays at a Tier 2 level, but other decks in the meta snapshot have surpassed this deck.
Opening Play
Swarm board. [Gate] is high priority to play, because he is a Growth unit, all of his abilities come from having units played after him to trigger.
T2 Rathalos Zombie Rush - Hayakeo
Hero Art: Dive Attack
+2 Attack to all friendly units.
Deck Type: Aggro/Board Contest
Difficulty: (3.0/5.0)
Viability: (5.0/5.0)
Strength: Aggressive swarming and answer enemy units.
Weakness: Large rampant threats that we fail to destroy run us over.
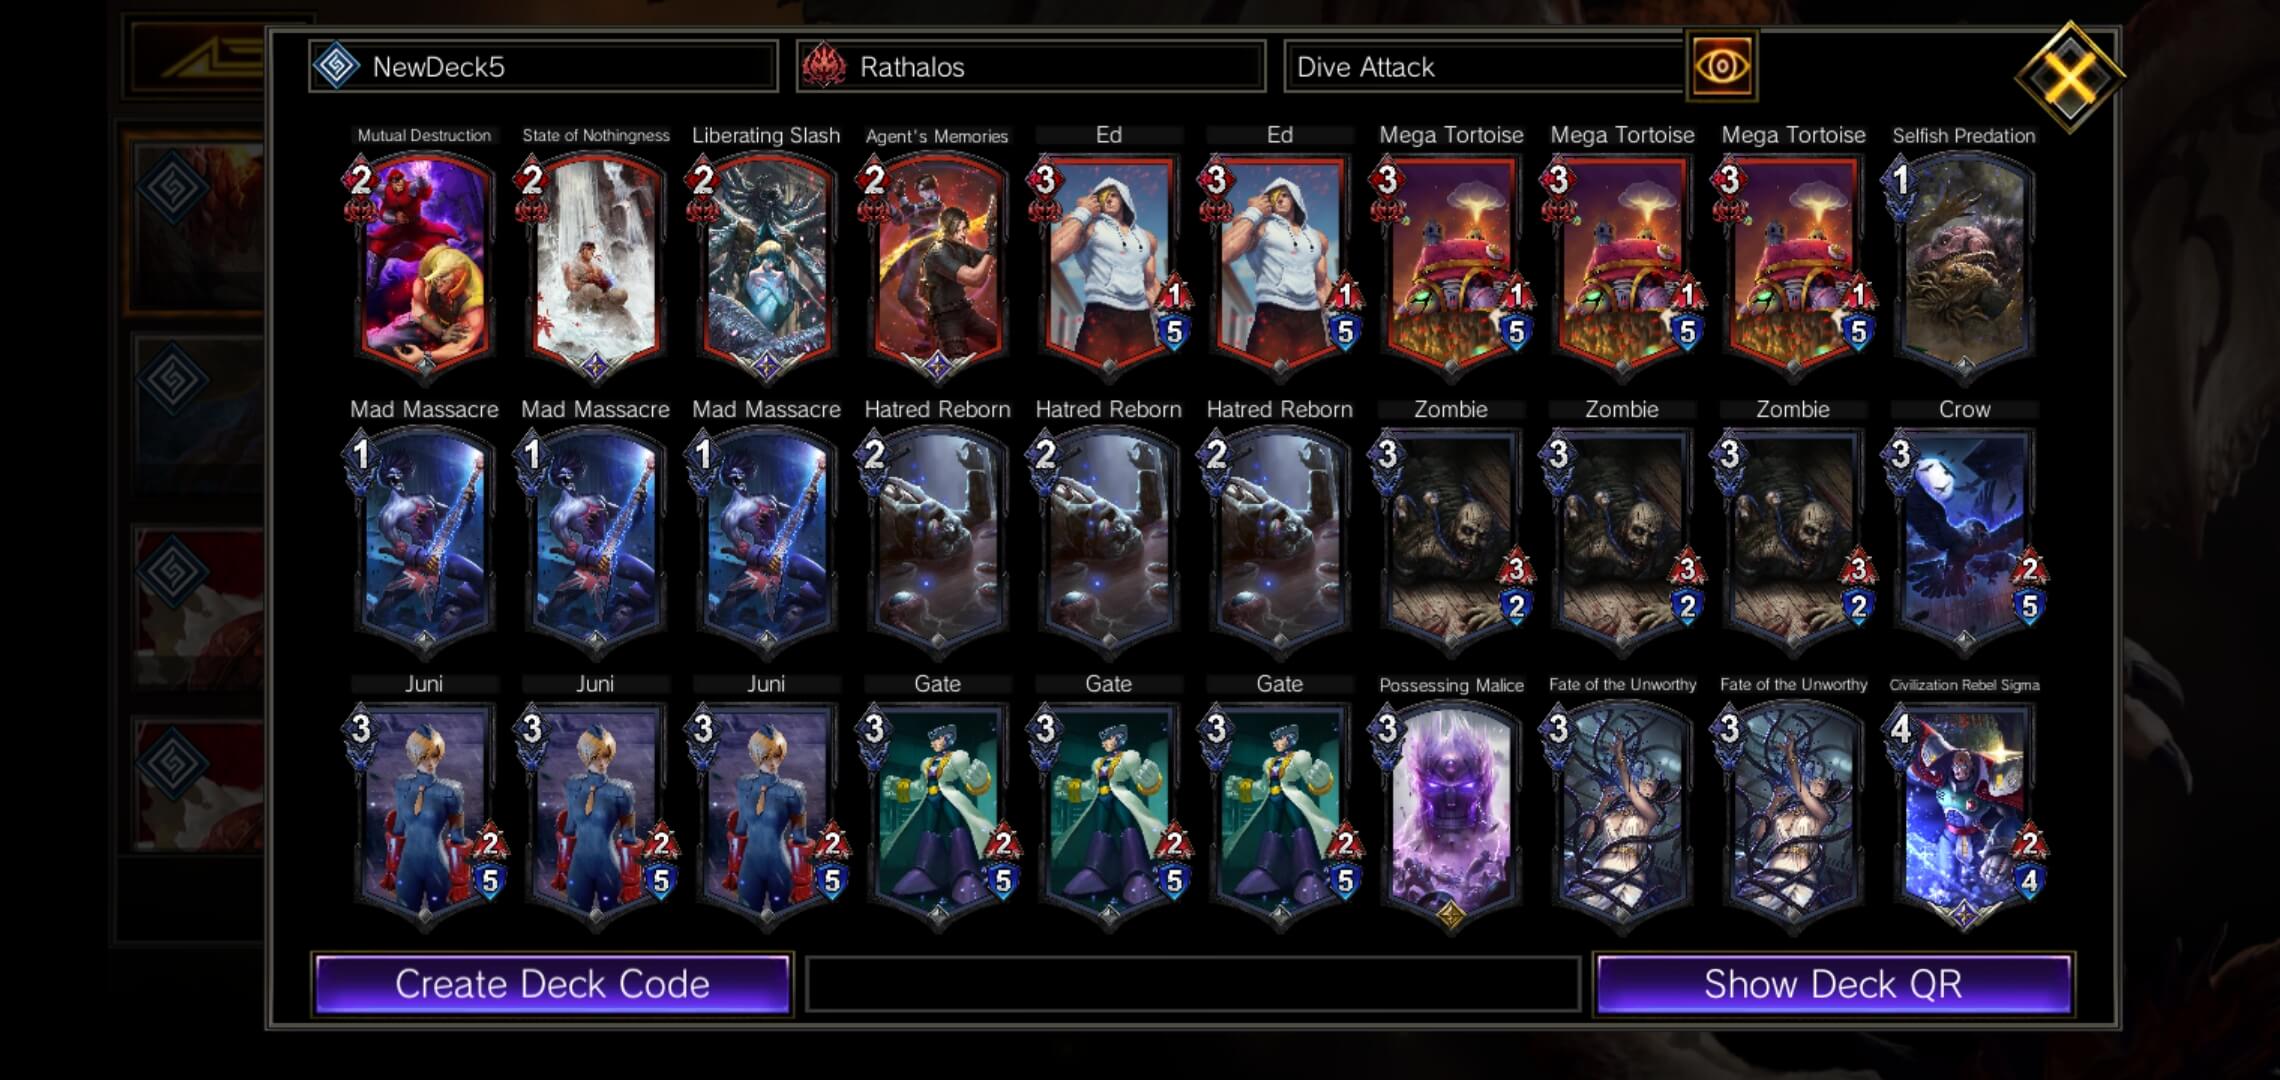
dyWWWPCv0yWWWVBiIteW4g5WzVXWGtFnRwW5a9lZLtbguaXWVTPHRwg5wABLWWLO2Wg4iqWWgnl25AWWvvALWJy5gxbLW9ZnejILWJC2Rwg5TGzLWJbRsBuLWWKLZ901Rwg5iHsZLXbOpSXWQ9xZLYW
Goal: Swarm board, destroy enemy problem units
Dive Attack is the newest addition to the Haunted by Memories meta. Early Season 6, this deck rose to the top sitting at Rank #1. It's not unusual for T2 decks to sit at #1. The reason this deck sits at a T2 instead of T1, is that there's no real unique attribute to differentiate this deck from the rest of the Zombie Rush decks. Playing Rathalos with the Zombie shell does work and makes the deck more aggressive. Aside from the +2 attack for [Ed], there's really no clear advantage to put this deck into T1.
Opening Play
Swarm board. [Gate] is high priority to play, because he is a Growth unit, all of his abilities come from having units played after him to trigger.
T2 X Charge Shot
Hero Art: Charge Shot
Gives “When HP is boosted: Gain +1 Attack" to all friendly units.
Deck Type: Swarm/Board Contest
Difficulty: (2.0/5.0)
Viability: (3.5/5.0)
Strength: Buffing units to unstoppable numbers.
Weakness: Removal easily shuts this deck down.
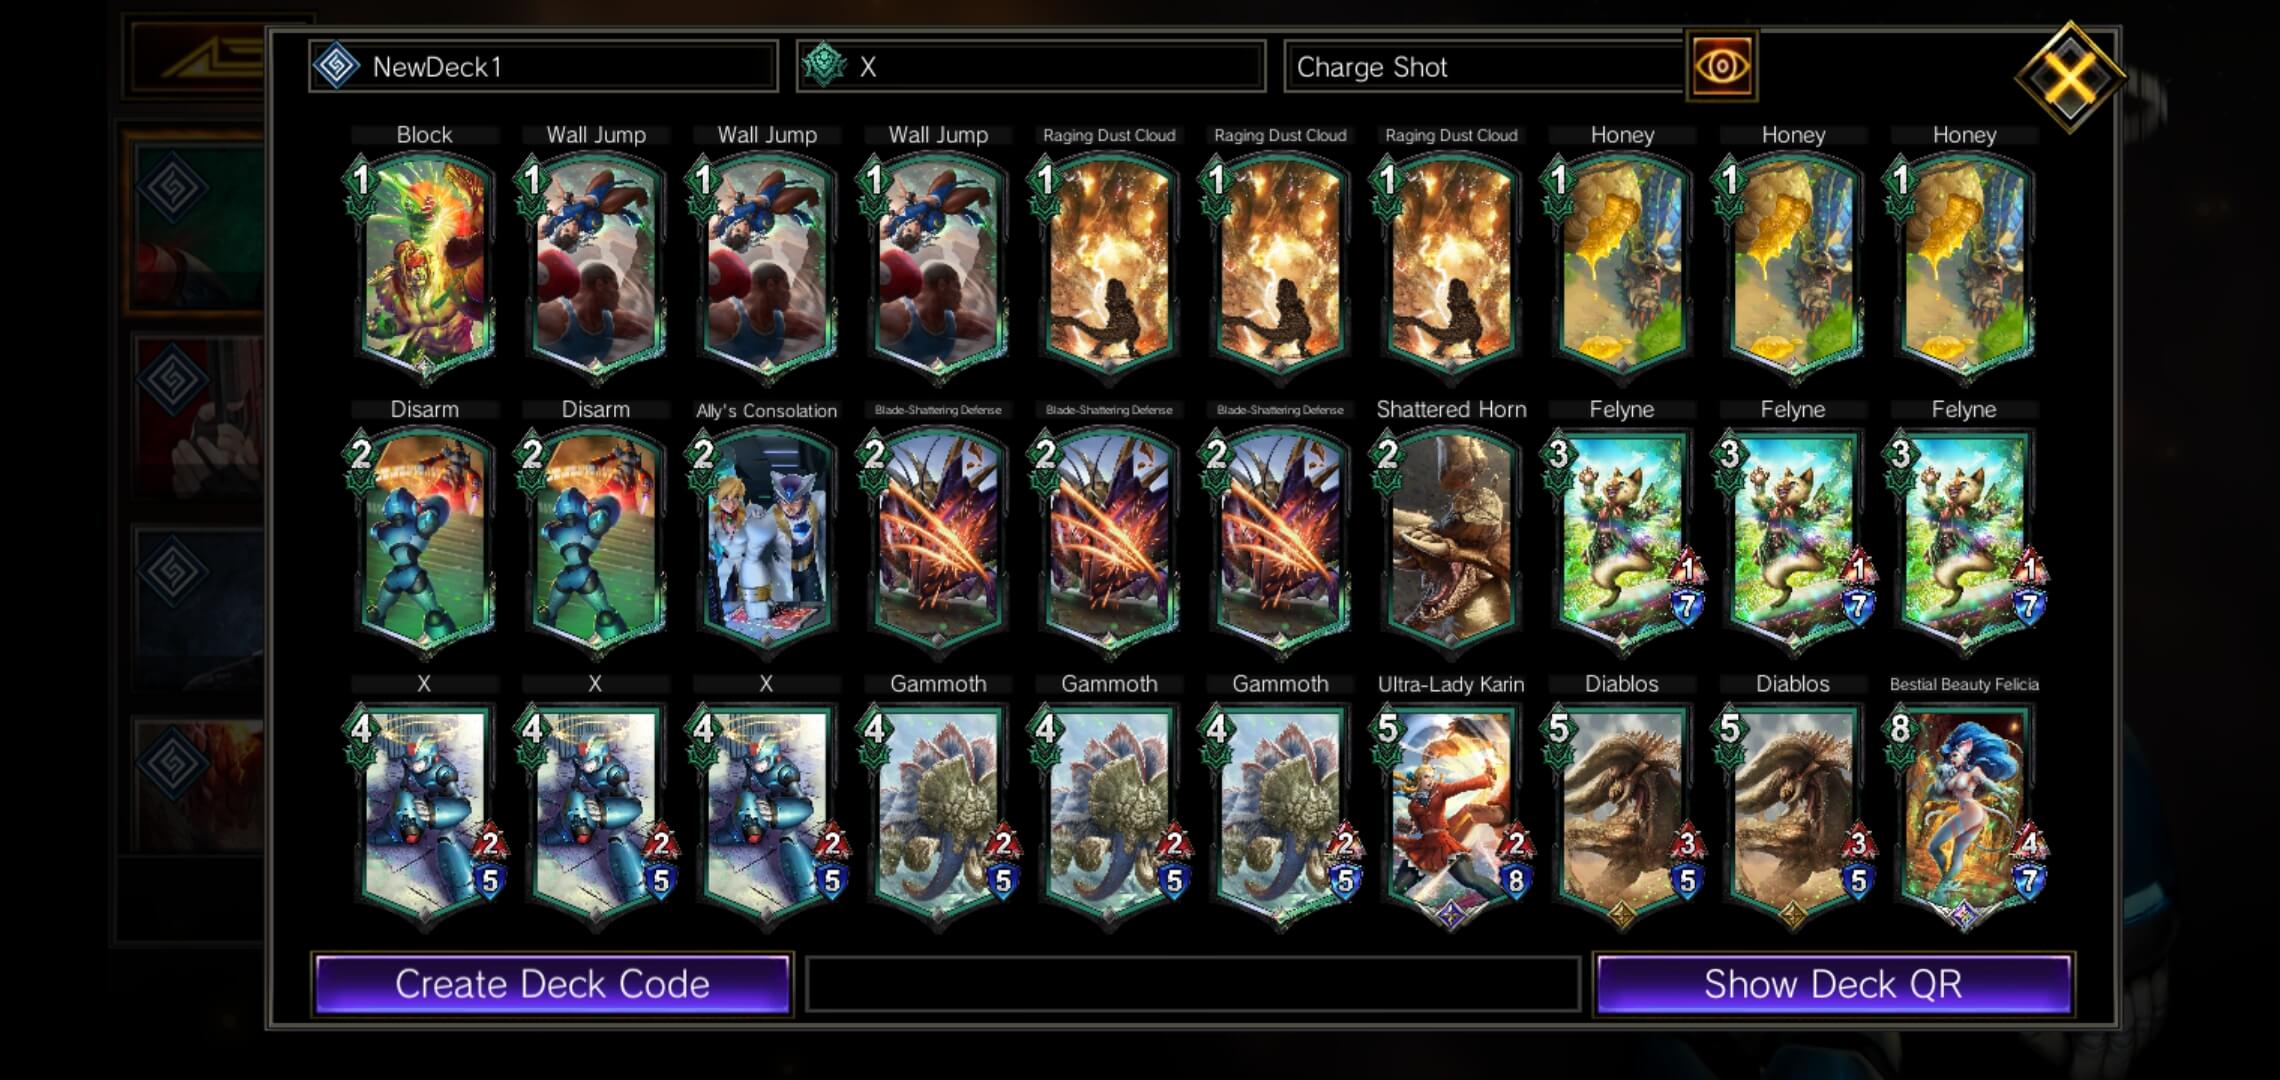
dyWWW9Cv0yWWWVerLtQWYg5WzVnWHYtURwJnFmFLWWLGMWJL7WW4XmWWAj1LWWkj2WWvbaXWVtMs7WW4GqWWAnFLWJxkRwJnuKKLW9yRNcbLWWLqMWIW7WWvBQXW3THnMWWjtSXWVtM+Rwg5OhbWyW
Goal: Create and protect unstoppable threat(s).
X Charge Shot has gained the new [X], [Gammoth], and [Diablos]. Allowing mono green more units to scale quickly with Charge Shot. Ideally you want to play 3 units to force out all removal your opponent may have. If your opponent cannot kill one of the units, the Hero Art Charge Shot allows us to scale all of our units with attack and health to unstoppable numbers.
Opening Play
MP Boost units, then play [X], [Gammoth], or [Diablos]. Prepare for Charge Shot
T2 Dante Burn - kuroookami1224
Hero Art: Devil Trigger
[Dante] takes no damage for 10 seconds.
Deck Type: Control, Burn
Difficulty: (4.0/5.0)
Viability: (3.5/5.0)
Strength: Doesn't have to play units for action based opponents to target. Thus action based opponents may brick against Dante Burn.
Weakness: Lose to aggro and early high damage output from the opponent.

dyWWWVCv0yWWWVd6AuJ4XyJwRwJnNUILWXYRMcpZW4gpMtWW27JnjGXLWnq6Rwg5YB=LW9ZnygILWtKWwQXWCTIGRwIR1gpZLIb89tWWIf8UWWpqBWWv4QXWZYgZ3Wg4FAWWgyIRX9cZLfywSSXWQgp6LvW
Goal: Burn the enemy’s health total to 0
This deck has been floating around for quite some time. We all thought it was a meme, why would you play this deck instead of Ryu Denjin? Honestly, I don't know too much about this deck, but I will take time to analyze and write out my thoughts.
It's important to note that, this deck has more than 30 damage at face value when you count all the damage for burn actions in the deck. The deck seemingly prioritizes in getting engine going with [Foresight] and [Exposed Evil Eye]. Then uses [Splendid Buffet] and [Dark Hold] to control any problems that Devil Trigger cannot stop. In my few sample games I played, I found the deck needing to cycle quickly to catch up with the meta, throwing burn actions is important to charge up Devil Trigger. This deck does get Art Points fairly quickly, allowing the pilot to trigger multiple Devil Triggers, preventing damage by the opponent. Some cards in the deck could be considered as "one-offs" (played in the game once in a pinch), [Valstrax] is in there to cheese any damage needed and [Maverick's Memories] and [Monstrous Virus] can buy time for this deck to win in tight spots.
What gives this deck credibility is the pilot kuroookami1224 taking it to Top 16 and tweeting the results. This is highly credible since kuro was nice enough to post their match history. See original tweet below.
Opening Play
[Foresight] and [Exposed Evil Eye]
T2 Zero Zombie Rush
Hero Art: Rakuhouha
- Deals 4 damage split among enemy units.
- Deals 7 damage split among enemy units instead. <Memory>: 4
- Deals 12 damage split among enemy units instead. <Memory>: 10
Deck Type: Aggro/Board Contest
Difficulty: (3.0/5.0)
Viability: (5.0/5.0)
Strength: Aggressive swarming and answer enemy units.
Weakness: Large rampant threats that we fail to destroy run us over.
dyWWW4Cv0yWWWVQPAGgYXyJwRwgnyPILWty5d80LWJOLeVXW3vexRwIRXvhZLfbw4QXWZ98A7WWRjWFR7WWRZf0y7WWR3goa7WWRQ9xe7WgJZ9U1Rwg5iHuLWJZnevFLWWARsQXWnW
Goal: Swarm board, destroy enemy problem units
This deck did not age well. A T1 deck moved down to a T2 status, this deck has been overshadowed in the Zombie Rush realm when it comes to top level ladder climbing. Since the meta has changed and Zero Exodia has evolved, the match ups for Zero Zombie Rush has gotten worse, which is why it now places in a T2 level today.
This is really just a Zombie Rush deck that can negate [X Hunters] with [Maverick's Memories].
Opening Play
Swarm board. [Gate] is high priority to play, because he is a Growth unit, all of his abilities come from having units played after him to trigger.
T2 Mono B Nergigante Spike Launch - Hayakeo
Hero Art: Spike Launch
Split damage equal to sacrificed life points to all enemy units up to 12 points of damage.
Deck Type: Board Contest
Difficulty: (4.0/5.0)
Viability: (4.0/5.0)
Strength: On demand board clear using Hero Art. Durable Units and a lot of removal.
Weakness: We cut our own life, so our life is generally low
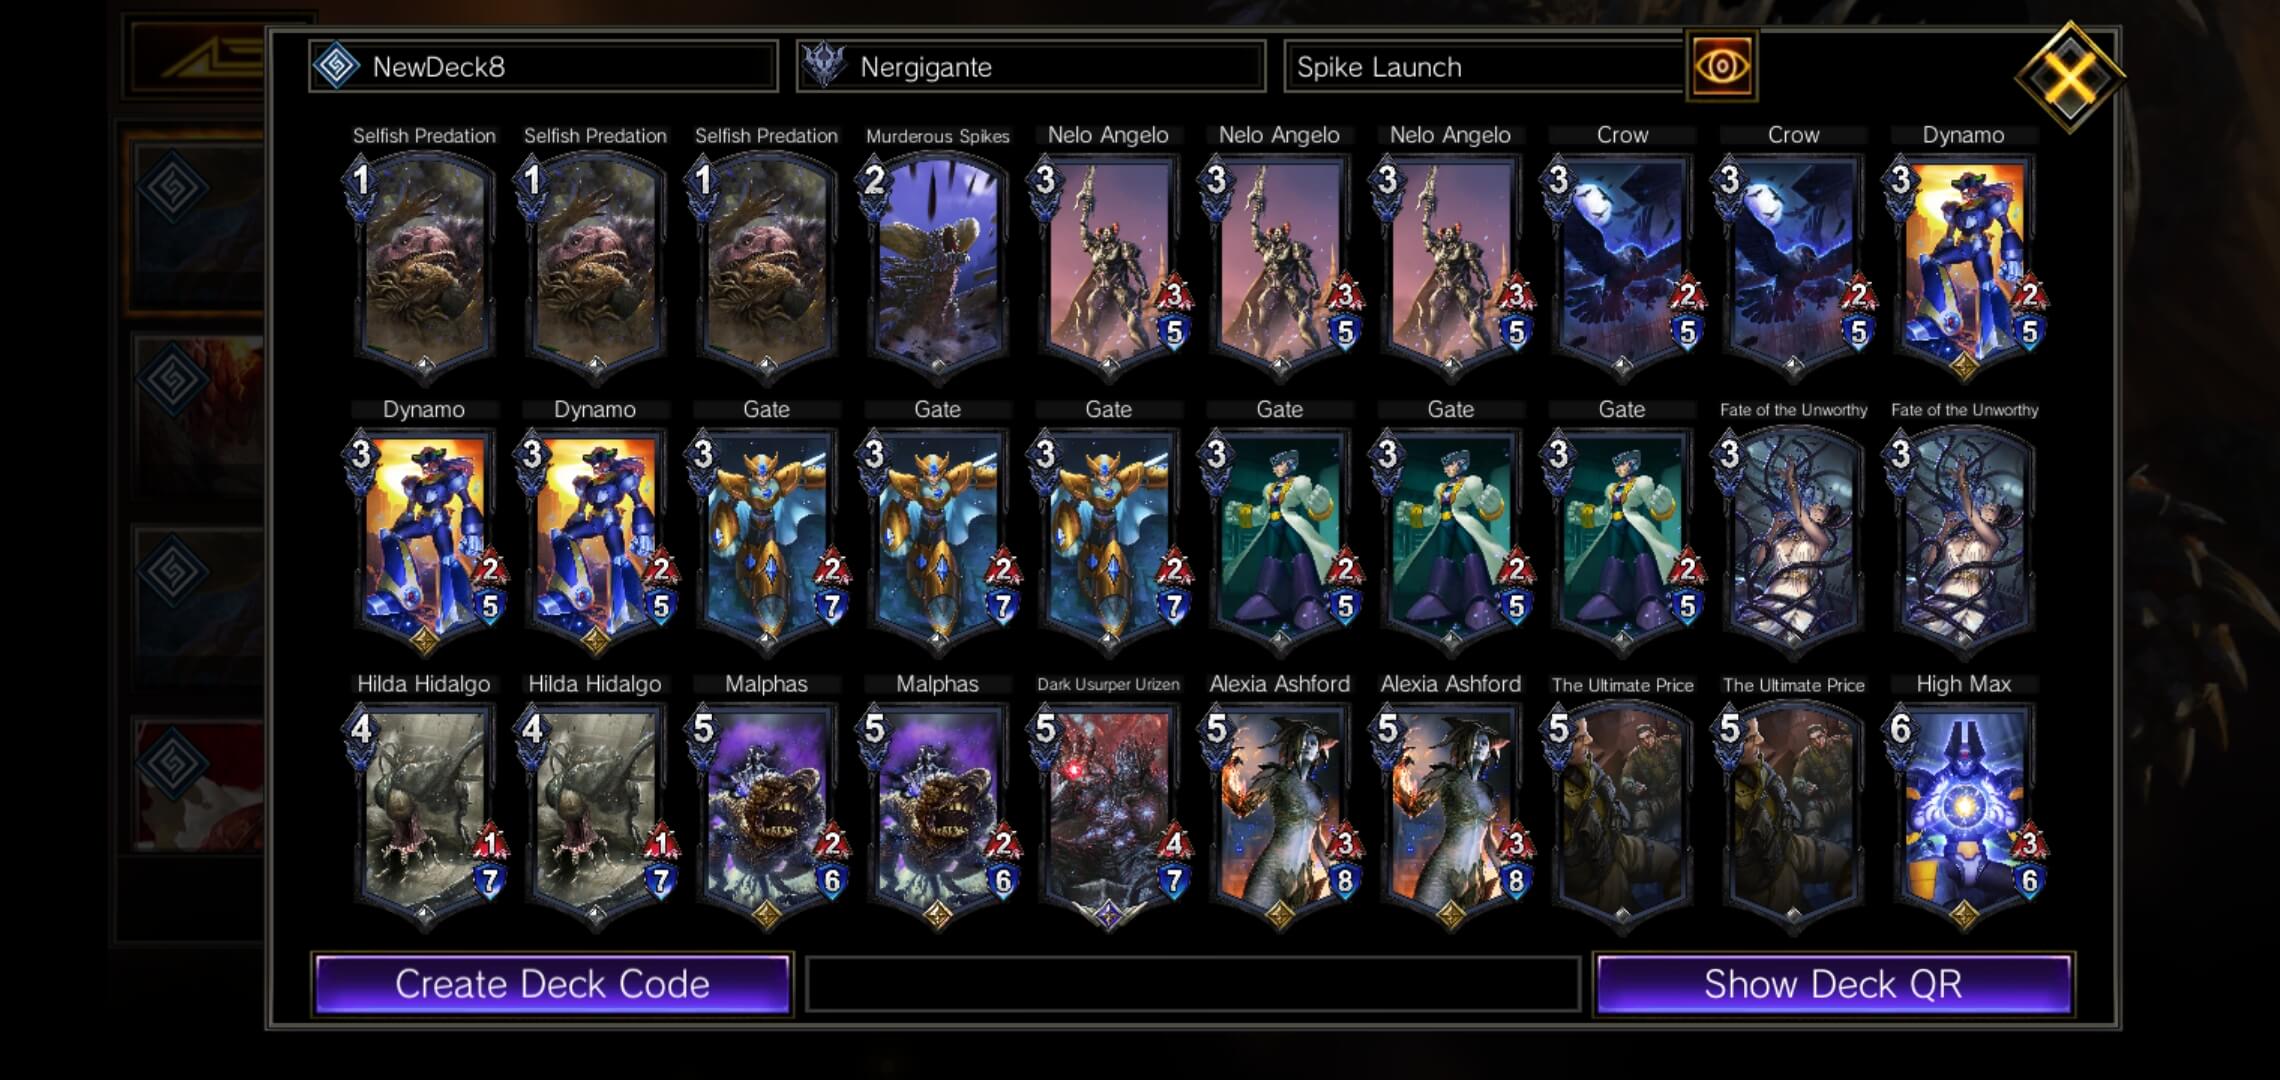
dyWWWXCv0yWWWVQhA8g7XyJwRwgnsjtLWXdWn9SDRyWysxALWntWZfG27WWRCvyD7WWR3jaw7WWRQ9xe7Wgn3jF97WgnQ9qP7WWnCvy87WW4dqWWIWcwWnLM7WWTWIyP+VXWjWFdRwg5iutWYW
Goal: Burn your own health with sacrifice life cards, play a swarm of units, and control the board.
This deck surfaced on Twitter from Hayakeo. At first glance, it just looks like an updated version of Mono Black Spike Launch. With this deck, control is the goal.
[Dark Usurper Urizen] is hands down the best card in this deck. By playing Urizen, Urizen cuts half your life instantly meeting the life cut condition for Spike Launch, and you have a 4/7 with <Veil> on the board that can destroy 2 units on growth.
This deck plays a normal game of board contest. However cards in this deck that gain increase in stats for being low on health or <Revenge> is why the deck is so good. The deck tends to evenly trade, but when both players are both seemingly low on resource, this deck can play many strong units for cheap and have Spike Launch on command to clear the board.
Opening Play
Swarm the board with life cutting units. Conserve MP and stat increasing units in your hand for a big drop and use Spike Launch to clear the enemy board
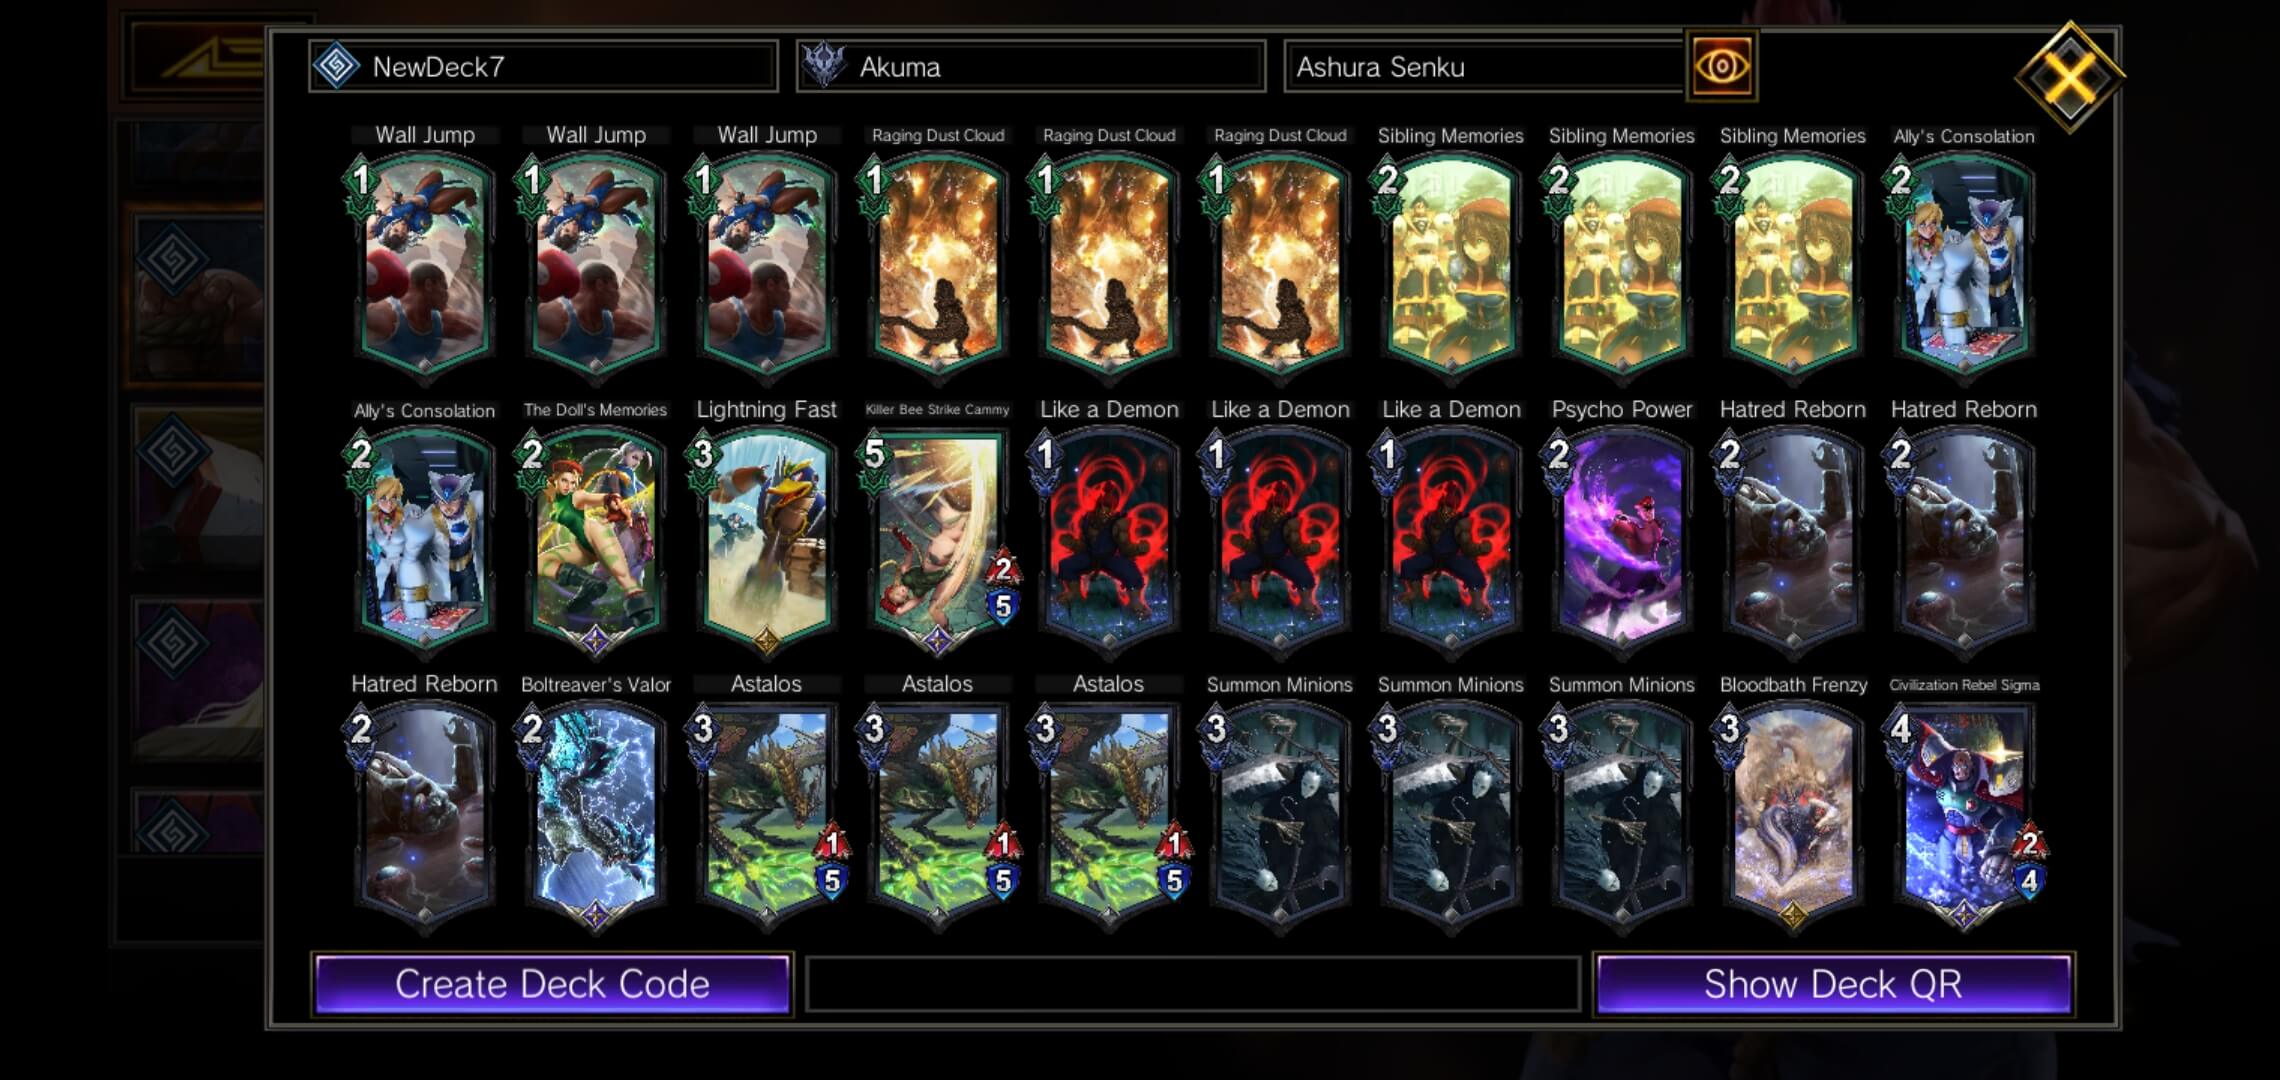
T2 Akuma Senku - iowa
Hero Art: Ashura Senku
Move a friendly unit to a random board slot. Grants “<Veil>: 10 seconds” and “Immune to damage: 10 seconds.”
Deck Type: Aggro
Difficulty: (3.5/5.0)
Viability: (4.0/5.0)
Strength: Buffing units to absurd amounts and protecting them with Ashura Senku.
Weakness: Well timed removal or direct damage to health.
dyWWWYCv0yWWWVe6A6IYXyJwRwJnFmFLWWLGMWgW7Wg=WIg6KAWW47WRNluLWW8is9WWIJKLWXxDRyI4rPqLWJBWZ9GLRwW5gxbLWJvRcL+ZLflu1qWWVnb2jEWWJxZu9VXWQ9xZLPW
Goal: Set up [Astalos], buff them quickly while trying to swam other lanes. If the opponent can potentially remove your unit, you want to spread your resources to make multiple threats. If you feel your opponent will not remove your unit, you can invest all in one unit.
This deck excels in getting [Astalos] out and having a million of actions to play. With massive flight chip damage, this deck immediately brings pressure to the opponent. The key to winning with this deck, is to set up multiple threats, and using Hero Art Ashura Senku to protect a unit to guarantee 1 damage line with <Veil>. If a unit is given <Agility> when Ashura Senku was just used, then there will be 2 attacks with <Veil>.
Ideally the deck wants to buff, pop Ashura Senku, and give <Agility>. The deck can brick, however most cards in the deck can be played with no units on the field, allowing us to cycle for cards we're looking for. It is important to note that players will want to use all available MP during action phases and use cards that target friendly units to prevent bricking.
Opening Play
[Summon Minions] or [Astalos]
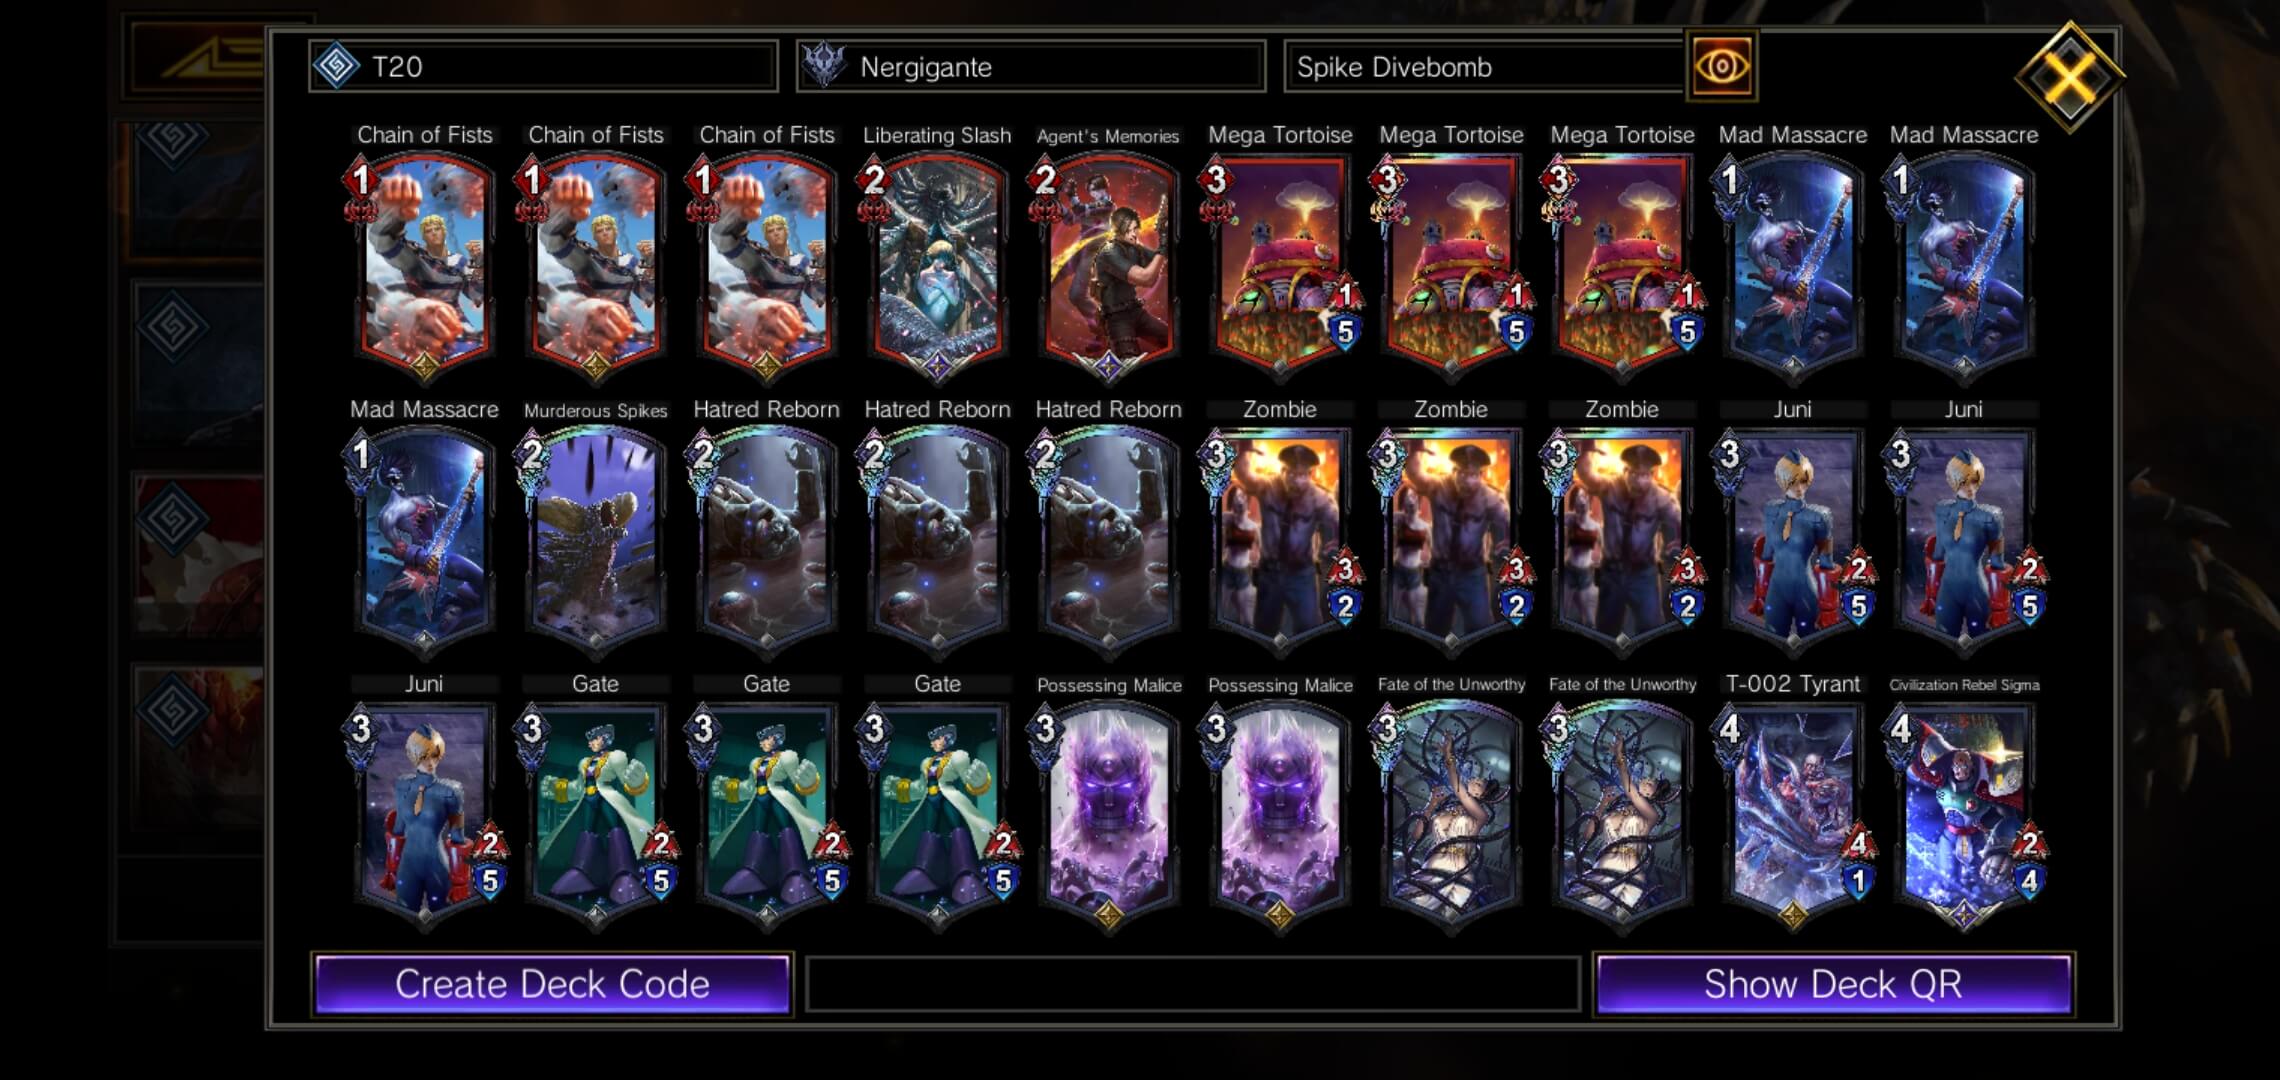
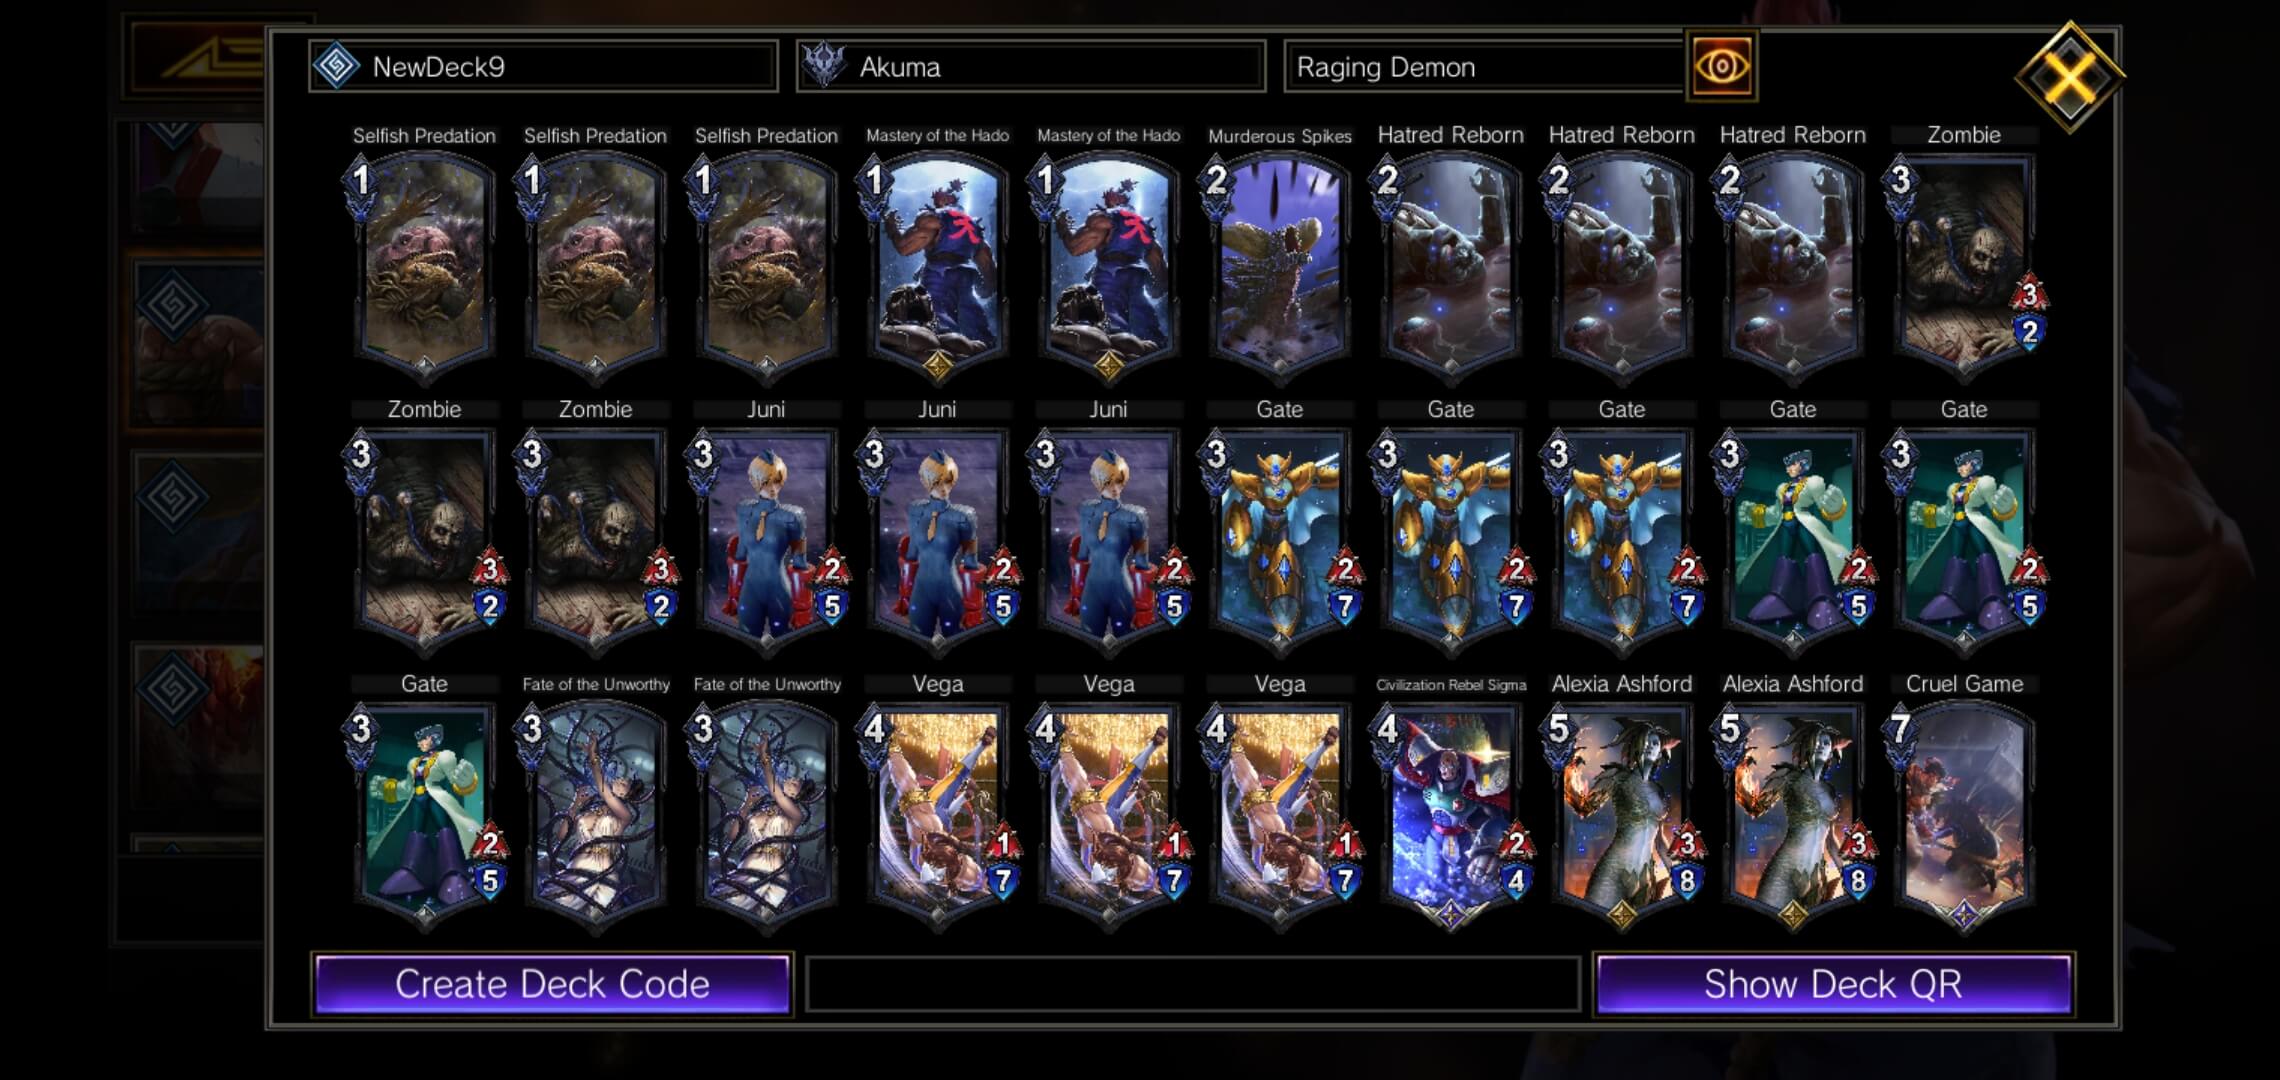
T2 Akuma Raging Demon
Hero Art: Raging Demon
Grants the <Ascended> status to a friendly unit without the <Ascended> status and destroys the unit in front of it.
Deck Type: Midrange
Difficulty: (4.0/5.0)
Viability: (4.5/5.0)
Strength: On demand unit clear using Hero Art.
Weakness: The deck does not rely on gimmicks and uses tech to face different match-ups in the meta

.
dyWWW4Cv0yWWWVd6A6gwXyJwRwgnsgtLWYZ5iSqLWJdWn9sDRwW5g8bLWJZnegILWfZ5TGzLWW0OzgyW4tWWVfluxqWWjXbOJqWWJgcZ3WWL7WWYQ9xUWWzOTVXW3joMRwg5isuWoW

Goal: Keep aggressive pressure but conserve MP for counter/tech plays against certain match-ups.
The way I look at this deck, it's play style is similar to Traditional Ryu decks. We play the board fight, playing units to try and be aggressive, but we also hold many answers to different situations.
- [Murderous Spike] to counter [Valstrax] or any other 2 attack or less target.
- [Fate of the Unworthy] for X Charge Shot decks.
- [Cruel Game] to counter [X Hunters]
- [Alexia Ashford] as a solution to destroy any unit of 5 MP or less including [X Hunters] units.
- [Selfish Predation] to heal us in the Denjin match-up and the units in our deck have large health to withstand the burn coming from Denjin.
The key to winning with this deck is to maximize trading, using Raging Demon for high priority targets, which generally means holding Raging Demon back. Playing a midrange deck like this one requires the pilot to only use their resources to counteract situations units themselves cannot already handle.
But also knowing when to Raging Demon to push pressure is very important, in this case, match up knowledge allows you to understand when to Raging Demon or not.
Opening Play
[Gate from Haunted by Memories] is the best card to start with and have the deck rolling. The deck starts off as a Zombie Rush deck, but definitely drifts to a midrange play style mid-late game requiring that the pilot be conservative with their resources for the right situations or knowing when to push pressure when the opponent is very behind.
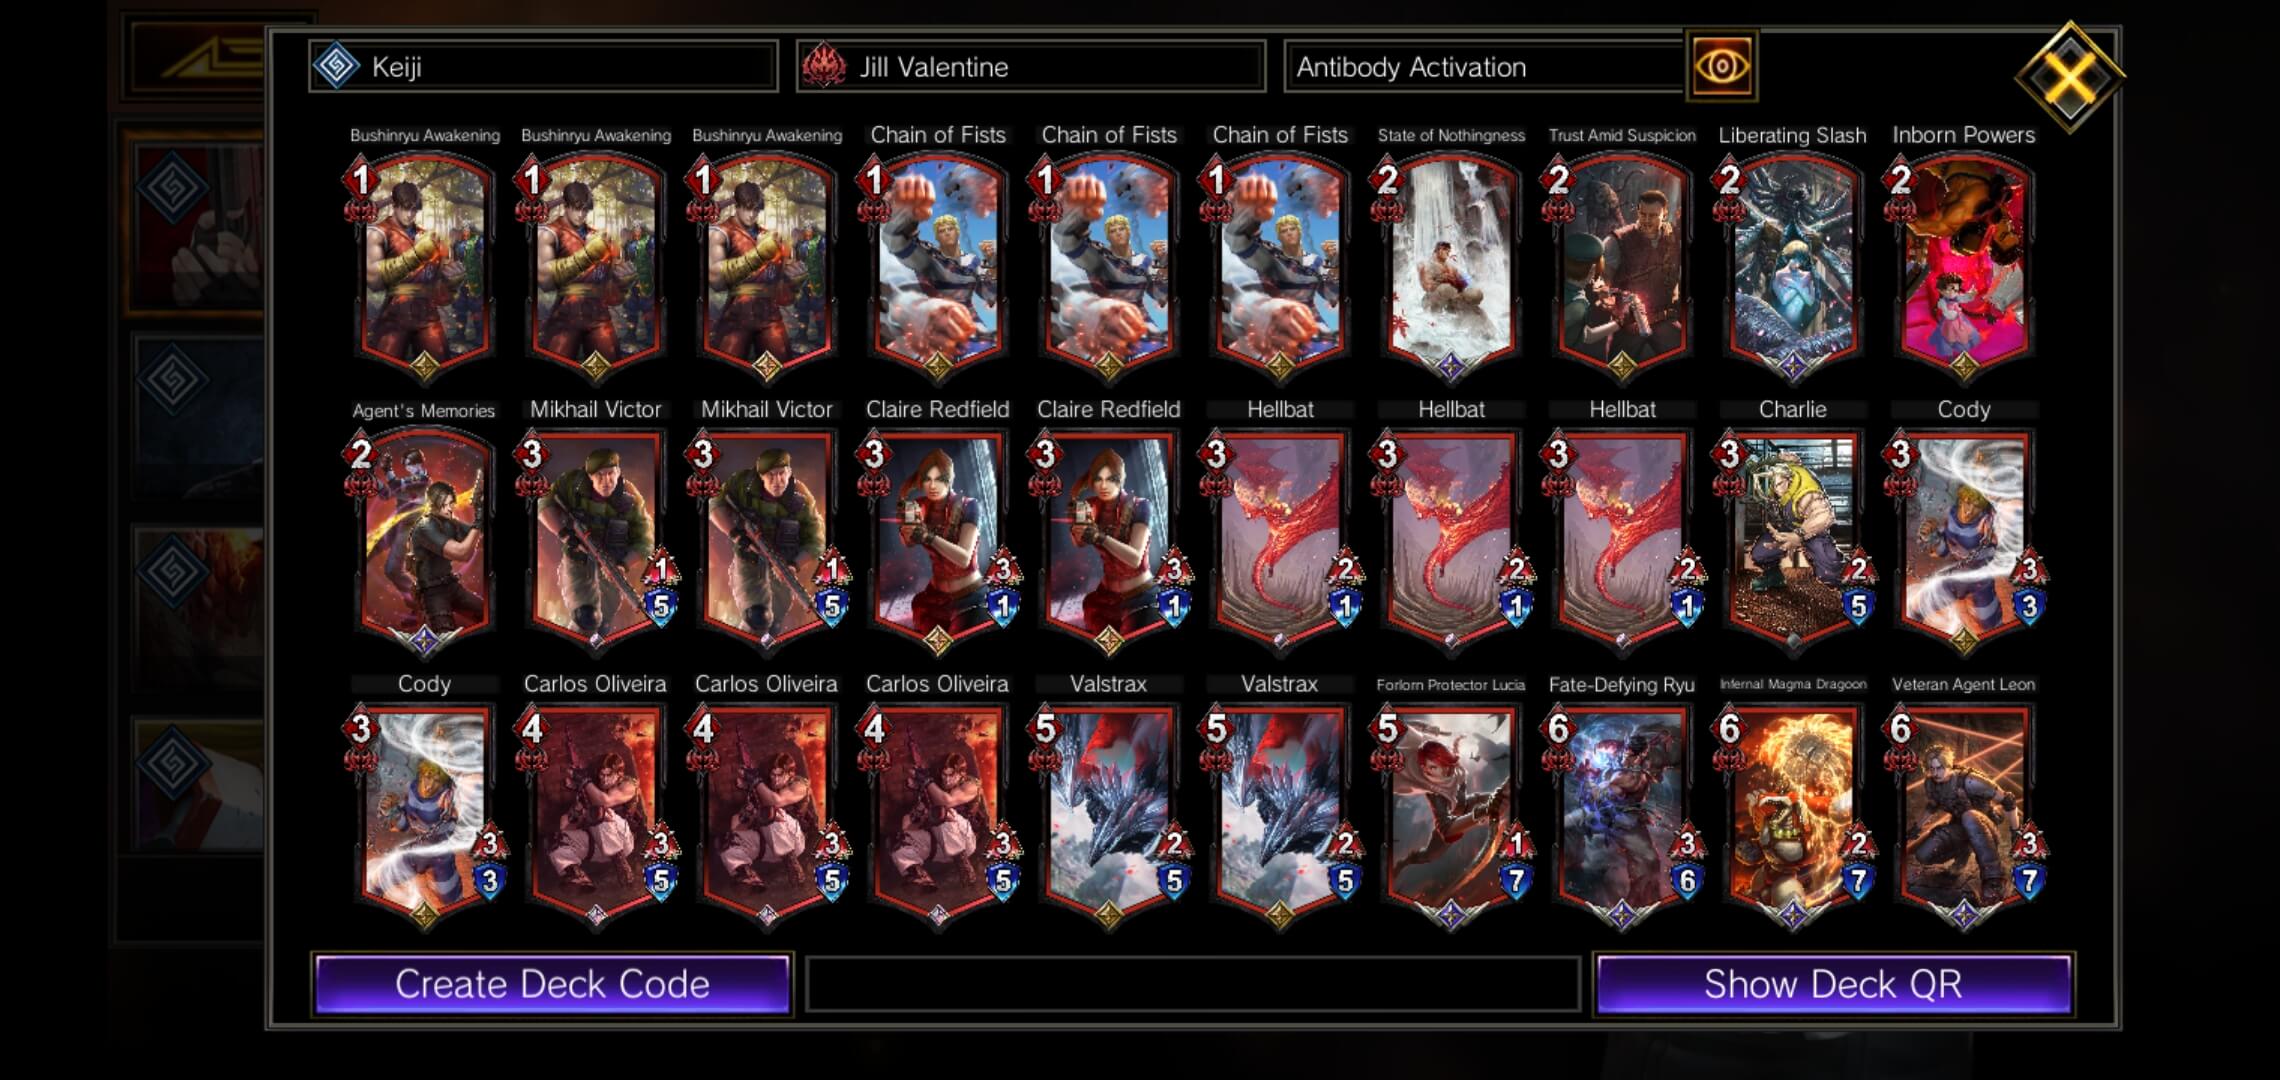
T3 Jill Antibody Activation - Keiji Maeda
Hero Art: Antibody Activation
If you have explored 3 or more times, target friendly unit gets +1/+3 and <Shield>.
Deck Type: Explore Tempo
Difficulty: (4.0/5.0)
Viability: (3.0/5.0)
Strength: Protect units.
Weakness: Limited by Explore cards options.
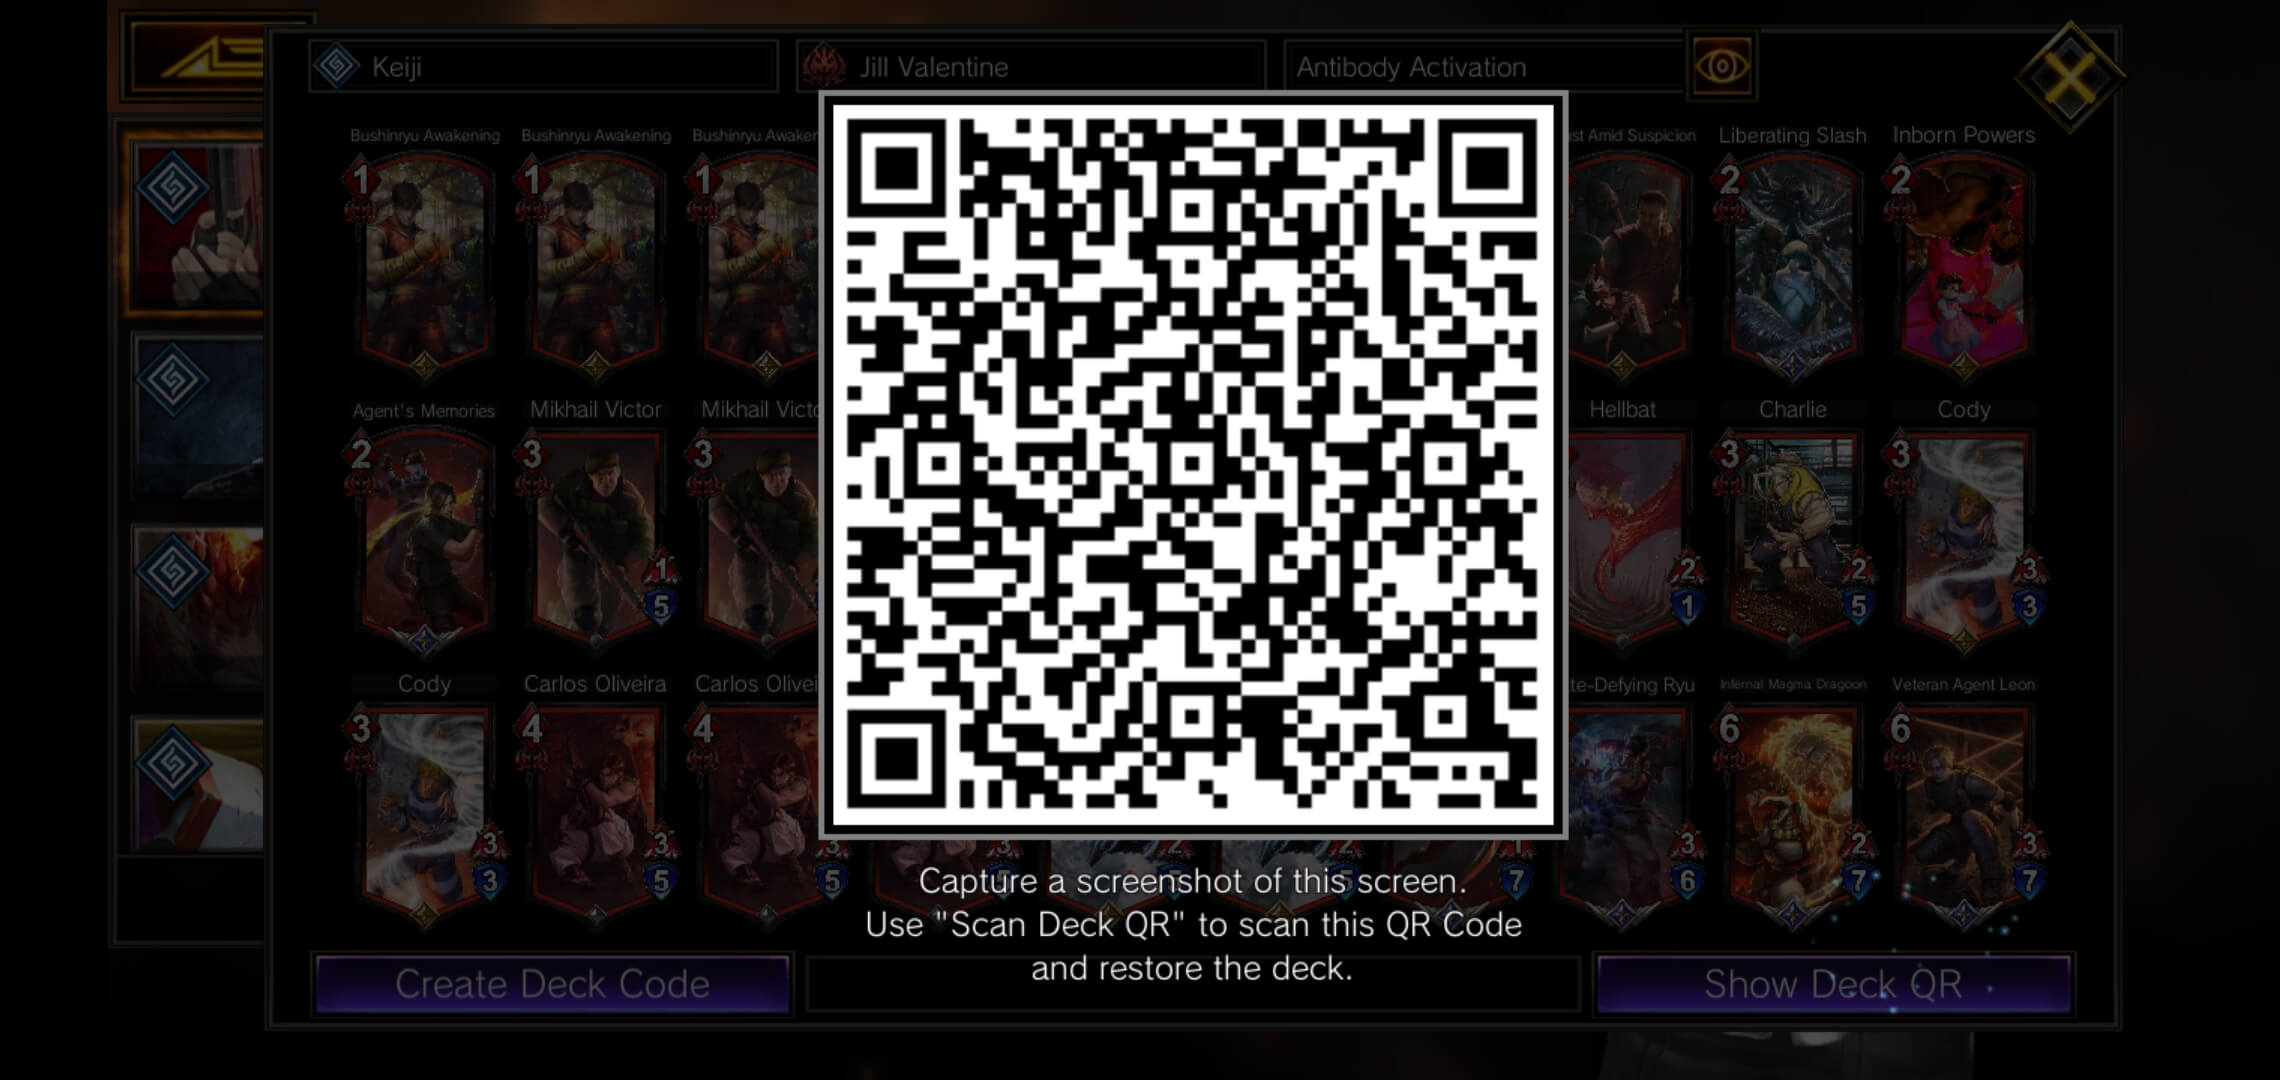
dyWWWW3v0yWWWVBhAxgHXyJwRwW5av0LWJCdRwWRRoKLWWY5a9lZLtbgHEWWI91HWtomRwWRMcpZWjg6cqWWInhUWJCjRwI5WOzLWWyRRoALWnLp7WWRj9bf7WI53Jf77WWTyW8ZLYyhuSXW3Jf2RwWRRavWdW
Goal: Destroy enemy units and protect our own units.
Jill Explore has a little bit of everything when it comes to their deck kit. Removal, strong units, buffs, and shields. Jill excels in decent board trades by powering up her Units on the board, giving them a shield, more damage, and more health. Jill’s kit is not inherently explosive but gets a lot of value from board control.
Jill’s kit has multiple combinations of plays that the player can sequence with their MP. Playing Jill requires the Jill to have matchup knowledge and timing the use of the Jill player’s cards accordingly to the matchup. Jill’s bread and butter is her Hero Art, a Jill player must use their Hero Art on a worthwhile target to be able to establish pressure against the opponent. Generally, good value plays are using [Detonate] from [Hell Bat] and [Guile], [Claire Redfield] to deal 6 damage, and [Nash] because [Nash] has large stats. This deck list does not include [Nash] but does play [Valstrax].
Opening Play
Play Explore Units as soon as possible to pressure your opponent. Try to get to 3 Explores as soon as possible
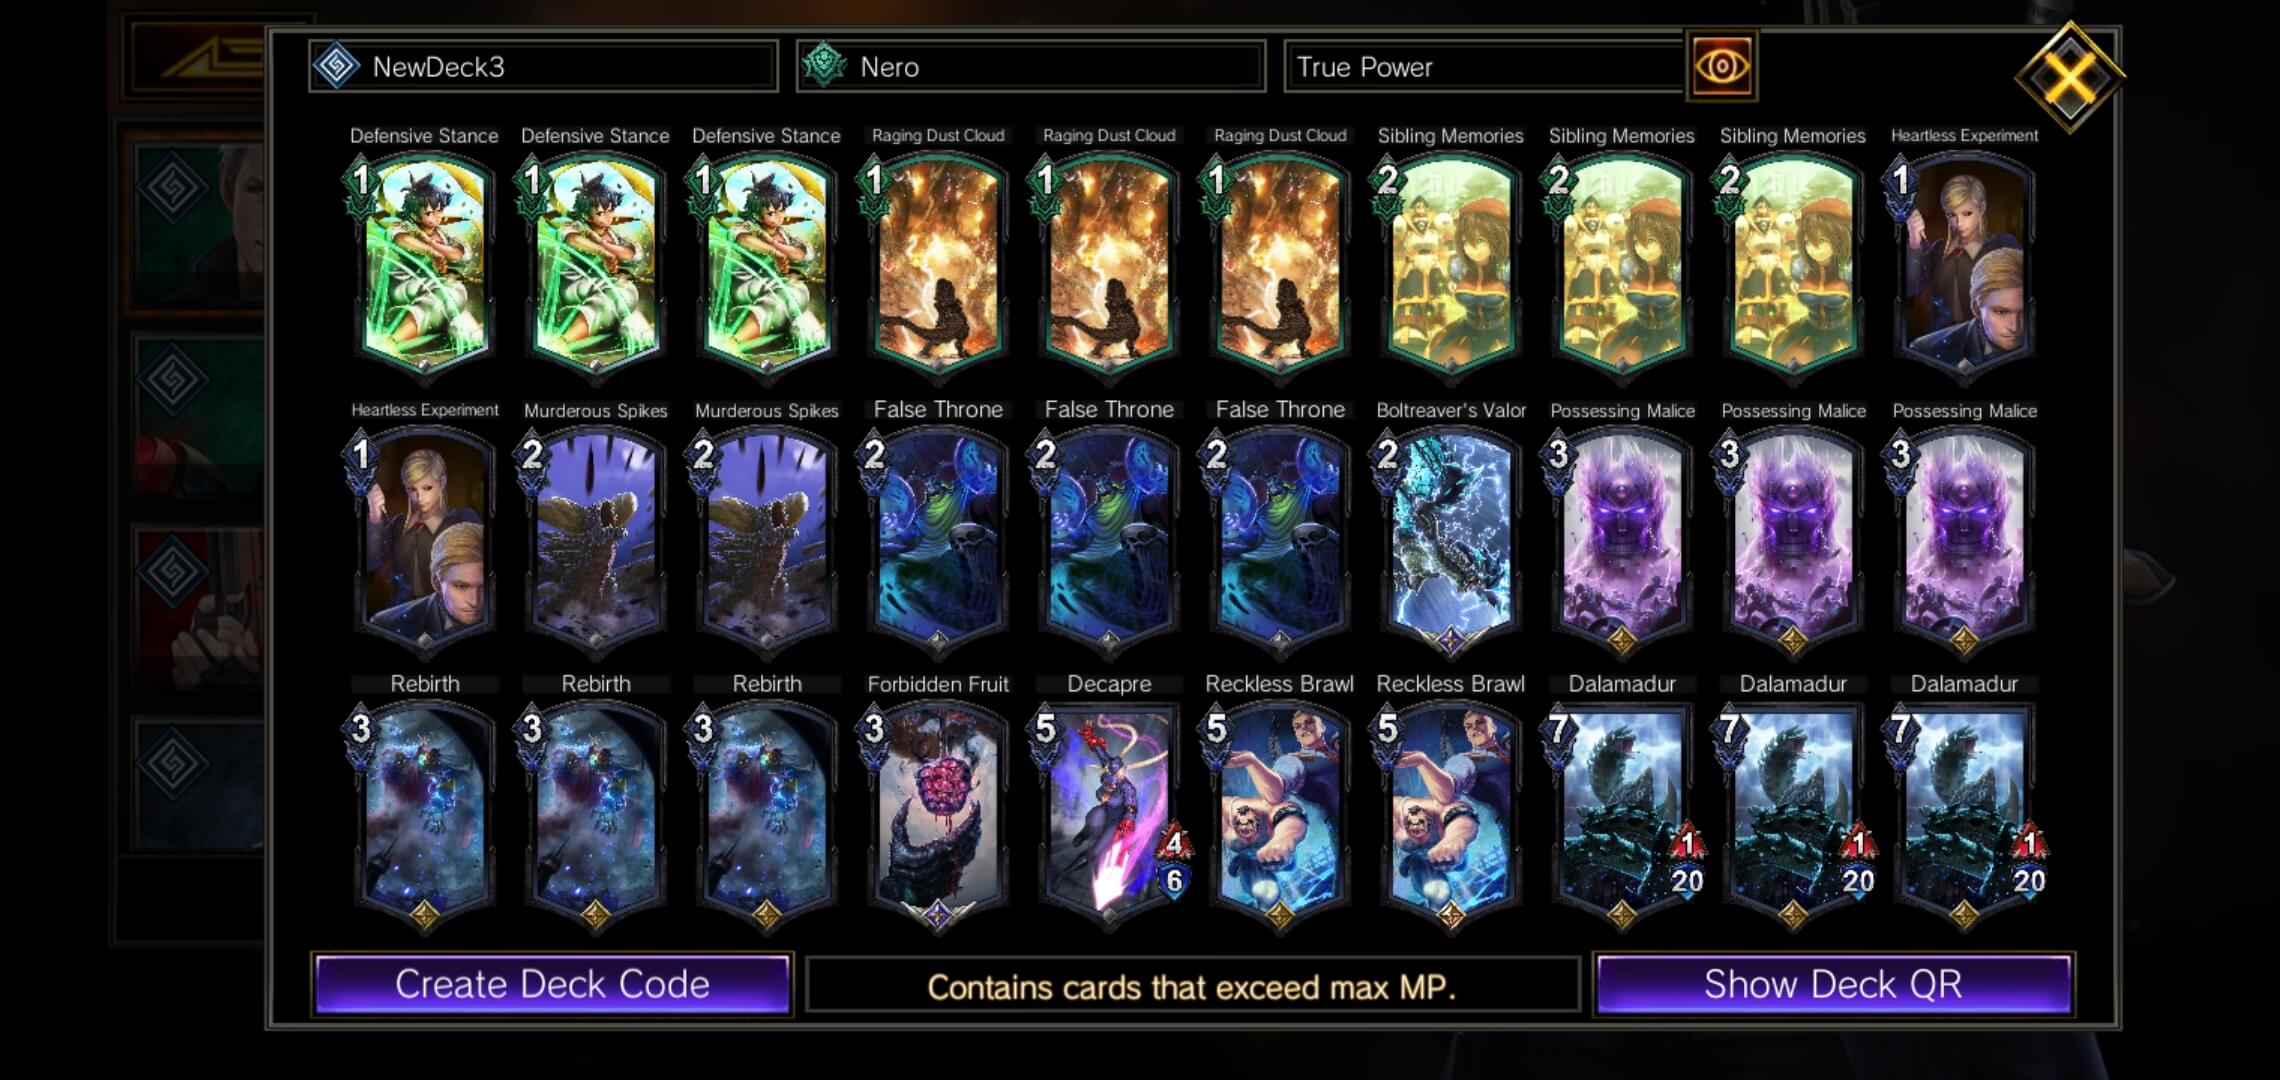
T3 Nero Dalamadur
<div id="nerod"> </div>
Hero Art: True Power
Increases the level of a friendly unit with <Growth> by 1.
Deck Type: Control
Difficulty: (2.0/5.0)
Viability: (2.5/5.0)
Strength: Board clear, interrupting the opponent.
Weakness: Run into brick hands or losing to aggressive starts.

dyWWWfCv0yWWWVQhAsIwXyJwRyJLLAKLWXtWGP5G7Wg=WIg6zAWWU7gnegKLWY4Wn9sD7WW0Lnl2JAWWgfZuIiWWvIELWJy5gUqLWW9539JZLfZIuNUWIvtLWWmWwQXWCvlfRwJ5CYeZLvl50HJU
Goal: Have Dalamadur on board as a on-command boardwipe.
Dalamadur Nero has always been a meme. With the release of [Decapre] and more options to return units from the graveyard to the field, the consistency of this combo is more viable than it was before. For awhile, players in matchmaking went through a meme phase and seeing decks like Dalamadur Nero was prominent. The way the deck functions can “rob” games (winning games unexpectedly). The goal is to have [Dalamadur] hulking on the field protecting the lane, having an on command boardwipe, and turning Dalamadur into a chipping threat mid-late game.
Opening Play
Mulligan for [False Throne], cycle for a [Rebirth] or [Reckless Brawl]
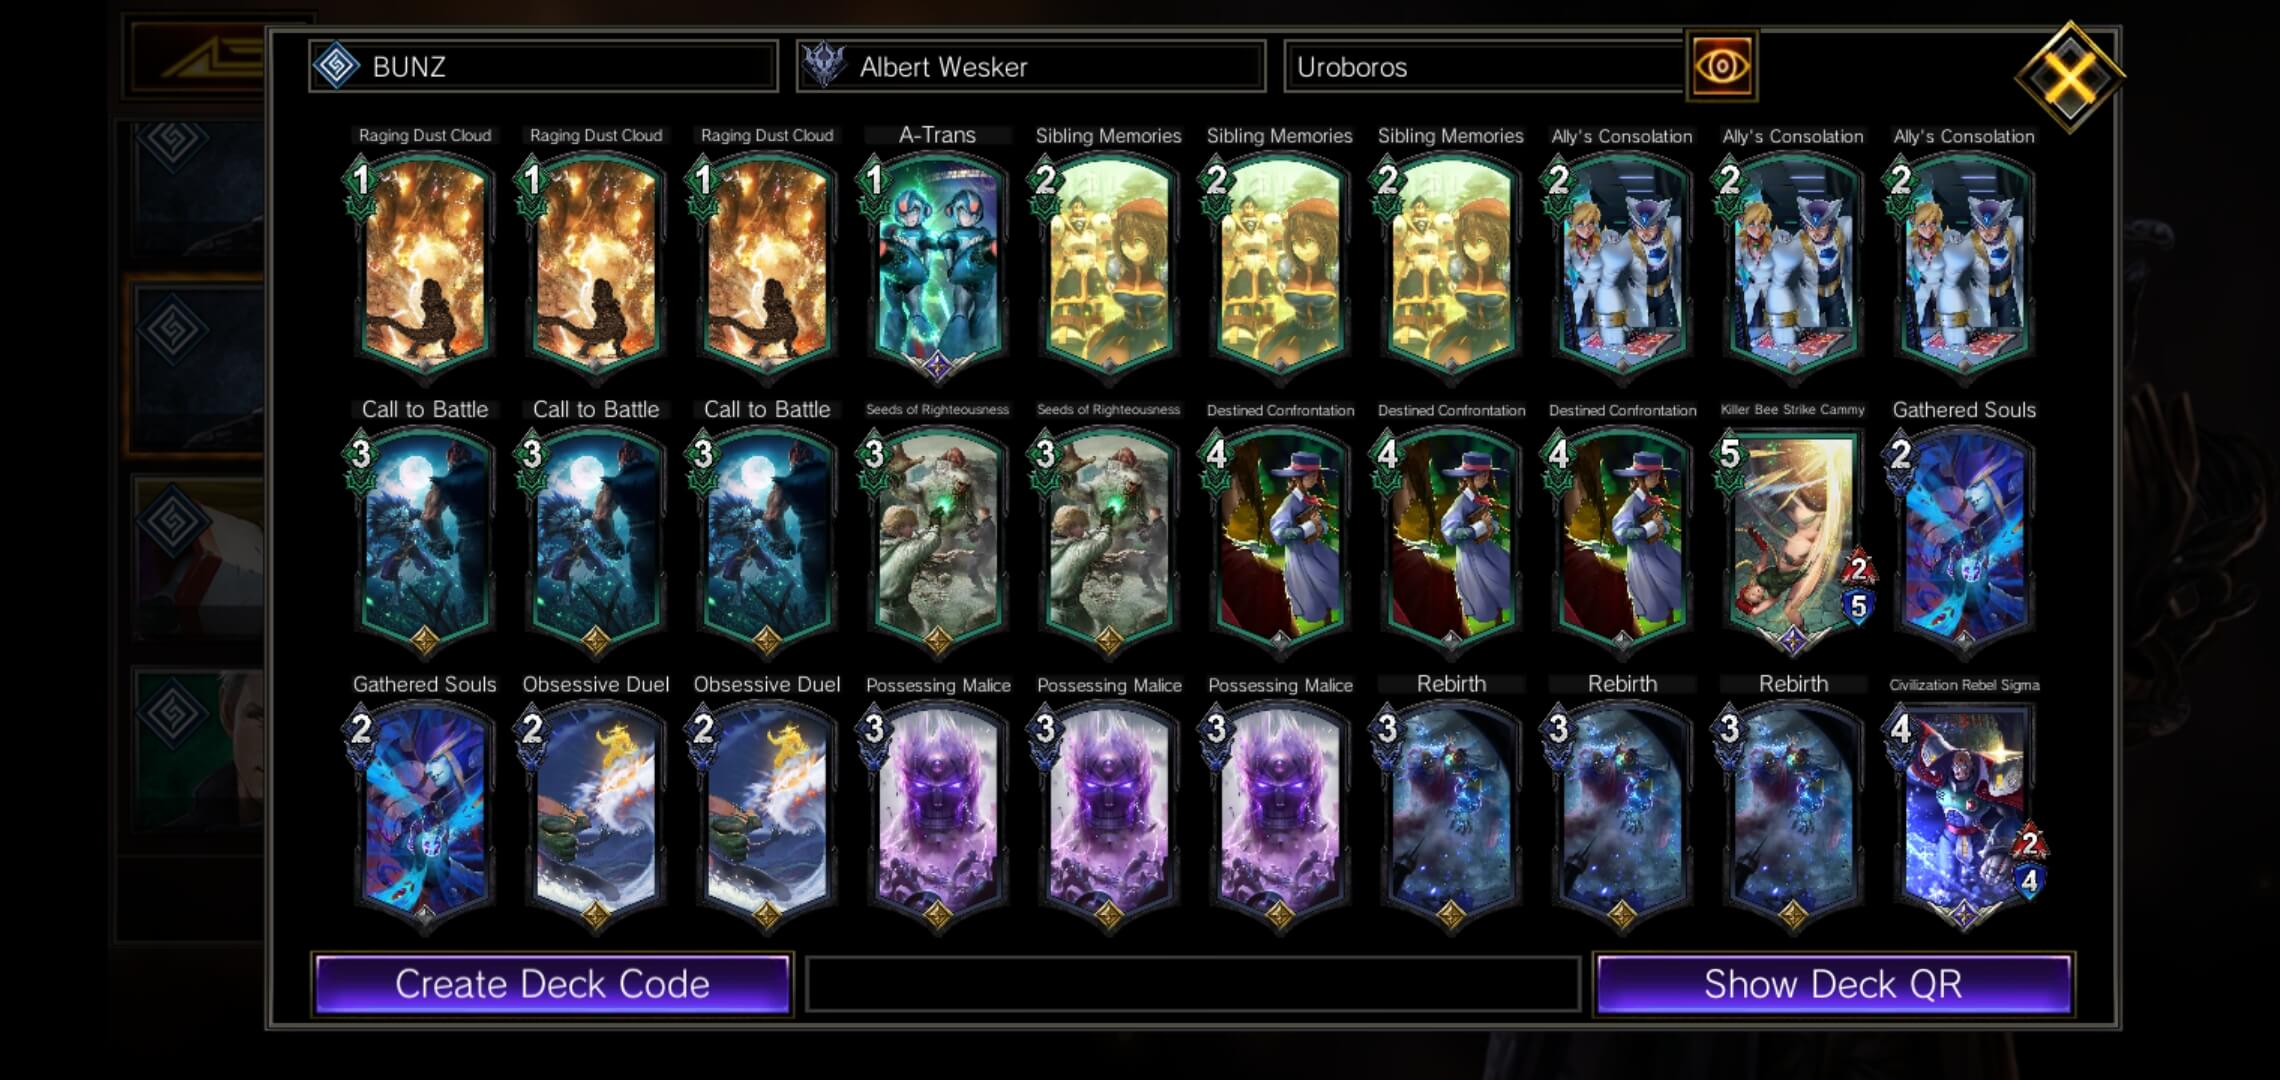
T3 Wesker Cammy Uroboros
Hero Art: Uroboros
Place the highest cost Unit from your graveyard on the field. Give that unit “Death: banish this unit.”
Deck Type: Combo/Reanimator
Difficulty: (2.0/5.0)
Viability: (3.0/5.0)
Strength: Reanimate strong units that are difficult to get rid of.
Weakness: Aggressive decks, [Brainwash] and [Blockade Strike].
dyWWWVNv0yWWWY26AzW7XyJwRwJnFlXLWXY58efZWIg6zAWWY7WRNluLWJZ5OBELWIyRCoILWW0iulUWHtWWlQeZLnl26tWWZfZuGtWWVnl2jAWWVIyPJAWWIxluRwJZW4IHLL
Goal: Get 4 memory, then find a way to play [Killer Bee Strike Cammy], continue to reanimate Cammy until you win.
This deck is very consistent and unstoppable when it gets going, however loses normally against aggro match ups, thus why the deck is not Tier 1. Cammy has two modes, Memory 4 gain +1/+1 for each Action in your hand and Memory 7 gain <Agility> and <Heavy Pierce>. These modes do stack, so once you are Memory 7 you will have a big Cammy with <Agility> and <Heavy Pierce>.
The next annoying aspect to this deck is that it can create copies of Cammy, which is why Uroboros is the Hero Art, so that we can bring back more copies of Cammy. Keep in mind that Uroboros will remove ANY target it brings back once the unit dies, meaning that you will not be able to bring back that target with other cards.
Here are the combos that bring Cammy to the field (please have 4 memory first):
- [False Throne] > [Rebirth] this is the worst option because Reanimate is a very flexible tool for mid-late game and we want to save [Rebirth] for mid-late game. We do not use this combo early game unless we have to.
- [Destined Confrontation] if your opponent has a unit on the field, you can bring a Cammy from your deck to the field in front of it.
- [Call to Battle] or [Unwavering Faith] allows you to grab Cammy from your deck into your EX Pocket. If you have [A-Trans], you can make a copy of Cammy if she is in the EX Pocket.
- [Obsessive Duel] is a tricky card to use, we play this card because Cammy clears unit with ease. Because of this, Obsessive Duel is optimally used after the opponent kills Cammy and there's an empty board spot. It's a cheap 2 MP reanimate Action. [Obsessive Duel] requires for one lane for both you and your opponent to be completely empty.
Here are cards that create copies of Cammy:
[Seeds of Righteousness] or [Golden Orb] give a unit the ability to respawn after death. Seeds requires 7 memory to activate however.
[Possessing Malice] this card will destroy your unit, send it to the grave, and replace the unit with a new copy. This makes 2 copies, one in the grave, one one on the field. Keep in mind that [Possessing Malice] can be used to reset a unit during the action phase, this will wash off any target abilities.
We added [Civilization Rebel Sigma] from a Twitch viewer's suggestion, and it's clunky but also good. Early game there's the chance that [Destined Confrontation] pulls Sigma instead of Cammy and we're sad. However, if we already have the Cammy train running, then Sigma synergizes really well the deck, allowing us to defend and cycle through the deck faster. [Destined Confrontation] gains the most value from having Sigma in the deck.
Opening Play
Because this variant has many ways to bring Cammy to the field, generally the best opening hand is one you can get to 4 memory quickly without having to burn important reanimate spells like [Rebirth]. We call this process cycling, playing cards for not a real purpose except to go through the deck and draw cards.
Author(s)

Comments


