Mission and Clear Conditions:
Mission:
Capture All nodes in the map
Clear Guide:
Team Recommendations:
- 1 RFHG 90x5 (preferably with Surehit unit)
- 1 MGSG/1RFHG 90x5
- 1 ARSMG/RFHG (See below for details)
- 2 dummies
- 2 HOCs
- AT4/BGM recommended
- BGM/AGS can also be used, though with a higher repair bill
Clear Steps
How you tackle this map is going to depend on your personal abilities when kiting and what Echelons you can field, but you'll need to move reasonably quick to capture every node within the 9 turn limit. The enemies are on the Expand AI, meaning they try and cover as much of the map in red as they can.
HOCs are mandatory, as the Uhlans, and Patroller has 100% shields. The Doppelsolders have 50% and the Gladiators start with 33% shielding.

You'll also want a team with Taunt/Twins to deal with max shield Uhlans and the Strider. A Taunt is preferable since:
- No targeting RNG on Strider
- No targeting RNG against Rodeos, which means you don't risk your RFs losing HP
- More HP to eat Gunner shots, since if one Twin dies, so does the other
- Can also tank efficiently 2 Uhlan enemy comp
- Slightly better aura than Twins.
If you wish to field MGSG team to clear bottom left of the map as Ceia does on his guide, remember it needs to be strong enough to kill Gundams before they nade your team.
To clear bottom right of the map, it's advisable to field a strong RFHG team. If needed, consider fielding MP5 Mod or an SG (preferably DP-12 because RF tiles or SAT8 for early shield) to help tank Gunners.
General Tips
I'll see about making a proper image-based guide for this map after launch on EN, but for now I think I'm going to stick to something similar to Garden of Old EX from GSG, and just go over some quick information and such here.

First things first, you have a lot more AP than it looks like you should, as you probably noticed in Critical Angle EX. MICA has cheated the system by stacking closed Helipads to give us many more AP than we should actually have. Use this to your advantage, in terms of positioning HOCS to provide fire support, and also to set up surround captures.

Abuse surround captures, and always try to end your turn by taking over new nodes. There are 63 nodes on the map, and with only 9 turns, you can't just capture them one at a time, so make sure to surround capture when possible. Enemies don't respawn, so don't worry to much about that!

Speaking of, don't be afraid of spamming repairs if you need to. There are no points on the line, so you can be as liberal as needed with repairing your Echelons. Priority should be given to the Uhlans near the Heavy Heliport and the Patroller threatening your Command Post, followed by the Uhlan threatening the upper Heliport.


Ahahahah....maybe?
Anyway, there isn't that much more to say about this map, beyond attempt it yourself a few times and see what works. It is a reasonably enjoyable challenge, with some proper fights involved, to at least wet the pallets of the veteran players, although without much following payoff.

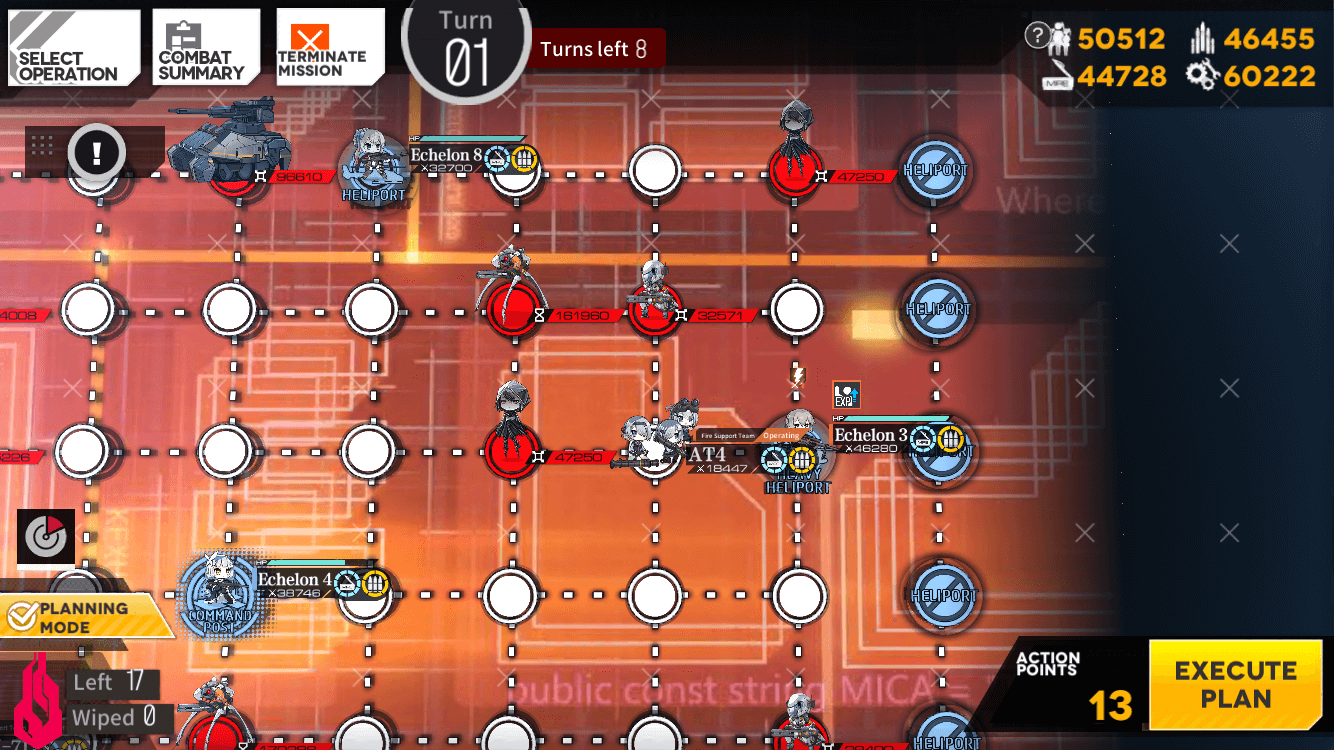
Turn 1
Team Choices
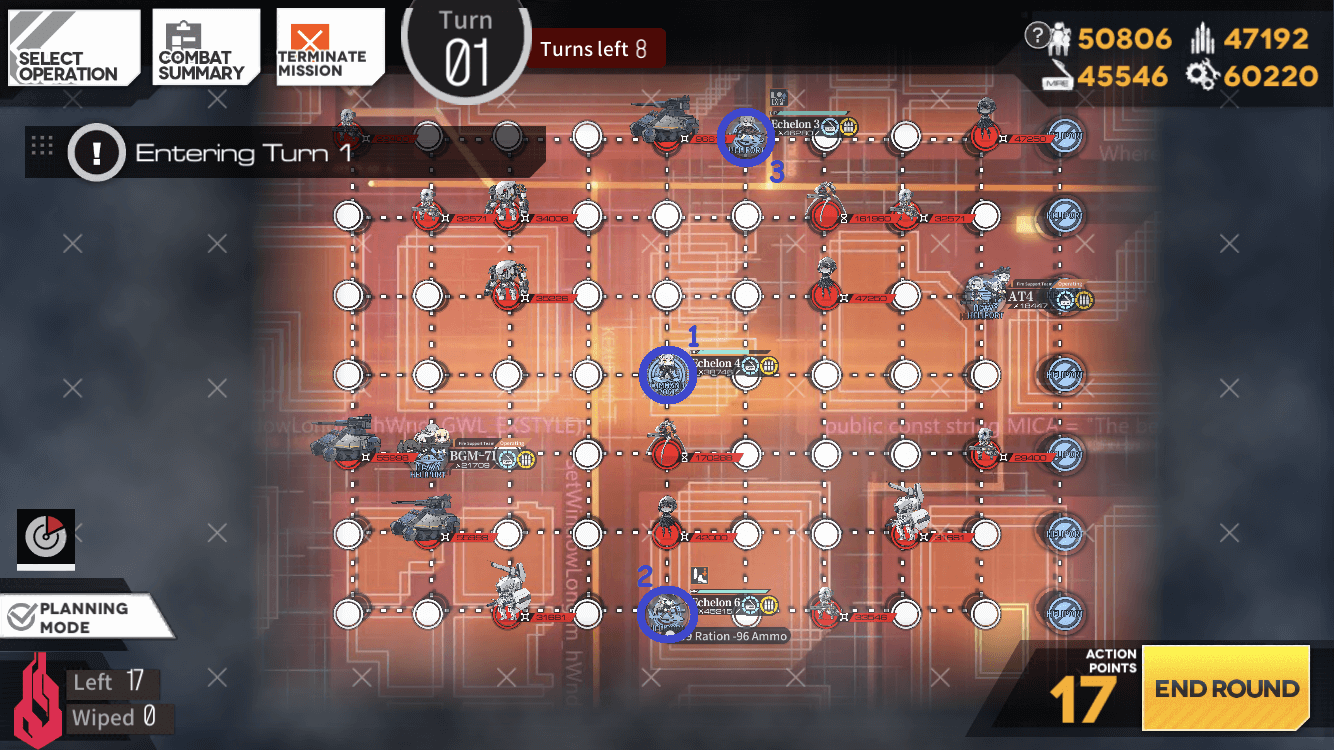
Before we start the map, let's run through what you'll be fielding at the start:
- BGM and AT-4 (or AGS if AT-4 is unavailable. Do note that AT-4 performs much better because Uhlans have max shield)
- Team 1 can be a dummy team
- Team 2 can either be an ARSMG, or a strong RFHG, depending on your armory. If you don't have the armory to field a strong MGSG team, or field 3 strong RFHG teams, opt to make Team 2 as an ARSMG which will only fight an Abandoned Isomer comp. If you can make Team 2 a strong RFHG that can clear bottom right of the map without HOC support those are some options for it:
- MP5 Mod as tank
- DP-12 as tank
- SAT8 as tank
- KSVK Mod + Beach (Skill 2 makes short work on those nodes)
- Hanyang (Type 88) Mod can also be helpful due to her pierce
- Taunt/Twins +HS2000 (insurance against Gunners/Doppels). Do note that you should only consider either of those fairies if you have a Taunt/Twins to spare for Strider team.
- Grape can be useful, as always.
- Rico, with her early nuke, and tiles that allow CD reduction of P22 on Position 7 is also MVP here.
- Team 3 is also a dummy
- Teams 4 and 5 will be fielded later, and detailed when fielded
- Note that team 4 can perform Team 2's actions on Turn 2. If you cant make a 3rd strong RFHG or MGSG to clear bottom left of the map, build this team with Team 2's options in mind.
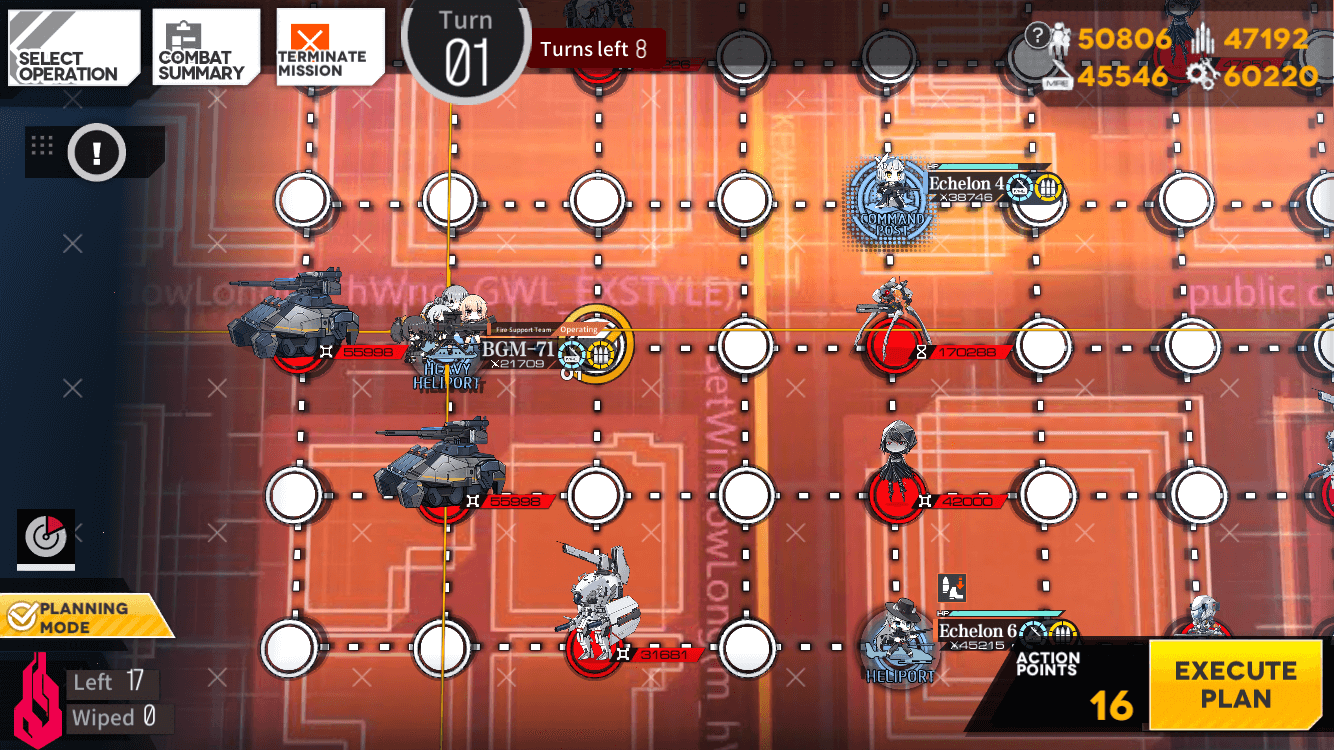
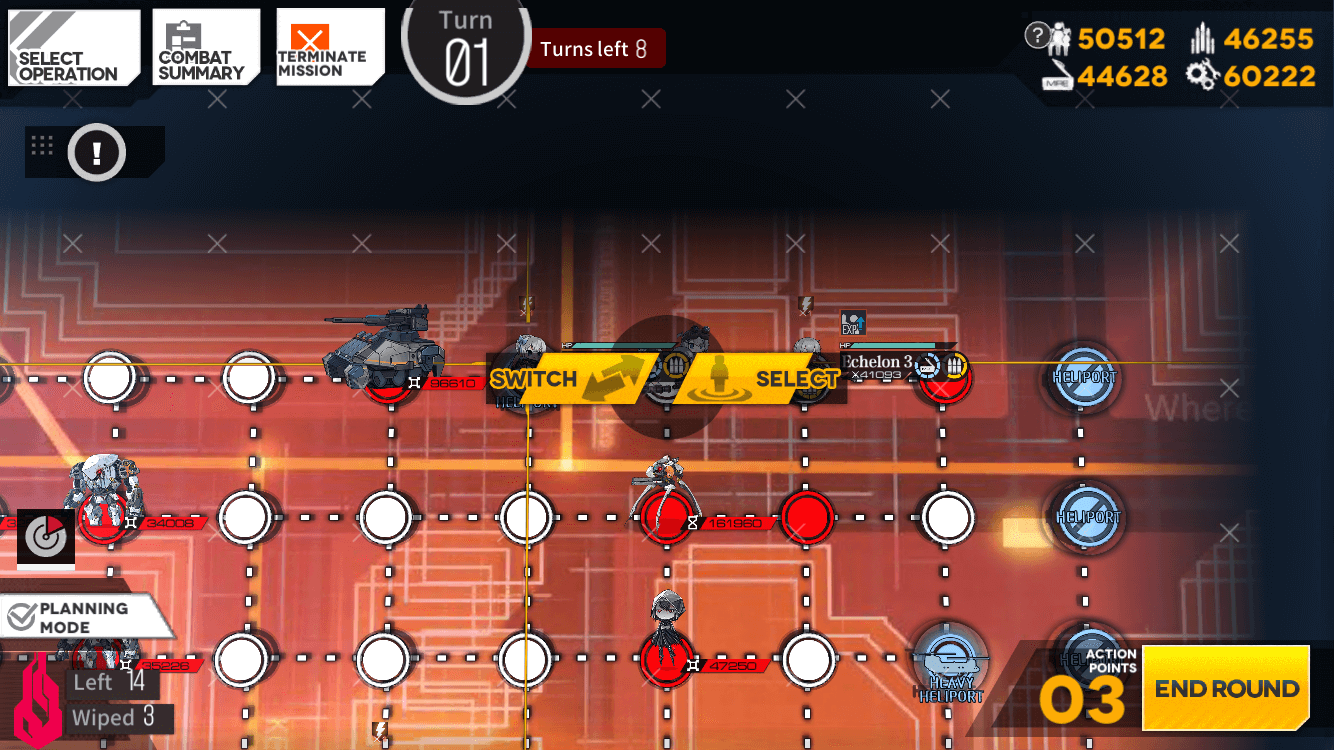
Move BGM to the right
Spawn Team 4
Team 4 can either be MGSG or RFHG. However, note the following:
- It'll fight two enemy comps with 1 Uhlan and Strelets
- It'll fight one comp with Gundams
Those things considered, if you opt to field an MGSG, using SAT8 is advisable to minimize repairs, and it needs to be strong enough to kill the Uhlan before it gets a chance to ram forward.
It also needs to kill the two Gundams before having to reload, otherwise your team will get naded by the second Gundam.
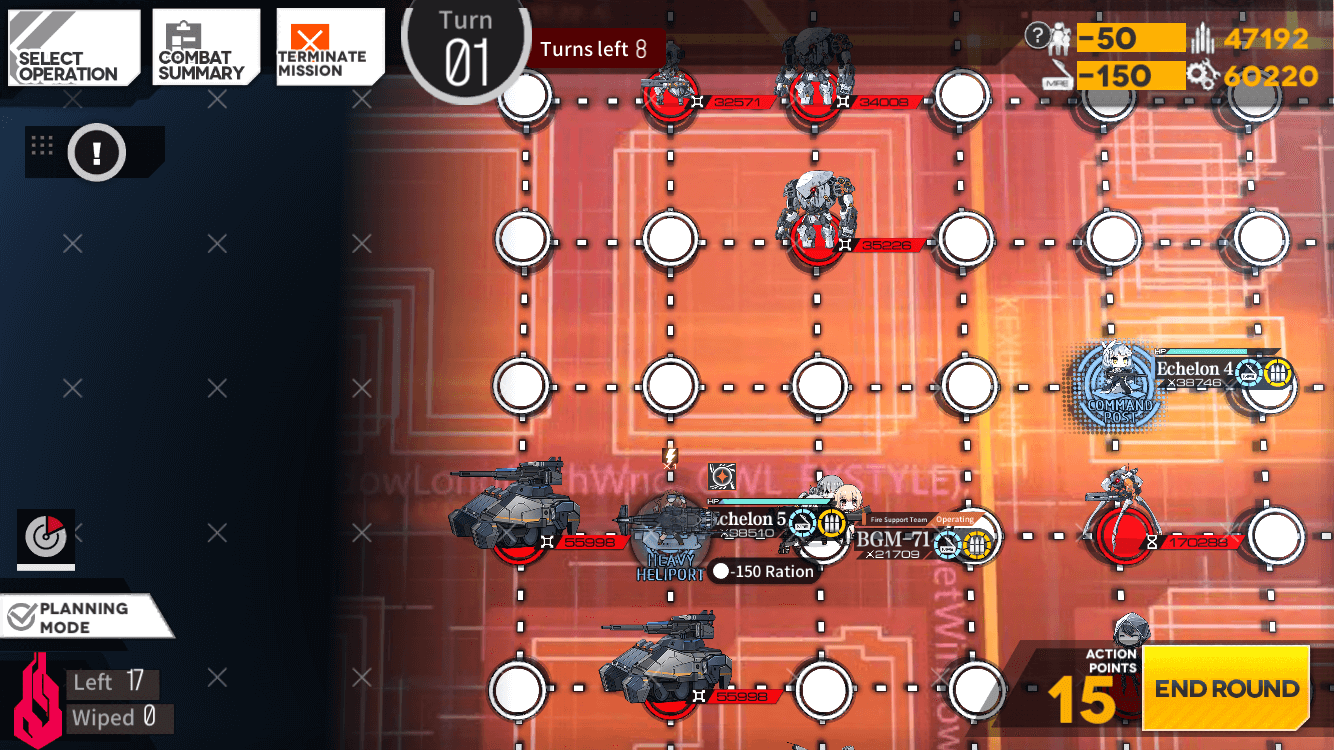
Move BGM to the right

Move AT-4 to the left.
Spawn Team 5
Team 5 is the most restrictive team in terms of DPS check and fairies/units fielded, as it needs to kill Isomers, Uhlans, Rodeos and Striders. Note the following:
- A Taunt is highly preferable, since it can aggro the Rodeos and Strider while leaving your RFs safe. It can also soak up the Gunners shots for longer than Twins.
- Twins can work here, but you'll be taking damage on your RFs. A strategy to avoid that would be to leave your RFs in the middle row when facing the Rodeo comps and either retreating your HGs or pray Rodeos target only one Twin and move away from the row getting lasered.
- Using an SG here can work If you know how to kite the Uhlans, and especially kite the Strider when it enters pierce mode.
- Since it is a day map, M200 is not a strict requirement for Uhlans. Do note that she still is MVP against Strider. NTW-20 Mod is also a good option
- Deagle can also help against Strider because of her passive skill. However, remember to move the RF on position 4 to position 8 or 2 as soon as the battle starts if you're using a Taunt/SG on 6.
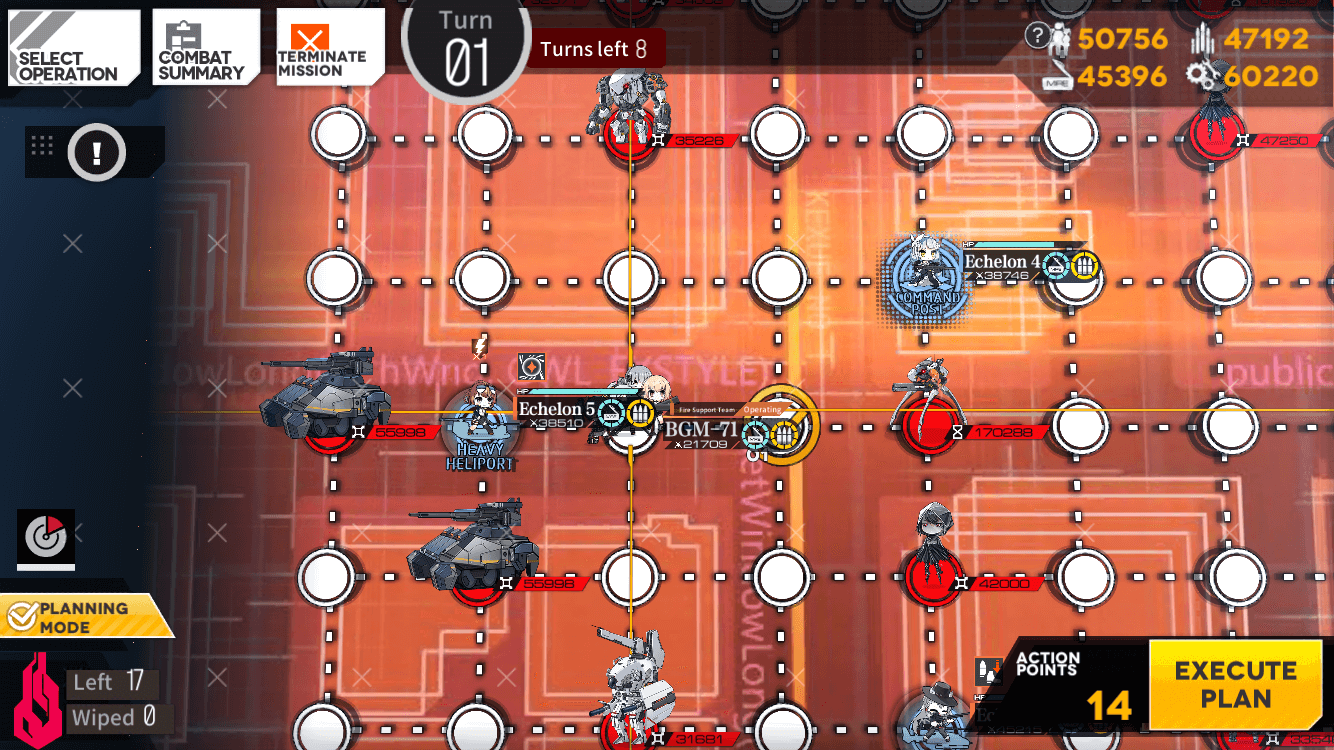
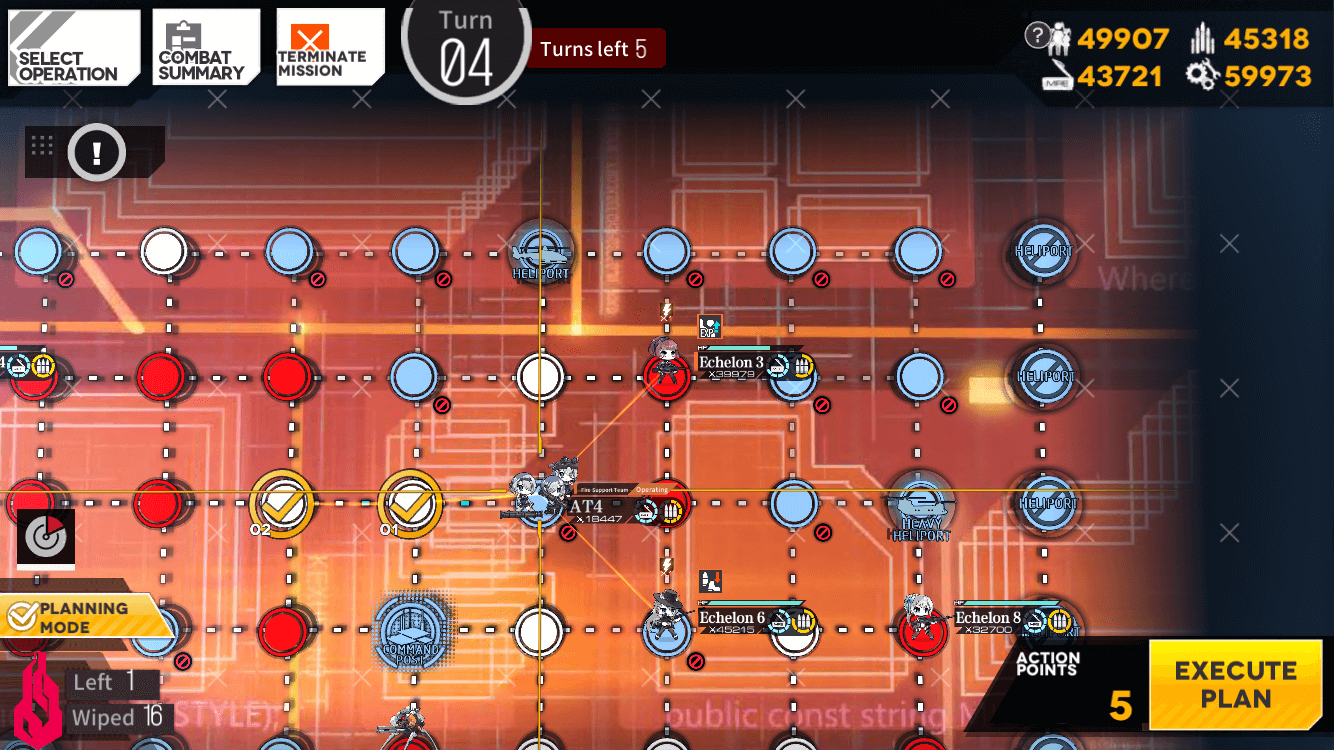
Move RF team up
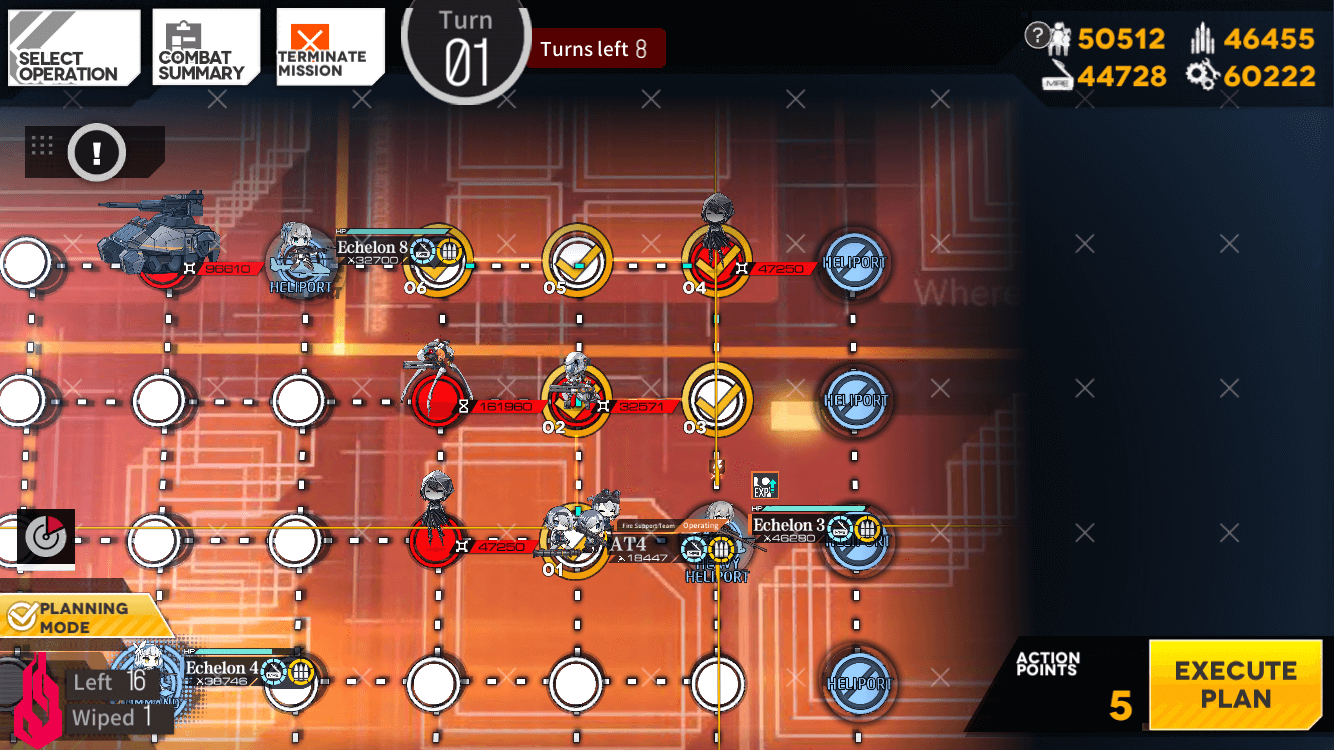
Swap AT-4 and Echelon, move to engage Gunner enemy, then move to engange Isomer, and finally park beside the dummy
Move AT-4 to beside the heliport. Remember to leave the Uhlan within it's range.
Station AT-4 right of the Heliport to provide HOC support. Team 5 ressuplies at the Heliport
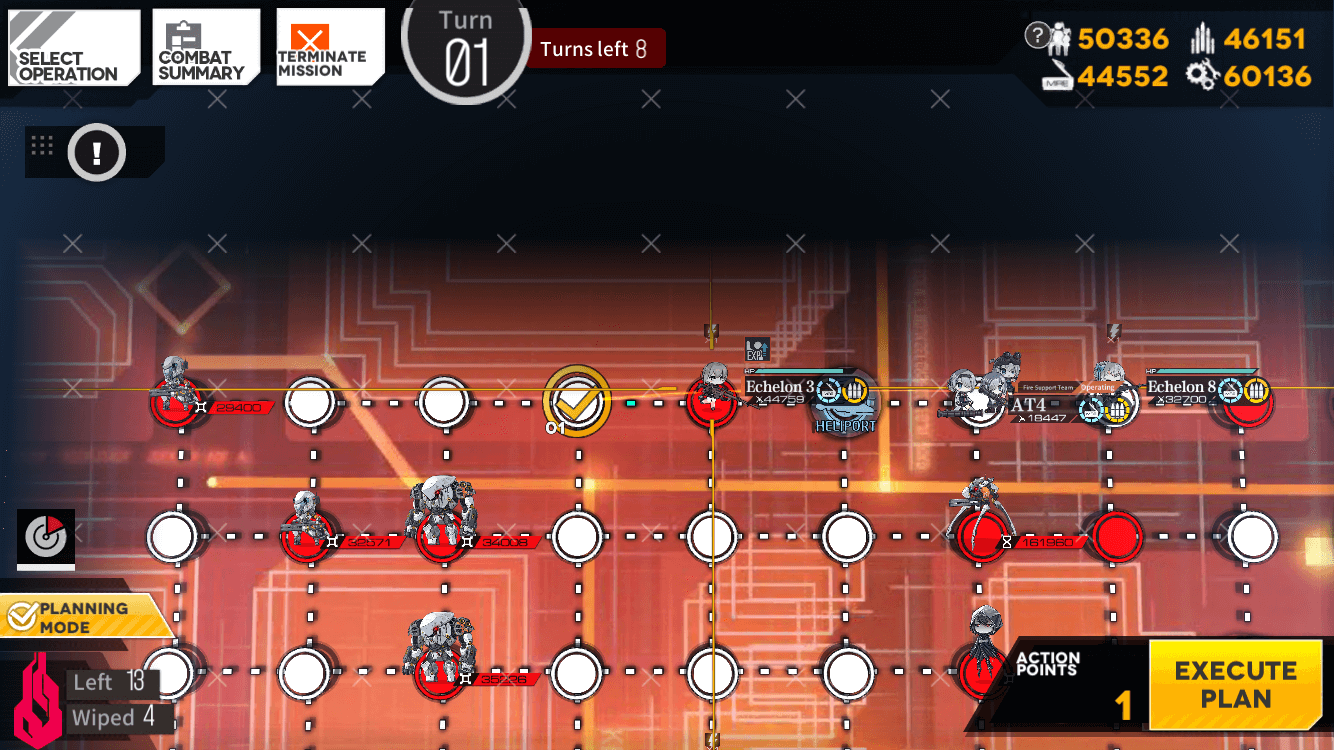
Engage Uhlan then move to the left

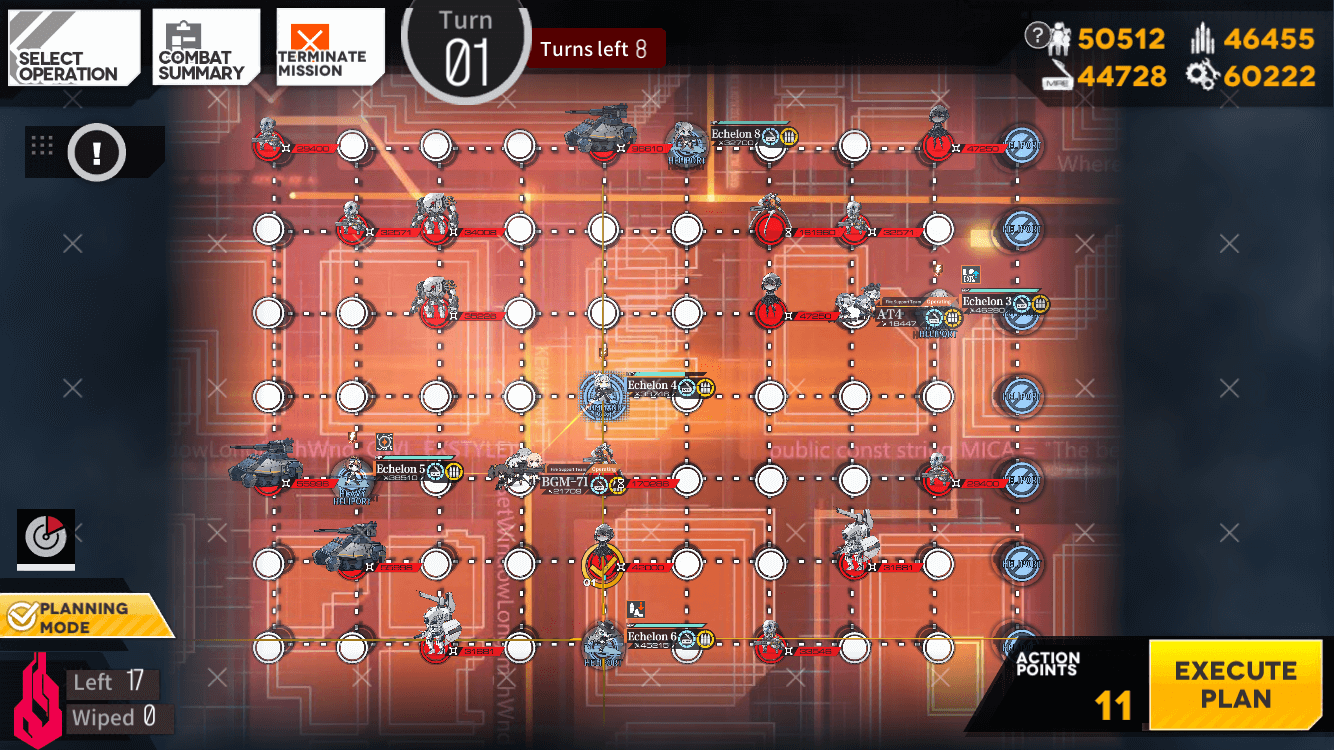
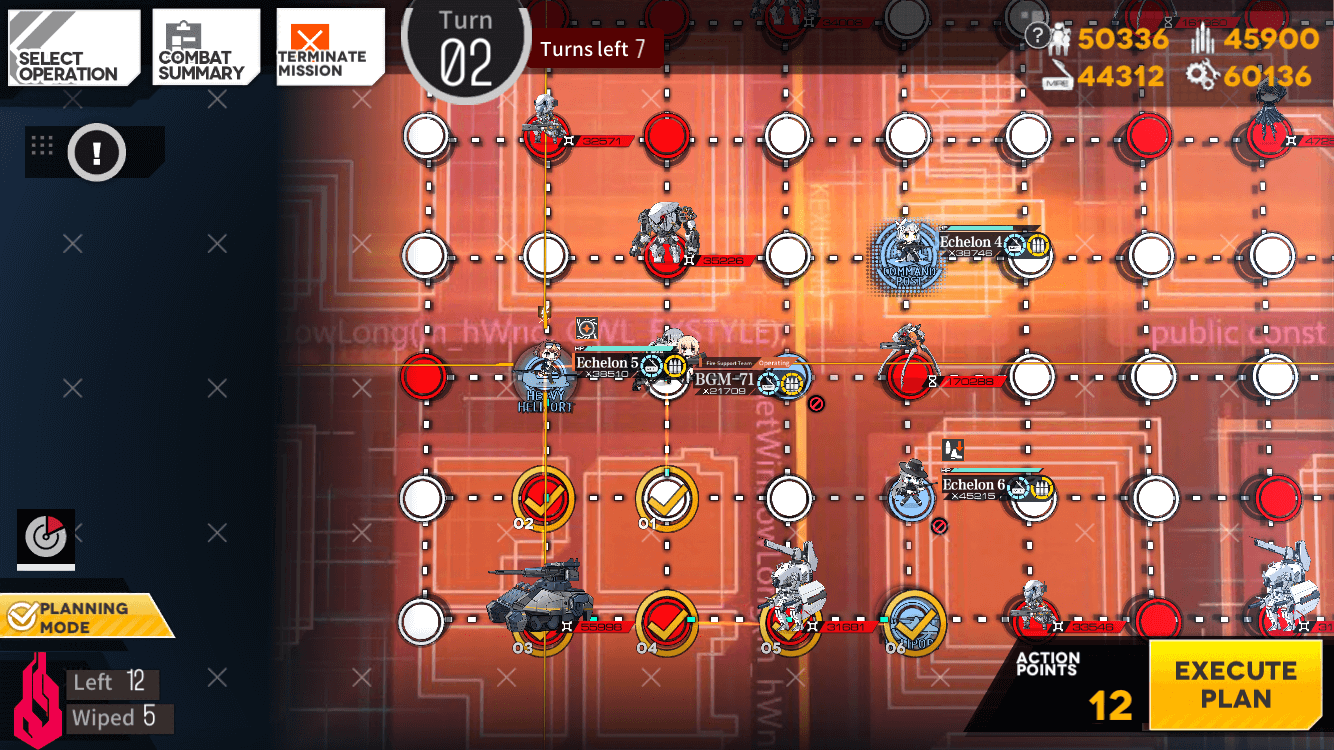
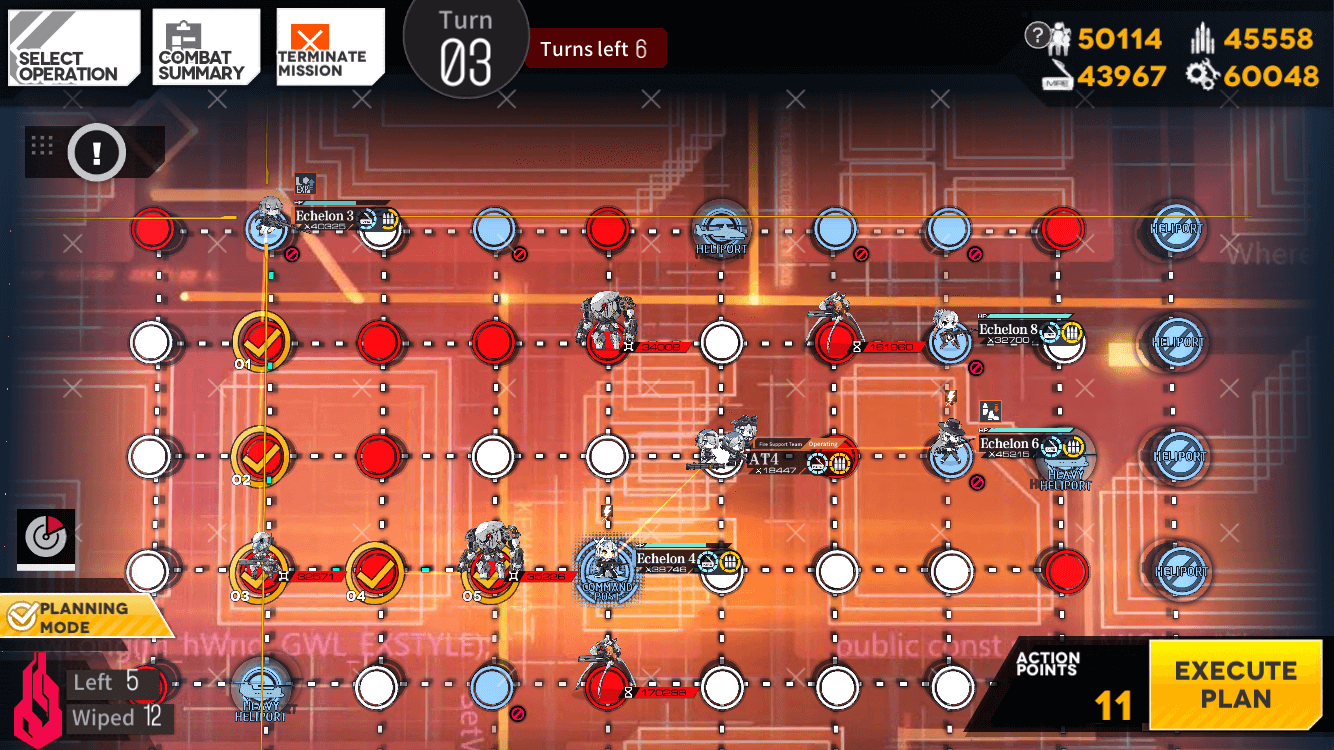
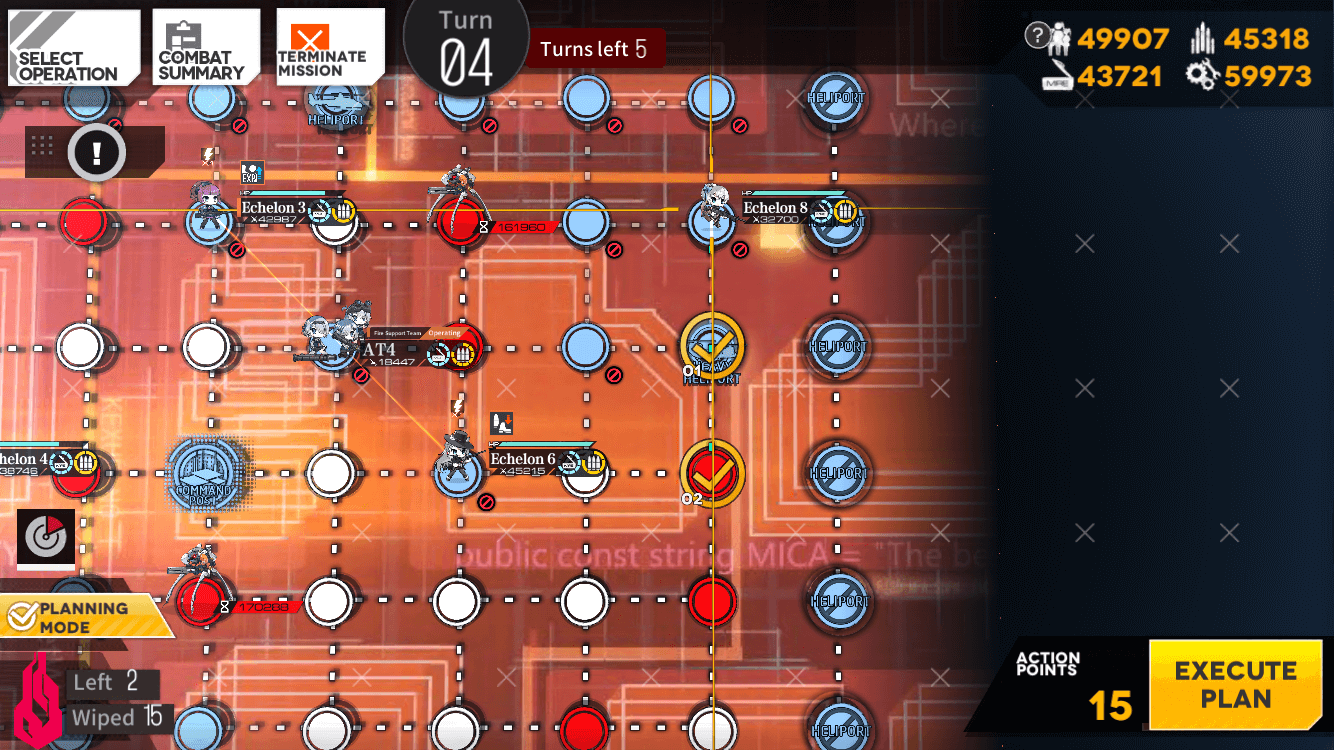
Your end turn should look like this. Note that Team 1 (Dummy) hasn't moved, Team 4 is on the heliport it spawned, and Team 3 (second Dummy) is beside AT-4. Don't worry about the Striders, it won't attack your HOC on top right, nor it'll attack your dummy on bottom half of the map
Turn 2
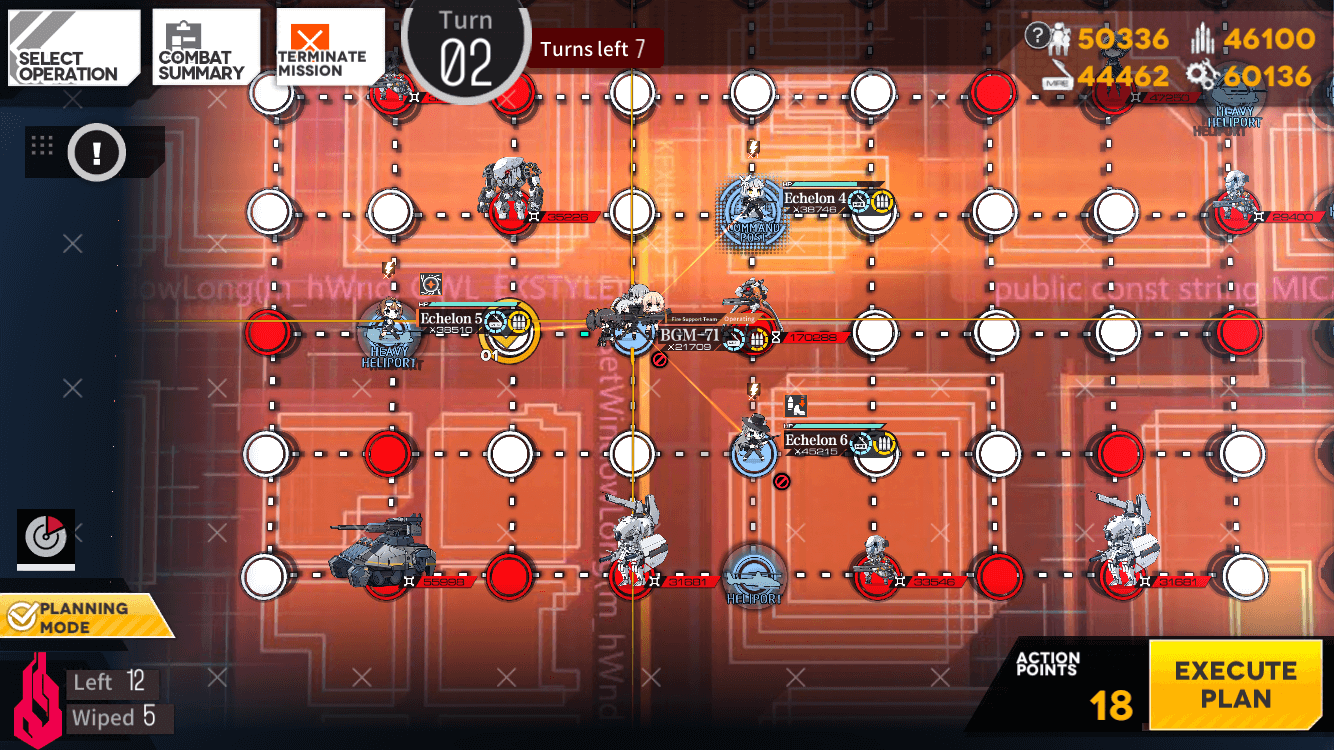
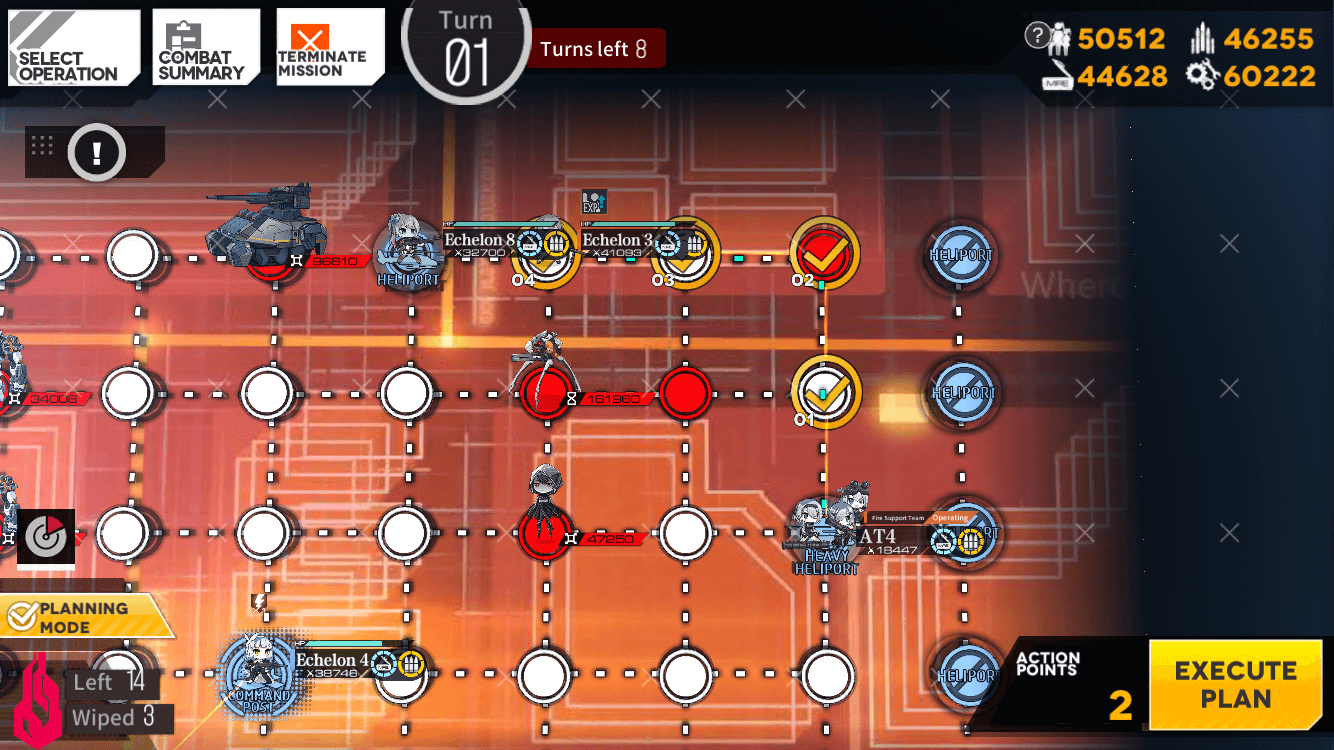
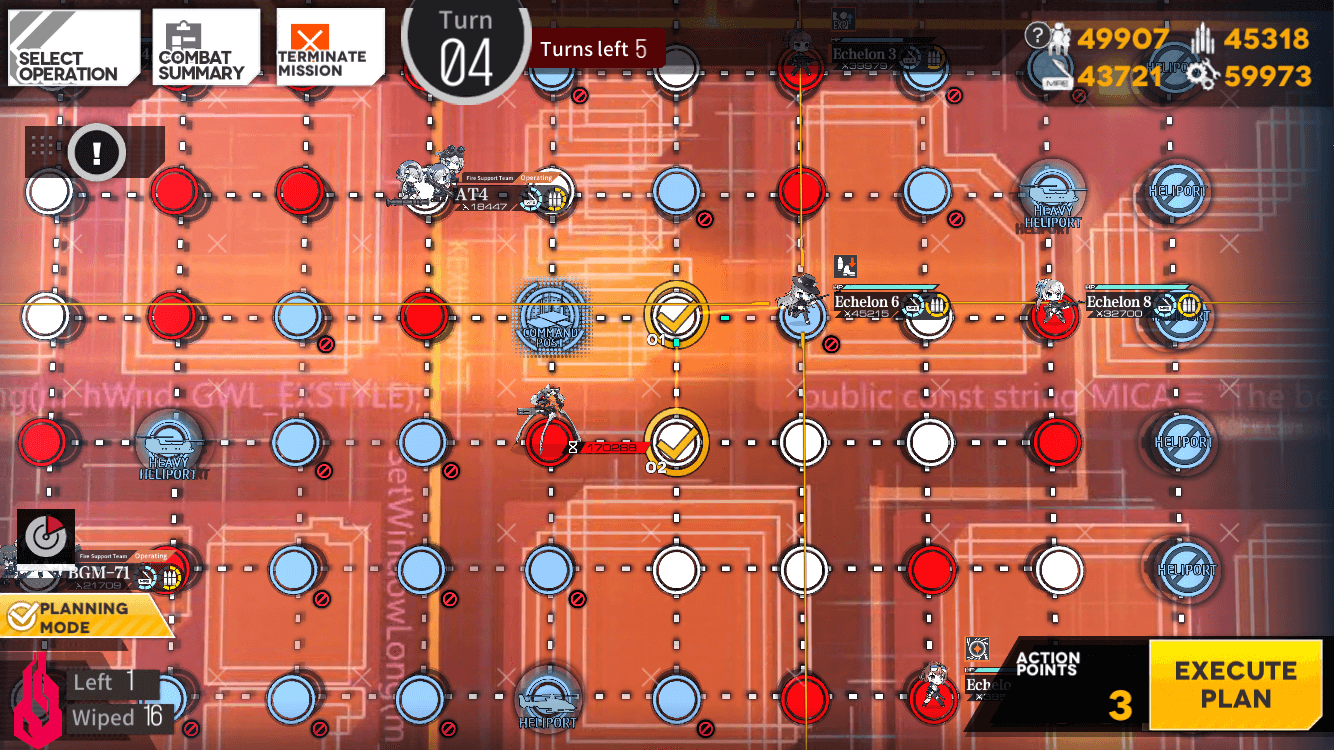
Once the enemy turn is over, and Turn 2 starts, ressuply and repair (if needed) Team 4, then move HOC to the left

Ressuply HOC
Plan to move HOC down (you can also choose to just move the HOC)
Plan move Team 4 to left of the Heliport

Move Team 2 down

With Team 2/Team 4 starting on Heliport, move to engage Gunner comp, Gundam comp, then Gunner comp below top right Heliport. Then park at the Heliport and ressuply and repair (if needed)

Move to right to engage Isomer comp
Move up

Move team 5 to engage Gunner comp on the left
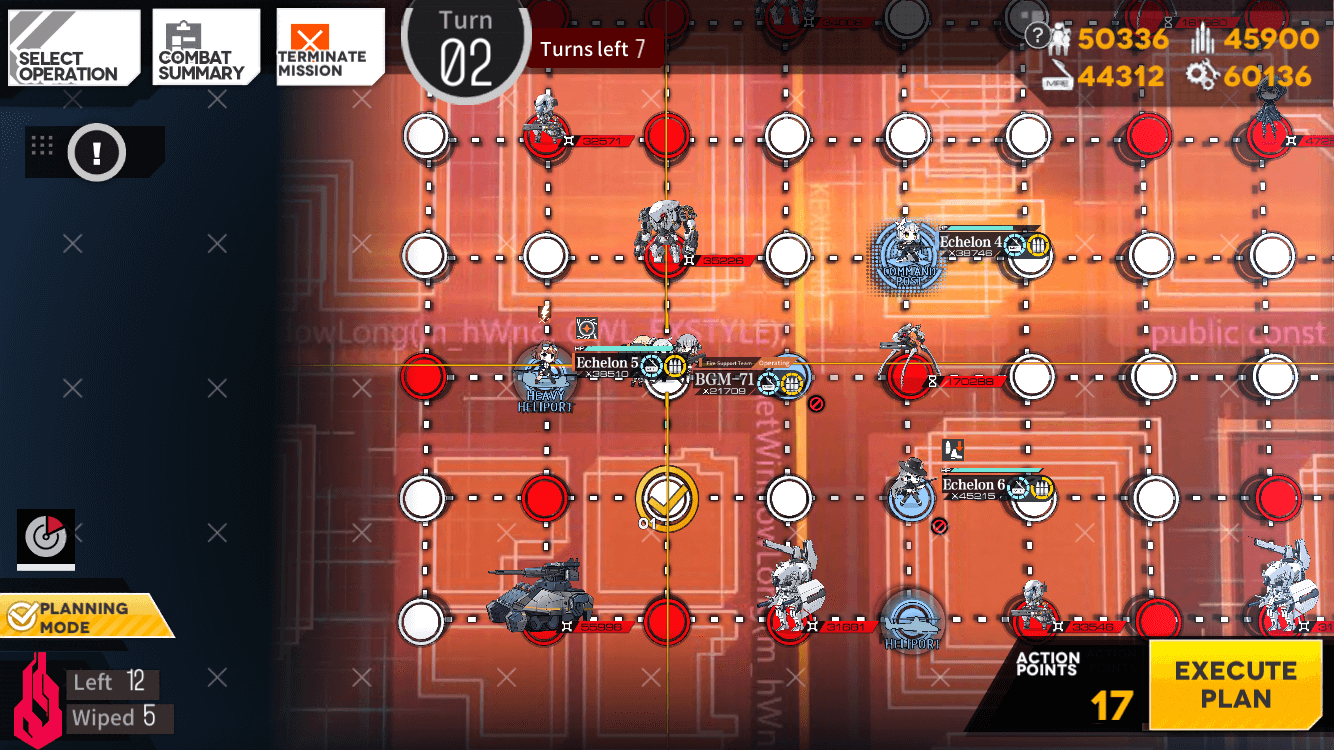
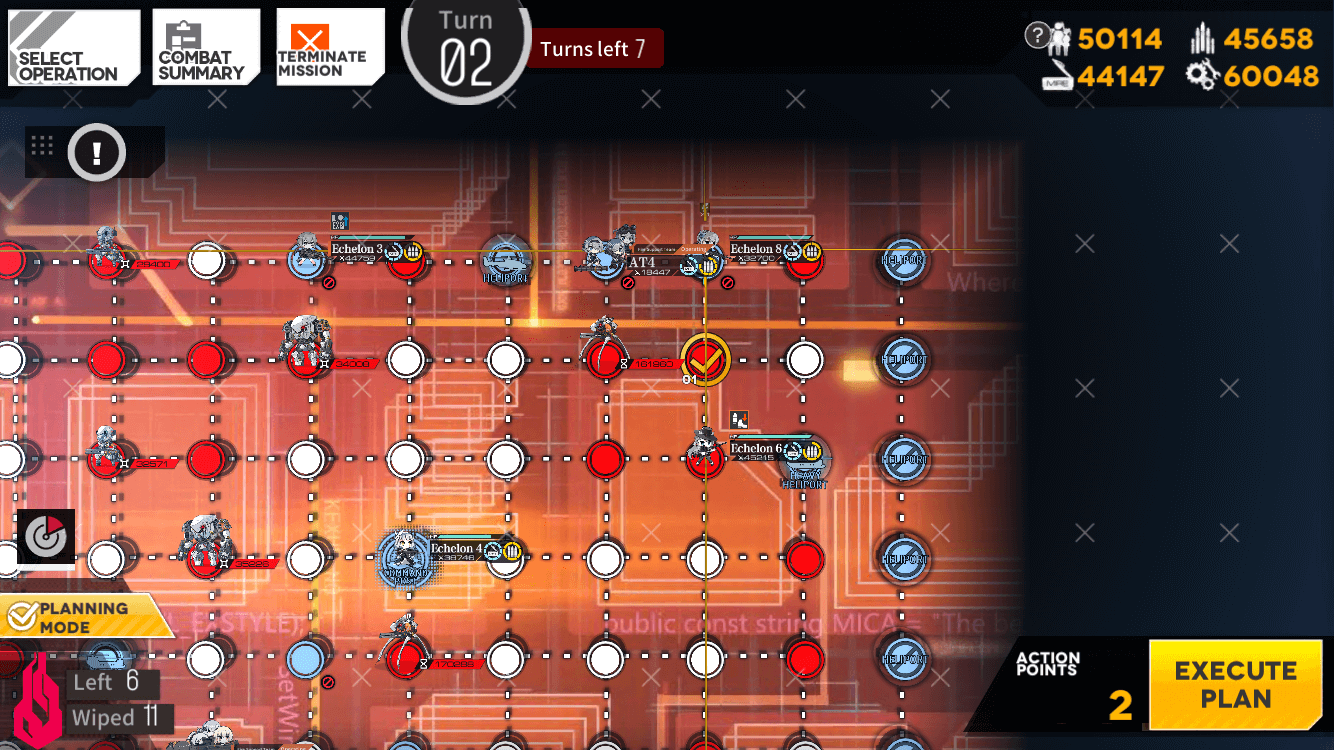
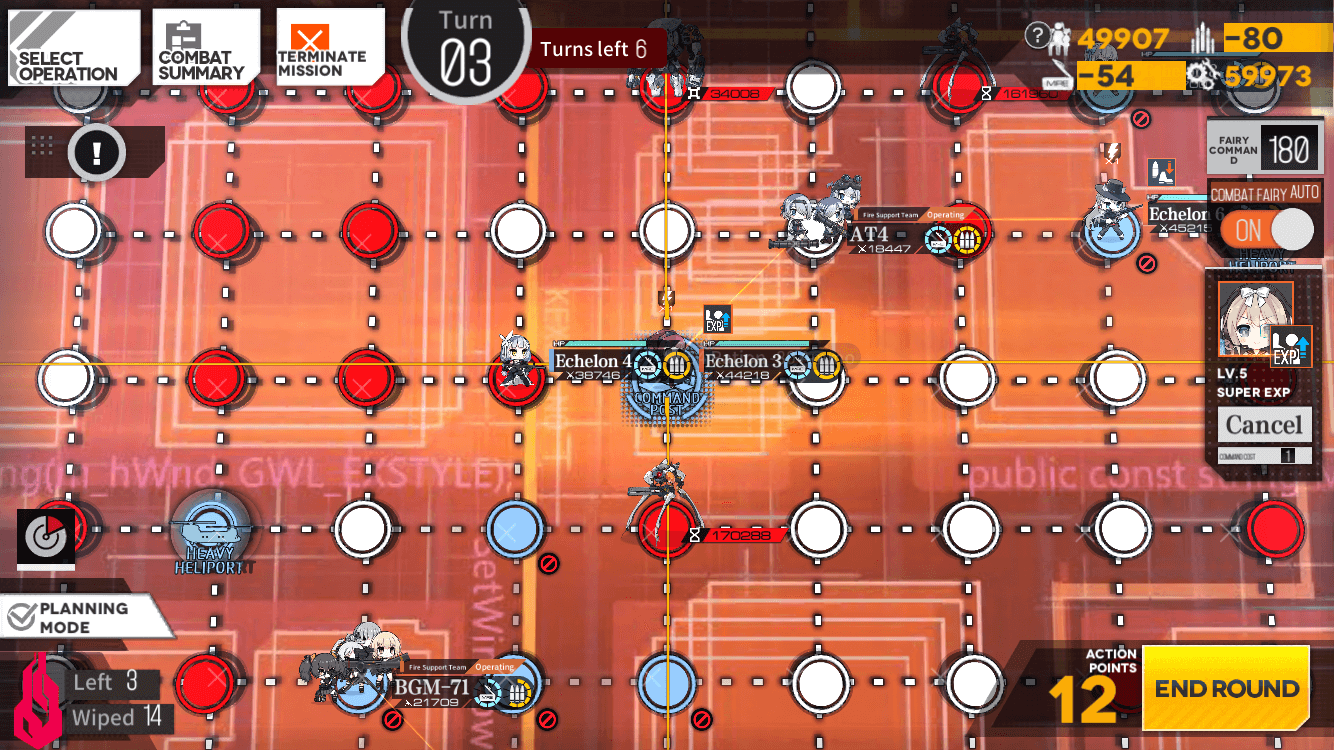
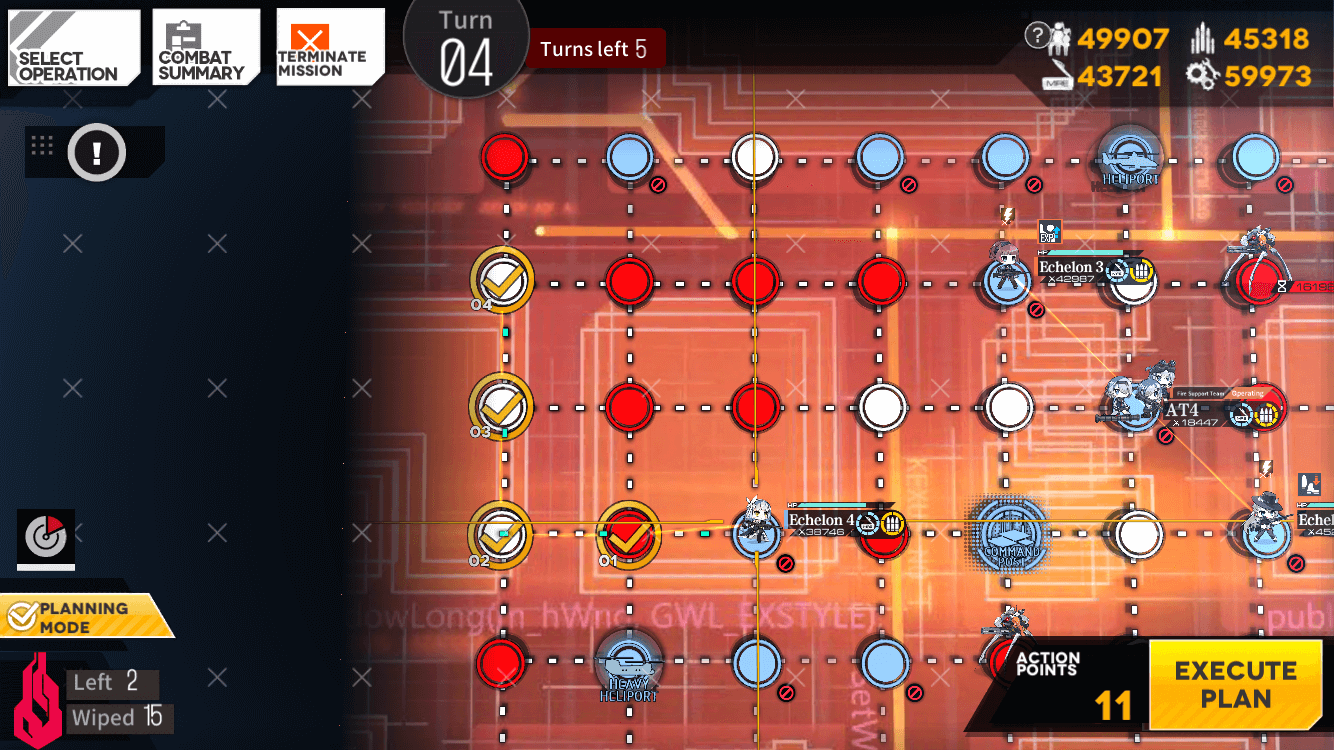
The end of your Turn 2 should look like this
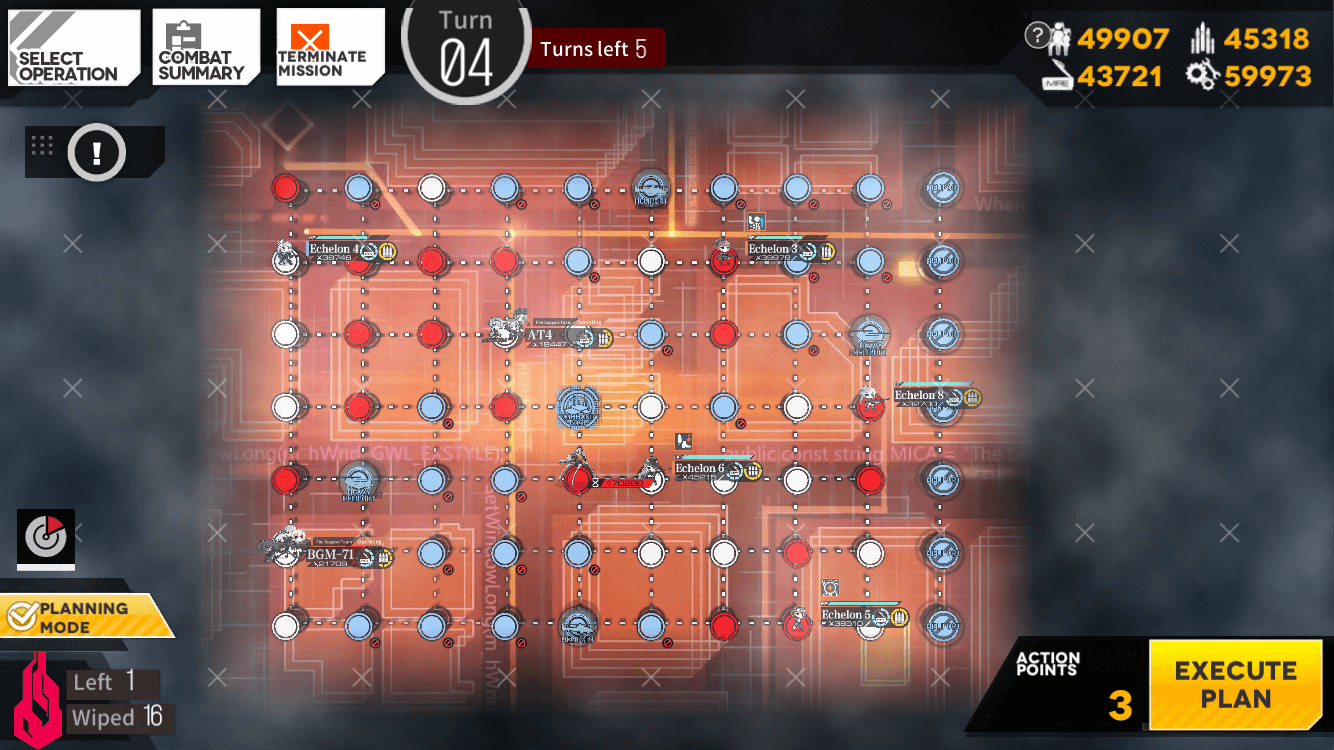
Turn 3
Move HOC to the left and ressuply

Once ressuplied, move HOC down 2 nodes
Move Team 5 to kill Gunner comp then Gladiator comp.
If team 5 is severely damaged, you can choose to retreat it then spawn it on Heavy Heliport right below Gunner comp.
Swap with Dummy and ressuply and repair (if needed)
Move team up to engage Gladi comp

Plan to move Dummy to the left (top team)

Move Team 2/4 to the left then down
Move first dummy to the left

Move HOC to the left then down. Then move the Echelon to right side of Heliport

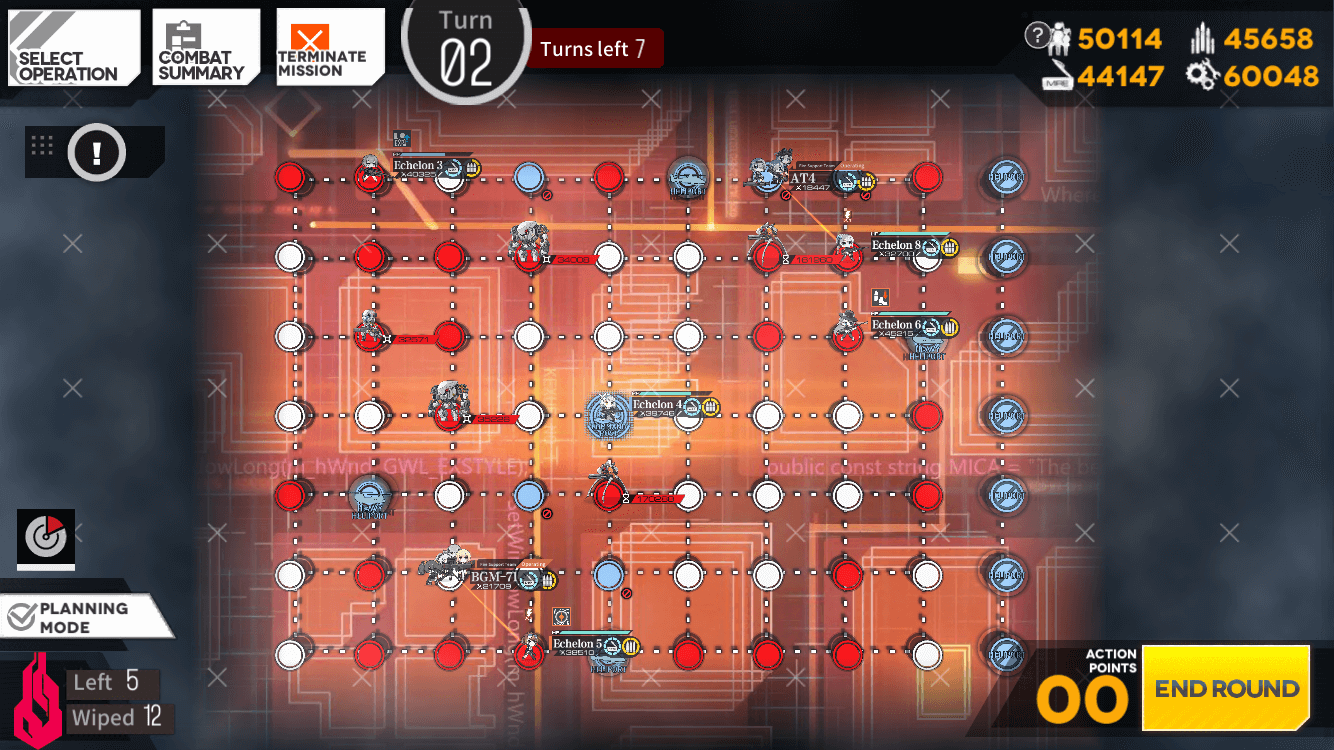
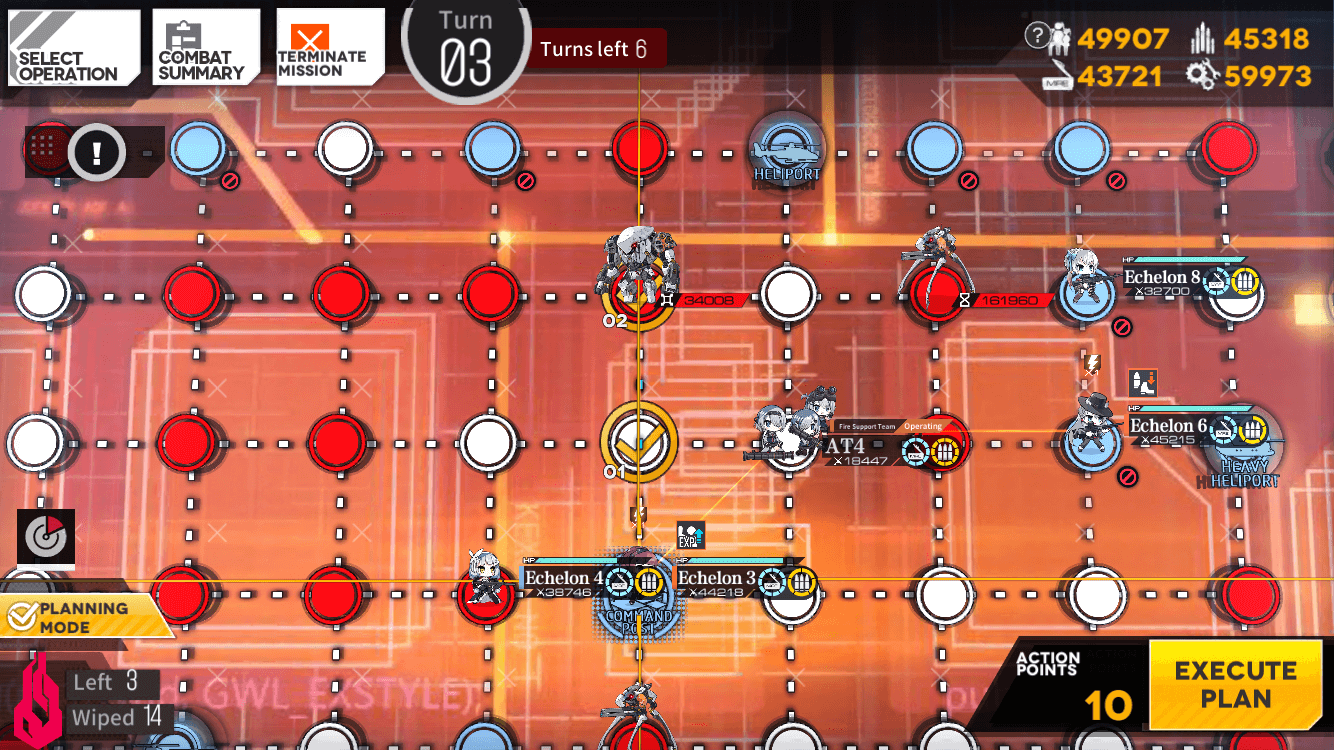
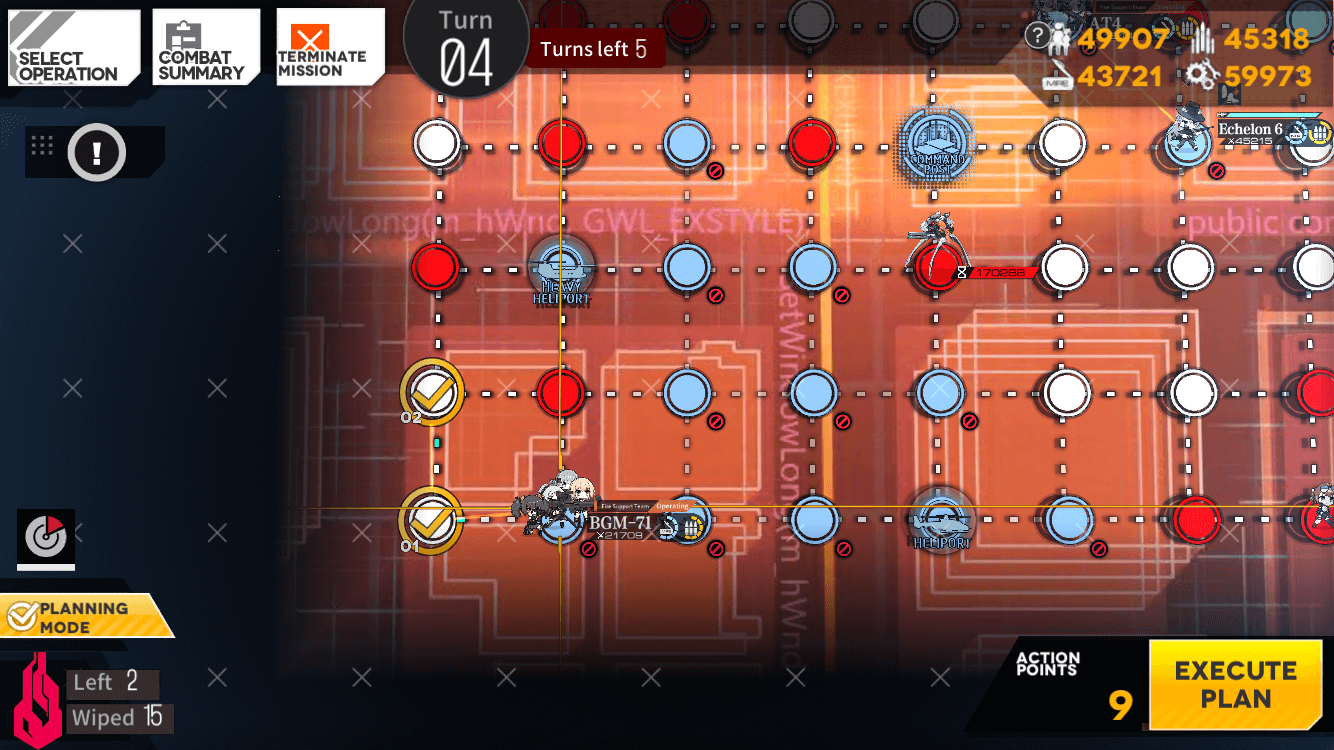
Your end of Turn 3 should look like this
Turn 4

Move Echelon at the bottom two nodes to the right
Move second dummy (Team 3) on top right of the map down two nodes
Move first dummy (Team 1) two nodes to the left then two nodes up
Move HOC on bottom left of the map left then up
Move Team 5 to engage Patroller on the right
Move top right HOC left two nodes
Move Team 2 (or Team 4 if Team 2 was ARSMG) to the left then down
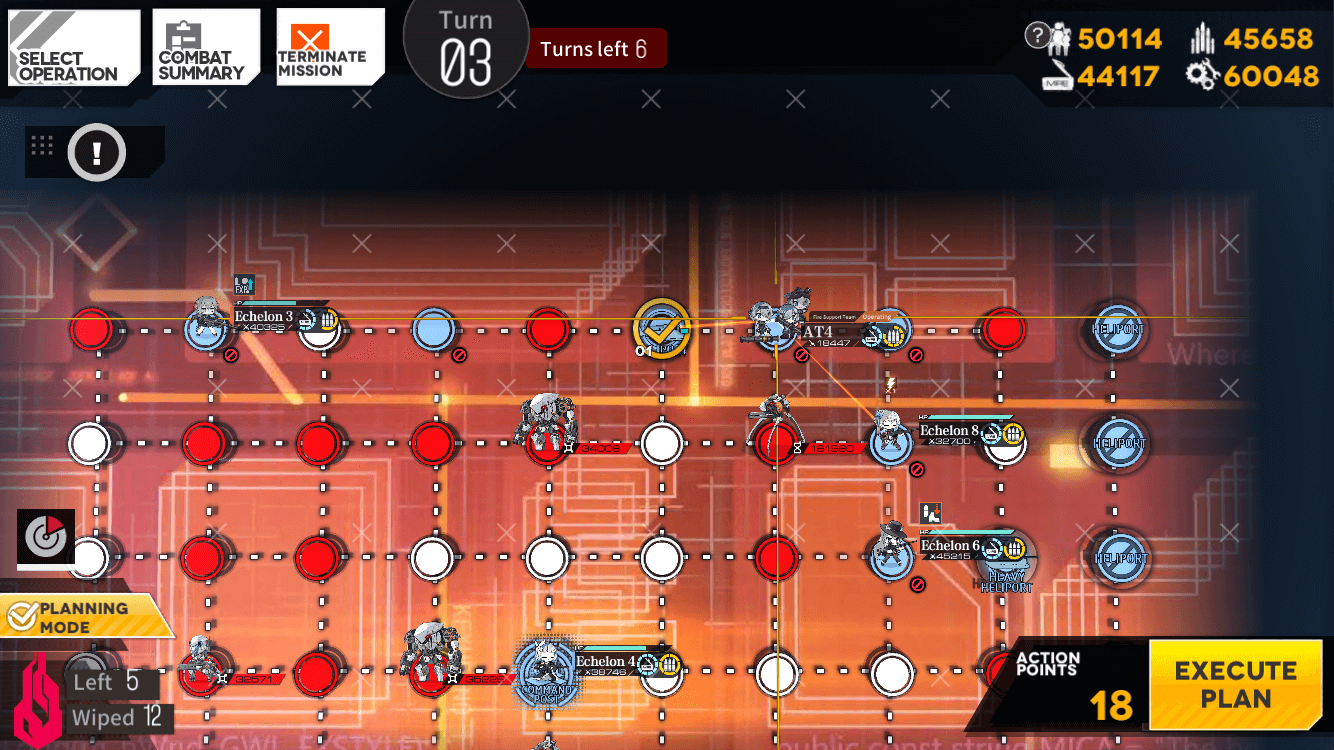
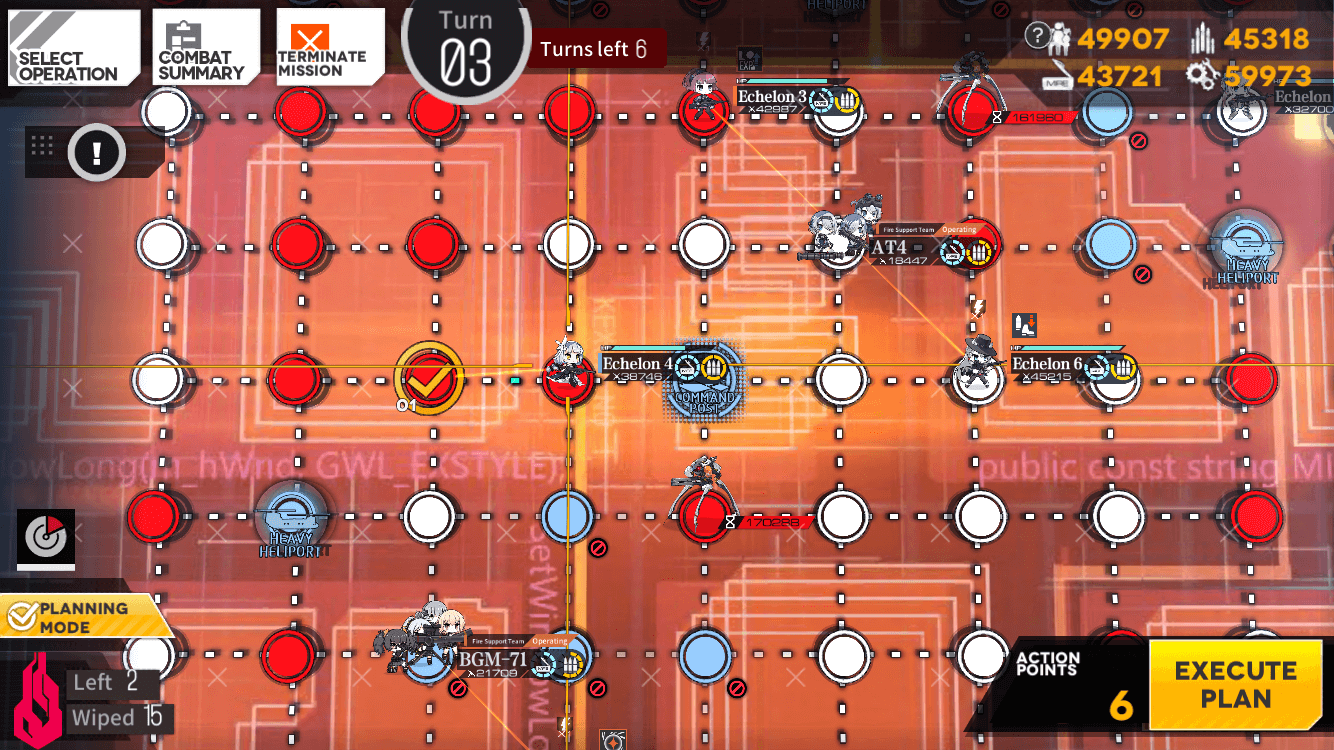
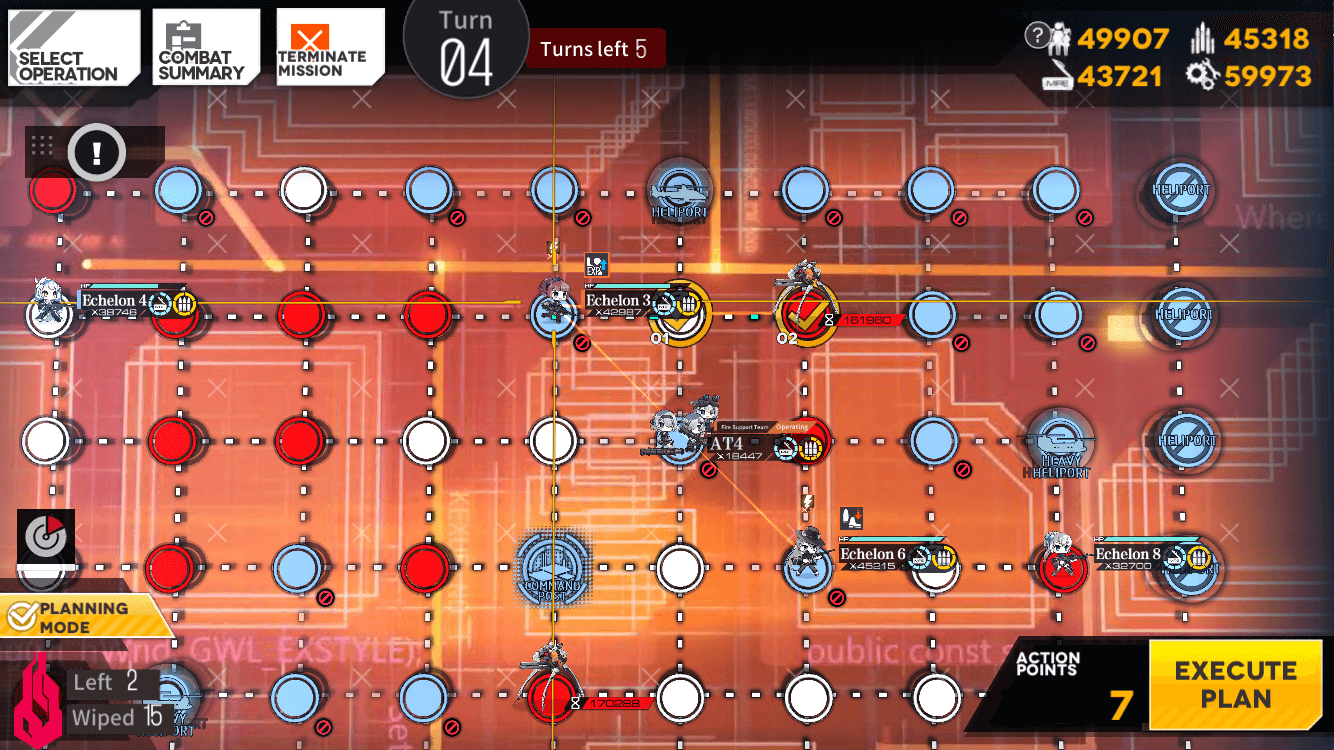
End of Turn 4 should look like this
Turn 5
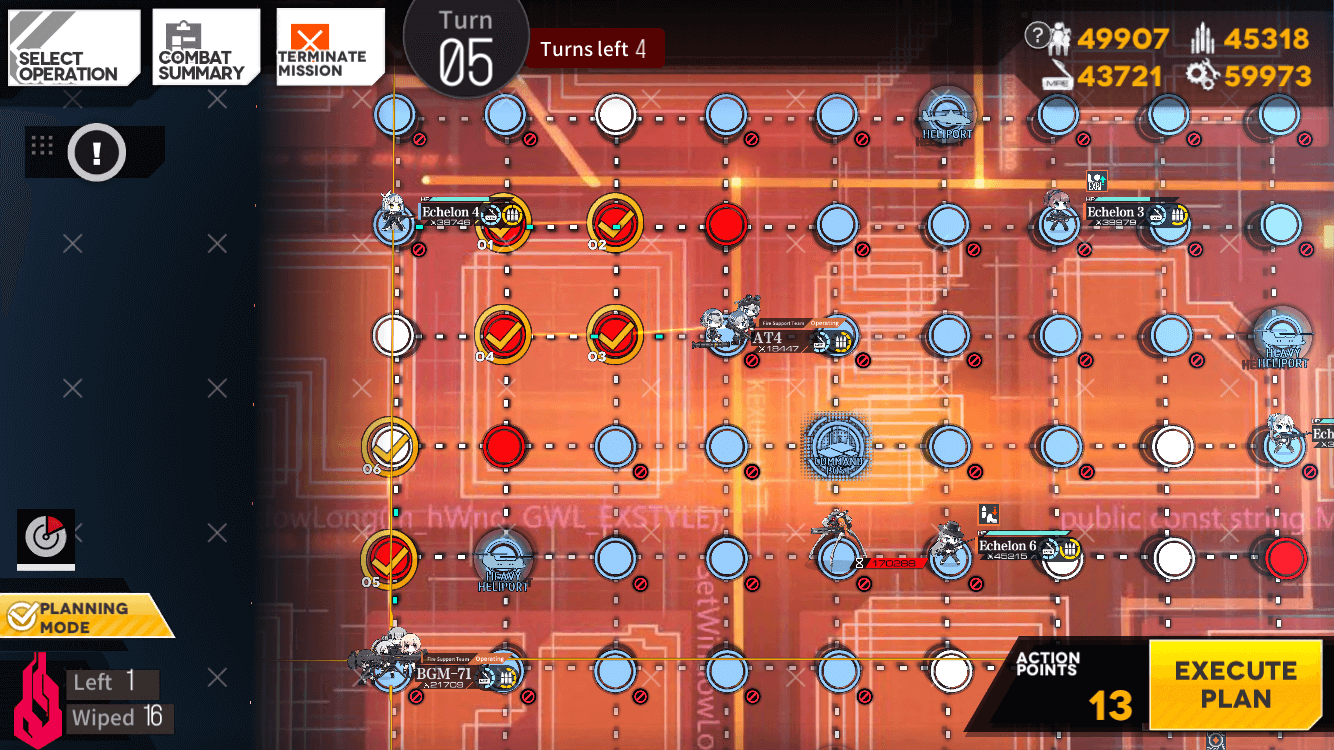
Move first dummy (Team 1) right two nodes.
Then move second HOC (AT-4 on the image. Should be BGM if using AGS/BGM duo) left two nodes.
Finally move first HOC (BGM on the image, AGS if using AGS/BGM duo) up two nodes
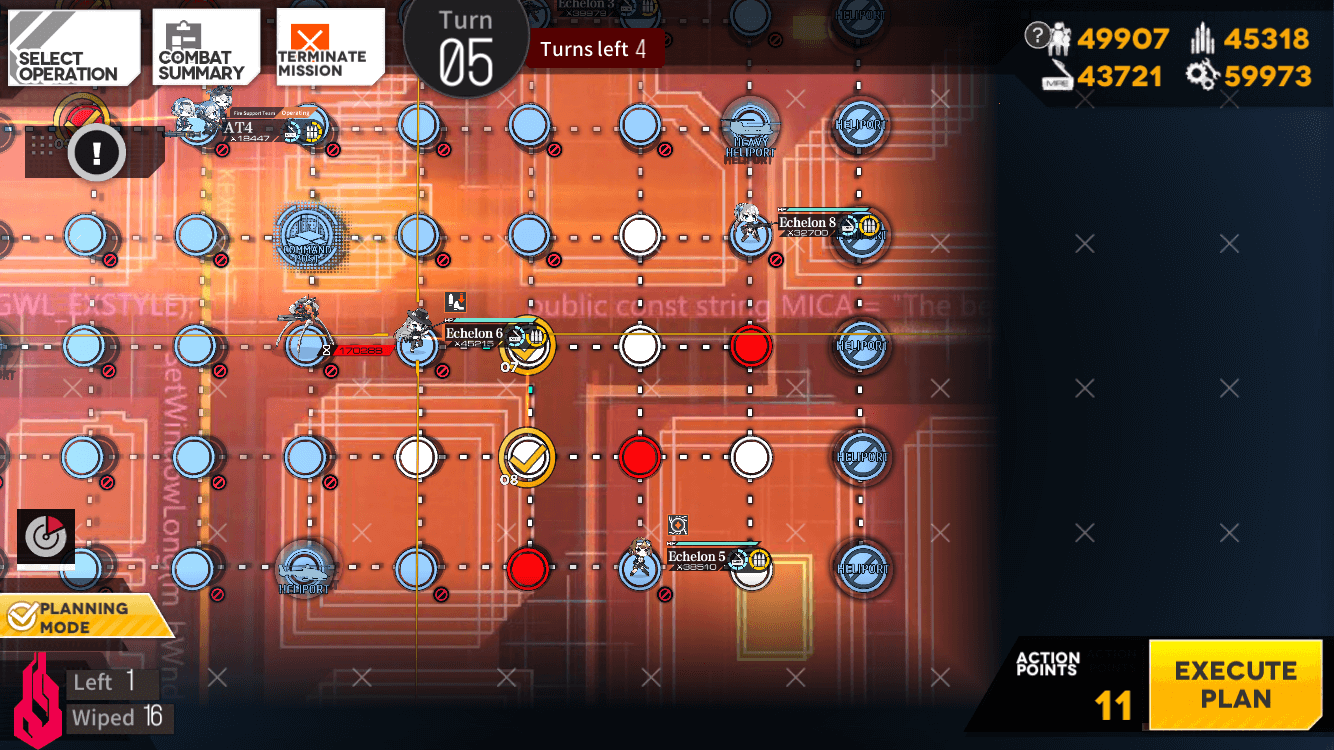
Move Team 2 (Team 4 if Team 2 is ARSMG) left then down
Move Team 4 (Team 2 if Team 4 is ARSMG) up then right
Move second dummy (Team 3) left

End of Turn 5 should look like this. Don't worry about the Strider capturing that node, it'll be recaptured at the end of enemy turn

Video Guides:
Next Chapter:


-
Chapter 1
-
Chapter 2
-
Chapter 3
-
Chapter 4
-
Chapter 5
-
EX Maps and Challenges